1
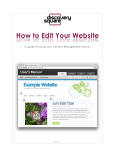
How to Edit Your Website
A guide to using your CMSmadeeasy
CMSmadeeasy.com
How to Edit Your Website
A guide to using your CMSmadeeasy
Overview
3
Accessing the CMS
3
Choosing Your Language
3
Resetting Your Password
3
Sites
4
Favorites
4
Pages
5
Creating Pages
5
Managing Files
5
Viewing Analytics
8
Page Options
9
Editing
10
Editing Content
10
Editing Page Properties
15
Publishing Pages
15
Settings
17
Updating Your Personal Info
17
Help
18
Submitting a Help Request
18
CMSmadeeasy.com
Overview
This manual will help you edit your website using the Content Management System. A content management system,
or CMS (pronounced C-M-S), is any software that gives you the ability to update content on your website.
Accessing the CMS
To access the CMS, you will need a web browser and an Internet connection. All modern browsers are supported,
including:
•
•
•
•
•
Google Chrome
Firefox
Internet Explorer 8+ (for a better experience, use Internet Explorer 10 or above)
Opera
Safari
To access the CMS, navigate to the following website in your browser:
http://www.cmsmadeeasy.com/login/
The login page will appear:
To login, use your email address and password.
Choosing Your Language
You can set your language preference from the login page and in the Settings > Account section. Your language
preference will be saved in a cookie on your computer, so if you use another computer or clear your cookies, you
will need to set it again.
Resetting Your Password
If you forget your password, you can reset it by selecting Forgotten password? from the login page. The Reset
Password page will appear; enter details and we will send an email.
CMSmadeeasy.com
Sites
The first page you will see when you login will be the Sites page. Since the CMS is capable of managing multiple
websites, your list will contain all of the sites you have access to. At any time, you can select the Sites tab to come
back to this list.
To edit a site, select the appropriate one from the list. This will take you to the Pages page, where a list of pages you
can edit will be shown.
Favorites
If you have access to more than one site, you may want to “star” the ones you’ll be working with frequently for
easier access. Sites in your Favorites list will appear on the left side of the Sites page:
To remove a site from your Favorites, just “unstar” it.
CMSmadeeasy.com
Page 4
Pages
Once you’ve selected a site for editing, you will be taken to the Pages page. This section shows all the pages on
your site that you are able to edit. To edit a page, select its label from the list.
The sidebar on the left may have different options depending on how we setup your site. If you don’t see an option
mentioned here, it is not enabled for your site.
Creating Pages
To create a new page, select Create a New Page from
the sidebar or select
a New Page dialog.
. This will bring up the Create
The following information is needed to create a page:
Label – A short, descriptive name for the page that
will only be used to reference it inside the CMS.
Filename – The name of the new page without an
extension. By default, the name will be generated from
the label you enter.
Template – We can include one or more templates
that you can use for creating pages. Select the one you
want to use for your new page. (See “duplicate” p9)
Folder – The location where the page will be created.
This will be your home folder by default.
Managing Files
CMSmadeeasy.com
Page 5
If we have enabled this feature, a link will appear in the sidebar of the Pages page called Manage Files. Selecting
this link will bring up the File Manager.
The File Manager gives you direct access to your web server. You can upload, delete, and rename files. You can
also create new folders.
Shortcuts
The File Manager features shortcuts that quickly link you to the folders where documents, images, and media are
stored. Always try to use these folders to organize your files and refrain from uploading them to the home folder.
Uploading
Before you can link to documents, images, and other files on your site, you need to upload them to your server. To
upload a file, select the Upload link. A window will appear allowing you to browse your computer for files. Once
you’ve selected one or more files, they will begin uploading.
CMSmadeeasy.com
Page 6
Please allow sufficient time for uploading to complete, especially with larger files. Since files are uploaded to the
CMS first and then to your website, this could take a bit longer than usual. The maximum combined file size for
uploading is 50MB.
Creating Folders
You can create new folders to help organize files on your server. To create a new folder, select the New Folder link.
The following form will appear:
Enter a name for the folder and select Create. The new folder will then appear in the File Manager.
Good folder names are short and descriptive. Try using all lowercase letters and use dashes or underscores instead
of spaces.
Renaming Files
A file can be renamed by checking it off in the File Manager and selecting Rename. The following form will
appear:
Enter a name for the file and select Rename. Be careful to not remove the file extension!
Deleting Files
Files can be deleted by checking them off in the File Manager and selecting Delete. The following confirmation will
appear:
To delete the selected files, select Delete.
Be careful when deleting files from your server—this cannot be undone!
CMSmadeeasy.com
Page 7
Viewing Analytics
If we have enabled this feature, a link will appear in the sidebar of the Pages page called View Analytics. Selecting
this link will bring up the Analytics Dashboard:
There are many reports available in the Analytics Dashboard:
• Overview
• Shows an at-a-glance view of your traffic for the specified date range
• Visitors
• Continent – shows traffic by continent
• Country – shows traffic by country
• City – shows traffic by city
• Language – shows what languages visitors use
• Length of Visit – shows how long visitors stay on your site
• Depth of Visit – shows how many pages visitors access while on your site
• Content
• Top Content by Path – shows the path of the most popular pages on your site
• Top Content by Title – shows the title of the most popular pages on your site
• Top Landing Pages – shows which pages users come to first on your site
• Top Exit Pages – shows which pages users leave your site from
• Second Page Visited – shows the second page that visitors go to on your site
• Traffic
CMSmadeeasy.com
Page 8
• Keyword – shows which keywords visitors used to find your site
• Traffic Source – shows where the traffic to your site comes from
• Referring URLs – shows other sites that referred visitors to your site
• Technical
• Browser – shows which browsers your visitors use
• Browser Version – same as Browser, but organized by versions
• Operating System – shows which operating systems your visitors use
• Operating System Version – same as Operating System, but organized by versions
• Screen Color – shows the color depth of visitors’ devices
• Screen Resolution – shows the screen size of visitors’ devices
Page Options
Each page has a dropdown menu with various options. To access the menu, select
next to the appropriate page.
The Page Options menu will appear:
Relabel
Page labels are used to identify pages inside the CMS. To change a page label, select the Relabel option and enter a
new label for the page.
Duplicate
This option allows you to create a new page by duplicating an existing one. To duplicate a page, select the
Duplicate option and enter a new page label and filename (see Creating Pages for more details).
Move
Moving pages allows you to organize them in folders. To move a page, select the Move option. You will be
prompted to browse for the folder you want to move the page to.
CMSmadeeasy.com
Page 9
Be careful when moving pages, as this will break any links you have that point to the affected page. If you do move a
page, double check that you’ve updated all your links afterwards.
Delete
To permanently remove a page from your server, select the Delete option. The page will be removed from the CMS
and deleted from the server.
Be careful when deleting pages from your site—this cannot be undone! If you’re not sure about deleting a page, ask
us first!
Editing
Once you’ve selected a page to edit, you will be taken to the Live Editor. The Live Editor is a limited version of your
page that lets you edit content and shows what changes will look like once they’re published. By design, you will
not be able to follow links or navigate away from the page while editing your site in the Live Editor.
Editable Regions are sections of the page that have been enabled for editing. They are indicated by gray edit
bubbles:
Editing Content
To edit a region, select an edit bubble or place your cursor anywhere inside an editable region. Depending on the
region, various features will be made available in the Live Editor’s toolbar.
Headings & Paragraphs
The Paragraph menu lets you format entire blocks of text into headings,
paragraphs, block quotes, or pre-formatted text.
CMSmadeeasy.com
Page 10
To create a heading, place your cursor inside an Editable Region and select
. The Paragraph menu will appear.
Select the desired heading level and the block your cursor is in will turn into a heading. You can also format a
paragraph as a block quote or as pre-formatted text.
To remove a block format, place your cursor in the desired block and select Paragraph from the Paragraph menu.
You can use keyboard shortcuts to create headings quickly. Shortcuts appear to the right of each option in the menu.
Text Formatting
To apply formatting such as bold, italic, and underline to text, highlight the
desired text and select
. The Text Formatting menu will appear. Select the
desired format and it will be applied to the highlighted text.
To remove a format, select it again from the Text Formatting menu. To remove all
formatting, select Remove Formatting.
If we enabled Font Styles, you can use this option to change the font, size, color,
and background color of text.
Similarly, you can use Custom Styles to select from a list of predefined styles if your website has them.
On websites, underlining text is typically reserved for hyperlinks and may be considered bad usability. When you
need to emphasize text, consider using bold or italic instead.
Alignment
Use the Alignment buttons in the Live Editor’s toolbar to align text left, right, center, or
justified. You can also use the alignment buttons to float an image left or right.
Lists
Use the List buttons in the Live Editor’s toolbar to create ordered and unordered lists. Make
nested lists using the Indent and Outdent buttons.
Links
To insert a link to another page or file, highlight the
desired text, go to
, and select Link. This will
bring up the Link dialog.
Enter a URL or select
to browse for a file on
your server. If you’d like the link to open in a new
window, check the Open in a new window box. When you’re finished, select Submit to create the link.
CMSmadeeasy.com
Page 11
To edit an existing link, place your cursor on it and select Insert > Link.
You can save time and bypass the Insert menu by using CMD+K (Mac) or CTRL+K (Windows/Linux) to insert and
edit links.
Images
To insert an image, place your cursor inside an
Editable Region, go to
, and select Image. This
will bring up the Image dialog.
Enter a URL or select
to browse for a file on
your server. After a URL has been entered, a preview
of your image will appear on the right side of the
dialog.
Providing a Description is recommended, as this will
aide users who have images disabled, users with textbased browsers, and users with disabilities that prevent
them from seeing images.
Once you’ve entered a URL and a description, select Submit to insert the image into your page.
To edit an existing image, place your cursor on it and select Insert > Image or double-click on it.
If desired, you can crop an image by dragging a selection over the preview in the Image dialog. When an image is
cropped, the original file is left intact and a new one is created.
By default, images will be physically resized when a smaller width or height is entered. This optimizes them so they
load faster, but the option can be disabled by unchecking the Resize image for smaller file size box.
When cropping or resizing an image, the original file will never be modified. Instead, a new file will be created with
the dimensions appended to the filename. This lets you “undo” your changes anytime by reverting back to the
original image.
Media
To insert a video or audio file into your page, place your
cursor inside an Editable Region, go to
, and select
Media. This will bring up the Media dialog.
The CMS supports HTML5 videos, YouTube videos,
and Vimeo videos.
CMSmadeeasy.com
Page 12
To insert an HTML5 video or audio file, you will need to specify a Source, an Alternative Source (optional, but
recommended), and a Poster Image (optional).
To maximize browser compatibility for videos, use an MP4 format for your Source and a WEBM format for your
Alternative Source.
To insert a YouTube or Vimeo video, copy the full URL (from your browser’s address bar) into the Source field.
You can also paste the embed code into the Embed Code field under the Advanced tab.
To edit an existing video or audio file, place your cursor on it and select Insert > Media or double-click on it.
Anchors
Anchors let you deep-link into a specific section of
your page. To create an anchor, place your cursor in
front of the heading you want to link to, go to
and select Anchor. This will bring up the Anchor
dialog.
,
Enter a name for your anchor. Since anchors must
follow a special naming convention, the CMS will automatically convert the value you enter into a compatible
name.
Anchors are normally not visible on webpages, so once an anchor has been inserted into your page it will appear as a
symbol. This allows you to identify and edit anchors, but the symbol will not appear on the live site.
To edit an existing anchor, place your cursor on it and select Insert > Anchor or double-click on it.
Inserting Tables
To insert a table into your page, place your cursor
inside an Editable Region, go to
, and select
Insert Table. This will bring up the Insert Table
dialog.
Enter the number of columns and rows for your new
table.
If you want your table to have a header that spans across the first row of your table, check the Header on top box. If
you want your table to have a header that spans across the first column of your table, check the Header on left box.
To add a caption to your table, check the Caption box.
Once you’ve configured the table options, select Insert Table to insert the table into your page.
CMSmadeeasy.com
Page 13
Editing Tables
You can edit existing tables using the Table menu. To open it, go to
and select the appropriate option. You
can add and remove rows and columns, merge and split cells, or delete the table entirely.
Repeatable Regions
Your designer may configure Repeatable Regions on
one or more of your pages. These are useful for many
things, as they allow you to add, remove, and reorder
blocks of content very easily.
Repeatable Regions are indicated by a thin, dashed
border. When your cursor is inside a Repeatable
Region, the
button will become available in the
Live Editor’s toolbar. Selecting this button will bring
up the Repeatable Regions menu which has options to
add, remove, and reorder blocks of content.
If you find yourself working with Repeatable Regions often, take note of the shortcut keys shown in the menu. They
can save you quite a bit of time!
Editing Photo Galleries
If your site has a photo gallery, your designer may have set it up to be editable in the CMS. To edit a photo gallery,
select it by clicking or tapping on it. This will bring up
the Gallery dialog.
You can add photos by selecting the Add to Gallery
link.
To highlight a thumbnail, click or tap on it. To select
more than one thumbnail at a time, press CMD or
CTRL while clicking or tapping. You can also select a
range of images by holding down SHIFT.
When a thumbnail is selected, the Link and
Description fields will become available. You can use
these fields to customize where each photo links to
(usually the full-size version of themselves) and the description that visitors will see for each photo.
To reorder photos, highlight one or more thumbnails and select Move Up or Move Down. (You can also drag and
drop on desktop devices.)
To delete photos from the gallery, highlight one or more thumbnails and select Delete from Gallery. Note that this
will not delete any files from your server.
CMSmadeeasy.com
Page 14
When you’re done editing your gallery, select Submit to save your changes.
Editing Page Properties
Page Properties include the Title, Description, and
Keywords that are used to tell search engines
information about each page. If this feature is enabled,
you can change these values for each of your pages by
going to Edit > Edit Page Properties. This will bring
up the Edit Page Properties dialog.
Title – This is usually the first thing people see when
viewing your site in a search engine, so make it
interesting but not too long.
Description – This typically appears under the Title in
a search engine’s results. Keep them short but relevant. Remember that you are limited to a varying number of
characters depending on the search engine a potential visitor may be using.
Keywords – A list of comma-separated words and phrases that relate to the content of your page. You may add as
many keywords as you like, but three to five are usually sufficient.
Search Engine Preview – This will show you what your page will look like in most major search engines. The
maximum lengths for titles and descriptions will vary, but this will give you a good idea of how potential visitors
will see your page when browsing a list of search results.
Publishing Pages
Publishing
When you’re finished editing a page, you’ll need to publish your changes before they appear on the live version of
your site. To publish a page, go to
and select Publish. When you see the
of your screen, your page has been published and you can safely exit the editor.
symbol appear in the center
Auto-publishing
You can tell the CMS to publish your changes at a
specific date and time. To Auto-publish a page, go to
and select Auto-publish. This will bring up
the Auto-publish dialog.
Enter the date and time that you want your changes to
be published and select Auto-publish.
CMSmadeeasy.com
Page 15
When you see the
symbol appear in the center of your screen, your changes have been scheduled for
publishing and you can safely exit the editor.
Saving Drafts
If you want to save your changes but don’t want to publish them to the live site yet, you can save a Draft. To save a
draft, go to
and select Save Draft. When you see the
your draft has been saved and you can safely exit the editor.
symbol appear in the center of your screen,
The next time you open the page for editing, you’ll be asked if you want to resume editing the draft. You can also
access it by going to Edit > View Revisions.
Loading Revisions
Every time a page is saved in the CMS, a Revision is
created. You can view all the revisions of a page by
going to Edit > View Revisions. This will bring up the
View Revisions dialog.
To open a revision for editing, simply select it from the
list.
You can also delete revisions you no longer need. Just remember that once a revision is deleted, there’s absolutely
no way to get it back!
CMSmadeeasy.com
Page 16
Settings
Updating Your Personal Info
You can manage your account settings by selecting Settings from the main menu.
To make changes, simply update your name, email and/or language and select Update. You can also change your
password by selecting the Change button on the right side of the page.
Your language preference will be saved in a cookie on your computer, so if you use another computer or clear your
cookies, you will need to set it again.
CMSmadeeasy.com
Page 17
Help
Submitting a Help Request
The Help section is designed to expedite help requests. To submit a help request, select Help from the main menu.
When submitting a request, please select the appropriate reason for the request and the affected site. Remember to
provide as much information as possible to help troubleshoot your problem. If necessary, include details such as
your operating system (e.g. Windows or Mac), your browser, browser version, and any steps they should take to
reproduce the problem.
In most cases, your designer will respond to you via email. Feel free to write them back by replying directly from
your email client.
CMSmadeeasy.com
Page 18