1
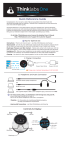
Thinklabs
:ds32
Rhythm
High Resolution
Auscultation
Digital
Electronic
Stethoscope
User’s Manual
ds32umpdf V1.2
Table of Contents
3
3
4
4
Thinklabs Rhythm Digital Stethoscopes
Indications for Use
Caution - Follow Directions for Use
Optimal Use of the ds32
5
Quick Reference - Controls and Display
6
6
7
8
Initial Setup
Installing Batteries
Battery Life and the Low Battery Indicator
Probe Setup
9
9
10
11
Using the ds32
Control Ergonomics
Power On/Off
Zoom and Volume Control
Volume Settings and Psychoacoustics
Bell-Diaphragm Mode
Auscultation - a Pathology-Physiology Dichotomy
Sync Indicator
Using Sync
Input/Output Port
Using the Audio Input/Output Port
12
13
14
15
15
16
17
Optimizing the ds32
General Maintenance and Cleaning
Eartip Adjustment
Headphone Adjustment
18
Listening with the ds32
Diaphragm Pressure and Frequency Response
Holding the Probe - steady pressure reduces sub-sonics
Diaphragm Selection
The Diaphragm - fine-tuning your stethoscope sound
Diaphragm Changing and Replacement
19
20
21-22 Probe Maintenance - ensuring low-noise performance
Noise Symptoms
Alcohol Cleaning
Air Spray Cleaning
23
Eartip Cleaning and Replacement
24-25 Tips and Troubleshooting
26
Service and Warranty Information
26
Package Contents List
Rhythm :ds32
2
Thinklabs Rhythm Digital Stethoscopes
Congratulations on purchasing your ds32. You now own an instrument designed for high
resolution auscultation - an instrument that produces body sounds with low-noise and highamplification, providing a new level of clarity.
Your ds32 includes the following features:
• Power: Zoom Adjustable Volume mode provides low distortion, high power amplification,
while standard Acoustic power mode provides the familiar sound of a conventional acoustic
stethoscope. Both modes utilize signal processing designed to provide very high signal
definition.
• Ease-of-Use: Simple controls provide familiar Diaphragm and Bell modes at either standard
Acoustic or Zoom power levels, with mode changes at the push of a button.
• Patented Transducer: The Electromagnetic Diaphragm™ (EmD) senses and converts body
sounds to electronic signals right at the diaphragm, eliminating signal degradation through airborne transducers or tubing. The EmD is pressure-modulated. By subtle variation of Probe
pressure, amplitude and frequency response can be tuned to listen to specific sounds. This is
even provided in standard Acoustic mode, combining familiar acoustics with advanced signal
processing.
• Sync: LED Indicator shows cardiac cycle timing to help students improve auscultation skills.
• Audio Port: An Input/Output port provides an audio line-level output signal or use of the ds32
as headphones suited to listening to recorded auscultation sounds.
• Design: All these features are packaged in a stethoscope that has the form factor and weight
of an instrument so familiar to the professional community of users.
Indications
The Thinklabs Rhythm Digital Stethoscope is intended for use as a diagnostic aid in patient
diagnosis. It can be used for the amplification of heart, lung, and other body sounds with
selective frequency filtering. This product is not designed, sold, or intended for any use except
as indicated.
Rhythm :ds32
3
Caution - Follow Directions for Use
Misuse of this product could result in damage to the product, malfunction of the product, or
compromise performance.
• Use only AAA Alkaline batteries. The Rhythm will not function if battery voltage is depleted.
Use fresh batteries, and replace when indicated.
• Do not sterilize this device, or immerse it in liquids. Clean using alcohol swabs or nonabrasive cloth lightly dampened with alcohol or water.
• Avoid use/storage in very high humidity, high temperature or dusty conditions. Leaving the
device in excessively hot or cold vehicles is NOT recommended.
• Do not attempt to modify or repair this device yourself. If you experience problems, send this
device to Thinklabs for repair. See the Support page at http://www.thinklabsmedical.com
• The Thinklabs Rhythm stethoscope has been tested to be resistant to electromagnetic
interference (EMI & ESD). However, it may be susceptible to stray electromagnetic fields. If
unexpected sounds are heard, change location, or move away from possible sources of
interference, such as cellular telephones or wireless devices.
• At the conclusion of this device's useful life, dispose or recycle in accordance with local
regulations.
Optimal Use of the ds32
• Instructions - The ds32 is designed to be very easy-to-use. However, taking the time to read
the User’s Manual will greatly facilitate the effective and optimal use of the ds32. These
instructions provide valuable tips that are well worth knowing, to get the most out of the ds32.
• Sound Levels - Adjust the Volume to a comfortable level. The ds32 has powerful
amplification. Maximum volume is not necessary except when examining obese patients or in
high-noise environments. Experiment to identify optimal settings and personal preferences.
• Acoustic and Zoom Modes - The ds32 has Acoustic mode, with more of a conventional
stethoscope sound, and Zoom mode, which allows for adjustable volume levels. Both modes
provide the clarity and benefits of Thinklabs electronic signal processing and amplification.
• Diaphragm Pressure - The ds32 Probe uses Electromagnetic Diaphragm (EmD) technology
which is pressure-sensitive. The sound characteristics change as the Probe is applied with
greater or lesser pressure to the patient. Simply apply the Probe to the patient as with a
conventional stethoscope, and make subtle changes in pressure, listening for the optimal sound
characteristics. Lighter pressure is usually optimal, and increases low frequency response to
murmurs and heart sounds, while increased pressure will amplify lung sounds. Avoid
unnecessary Probe movement, and apply steady diaphragm pressure.
• Diaphragm Selection - Two diaphragms are provided, with different sensitivity, to suit the
personal preference of each practitioner. Experiment to find the optimal choice.
• Skin Contact - Always auscultate directly, not through clothing. The ds32’s EmD diaphragm
operates best when in direct skin contact with the patient.
Rhythm :ds32
4
Quick Reference - Controls and Display
Sync Indicator LED - S1/S2 Cardiac Timing
Push key to activate/deactivate
Page 13
Select Bell or Diaphragm
Green LEDs show selection
Page 12
Control Panel
Rhythm :ds32
Volume Control
BELL
behind Control Panel
(active when Blue LED is On)
Page 11
DIA
ZOOM
Power On
Push+Hold
until all LEDs light
then Release
HIGH
RESOLUTION
Zoom - Select Pre-Set or Adjustable Volume
Push key to alternate between augmented Zoom mode
and pre-set non-augmented Acoustic mode:
Power Off
Shuts off after 120 seconds OR
Push+Hold
until all LEDs light
then Release
Mode
Zoom
Blue LED Function
ON
Augmented ADJUSTABLE Volume
to “zoom in” by increasing Volume.
Acoustic OFF
non-augmented PRE-SET Volume
similar to acoustic stethoscope.
Page 11
Page 10
Display
Sync Indicator (Red)
Flashes on S1 / S2
Diaphragm Mode (Green)
Low Battery (Red)
Change Batteries
Page 7
Bell Mode (Green)
Zoom Mode (Blue)
LED On - Volume is Adjustable
LED Off - Volume is Pre-Set
Rhythm :ds32
5
Initial Setup
Installing Batteries
Open the Battery Cover.
Battery Cover
Daniel Smith
Hold the Control System Casing with two hands as shown. Slide
the Battery Cover in the direction shown by the arrow, by using
both thumbs placed on the Battery Cover sides as shown, or by
using one thumb applied to the ribbed indentation in the center of
the battery cover.
Control System Casing
Insert 2 AAA Batteries as shown below. NOTE THE POLARITY - Reversing the polarity
can cause damage to the ds32.
+
+
Compress the large battery spring sufficiently to ensure that the batteries are well-seated in the
battery compartment, and that all springs connect with the battery contacts.
Use Alkaline Batteries only. Rechargeable batteries tend to have lower voltages even when fully
charged, which might trigger a Low Battery indication even when the batteries are fully charged.
Close the Battery Cover.
Place the Battery Cover into the slide grooves, and slide the
Battery Cover, using thumb and forefinger as shown, until fully
closed. If the cover does not close easily, take care to ensure
that the Battery Cover is pushed all the way into the grooves,
and slides easily. Do not exert excessive force.
If your Rhythm does not operate after changing batteries,
carefully recheck battery polarity, and ensure that fresh
batteries are being used.
Rhythm :ds32
(a) Push cover DOWN into
grooves to slide easily.
a
b
b
(b) Slide closed.
a
Do NOT Force. If not
closing, check step (a).
6
Battery Life and the Low Battery Indicator
The Low Battery Indicator on the display will show when the batteries require
replacement. A red LED in the Low Battery Indicator signifies a low battery condition.
Low Battery (Red)
Change Batteries
After a Low Battery indication initially occurs, the Rhythm will provide a few additional hours of
operation, which should be sufficient for a few days of use in a typical work environment. It is
recommended, however, that batteries be replaced within a day of the Low Battery Indicator
warning, to ensure uninterrupted service.
When the batteries have become depleted beyond their useful life, the unit will fail to power up, or
will power up and immediately power down, preventing further use. The unit cannot be used in
any mode without battery power.
ds32 battery life is highly dependent on device use. Examining a large number of patients
each day will naturally require more regular battery replacement than occasional use. Another
important factor is the volume level and type of body sound. The ds32 has high current bass drive
circuitry to reproduce powerful low frequency signals without distortion. This circuitry consumes
more current when reproducing heart sounds in Bell mode compared with, say, listening to lung
sounds in Diaphragm mode. It is for this reason that an exact battery life specification is not
provided.
Rhythm :ds32
7
Probe Setup
The Probe has a black Acoustic Aperture ring which is shipped in the closed
position. The Aperture should be left closed in most cases.
Opening the Acoustic Aperture
Closing the Acoustic Aperture
a. Hold Probe HERE
b. Rotate ring Anti-Clockwise about 90 degrees
until it stops in the Open position shown.
Acoustic Aperture Ring
Rotate Acoustic Aperture
90 degrees clockwise until it
stops at the Closed position shown.
To open the Acoustic Aperture, rotate the ring anti-clockwise. To close, turn clockwise.
The Acoustic Aperture affects the Probe acoustics, subject to the environment in which the ds32 is
used. In many situations, the audible differences are very subtle, and the Aperture Ring should then
be kept closed to protect the Probe from dust and moisture. The effect of the Acoustic Aperture
positions are as follows:
Aperture Closed - The Acoustic Aperture closes the internal Probe cavity, protecting it from dust
and moisture, and producing a more “closed” tonality.
Aperture Open - When open, the Acoustic Aperture can improve the acoustics of the ds32 in
certain environments. If you are using the ds32 in a high ambient noise environment, try opening the
aperture ring. You may find that the more “open” sound is preferable. Then rotate the ring to the
closed position when you return to a quiet environment.
Using the ds32 with open or closed aperture is a matter of personal preference.
Rhythm :ds32
8
Using the ds32
The ds32 is designed to be very intuitive to use. Take a few minutes to understand the
various functions, and within a very short time, using the ds32 will become second
nature. You will be able to feel and hear, rather than have to look at the keys and
display.
The Quick Reference guide on Page 5 provides a summary of the Control keys and Display
Indicators on the ds32. Details of each Control and Display function are provided in the
following pages.
It is suggested that you first familiarize yourself with operating the ds32 without wearing the
headphones. Get comfortable with the layout and operation of the Controls. Then do some
listening with the ds32, operate the Controls, and listen to the effects of the various
operating modes and functions.
Control Ergonomics
The Control keys are designed to be operated by the thumb and
forefinger of the left hand, as shown.
Operate the controls with firm pushes on the keys. The keys are
designed to require a modest amount of pressure, in order to
avoid accidental switching.
Suggested Grip
Forefinger
for Keys
Left hand
Thumb
for Volume
The Volume Control is located behind the Power/Zoom
Key. It is designed to be operated by the left thumb as
shown in the illustrations, leaving fingers to control the
keys.
The exact grip and position is a matter of personal
preference, and should be adjusted for comfort and ease
of operation.
Rhythm :ds32
9
Power On/Off
Power On
Push and Hold the
key for about 1 second. When all LEDs light up, release the
(The delay is intended to prevent accidentally powering on the ds32.)
key.
Power Off
Push and hold the
key for a few seconds until all LEDs light up, then release.
Auto Shut-Off
The ds32 will power down automatically after 120 seconds. It is therefore not necessary to
manually turn off Power.
The
key has the dual function of controlling the
PUSH & HOLD
key
until ALL LEDs light up,
then RELEASE key.
ZOOM
function, as discussed on the next page.
BELL
DIA
ZOOM
POWER OFF
Device turns off after 120 secs
or HOLD
> LEDs > RELEASE
Rhythm :ds32
10
Zoom
ZOOM
and Volume Control
To alternate between Zoom and Acoustic modes, push the
Push
ZOOM
ZOOM
key:
key to switch between:
Acoustic - Volume is pre-set. Blue LED OFF.
Zoom - Volume Adjustable. Blue LED ON.
BELL
DIA
ZOOM
VOLUME CONTROL
active when Blue LED ON
Zoom mode - Augmented sound, Volume is Adjustable - BLUE LED On
Volume is ADJUSTABLE with the Volume Control located behind the Control Panel. This
allows the user to augment or “zoom in” on body sounds i.e. magnify signals to discern more
detail, analogous to zooming in on an image.
Acoustic mode - Volume is Pre-Set - BLUE LED Off
Provides PRE-SET Volume similar to a conventional acoustic stethoscope. The ds32 still
performs electronic signal processing in Acoustic mode, and you will notice the resulting
clarity of signals in Acoustic mode. However, the sound characteristics in this mode are set to
be similar to an acoustic stethoscope, so that users can compare standard and boosted
sounds, such as during the grading of murmurs. This provides the “best of both worlds”, with
access to both acoustic and boosted sound characteristics in one device.
Volume Settings and Psychoacoustics
It is suggested that volume levels be varied when listening to each patient. Body sound characteristics
and detail change as the signal is zoomed to different volume levels. Sounds also vary with Probe
position, age and obesity of patients.
The human auditory system “masks” quieter sounds with louder sounds. This is often a problem when
using a conventional stethoscope, where louder heart sounds mask quieter sounds such as murmurs,
and there is no way to control volume. By listening to the same sounds at different volume levels,
auditory masking can be exploited, rather than being a limitation. At low volumes, masking will help to
hear only certain louder sounds and quieter sounds will be masked. At higher volume settings, the
ds32 will allow the auditory response to overcome masking effects to hear low-amplitude murmurs
“through” the louder sounds. Volume levels from 5-8 are usually optimal. Some users might prefer to
use the pre-set Acoustic mode for most listening, using the Zoom mode when further signal detail is
required.
Warning - Protect your Hearing: Permanent hearing loss or Tinnitus can result from
exposure to high sound pressure levels. Threshold shift (adaptation to high volume)
makes loud sounds seem normal. Use caution when listening at high Volume, and limit
exposure to loud sounds.
Rhythm :ds32
11
Bell-Diaphragm Mode
BELL
DIA
To Alternate between Bell and Diaphragm Modes, push the
DIA
Push BELL
key
to switch between
Bell and Diaphragm Mode.
Green LEDs show Mode.
BELL
BELL
DIA
key:
DIA
ZOOM
Diaphragm
Bell
Symbol Mnemonic:
a Bell Curve
looks like a Diaphragm
Diaphragm Mode - provides frequency response suited to valve and breath sounds. Diaphragm
Mode will remove low frequencies, making it easier to discern higher frequencies that may be
masked by the louder low frequencies.
Bell Mode - provides boosting of very low frequencies to facilitate listening to heart murmurs. Due
to the substantial low frequency energy in some heart sounds, Bell Mode has significantly higher
signal power than Diaphragm Mode.
The choice of Mode for any given diagnostic situation is a matter of listener preference, and
alternating between modes helps to discern the nuances of body sounds.
Auscultation - a Pathology-Physiology Dichotomy
There is a dichotomy between the frequency characteristics of cardiac pathology and the physiology of
human hearing. Many pathological heart sounds have significant low-frequency content. Unfortunately,
human hearing is most inefficient when detecting such low frequencies. This dichotomy helps to explain why
pathological sounds can be so difficult to discern, especially with a conventional acoustic stethoscope.
Much of the energy in a heart sound is in the frequency range below 100Hz. At the low sound pressure levels
of a conventional acoustic stethoscope, a sound at 30Hz, for example, would be perceived as 40 decibels
softer than a sound at 200Hz, even if both signals had the same power. In other words, the ear is 40dB (100
times) less sensitive at 30Hz than at 200Hz. The combination of low-amplitude and low-frequency can thus
result in heart sounds that fall below the threshold of human hearing, making some pathological sounds
essentially inaudible.
The ds32 reproduces very high audio power levels in the low-frequency range when compared to an acoustic
stethoscope, raising the power at these frequencies above the human hearing threshold. In particular, Bell
Mode is designed to provide significant power boost in the low-frequency range.
The Rhythm stethoscope’s ability to reproduce low bass heart sounds explains one of the reasons the Bass
Clef appears in the Rhythm logo.
Rhythm :ds32
12
Sync Indicator
To Enable the Sync function, push the
key.
To disable the Sync function, push the
key again.
Push
key to activate.
Red LED flashes on S1,S2, S1+S2.
Push
again to de-activate.
BELL
DIA
ZOOM
The Sync function is useful for learning cardiac signal timing. The Sync Indicator will flash when a
peak occurs in the heartbeat signal, subject to location of the Probe. When the Probe is over the
apex of the heart, the peak Sync indication will usually occur on the S1 heart sound. When the
Probe is placed higher up on the chest, the peak Sync indication will occur on the S1 or S2 heart
sound, and in some locations might indicate both S1 and S2. The Table below shows the detection
system’s bias towards S1 or S2 subject to Probe location.
Location
Mitral/Apex
Tricuspid
Other locations
Most Likely Sync Indication
S1 is usually detected over S2.
S1, S2, or both S1 and S2 are indicated.
S1 is usually detected over S2.
When Sync is active, you may hear a faint “ticking” sound signifying the detection trigger of the Sync
Indicator.
Using Sync
To detect and display cardiac timing, the ds32 performs complex signal processing and analysis of
the auscultation signal. Reliable detection of cardiac cycle timing using only sound (without EKG) is
subject to variations between patients, heart rate, and especially to the location of the Probe on the
patient, since the first and second heart sound characteristics change based on Probe position.
In order to perform reliable detection, it is suggested that the Probe is placed lightly but firmly on the
patient, and held in a steady position. Place the probe in locations that are least affected by chest
wall motion, body hair, and body fat, which all tend to attenuate the cardiac signal. The detection
system takes a few seconds to “lock in”, so place the Probe and wait for 2-3 seconds to observe the
Sync LED. If detection is consistent, the location is suited to cardiac timing detection. If the
indication is inconsistent, try a different position. In some cases, the carotid artery provides good
timing signals.
The Sync Indicator is not affected by operating Modes or Volume control level.
Rhythm :ds32
13
Input/Output Port
An Input/Output Port is provided on the ds32.
The connector is a 2.5mm 4-position jack:
1.
Signal Ground.
2.
Serial Digital Output
3.
Serial Digital Input
4.
Analog Input/Output
Use only Thinklabs-supplied cables. Do not try to use
2.5mm plugs with less than 4 conductors. While such plugs
fit into the jack, they will short-circuit some of the signals
on the Port.
Input/Output Port
2.5mm Jack
BELL
DIA
ZOOM
Using the Audio Input/Ouput Port
Analog Input - The Analog port can be used as an Input when the ds32 is powered OFF. This provides the
following functionality:
• Dual Listening - Connect two Rhythm stethoscopes together. Turn one ds32 ON to be used as a
stethoscope, and turn the second ds32 OFF to be used as a second listening device. This is useful for
teaching purposes. A Thinklabs dual 2.5mm-plug cable is required.
• Headphones - Turn OFF the ds32, and use it as a set of high quality sealed headphones for listening to
recorded auscultation sounds. Connect the ds32 to the headphone output of any audio device such as a PC,
MP3 player, or CD player. The ds32 headphones are very sensitive, and will often reproduce noise from the
connected device that may not be audible with conventional headphones. Neither the ds32 nor the
equipment is faulty - simply use very low noise audio equipment or sound cards with the ds32. The ds32
headphones are mono, and are optimized for low/mid-frequency (body sound) reproduction.
Warning: Sounds levels can be extremely high due to the sealed eartip design of the ds32.
Analog Output - The Analog output provides a line-level signal for recording body sounds on external
portable devices, such as notebook computers, PDA’s or Digital recorders. Connect the ds32 to the Mic or
Line Input of the recording device. When recording, make sure that the recording levels are set appropriately,
so that signals from the ds32 are not “clipped” or otherwise distorted. Recorded sounds can then be played
back through the ds32 headphones, as described above. Note that Volume and Bell/Diaphragm settings
affect the Output signal.
The same cable can be used for recording and playback. When recording, the cable is connected to the
recording equipment Mic/Line Input, and during playback to the Line or Headphone Output.
Notes:
1. Warning: When used as a stethoscope, do not connect the ds32 to mains grounded equipment.
Use only with portable devices operating on batteries.
2. Contact Thinklabs for accessories and connection cables. Do not use cables or connections
provided by third parties.
4. Contact Thinklabs for information regarding software and equipment interfaces to the ds32 serial Port.
Rhythm :ds32
14
Optimizing the ds32
The ds32 can be fine-tuned to each user’s preferences. Take the time to read this
section, and learn how to maintain and optimize your ds32 to get the most out of
using your stethoscope.
General Maintenance and Cleaning
• Do not immerse the ds32 in any liquid. If the ds32 is inadvertently immersed in liquid, do NOT
Power ON the unit. Completely dry out the inner spaces before trying to use the ds32 again. Contact
Thinklabs for assistance.
• Do not sterilize the ds32 using any sterilization process.
• Wipe the ds32 with alcohol swabs or a soft cloth moistened with alcohol or water. Do not use
abrasive cleaning agents, and do not allow fluids to enter the device.
• Avoid extreme heat, cold or humidity for either storage or use of this device. -4F to 110F (-20C to
43C) storage. Room temperature is recommended for use. Note that closed vehicles reach well
above 120F in summer.
• Wearing the ds32 on the shoulders is preferable to tightly folding the device and placing it in a
jacket pocket.
• Avoid excessive force applied to any part of the device. Damage could result.
• Avoid dropping the ds32 on hard floors, especially concrete. Damage could result.
• Remove batteries if device is not to be used for a period of months.
• See Tips and Troubleshooting, Page 24, for more information.
Damage resulting from inappropriate care of the device may compromise product performance or
void the Warranty.
Rhythm :ds32
15
Eartip Adjustment
The headphones are designed with soft silicone eartips. Adjustment of the eartips and
the headphones will ensure that optimal comfort and fit is obtained.
See also Eartip Cleaning and Replacement, Page 23.
When using the ds32, the eartips should be pointed forward.
To adjust the eartip angles, grip the solid eartip
shafts, as shown, and rotate clockwise to the
correct angle. Do NOT rotate anti-clockwise. This
may loosen the headphone assembly. Do not force.
This adjustment has been done at the factory and
should not be necessary when the ds32 is new.
Both eartips should be at the same angle, and the headphones should be aligned symmetrically
as shown, such that the eartips and headphones are mirror images. This may require than the
headphone arms be pushed forward and back (one forward, the other back) as shown by the
arrows, to align the spring. This adjustment may be required from time to time to maintain alignment
and comfort.
Twist headphones arms in direction shown by arrows,
to align eartips to face each other, as shown by dotted lines.
Rhythm :ds32
16
Headphone Adjustment
Use two hands!
To maintain headphone comfort, fit, and alignment, use
both hands to insert and remove headphones. Do not
“rip” headphones from the ears using one hand.
Increasing Headphone Tension
If increased headphone spring tension is desired, close the
headphone arms beyond their normally opened position a few
times, crossing the metal tubes, and test for comfort and fit.
Although it has been customary in the past to adjust stethoscopes
with very tight fit, the amplification of the ds32 and the design of the
eartips allows for very light pressure to produce an excellent sound
seal.
Decreasing Spring Tension
To decrease spring tension, open the headphones beyond their normal
position and test for comfort and fit.
X
Rhythm :ds32
Folding and carrying the ds32
Tightly folding the stethoscope at the headphones
to place in a jacket pocket is discouraged. While
the ds32 is designed to fold as shown, wearing the
ds32 on the shoulders is a more benign practice,
inflicting less wear on the stethoscope.
17
Listening with the ds32
The ds32 Probe uses Electromagnetic Diaphragm (EmD) technology which has some important
characteristics that should be understood to achieve optimal performance:
a. Pressure - The Diaphragm is pressure-modulated i.e. pressure controls the mechanical and
electrical parameters of the EmD sensing system thereby changing the frequency response.
The user can significantly alter the sound by adjusting diaphragm pressure. Learn how to use
this to advantage during patient examination.
b. Low-Frequency Response - The EmD system is designed to be sensitive to sub-sonic
frequencies. This is important and useful for murmur and bruit detection. This can also make the
EmD somewhat sensitive to other sub-sonic signals such as chest wall motion and operator
hand movement. Learn how to avoid sub-sonic artifact to achieve optimal sound.
(See also Diaphragm Selection, Page 19).
Diaphragm Pressure and Frequency Response
Apply the Probe to the chest, make subtle changes in diaphragm pressure, and listen to the
effects. The following control is possible:
- Light Pressure - low-frequency sounds are enhanced for listening to heart sound, murmurs
and bruits that are low-pitched.
- Moderate Pressure - low-frequency sounds are attenuated. This is suitable for attenuating
heart sounds and listening primarily to lung sounds.
Within a short time, it should become intuitive to adjust the Probe/diaphragm pressure for a
particular examination. Do not apply excessive diaphragm pressure. This will severely cut the
sensitivity and free motion of the diaphragm.
Holding the Probe - steady pressure reduces sub-sonics
The EmD150L Diaphragm* detects signals in the sub-sonic
frequency range, to reproduce quiet low-frequency heart murmurs.
Patient chest wall motion, or unsteady examiner hand motion, can
induce large-amplitude sub-sonic vibrations. This can overload the
detector and produce signal artifact or cutout. Apply steady
pressure to avoid these problems.
It is helpful to hold the Probe so that the fingers holding the Probe
also touch the patient chest wall (such as the left edge of the thumb
and the fingertips in the figure.) The Probe and chest wall then
move in unison, with a consistent, light diaphragm pressure.
Alternatively, the “flat palm” grip (palm flat, Probe between fingers)
will also serve to ensure that chest wall and Probe move in unison.
* The EmD200L diaphragm has lower sub-sonic sensitivity, and has
greater immunity to motion artifact.
Rhythm :ds32
18
Diaphragm Selection
The ds32 is shipped with 2 different diaphragms, each with unique acoustic
characteristics. Try each diaphragm, and use the one that suits your medical practice
and personal preferences. See also Diaphragm Cleaning & Replacement, page 20.
Model
EmD200L
EmD150L
Overall Sensitivity
Medium
High
Low Frequency Sensitivity
Medium
High
Immunity to motion artifact
High
Medium
Immunity to ambient noise
Good
Better
Pros
! Medium-level sensitivity suited for
! High sensitivity useful for very low-
! Medium-level sensitivity throttles
! Higher sensitivity to operator or
If you find the 150L too sensitive, try
the 200L. You might find it ideal, and
robust with regard to patient
This diaphragm produces superior
sound, although some users might
find it too sensitive.
most medical- practice use, blood
pressure measurements, pulmonary,
etc.
! Less sensitive to operator or patient
movement.
! Easy to learn, easy to use.
Cons
back a little on performance for those
seeking high sensitivity.
! Slightly more sensitive to ambient
noise.
Recommendation
amplitude sounds, obese patients,
etc. when maximum performance is
desired.
! High sensitivity to ultra low
frequencies helpful for heart murmurs.
patient movement requires more
steady contact.
! Takes a little time to get used to
such high sensitivity after using an
acoustic stethoscope.
The Diaphragm - fine-tuning your stethoscope sound
A key aspect of Thinklabs stethoscopes’ high performance is the patented Electromagnetic Diaphragm
(EmD). Diaphragm motion is measured electronically and converted directly into an electronic signal.
This opens up a new level of acoustic control, such that the audio characteristics of the stethoscope can
be very carefully fine-tuned through design and materials selection. Think of the diaphragm as the
equivalent of the wood used on an acoustic musical instrument.
Our initial thinking was that we would fine-tune the diaphragm design in the lab to achieve an “optimal”
sound characteristic. However, we realized that, like owners of a fine musical instrument, users will
have personal preferences. It would be more beneficial to give users a choice in the tonality and
acoustics of their instrument.
By providing two diaphragms, each user is able to customize the sound of his/her stethoscope
according to personal preference, sub-speciality and medical practice requirements, and other criteria.
This research continues, and as users develop preferences and discover clinical benfits of various
acoustic characteristics, new ds32 diaphragms might be offered. User feedback is an important part of
this process. Contact Thinklabs with comments and feedback.
Rhythm :ds32
19
Diaphragm Changing and Replacement
The Electromagnetic Diaphragm (EmD) requires replacement if:
a. The Diaphragm is being swapped to a different model diaphragm to adjust acoustics.
b. The Diaphragm is damaged or contaminated.
To replace the Diaphragm
Always use a Thinklabs Electromagnetic
Diaphragm (EmD). Conventional
stethoscope diaphragms will not work on
the ds32.
Do not touch brass surface
or inner surface of diaphragm
Never open the ds32 in a dusty
environment. Do not allow dust, lint or
excess moisture to enter the Probe. For
best results, change the diaphragm in a
clean, dust-free environment, such as a
medical examination room, or other clean
environment.
- Unscrew the diaphragm ring and
remove as shown. (Direction - unscrew
anti-clockwise when looking directly at
the diaphragm).
Avoid touching the brass plate or the inside surface of the diaphragm. These surfaces are
sensitive, and surface contamination can compromise performance, or cause permanent damage.
- Place the new diaphragm in the diaphragm ring, with graphics facing out, and re-attach the
diaphragm ring. Do not over-tighten the diaphragm ring.
If problems occur after replacing the diaphragm, see
Probe Maintenance, Page 21,
Tips and Troubleshooting, Page 24.
Rhythm :ds32
20
Probe Maintenance - ensuring low-noise performance
The EmD sensor sets up has a high-voltage electric field in the space behind the
diaphragm. Diaphragm movement modulates this field, such that extremely small vibrations
of the diaphragm are directly detected as field changes. For proper operation, the space in
which the field exists must be clean and dust- and lint-free, and not contain excess
moisture.
Under normal circumstances, the field will remain clean, and require no maintenance.
However, if dust, lint or moisture do enter the Probe, unexpected background of louder
noises can occur. The simple cleaning procedures below can then be used to rapidly reestablish noise-free operation, using a standard alcohol swab. These procedures are
described in great detail for clarity. However, they are simple, and take less than 2 minutes
to complete.
Noise Symptoms
Dust, lint or moisture in the field produces the following possible symptoms:
- intermittent faint white-noise.
- squealing sounds, either faint or more prominent.
- ticking sounds (static discharges).
- above artifact sounds change when the diaphragm is pressed or unscrewed slightly.
If you notice any of these symptoms, follow the cleaning procedures below. If your ds32 is
operating well, these procedures are not required for regular maintenance.
Alcohol Cleaning
- Make sure the unit is turned off.
- Unscrew the diaphragm as described on
the previous page. Open the probe in a
clean, dust-free environment, and place
the open part of the probe face-up. DO
not touch the brass plate. Do not place
the open probe on a dusty surface or a
cloth surface. Lint could be attracted into
the Probe.
- Using a lint-free alcohol swab, carefully
wipe the inner surface of the diaphragm as
shown. Do not touch the inner plastic
surface of the diaphragm with anything
other than the alcohol swab.
(Continued on next page)
Rhythm :ds32
21
Probe Maintenance (continued)
- Using the alcohol swab, carefully wipe the
brass plate inside the Probe. Do not touch
the brass plate. This could permanently
damage the sensor.
- Allow the diaphragm and probe surfaces to
dry by evaporation. Do not close the unit and
power it up with alcohol moisture on the
diaphragm. Only after evaporation will the
surfaces be clean and ready for use.
Air Drying and Cleaning
The probe can further be cleaned using a dry air
aerosol spray. These are available at hardware
or office supply store, and are usually used for
cleaning computers. This cleaning method is
useful when the unit has been exposed to
extreme dust, lint, humidity or moisture, or in
addition to the alcohol-swab cleaning described
above, the rare instance than contaminants exist
inside the probe.
Dry Air Spray
- Make sure the unit is turned off.
- Rotate the Aperture Ring to the open position (see page 8) to allow air flow in the Probe.
- Unscrew the Diaphragm Ring and remove the diaphragm. Place the diaphragm with Thinklabs
logo face DOWN, so the inside surface does not become dusty.
- Using the dry air spray with the spray’s plastic straw, spray the inside of the probe via the vent
holes in the Aperture Ring, and around the circumference of the brass plate. Do not touch the
brass plate with anything, including the plastic straw. Do not overspray. White condensation
sometimes forms, which is counterproductive when trying to dry out the Probe.
- Replace the Diaphragm, and close the Aperture Ring. Wait a few minutes for the Probe to
stabilize, and then power up the unit to test.
If these cleaning procedures do not correct the problem, see Tips and Troubleshooting, Page 24,
and contact Thinklabs.
Rhythm :ds32
22
Eartip Cleaning and Replacement
b
The eartips can be removed for cleaning or
replacement.
To remove eartips, grip the eartip between thumb and
forefinger as shown, and (a) pull the eartips off in a straight
line or (b) gently twist the eartip off the eartip shaft. Do not
use excessive force.
a
To replace eartips, gently push the eartip over the eartip
shaft into position. Do not use excessive force.
Quick Clean
Without removing the eartips, use a slightly damp soft cloth or alcohol swab to wipe the eartips.
Never allow fluids to enter the speaker housings.
Thorough Clean
- Remove eartips for cleaning.
- Clean the eartips with non-abrasive cleaning materials. Alcohol or gentle soap and running water
are recommended. (Don’t lose the eartips down the drain.)
- Rinse off cleaning agent thoroughly and dry.
- Re-attach the eartips.
When the eartips become worn, contact Thinklabs or go to the website for replacement eartips.
To Adjust Eartips for comfort and fit, see Eartip Adjustment, Page 16.
Rhythm :ds32
23
Tips and Troubleshooting
Your ds32 is designed, built and tested to provide you with excellent sound quality and performance. If
you have any questions, comments, suggestions or experiences you would like to share, please let us
know at [email protected] We will respond to all emails. If you have a problem requiring
more immediate attention, please call us.
Before contacting us, we suggest that you read relevant sections of the User’s Manual, read this section
of tips and troubleshooting suggestions, and look at www.thinklabsmedical.com, where we will place
FAQ’s, updates and useful information for Rhythm owners.
Get the most out of your ds32 - Most users do not read User’s Manuals. We have tried to provide
additional information and tips in the Manual to help you get the most out of using the ds32. In particular,
read the following sections:
Optimal Use of the ds32
Probe Setup
Control Ergonomics
Volume Settings and Psychoacoustics
Auscultation - a Pathology-Physiology Dichotomy
Listening with the ds32
Diaphragm Selection
Page 4
Page 8
Page 9
Page 11
Page 12
Page 18
Page 19
The ds32 does not Turn On
- Check the Battery polarity (page 6). The wrong polarity can cause damage to the ds32.
- Batteries may need replacement. Follow instructions on page 6.
- You are not Holding the Power key long enough to see all LEDs light up, and then releasing the key. If
the device does not power on, execute this keystroke sequence again, until LEDs light (page 10).
The ds32 is not producing any sound
- No sound in Zoom mode (when Blue LED On). Increase the Volume setting. It may be set at a very low
level. Set Volume to say, ‘7’, and try again.
- Check the headphone fit. Do you have the ds32 on backwards and the eartips are facing the wrong
way? The eartips should face forward, and the control panel should face forward. Check the adjustment
of the eartips. See pages 16-17.
The ds32 is producing unexpected interference or noise
The ds32 should provide a low-noise, high-quality signal. If used on clothing or not applied correctly to the
patient, artifact can be produced. Simply apply the Probe as recommended, making good contact with the
patient. There are some interfering noises that can occur even when not examining a patient. Some
potential culprits are listed below, with remedies:
- Radio stations or electromagnetic pickup: Move the ds32 to a location that does not have strong
electromagnetic fields from such sources.
- Continuous loud buzzing: The diaphragm is loose. Tighten the diaphragm retainer ring.
- Continuous loud buzzing: The ds32 is connected to mains-powered or grounded equipment. If you have
the ds32 connected to an external device, is the device powered by mains electricity or on a wired
network? If so, disconnect the other cables from the equipment, so that the ds32 is connected only to
“floating” (ungrounded) device.
- Other noise: Dust or moisture may exist inside the Probe. See Pages 21, 22.
- Problem unsolved? Contact Thinklabs for assistance. (See page 26 for contact information).
Rhythm :ds32
24
Tips and Troubleshooting (continued)
Headphones do not fit correctly or are uncomfortable
- Are you wearing the headphones the right way? The eartips should face forward, and the Control Panel
should face forward.
- Eartips or headphones are out of alignment (page 16).
- Headphone spring tension isn’t correct (page 17).
Sound is sometimes distorted or cuts out temporarily when listening
- Volume is too high. Reduce Volume level or try Acoustic mode (page 11).
- Probe is not being held in a firm and steady position, or is not being held with a steady pressure against
the patient. The ds32 EmD diaphragm can sense frequencies down to the sub-sonic range, in order to
cover the whole audio spectrum for murmur detection. Vibrations caused by patient or user hand
movement are also sometimes sensed as loud signals that distort body sounds. Hold the Probe steady
with a light but consistent pressure against the patient. It sometimes helps to hold the Probe so that the
fingers holding the Probe also touch the patient chest wall, so that the Probe and chest wall move in
unison.
Heart sounds on some patients are difficult to hear
Heart sounds are attenuated in obese patients. When patients have substantial body hair, this reduces
the contact of the diaphragm against the body. Similarly, clothing can sometimes reduce sound
transmission. This is a matter of physics, and in such circumstances, conventional stethoscopes are
usually not effective. To overcome such limitations, try and ensure that the EmD diaphragm is making
good, direct skin contact, preferably in a location that has less body fat or hair to cause attenuation. Do
not apply excessive pressure on the Probe. Preferably, apply a light but firm pressure, so that the lowfrequency sensitivity of the ds32 is optimized, and the diaphragm is making full contact with the patient.
Working in high ambient noise environments
Rhythm stethoscopes are designed to attenuate ambient noise. To optimize this attenuation:
- Do not listen through clothing.
- Ensure that the diaphragm is making good contact with the patient.
- Apply light but firm pressure on the Probe. Do not press too hard.
- Adjust the Volume such that body sounds are audible, but avoid using such a high volume that ambient
sounds become audible. There is usually an optimal volume setting for a given environment.
- If you are using the EmD200L Diaphragm, try the EmD150L, which has higher immunity to ambient
noise. See Diaphragm Selection, Page 19.
- Experiment with the Acoustic Aperture (page 8). In high noise environments, it is suggested that the
Aperture be kept open!
Wearing the ds32 - why shoulders and not pocket?
We do not recommend folding the ds32 into a small bundle and stuffing it into your jacket pocket. We
know this is done with acoustic stethoscopes, and we’ve also designed and tested the ds32 to be folded
that way. However, wearing the ds32 on the shoulders is a more benign practice, since it places less
stress on the mechanical parts. It is therefore a highly preferred way to treat your stethoscope.
Rhythm :ds32
25
Service and Warranty
This product is warranted against manufacturing or materials defects for a period of one
year from the invoice date. If a material or manufacturing defect occurs within the warranty
period, repairs will be performed free of charge upon returning the device to Thinklabs. The
warranty will be voided in cases of abuse, excessive or inappropriate use conditions, or
accidental damage to the product. The warranty is transferable at Thinklabs’ discretion
only.
For maintenance, repair, service and contact information, visit the Thinklabs website at
www.thinklabsmedical.com, and check the Support page. Before shipping the product for
repair, please contact Thinklabs first, at
[email protected],
or (303)521-5023.
Please quote the serial number, located inside the battery compartment when contacting
us.
To have the product repaired, ship the product in suitably protective packaging, with name,
return address, daytime telephone number, a description of the problem, and a copy of the
purchase invoice, to:
Thinklabs inc.
Attn: Service
6571 South Pontiac Court
Centennial, CO 80111
Package Contents
1x
2x
2x
1x
1x
1x
Rhythm ds32 High Resolution Stethoscope with EmD200L Medium-sensitivity Diaphragm
AAA Batteries
Spare eartips
EmD150L high-sensitivity Diaphragm
Quick Reference Guide
Reference CD with complete User’s Manual
Rhythm :ds32
26
© 2004,2005 Thinklabs inc. All rights reserved.
Thinklabs, the Thinklabs logo, Rhythm, the Rhythm logo, High
Resolution Auscultation, Hear Everything in a Heartbeat, EmD,
Electromagnetic Diaphragm, are all trademarks of Thinklabs inc.
Centennial, CO 80111
http://www.thinklabsmedical.com
[email protected]
303-521-5023
6571 South Pontiac Court
Centennial, CO 80111
Product Made in China for Thinklabs inc.
US Patents 6,498,854 6,661,897
Other US and Foreign Patents Pending.
Thinklabs Part no. ds32umpdf v1.2
Rhythm :ds32