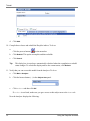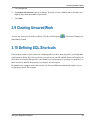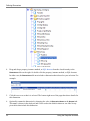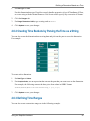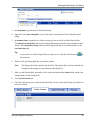
1
Using the DeepSee
Architect
Version 2009.1
10 August 2009
InterSystems Corporation 1 Memorial Drive Cambridge MA 02142 www.intersystems.com
Using the DeepSee Architect
Caché Version 2009.1 10 August 2009
Copyright © 2009 InterSystems Corporation
All rights reserved.
This book was assembled and formatted in Adobe Page Description Format (PDF) using tools and information from
the following sources: Sun Microsystems, RenderX, Inc., Adobe Systems, and the World Wide Web Consortium at
www.w3c.org. The primary document development tools were special-purpose XML-processing applications built
by InterSystems using Caché and Java.
and
Caché WEBLINK, Distributed Cache Protocol, M/SQL, M/NET, and M/PACT are registered trademarks of InterSystems
Corporation.
,
,
and
InterSystems Jalapeño Technology, Enterprise Cache Protocol, ECP, and InterSystems Zen are trademarks of
InterSystems Corporation.
All other brand or product names used herein are trademarks or registered trademarks of their respective companies
or organizations.
This document contains trade secret and confidential information which is the property of InterSystems Corporation,
One Memorial Drive, Cambridge, MA 02142, or its affiliates, and is furnished for the sole purpose of the operation
and maintenance of the products of InterSystems Corporation. No part of this publication is to be used for any other
purpose, and this publication is not to be reproduced, copied, disclosed, transmitted, stored in a retrieval system or
translated into any human or computer language, in any form, by any means, in whole or in part, without the express
prior written consent of InterSystems Corporation.
The copying, use and disposition of this document and the software programs described herein is prohibited except
to the limited extent set forth in the standard software license agreement(s) of InterSystems Corporation covering
such programs and related documentation. InterSystems Corporation makes no representations and warranties
concerning such software programs other than those set forth in such standard software license agreement(s). In
addition, the liability of InterSystems Corporation for any losses or damages relating to or arising out of the use of
such software programs is limited in the manner set forth in such standard software license agreement(s).
THE FOREGOING IS A GENERAL SUMMARY OF THE RESTRICTIONS AND LIMITATIONS IMPOSED BY
INTERSYSTEMS CORPORATION ON THE USE OF, AND LIABILITY ARISING FROM, ITS COMPUTER
SOFTWARE. FOR COMPLETE INFORMATION REFERENCE SHOULD BE MADE TO THE STANDARD SOFTWARE
LICENSE AGREEMENT(S) OF INTERSYSTEMS CORPORATION, COPIES OF WHICH WILL BE MADE AVAILABLE
UPON REQUEST.
InterSystems Corporation disclaims responsibility for errors which may appear in this document, and it reserves the
right, in its sole discretion and without notice, to make substitutions and modifications in the products and practices
described in this document.
For Support questions about any InterSystems products, contact:
InterSystems Worldwide Customer Support
Tel:
+1 617 621-0700
Fax:
+1 617 374-9391
Email:
[email protected]
Table of Contents
About This Book ................................................................................................................................ 1
1 Introduction to the DeepSee Architect ......................................................................................... 3
1.1 Purpose of the DeepSee Architect .......................................................................................... 3
1.2 Logging Into DeepSee ........................................................................................................... 4
1.3 Accessing the DeepSee Architect ........................................................................................... 5
1.4 Switching to Another Namespace .......................................................................................... 6
2 Tutorial ............................................................................................................................................ 7
2.1 Tutorial Part 1: Setup ............................................................................................................. 7
2.2 Tutorial Part 2: Creating a Basic DeepSee Model ................................................................. 8
2.3 Tutorial Part 3: Adding a Detail Listing to the Model ......................................................... 13
3 Enabling Classes for Use in DeepSee .......................................................................................... 17
3.1 Overview .............................................................................................................................. 17
3.2 BI-enabling Your Classes ..................................................................................................... 18
3.3 Opening a Class Definition .................................................................................................. 19
3.4 Opening a BI-enabled Class ................................................................................................. 20
3.5 Available Properties and Methods of a BI-enabled Class .................................................... 20
3.6 Recompiling and Rebuilding ............................................................................................... 21
3.6.1 Incremental Rebuilds ................................................................................................. 21
3.7 Rebuilding Selectively ......................................................................................................... 22
3.8 Specifying the Number of Processors .................................................................................. 22
3.9 Clearing Unsaved Work ....................................................................................................... 23
3.10 Defining SQL Shortcuts ..................................................................................................... 23
4 Defining Dimensions .................................................................................................................... 27
4.1 Overview of the Dimension Tab .......................................................................................... 27
4.1.1 Class Hierarchy .......................................................................................................... 28
4.1.2 Dimensions Table ....................................................................................................... 28
4.1.3 Tabs ............................................................................................................................ 30
4.2 Defining a Dimension .......................................................................................................... 31
4.3 Specifying the Data on Which a Dimension Is Based ......................................................... 33
4.3.1 Basing a Dimension on a Caché ObjectScript Expression ........................................ 34
4.4 Specifying the Dimension Data Type .................................................................................. 35
4.4.1 Creating a Custom Data Type .................................................................................... 37
4.5 Defining a Dimension Based on a Date ............................................................................... 37
4.5.1 Recognized Date Formats .......................................................................................... 38
4.5.2 Converting Other Date Formats ................................................................................. 39
Using the DeepSee Architect iii
4.5.3 Date Dimension Details ............................................................................................. 39
4.6 Defining a Dimension Based on a Time .............................................................................. 40
4.6.1 Creating Hourly Buckets ........................................................................................... 40
4.6.2 Creating Time Buckets by Parsing the Time as a String ............................................ 41
4.6.3 Defining Time Ranges ............................................................................................... 41
4.7 Defining a Dimension Based on a Collection ...................................................................... 43
4.7.1 Using the Words Dimension Data Type ..................................................................... 43
4.7.2 Using the Words Dimension Data Type with Complex Code .................................... 43
4.7.3 Using the M.C.B Feature with a List-type Property .................................................. 44
4.7.4 Using the M.C.B Feature with an Array-type Property ............................................. 46
4.7.5 Understanding Dimensions Based on Collections ..................................................... 46
4.8 Modifying a Dimension ....................................................................................................... 47
4.9 Controlling Whether a Dimension Is Selectively Rebuilt .................................................... 48
4.10 Deactivating or Activating a Dimension ............................................................................ 48
4.11 Deleting a Dimension ........................................................................................................ 48
4.12 Next Steps .......................................................................................................................... 49
5 Defining Special Dimensions ....................................................................................................... 51
5.1 Creating a Dynamic Dimension ........................................................................................... 51
5.1.1 Run-time Filter Values ............................................................................................... 51
5.1.2 Creating a Dynamic Dimension ................................................................................. 52
5.1.3 Example 1 .................................................................................................................. 52
5.1.4 Example 2 .................................................................................................................. 53
5.2 Creating a Compound Dimension ........................................................................................ 53
5.3 Next Steps ............................................................................................................................ 54
6 Defining Relationships between Dimensions ............................................................................. 57
6.1 Defining a Relationship ....................................................................................................... 57
6.2 Next Steps ............................................................................................................................ 58
7 Defining Measures ........................................................................................................................ 59
7.1 The Default Measure ............................................................................................................ 59
7.2 Defining a Measure .............................................................................................................. 60
7.3 Next Steps ............................................................................................................................ 60
8 Defining Subject Areas ................................................................................................................. 63
8.1 Overview of the Subject Area Tab ....................................................................................... 63
8.1.1 Subject List ................................................................................................................ 63
8.1.2 Subject Details ........................................................................................................... 64
8.2 Defining a Subject Area: The Basics ................................................................................... 65
8.3 Modifying a Subject Area .................................................................................................... 66
8.4 Filtering a Subject Area ....................................................................................................... 67
8.5 Specifying Role Access to a Subject Area ........................................................................... 67
iv Using the DeepSee Architect
8.5.1 Advanced Role Options ............................................................................................. 68
8.6 Defining Dimension-to-dimension Drill Options ................................................................ 68
8.7 Specifying the Available Dimensions in a Subject Area ...................................................... 69
8.8 Defining Custom Aggregates for Use in Measures .............................................................. 70
8.9 Deactivating or Activating a Subject Area ........................................................................... 71
8.10 Deleting a Subject Area ..................................................................................................... 71
8.11 Next Steps .......................................................................................................................... 71
9 Defining Listing Fields ................................................................................................................. 73
9.1 Overview of the List Field Library Tab ............................................................................... 73
9.1.1 Class Hierarchy .......................................................................................................... 73
9.1.2 Listing Field Table ..................................................................................................... 74
9.1.3 Tabs ............................................................................................................................ 75
9.2 Defining a Listing Field: The Basics ................................................................................... 76
9.2.1 Creating a Dimension-type Listing Field .................................................................. 77
9.2.2 Creating an Independent Listing Field by Copying a Dimension ............................. 77
9.2.3 Creating an Independent Listing Field from Scratch ................................................. 78
9.3 Modifying a Listing Field .................................................................................................... 79
9.4 Specifying the Data on Which a Listing Field Is Based ...................................................... 79
9.5 Specifying the Data Type for an Independent Listing Field ................................................ 80
9.6 Controlling Whether a Listing Field Is Selectively Rebuilt ................................................. 81
9.7 Deactivating or Activating a Listing Field ........................................................................... 81
9.8 Deleting a Listing Field ....................................................................................................... 82
9.9 Next Steps ............................................................................................................................ 82
10 Using Other Tables to Define Dimensions, Measures, and Listing Fields ............................. 83
10.1 Using Complex Code and Embedded SQL ........................................................................ 83
10.2 Using a Class Query ........................................................................................................... 84
11 Defining Detail Listings ............................................................................................................. 87
11.1 Overview of the Detail List Library Tab ............................................................................ 87
11.2 Defining a Detail Listing: The Basics ................................................................................ 88
11.3 Modifying a Detail Listing ................................................................................................. 90
11.4 Modifying the Layout of a Detail Listing .......................................................................... 90
11.5 Adding Summary Lines to a Detail Listing ....................................................................... 91
11.6 Specifying Role Access to a Detail Listing ........................................................................ 92
11.7 Adding a Link to Another Detail Listing ........................................................................... 93
11.8 Adding a Link to a URL ..................................................................................................... 94
11.9 Deleting a Detail Listing .................................................................................................... 95
11.10 Next Steps ........................................................................................................................ 95
12 Using Replacements, Ranges, and Transformations ............................................................... 97
12.1 Overview of Replacements, Ranges, and Transformations ............................................... 97
Using the DeepSee Architect v
12.2 Replacing Null Values for a Dimension, Measure, or Listing Field .................................. 98
12.3 Defining Replacements for a Dimension or Listing Field ................................................. 99
12.3.1 Other Options ......................................................................................................... 100
12.4 Defining Ranges for a Dimension or Listing Field .......................................................... 100
12.4.1 Basics ..................................................................................................................... 100
12.4.2 Other Options ......................................................................................................... 101
12.5 Defining and Modifying Transformations ....................................................................... 102
12.5.1 Defining Text-to-Image Replacements .................................................................. 103
12.5.2 Deleting a Transformation ..................................................................................... 104
12.5.3 Next Steps .............................................................................................................. 105
12.6 Applying a Transformation to a Dimension or Listing Field ........................................... 105
13 Validating Your DeepSee Data Model ..................................................................................... 107
13.1 Useful Tools ..................................................................................................................... 107
13.2 Validating a Dimension .................................................................................................... 108
13.3 Validating a Measure ........................................................................................................ 112
13.4 Validating a Listing Field ................................................................................................. 113
Appendix A: Expressions and Scripts in DeepSee Architect ..................................................... 115
A.1 Filter Expressions .............................................................................................................. 115
A.1.1 Where Used ............................................................................................................. 115
A.1.2 Syntax ..................................................................................................................... 116
A.1.3 Filter Expression Using IN ..................................................................................... 116
A.1.4 Filter Expression with a Full Date .......................................................................... 116
A.1.5 Filter Expression with Embedded Caché ObjectScript ........................................... 117
A.1.6 Filter Expression That Uses Session Data .............................................................. 117
A.2 Caché ObjectScript Expressions ....................................................................................... 117
Appendix B: When to Recompile and Rebuild ........................................................................... 119
Index ............................................................................................................................................... 121
vi Using the DeepSee Architect
List of Tables
Options on the Dimension Tabs ........................................................................................................ 30
Data Types for Dimensions ............................................................................................................... 36
Options for Subject Areas ................................................................................................................. 64
Options on the List Field Library Tabs ............................................................................................. 75
Data Types for Listing Fields ............................................................................................................ 80
Options for Detail Listings ................................................................................................................ 88
Options for the Detail Listing Summary Lines ................................................................................. 92
Options in a Named Transformation ............................................................................................... 102
When to Recompile and When to Rebuild ...................................................................................... 119
Using the DeepSee Architect vii
About This Book
This book describes how an implementer can use DeepSee Architect to create a DeepSee model for
use in pivot tables. It contains the following sections:
•
Introduction to the DeepSee Architect
•
Tutorial
•
Enabling Classes for Use in DeepSee
•
Defining Dimensions
•
Defining Special Dimensions
•
Defining Relationships between Dimensions
•
Defining Measures
•
Defining Subject Areas
•
Defining Listing Fields
•
Using Other Tables to Define Dimensions, Measures, and Listing Fields
•
Defining Detail Listings
•
Using Replacements, Ranges, and Transformations
•
Validating Your DeepSee Data Model
•
Expressions and Scripts in DeepSee Architect
•
When to Recompile and Rebuild
For a detailed outline, see the table of contents.
For more information, see the following books:
•
Introduction to InterSystems DeepSee, an introductory guide for all users.
•
Using the DeepSee Analyzer, a guide for implementers and advanced users who want to create
pivot tables to embed in applications — or who simply want to explore their data.
•
Using the DeepSee Dashboard Designer, a guide for implementers who are creating dashboards.
•
Using the DeepSee Connector, a guide for implementers who are using the DeepSee Connector
to access externally stored data. Note that the DeepSee Connector is available only with Ensemble.
Using the DeepSee Architect 1
About This Book
•
DeepSee Site Configuration and Maintenance Guide, a guide for implementers and system
administrators. This book describes how to configure and maintain a DeepSee site. It also includes
a chapter on troubleshooting.
•
DeepSee User Guide, a user manual for your end users. This book describes how to work with
deployed dashboards and pivot tables.
For general information, see the InterSystems Documentation Guide.
2 Using the DeepSee Architect
1
Introduction to the DeepSee
Architect
This chapter introduces the DeepSee Architect. It discusses the following topics:
•
Purpose of the Architect
•
How to log into DeepSee
•
How to access the DeepSee Architect
•
How to switch to another namespace
Be sure to consult InterSystems Supported Platforms for information on system requirements.
1.1 Purpose of the DeepSee Architect
You use the DeepSee Architect to create DeepSee models, which in turn are needed for in creating
pivot tables and for using the Analyzer in general. When you are done using the Architect, you will
have set up all the following elements:
•
BI-enabled classes.
•
Dimensions based on properties of those classes.
•
Automatically created measures based on properties. You can add more measures with the DeepSee
Analyzer, which is discussed in another book.
•
Detail listing fields based on properties.
•
Detail listings associated with different user roles, as needed.
Using the DeepSee Architect 3
Introduction to the DeepSee Architect
•
Subject areas associated with different user roles, as needed.
1.2 Logging Into DeepSee
To log into DeepSee:
1.
Click the InterSystems Launcher.
When you do so, the system displays a menu.
2.
Click DeepSee.
If you have not yet specified a namespace, the system displays a page that prompts you for a
namespace.
Otherwise, the system displays the DeepSee login page.
3.
If you are prompted for a namespace, type the name of the namespace you want to work in and
then click Logon to DeepSee.
The system then displays the DeepSee login page.
4.
On the DeepSee login page, enter a DeepSee username and password. For example, you can use
the username demo with the password demo.
5.
For Role, select demo.
6.
Click Login.
DeepSee displays the home page, which depends upon the user ID you used to log in. In general, the
home page is either a DeepSee module or a dashboard. If the page is a DeepSee module, it has a row
of buttons at the top as follows:
If the page is a dashboard, the right-click menu provides access to all the same options provided by
these buttons, in addition to options that apply to dashboards:
4 Using the DeepSee Architect
Accessing the DeepSee Architect
1.3 Accessing the DeepSee Architect
To access the Analyzer:
•
If you are currently viewing a DeepSee module, click Data Modeler > Architect.
•
If you are currently viewing a dashboard, right-click and then click Go To > Data Modeler >
Architect.
The Architect looks like this:
Using the DeepSee Architect 5
Introduction to the DeepSee Architect
1.4 Switching to Another Namespace
To switch to a different namespace:
1.
Log out. To do so, do one of the following, depending on what you are currently viewing:
•
If you are currently viewing a DeepSee module, click the Log Off button in the upper right.
•
If you are currently viewing a DeepSee dashboard, right-click and then click the Log Out
option.
The system logs you out of DeepSee.
2.
Click Switch Namespace.
3.
For Namespace, type the name of the namespace you want to work in.
4.
Click Logon to DeepSee.
This displays a login page.
5.
Log in as usual.
6 Using the DeepSee Architect
2
Tutorial
This tutorial starts with a BI-enabled class and ends with a simple but complete DeepSee model that
you can use in the Analyzer. It consists of the following parts:
1.
Setup work
2.
Creating a basic DeepSee model in the Architect and checking your work in the Analyzer
3.
Adding a detail listing to the model in the Architect and checking your work in the Analyzer
Because all this work is within a single namespace, you can open two browser tabs and use one for
the Architect and the other for the Analyzer. The tutorial does not describe this technique specifically,
but it can be a convenient way to work.
2.1 Tutorial Part 1: Setup
This tutorial continues the tutorial in Using the DeepSee Connector. If you plan to use the Connector,
that tutorial is a useful starting point.
However, if you do not plan to use the Connector or if you do not want to perform that tutorial now,
you can get a sample database from InterSystems that consists of the CACHE.dat file that you would
have if you had used the tutorial.
To install this database:
1.
Shut down Caché.
2.
Rename the file install-dir/Mgr/User/CACHE.DAT, so that you can restore this file later if needed.
3.
Place the new database file into install-dir/Mgr/User/ and rename it to CACHE.DAT.
4.
Start Caché.
Using the DeepSee Architect 7
Tutorial
In either case, notice the following items within the USER namespace:
•
The classes Sample.Categories, Sample.Customers, Sample.Employees, Sample.Orders,
Sample.OrderDetails, Sample.Products, Sample.Shippers, and Sample.Suppliers.
The class Sample.Orders is BI-enabled; that is, its superclass list includes %BI.Adaptor. None of
the other classes are BI-enabled.
•
Data for each of these classes. For reference, Sample.Orders has 830 records. Sample.OrderDetails
has 2155 records.
2.2 Tutorial Part 2: Creating a Basic DeepSee
Model
In this part of the tutorial, you create dimensions, a measure, and a subject area, using Sample.Orders
as the base class.
1.
2.
Log into the DeepSee Architect as described earlier.
Click the open class button (
) in the Architect menu bar.
3.
Click the Sample.Orders class and then click OK.
4.
Click the plus sign (+) beside Sample.Orders. DeepSee displays the following:
8 Using the DeepSee Architect
Tutorial Part 2: Creating a Basic DeepSee Model
Notice that here you can view the Sample.Orders class as well as (via properties) the classes
Sample.Customers, Sample.Employees, Sample.Orders, and Sample.Shippers. The other classes
are not visible, because they are not available via properties, but we can still use them in DeepSee,
as you will see later in this tutorial.
5.
Expand the folders and double-click each of the following properties (or drag and drop them to
the Dimensions table):
•
Freight
•
ShipCity
•
ShipCountry
•
ShipRegion
•
ShippedDate
•
Within CustomerID, CompanyName
•
Within ShipVia, CompanyName
•
Within EmployeeID, LastName
As you do this, the Architect defines a dimension based on each of these properties. When you
are done, DeepSee displays something like the following (your ID values might be different from
this):
The Freight dimension is also a measure, because Data Type is Number. In fact, this is the process
to define measures: add a numeric dimension.
6.
Now rename most of these dimensions, as follows:
a.
Click the dimension in the table.
Using the DeepSee Architect 9
Tutorial
b.
The tabs below the table now show details for this dimension.
c.
Edit Dimension Name within the General tab.
d.
Click Update to save this change.
The buttons in the lower right apply to the currently selected dimension. If you do not save
changes before selecting another dimension, your changes to that dimension are discarded.
Use the following new names:
Old Name
New Name
ShipCity
Ship City
ShipCountry
Ship Country
ShipRegion
Ship Region
ShippedDate
Ship Date
CompanyName (based on
CustomerID.CompanyName)
Customer
CompanyName (based on ShipVia.CompanyName)
Shipper
LastName
Staff
Do not forget to click Update after you modify a dimension.
Now DeepSee displays something like the following:
7.
Next we modify the definition of the Staff dimension so that it uses both the first and last names.
To do this:
10 Using the DeepSee Architect
Tutorial Part 2: Creating a Basic DeepSee Model
a.
Click Staff in the Dimensions table.
b.
On the General tab, type the following Caché ObjectScript expression into Complex Code:
##this.EmployeeID.FirstName _ " " _##this.EmployeeID.LastName
c.
Delete the string EmployeeID.LastName contained in the second property field (this step
is optional but makes the definition less confusing to view, here in the Architect).
d.
Click Update to save this change.
The details for this dimension are now as follows:
8.
In this step, we modify Ship Region so that it replaces any null values with the string No
Region.
a.
Click Ship Region in the Dimensions table.
b.
Click the Translation/Replacement tab.
c.
For Null field Replacement, type No Region.
d.
Click Update to save this change.
There are other ways to handle null values, and they are discussed later in this manual.
Also, in this example, this is the only dimension we are defining that happens to contain null
values. In practice, you would examine all your dimensions carefully to determine whether they
contain null values (or whether they might later contain null values, as new data becomes available).
9.
Next, we define a subject area so that we can see these dimensions in the Analyzer. To do this:
a.
Click the Subject tab.
b.
In Subject Area, type the name Orders.
c.
On the Role Access tab, click the check box next to the demo role.
Using the DeepSee Architect 11
Tutorial
d.
Click Add.
10. Compile these classes and rebuild the DeepSee indices. To do so:
a.
Click the process button (
) in the menu bar.
b.
Click Rebuild. This option recompiles and then rebuilds.
c.
Click Cancel.
Tip:
This dialog box is not always automatically refreshed when the compilation or rebuild
status changes. To refresh the display and see the current status, click Refresh.
11. Verify that you can access this model from the Analyzer. To do so:
a.
Click Main > Analyzer.
b.
Click the browse button (...) in the Subject Area panel.
c.
Click Orders and then click OK.
If Orders is not listed, make sure you gave access to this subject area to the demo role.
Now the Analyzer displays the following:
12 Using the DeepSee Architect
Tutorial Part 3: Adding a Detail Listing to the Model
If you do not see these dimensions and measures, make sure that you have rebuilt the DeepSee
indices.
In theory, you could now start to create pivot tables, as described in Using the DeepSee Analyzer. In
practice, however, you may want to continue to use the Architect to do some or all of the following:
•
Add detail listings (as discussed in the next part of the tutorial).
•
Add other special types of dimensions.
•
Add more subject areas, filtered for different user roles.
•
Define and use transformations to modify data in dimensions and in detail listings.
2.3 Tutorial Part 3: Adding a Detail Listing to
the Model
In this part of the tutorial, we add a simple detail listing. In general, first we create listing fields and
then we use them to create detail listings.
There are two general kinds of listing fields:
•
A dimension-type listing field is a listing field whose definition is owned by a dimension definition.
If you redefine the dimension, the listing field is automatically redefined as well. (Similarly, if
you delete the dimension, the listing field is automatically deleted.)
Using the DeepSee Architect 13
Tutorial
The data used by the listing field is stored in a DeepSee global, which means that its performance
is fast. This kind of listing field, however, requires more disk space than the other kind.
There is one way to create this kind of listing field.
•
An independent listing field is a listing field that has an independent definition (not dependent on
the definition of any dimension).
For this kind of listing field, DeepSee does not access the data until the user displays the detail
listing; then DeepSee directly accesses the source data.
There are two ways to create this kind of listing field.
In this part of the tutorial, we will try all three ways of creating listing fields.
1.
2.
At the top of the page, click Data Modeler > Architect.
Click the open class button (
) in the Architect menu bar.
3.
Click the Sample.Orders class and then click OK.
4.
In the Dimensions table, notice that the Listing check box is already selected for Freight and
Ship Date. This is the default setting for date and numeric dimensions. So we already have two
listing fields (and they are dimension-type listing fields).
5.
We add Ship Region as another dimension-type listing field. To do so:
a.
In the Dimensions table, click Ship Region.
b.
On the General tab, click the Listing Field check box.
c.
Click Update to save this change.
Now the Dimensions table looks like this:
6.
We add Ship Country as an independent listing field by copying a dimension. We then apply
an existing sample transformation to it so that the listing field is shown as a bitmap (the flag for
the country).
a.
Right-click Ship Country and then click Add To Listing Fields. This listing field is immediately added; its current definition is similar to the dimension we copied.
14 Using the DeepSee Architect
Tutorial Part 3: Adding a Detail Listing to the Model
b.
Click the List Field Library tab. The purpose of this tab is to list all the independent listing
fields, so this tab displays only one listing field: Ship Country.
c.
In the Listing Field table, click Ship Country. The tabs below the table show details for
this listing field.
d.
For Transformation Type, click Convert to flag.
e.
Click Update to save this change.
Convert to flag is a transformation that is defined elsewhere. It is a sample that you can
redefine or delete.
7.
We add another listing field, OrderID, from scratch. To do so:
a.
On the List Field Library tab, expand the class hierarchy on the left.
b.
Double-click OrderID. A new listing field is immediately added.
The right area looks as follows:
8.
Now create a detail listing that includes all these listing fields.
a.
Click the Detail List tab.
b.
In Listing Name, type Basic Details.
c.
In Available Fields, expand the two folders so that you can see all the available listing fields.
The Dimension ListingField folder lists the dimension-type fields. The ListingFields Library
folder lists the independent listing fields.
d.
Double-click each of the five listing fields. When you double-click a field, it is added to the
area on the right, which lists the contents of this detail listing.
The order of the listing fields here controls the order of the fields in the actual detail listing.
However, you can add fields in any order and change the order later. To change the position
of a listing field, right-click it and click Move Up or Move Down.
e.
Click the Role Access tab.
f.
On the Role Access tab, click the check box next to the demo role.
g.
Click Add.
Using the DeepSee Architect 15
Tutorial
The detail listing is added and the tab is immediately cleared, which can be confusing. To
double-check this detail listing, click the browse button (...), click the detail listing name, and
click OK. This redisplays the definition of the detail listing, which you can now modify.
9.
Recompile these classes and rebuild the DeepSee indices, as in the previous part of this tutorial.
10. Verify that you can access this detail listing in the Analyzer. To do so:
a.
Click Main > Analyzer.
b.
The Orders subject area should be displayed from the last time you used the Analyzer.
However, if it is not, click the search button (...) in the Subject Area panel. Then click Orders
and then click OK.
c.
Click Find in the upper right. The Analyzer then displays a pivot table that counts the records
in this subject area. It looks like this:
d.
Right-click on the white cell and then click Listing to Screen.
If Basic Details is not listed, make sure you gave access to this detail listing to the demo
role. If correcting that does not fix the problem, make sure that you recompiled and rebuilt.
DeepSee then displays something like the following:
If you do not see a result similar to this, make sure that you recompiled and rebuilt.
16 Using the DeepSee Architect
3
Enabling Classes for Use in
DeepSee
Within the Architect, you can perform most activities in nearly any order. In all cases, however, you
start by enabling Caché class definitions for use with DeepSee. This process is known as BI-enabling
the classes. This chapter discusses the following topics:
•
What it means to BI-enable a class
•
How to BI-enable a class in general
•
How to open a class definition from the Architect
•
How to open a BI-enabled class in the Architect
•
A summary of the properties and methods available for a BI-enabled class
•
How to recompile the classes and rebuild the indices
•
How to selectively rebuild the indices
•
How to specify the number of processors used when DeepSee rebuilds the indices
•
How to clear unsaved work in the Architect
•
How to create SQL shortcuts to manage confusing property names
3.1 Overview
A BI-enabled class is a class that inherits from %BI.Adaptor. When you BI-enable a class, that class
and all classes related to it are automatically included in the generated cube. Consider a simple example:
Using the DeepSee Architect 17
Enabling Classes for Use in DeepSee
•
The MyApp.Customer class defines customers.
•
The MyApp.Shipper class defines shippers.
•
The MyApp.Orders class defines orders placed by customers and shipped by various shippers.
It includes the properties Customer, which is of type MyApp.Customer, and Shipper, which
is of type MyApp.Shipper.
If you BI-enable MyApp.Orders, and recompile and rebuild the classes, you automatically create a
DeepSee cube that contains all the data from these three classes (and any other related classes).
In general, any property of these classes can be used as either a dimension, a listing field, or both.
When you define dimensions and listing fields, you work in the DeepSee Architect, which displays
these classes in a hierarchical format as follows:
The root item and the items shown as folders represent the class definitions. The other items are
properties. You can expand the folders, which contain more properties and possibly more class definitions.
The root item is special; this class is the base class in this cube. The base class determines the meaning
of the predefined Count measure, as we will see later in this chapter.
3.2 BI-enabling Your Classes
The first step depends on where your data is now:
•
If you have Caché classes, you can open them from within Architect. This automatically adds the
DeepSee superclass (%BI.Adaptor) to the superclass list. See the following section.
18 Using the DeepSee Architect
Opening a Class Definition
In some cases, you cannot modify the class or you have an existing complex query that you want
to use. DeepSee supports an alternative approach in which you create and BI-enable a class query;
see “Using a Class Query,” later in this book.
•
If you are creating a new application, you can create it in Studio in the same way you create any
other Caché application. For any class that needs it, you include the DeepSee superclass
(%BI.Adaptor) in the superclass list.
•
If you are starting with an existing Caché application that does not use Caché class definitions,
map the existing globals to class definitions and then add the DeepSee superclass (%BI.Adaptor)
to the superclass list.
•
If your data is stored outside of Caché, you can first use the DeepSee Connector to browse the
data and generate BI-enabled class definitions.
In all cases, the Architect automatically has access to any classes that extend %BI.Adaptor.
The Architect accesses and modifies the same class definitions that you see directly in the Studio. This
means that if you make a change in one location and save it, that change is immediately available in
the other.
For convenience, you can recompile and rebuild the classes as needed from Architect.
3.3 Opening a Class Definition
When you open a class definition in the Architect, the Architect automatically adds %BI.Adaptor to its
superclass list, if that is not yet included.
To open a class definition in the Architect:
1.
First, do any of the following:
•
Click the open class button (
) in the Architect menu bar. The Architect displays a dialog
box. Click the Add button in the lower left of this dialog box. Then click Search.
•
Click the Base Class link in the lower left. The Architect displays a dialog box. Click the Add
button in the lower left of this dialog box. Then click Search.
•
Click the Add button in the lower left.
In all cases, the Architect displays a search dialog box. The appearance of this dialog box depends
on the path you used.
2.
In the search dialog box, optionally type the name of the package that contains the class. If you
do not specify a package name, the Architect searches all packages in this namespace.
Using the DeepSee Architect 19
Enabling Classes for Use in DeepSee
3.
Click Search.
The dialog box then displays all classes in this namespace or all classes in this package.
4.
Click the class name and then click OK.
3.4 Opening a BI-enabled Class
If a given class already extends %BI.Adaptor, you can open it in fewer steps (no search is required).
To open a BI-enabled class definition in the Architect:
1.
First, do either of the following:
•
Click the open class button (
) in the Architect menu bar.
•
Click the open recent class button (
2.
) in the Architect menu bar.
Click the class name and then click OK.
3.5 Available Properties and Methods of a
BI-enabled Class
The following rules govern the display of a class in the Architect:
•
For a BI-enabled class, all properties are shown except for the parent side of a parent-child relationship.
•
This display is recursive; that is, properties of properties are shown.
•
If a property is a collection (a list or an array), it is shown as a folder that contains the properties
and methods of the collection.
•
If a property is of type %List (which is the object equivalent of $LISTBUILD), it is not shown
as a folder.
•
If a property is a relationship, it is not shown as a folder.
•
If a class is not accessible from the base class via Caché dot syntax, it is not shown by default.
20 Using the DeepSee Architect
Recompiling and Rebuilding
•
The Architect does not display properties and methods inherited from superclasses. You can use
these properties and methods anyway.
This view of the class provides a useful starting point for creating dimensions, measures, and listing
fields. In many cases, you can simply create an element by double-clicking a property within this
hierarchy, as seen in the tutorial.
But it is important to know that although this view provides a convenient way to access some properties,
you can in fact access any property, and you can access data in any table by using Complex Code.
3.6 Recompiling and Rebuilding
To recompile, rebuild, or both:
1.
Click the process button (
) in the menu bar.
DeepSee displays a dialog box that shows the results from the last time you recompiled or rebuilt.
2.
In this dialog box, do one of the following:
•
To recompile the BI-enabled class and any related classes, click Compile.
•
To recompile the classes and rebuild the indices, click Rebuild.
Tip:
3.
This dialog box is not always automatically refreshed when the compilation or rebuild
status changes. To refresh the display and see the current status, click Refresh.
When you are done, click Cancel.
You can also recompile the classes in the Studio, in the same way that you recompile any other class
definitions.
To rebuild all the indices programmatically, use the Caché Terminal, go to the appropriate namespace,
and enter the following command, where classname is the package and class name of the BI-enabled
class:
Do ##class("classname").HiRebuild(0)
3.6.1 Incremental Rebuilds
After initial development, it is not generally desirable to rebuild all the indices, because that can be
time-consuming. Instead, your application should detect data changes and update the indices for only
the affected objects. There are three parts to this approach:
Using the DeepSee Architect 21
Enabling Classes for Use in DeepSee
•
You must enable DeepSee to rebuild the indices incrementally. To do this, enable the site option
ETL > Incremental Index Update and recompile the classes. See the DeepSee Site Configuration
and Maintenance Guide.
Despite the fact that this option is in the ETL group, it does apply to all BI-enabled classes in this
namespace (it is not specific to classes created via the DeepSee Connector).
•
If a data change affects a record in the base BI-enabled class itself, DeepSee automatically detects
that change and updates the indices for that record.
This occurs because the base BI-enabled class inherits from %BI.Adaptor, which provides the
method %OnAfterSave() and the triggers HyperDelete, HyperInsert, and HyperUpdate. When
an object is saved, Caché runs the method %OnAfterSave(), which updates the DeepSee indices
for this object. Similarly, when an record is deleted, inserted, or updated via SQL, Caché fires the
corresponding trigger, which updates the DeepSee indices for this object.
•
If a data change affects a record in another class to which the base BI-enabled class refers, it is
the responsibility of your application to do the following:
1.
Determine the IDs of the affected objects in the base BI-enabled class.
2.
Update the DeepSee indices for those objects by using the zzBuildOne() method of the base
class (inherited from %BI.Adaptor). The first argument for this method is the ID of the object
whose indices need to be updated.
3.7 Rebuilding Selectively
To rebuild a subset of dimensions and listing fields:
1.
Click the selective processing button (
2.
) in the menu bar.
You are prompted to confirm this action. Click OK.
Also see “Controlling Whether a Dimension Is Selectively Rebuilt” and “Controlling Whether a
Listing Field Is Selectively Rebuilt.”
3.8 Specifying the Number of Processors
If you are rebuilding the DeepSee indices on a machine that has multiple CPUs, you can increase the
number of processors used when DeepSee builds the indices for this class. To do so:
22 Using the DeepSee Architect
Clearing Unsaved Work
1.
Click the Sys tab.
2.
For Number of Processors, specify an integer. Typically you use a number that is the same as or
slightly larger than the number of processors.
3.
Click Save.
3.9 Clearing Unsaved Work
To clear any unsaved work in the Architect, click the refresh button (
immediately cleared.
). The unsaved changes are
3.10 Defining SQL Shortcuts
If the property names in your classes are confusing and if you have many properties, you might find
it convenient to define SQL shortcuts before you start to use your BI-enabled classes. In DeepSee, an
SQL shortcut is an alias that provides a new name for a class property (or property of a property), to
make it easier to identify the properties you want to use in DeepSee.
In contrast to the example used in the tutorial, not all class definitions contain only simple, easy-toread property names. For example:
Using the DeepSee Architect 23
Enabling Classes for Use in DeepSee
To define SQL shortcuts:
1.
At the top of the Architect page, click Data Modeler > SQL Field Shortcuts.
The system then displays a page like the following:
2.
Click the browse button (...) next to Class Name.
3.
Click a class name and then click OK.
The class is displayed in Class-Field List.
4.
Expand the class folder and subfolders in Class-Field List, as needed.
24 Using the DeepSee Architect
Defining SQL Shortcuts
5.
To create an SQL shortcut for any property, double-click that property. When you do, the system
adds a row to the Shortcut table. For example, if you double-clicked the property STKZOL within
the property STKAcctOth, you would see the following:
6.
Type a string into Name in the same row. Typically, this string is easier to remember and understand
than the field name. For example: Accounting Office.
7.
Optionally type a tooltip into Tooltip.
8.
Click Save.
When you next view the class in the Architect, the shortcuts are shown at the top, as follows:
If you hover the cursor over a shortcut, the Architect displays the tooltip for the shortcut. You can use
these shortcuts when you define dimensions and listing fields.
Using the DeepSee Architect 25
4
Defining Dimensions
This chapter describes how to create most kinds of dimensions. It discusses the following topics:
•
An overview of the Dimension tab
•
How to define a dimension in general
•
How to specify the value on which a dimension is based
•
How to choose a dimension data type
•
How to define a dimension based on a date
•
How to define a dimension based on a time
•
How to define a dimension based on a collection
•
How to modify a dimension in general
•
How to control whether a dimension is included in the subset that can be selectively rebuilt
•
How to activate or deactivate a dimension
•
How to delete a dimension
•
How to make your changes visible in the Analyzer
Also see the chapters “Defining Special Dimensions” and “Using Other Tables to Define Dimensions,
Measures, and Listing Fields.”
4.1 Overview of the Dimension Tab
You use the Dim tab to add, modify, and delete dimensions. This tab has three main areas.
Using the DeepSee Architect 27
Defining Dimensions
4.1.1 Class Hierarchy
The class hierarchy on the left shows the BI-enabled classes you are working with:
Here you can do the following:
•
Expand a collapsed folder by clicking the plus sign (+) to its left.
•
Collapse an expanded folder by clicking the minus sign (-) to its left.
•
Double-click a property to create a new dimension definition based on it.
•
Drag and drop a property, instance method, or SQL shortcut to the Dimensions table on the right,
to create a new dimension definition based on it.
Any instance methods are shown alphabetically after the properties.
4.1.2 Dimensions Table
The Dimensions table on the right summarizes the currently defined dimensions:
28 Using the DeepSee Architect
Overview of the Dimension Tab
Each row corresponds to a dimension. For Sort By, click either ID or Name, to control how the rows
are sorted. In this table:
•
is the name of the dimension, as seen in the Analyzer and in any pivot tables
that include this dimension. When you first create a dimension, this is the same as the name of
the property, instance method, or SQL shortcut.
Dimension Name
Note:
You can include a question mark (?) or a single quote (') in the name, but avoid other
non-alphanumeric characters. In particular, do not use a period.
Also, dimension names must be unique, and dimensions and measures cannot have the
same name.
•
Property
is the class property or instance method on which the dimension is based.
In the tutorial, all dimensions were based on properties. In other cases, however, a class may have
an instance method that returns an identifier or other piece of data, perhaps formatted in a particular way; you can use such instance methods in addition to properties.
This field is ignored if the dimension is based on complex code.
•
Data Type
affects how members are defined, as well as their default names. The data type is set
automatically based on the data type of the field you are using, but you can change it. See
“Specifying the Dimension Data Types.”
•
Active controls whether this dimension is active (visible in the Analyzer and in pivot tables). When
you create a dimension, it is active by default. See “Deactivating or Activating a Dimension.”
•
Complex
indicates whether this dimension is based on a Caché ObjectScript expression, instead
of on a single class property. See “Basing a Dimension on a Caché ObjectScript Expression.”
•
M.C.B.
indicates whether the Manual Child Browse tab contains information for this dimension.
You use this tab to describe how to index the values in dimension that is based on a list-type
property. See “Defining a Dimension Based on a Collection.”
Using the DeepSee Architect 29
Defining Dimensions
•
Trns/Rng indicates whether you have entered information on the Translation/Replacement or Range
tabs. See the chapter “Using Replacements, Ranges, and Transformations.”
•
Listing
indicates whether this dimension definition also defines a listing field. See the chapter
“Defining Listing Fields.”
•
Select
controls whether this dimension is included in the subset that can be selectively rebuilt.
See “Controlling Whether a Dimension Is Selectively Rebuilt.”
In this table, when you click the dimension that you want to work on, the tabs in the lower right display
details for that dimension.
4.1.3 Tabs
The tabs in the lower right display details about the currently selected dimension:
The following table summarizes the options on these tabs. Unless otherwise noted, the sections listed
here are in this chapter.
Options on the Dimension Tabs
Option
Purpose
General
tab: Listing Field option
Reuses this definition as a listing field as well. See the
chapter “Defining Listing Fields.”
General
tab: Count Per Node
For advanced use only. When a dimension is used as
a listing field, this option controls the size of nodes in
the global. The default is 500. If you encounter
<MAXSTRING> errors when you rebuild indices, then
use a smaller number.
option
30 Using the DeepSee Architect
Defining a Dimension
Option
Purpose
General
tab: Data Type option
Controls how members are defined, as well as their
default names.The data type is set automatically based
on the data type of the field you are using, but you can
change it. Several of the following section discuss the
types.
General
tab: Transformation Type
Applies a transformation that affects how the dimension
members are defined and displayed. See the chapter
“Using Replacements, Ranges, and Transformations.”
If you apply a transformation, you generally do not use
the Translation/Replacement and Ranges tabs.
option
tab: Property options
and Complex Code option
General
tab: Link Property and
options
General
Link To
Ranges
tab
Ignore these.
Applies only to dimensions based on list-type
properties. This tab specifies how to index the values
in the list. See “Defining a Dimension Based on a
Collection.”
Manual Child Browse
Translation/Replacement
Specifies the data on which this dimension is based.
See “Defining a Dimension.”
tab
Defines a set of replacements that alter the names of
the dimension members. See the chapter “Using
Replacements, Ranges, and Transformations.”
Defines the dimension members as a set of ranges of
values (applies to numeric-valued and time-valued
dimensions). See the chapter “Using Replacements,
Ranges, and Transformations.”
4.2 Defining a Dimension
This section describes the basic method for defining dimensions:
1.
Open a BI-enabled class as described in the previous chapter.
2.
Click the Dim tab.
3.
Expand the class hierarchy in the left area as needed.
Using the DeepSee Architect 31
Defining Dimensions
4.
Drag and drop a property, instance method, or SQL shortcut from the class hierarchy to the
Dimensions table on the right. Or double-click the property, instance method, or SQL shortcut.
In either case, the Dimensions table now includes a dimension that is based on your selection. For
example:
5.
Click this new row so that it is selected. The bottom right area of the page then shows details for
this dimension.
6.
Optionally rename the dimension by changing the value in Dimension Name on the General tab.
This name is shown in the Analyzer and is also used as the default column or row label in any
pivot tables that include this dimension.
32 Using the DeepSee Architect
Specifying the Data on Which a Dimension Is Based
The dimension name should make sense on its own; notice that it does not indicate the table that
owns this property. In the example here, CompanyName might be ambiguous, so you might rename
this dimension to Shipper. Also, the dimension name can use only alphanumeric characters.
In the General tab, the editable two Property fields contain the following data:
a.
The first field, which is required, shows the package and class name of the BI-enabled class
from which you started, in the form package.class.
b.
The second field, which is optional, shows the name of the property or instance method on
which this dimension is based, relative to this class. This is expressed in the form property
or property.subproperty and so on, in exactly the same way you would refer to that property
in Caché ObjectScript.
This field is optional because there are other ways to specify the data on which the dimension
is based; see the next section.
7.
Click Update to save your changes.
Tip:
You can also start to create a dimension by clicking the New button in the lower right. When
you add a dimension this way, note that the Active check box is cleared by default for the
dimension. After creating and saving the dimension, select the Active check box for the
dimension and save it again.
4.3 Specifying the Data on Which a Dimension
Is Based
There are three general options for specifying the value on which the dimension is based:
•
Base it directly on a single class property, as in the preceding section.
Using the DeepSee Architect 33
Defining Dimensions
•
Use Complex Code and base the dimension on a Caché ObjectScript expression, possibly using
multiple class properties, as described in the following subsection.
This option takes precedence over the preceding option.
•
Use the Manual Child Browse option to generate a set of values, typically from a collection property.
See “Defining a Dimension Based on a Collection,” later in this chapter. When you do this, the
dimension is based on these values.
This option takes precedence over the preceding two options.
If you use Complex Code or Manual Child Browse option, DeepSee ignores the setting of Null Field
Replacement (on the General tab).
4.3.1 Basing a Dimension on a Caché ObjectScript Expression
To redefine a dimension so that it is based on a Caché ObjectScript expression:
1.
In the Complex Code field, type a Caché ObjectScript expression that returns a different value for
each dimension member. The expression can use the variable ##this, which refers to the BI-enabled
class you started from.
Or click the Script button, which displays an editor where you can build an expression from
existing dimensions, data fields, and Caché ObjectScript functions.
You can use any Caché ObjectScript, which means that you can also invoke methods or routines
in this namespace.
2.
Delete the contents of the second Property field.
This step is optional, because this field is ignored if there is data in Complex Code.
Consider the following example:
34 Using the DeepSee Architect
Specifying the Dimension Data Type
This dimension (Staff) groups the source records into buckets based on the following string, which
is based on two properties:
##this.EmployeeID.FirstName _ " " _ ##this.EmployeeID.LastName
Each first name/last name combination that is present in the data receives a separate bucket. Each
member of this dimension corresponds to one of these buckets.
Also notice that the Complex check box is checked in the table at the top of the page; this happens
automatically when you enter data into the Complex Code field.
When you use Complex Code, DeepSee ignores the setting of Null Field Replacement (on the General
tab). This means that if you want to replace null values with a string such as "No Assigned Staff",
you must check for the null value within the expression used in Complex Code.
4.4 Specifying the Dimension Data Type
The Data Type option of a dimension affects how members are defined. The following table summarizes
the options.
Using the DeepSee Architect 35
Defining Dimensions
Data Types for Dimensions
Dimension Data
Type
Purpose and Comments
Values
Creates a dimension that has a member for each unique value
of the dimension data. By default, these are collated as strings.
Can be used with any type of data. This is the most commonly
used option.
Reference
Creates a dimension that has a member for each unique internal
identifier. Use this type of dimension if you expect the dimension
data values to change and if you do not want to rebuild the
indices when that occurs. For example, if you use the customer
name as a dimension, you might use the Reference type for this
dimension. Then if a customer company changes its name, it
would not be necessary to rebuild the indices to accommodate
that change.
Can be used with any type of data.
Date
See the section “Defining a Dimension Based on a Date,” later
in this chapter.
Number
Creates a series object dimension and a measure.
Appropriate only for numeric data.
Note that you can use Null Field Replacement with this type, as
you can with the other types.
Boolean
Words
Date
and format
Creates a dimension that has two members:
•
No groups records for which the dimension data equals 0,
"N", "NO", "F", or "FALSE" (case insensitive).
•
Yes groups records for which the dimension data equals 1,
"Y", "YES", "T", or "TRUE" (case insensitive).
Treats the property as a space-separated collection of words
and creates a dimension for each word. DeepSee considers
case; for example, it treats AllergyCode1 and allergycode1
as different words. See “Defining a Dimension Based on a
Collection” , later in this chapter.
See the section “Defining a Dimension Based on a Date,” later
in this chapter.
36 Using the DeepSee Architect
Defining a Dimension Based on a Date
Dimension Data
Type
Purpose and Comments
Time
Use this only if you also specify a Range Dimension Suffix. Note
that you can also use Values to create dimensions based on
time. See the section “Defining a Dimension Based on a Time,”
later in this chapter.
In this table, the phrase “dimension data” refers to the data on which the dimension is based (whether
that is a single field or an expression).
The drop-down list also includes any custom types that have been defined.
4.4.1 Creating a Custom Data Type
If the standard types do not meet your needs, you can create and use custom data types, as follows:
1.
At the top of the Architect page, click Data Modeler > Abstract Data Type.
The Date Type Name list shows any custom types that have been defined. The right area shows
the details for the currently selected type, if any.
2.
Type a name into Type Name.
3.
Click the Base Type drop-down list and then choose a type upon which to base the new type.
4.
Specify details for this type. The details depend upon the base type.
5.
Click Add.
For example, the standard type Values uses string collation, which is often unsuitable for numeric data.
For example, if you create a dimension based on age, you would generally prefer to sort the ages in
numeric order rather than in string order. For such a dimension, you would create a custom type based
on Values, but you would set Collating Sequence equal to Numeric. You would use this type as the
type for your dimension.
Listing field definitions, described later in this book, are similar in many ways to dimension definitions.
However, custom data types are available only for dimensions.
4.5 Defining a Dimension Based on a Date
Date values are special; when you create a dimension that uses a date, DeepSee automatically generates
a set of dimension variations that group data by weekday, week, month, quarter, and so on. For
example, if you define the Birth Date dimension, DeepSee creates the following dimensions (as
seen in the Analyzer):
Using the DeepSee Architect 37
Defining Dimensions
DeepSee automatically recognizes dates of type %Date and %TimeStamp, but also accepts several
string forms, and you can convert from any other format. This section describes how to use date-valued
properties as dimensions and gives details on the resulting dimension variations.
4.5.1 Recognized Date Formats
If you start with a property of type %Date or %TimeStampand you create a dimension based on the
property, then DeepSee automatically sets Data Type equal to Date, the default date format. In other
cases, you must set Data Type appropriately as follows:
Property Type
String Format (If Applicable)
Appropriate Setting for
Data Type of Dimension*
%Date
Date
%TimeStamp
Date
or Date YYYY-MM-DD
YYYY-MM-DD plus optional trailing
time piece
Date
or Date YYYY-MM-DD
YYYY/MM/DD plus optional trailing
time piece
Date YYYY/MM/DD
DD-MM-YYYY plus optional trailing
time piece
Date DD-MM-YYYY
DD/MM/YYYY plus optional trailing
time piece
Date DD/MM/YYYY
%String
The logical value for a property of type %TimeStamp includes the time, which the predefined dimension
data types ignore. For a property of type %String, if the date piece is followed by a space and then a
time piece, the time piece is ignored.
38 Using the DeepSee Architect
Defining a Dimension Based on a Date
4.5.2 Converting Other Date Formats
If the date dimension is not in one of the preceding formats, you must use the Complex Code option
to reformat it.
For example, suppose the property BirthDateVar5 is in the format YYYYMMDD. To use this
property as a date dimension, you could do the following:
•
Specify the following for Complex Code:
$ZDATEH(##this.BirthDateVar5,8)
•
Set Data Type equal to Date.
For information on the $ZDATEH function, see the book Caché ObjectScript Reference.
4.5.3 Date Dimension Details
This section describes the behavior of the dimension variations that DeepSee automatically generates,
using the Birth Date dimension as an example:
•
The Birth Date Day dimension has one member for each day of the month, 1 through 31.
Any given member uses data for the corresponding day of the month, ignoring the year and month
used in the data. For example, the member 2 uses data for all records where the birth date is the
second day of the month, for any month and year.
•
The Birth Date Month dimension has one member for month, January through December.
Any given member uses data for the corresponding month. For example, the member March uses
data for all records where the birth date is in March, for any year.
•
The Birth Date Period dimension has one member for year-month combination. For
example, the member 2005-11 uses data for all records where the birth date is in November 2005.
•
The Birth Date Quarter dimension has four members: Q1, Q2, Q3, and Q4. Any given
member uses data for the corresponding quarter. For example, the member Q1 uses data for all
records where the birth date is in Q1, for any year.
•
The Birth Date Week dimension has one member for each week number of the year. Any
given member uses data for the corresponding week. For example, the member 7 uses data for all
records where the birth date is in the seventh week of the year, for any year.
•
The Birth Date Week of Month dimension has one member for week number of the month.
Any given member uses data for the corresponding week of the month. For example, the member
3 uses data for all records where the birth date is in the third week of the month, for any month
and year.
Using the DeepSee Architect 39
Defining Dimensions
•
The Birth Date Weekday dimension has one member for each day of the week, Sunday
through Saturday. Any given member uses data for the corresponding weekday, ignoring the year
and month used in the data. For example, the member Wednesday uses data for all records where
the birth date is on a Wednesday, for any month and year.
•
The Birth Date Year dimension has one member for each year.
4.6 Defining a Dimension Based on a Time
You can define dimensions based on time data. Typically you would do this to look at periodicity over
the course of the day, and you would group data by hour or perhaps into larger buckets. This section
describes three possible techniques:
•
Creating hourly buckets
•
Creating buckets by parsing the time as a string
•
Creating custom ranges
4.6.1 Creating Hourly Buckets
If you use the Time dimension data type and specify a Range Dimension Suffix, DeepSee generates a
set of hourly buckets as follows:
To create a dimension with hourly buckets as shown in this example:
40 Using the DeepSee Architect
Defining a Dimension Based on a Time
1.
Set Data Type to Time.
For this dimension data type, DeepSee correctly handles properties of type %TimeStamp, %Time,
or even a string with the format hh:mm:ss. You do not need to specify any conversion of format.
2.
Click the Ranges tab.
3.
For Range Dimension Suffix, type a string such as Hours.
4.
Click Update to save your changes.
4.6.2 Creating Time Buckets by Parsing the Time as a String
You can also create the dimension data as string data and pick out the part to use as the dimension.
For example:
To create such a dimension:
1.
Set Data Type to Values.
2.
For Complex Code, use an expression that extracts the part that you want to use as the dimension.
For example, the following extracts the hour piece from a date in ODBC format:
$PIECE($PIECE(##this.BirthDateTimeStamp," ",2),":",1)
3.
Click Update to save your changes.
4.6.3 Defining Time Ranges
You can also create custom time ranges as in the following example:
Using the DeepSee Architect 41
Defining Dimensions
To create custom time ranges:
1.
Set Data Type to Values.
2.
If the source data is not expressed in terms of seconds since midnight, convert it to that format.
For example, suppose that the property BirthDate contains dates in ODBC format (YYYYMM-DD HH:MM:SS). To determine the number of seconds since midnight, you would use the
following for Complex Code:
$ZTIMEH($PIECE(##this.BirthDate," ",2),3)
3.
Click the Ranges tab and define ranges. You can use Caché ObjectScript expressions for the From
and To values. For example:
The dimension has one member for each range that you define.
4.
Click Update to save your changes.
Note:
By default, the members of this dimension are sorted alphabetically, but when you use this
dimension in a given pivot table, you can easily modify the sort order; see the chapter
“Creating and Customizing Dimensions” in the book Using the DeepSee Analyzer.
42 Using the DeepSee Architect
Defining a Dimension Based on a Collection
4.7 Defining a Dimension Based on a Collection
In many cases, the BI-enabled class includes properties that contain collections. You can define
dimensions based on collections. This section describes the following:
•
How to use the Words dimension data type
•
How to use the Words dimension data type with custom code
•
How to use the M.C.B. feature with a list property
•
How to use the M.C.B. feature with an array property
•
How to interpret such dimensions
4.7.1 Using the Words Dimension Data Type
The simplest kind of collection is a space-separated list. The Words dimension data type removes nonalphanumeric characters (other than spaces) from the dimension data, parses the data into spacedelimited words, and creates a member for each unique word. DeepSee considers case; for example,
it treats AllergyCode1 and allergycode1 as different words. For example, suppose that your BIenabled class included the property FavoriteColors, which might have values like the following:
•
Red
•
Green Red
•
Blue
•
Pink Red
If you use this property as a dimension and you set Data Type to Words, you create the members Red,
Green, Blue, and Pink.
4.7.2 Using the Words Dimension Data Type with Complex Code
You may be able to convert a collection property to a space-separated list so that you can use the Words
dimension data type. You might find it convenient to create class methods or routines to perform the
conversion.
For example, suppose that your BI-enabled class represents patients and that it has a property called
Diagnoses, which is an array. To create a dimension based on diagnoses, you could do the following:
1.
Click the Dim tab.
2.
Click New in the lower right area.
Using the DeepSee Architect 43
Defining Dimensions
DeepSee automatically sets Property to the name of the BI-enabled class, and you should not
change this.
3.
For Dimension Name, type the dimension name.
4.
For Data Type, click Words.
5.
For Complex Code, type an expression that returns a space-separated list. For example:
##class(Dev.Utils).ArrayToString(##this.DiagnosesAsArray)
This class method iterates through the array, extracts the values, and returns a string consisting
of a space-separated list of the values.
6.
Click Add in the lower right area.
The class method used here is defined as follows:
ClassMethod ArrayToString(input, delimiter As %String)
{
If '$Data(delimiter) set delimiter=" "
set string=""
Set i=""
for
{
Set i=input.Next(i)
Quit:(i="")
If i=1 {Set string=input.GetAt(i)}
Else {Set string=string_delimiter_input.GetAt(i)}
}
If string="" Set string="None"
Quit string
}
This technique is not suitable if the resulting string is longer than 32 kB (unless long strings are enabled).
Also remember that non-alphabetic characters are stripped from the string and are not used in the
dimension.
4.7.3 Using the M.C.B Feature with a List-type Property
To see how to use the M. C. B. (Manual Child Browse) feature, it is best to consider an example.
In this example, we have added (for demonstration purposes) a property to the Samples.Orders
class. As seen in the Studio, the property definition is as follows:
Property ListProp As list Of %String;
Within the Architect, this property is shown as a folder:
44 Using the DeepSee Architect
Defining a Dimension Based on a Collection
For this example, to use this list property as a dimension:
1.
Drag and drop the entire property folder from the Class list to the Dimensions table. This adds a
dimension whose default name is the folder name.
2.
Set Data Type to Values.
3.
Click the Manual Child Browse tab. Here you specify how to iterate through the elements of the
list and how to get the dimension data that corresponds to each element.
You can access all elements of the list or a subset according to your own logic.
4.
For Loop Coding, specify a fragment of Caché ObjectScript code that iterates through the list (or
click Sample to insert an editable sample). For example:
For wI=1:1:##this.ListProp.Count()
Important:
Do
You must include two spaces before Do and one space after Do. There must not
be any empty lines after that.
To refer to the list property, use the syntax ##this.PropertyName as shown.
You can include complete statements before the fragment, but do not include manual line breaks.
(That is, type on a single line within Loop Coding. The text wraps automatically so that you can
see all of it.) For example:
Set max=##this.ListProp.Count()
5.
For wI=1:1:max
Do
For Each Fetch, specify one or more Caché ObjectScript statements that assign a value to the
variable val (or click Sample to insert an editable sample). For example:
Set val=##this.ListProp.GetAt(wI)
Using the DeepSee Architect 45
Defining Dimensions
Your code can refer to the variables used in Loop Coding. If you use multiple statements, do not
include manual line breaks. (That is, type on a single line within Each Fetch. The text wraps
automatically so that you can see all of it.)
6.
Click the General tab and then delete the contents of the second Property field.
This step is optional, because this field is ignored if there is data on the Manual Child Browse tab.
Notice that in the Dimensions table, the M.C.B. check box becomes selected automatically for this
dimension. This indicates that this dimension has information specified on the Manual Child Browse
tab.
4.7.4 Using the M.C.B Feature with an Array-type Property
For an array-type property, you would use a similar technique.
For Loop Coding, you would use something like the following:
Set wI="" For
Important:
Set wI=##this.Categories.Next(wI) Quit:wI=""
Do
You must include two spaces before Set. Also, there must be two spaces before Do
and one space after Do. There must not be any empty lines after that.
To refer to the array property, use the syntax ##this.PropertyName as shown.
For Each Fetch, you would use something like the following:
Set val=##this.Categories.GetAt(wI)
4.7.5 Understanding Dimensions Based on Collections
When you use dimensions that are based on collections, it is important to remember that, as always,
the items being counted are the items in the base class, not the items of the collection.
For example, a company generally has multiple employees, and each employee has a single home
town. Suppose that your base class is Company, and suppose that you use Manual Child Browse to
create a dimension called Employee Home Town.
If you performed a breakout by Employee Home Town, you might see a pivot table like the following:
Employee Home Town
Count
Beverly
4
Cambridge
59
Dedham
16
...
...
46 Using the DeepSee Architect
Modifying a Dimension
Because Company is the base class, this pivot table is counting companies. The row for Beverly indicates
that 4 companies have at least one employee whose home town is Beverly. It does not indicate the
number of employees who live in Beverly.
It is also important to remember that, as always, the items being correlated are the items in the base
class, not the items of the collection. Let us expand the previous example by adding the Employee
Gender dimension. If we add this dimension to the preceding pivot table, we might see this:
Female
Male
Employee Home Town
Count
Count
Beverly
2
4
Cambridge
34
30
Dedham
8
7
...
...
Let us examine the cells in the Beverly row. Notice that the count for Female and the count for Male
total to more than the count for Beverly in the preceding example.
The Beverly, Female=2 cell means that there are two companies that have at least one employee living
in Beverly and at least one female employee. There is no guarantee that these employees are the same
people. If Teradyne Corp. has 1296 male employees who live in Beverly and one female employee
who lives on Martha's Vineyard, that company is counted once for the Beverly, Female cell.
Tip:
As you can see, the default measure name Count can be misleadingly generic. When you use
this measure in a pivot table, It is good practice to rename it as appropriate for your base class
(for example, Company Count or Companies). See “Defining Measures” in the book Using
the DeepSee Analyzer.
4.8 Modifying a Dimension
In general, to modify the definition of a dimension:
1.
Open a BI-enabled class as described in the previous chapter.
2.
Click the Dim tab.
3.
Click the dimension in the Dimensions table.
4.
Make the changes.
5.
Click Update to save your changes.
Using the DeepSee Architect 47
Defining Dimensions
4.9 Controlling Whether a Dimension Is
Selectively Rebuilt
The Architect provides an option to rebuild only a subset of the dimensions. Within the definition of
each dimension, you specify whether that dimension is included within the selective rebuild. To do
so:
1.
Open a BI-enabled class as described in the previous chapter.
2.
Click the Dim tab.
3.
To enable this dimension to be rebuilt selectively, click the Select check box for the dimension
in the Dimensions table.
4.
Click Update to save your changes.
See “Rebuilding Selectively,” earlier in this book.
4.10 Deactivating or Activating a Dimension
When you create a dimension, it is automatically activated. You can deactivate it so that it is no longer
available in the Analyzer.
To deactivate or activate a dimension:
1.
Open a BI-enabled class as described in the previous chapter.
2.
Click the Dim tab.
3.
Click the dimension in the Dimensions table.
4.
To deactivate the dimension, clear the Active check box on the General tab.
Or to activate the dimension, click the Active check box.
5.
Click Update to save your changes.
4.11 Deleting a Dimension
To delete a dimension, do the following:
48 Using the DeepSee Architect
Next Steps
1.
Open a BI-enabled class as described in the previous chapter.
2.
Click the Dim tab or Compound Mem tab.
3.
Click the dimension in the Dimensions table.
4.
Click Delete. You are prompted to confirm this action.
4.12 Next Steps
After you define, modify, or delete a dimension, do the following to make your changes visible in the
Analyzer:
1.
Recompile and rebuild, as described in “Recompiling and Rebuilding” earlier in this book.
2.
Define a subject area, as described later in this book.
If you have added dimensions, make sure the subject area includes all dimensions (the default).
When you define the subject area, make sure to give access to it to all suitable roles.
3.
If the subject area is already open in the Analyzer, you may need to reopen it.
Using the DeepSee Architect 49
5
Defining Special Dimensions
This chapter describes how to define special kinds of dimensions. It discusses the following topics
•
How to create dynamic dimensions for use in filters
•
How to create compound dimensions based on filter expressions
•
How to make your changes visible in the Analyzer
Also see the chapter “Defining Dimensions.”
5.1 Creating a Dynamic Dimension
A dynamic dimension is a dimension whose members are defined by Caché ObjectScript statements,
using the value given by a filter at run time. Dynamic dimensions can be used only for filtering.
5.1.1 Run-time Filter Values
Before discussing how you create a dynamic dimension, it is useful to understand how filter values
are available at run time:
•
When you add a data element (such as a pivot table) to a dashboard, you can apply a hardcoded
filter directly to it. In general, you specify a filter expression like the following example:
[Ship Country = Canada]
For syntax and other details, see the appendix “Expressions and Scripts in DeepSee Architect.”
•
You can configure a data control (such as a drop-down list or a text box) to act as a filter. You
associate the data control with a dimension, so that DeepSee knows which dimension to use on
Using the DeepSee Architect 51
Defining Special Dimensions
the left side of the filter expression. The user selects or enters a value, and that is used as the value
on the right side of the filter expression.
In either case, at run time DeepSee obtains the value of the right side of the filter expression and writes
that value to the variable PARAM, which you can use within any dynamic dimension.
5.1.2 Creating a Dynamic Dimension
You use the Dyn Dim tab to define dynamic dimensions. To define a dynamic dimension:
1.
Open a BI-enabled class as described in “Opening a BI-enabled Class,” earlier in this book.
2.
Click the Dyn Dim tab.
The tab lists any dynamic dimensions that are already defined.
3.
Right-click and then click Add Line.
DeepSee adds a new, blank line to the table in this tab.
4.
For Dimension Name, type the name of the dimension, exactly the same as you will use later in
the filter. For example: MyDim
5.
For Script, type a Caché ObjectScript statement that specifies which objects to use in the base BIenabled class. This statement typically calls your custom routine or class method. In your custom
code, do the following:
•
Use the variable named PARAM, which will contain the value used in the right-hand side of
the filter expression.
•
To use one object in the base class, set the variable val equal to an ID of an object in the
base class.
•
To use multiple objects in the base class, set nodes of the multidimensional array OLIST. For
example, to use three objects:
Set
Set
Set
Set
OLIST=3
OLIST(1)=id1
OLIST(2)=id2
OLIST(3)=id3
Where objectid1, objectid2, and objectid3 are IDs.
•
6.
If no ID is appropriate, set val or OLIST equal to null.
Click Save.
5.1.3 Example 1
In the Sample.Orders class, you might create a dynamic dimension as follows:
52 Using the DeepSee Architect
Creating a Compound Dimension
Dimension Name
Script
MyDim
set val=PARAM
Then in a pivot table or in a dashboard, you might use a filter like the following:
[MyDim = 10248]
At run time, the variable PARAM equals 10248. Then the definition of MyDim becomes set
val=10248, which opens the Orders object that has the ID 10248.
5.1.4 Example 2
In the Sample.Orders class, you might create a dynamic dimension as follows:
Dimension Name
Script
MyDim2
set OLIST=3, OLIST(1)=PARAM, OLIST(2)=PARAM+1,
OLIST(3)=PARAM+2
Then in a pivot table or in a dashboard, you might use a filter like the following:
[MyDim = 10248]
At run time, DeepSee retrieves the orders with ID 10248, 10249, and 10250.
5.2 Creating a Compound Dimension
A compound dimension is a dimension whose members are defined by DeepSee filter expressions.
You use these in two different cases:
•
If you want to group data at a higher level than is directly supported by the object model. In such
a case, you can define a dimension whose members are groups of lower-level data. For example,
you can define the continent dimension. The North American member would be defined by a filter
that selected the North American ship countries. For example:
[Ship Country = Canada] OR [Ship Country = Mexico]
OR [Ship Country = USA]
•
If you want to define a dimension whose members are determined by complex logic.
For example:
[Item Group = ABC] AND [Item Status IN Planned,Executed]
Using the DeepSee Architect 53
Defining Special Dimensions
In either case, you define each member separately with its own filter expression:
A compound dimension can be indexed (and thus available for use as columns or rows), but does not
have to be.
You use the Compound Mem tab to define compound dimensions. To define a compound dimension:
1.
Open a BI-enabled class as described in “Opening a BI-enabled Class,” earlier in this book.
2.
Click the Compound Mem tab.
The left side of the page lists any compound dimensions that are already defined, along with their
members.
3.
Click New in the lower right, to ensure that any existing data is cleared.
4.
For Dimensions, type the name of the new dimension. For example: Continent.
5.
Optionally clear the Dynamic? check box if you want this dimension to be indexed (dynamic
dimensions are not indexed).
6.
For Condition Name, type the name of a member of this dimension. For example: North America.
7.
In the Filter box, type a filter expression that selects the data for this member. For example:
[Ship Country = Canada] OR [Ship Country = Mexico]
OR [Ship Country = USA]
Or click the Edit option and define the filter expression interactively. For syntax and other details,
see the appendix “Expressions and Scripts in DeepSee Architect.”
8.
Click Add.
Repeat as needed until you have defined all members.
5.3 Next Steps
After you define, modify, or delete a dynamic or a compound dimension, do the following to make
your changes visible in the Analyzer:
54 Using the DeepSee Architect
Next Steps
1.
Recompile, as described in “Recompiling and Rebuilding” earlier in this book.
2.
Define a subject area, as described later in this book.
If you have added dimensions, make sure the subject area includes all dimensions (the default).
When you define the subject area, make sure to give access to it to all suitable roles.
3.
If the subject area is already open in the Analyzer, you may need to reopen it.
Using the DeepSee Architect 55
6
Defining Relationships between
Dimensions
Where appropriate, you use the Rel tab to define relationships between dimensions, which improves
performance when you use the dimensions together.
For example, suppose that you create one dimension based on a unique item code and another dimension
based on the corresponding unique item description. In this case, you should also define a one-to-one
relationship between these dimensions.
This chapter describes how to define relationships between dimensions.
6.1 Defining a Relationship
To define a relationship between dimensions, do the following:
1.
Open a BI-enabled class as described in “Opening a BI-enabled Class,” earlier in this book.
2.
Click the Rel tab.
The tab lists any relationships that are already defined.
3.
Right-click and then click Add Line.
4.
Double-click in the row, within the column for Source Dimension. DeepSee then displays a dropdown list of the dimensions (not including any dynamic dimensions).
5.
Click a dimension in the column for Source Dimension.
6.
Double-click in the row, within the column for Relationship. DeepSee then displays a drop-down
list of the available types of relationships: Parent of, One to One, Many to Many
Using the DeepSee Architect 57
Defining Relationships between Dimensions
7.
Click a relationship type.
8.
Double-click in the row, within the column for Target Dimension. DeepSee then displays a dropdown list of the dimensions (not including any dynamic dimensions).
9.
Click a dimension in the column for Target Dimension.
10. Click Save.
For example, the following relationship states that the Home ZIP dimension is the parent of the Home
City dimension:
6.2 Next Steps
After you define, modify, or delete a relationship, do the following to make your changes visible in
the Analyzer:
1.
Recompile and rebuild, as described in “Recompiling and Rebuilding” earlier in this book.
2.
Define a subject area, as described later in this book.
When you define the subject area, make sure to give access to it to all suitable roles.
3.
If the subject area is already open in the Analyzer, you may need to reopen it.
58 Using the DeepSee Architect
7
Defining Measures
This chapter describes how to define measures in the Architect. You can define additional measures
within the Analyzer, using these measures as a basis.
Also see “Defining Custom Aggregates for Use in Measures,” later in this book, and see the chapter
“Using Other Tables to Define Dimensions, Measures, and Listing Fields.”
7.1 The Default Measure
DeepSee automatically creates a default measure called Count. This measure is not visible in the
Architect, but is available in the Analyzer, in pivot tables, and in dashboards.
The Count measure counts the number of records (from the base class) used in any context. For
example, if you create a pivot table in the Analyzer without specifying any dimensions or measures,
the Analyzer displays the following, which indicates the number of records in the subject area:
When you use the Count measure in the Analyzer, It is good practice to rename it as appropriate for
your base class. For example, if the base class is Orders, you could rename Count to Orders or
Order Count. See “Defining Measures” in the book Using the DeepSee Analyzer.
Using the DeepSee Architect 59
Defining Measures
7.2 Defining a Measure
To define a measure, define a dimension as described in “Defining a Dimension: The Basics.” When
you do so, make sure of the following:
•
Use a numeric field or a numeric-valued expression as the dimension data. (All measures are based
on numeric data.)
•
For Data Type, choose Number.
•
Use a unique name for the measure name. Note that the name of the measure cannot be the same
as the name of any dimension. Otherwise, the measure is not available in the Analyzer. Also, the
measure name can use only alphanumeric characters.
•
When you define a measure in the Architect, DeepSee truncates any data after two decimal places,
so that the measure can also be used as a dimension. If this is undesirable, use the following
workaround: Within the measure definition in Architect, apply a multiplicative factor to it, such
as 100. Then in the Analyzer, create a new measure that divides this measure by that same factor.
By default, the measure is aggregated by summing. Within the Analyzer, you can redefine it to
aggregate in a different way (such as by averaging). Also in the Analyzer, you can use this measure
as the basis of another measure.
7.3 Next Steps
After you define, modify, or delete a measure, do the following to make your changes visible in the
Analyzer:
1.
Recompile and rebuild, as described in “Recompiling and Rebuilding” earlier in this book.
2.
If you have not yet done so, define a subject area, as described later in this book. Be sure to give
access to it to all suitable roles.
3.
If the subject area is already open in the Analyzer, you may need to reopen it.
4.
In the Analyzer, optionally create additional measures based on the measures you created in the
Architect. For example:
60 Using the DeepSee Architect
Next Steps
For Formula, specify a Caché ObjectScript expression in which the syntax [measure name]
represents a measure.
When you define a measure in the Analyzer, you specify how to aggregate it; you can sum the
values, average them, select the highest or lowest, and so on.
For information, see Using the DeepSee Analyzer.
Using the DeepSee Architect 61
8
Defining Subject Areas
This chapter describes how to create subject areas. It discusses the following topics:
•
An overview of the Subject tab
•
The basic process to define a subject area
•
How to modify a subject area in general
•
How to filter a subject area
•
How to specify the roles that have access to a subject area
•
How to specify dimension-to-dimension drill options
•
How to specify the dimensions included in a subject area
•
How to define custom aggregates for use in measures
•
How to activate or deactivate a subject area
•
How to delete a subject area
•
How to make your changes visible in the Analyzer
8.1 Overview of the Subject Area Tab
You use the Subject tab to define, redefine, and delete subject areas. This screen has two main areas.
8.1.1 Subject List
The left area lists the subject areas that have already been defined.
Using the DeepSee Architect 63
Defining Subject Areas
Here you click the subject area that you want to work on.
8.1.2 Subject Details
The right area displays details for the currently selected subject area.
The following table summarizes the options. Unless otherwise noted, the sections listed here are in
this chapter.
Options for Subject Areas
Option
Purpose
Subject Name
Name of currently selected subject area; you can
change this name.
Detail Listing
This list shows all the available detail listings. The
highlighted detail listing is the default detail listing, if
any, for this subject area.
64 Using the DeepSee Architect
Defining a Subject Area: The Basics
Option
Purpose
Subject Filter
options
Access All Dim.
Active?
check box
check box
Role Access
Drill Down
Controls whether the subject area includes all
dimensions. See “Specifying the Available Dimensions
in a Subject Area.”
Controls whether this subject area is active (visible in
the Analyzer). When you create a subject area, it is
active by default. See “Deactivating or Activating a
Subject Area.”
tab
Lists the roles that have access to this subject area.
See “Specifying Role Access to a Detail Listing.”
tab
Dimension Access
Optionally specifies how this subject area is filtered.
See “Filtering a Subject Area.”
Optionally defines the dimension-to-dimension
(double-click) drill options available in this subject area.
See “Defining Dimension-to-dimension Drill Options.”
tab
Custom Aggregates
tab
Optionally specifies the subset of dimensions included
in this subject area. See “Specifying the Available
Dimensions in a Subject Area.”
Optionally specifies custom aggregates, for use in
defining measures. See “Defining Custom Aggregates
for Use in Measures.”
8.2 Defining a Subject Area:The Basics
This section describes the basic method for defining a subject area:
1.
Open a BI-enabled class as described in “Opening a BI-enabled Class,” earlier in this book.
2.
Click the Subject tab.
3.
Click New in the lower right, to ensure that the screen is clear.
Using the DeepSee Architect 65
Defining Subject Areas
4.
In Subject Area, type the name of this subject area.
5.
In Detail Listing, optionally click the detail listing to use as the default within this subject area.
6.
On the Role Access tab, click the check box next to each role that should have access to this subject
area.
By default, no roles are selected.
7.
Click Add.
This new subject area has access to all the dimensions associated with the BI-enabled class and all the
data that is currently in the database. You can immediately use the subject area in the Analyzer.
8.3 Modifying a Subject Area
In general, to modify the definition of a subject area:
1.
Open a BI-enabled class as described in “Opening a BI-enabled Class,” earlier in this book.
2.
Click the Subject tab.
3.
Click the subject area in the Subject List area.
4.
Make the changes.
5.
Click Update to save your changes.
66 Using the DeepSee Architect
Filtering a Subject Area
8.4 Filtering a Subject Area
By default, a subject area provides access to all records in the associated tables. You can filter a subject
area to restrict the number of records that it can access, for security or for performance.
To filter a subject area:
1.
Open a BI-enabled class as described in “Opening a BI-enabled Class,” earlier in this book.
2.
Click the Subject tab.
3.
Click the subject area in the Subject List area.
4.
In the Filter box, type a filter expression that selects the data for this subject area. For example:
[Ship Country = Canada]
Or click the Edit option and define the filter expression interactively. For syntax and other details,
see the appendix “Expressions and Scripts in DeepSee Architect.”
8.5 Specifying Role Access to a Subject Area
To specify the roles that have access to a subject area:
1.
Open a BI-enabled class as described in “Opening a BI-enabled Class,” earlier in this book.
2.
Click the Subject tab.
3.
Click the subject area in the Subject List area.
4.
Click the Role Access tab.
5.
Click the check box next to each role that should have access to this subject area. Clear the check
box for any roles that should not have access.
6.
Click Save.
Using the DeepSee Architect 67
Defining Subject Areas
8.5.1 Advanced Role Options
You can also make the following additional changes in the row for a given role:
•
In the Default Detail Listing field, double-click to display the drop-down list. Then select a detail
listing to use as the default for users of this role. This option overrides the default detail listing
for the subject area.
•
In the Filter for Detail Listing field, type a filter expression to be applied to any detail listing that
is displayed by users of this role. Or click the F option and define the filter expression interactively.
•
In the Filter for Pivot field, type a filter expression to be applied to any pivot table that is displayed
by users of this role. Or click the F option and define the filter expression interactively.
For filter syntax and other details, see the appendix “Expressions and Scripts in DeepSee Architect.”
You can also filter the subject area itself; see “Filtering a Subject Area.”
8.6 Defining Dimension-to-dimension Drill
Options
DeepSee provides support for dimension-to-dimension drill through. For example, a user might doubleclick on a ship date year in a pivot table and immediately see a drill through by ship date month, for
that year.
Or, if the user is viewing the pivot table in graph mode, the user might right-click a year and select
Drill Down. DeepSee would then display a graph showing the ship date months for that year.
In either case, if more than one drill option is available, DeepSee displays a list of the available options,
and the user can choose one.
This type of drilling is configured separately for each dimension; that is, the available behavior is
potentially different for each dimension.
To define dimension-to-dimension drill options:
1.
Open a BI-enabled class as described in “Opening a BI-enabled Class,” earlier in this book.
2.
Click the Subject tab.
3.
Click the subject area in the Subject List area.
4.
Click the Drill Down tab. This tab displays all dimensions in the subject area.
Note:
Despite the tab name, here you are defining drill through, not drill down.
68 Using the DeepSee Architect
Specifying the Available Dimensions in a Subject Area
5.
To enable drill options in a given dimension, drag and drop other dimensions to that dimension.
For example, drag and drop Shipper to Continent. Then you see the dimension that you dragged
shown as a node beneath the dimension you dragged it to; for example:
6.
Click Update to save your changes.
8.7 Specifying the Available Dimensions in a
Subject Area
By default, when you create a subject area, it includes all dimensions that are defined for the BI-enabled
classes. You can define the subject area so that it includes only a subset of those. To do so:
1.
Open a BI-enabled class as described in “Opening a BI-enabled Class,” earlier in this book.
2.
Click the Subject tab.
3.
Click the subject area in the Subject List area.
4.
Clear the Access All Dim. check box.
5.
Click the Dimension Access tab. This tab displays all dimensions that are defined for the BIenabled classes.
6.
Click the check box for each dimension to include in this subject area.
7.
Click Update to save your changes.
Using the DeepSee Architect 69
Defining Subject Areas
8.8 Defining Custom Aggregates for Use in
Measures
A subject area can include custom aggregates. A custom aggregate uses a Caché ObjectScript
expression to retrieve data directly from the globals that store data for your application. When you
define custom aggregates, they are available as additional building blocks within the measures editor
in the DeepSee Analyzer (in addition to Count, for example).
To define a custom aggregate:
1.
Make sure you understand the structure of the globals that store your data.
2.
Open a BI-enabled class as described in “Opening a BI-enabled Class,” earlier in this book.
3.
Click the Subject tab.
4.
Click the subject area in the Subject List area.
5.
Click the Custom Aggregates tab.
6.
Right-click and then click Add Line. A new, empty line is added to the table on this tab.
Click within this line and type.
7.
For Aggregate Name, specify a user-friendly name (for example FreightFromGlobal). Any
user who is going to define measures in the Analyzer should be able to understand what this custom
aggregate is.
Note:
8.
Do not use spaces in the name. (If you do, the custom aggregate cannot be used.)
For Aggregate Access Code, specify a Caché ObjectScript expression that retrieves data from the
appropriate global. In this expression, use Id to refer to the object ID. For example:
$LG(^Sample.OrdersD(Id),4)
9.
Click Update to save your changes.
The new custom aggregate is shown in the measures editor in the DeepSee Analyzer as follows:
70 Using the DeepSee Architect
Deactivating or Activating a Subject Area
8.9 Deactivating or Activating a Subject Area
When you create a subject area, it is automatically activated. You can deactivate it so that it is no
longer available in the Analyzer.
To deactivate or activate a subject area:
1.
Open a BI-enabled class as described in “Opening a BI-enabled Class,” earlier in this book.
2.
Click the Subject tab.
3.
Click the subject area in the Subject List area.
4.
To deactivate the subject area, clear the Active? check box.
Or to activate the subject area, click the Active? check box.
5.
Click Update to save your changes.
8.10 Deleting a Subject Area
To delete a subject area:
1.
Open a BI-enabled class as described in “Opening a BI-enabled Class,” earlier in this book.
2.
Click the Subject tab.
3.
Click the subject area in the Subject List area.
4.
Click Delete.
8.11 Next Steps
After you define, modify, or delete a subject area, your changes are usually immediately visible in the
Analyzer.
If the subject area is already open in the Analyzer, in some cases, you may need to reopen it.
Using the DeepSee Architect 71
9
Defining Listing Fields
This chapter describes how to create listing fields. It discusses the following topics:
•
An overview of the List Field Library tab
•
The basic process to define a listing field
•
How to modify a listing field
•
How to specify the data on which a listing field is based, particularly if you do not want to base
it on a single class property as in the basic technique
•
How to choose a data type for a listing field
•
How to control whether a listing field is included in the subset that can be selectively rebuilt
•
How to activate or deactivate a listing field
•
How to delete a listing field
•
How to make your changes visible in the Analyzer
Also see the chapter “Using Other Tables to Define Dimensions, Measures, and Listing Fields.”
9.1 Overview of the List Field Library Tab
You use the List Field Library tab to add, modify, and delete the independent listing fields; it does not
display the dimension-type listing fields. This tab has three main areas.
9.1.1 Class Hierarchy
The class hierarchy on the left shows the BI-enabled classes you are working with.
Using the DeepSee Architect 73
Defining Listing Fields
Here you can do the following:
•
Expand a collapsed folder by clicking the plus sign (+) to its left.
•
Collapse an expanded folder by clicking the minus sign (-) to its left.
•
Double-click a property to create a new listing field definition based on it.
•
Drag and drop a property, instance method, or SQL shortcut to the Listing Field table on the right,
to create a new listing field definition based on it.
Any instance methods are shown alphabetically after the properties.
9.1.2 Listing Field Table
The Listing Field table on the right summarizes the currently defined independent listing fields:
Each row corresponds to a listing field. Here you click the listing field that you want to work on.
•
is the name of the listing field, as seen in any detail listings that include it. When
you first create a listing field, this is the same as the name of the property, instance method, or
SQL shortcut.
Fields Caption
74 Using the DeepSee Architect
Overview of the List Field Library Tab
•
Property is the property or instance method on which it is based. This field is empty if the listing
field is based on complex code.
If you use an SQL shortcut, Property shows the property used in that shortcut.
•
Data Type controls how the data is displayed. The data type is set automatically based on the data
type of the field you are using, but you can change it. See “Specifying the Data Type for a Listing
Field.”
•
Active
controls whether this listing field is active (visible in the Analyzer and in pivot tables).
When you create a listing field, it is active by default. See “Deactivating or Activating a Listing
Field” later in this chapter.
•
Complex
indicates whether this dimension is based on a Caché ObjectScript expression. See
“Specifying the Data on Which a Listing Field Is Based” later in this chapter.
9.1.3 Tabs
The tabs in the lower right display details about the currently selected listing field:
The following table summarizes the options on these tabs. Unless otherwise noted, the sections listed
here are in this chapter.
Options on the List Field Library Tabs
Option
Purpose
General
tab: Other Options link
Provides miscellaneous options. See “Deactivating or
Activating a Listing Field” and “Controlling Whether
a Listing Field Is Selectively Rebuilt.”
General
tab: Data Type option
Controls how the data is displayed. The data type is
set automatically based on the data type of the field
you are using, but you can change it. See “Specifying
the Data Type for a Listing Field.”
Using the DeepSee Architect 75
Defining Listing Fields
Option
General
Purpose
tab: Transformation Type
Applies a transformation that affects how the listing
field data is defined and displayed. See the chapter
“Using Replacements, Ranges, and Transformations.”
If you apply a transformation, you generally do not use
the Translation/Replacement and Ranges tabs.
tab: Property field and
field
Specifies the data on which this listing field is based.
See “Specifying the Data on Which a Listing Field Is
Based.”
option
General
Complex Code
Translation/Replacement
Ranges
tab
tab
Defines a set of replacements that alter the listing field
data. See the chapter “Using Replacements, Ranges,
and Transformations.”
Defines a set of ranges to display instead of the listing
field data (applies only to numeric-valued listing fields).
See the chapter “Using Replacements, Ranges, and
Transformations.”
9.2 Defining a Listing Field:The Basics
Listing fields and dimensions are defined in similar ways; the difference is that a dimension definition
includes more information than the listing field definition. Sometimes you want to define both a
dimension and a listing field using the same basic definition; the Architect provides a couple of ways
to do this.
As a result, there are two general kinds of listing fields:
•
A dimension-type listing field is a listing field whose definition is owned by a dimension definition.
If you redefine the dimension, the listing field is automatically redefined as well. (Similarly, if
you delete the dimension, the listing field is automatically deleted.)
The data used by the listing field is stored in a DeepSee global, which means that its performance
is fast. This kind of listing field, however, requires more disk space than the other kind.
To define this kind of listing field, when you define the dimension, click the Listing Field check
box. See the subsection “Creating a Dimension-type Listing Field.”
•
An independent listing field is a listing field that has an independent definition (not dependent on
the definition of any dimension).
For this kind of listing field, DeepSee does not access the data until the user displays the detail
listing; then DeepSee directly accesses the source data.
76 Using the DeepSee Architect
Defining a Listing Field: The Basics
You can define this kind of listing field in a couple of equivalent ways:
-
You can copy a dimension definition and use it as the basis of a listing field definition, which
you can then modify. That is, right-click the dimension definition and then click Add To
Listing Fields or Add All To Listing Fields. See the subsection “Creating an Independent
Listing Field by Copying a Dimension.” Then if you redefine or delete either the dimension
or the listing field, the other is unaffected.
-
You can create a listing field definition from scratch. See the subsection “Creating an Independent Listing Field from Scratch.”
9.2.1 Creating a Dimension-type Listing Field
To use a dimension as a listing field:
1.
Open a BI-enabled class as described in “Opening a BI-enabled Class,” earlier in this book.
2.
Click the Dim tab.
3.
Click the dimension in the Dimensions table to select it.
4.
In the General tab, click the Listing Field check box.
Notice that at the top of the page, the Listing check box is checked; this indicates that this definition
specifies both a dimension and a listing field.
5.
Click Update to save your changes. The listing field is now created.
9.2.2 Creating an Independent Listing Field by Copying a
Dimension
To create independent listing fields by copying one or more dimension definitions:
1.
Open a BI-enabled class as described in “Opening a BI-enabled Class,” earlier in this book.
2.
Click the Dim tab.
3.
Then do one of the following:
•
To copy the dimension definition, right-click the dimension in the Dimensions table and click
Add To Listing Fields.
•
To copy all the dimension definitions, right-click anywhere in the Dimensions table and click
Add All To Listing Fields.
If you already have a dimension-type listing field that uses a given dimension, that dimension
is ignored. You can, however, copy the definition for that dimension by using Add To Listing
Fields; see the previous bullet.
Using the DeepSee Architect 77
Defining Listing Fields
The definition or definitions are copied immediately.
4.
Click the List Field Library tab and make edits as needed.
9.2.3 Creating an Independent Listing Field from Scratch
To define an independent listing field manually, do the following:
1.
Open a BI-enabled class as described in “Opening a BI-enabled Class,” earlier in this book.
2.
Click the List Field Library tab.
Although it is useful to become acquainted with all the options on this tab, in many cases you can
define listing fields very simply, without knowing these options in detail. This section describes
the basic method, which is a suitable start in all cases:
3.
Expand the class hierarchy in the left area so that you can see the class property that you want to
use.
4.
Drag and drop the property, instance method, or SQL shortcut from the class hierarchy to the
Listing Field table on the right. Or double-click the property, instance method, or SQL shortcut.
In either case, the Listing Field table now includes a listing field that is based on your selection.
For example:
5.
Click this new row so that it is selected. The bottom right area of the page then shows details.
6.
Optionally rename the listing field by changing the value in Dimension Name on the General tab.
This name is shown in the Analyzer and is also used as the default column header in the detail
listings. The name should make sense on its own; notice that it does not indicate the table that
owns this property.
For example, you might rename this listing field to Ship Date:
78 Using the DeepSee Architect
Modifying a Listing Field
7.
Optionally make additional changes as described in the rest of this chapter.
8.
Click Update to save your changes.
9.3 Modifying a Listing Field
The way to modify a listing field depends on its type:
•
If the listing field is a dimension-type listing field, modify the dimension definition. See “Modifying a Dimension,” earlier in this book.
•
If the listing field is an independent listing field, modify its definition on the List Field Library tab,
as described in the following steps.
In general, to modify the definition of an independent listing field:
1.
Open a BI-enabled class as described in “Opening a BI-enabled Class,” earlier in this book.
2.
Click the List Field Library tab.
3.
Click the listing field in the Listing Fields table.
4.
Make the changes.
5.
Click Update to save your changes.
To modify the definition of a dimension-type listing field, modify the dimension itself. See the chapter
“Defining Dimensions.”
9.4 Specifying the Data on Which a Listing Field
Is Based
In general, a listing field of any kind is based on data in the same way that a dimension is. There are
two cases:
•
A listing field can be based on a single class property, instance method, or SQL shortcut.
•
A listing field can be based on a Caché ObjectScript expression, possibly using multiple class
properties.
The techniques are the same as they are for dimensions. See the section “Basing a Dimension on a
Caché ObjectScript Expression,” earlier in this book.
Using the DeepSee Architect 79
Defining Listing Fields
9.5 Specifying the Data Type for an Independent
Listing Field
The data type of a listing field affects how its data is displayed. To specify the data type for an independent listing field, choose a value for Data Type on the General tab. Depending on your choice, the
page then shows another field that you can use to specify an appropriate formatting option.
The following table describes the options.
In the following table, the phrase “dimension data” refers to the data on which the dimension is based
(whether that is a single field or an expression).
Data Types for Listing Fields
Listing Field Data
Type
Purpose and Comments
Text
Displays the data as text.
This is recommended for date values other than Caché dates.
Check Box
Display a check box instead of the data:
•
The check box is cleared if the data equals 0 or false.
•
The check box is selected if the data equals 1 or true.
CacheDate
Displays the data as a date. If you select this, the system
displays a drop-down list that you can use to select a display
style. This is suitable for use with Caché date-type data (dates
in $HOROLOG format).
CacheTime
Displays the data as time. If you select this, the system
displays a drop-down list that you can use to select a display
style.
Number
Displays the data as a number.
Currency
Displays the data as currency. If you select this, the system
displays another field in which you can type the number of
decimal places to display. The default is 1.
80 Using the DeepSee Architect
Controlling Whether a Listing Field Is Selectively Rebuilt
9.6 Controlling Whether a Listing Field Is
Selectively Rebuilt
The Architect provides an option to rebuild only a subset of the listing fields. Within the definition of
each listing field, you specify whether that listing field is included within the selective rebuild. To
modify this for an independent listing field:
1.
Open a BI-enabled class as described in “Opening a BI-enabled Class,” earlier in this book.
2.
Click the List Field Library tab.
3.
Click the listing field.
4.
On the General tab, click the Other Options link, which displays a dialog box.
5.
To enable this listing field to be rebuilt selectively, click Selective Rebuild and click OK.
6.
Click Update to save your changes.
For a dimension-type listing field, the listing field is rebuilt selectively if the dimension is rebuilt
selectively. See the chapter “Defining Dimensions.”
See “Rebuilding Selectively,” earlier in this book.
9.7 Deactivating or Activating a Listing Field
When you create a listing field, it is automatically activated. You can deactivate it so that it is no longer
available in the Analyzer.
To deactivate or activate an independent listing field:
1.
Open a BI-enabled class as described in “Opening a BI-enabled Class,” earlier in this book.
2.
Click the List Field Library tab.
3.
Click the listing field.
4.
On the General tab, click the Other Options link, which displays a dialog box.
5.
To deactivate the listing field, clear the Active? check box.
Or to activate the listing field, click the Active? check box.
6.
Click OK to exit the dialog box.
7.
Click Update to save your changes.
Using the DeepSee Architect 81
Defining Listing Fields
To deactivate or activate a dimension-type listing field, deactivate or activate the dimension. See the
chapter “Defining Dimensions.”
9.8 Deleting a Listing Field
To delete an independent listing field, do the following:
1.
Open a BI-enabled class as described in “Opening a BI-enabled Class,” earlier in this book.
2.
Click the List Field Library tab.
3.
In the upper right area, click the listing field.
4.
Click Delete to save your changes. You are prompted to confirm this action.
To delete a dimension-type listing field, do one of the following:
•
Delete the dimension.
•
Modify the dimension and clear the List Field check box on the General tab.
See the chapter “Defining Dimensions.”
9.9 Next Steps
After you define, modify, or delete any kind of listing field, do the following to make your changes
visible in the Analyzer:
1.
Recompile and rebuild, as described in “Recompiling and Rebuilding” earlier in this book.
2.
If you have not yet done so, define a subject area, as described later in this book.
When you define the subject area, make sure to give access to it to all suitable roles.
3.
If you have added a listing field, add it to a detail listing, as described in the next chapter.
4.
If you have deleted a listing field, remove it from all detail listings, as described in the next
chapter.
5.
If the subject area is already open in the Analyzer, you may need to reopen it.
82 Using the DeepSee Architect
10
Using Other Tables to Define
Dimensions, Measures, and Listing
Fields
The preceding chapters describe how to define dimensions, measures, and listing fields that are based
on properties that are in the base class or in classes that are related to it by property relationships.
Sometimes, however, it is necessary to access properties in other tables, properties that you cannot
access via dot syntax. This chapter describes the techniques for doing so:
•
Using complex code and embedded SQL
•
Using a class query
10.1 Using Complex Code and Embedded SQL
You can use the following technique to define a dimension, measure, or listing field on a property in
a table that is external to the base class:
1.
Write a class method or a routine that uses embedded SQL to access the external property.
2.
Use Complex Code to invoke that method or routine.
For example, suppose that the base class is EPI.Patient, and suppose that another class
EPI.PatientDetails contains properties that you want to use as a dimension. There is no direct
Using the DeepSee Architect 83
Using Other Tables to Define Dimensions, Measures, and Listing Fields
relationship between these classes; that is, you cannot access properties of EPI.PatientDetails
from EPI.Patient via dot syntax.
Instead, in both classes, the property PatientID, which is not the primary key, identifies the patient.
You could write a method like the following:
ClassMethod GetFavoriteColor(patientID As %String) As %String
{
&sql(SELECT FavoriteColor INTO :FavoriteColor FROM EPI.PatientDetails
WHERE PatientDetails.PatientID=:patientID)
If (SQLCODE=0) {
Quit FavoriteColor
}
Else {
Quit "None"
}
}
Then you could define a dimension as follows:
•
Dimension Name: Favorite Color
•
Property
(first field): EPI.Patient
•
Property
(second field): empty
•
Complex Code:
##class(EPI.UtilsForSubjectArea).GetFavoriteColor(##this.PatientID)
The method is executed when the indices are generated.
Tip:
To make this method run more quickly, be sure to add an index to the child table, on the field
that you are using in the SELECT statement. In the example here, add an index to PatientID
in the PatientDetails table.
10.2 Using a Class Query
You can use the following technique to define a dimension or measure on a property in a table that is
external to the base class:
1.
Create a class that inherits from %RegisteredObject and %BI.Adaptor.
2.
In this class, create a query that selects the desired fields. This query must specify which field is
the ID field.
The class definition should include only one query. DeepSee ignores additional queries.
3.
In the Architect, use those fields as dimensions or measures.
84 Using the DeepSee Architect
Using a Class Query
Note:
You cannot use the fields as listing fields.
This technique is also useful if you cannot modify the base class, if you have an existing complex
query that you want to use, or if you want to combine multiple classes via an SQL UNION.
For example:
Class DeepSee.FilmQuery Extends (%RegisteredObject, %BI.Adaptor)
{
Query Films() As %SQLQuery(CONTAINID = 1)
{
SELECT Title,Category->CategoryName,Rating,TicketsSold FROM Cinema.Film
}
}
In this example, the Title field is the ID field, which we indicate in the query by including CONTAINID
= 1.
When you open this class in the Architect, you see the following:
Each field in the query is available for use as a dimension or (if numeric) a measure. You cannot,
however, use these fields as listing fields.
For another example, suppose that EPI.Patient contains unique patient records, and that
EPI.PatientSet2 contains an additional set of unique patient records (perhaps that come from a
different source). To perform analysis on the combined set of patients, you could create an additional
class like the following:
Class EPI.PatientClassQuery Extends (%RegisteredObject, %BI.Adaptor)
{
Query Patients() As %SQLQuery(CONTAINID = 1)
{
SELECT PatientID,Age,Gender,TestScore FROM EPI.Patient
UNION ALL
SELECT PatientID,Age,Gender,TestScore FROM EPI.PatientSet2
}
}
The class query is executed when the indices are generated.
Using the DeepSee Architect 85
11
Defining Detail Listings
This chapter describes how to create detail listings. It discusses the following topics:
•
An overview of the Detail List tab
•
The basic process to define a detail listing
•
How to modify a detail listing in general
•
How to modify the layout of a detail listing
•
How to add summary lines to a detail listing
•
How to specify the roles that have access to a detail listing
•
How to add a link from one detail listing to another
•
How to add a link from a detail listing to a URL
•
How to delete a detail listing
•
How to make your changes visible in the Analyzer
11.1 Overview of the Detail List Library Tab
You use the Detail List tab to define, redefine, and delete detail listings.
Using the DeepSee Architect 87
Defining Detail Listings
The Listing Name field shows the name of currently selected detail listing. To select a detail listing,
click the browse button (...), click the detail listing, and then click OK.
The following table summarizes the other options. Unless otherwise noted, the sections listed here are
in this chapter.
Options for Detail Listings
Option
Purpose
Show Listing Bar
Grid Layout
option
tab
Role Access
tab
Data Browser
tab
Controls whether the title bar is shown within this detail
listing.
Lists the listing fields in this detail listing, in order. See
“Modifying the Layout of a Detail Listing” and “Adding
Summary Lines to a Detail Listing.”
Lists the roles that have access to this detail listing.
See “Specifying Role Access to a Detail Listing.”
Lists the detail listings to which the user can jump, from
within this detail listing. See “Adding a Link to Another
Detail Listing.”
11.2 Defining a Detail Listing:The Basics
You define detail listings on the Detail List tab. Although it is useful to become acquainted with all the
options on this tab, in many cases you can define detail listings very simply, without knowing these
options in detail. This section describes the basic method, which is a suitable start in all cases:
1.
Open a BI-enabled class as described in “Opening a BI-enabled Class,” earlier in this book.
2.
Click the Detail List tab.
88 Using the DeepSee Architect
Defining a Detail Listing: The Basics
3.
In Listing Name, type the name of this detail listing.
4.
Optionally clear Show Listing Bar if you do not want to include the title bar within this detail
listing.
5.
In Available Fields, expand the two folders so that you can see all the available listing fields.
The Dimension ListingField folder lists the listing fields that are based directly on dimension definitions. The ListingFields Library folder lists the listing fields that you created manually on the
List Field Library tab.
Tip:
If you do not see all the listing fields you expect to see, click the refresh button (
the menu bar.
6.
) in
Double-click each listing field that you want to include.
Note:
The listing field is then copied to the detail list. This means that if you later redefine the
listing field, the changes are not reflected in this detail list.
7.
After you add a listing field, optionally click it in the table and edit the Caption field, which is the
column header for this listing field.
8.
Click the Role Access tab.
9.
Click the check box next to each role that should have access to this detail listing. By default, no
roles are selected.
Using the DeepSee Architect 89
Defining Detail Listings
10. Click Add.
11.3 Modifying a Detail Listing
In general, to modify the definition of a detail listing:
1.
Open a BI-enabled class as described in “Opening a BI-enabled Class,” earlier in this book.
2.
Click the Detail List tab.
3.
Click the browse button (...) next to Listing Name.
4.
Click the detail listing and then click OK.
5.
Make the changes.
6.
Click Update to save your changes.
11.4 Modifying the Layout of a Detail Listing
To modify the layout of a detail listing:
1.
Open a BI-enabled class as described in “Opening a BI-enabled Class,” earlier in this book.
2.
Click the Detail List tab.
3.
Click the browse button (...) next to Listing Name, click the detail listing, and then click OK.
4.
Now you can do the following on the Grid Layout tab:
•
Move a row up. To do so, right-click it and click Move Up. This action moves the corresponding
listing field to the left within the detail listing.
•
Move a row down. To do so, right-click it and click Move Down. This action moves the corresponding listing field to the right within the detail listing.
•
Remove a row. To do so, right-click it and click DeleteLine.
•
Add a listing field. To do so, in Available Fields, expand the two folders so that you can see
all the available listing fields.
Tip:
If you do not see all the listing fields you expect to see, click the refresh button (
in the menu bar.
)
90 Using the DeepSee Architect
Adding Summary Lines to a Detail Listing
Double-click each listing field that you want to include. The additions are added at the bottom
of the table.
•
5.
Edit the column header for any listing field. To do so, click it in the table and edit the Caption
field.
Click Save.
11.5 Adding Summary Lines to a Detail Listing
A detail listing can include either or both of the following kinds of summary lines:
•
A summary line for the current page of the detail listing
•
A summary line for the entire detail listing
You define these summary lines separately. Each can include a summary for any or all of the listing
fields contained in this detail listing.
To add such summary lines:
1.
Open a BI-enabled class as described in “Opening a BI-enabled Class,” earlier in this book.
2.
Click the Detail List tab.
3.
Click the browse button (...) next to Listing Name, click the detail listing, and then click OK.
4.
To add a summary line for the entire detail listing:
a.
Decide which detail listing fields you want to summarize in this line.
b.
Double-click in the first Option column, in the row for one of those detail listing fields.
c.
In this column, click an option that specifies the kind of syntax to use. For example, System
refers to system functions. The options are explained after these steps.
d.
Double-click in the Grand column, in the same row.
e.
In this column, either select an appropriate option or type the appropriate syntax. For example,
Total displays a numeric total; this option is available if you selected System in the previous
column. The options are explained after these steps.
Repeat as necessary for all detail listings that you want to summarize in this summary line.
5.
To add a page summary line, follow the preceding steps but use the second Option column and
the Page column.
6.
Click Save.
Using the DeepSee Architect 91
Defining Detail Listings
In either Option column, the value you select controls the value to use in the column to its right, as
follows:
Options for the Detail Listing Summary Lines
Value of Option
Value to Use for Grand or Page
Label
Type a string to use as a label.
System
Select one of the following numeric aggregation functions:
•
Total
•
Average
•
Max
•
Min
•
Count
•
Std. Dev
•
Variance
•
% Per
•
Median
(Percentage of the total value)
11.6 Specifying Role Access to a Detail Listing
To specify the roles that have access to a detail listing:
1.
Open a BI-enabled class as described in “Opening a BI-enabled Class,” earlier in this book.
2.
Click the Detail List tab.
3.
Click the browse button (...) next to Listing Name, click the detail listing, and then click OK.
4.
Click the Role Access tab.
5.
Click the check box next to each role that should have access to this detail listing. Clear the check
box for any roles that should not have access.
92 Using the DeepSee Architect
Adding a Link to Another Detail Listing
6.
Click Save.
11.7 Adding a Link to Another Detail Listing
Within a detail listing, a user can display another detail listing, in any subject area to which the user
has access. Specifically, the user can right-click a row and then select the name of another detail listing;
DeepSee then displays that other detail listing with details for the selected row.
To add a link to another detail listing:
1.
Open a BI-enabled class as described in “Opening a BI-enabled Class,” earlier in this book.
2.
Click the Detail List tab.
3.
Click the browse button (...) next to Listing Name, click the detail listing, and then click OK.
4.
Click the Data Browser tab.
This table displays one row for each detail listing that you can access from within this detail listing.
5.
For each detail listing to which you want to link, right-click and then click Add Line. This adds a
new, empty row. Then enter the following information:
•
Listing ID — Specifies the detail listing to display. Double-click this field. DeepSee displays
a list of all detail listings available to you, given your role access. Click a detail listing and
then click OK.
•
Menu Caption — Specifies a string to display in the right-click menu. (For example, type the
name of the detail listing).
•
Query — Specifies the filter expression that indicates which records to select when displaying
this associated detail listing.
If the associated detail listing is in a different subject area, use the following guidelines:
-
The dimension name you use should be the name of the dimension as defined in the other
subject area. Use this dimension name on the left side of the filter expression.
Using the DeepSee Architect 93
Defining Detail Listings
-
To select members of that dimension, you can use the syntax ##this.propertyname to
refer to a property in the current subject area. Use this syntax on the right side of the filter
expression.
For example, suppose that we want to link from detail listing 1 (in the subject Orders) to detail
listing 2 (in the subject area Order Details). Also suppose that:
-
The Order Details subject area has an Order ID dimension.
-
The Orders subject area has an OrderID property.
We would use the following filter expression:
[Order ID = ##this.OrderID]
The user right-clicks in detail listing 1, perhaps on order 10366, and selects Order Details.
Then DeepSee evaluates ##this.OrderID. Next, when it retrieves records from the Order
Details subject area to display in detail listing 2, DeepSee applies the filter expression [Order
ID = 10366].
6.
Right-click in the empty area and select Save Data Browser.
7.
Click Save.
On the Data Browser tab, you can also do the following:
•
Move a line up or down, to control the order of the options in the detail listing. To do so, rightclick a line and then click Move Up or Move Down.
•
Remove a line from the table. To do so, right-click it and then click Delete Line. The line is
immediately removed.
•
Remove all lines from the table. To do so, right-click in the empty area and then click Clear.
DeepSee prompts you for confirmation.
Note that your changes on this tab are not saved unless you right-click in the empty area and select
Save Data Browser.
11.8 Adding a Link to a URL
Within a detail listing, a user can right-click, select an option, and go to a URL in a new browser
window. To add a right-click option that opens a URL:
1.
Open a BI-enabled class as described in “Opening a BI-enabled Class,” earlier in this book.
2.
Click the Detail List tab.
94 Using the DeepSee Architect
Deleting a Detail Listing
3.
Click the browse button (...) next to Listing Name, click the detail listing, and then click OK.
4.
Click the Popup tab.
This table displays one row for each URL that you can access from within this detail listing.
5.
6.
For each URL to which you want to link, right-click and then click Add Line. This adds a new,
empty row. Then enter the following information:
•
Menu Caption
— Specifies the string to display in the right-click menu.
•
Pre Script
•
URL Action
— Specifies the URL to open in a new browser window.
•
Post Script
— Specifies a Caché ObjectScript statement to execute after opening the URL.
— Specifies a Caché ObjectScript statement to execute before opening the URL.
Click Save.
Tip:
To remove a line from the table, right-click it and then click Delete Line. DeepSee prompts
you for confirmation.
11.9 Deleting a Detail Listing
To delete a detail listing:
1.
Open a BI-enabled class as described in “Opening a BI-enabled Class,” earlier in this book.
2.
Click the Detail List tab.
3.
Click the browse button (...), click the detail listing, and then click OK.
4.
Click Delete.
11.10 Next Steps
After you define, modify, or delete a detail listing, do the following to make your changes visible in
the Analyzer:
1.
Recompile, as described in “Recompiling and Rebuilding” earlier in this book.
2.
If you defined a new detail listing, make sure to give access to the detail listing to all suitable
roles, as described earlier in this chapter.
Using the DeepSee Architect 95
Defining Detail Listings
3.
If you have not yet done so, define a subject area, as described later in this book.
When you define the subject area, make sure to give access to it to all suitable roles.
4.
If the subject area is already open in the Analyzer, you may need to reopen it.
96 Using the DeepSee Architect
12
Using Replacements, Ranges, and
Transformations
Replacements, ranges, and transformations allow you to modify the data shown in the Analyzer and
in pivot tables, for dimensions and for listing fields. The Architect provides these tools in several
contexts. This chapter discusses the following topics:
•
An overview
•
How to replace null values for a dimension, measure, or listing field
•
How to define a set of replacements for a dimension or listing field
•
How to define a set of ranges for a dimension or listing field
•
How to define a transformation to use in a dimension or a listing field
•
How to apply a transformation to a dimension or a listing field
12.1 Overview of Replacements, Ranges, and
Transformations
Replacements, ranges, and transformations allow you to modify the data shown in the Analyzer and
in pivot tables, for dimensions and for listing fields.
A replacement substitutes one string for another. If you use a replacement within a dimension, you
are effectively renaming a dimension member. If you use a replacement within a listing field, you are
replacing any occurrences of the old string in any detail listing that uses this field. The comparison is
Using the DeepSee Architect 97
Using Replacements, Ranges, and Transformations
case-sensitive and it considers the entire string (there is no partial matching option). With one exception,
replacements do not affect measures; that is, DeepSee ignores them if the dimension data type is
Numeric.
A special case of replacement is the Null field replacement option, which replaces null values with the
string or number you specify. You can use this option with all dimension data types (including Numeric,
which is the type used by measures).
Ranges examine numeric source data and place it into named buckets. For a dimension, when you
define ranges, you are effectively defining the members of that dimension. Each member of the
dimension corresponds to a range of values. For a listing field, when you define ranges, then in each
row of a detail listing, the name of the appropriate range is displayed instead of the listing field data.
Transformations are reusable definitions that include replacements, ranges, and other options such as
case conversion and field justification. You define them separately and apply them to dimensions or
listing fields where needed.
Transformations have a lower priority than replacements and ranges that are included directly within
dimension or listing field definitions; for example, if a dimension includes a set of replacements and
has a transformation applied to it, the transformation is ignored.
12.2 Replacing Null Values for a Dimension,
Measure, or Listing Field
To replace null values for a dimension, measure, or a listing field:
1.
Open a BI-enabled class as described in “Opening a BI-enabled Class,” earlier in this book.
2.
Select the dimension, measure, or a listing field. Either:
•
Click the Dim tab and then click the dimension or measure.
•
Click the Listing Field tab and then click the listing field.
3.
Click the Translation/Replacement tab.
4.
Type a value into Null field replacement. For example: No region
DeepSee ignores this option if you have entered an expression into Complex Code, if you are using
the Words dimension data type, or if you are using the Manual Child Browse feature. In such cases,
write an expression in Complex Code that detects the nulls and replaces them appropriately.
5.
Click Update to save your changes.
98 Using the DeepSee Architect
Defining Replacements for a Dimension or Listing Field
If you edited a dimension or measure, notice that the Trns/Repl check box is checked in the table at
the top of the page; this happens automatically when you enter information on the Translation/Replacement or the Range tab.
12.3 Defining Replacements for a Dimension or
Listing Field
To define a set of text replacements for a dimension or a listing field:
1.
Open a BI-enabled class as described in “Opening a BI-enabled Class,” earlier in this book.
2.
Select the dimension or a listing field. Either:
•
Click the Dim tab and then click the dimension.
•
Click the Listing Field tab and then click the listing field.
3.
Click the Translation/Replacement tab.
4.
To add a row to the table:
a.
Right-click in the empty area and select Add Line.
b.
Click the blank line, beneath the Original Text heading.
c.
Type the exact text that you are going to replace. Matching is exact and case-sensitive.
d.
Press Tab or click the blank line beneath the Translate to heading.
e.
Type the replacement text.
Repeat as necessary. For example:
5.
Click Update to save your changes.
If you edited a dimension, notice that the Trns/Repl check box is checked in the table at the top of the
page; this happens automatically when you enter information on the Translation/Replacement or the
Range tab.
Using the DeepSee Architect 99
Using Replacements, Ranges, and Transformations
12.3.1 Other Options
You can also do the following on the Translation/Replacement tab:
•
To delete a single line, right-click it and select Delete Line. The line is immediately deleted.
•
To delete all lines, right-click and select Clear. You are prompted to confirm this action.
•
To copy all lines of this table to the system clipboard, right-click and select Copy to Clipboard.
•
To paste the contents of the system clipboard, right-click and select Paste from Clipboard.
CAUTION:
If the clipboard does not currently contain lines from a replacement table like this
(perhaps from a different dimension or listing field), the current contents of your
replacement table are cleared and nothing is pasted.
12.4 Defining Ranges for a Dimension or Listing
Field
You can define ranges for dimensions and for listing fields that use numeric data:
•
If you define ranges for a dimension, you are defining the members of the dimension. Each range
creates one dimension member; the name of the range is the name of the member.
Also see “Creating Hourly Buckets, ” earlier in this book.
•
If you define ranges for a listing field, then in each row of a detail listing, the name of the appropriate range is displayed instead of the listing field data.
12.4.1 Basics
To define a set of ranges for a dimension or a listing field:
1.
Open a BI-enabled class as described in “Opening a BI-enabled Class,” earlier in this book.
2.
Select the dimension or a listing field. Either:
3.
•
Click the Dim tab and then click the dimension.
•
Click the Listing Field tab and then click the listing field.
Click the Ranges tab.
In this tab, you define a set of ranges, each with a name or caption.
100 Using the DeepSee Architect
Defining Ranges for a Dimension or Listing Field
4.
To add a row to the table:
a.
Right-click in the empty area and select Add Line.
The system then adds a blank line.
b.
Click the blank line, beneath the Caption heading.
Then the cursor blinks to indicate that you can type here.
c.
Type the name of this member.
To move to other fields in the row, press Tab or click the blank line beneath the appropriate
heading.
d.
For From, type the lower end of the range, if any.
This can be a Caché ObjectScript expression or a constant. If you use an expression, note that
DeepSee evaluates it at compile time.
e.
If this range includes this value, click the check box in the first inclusive column.
f.
For To, type the upper end of the range, if any.
This can be a Caché ObjectScript expression or a constant. If you use an expression, note that
DeepSee evaluates it at compile time.
g.
If this range includes this value, click the check box in the second inclusive column.
Repeat as necessary. For example:
5.
If you are editing a dimension, optionally type a string into Range Dimension Suffix. This string
is appended to the dimension name.
6.
Click Update to save your changes.
If you edited a dimension, notice that the Trns/Repl check box is checked in the table at the top of the
page; this happens automatically when you enter information on the Translation/Replacement or the
Range tab.
12.4.2 Other Options
You can also do the following on the Range tab:
Using the DeepSee Architect 101
Using Replacements, Ranges, and Transformations
•
To delete a single line, right-click it and select Delete Line. The line is immediately deleted.
•
To delete all lines, right-click and select Clear. You are prompted to confirm this action.
•
To copy all lines of this table to the system clipboard, right-click and select Copy to Clipboard.
•
To paste the contents of the system clipboard, right-click and select Paste from Clipboard.
CAUTION:
If the clipboard does not currently contain lines from a range table like this (perhaps from a different dimension or listing field), the current contents of your
range table are cleared and nothing is pasted.
12.5 Defining and Modifying Transformations
To define or redefine a transformation:
1.
At the top of the Architect page, click Data Modeler > Transformation.
The system then displays a page like the following:
2.
Either:
•
Type a new transformation name into Transformation Name.
•
Click a transformation name in the list on the left.
3.
Make edits as needed. The options are described after these steps.
4.
Click Add or Update in the lower right.
Options in a Named Transformation
Option
Purpose
Transformation Name
Name of this transformation, as you want to see in the
Architect.
102 Using the DeepSee Architect
Defining and Modifying Transformations
Option
Purpose
Case Conversion
Specifies how to convert the case of any strings. Optionally
choose Upper Case or Lower Case.
External Value
Click this option if you want DeepSee to use the external
value for this field, rather than the internal value. This option
takes effect only if the field has both internal and external
values.
Null Field Replacement
Optionally specifies a string to use as replacement for any
null values.
Invalid Pointer Replacement
Optionally specifies a string to use as replacement for any
invalid pointers.
Justification
Specifies how to convert the horizontal alignment of any
strings. Optionally choose Left, Center, or Right.
Translations
Ranges
Bitmaps
tab
Optionally defines a set of text replacements. Follow the
general instructions in “Defining Replacements for a
Dimension or a Listing Field,” earlier in this chapter.
tab
Optionally defines a set of ranges. Follow the general
instructions in “Defining Ranges for a Dimension or a Listing
Field,” earlier in this chapter.
tab
Optionally defines a set of text-to-image replacements. This
affects only independent listing fields. See the following
subheading.
12.5.1 Defining Text-to-Image Replacements
Within a transformation, you can define a set of replacements that substitute images in the place of
text. You specify the text to replace, and a bitmap image to display in its place. This replacement
affects only independent listing fields; dimensions and dimension-type listing fields ignore any textto-image replacements.
To define text-to-image replacements within a transformation:
1.
Make sure the Translations tab is empty. Otherwise, the replacements defined there take precedence
over the text-to-image replacements that you are adding.
2.
Click the Bitmaps tab.
3.
Right-click and click Add Line.
4.
In the right column (Field Value), type the exact text that you are going to replace. Matching is
exact and case-sensitive.
Using the DeepSee Architect 103
Using Replacements, Ranges, and Transformations
5.
Make sure the new row is still selected.
6.
Click the Select Image button.
This brings up a dialog box.
7.
Click the image that you want to use and click OK. The internal ID of this image is automatically
written to the Id column.
8.
In the Remark, type an optional remark.
9.
Repeat as needed.
For example:
On this tab, you can also do the following:
•
Delete a line. To do so, right-click the line and click Delete Line.
•
Delete all lines. To do so, right-click and click Clear. You are prompted to confirm this action.
•
Preview the image used in a given row. To do so, click the line. The image is displayed in the
Bitmap Preview box.
•
Remove an image for a given line. To do so, click the line and click Clr.
If you make any change, click Update to save this change.
For an example of text-to-image replacement, see “Tutorial Part 3: Adding a Detail Listing to the
Model,” earlier in this book.
12.5.2 Deleting a Transformation
To delete a transformation:
1.
At the top of the Architect page, click Data Modeler > Transformation.
104 Using the DeepSee Architect
Applying a Transformation to a Dimension or Listing Field
2.
Click a transformation name in the list on the left.
3.
Click Delete in the lower right. The transformation is immediately deleted.
12.5.3 Next Steps
After you add, modify, or delete a transformation, recompile and rebuild, as described in “Recompiling
and Rebuilding” earlier in this book.
12.6 Applying a Transformation to a Dimension
or Listing Field
To apply a transformation to a dimension or a listing field:
1.
Define the transformation if it is not yet defined. See the previous section.
2.
Open a BI-enabled class as described in “Opening a BI-enabled Class,” earlier in this book.
3.
Select the dimension or a listing field. Either:
•
Click the Dim tab and then click the dimension.
•
Click the Listing Field tab and then click the listing field.
4.
In the General tab, select the transformation from the Transformation Type drop-down list.
5.
Click Update to save your changes.
Using the DeepSee Architect 105
13
Validating Your DeepSee Data
Model
This chapter briefly describes some useful tools and techniques to help you validate your dimensions,
measures, and listing fields.
13.1 Useful Tools
To assist you during testing, make sure that the Listing Field option is selected for each measure.
Also make sure that you have the following tools:
•
A listing field based on an identifier or other unique value in the source data (for example, OrderID
or PatienID. This enables you to easily identify the source records when viewing detail listings.
•
A detail listing that displays the preceding listing field and all measures. Even if you do not intend
to provide this to users, you will find this tool useful during testing.
•
Other detail listings that contain all the listing fields that you intend to provide to users.
•
A low-level dimension (so that any member uses a small number of records that you can easily
look at). For example, if the base class is Sample.Orders, you might base a dimension on
OrderID. Even if you do not intend to provide this dimension to the users, you will find it useful
during testing.
•
The System Management Portal, especially its SQL tools.
•
The DeepSee Analyzer.
Before you test your model, be sure that the DeepSee indices are current.
Using the DeepSee Architect 107
Validating Your DeepSee Data Model
13.2 Validating a Dimension
For a dimension, it is useful to consider the following questions:
•
Do the members access the expected records and no others?
•
Does the dimension handle nulls in the way that you want it to?
The following procedure is a good starting point:
1.
In the Analyzer, place the dimension on the row axis and display a grand total. Use the default
measure (Count). The following example shows the home city of the patients as a dimension,
using patients as the base class:
DeepSee computes the grand total by adding the Count for each member.
2.
Compare the grand total to the record count for this subject area. (You can see the record count
in the Filter area on the left.)
108 Using the DeepSee Architect
Validating a Dimension
If these numbers are not the same, make sure that you understand why they do not match.
There are two reasons why these numbers can be different:
•
In some of the source records, the data used this dimension might contain null values. If you
do not convert those null values to a string, this dimension essentially ignores those records.
This outcome may or may not be desirable depending on your business needs.
For example, consider the following dimension, which is based on the industry in which the
patients work:
This dimension includes a member called None, which is intended to contain the records
with no recorded industry. By comparing the total shown here to the record count, however,
we can tell that the dimension probably does not handle nulls correctly.
•
If the dimension is based on a collection, any given source record can be included in multiple
dimensions. The following example shows a dimension based on patient allergies, using
patients as the base class:
Using the DeepSee Architect 109
Validating Your DeepSee Data Model
Because a patient can have multiple allergies, the total here (690) is greater than the number
of patients (500), as expected.
3.
Double-check that the dimension is accessing the records that you expect.
Look at the count for a given member. In the System Management Portal, execute a suitable query
to determine how many records this particular member should include. Compare that to the count
shown in the pivot table.
For example, consider the Real Estate and Leasing member in the following pivot table
(in which the Industry dimension now handles nulls correctly):
110 Using the DeepSee Architect
Validating a Dimension
In the System Management Portal, you could enter an SQL query like the following:
SELECT Count(*) as Count, Profession->Industry FROM EPI.PatientDetails
GROUP BY Profession->Industry
The results might be as follows:
Using the DeepSee Architect 111
Validating Your DeepSee Data Model
There are indeed 9 patients employed in this industry.
If the counts are not the same, display a detail listing in the Analyzer and determine which records
DeepSee is using. Compare this to the records in the source table itself.
13.3 Validating a Measure
For a measure, particularly a measure based on Complex Code, it is useful to consider the following
questions:
•
Does the measure return the correct value at the lowest level?
•
Is the measure aggregated as expected to higher levels?
The following procedure is a good starting point:
1.
In the Analyzer, place the lowest-level dimension on the row axis. For Metrics, use the measure
and the Count measure. For example:
2.
Find a member that has a fairly low value for Count.
3.
Display the detail listing for this member.
4.
For each measure, look at a single record and check that the value shown in the detail listing is
as expected.
112 Using the DeepSee Architect
Validating a Listing Field
5.
If the lowest-level values for a measure are as expected, aggregate those values for all the records
in this detail listing. Use the aggregation type specified in the measure. Compare the resulting
number to the number shown for this measure in the pivot table itself.
13.4 Validating a Listing Field
For a listing field, it is useful to consider the following questions:
•
Does the listing field display the correct value?
Are the appropriate transformations, ranges, or replacements applied?
•
Does the listing field display the correct value when the source data is null?
Because listing fields are directly associated with source records and because they are not aggregated
in any way, it is a simpler process to validate them.
1.
In the Analyzer, use any dimensions and measures, and display a detail listing.
2.
Examine each listing field and consider the preceding questions.
Using the DeepSee Architect 113
A
Expressions and Scripts in
DeepSee Architect
The DeepSee Architect uses formulas, expressions, and scripts of varying types. This appendix summarizes the cases and the syntax for your convenience. It discusses the following topics:
•
Filter expressions
•
Caché ObjectScript expressions
A.1 Filter Expressions
A filter expression is a boolean expression that specifies which records to include.
A.1.1 Where Used
Filter expressions are used in the following contexts:
•
An optional filter applied to a subject area (to restrict the number of rows that can be accessed).
•
The definition of a member of a compound dimension.
•
An optional filter applied to any pivot table in a subject area when used by a specific role (a rare
usage).
•
An optional filter applied to any detail listing in a subject area when used by a specific role (a rare
usage).
Using the DeepSee Architect 115
Expressions and Scripts in DeepSee Architect
A.1.2 Syntax
A filter expression has the following syntax:
[DimensionName = String]
Here:
•
DimensionName is the name of a dimension, without quotes.
•
String is an unquoted string that typically equals the name of a member of that dimension, or the
start of a name.
Notes:
•
The spaces before and after the equals sign (=) are required.
•
You can combine filter expressions by using the logical operators NOT, AND, and OR. For
example:
[Ship Country = Canada] OR [Ship Country = Mexico]
OR [Ship Country = USA]
Use brackets to control the precedence.
•
Filter expressions use the internal names of dimensions and members. By default, the external
name of a dimension is the same as the internal name; similarly, the external name of a member
is the same as the internal name. This means that if you have renamed dimensions or members,
the filter editor still shows the original names.
A.1.3 Filter Expression Using IN
You can also create a filter expression with the following syntax:
[DimensionName IN String1,String2,String3,...]
For example:
[Ship Country IN Canada,Mexico,USA]
A.1.4 Filter Expression with a Full Date
When you create a dimension based on a date, DeepSee creates a set of dimension variants, which you
can use separately or in combination. For example, if you create a date dimension called Order Date,
DeepSee creates the variants Order Date Year, Order Date Quarter, Order Date Month,
and so on. The Order Date Year variant uses only the year part of the date, Order Date Quarter
uses only the quarter number, and so on.
116 Using the DeepSee Architect
Caché ObjectScript Expressions
You can use these in the same way as any other dimensions, including using them in filters.
However, when you filter by date, you often want the filter to consider a complete date rather than
just an isolated segment of it. For example, you might want to filter a subject area to show only the
data that falls within a particular ten-year span of time.
To do so, you can use the base date dimension name without any of the automatically generated suffixes.
For example:
[Birth Date > 01/01/1980] AND [Birth Date < 01/01/1990]
The dates must be in the form dd/mm/yyyy or dd/mm/yy.
A.1.5 Filter Expression with Embedded Caché ObjectScript
A filter expression can include an embedded Caché ObjectScript expression. The syntax is as follows:
[DimensionName = {COS expression}]
An extremely simple example is as follows:
[Ship Country = {"Den"_"mark"}]
A.1.6 Filter Expression That Uses Session Data
In a Caché ObjectScript expression in DeepSee, you can refer to the current DeepSee username or the
current DeepSee user role, as follows:
%session.Data("CurrUser")
%session.Data("CurrRole")
For example, you could use the current DeepSee role to specify the filter on a subject area:
[Region Name = {$CASE(%session.Data("CurrRole"),
"role1":"North Region","role2":"South Region",
"role3":"West Region",:"East Region") }]
A.2 Caché ObjectScript Expressions
You can use Caché ObjectScript expressions in multiple places in DeepSee Architect:
•
Within the name of a member in a filter expression, as described in the previous section.
•
As the expression that defines dimension members (the Complex Code option).
•
As the expression that defines a detail listing field (the Complex Code option).
Using the DeepSee Architect 117
Expressions and Scripts in DeepSee Architect
•
As the values of From and To, within a range definition.
118 Using the DeepSee Architect
B
When to Recompile and Rebuild
For your convenience, this appendix summarizes when to recompile and when to rebuild indices, in
order to make the changes visible in the Analyzer and in pivot tables.
When to Recompile and When to Rebuild
Item Added, Modified (Including
Renaming), or Deleted
Need to
Recompile?
Need to Rebuild
Indices?
Dimension
Yes
Yes
Compound dimension or member (if not
dynamic)
Yes
Yes
Compound dimension or member (if dynamic)
Yes
No
Dynamic dimension
Yes
No
Relationship between dimensions
Yes
Yes
Subject area
No
No
Dimension-type listing field
Yes
Yes
Independent listing field
Yes
No
Detail listing, any change other than role
access
Yes
No
Detail listing, changing role access
No
No
Transform used by dimension or
dimension-type listing field
Yes
Yes
Transform used by independent listing field
Yes
No
Using the DeepSee Architect 119
When to Recompile and Rebuild
For information on recompiling and rebuilding, see the section “Recompiling and Rebuilding,” earlier
in this book.
120 Using the DeepSee Architect
Index
C
class queries, using in DeepSee, 84
D
dimensions
relationships between, 57
drill-through
by double-clicking, 68
E
embedded SQL, using in DeepSee, 83
H
hourly buckets, 40
N
null values
replacing, 98
R
ranges
hourly buckets, 40
relationships between dimensions, 57
Using the DeepSee Architect 121