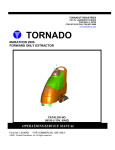
1
TORNADO INDUSTRIES, LLC
7401 W. Lawrence Avenue
Chicago, IL 60706
Ph (708) 867-5100
Fax (708) 867-6968
www.tornadovac.com
Tornado® Operations & Maintenance Manual
MODEL NO.
98494 Tornado 17” Battery Burnisher
L9736 © Tornado Industries, LLC 2008
All Rights Reserved
Table of Contents
Warranty......................................................................................................................................................... 3
General Information ....................................................................................................................................... 4
Important Safety Advice............................................................................................................................. 4
Guidelines for the Operator ........................................................................................................................ 4
Transporting the Machine........................................................................................................................... 5
Electrical Connection ................................................................................................................................. 5
Controls .......................................................................................................................................................... 5
Fitting the Pads ........................................................................................................................................... 6
Adjusting the Handle Height ...................................................................................................................... 7
Operation ........................................................................................................................................................ 7
Starting the Machine................................................................................................................................... 7
Burnishing .................................................................................................................................................. 7
Cleaning Solutions...................................................................................................................................... 7
When Cleaning is Finished......................................................................................................................... 7
Recharging the Batteries............................................................................................................................. 7
Storage............................................................................................................................................................ 8
Maintenance ................................................................................................................................................... 8
Electrical & Electronic Equipment Disposal .................................................................................................. 8
Technical Specification .................................................................................................................................. 8
Accessories..................................................................................................................................................... 8
Fault Diagnosis............................................................................................................................................... 8
2
Warranty
3
General Information
This commercial battery powered Cordless Burnisher is the latest innovation at the forefront of daytime
cleaning. Its quietness of operation and compact design makes it ideal for use in a variety of environments.
It is especially suited for use on hard floors in hotels, schools, hospitals, factories, retail shops, stores and
offices.
Maintenance free (gel) batteries must be used which provide up to 2 hours running time. A battery life
indicator allows the operator to assess the degree of battery life available. An on board battery charger
provides a convenient way of charging. The machine can be fitted with an optional handle mounted
cleaning solution spray system, which can be operated while gripping the handle with both hands,
maintaining full control of the machine.
The following instructions contain important information about the Tornado Cordless Burnisher and safety
advice for the operator.
Equipment must be operated, serviced and maintained in accordance with the manufacturer’s instructions.
If in doubt, contact the supplier of your machine.
Important Safety Advice
When using electrical equipment, basic safety precautions should be followed including the following:
• Read all instructions carefully before use.
• Keep children and unauthorized persons away from the machine when in use.
• Do not leave the key in the switch when not in use.
• Do not operate the machine if it malfunctions or is damaged in any way. Contact an authorized service
agent for repair or adjustment.
• Do not operate the machine when connected to the electrical supply.
• The key of the operating switch must be removed before cleaning or doing maintenance on the
machine.
• To unplug, pull the plug and not the cord.
• The battery charging lead needs to be regularly inspected for signs of damage. If the lead is damaged,
it has to be replaced.
• When recharging, make sure the area is ventilated.
• Do not use where hazardous dust is present.
• Do not use in near flammable areas.
• Be careful when using the machine near stairways.
Guidelines for the Operator
• Operators must be fully trained in the use of the machine in accordance with these instructions, able to
perform user maintenance and the correct selection of accessories.
• Operators should be physically capable to move, transport and operate the machine.
• Operators should be able to recognize unusual operation of the machine and report any problems.
• Keep hands and feet clear of the rotating pad.
• Wear suitable footwear and clothing.
• Where possible, implement job rotation and adequate rest periods for the operator(s).
• Do not smoke when using the machine.
• This machine is for indoor use only. Do not store outdoors or in wet areas.
4
Transporting the Machine
CAUTION – THIS MACHINE IS HEAVY
• Do not attempt to lift the machine without mechanical assistance.
• Do not lift the machine by the operating handle or outer cover, always lift from the chassis.
• Use a mechanical lift, hoist or forklift and ensure the machine is securely in place before lifting.
Incorrect lifting techniques may result in injury.
• To move the machine to the work area, lock the handle and tilt backwards to raise the front off the
floor, and wheel into position.
CAUTION – BUMPING THE MACHINE THROUGH OBSTACLES CAN DAMAGE THE MACHINE.
SMALL OBSTACLES CAN BE OVERCOME BY PULLING THE MACHINE BACKWARDS.
Electrical Connection
• Before connecting the machine to the power supply, check that your supply voltage corresponds with
that marked on the rating label.
IMPORTANT – IF THE CHARGING LEAD IS DAMAGED, IT MUST BE REPLACED BY A CORD
PROVIDED ONLY BY THE MANUFACTURER OR AN AUTHORIZED SERVICE AGENT.
Controls
The main operating controls are located on the handle.
Switch Trigger, left hand
Used to switch motor ON and OFF. Can only
be operated with handle in working position,
and if left hand interlock button has previously
been pressed.
Switch Trigger, right hand
Used to switch motor ON and OFF. Can only
be operated with handle in working position,
and if right handle interlock button has
previously been pressed.
Interlock Button, left hand
This must be pressed initially to enable left hand
switch trigger to switch the motor on.
Interlock Button, right hand
This must be pressed to enable right hand
switch trigger to switch the motor on.
5
Handle Adjustment Lever
Used to adjust handle to comfortable working
height. Note: For safety Reasons the machine
cannot be operated unless the handle is moved
to a working height.
Battery Life Indicator
Gives indication of battery life available.
Solution Feed Lever
Operates flow valve in spray bottle (if fitted).
- Pull lever to release solution.
- Release lever to stop flow.
Battery Charge Indicator Lights
Shows charge state of battery.
Key Operated Switch
Switches battery power ON and OFF.
Battery Charging Lead
Connects machine to electricity supply for
battery charging.
Fitting the Pads
WARNING – THIS APPLIANCE HAS BEEN DESIGNED FOR USE WITH QUALITY BURNISHING
PADS ONLY. THE FITTING OF INAPPROPRIATE PADS MAY AFFECT ITS PERFORMANCE AND
SAFETY.
Make sure the machine is switched OFF by the key operated switch and the key is removed before fitting or
removing pads.
CAUTION – IF SPRAY BOTTLE IS FITTED, LOWER THE HANDLE GENTLY TO AVOID
DAMAGING IT.
• Raise cleaning head bringing the machine to rest on storage castor.
• Remove pad retainer by unscrewing it.
• Press cleaning pad onto the drive board. Secure the pad using the pad retainer.
• Return the machine to upright position.
6
Adjusting the Handle Height
Select the most comfortable handle height using the adjustment lever and lock into position.
Operation
Starting the Machine
WARNING – NEVER START THE MACHINE WITHOUT A PAD FITTED.
• Turn the key operated switch to the ON position.
• With the handle set at a comfortable working height and with both left and right hands on the handle,
press both interlock buttons with your thumb and squeeze both switch triggers to start the machine.
• Once the machine has started, the interlock buttons can be released. The machine will operate with
either or both of the switch triggers held.
• To stop the machine, release the switch triggers.
• Normal movement of the machine is in a forward and backward position.
Burnishing
• Fit pads suitable for the speed of the machine and the surface to be polished, as recommended by the
pad manufacturer.
• Apply cleaning solution to the floor in accordance with the manufacturer’s instructions.
• Do not keep the machine rotating on one spot, as this could cause overheating and damage the floor
surface.
Cleaning Solutions
The choice of cleaning solution is at the discretion of the operator, when assessing the surface to be
cleaned. Cleaning solutions are only recommended for stubborn marks and should not be used as a general
cleaning aid.
When Cleaning is Finished
• Switch OFF the machine, raise cleaning head and remove pad.
• Wipe over the machine with a damp cloth.
• Check battery life indicator and recharge as necessary.
Recharging the Batteries
• IMPORTANT - Only recharge the battery when the battery life indicator is in the red zone (two lights
remaining).
• Note that when only 1 RED LED is showing on the battery life indicator the internal controller will
disable the machine.
• IMPORTANT – Opportunity top up charging will damage the batteries. This will cause run time to
fall and overall battery life will be affected. AVOID TOP UP CHARGING.
• Take the battery charging lead supplied with the machine plug into the main supply, ensure that the
supply matches the rating plate.
• It takes approximately 8 hours to fully charge the batteries.
Battery Charge Indicator Lights:
• Two RED LEDs – The first indicates that the power is on and the second indicates that the initial bulk
charge is taking place.
• YELLOW LED – indicates that the battery is now being charged on a constant voltage and that the
battery is about 80% charged.
• GREEN LED – shows when the charger has switched over to float charge and that the battery is ready
for use. The battery should be left connected with a GREEN LED list until the battery is required for
use.
• IMPORTANT – CHARGE ONLY IN A WELL-VENTILATED AREA.
• THE CHARGER IS SET FOR GEL BATTERIES ONLY.
• DO NOT OPERATE THE MACHINE WHEN CONNECTED TO THE MAIN ELECTRICAL
SUPPLY.
7
Storage
Always switch off and wipe down and dry the machine after use. Store the machine in a dry indoor area
only.
Maintenance
WARNING – BEFORE DOING ANY MAINTENANCE OPERATIONS OR ADJUSTMENTS, SWITCH
OFF THE MACHINE AND UNPLUG IT FROM THE ELECTRICAL SUPPLY.
The machine requires minimum maintenance apart from the following checks by a trained operator.
Charging Cord and Plug
Regularly inspect the sheath, plug and cord for damage or loose connection.
IMPORTANT – All other servicing and repairs should only be performed by an authorized service agent.
IMPORTANT – Should the machine fail to operate, please refer to the fault diagnosis section in the back of
the instruction manual. If the problem or remedy is not listed, please contact an authorized service agent.
Electrical & Electronic Equipment Disposal
Improper disposal may be harmful to the environment. Please refer to your local waste authority for
information on return and collection systems in your area.
Technical Specification
Charging Voltage
Voltage
Motor Rating
Working Width
Pad Diamter
Pad Speed
Handle Height
Sound Pressure Level
Weight (with batteries)
Weight (without batteries)
100-230V
24V
65HP
17 inches
17 inches
1500 rpm
42 inches
57 dB (A)
138 lbs.
50 lbs.
Accessories
Part
Spray Kit System
Part No.
05-4156-0000
Description
Spray Cleaning Attachment
Fault Diagnosis
Fault
No lights are lit on charger
module.
Only Red LED on charge
module is lit.
Machine not working.
Machine wobbles or vibrates
excessively.
Reason
Power failure
Charger not connected correctly
Remedy
Check the main fuse, the power
supply cord and plug.
Contact service agent
Switch interlock incorrectly
operated.
Current overload fuse blown
Pad worn or damaged
Pad centered on drive disc
Pad dirty
Incorrect pad selection
Check operating procedure
instructions.
Contact service agent
Renew pad
Place pad in correct position
Clean the pad
Contact pad supplier
8