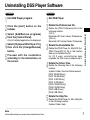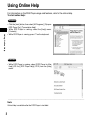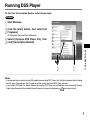
1
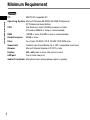
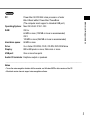
PC TRANSCRIPTION KIT
AS-4000
ONLINE
INSTRUCTIONS
EN
DSS Player Pro Transcription Module Features
- Plays files in the background when another application is running, such as a word
processor.
- Automatically runs a word processor when replaying a dictation file starts, so that
transcription can be started immediately.*
- Receives dictation files and sends created document files by e-mail or FTP.*
- Sorts received dictation files by sender, and automatically sends created document files.*
- Manages created document files in association with dictation files.*
- Enables foot switch control of the playback process.
* Windows only
● OLYMPUS IMAGING CORPORATION holds the copyrights for DSS Player Pro Transcription
Module software and the instructions (this manual).
● Microsoft and Windows are registered trademarks of Microsoft Corporation.
● Apple, Macintosh, iMac, eMac, Mac, and PowerMac are trademarks or registered trademarks
of Apple Computer, Inc.
● Intel and Pentium are registered trademarks of Intel Corporation.
● Other product and brand names mentioned herein may be the trademarks or registered
trademarks of their respective owners.
2
Table of Contents
Introduction
Minimum Requirement ......................... 4
Getting Ready
Installing DSS Player Software ............ 6
Using Online Help ................................. 8
Uninstalling DSS Player Software ........ 7
Let’s Get Started
Running DSS Player ............................. 9
Connecting the RS25/RS26 Foot Switch... 11
Connecting the E61 Headset ............. 12
Setting a Word Processor
or Document Management ............. 17
Receiving Dictation Files/Sending
Window Names ................................... 13
Document Files ............................... 18
Downloading Dictation Files ............... 14
Setting the E-mail/FTP Service .......... 21
Starting Transcription ......................... 16
User Support
Technical Assistance and Support ..... 28
3
Minimum Requirement
Windows
PC:
IBM PC/AT compatible PC
Minimum Requirement
Operating System: Microsoft Windows 98/ 98SE/ Me/ 2000 Professional/
XP Professional,Home Edition
CPU:
Intel Pentium II class 333 MHz processor or faster
(Processor 500MHz or faster is recommended)
RAM:
128 MB or more (256 MB or more is recommended)
Hard drive space:
50 MB or more
Drive:
2x or faster CD-ROM, CD-R, CD-RW, DVD-ROM drive
Sound card:
Creative Labs Sound Blaster 16 or 100% compatible sound card
Browser:
Microsoft Internet Explorer 4.01 SP2 or later
Display:
800 x 600 pixels or more, 256 colors or more
USB port:
One or more free ports
Audio I/O terminals: Microphone input and earphone output or speaker
4
Macintosh
Power Mac G3 233 MHz class processor or faster
iMac/ iBook/ eMac/ Power Mac/ PowerBook
(The computer must support a standard USB port.)
Operating System:
Mac OS 9.0-9.2.2/10.1-10.3
RAM:
OS 9.x
64 MB or more (128 MB or more is recommended)
OS X
128 MB or more (256 MB or more is recommended)
Hard drive space:
50 MB or more
Drive:
2x or faster CD-ROM, CD-R, CD-RW, DVD-ROM drive
Display:
800 x 600 pixels or more, 256 colors or more
USB port:
One or more free ports
Minimum Requirement
PC:
Audio I/O terminals: Earphone output or speakers
.................................................................................................................................................................
Notes
• To use the voice recognition function with the recorder, use Windows 98SE or later versions of the OS.
• Macintosh version does not support voice recognition software.
5
Installing DSS Player Software
Be sure to confirm the following before installation:
• Exit all running applications.
• Eject the floppy disk if you are using one.
• If you are running Windows 2000/XP (Professional only) or Mac OS X on the network, you
need to log on as an Administrator.
* “DSS Player” in this manual refers to the DSS Player Pro Transcription Module.
Installing DSS Player Software
Windows
1
Insert Olympus DSS Player CD into
the CD-ROM drive.
The installation program will start
automatically.
If the installation program does not start
automatically, browse your CD-ROM drive
and execute “setup.exe”.
2
3
The installation Language Selection
dialog box appears.
4
Proceed with the installation
according to the instructions on the
screen.
Select the desired language.
Register user information.
Enter your name, company name, and
license ID number (serial number).
The license ID number is printed on the
license ID card included inside the
recorder package.
Click the [Next] button. When confirmation
dialog box appears, click the [Yes] button.
Macintosh
1
2
3
4
Insert Olympus DSS Player CD into
the CD-ROM drive.
Double-click the CD icon.
Select the folders named “Mac OS 9.x” and
“Mac OS X” and start up your OS.
Double-click the following icon.
Select the folder of which the language is
to be installed, and execute the installation
program in the folder.
Proceed with the installation
according to the instructions on the
screen.
.................................................................................................................................................................
Note
6
Never install DSS Player in Mac OS 9.x system, when using DSS Player with Mac OS X. The device connected
when using classic environment may not be recognized.
Uninstalling DSS Player Software
Windows
Exit DSS Player program.
Click the [start] button on the
taskbar.
1
2
Exit DSS Player.
3
Delete the Executable file.
4
Delete the Driver files.
5
Delete the Help file.
Select [Add/Remove programs]
from the [Control Panel].
A list of installed applications is displayed.
Select [Olympus DSS Player Pro],
then click the [Change/Remove]
button.
Proceed with the installation
according to the instructions on
the screen.
Delete the Preferences file.
Delete the [DSS Preference] file in the
following location.
(OS X)
Macintosh HD: User: Library: Preferences
(OS 9.x)
Macintosh HD: System Folder: Preferences
Uninstalling DSS Player Software
1
2
3
4
5
Macintosh
Delete the [DSS Player for Mac](OS 9.x)
/[DSS Player](OS X) file in the location
where you installed the file.
For OS X users, uninstalling has been
completed. For OS 9.x users, proceed to step 4.
Delete the following files in the following
location.
System Folder: Function Enhancement
[DSS 10USB Driver]
[DSS 10USB Shim]
[DSS 1USB Driver]
[DSS 1USB Shim]
[DSS FSUSB Driver]
[DSS FSUSB Shim]
[DSS USB Driver]
[DSS USB Shim]
Delete the [DSS Player for Mac Help] file
in the following location.
System Folder: Help
.................................................................................................................................................................
Note
Uninstallation does not erase the stored dictation files.
7
Using Online Help
For information on the DSS Player usage and features, refer to the online Help.
To start online Help:
Windows
Using Online Help
• Click the [start] button, then select [All Programs], [Olympus
DSS Player Pro], [Transcription Help].
• While DSS Player is running, select the [Help] menu,
[Contents] .
• While DSS Player is running, press F1 on the keyboard.
Macintosh
• While DSS Player is running, select [DSS Player for Mac
Help] (OS 9.x)/ [DSS Player Help] (OS X) from the [Help]
menu.
.................................................................................................................................................................
Note
Online Help is available after the DSS Player is installed.
8
Running DSS Player
To start the Transcription Module, follow these steps:
Windows
1
2
3
Start Windows.
Click the [start] button, then select [All
Programs].
All program menu will be displayed.
Select [Olympus DSS Player Pro], then
click [Transcription Module].
Running DSS Player
2
3
.................................................................................................................................................................
Notes
• If you connect the foot switch via the USB cable before installing DSS Player, the “Add New Hardware Wizard” dialog
box will open. If this happens, click [Cancel] to exit the wizard, then install DSS Player software.
• If you install DSS Player Pro, Device Detector that makes DSS Player run automatically when connecting Olympus
Digital Voice Recorder will be installed.Device Detector will always be displayed as
icon in the task tray.
9
Running DSS Player
Macintosh
1
2
Start your Macintosh.
Double-click the [DSS Player for
Mac] (OS 9.x)/[DSS Player] (OS X)
folder.
The DSS Player (for Mac) folder opens.
Running DSS Player
3
Double-click DSS Player.
4
Register user information (OS X).
2
DSS Player for Mac (OS 9.x)/DSS Player
Plus (OS X) launches.
For the OS X users: “The user ’s
registration screen” is displayed when first
launched.
The users registration screen will be
displayed at the time of initial startup.
Please input the serial number.
Please see the seal attached to the CDROM package included with the DSS
Player, for the serial number.
After the input has ended, click [OK] to
complete the registration.
3
................................................................................................................................................................
Note
The Mac version DSS Player does not have the automatic start function.
10
Connecting the RS25/RS26 Foot Switch
Windows
Macintosh
Connecting to a USB Port
1
2
Connect the foot switch cable to
the USB adapter cable.
1
Connect the USB adapter cable to
the PC’s USB port.
2
USB adapter
Windows
Connecting to a Serial Port
1
2
Connect the serial adapter cable to
the PC’s serial port.
Serial adapter
Foot switch setting
3
4
Start the DSS Player and select
“Foot Switch Settings” from the
“Tools” menu.
Select the foot switch connection
method and the function for each
of the three switches.
Connecting the RS25/RS26 Foot Switch
1
2
Connect the foot switch cable to
the serial adapter cable.
................................................................................................................................................................
Note
The RS25/RS26 foot switch works only with the DSS Player.
11
Connecting the E61 Headset
Connecting the E61 Headset
➔
The E61 is a stereo headset. When playing stereo sound, wear the set properly, observing the L
and R markings.
S T ERE
Plug the headset into the PC’s earphone terminal
.
.............................................................................................
Note
If your PC does not have a terminal marked with
headset into a terminal marked with
or
.
12
, plug the
O H EA D S E T E 6 1
Window Names
* Main screen is displayed
when DSS Player is started.
1
5
2
1
2
4
Window Names
Windows
3
Macintosh
1 Playback Control Bar
Control buttons to play and stop dictation files.
2 Transcriptionist Tree View
Displays the directory structure of the folders in
which dictation files and document files are
stored.
4 Device Tree View
Displays the directory structure of the folders in
the recorder.
5 Dictation List View
Displays the dictation files in the folder selected
in 2 and 5.
3 Dictation Tree View
Displays the directory structure of the folders in
which dictation files are stored.
13
Downloading Dictation Files
To save dictation files to DSS Player Pro Transcription Module, follow these steps.
Downloading a Dictation from with the Recorder
Windows
1
2
Macintosh
Connect the recorder.
For instruction on how to connect the recorder, check the recorder manual.
Click the [Download]
icon on the toolbar.
The dictation file is downloaded and saved to the corresponding folder in the Download Tray.
Downloading Dictation Files
Mapping to a Shared Folder on the Network
Windows
1
2
3
Right-click a folder in the Download Tray, and select
[Properties] from the drop down menu.
In the dialog box, click the [Move…] button, and
select a folder on the network.
Click the [OK] button to finish setting.
In the main screen, clicking the folder specified as the shared
folder displays the contents in the Dictation List View.
Macintosh
1
2
14
From the [Tools] menu, select [Options], and open
the [Folder] tab.
Set the Message folder as the shared folder on the
network.
3 2
Downloading a Dictation File Sent by E-mail or FTP
Windows
1
2
Create a Client Profile for E-mail or FTP.
For the profile settings, see P.18. For details. Follow the on screen instruction.
On the toolbar, click the [Send/Receive files]
icon.
The transcription module will automatically connect to your E-mail and FTP location specified
in the Client Profile. New dictation will be downloaded and saved into the Inbox folder in the
Transcriptionist Tree View by default. If a Client Profile is created and an alternate folder is
specified, the dictation will be saved to that folder (☞ P.18).
.............................................................................................................................................................................
DSS Player for Mac cannot directly receive a file sent by E-mail or FTP. When a dictation file is received with
other mail or FTP software, save the file with the software, and then download it to DSS Player for Mac using
the [Import File] command from the [File] menu.
Downloading Dictation Files
Note
15
Starting Transcription
Windows
Starting Transcription
1
2
3
Select the folder.
4
To end transcription, click the
in the Transcribe bar.
5
To complete transcription, select
[Finished].
Select the folder where the dictation file resides.
Select the dictation file.
Select the dictation file to play from the Dictation
List View.
On the toolbar, click the
button.
The transcribe bar will appears while the main
windows is hidden from view.
A word processing application or another program can
be set to start automatically. For setting, see P.17.
Playback of dictation file can be controlled with the
connected foot switch or the buttons on the
Transcribe bar.
3 1
2
4
button
The dialog box for setting the status of the
transcribed file appears.
The dictation will be moved to the [Finished] folder
in the Transcriptionist Tree View and the transcribed
document will be saved to the Documents folder.
5
The created document file is associated with the dictation file. When a folder in the Transcriptionist
Tree View is opened and any dictation file in the folder has an associated document file, the
document file is listed under the Document column.
.............................................................................................................................................................................
Notes
• When transcribing a dictation file sent by E-mail or FTP from the DSS Player Pro Dictation Module Release 4 or
later is completed, the created document file is automatically returned to the sender of the dictation file.
• With DSS Player for Mac, a word processor cannot be set to automatically run when replaying a selected
dictation file starts. After selecting a dictation file, control the foot switch to start transcribing.
16
Setting a Word Processor or Document Management
You can set a word processor or template file used for transcribing.This will run the set application
or file automatically when starting transcribing.
Windows
Setting a Word Processor
To set a word processor for transcription, follow these steps.
From the [Tools] menu, select [Options].
Select the [Send] tab, and set the word processor
software.
Click the [OK] button to save setting.
2
Setting a Document Management
The Document Management function allows the association of word processor template with
Author ID or Work Type ID. Create and save the templates to be used beforehand.
1
2
Check [Enable Document Management].
Configure the template as required.
A template can be set for each Work Type ID or Author ID.
Select Work Type ID or Author ID, and click the [Add] button.
In the Template Association dialog box, enter the Work Type/
Author ID, and select the desired template file.
1
2
Setting a Word Processor or Document Management
1
2
3
17
Receiving Dictation Files/Sending Document Files
Windows
The transcription module will automatically send the document to the dictation sender or to a
third party as specified in the Client Profile.This process can be automated by configuring the
DSS Player with the Client Profile information and the sending method.
Setting the E-mail/FTP Service
E-mail/FTP service needs to be set to send/receive files. See the E-mail/FTP service setting on P.21-28.
Setting the Client Profile
Receiving Dictation Files/Sending Document Files
If a Client Profile is created, destination folder for the dictation files can be specified. The transcribe
documents of the dictation file will be sent back to the sender or to an alternate E-mail address
or FTP location specified in the Client Profile.
1
2
From the [Tools] menu, select [Options],
then click the [Receive] tab in the Option
dialog box.
Click the [Create] button, and create a Client
Profile for each sender.
By creating Client Profile, received dictation files can
be sorted by sender, and the designation to send back
document files can be also specified.
Protocol
Select method of sending dictation files from the sender.
Dictation Sender
2
Select a sender. To do this, a E-mail or FTP Profiler must be already created for the protocol
selected on the [E-mail/FTP] tab (☞ P.21). Clicking the [Address Book] button opens the dialog
box to select a dictation sender.
18
Document Receiver
Specify the destination to send back document files. This
setting item is available when the function to send
documents is enabled on the [Send] tab (☞ P.20).
Enable Encryption/Decryption
Enter the password to decrypt when a received file is
encrypted.
Destination Folder
Select a default folder to save dictation files received from the
sender.
1
2
3
4
5
From the Transcriptionist Tree View, select the Documents folder.
Right-click the document file, select [Send File], and then select E-mail or
FTP for the sending method.
The Send dialog box appears.
In the dialog box for specifying the destination, enter the destination to send
the file.
In the Send dialog box, click the [Send] button.
The file is saved to the Outbox until the file transmission is actually carried out.
On the toolbar, click the [Send/Receive files]
button.
When the connection to the server is established, the file stored in the Outbox is sent.
Receiving Dictation Files/Sending Document Files
Manually Sending Document Files
.............................................................................................................................................................................
Note
When using E-mail and/or FTP for sending/receiving files, see P.18-26 to configure the settings.
19
Receiving Dictation Files/Sending Document Files
Automatically Receiving Dictation Files
Enabling this function allows the transcription module to
automatically check for new dictation files.
1
2
Receiving Dictation Files/Sending Document Files
20
From the [Tools] menu, select [Options],
then click the [Receive] tab in the Option
dialog box.
Check [Auto Receive], and enter the time
interval to attempt to receive dictation files.
2
Automatically Sending Document Files
1
2
3
From the [Tools] menu, select [Options],
then click the [Send] tab in the Option dialog
box.
2
Check [Automatically send documents
every], and enter the time interval to attempt
to send document files.
Check [Enable Document Management],
then check [Automatically place outgoing
transcribed document in the Outbox folder].
When dictation file transcription is complete, the
created document file is saved to the Outbox folder.
Files in the Outbox folder are automatically sent at
the specified interval.
Check “Send the document to the specified address
in Client Profile” to send the document to the alternate
address specified in the Document Reciever section
of the Client Profile instead of the sender address (☞
P.19).
3
Setting the E-mail/FTP Service
Windows
When using E-mail and/or FTP to retrieve dictation files attachments and/or send typed
documents, it is important to configure the E-mail/FTP service in the DSS Player to match that of
the E-mail/FTP program you have configured on your PC. Please consult with your system
administrator if you need help with setting your E-mail/FTP service.
1
2
From the DSS Player main window, click the
[Tools] menu, select [Options], then click the
[E-mail/FTP] tab.
Create a profile which specifies the destination.
When E-mail is used to send and/or receive files,
select the type of E-mail service used on your system.
Internet E-mail
Select when using E-mail, connecting to POP3 or
SMTP server via an internet service provider.
Corporate or Workgroup
Setting the E-mail/FTP Service
A profile must be created for each account to be
connected.
To create a profile, select the sending method, and
click the [Setting] button.
Select when using MAPI Compliant services such as
Microsoft Exchange, Lotus Notes or Group Wise. For
details on the setting procedure (☞ P.22).
3
Select a profile.
When the setting is complete, click the [OK] button to enable the setting.
21
Setting the E-mail/FTP Service
Setting Connection for the MAPI Compliant Service
1
2
Setting the E-mail/FTP Service
22
Click the [start] button of Windows OS, select [Settings], then [Control Panel].
The [Control Panel] appears.
Check whether the [Mail] or [Mail and Fax] icon
Panel.
is present in the Control
If the icon exists, the MAPI subsystem has already been installed on your computer. Go to the
“Activating Send Mail Function” section in this manual (☞ P.26).
If the icon does not exist, install the MAPI subsystem. The MAPI subsystem will be installed
when Microsoft Exchange Client, or Microsoft Outlook is installed.
Microsoft Outlook is included in the Microsoft Office.
Installing the MAPI Subsystem
Installing Microsoft Outlook 98
1
Start the Setup program for Outlook 98.
2
When the following window appears,
select [Corporate or Workgroup] and
click the [Next] button.
3
Follow the instructions on screen.
When the following window appears,
select [Other Mail Applications] and click
the [Next] button.
Installing Microsoft Outlook 2000
2
Select [Corporate or Workgroup]
and click the [Next] button.
When the following window appears, click
the [Next] button.
A dialog box for setting up Microsoft
Outlook appears.
This is the wizard for creating a profile.
For information on creating a profile, check
Step 3 in the “Activating Send Mail
Function” (☞ P.26).
Setting the E-mail/FTP Service
1
After installing Outlook 2000, start
the program.
3
23
Setting the E-mail/FTP Service
Installing Microsoft Outlook XP/2003
1
Setting the E-mail/FTP Service
24
After installing Outlook XP, doubleclick the [Mail] icon in the [Control
Panel], and then click the [Show
Profiles…] button.
2
Click the [Add…] button.
3
Type the profile name and click the
[OK] button.
4
Select “Add a new e-mail account”
and click the [Next] button.
5
Select your e-mail server type.
If you are going to use an MAPI compliant
Workgroup system such as Lotus Notes
or Novell GroupWise, select “Additional
Server Types”, click the [Next] button to
continue. If you are going to use an
internet standard E-mail account, select
“POP3” server, click the [Next] button, and
skip to Step 7.
6
Click the [Connection] tab in the following
dialog box and make sure the appropriate
connection method is selected.
If you select “Additional Server
Types”, you will see the following
dialog box.
Click the [Next] button and follow the
instructions on the screen, then skip to Step 8.
Enter the necessary information and click
the [More Settings…] button.
8
After the setup is completed, click
the [Tools] menu, select [Options],
then click the [E-mail/FTP] tab.
Select the MAPI profile name you
have created.
Setting the E-mail/FTP Service
7
If you select “POP3”, you will see
the following dialog box.
25
Setting the E-mail/FTP Service
Activating the Send Mail Function (Create a Profile)
Profile is a group of information services to set up the messaging application. The information
services allow you to access the Mailbox and the Address Book. The send mail function will not
work if there is no profile. If the profile exists and has already been used for sending e-mail, it is
not necessary to create a new profile.
Setting the E-mail/FTP Service
26
1
2
3
Start the DSS Player and click the [Tools] menu, select [Options].
4
Select [Use the following information
services] and check one application
from the list.
In the Option Setting dialog box, click the [E-mail/FTP] tab and select the
profile name you want to use.
Click the [Profile setting] button.
The Setup Wizard runs and will list the
messaging applications that comply with
MAPI. For example, if Groupware such as
Lotus Notes, Novell GroupWise, or
Microsoft Exchange is installed, these
applications will be listed.
If you want to set up a dialup connection
through an internet service provider, select
[Internet E-mail] in the list. If you want to
set up to use a LAN within your company,
also select [Internet E-mail] in the list.
Note
The send mail function does not work with
AOL or internet service providers that
cannot open POP3 server addresses.
5
6
Click the [Next] button and follow the instructions on the screen.
When the Wizard is complete, it returns to the profile in the Option Setting
dialog box.
Please make sure that the profile name you have created using the Setup Wizard is displayed
in the Option Setting dialog box. If a different profile name is displayed, switch to the profile
you have created.
Setting the E-mail/FTP Service
27
Technical Assistance and Support
AS-4000 is part of the Olympus Professional Dictation System. Your dealer is trained to
troubleshoot and fix many common problems that you may be having with this system. If you
encounter problems with use of AS-4000, we recommend that you contact your Olympus
Professional Dealer that sold you the system. If your dealer cannot fix your problem, please call
our technical hotline number or send an e-mail.
◆ Technical Hotline Number in the U.S. and Canada
1-888-553-4448
Technical Assistance and Support
28
◆ User Support E-mail address in the U.S. and Canada
[email protected]
◆ For detailed support please contact your authorized dealer.
◆ Contact e-mail address in Europe:
[email protected]
Shinjuku Monolith, 3-1 Nishi-Shinjuku 2-chome, Shinjuku-ku, Tokyo 163-0914, Japan. Tel. 03-3340-2111
Two Corporate Center Drive, PO BOX 9058 Melville, NY 11747-9058, U.S.A. Tel. 1-800-622-6372
(Premises/Goods delivery) Wendenstrasse 14-18, 20097 Hamburg, Germany. Tel. 040-237730
(Letters) Postfach 10 49 08. 20034 Hamburg. Germany.
2-8 Honduras Street, London EC1Y OTX, United Kingdom, Tel. 020-7253-2772
http://www.olympus.com
For customers in North and South America
Declaration of Conformity
Model Number:
Trade Name:
Responsible Party:
Address:
Telephone Number:
RS25
PC TRANSCRIPTION KIT
OLYMPUS IMAGING AMERICA INC.
2 Corporate Center Drive, PO BOX 9058 Melville, NY 11747-9058,
U.S.A.
800-622-6372
This device Complies with Part 15 of the FCC Rules. Operation is subject to the following two conditions:
(1) This device may not cause harmful interference, and (2) this device must accept any interference
received, including interference that may cause undesired operation.
Tested To Comply
With FCC Standards
FOR HOME OR OFFICE USE
Canadian RFI
This digital apparatus does not exceed the Class B limits for radio noise emissions from digital apparatus as
set out in the Radio Interference Regulations of the Canadian Department of Communications.
Cet appareil numérique ne dépasse pas les limites de Catégorie B pour les émissions de bruit radio émanant
d’appareils numériques, tel que prévu dans les Règlements sur l’Interférence Radio du Département Canadien
des Communications.
For customers in Europe
“CE” mark indicates that this product complies with the European requirements for safety, health,
environment and customer protection.
This symbol [crossed-out wheeled bin WEEE Annex IV] indicates separate collection of waste
electrical and electronic equipment in the EU countries. Please use for the disposal of these types
of equipment with the available return and collection systems.
Applicable Product : Foot Switch
P2-BZ8032-02
AP0503