1
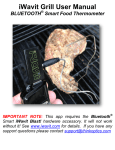
iWavit TV Pro User Manual 2-in-1 TV Listing & Remote Control IMPORTANT NOTE: This app requires the Apple-certified “iWavit Basic” or “iWavit Premium” hardware accessory, or the latest Bluetooth® Smart “iWavit Blast!”. It will not work without them! See www.iwavit.com for details. If you have any support questions please contact [email protected] TABLE OF CONTENTS (Tap Section to jump to it) 1. Introduction 2. An Interactive TV Guide 3. Four reasons for this app 4. Set-up 5. More Features 6. Other Buttons 7. Useful iWavit Links 8. The iWavit Hardware INTRODUCTION Congratulations on your iWavit™ purchase. The iWavit TV Pro app is a 2-in-1 TV Listing and Remote Control app that works together with your iWavit hardware to turn your iPhone, iPad or iPod touch into: 1. A Universal IR Learning Remote, and 2. An interactive TV Channel Guide You can use it together with the iWavit Basic, iWavit Premium or iWavit Blast! products. Focussing first on the iWavit Premium and Basic, they both come with an iWavit Attachment. Plug it into your iDevice and you iWavit Virtual Remote will be able to control your TV and your set-top box much like you would with any normal Universal IR learning remote control. The iWavit Blast! is very similar, but it does not require the iWavit Attachment. Instead it uses the Bluetooth® 4.0 RF technology in the newer iPhone/iPad/iPod models to communicate to a Bluetooth® Smart iWavit USB dongle which has an IR blaster. (see www.thinkoptics.com for more details about all iWavit hardware) When you launch this app, it will show you a “virtual remote” which you can use to control your TV, Home Theater system, and Cable box. You will even be able to learn IR codes from your old remotes. This app will also display a live TV guide that will display a real-time TV listing for your specific zip code and TV Service (for example, Comcast Digital Cable in San Jose, California). It will update automatically as time goes by. The really exciting "magic" happens when these two features are combined. Now you can select a TV Show in the TV Listings screen and the app will automatically change the channel on your TV or cable/satellite box. It is The interactive TV listing essentially a reinvention of the old Newspaper TV channel guide. This app and the iWavit hardware works for ALL TV brands and ALL TV services (Cable, dish, broadcast over-the-air) in the United States. The one-time setup is simple and takes only a few seconds. As we mentioned, the iWavit Blast! model does not require an attachment. Instead, when you press a button on your iPhone, it sends an RF signal from the iPhone to the iWavit Blast! USB dongle which in turn blasts a powerful IR signals to control your TV or Cable/SAT box, as shown above. The iWavit Premium also has an additional iWavit USB Blaster, but this one does need the iWavit Attachment. This is because it uses a different Zigbee RF radio built into the iWavit Premium hardware. The advantage of this is that it works with older versions of iPhones that do not have a Bluetooth® 4.0 Radio. AN INTERACTIVE TV GUIDE (TOP) Understanding what happens behind the scenes is very simple. When you browse your TV listing in this app and find a TV show you want to watch, like "Speed 2” on HBO channel 801 on Comcast, you just tap that listing. The app will then send a command to your iWavit hardware to blast the series of Infrared (IR) signals corresponding to you manually pressing numbers 8-0-1 on your old remote control. So from your perspective, you simply browse your TV listings on your iPad/iPhone and tap the TV Show you want to watch, and your TV will automatically change to that channel. You can further select to limit your TV channel list to your favorite channels or to most watched channels, or to see a history of channels you have been watching (ex: “how do I get back to the show I watched before this darn commercial made me channel-jump?”. You can also get more detailed information on each TV Show, with star rating, description, and online links to more information about the movie and its actors. FOUR REASONS TO USE THIS APP (TOP) There are 4 key reasons why you want the iWavit and this app: 1. Save money You already pay $$$$$ for your TV subscription. Now you can get the most out of it. Granted, it is great to have a DVR to be able to record shows and skip commercials, but many of us are not that organized or we just want the freedom to roam the channels. Also, in order to record a show you have to know what is on, and one of the most expedient ways to do THAT is through channel surfing. With hundreds of shows to choose from, you can now make sure you don’t miss out on anything important. With a few flicks of your finger you can scan all your TV channels for anything interesting to watch. 2. Save Time Channel Surfing with the iWavit TV Pro app is FAST. The app will download the list of all the TV shows that are on right now on your TV and you can quickly scan this list for anything you like. No more having to tap the remote control GUIDE button, then press the remote control arrow keys to painstakingly slow crawl through the on-screen TV guide. 3. Be a crowd pleaser When you scan the TV listings on your iWavit TV Pro app, you can do it discretely while you and your family can continue to watch your current TV show unobstructed on the big screen TV. There is no need to block most of the TV screen with the on-screen TV guide while you hunt for something better to watch. 4. More Control The Virtual Remote will allow you to reprogram specific buttons so you can control multiple devices in your home. Moreover, if you want even more control you can download and use the iWavit Tabula Rasa app, which will allow you to create your own remotes and even share them online. One more added bonus of the iWavit TV Pro app is that it is very fast to set up, so you can bring the iWavit with you to your visits to friends, relatives, and even hotel rooms, and be up and running in seconds. SET-UP (TOP) For all this to work properly, you will need to make sure this app has the right settings. The first time you use this app it will lead you through the initial set-up but you can always repeat it by going to Settings and selecting Restart Setup. Starting with the TV Listing, you will be asked to specify your location by entering your Zip Code (or simply have the iPhone automatically determine it for you). You will then be presented with a list of different TV Service Providers in your area, like Comcast, Dish, DirecTV, or ATSC Broadcast (for over-the-air digital TV). Select the one you have in your home. Your TV Listing (a.k.a. TV guide) is now configured. You only need do this once. This online TV listing is being provided by our partner TitanTV. Use the Wizard to set up your Remote Next, you will need to set up your Virtual Remote Control. There are a two different ways to do this. The simplest approach is to use the "Remote Wizard". The Wizard will ask you what type of TV or set-top box you want to control when you change channels. Once you select one, such as Comcast box or Sony LCD TV or even your PC, you will be presented with a list of different Remote Control options. All or some of these may work. To figure out which one will work for you, tap the "Test" button right next to the name. This will send out the Power ON/OFF signal to your TV or set-top box. Make sure to have the iWavit attached and pointed at your TV when you press this button. If your TV (or set-top box) powers on/off when you press this button, it is very likely that this is your remote. (NOTE: More than one Remote may work). Select the remote that appears to work the best. You have now configured your Remote Control with the Wizard. You can always re-launch the Remote Wizard by going to Settings>Remote Wizard and it will overwrite your current remote control. The extensive library of IR codes if being provided by our partner Remotec Inc. The other way to make sure you have the right IR codes in your Virtual Remote Control, is to skip the Wizard and instead go directly to the Remote Control screen. Here you can re-learn any of the IR codes for buttons individually from your old remote control. To do this you hold down the "p-button" on the remote control screen at the same time as you tap the button you want to re-learn. You will now be guided through how to learn an IR button. Check out this link for some video help with IR learning: http://www.thinkoptics.com/iWavitTVaid_IRlearning.mov. (NOTE: IR Learning requires the iWavit Attachment) To see a short demo of the iWavit TV Pro app in action, go to this link: http://www.thinkoptics.com/iWavitTVaid_Demo.mov The main buttons which NEED to be working on the IR Remote Control are the NUMBER buttons. As long as they are there, changing channels should work. In fact, if you have any problems changing channels from the TV Listing screen, go to the "Remote" screen and make sure that you can change the channels from here first. NOTE: At this time, the Remote Wizard does not include the "." or "-" IR Codes. This only matters if you are trying to watch TV using a digital TV antenna where you will see channels like "7.1" or "65.4". In this case, you WILL need to use the manual approach outlined above for this button only, until it gets added to our database. MORE FEATURES (TOP) The iPad and iPhone versions of this app are slightly different in the way that information is displayed, but apart from that their features are identical. For example, with the iPhone version of iWavit TV Pro, you will navigate between different screens using the Tab bar at the bottom of the screen. There is also a menu bar at the top of the screen that can be used to make further selections. For the iPad, almost everything is contained on a single screen. The selections are made using the Top Menu bar as shown here. The TV Listing screen will allow you to scroll up/down to select different channels. By default, it will display a list of TV shows that are on at the current time, but you can also go back and forth in time. The TV listings may turn red if you do this. This will indicate that the TV shows are in the future or the past and are not directly accessible. You can still press the channel to go there, but it will obviously change to what is currently being shown on that channel. You can also sort your channels into different categories. Swipe to rotate the 3D Remote on the iPhone. Pinch-to-zoom the Remote on the iPad For example, it is easy to add or remove channels from your "Favorites" list by tapping on the "heart" icon above the channel number. You can then filter your channel list by "Favorites" by selecting from the pull-down menu in the upper right of the screen. You can also filter channels by "most recent" which gives you a history of your last viewed channels, and by "My Top 10" to see your most commonly viewed channels. It is also important to note that on the iPhone and iPod touch, the virtual remote control is a 3D rotating remote with 4 screens. Slide you finger right-left to swipe between the different screens. Tap the TV listing icon to switch back to the channel guide view. On the iPad the screen is much bigger and the TV listing can be displayed on the left side of the screen while the remote control is shown on the right side of the screen. On the iPad you can pinch-zoom the remote to zoom in on it. The buttons then become larger and easier to hit. When viewing the TV listing you can tap the central portion of the button to immediately switch channels on your TV, or can tap the numbers on the right to quickly jump to the channel number range you are interested in. You can also tap the More Info button on the right to get a screen with more information about the show. The main “TV listing” screen is a fast way to get an overview of your TV channel content, while the “More Info” screen allows you to do a deep dive into each specific TV show. Select the info button to display more information about the TV Show. On the iPad, the info can be shown in quarter-screen or half-screen mode. You can scroll this screen up-down. The icons are also direct hyperlinks to even more info. From here you can scroll up-down to read a full description of each show, and if it is a movie you will also see an additional tomato rating and movie poster, courtesy of Rotten Tomatoes* online reviews. *Rotten Tomatoes and the Certified Fresh Logo are trademarks or registered trademarks of Flixster, Inc. in the United States and other countries. We do not imply any affiliation, sponsorship, endorsement, or other false association with Flixter, apart from their agreeing to allow ThinkOptics to use their API to show links to their online reviews. There are several active internet links you can select as well if you want even more information about the TV show or the actors. For example, tap on the IMDb link to take you to the IMDb website for this show, and similarly for Google, Wikepedia, Rotten Tomatoes, and YouTube. You can of course tap the “Watch now” button to change your channel. There are a few more important features to note about this app. The most important is that there is a button called "IR Blast". If there is a red X over this button, it means that you do not have the iWavit Attachment properly connected or you have not connected to the Bluetooth® Smart iWavit Blast!. Make sure that the red X is gone (You will hear a hear a gun-loading sound when the iWavit connected). When you press the "IR Blast" button you will get the option to blast the IR light from the iWavit Attachment connected to your iPhone, or from the (optional) iWavit USB dongle & Lightbar which is part of the iWavit Premium Kit. If you have an iDevice that supports Bluetooth 4.0 RF Technology you will also get the option to connect to any iWavit Blast! devices within RF range. The iWavit USB dongle & IR Lightbar are a simple yet powerful addition to your remote control. Plug the USB dongle into any powered USB socket (this could be a PC or a USB charger or the USB port on your TV), and it is ready to use. If you plug it into a PC you will also be able to control the PC via RF commands as if you just plugged in a wireless keyboard and mouse. There is no need to install any software on the PC. There is also no need to have Bluetooth passwords or to mess with any WIFI. The RF range is over 100 meters (300 feet). Use the IR Blast selector to choose which iWavit Device to control. You can blast IR signals from your attached iWavit or remotely from the USB dongle. If you have multiple iWavit devices, you can also rename them here for your convenience. The USB dongle and IR Lightbar act like a Wireless RF-toIR Extender. Why use the Lightbar? There are two good reasons: 1. IR Range: The IR Lightbar is about 10x more powerful than a normal remote control so it will be able to control almost any IR device that is in the same room, 2. RF Range: The iPhone can be ~300ft away from the iWavit USB dongle and still be able to control the USB dongle & Lightbar. The Lightbar is a must-have for people who have their A/V equipment inside a cabinet, or who just don't want to have to point at the device they are controlling and want some freedom to roam around. Furthermore, if you want still more IR power, you can purchase extra IR Lightbars and connect them together with a 2.5mm stereo splitter. This can also be helpful if you want to control IR equipment inside of cabinets while at the same time blasting IR into the room. You can chain many IR Lightbars together to achieve ungodly IR blasting power. However, if you do this make sure that your USB power supply can source the required current which is about 100mA/Lightbar, otherwise adding extra Lightbars will not improve your IR output. For reference, a normal PC USB port can source 500mA whereas an iPad charger can source 2000mA. See this link for more on the IR Extender options. OTHER BUTTONS (TOP) Finally, there are two buttons on the app that will launch different iWavit apps. The first one is the HOME button . Pressing the HOME button will take you to the app called iWavit Flow if it is installed, or it will prompt you to install it if you do not have it. iWavit Flow provides a convenient cover-flow way to navigate between all iWavit apps, whether they are installed on your iPhone or you just want to browse iWavit apps that are available on the App Store. The other button is the Tabula Rasa app link. This button will launch the iWavit Tabula Rasa app. This is a must-have app for anyone who has the iWavit hardware. With this app you can create your own custom remote controls. USEFUL iWAVIT LINKS (TOP) If you have any questions or just want to learn more about the iWavit, then try tapping on these helpful links. For example, contact us at [email protected] or visit our iWavit Forum to participate in discussions. THE iWAVIT HARDWARE (TOP) iWavit™ is an Apple-certified accessory that adds new hardware capabilities to Apple’s platform of iPod, iPhone and iPad devices. The iWavit currently comes in three flavors. 1. iWavit Basic 2012 2. iWavit Premium 2012 3. iWavit Blast! iWavit Basic 2012 consists of the iWavit Attachment which plugs into the iPhone/iPad. It will allow you to turn your iDevice into a Universal IR learning remote. iWavit Premium 2012 consist of the iWavit Attachment in addition to the iWavit USB dongle & IR Lightbar. The USB dongle enables plug & play control of any Computer that the USB dongle is plugged into. This control includes the patented DirectPointing mouse cursor control. Moreover, the USB dongle is also a wireless RF-to-IR extender which can increase the range of IR control to over 300 feet and allow for multi-room control. To be specific, the iWavit hardware includes: An IR emitter for sending IR signals and controlling TVs and DVD, An IR detector for learning IR codes from real IR remotes, A patented optical motion-sensing module, which allows for precise and absolute tracking of the iPhone's position and orientation in 3D space, making it ideal for use as a DirectPointing 3D air mouse for PCs and Macs. A wireless PC microphone for controlling a PC or Mac via voice commands, or simply for making VOIP calls on your PC. (This is separate from the iPhone's microphone) Wireless 2.4GHz Plug & Play USB dongle for controlling PC/Mac/Linux machines. Simply plug it in, and you are ready to go. It is like plugging in a wireless HID keyboard and mouse. No software installation is required on the PC! The iWavit Blast! is a new addition to the iWavit family. It is a Bluetooth® Smart USB Dongle. The iWavit Blast! is most similar to the iWavit Premium in that it is a powerful Remote IR Blaster and give you direct wireless control of almost any PC/Mac/Linux or PS3 system. However, unlike the iWavit Premium, the iWavit Blast! does NOT require any iWavit Attachment to be plugged into the iDevice. It communicates directly with the Bluetooth 4.0 radios that are in the latest generation iPhone 4S, iPhone 5, iPad (3rd and 4 gen.), iPod touch (5th gen) and iPad mini. Moreover, we have expanded the functionality a bit and will be adding new hardware options via the 2.5mm jack. The first of these new modules is the Temperature Probe that can turn your iPhone into a wireless food thermometer. So what does the iWavit Blast NOT do? It is not compatible with older generation iDevices that do not have a Bluetooth 4.0 RF radio. Also, it does not have IR learning built-in, and does not have a wireless microphone. Finally, while it can act as a wireless TrackPad and PC keyboard, it does not offer the directpointing 3D mouse features of the iWavit Premium. So in summary, get the iWavit product that best suits your needs, or if you are in doubt get all three. There is a lot of hardware packed into the small iWavit. Use iWavit TV Pro, Tabula Rasa and other iWavit apps to unlock the full potential. Note: iWavit TV Pro is a more full-featured version of the FREE iWavit TV Aid app. It adds more detailed program information and is ad-free.