1
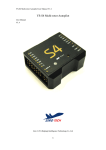
YS-X6 Multi-Rotor Autopilot
User Manual V 2.0
Revised on May 20th, 2013
www.zerouav.net
Copyright(C)2012ZeroUAV
1
All Rights Reserved
YS-X6 Profile
YS-X6 autopilot is a tremendous flight system for multi-rotors Supporting
Android/Apple IOS and PC system and providing excellent auto-navigation,
target lock, self-leveling and position/altitude holding. It is designed for both
professional and hobby applications in commercial and industrial platform, can
be installed easily in various common aircraft types from Quad-rotor to
Octo-rotor(Including common Customize Motor Mixer) and supports most
common third-party commercial ESCs. YS-X6 adopts ARM+FPGA classic
structure,
integrates
high-precision
sensor
elements,
applys
advanced
temperature compensation arithmetic and industrial attitude arithmetic,
400MHz refresh frequency as well, to make the system more stable, efficient
and realiable.
Warning and Declaimer
1. The manual contains information about installation, debugging,and how to
use the product. Please read it thoroughly before using the product.
2. Zero UAV (Beijing) Intelligence Technology Co. Ltd. assumes no liability for
damage(s) or injuries incurred directly or indirectly from the use of it.
3. Please keep far away from the crowd, children and property when using the
product.
4. When any of the following events or incidents has taken placed, we will not
offer any warranty and service:
(1) The product has been repaired, modified, or any parts of the product
have been substituted or replaced by anyone not expressly authorized
by Zero UAV.
(2) The warranty card, the serial number of the hardware and the flight data
or any of these items is lost.
(3) Damaged caused by use's faults such as attempting wiring not in
accordance with the manual, which may cause short circuit.
Copyright(C)2012ZeroUAV
2
All Rights Reserved
Safety Precautions
For safety reason, please pay serious attention to following items:
1.
Please remove all propellers during configuration and setup.
2.
The side marked "IMU" of the IMU faces up. The arrow points to the aircraft
head.
3.
Make sure switch on the RC transmitter first then power on multi-rotor
before takeoff! Power off multi-rotor first, then switch off RC transmitter
after landing. Pay special attention to it when using the S-BUS or
self-adaptive feature of the autopilot.
4.
Throttle calibration, manual rudder position, realtime rudder position,
channels setup must be accurate.
5.
GPS+COMPASS is sensitive to magnetic interference, should be far away
from any electronic devices. The arrowhead points to the aircraft head.
6.
Please enable F/S function of RC transmitter before takeoff.
7.
Do not fly in GPS mode when the signal is not good (red light blinks) or the
"GPS Velx (cm)" & "GPS Vely (cm)" in GCS is more than 15cm/s.
8.
The Gimbal Servo can be supplied power from any ESC, but if ESC has no
BEC output, please add extra power but not use the power supplied from
Autopilot.
9.
In auto Go Home mode, the two ways can stop motors : Make throttle stick
under 10%; Click "Diable Engine” in "Control" of GCS. The above two ways
can not stop motors when in other Flight Mode.
10. The low voltage Alert is NOT fun. You should land your multi-rotor ASAP
when the Alert remind you to prevent your multi-rotor from crash or any
other harmful consequences.
11. Please don’t takeoff when the “Vibrate state” in GCS displays a high value.
12. Must check the “Course Angle” and” Magnetic Declin” value in GCS are
correct after compass magnetic calibration.
13. Must check the “Attitude Angle” and“Static Angle” in GCS are correct before
Copyright(C)2012ZeroUAV
3
All Rights Reserved
takeoff.
14. Please pay special attention to the wire connection of
GPS/COMPASS , IMU
and MC. Wrong wire connection will result in short-circuit and may smoke
your devices.
15. Anti-plug Design is NOT fun, please don’t try.
16. In some strong magnetic field, if "Course Angle" value displays different
from real rotational angle, please recalibrate the compass magnetic before
takeoff.
17. The RC receiver is enabled in default, please check your RC transmitter
before takeoff.
Copyright(C)2012ZeroUAV
4
All Rights Reserved
In-Box
■Hardware
●Software(Download)
Electronic Device
■Main Controller (MC X1)
The Main Controller (MC) is the brain of the system, it communicates with
the IMU, GPS/Compass,ESC’s and RC transmitter to carry out autopilot
functionality. The Main Controller has a USB interface for configuration and
firmware updates via a PC.
■ IMU X1 (Inertial measurement unit)
The
Inertial
Measurement
Unit
(IMU)
consists
of
accelerometer, one 3-axis gyroscope and a barometer.
one
It is
3-axis
used
for sensing the attitude
■GPS +Compass X1
It is for locating and sensing direction.
■LED Indicator X1
It is for indicating current flight states via blinking in different colours.
■WIFI X1 (Data link can be added to extent range)
1 It is for communicating with the hot spot of Phone/Tablet.
2 It is for data communication by building up AP (Wireless Network).
Accessory
Copyright(C)2012ZeroUAV
5
All Rights Reserved
■GPS BracketX1
GPS/Compass is sensitive to magnetic interference, please use this bracket to
mount GPS module.
■3-PIN Servo Cable X8
Used to connect MC to RC Receiver.
■Sticker Paper X1 & Cable Label Paper X1
Used to mark different electronic devices and cables.
■USB Cable X1
Used for connecting PC to MC and firmware upgrade.
■Warranty Information Card X1
It provides Product Serial No., Purchase Date. Please fill out related information
and return back to Zero UAV for registering your product warranty.
Software (Download on website)
●GS Software for Android System
●GS Software for PC Windows XP/7/SP3 system
●Firmware Program on PC.
●Firmware updating assistant.
Copyright(C)2012ZeroUAV
6
All Rights Reserved
Table of contents
................................................................................................................................. 8
1 Assembly
Assembly.................................................................................................................................
......................................................................................................... 10
2 WIFI Configuration
Configuration.........................................................................................................
............................................................................................ 13
3. Installation Guide (GCS)
(GCS)............................................................................................
......................................................................................
16
4 Magnetic Course Calibration
Calibration......................................................................................
......................................................................................16
.....................................................................................................................
19
5 Control Modes
Modes.....................................................................................................................
.....................................................................................................................19
....................................................................................................................... 21
6 Aircraft Type
Type.......................................................................................................................
......................................................................
24
7 motor start, motor-cut and Failsafe
Failsafe......................................................................
......................................................................24
8 Phone Control
.....................................................................................................................
26
Control.....................................................................................................................
.....................................................................................................................26
........................................................................................................................................
29
9 Flight
light........................................................................................................................................
........................................................................................................................................29
..........................................................................................................
29
9.1 Motor Arming
Arming..........................................................................................................
..........................................................................................................29
......................................................................................... 29
9.2 Oscillate and Wobble
Wobble.........................................................................................
.......................................................................................
30
9.3 manual servo position
position.......................................................................................
.......................................................................................30
.................................................................... 30
9.4 Auto-takeoff and Auto-landing
Auto-landing....................................................................
.............................................................................................. 32
9.5 Click & Fly to point
point..............................................................................................
.............................................................................................................. 32
9.6 Target Lock
Lock..............................................................................................................
..................................................................................................
33
9.7 Waypoints Flying
Flying..................................................................................................
..................................................................................................33
..................................................................................................................
36
9.8 Follow Me
Me..................................................................................................................
..................................................................................................................36
9.9 Care free
....................................................................................................................
36
free....................................................................................................................
....................................................................................................................36
——
Blackbox
...............................................................................
37
9.10 Data record
record——
——Blackbox
Blackbox...............................................................................
...............................................................................37
............................................................................................................
37
10 Parameter Setup
Setup............................................................................................................
............................................................................................................37
......................................................................................... 40
11 Gimbal & Camera Control
Control.........................................................................................
1)Common
Common servo driving gimbal
................................................................... 41
(1
gimbal...................................................................
2)Zero-Steadi470
Zero-Steadi470
................................................................................................... 41
(2
Zero-Steadi470...................................................................................................
3)Brushless
Brushless Motor driving gimbal
................................................................ 42
(3
gimbal................................................................
4)Camera
Camera and shutter control
........................................................................ 42
(4
control........................................................................
................................................................................... 43
12 Power Management module
module...................................................................................
........................................................................................................................
43
13
Data Link
Link........................................................................................................................
........................................................................................................................43
14 Joystick
................................................................................................................................
45
Joystick................................................................................................................................
................................................................................................................................45
............................................................................................... 47
15 Multi-rotor Wobble Fix
Fix...............................................................................................
........................................................................................................ 49
16 Firmware Upgrade
Upgrade........................................................................................................
......................................................................................... 52
Appendix 1: LED Description
escription.........................................................................................
..........................................................................................
54
Appendix2: Port Description
Description..........................................................................................
..........................................................................................54
................................................................
56
Appendix 3: GCS Interface Introduction
Introduction................................................................
................................................................56
Copyright(C)2012ZeroUAV
7
All Rights Reserved
1 Assembly
Copyright(C)2012ZeroUAV
All 8Rights Reserved
• The power supply range of MC (Autopilot) and WIFI both are 3s~6s lipo(Power
remains a little), i.e.10.8V~25.5V. MC provides 5.7V power to RC receiver
automatically, no need to add any out-built power module. With proper
assembly and powered on, the autopilot will complete initialization in few
seconds and LED light starts to blink in red for three times in cycle
which
indicating the assembly is proper and FC has been motivated successfully. Refer
to Appendix 1 for details of LED description.
•If blue or green Led blinks after “red LED blinks for 3 times”, it indicates FC is
not in manual mode because the Tx is not configured or CH5 is not set to
position1. Then adjusting CH5 to position1 can make "the light blinks in red for
three times".
• The above "the light blinks in red for three times" is a sign to check whether all
hardware are working normally or not, all data communication is based on this.
After powering if no "the light blinks in red for three times", please contact Zero
UAV or local distributors.
Please check out the assembly carefully referring to the figure above before
powering on FC, any wrong connection of IMU or GPS may result in burning out
the devices!
• ESC and motors will produce serious magnetic interference during moving, so
make sure GPS & magnetic sensor module are installed by nonferrous to keep
them far away from motor and ESC (especially there are multiple ESCs), and the
arrow is towards aircraft nose. Otherwise, the aircraft will fly circling around and
incorrectly hover. As there are rich eletric current in the batterywire which can
produce magnetic field, be sure place the batterywire far away from GPS and
magnetic sensor module, otherwise the craft will fly in circle in GPS mode.
•
When using gimbal, user need to power on the servo. Just leave one ESC
powered on if ESCs come with bec function and others’ powered off. Connect
servo power to any one port of the M1~M8 if ESCs come without bec function.
Copyright(C)2012ZeroUAV
9
All Rights Reserved
When using video transmission, must keep the video transmission away from
IMU as far as possible, otherwise there will be serious magnetic interference!
2 WIFI Configuration
STEP1: Download YS-GCS.
It must be installed to the Mobile memory card. Android system can be installed
automatically via running file installation once in the file manager. Apple system
can be installed after APP jailbreak, please refer to” Apple Installation
Instructions”
STEP2: WIFI Communication
Two communication modes, <Router Mode> and <PTP(Point-to-Point) Mode>,
are available of WIFI module. The default communication mode is <Router
Mode>, both the SSID and password of WIFI are marked on the back side of
warranty card.
Users can configurate different modes by self referring to the Video and
download the [WIFI Configuration software]: http://youtu.be/9FgLQhFIkTk.
PTP(Point-to-Point) Mode
Copyright(C)2012ZeroUAV
10
All Rights Reserved
In PTP mode, Mobile and WIFI communicates directly and no need to prepare
extra router.
(1)
After WIFI works, search and communicate with the wireless network
named “ZERO-TECH”. The LED on WIFI module blinks before data
communicated, but be solid when data communication.
(2)
Enable
GCS,
the
data will
display there
if WIFI and
network
communicated. But if your mobile is not compatible with PTP mode,
please configurate the WIFI module to <Router Mode> referring to
regarding video http://youtu.be/9FgLQhFIkTk.
Router Mode
(1)Please prepare extra wireless router to build up AP.
Copyright(C)2012ZeroUAV
11
All Rights Reserved
(2)Setup the router as below:
SSID: "ZERO-TECH" (Note: The letters must be in Capital)
Password: 82890430
Encryption Method: WPA2-PSK AES
IP : 192.168.1.1
(3) Power on FC.The LED on WIFI module blinks before data communicated, but
be solid when data communication.
(4)Enable the Wlan on Mobile phone/ Tablet to communicate with router.
Tips
1 All the flight data can be saved to the files as following after data
communicated.
To Android:
In the file named “ T+ XX(Flying Time)”, which saved in folder “Yshj” under the
root directory of Phone/Tablet
To Apple:
In the folder /private/var/mobile/documents/yswifi
3 The files can be used for data analysis through the Replay Tool on PC.
Copyright(C)2012ZeroUAV
12
All Rights Reserved
3. Installation Guide (GCS)
Follow the steps below showing in “ Installation Guide” of GCS “Settings” section
to setup after data communication. (If the data is uncommunicated, please read
the above two chapter carefully)
.
(1)Tx alignment
(Make sure to cut off power battery or remove the propellers before alignment)
Set your Tx into Aeroplane mode and Do not set any mix-control. Do not set
any channel inverted for FUTABA transmitter, but make sure set all channels
inverted for Jr and WFLY transmitter.
Press button “Channel Alignment”, then Ok. Within 5 seconds, push every sticks
to the top, bottom,leftmost and rightmost. YS-X6 will complete reading the data
automatically beyond 5 seconds.
Then observe the diagram of Manual Servo Position on GCS user interface to
check whether it is the same as the real Tx operation, if same the Tx operation
is correct, if not same please set Tx channel to be inverted.
On the left side of the diagram means sticks of Rudder&Elevator, on the right are
Aileron&Throttle. A yellow mark may display there at the base if the throttle
stick placed in the min. position.
Copyright(C)2012ZeroUAV
13
All Rights Reserved
(2) CH5&CH6 check, Fail/Safe Setup
Set CH5&Ch6 to Position1 ensuring flight status is “manual” in Data section.
Setup the F/S of Tx referring to the instructions from manufacturer making sure
flight status is “Returning&Landing” in Data section.
(3)ESC stroke calibration (skip this section for some special ESCs with no need
to calibrate)
Now take HobbyWing ESC for an example:
A. only power on flight controller, push throttle stick in the min. Position, CH5 to
position1, click “Enter setup” in Setting section(GCS), keep motor armed over
0.1 sec. when screen up. Then push full throttle, connect power
battery.(remove the propellers).
B. Push the throttle stick in the Min. position if hearing the alert “B-B” from ESC,
it indicates the ESC stroke is completed when hearing “B-B-B-B……” (related to
battery cell number).
C. Click “Quit Setup” in Setting section(GCS), then OK when screen up.
Setup Aircraft type and parameter gains. Fill in local magnetic declination (to
West is positive, to East is negative). Select correct type of craft referring to
Chapter6 in this manual.
(4) Magnetic declination
Make sure to fill in the correct magnetic declination which only remains integer
without decimals referring to the below website.
http://magnetic-declination.com
http://www.ngdc.noaa.gov/geomagmodels/struts/calcDeclination
Precaution:For magnetic declination, west is negative and east is positive on the
magnetic declination website abroad, however, as for YS-X6 it is positive to west
and negative to east since the magnetic declination is to west in most regions of
China. Make sure to distinguish the difference.
Or click on the following link, software of download declination query.
http://www.zerouav.net/site_mag/UpLoads/GetMagnetic.rar
Copyright(C)2012ZeroUAV
14
All Rights Reserved
User in the case of the PC connected to the Internet, open the software, click
on the "Map" or "Satellite", then press
The software prompts Right click on the map area, you can get the longitude
and latitude in the size of the magnetic declination.
(5) IMU & GPS mounting orientation
Make sure not only the arrow marked on the printed surface of the IMU&GPS
faces the sky and points directly forward, also the GPS module is firmly fixed to
the plate.
(6)Test fly
Push throttle up to check out ensuring mix-control and motor spin are correct.
Then start to fly manually. You can switch to GPS mode If the copter managed
to fly in manual. Do not enable GPS mode before the magnetic compass
calibration outdoors.
Copyright(C)2012ZeroUAV
15
All Rights Reserved
4 Magnetic Course Calibration
There is no need to calibrate the magnetic course in manual mode, and the
[Course Angle] in data page of GCS will keep displaying as 0. But in GPS mode ,
the magnetic course calibration must be finished before take-off. Ferromagnetic
substances placed on multi-rotor or around its working environment will affect
the reading of earth magnetic for digital compass, it also reduces the accuracy
of the multi-rotor control, or even reads incorrect heading. Calibration will
eliminate such influences, and ensure MC system performs well in a non-ideal
magnetic environment. The magnetic data will display once after calibration and
be saved to the autopilot.
Notice:
Only changed to GPS mode, the actual course angle will display in [Course Angle]
in data page of GCS.
1 Calibration in horizontal:
STEP
TEP1
1 Click the button below in Setting section of GCS to get Compass Calibration
screen up.
2 Select Horizon calibration->Ok, then start calibration if the Word
“succeful” which indicates FC gets the calibration command displays in the text
bar. Redo the procedure if there is no word display there.
3 then hold Multirotor level and get the blue LED light on. Now turn slowly
clockwise 2-3 times in one spot ensuring the light remains on at all times.
Or you can ask a helper to monitor the data moving in “Attitude Angle” of GCS
Data section to make sure the value of Pitch and Roll both maintain
within 3 degree.
It indicates the attitude is good if LED remains on, but oversize if LED off.
STEP2 Calibration in vertical:
Copyright(C)2012ZeroUAV
16
All Rights Reserved
Select Vert Calibration. Then OK.
Observe text bar to confirm whether the command was successfully sent to AP.
The Attitude Angle will get close to zero slowly (reference coordinate has been
changed and craft nose downward is level)
Point the front of the Multi down and get the blue LED light on. Now turn slowly
clockwise 2-3 times in one spot ensuring the light remains on at all times and
the moving data of Attitude Angle remains within 3 deg.
It indicates the attitude is good if LED remains on, but attitude oversize if LEDoff
f
STEP3 Calibration Saved
Select save alignment. Then OK.
Now The calibration is managed after the procedure above. Then GCS screen
will auto-switch to user interface “Remote Control”, the megatic sensor data
shall display on the phone after waiting for dozens of seconds (The purple LED
keeps going on during data read). And you should see 2 round circles are almost
on top of each other which indicates a successful calibration and good data.
Successful Calibration Image:
Copyright(C)2012ZeroUAV
17
All Rights Reserved
Tips:
After correct assembly and successful magnetic compass calibration once, no
need to recalibrate without any constructional reconfiguration or only upgrade
the firmware.
Copyright(C)2012ZeroUAV
18
All Rights Reserved
5 Control Modes
Notices:
• Choose two 3-position switches as control mode switch, setup which to CH5 &
CH6 by Tx.
• CH5 is for switching among Manual/Manual Altitude Hold/GPS modes.
Note:the flight status display as “manual” ”manual altitude hold” “auto-hover”
on Data section(GCS)
• CH6 does not work until switching CH5 to position 3 (i.e. GPS mode). CH6 is
for switching among Auto-hover/Auto-navigation/ Auto go home.
The RC receiver on aircraft may be switched on/off by the button “Receiver on”
and “Receiver off” in Setting section(GCS). Tx operations do not work on aircraft
with RC receiver switched off
(when the two buttons Receiver on/off shall get
green ), i.e. There is no receiver installed on craft.
Currently this section is reserved only for customize manufacturing not common
users.
“Remote Control” interface on Phone GCS is a cross interface, by touching which
the copter flying can be controlled by phone. “RC Status” means whether the
cross operation is enabled or not.
Press the menu button of phone, click“Enable RC” button a circle will appear in
on the cross, which indicates “Phone Remote Control” has been enabled. Choose
“Disable RC”, it indicates the “Phone Remote Control” has been disabled if the
circle disappeared.
Copyright(C)2012ZeroUAV
19
All Rights Reserved
Receiver
Status
CH5
Status
Mobile
Status
Rc off
Currently
unavailabl
e
Currently
unavailable
CH5
Manual
X
Mobile
“Enable
control”
Rc on
RC
CH6
Status
Aircraft Status
Currently
unavailable
X
Currently unavailable
Manual mode, i.e.controlled by Tx
Warning: when flying in big actions or
fast speed in Manual Mode, Do not
switch into GPS Mode until flying gets
into stable
CH6
position1
There is a circle showing on the “cross” ,
please check the mobile status. This has
nothing to do with the Tx.
CH6
position2
“Auto-navigation" Mode is available by
clicking “Enable Waypoints” on Phone
GCS(make sure waypoints are uploaded
successfully
before
Entering
Auto-navigation)
CH6
position3
CH5 Auto
(In
position
3)
Mobile
“Disable
control
1
2
3
“Auto Go Home” Mode
CH6
position1
“GPS auto-hover” mode
Craft may drop fast if the throttle stick is
in the min. position, it is strongly
suggested to place the throttle stick in
the middle position.
CH6
position2
Enter
“Auto-navigation"
Mode
by
Clicking “Enable Waypoints” on Phone
GCS(make sure waypoints are uploaded
successfully
before
Entering
Auto-navigation)
CH6
position3
“Auto Go Home” Mode
Remark:
• “X”: means irrelevant, any kind of status is alright.
There is a circle showing on the cross if mobile remote control is enabled, no
circle means remote control disabled.
”: means mobile remote control is enabled or disabled
• “Mobile RC status
status”
”: 1 means the highest.
• “Priority
Priority”
Copyright(C)2012ZeroUAV
Priority
20
All Rights Reserved
4
6 Aircraft Type
The blue arrows of each figure below point to the direction where propellers
rotate. For coaxial propellers: Blue means propeller at Top; Purple means
propeller at Bottom. The yellow arrow in the center of each figure points to
aircraft nose. Those numbers under the figures mean the “Aircraft Type” which
may be filled in the Parameters Setup section.
Copyright(C)2012ZeroUAV
21
All Rights Reserved
Customized Parameters
Tips:
Users may assign the motor mix-control and define the speed up/down
proportion coefficient of each motor´s roll, pitch and turning, so that the
parameters are available to the multi-rotors in non-conventional rotor
arrangement.
• Customized Throttle: all of them must be 100.
• Customized Yaw: to keep the aircraft right rotated, rotation change speed of
corresponding motor should be decreased to -100, and increase to 100.
• Customized Pitch: to keep the aircraft nose downward, rotation change
speed of corresponding motor should be decreased to -100, and increase to
100.
• Customized Roll
Roll:to keep the aircraft roll to right, rotation change speed of
corresponding motor should be decreased to -100, and increase to 100.
Now let’s take Quad-X as an example, the gains may be setup as below:
Copyright(C)2012ZeroUAV
22
All Rights Reserved
In GCS, please click "Setting"--“Parameters Define” to fill in the gains. Confirm
the parameters are proper, then select “customized” as Aircraft Type. Make
sure the parameters are verified successfully by clicking button “Parameters
Define”--"Get". Repower YS-X6, throttle up a little making the motor move in
slow speed, meanwhile check whether the mix-control is the same with settings
carefully, flying may be started after confirming.
Once incorrect parameters filled in, the motors will immediately rotate in
full speed if powering on aircraft or changing aircraft type to“Customized”, so it's
strongly recommended that take off all of the propellers before filling in the
defined parameters to ensure your absolute safety!)
Copyright(C)2012ZeroUAV
23
All Rights Reserved
7 motor start, motor-cut and Failsafe
Enable Motor Protection
Only if it is in manual mode and the throttle stick is at the min. position, the
motors will be locked up completely 5 seconds later any time after landing or
before take-off;
if locked up, motors won't rotate even pushing the throttle stick. Pressing
“Enable insurance” on phone GCS or Motor Arming(please refer to Chapter9 for
setup details)is the only way to unlock the motors.
Motor-cut
Pushing throttle stick to the min. position can make motors stop moving only
when CH5 is placed in position1, i.e. in manual and altitude uncertain mode,
Other times, copter just degrades height still with motors moving.
During flying, if there is no unexpected accidents please Do Not synchronously switch to
manual mode and push the throttle stick to the min position, otherwise motors-cut will
immediately occure, craft will free-fall to the ground and never be rebooted!
Tips
Whenever need to stop the motors urgently, only the ways below work:
(1) Switch CH5 to position 1, i.e. in Manual & Altitude uncertain mode, and push
the throttle stick to the bottom.
(2)With multi-rotor landing on the ground in altitude hold/GPS mode and
throttle stick placed in the min position all the time, or landing in auto go home
mode, motors may stop rotating slowly until shut down and lock up.
WIFI Signal Lost
Please control multi-rotor by Tx if WIFI signal lose more than 1 second; But Wifi
Copyright(C)2012ZeroUAV
24
All Rights Reserved
signal loss do not affect navigation flying which will continue until completion
and back to the first waypoint hovering.
Radio Signal Lost
Be sure properly setup F/S referring to Transmitter instructions from
manufacturer: set both CH5 and CH6 to position3, throttle stick to the middle
position (installation guide has tips). If enable F/S for any reason in “receiver
on” status, the autopilot will be switched to Auto-hover mode(continue to fly for
5 seconds in auto-navigation mode), enable RTH (Auto return to home) if there
is no signal still after 5 seconds.
Copyright(C)2012ZeroUAV
25
All Rights Reserved
8 Phone Control
(1) Phone Remote Control Mode
During flight, when transmitter is switched to “Auto-hover” of “GPS mode”, the
aircraft shall enter auto-hover mode. Meanwhile phone control may be enabled
by pressing the menu of phone→ “Enable/Disable remote control(RC)” button.
How to control multi-rotor by phone?
Notice:
Mobile
control
User Interface Operations
Aircraft Status
enable
Circle status
Red: GPS un-lock
Position Hold
No pressing
Position hold.
Pressing and dragging the circle
1 up/down
2 left/right
3 left/right top, left/right bottom etc.
1. moving
forward/backward
2. moving left/right
3. Moving
left/right top,
left/right bottom etc
Moving
Operation
Climb/
Decline/
Turning
Green: GPS locked.
Click below area inside the cross
1.over circle
2.under circle
3.circle left side 4.circle right side
Note
(1) The distance between circle and click point
means the flight speed variation. The further
the distance, the faster the flying speed.
(2) Control circle Pressing Time = Aircraft
moving time
Copyright(C)2012ZeroUAV
26
--------
1、Climb
2、Decline
3、Rotate to left
4、Rotate to right
All Rights Reserved
Flying altitude may be changed in “Altitude Change” of Setting section (GCS).
When in GPS hover mode and throttle stick placed in the middle position, fill in
the target altitude in the status bar, then OK, aircraft shall fly to the target
altitude.
When using the firmware marked later than April 15th, 2013, if GPS has no lock
(such as inside doors), In manual mode you can use phone/Tablet and
phone/Tablet’s attitude control to handle the copter by switching transmitter to
CH5 position3 when the copter get off the ground, then the phone control or
phone attitude control is corresponding with the sticks operation. It is still
controlled by transmitter instead of phone/tablet when switching CH5 back to
position 1 or position 2.
2)Phone
Phone attitude control mode
(2
Phone attitude control means phone tilt direction determines the craft's
direction. Attitude control by phone also may be activated in remote control
mode, press “enable attitude” in “Remote Control” section, a blue cross will
display on user interface which indicates phone attitude control mode has been
enabled.
Notice:
Remain the phone level before enabling attitude control mode, otherwise the
aircraft will fly to the direction which the phone tilt to.
How to control multi-rotor in phone attitude control mode?
Copyright(C)2012ZeroUAV
27
All Rights Reserved
When RC Activation
User Interface Operations
Circle status
Red: GPS un-lock
Position Hold
No pressing
Green: GPS locked.
Aircraft Status
-------Position hold.
Tilt the phone as below direction:
1 Moving forward/backward
1 up/down
2
Moving left/right
2 left/right
3
Moving
Moving Operation
3 left/right top, left/right bottom etc.
left/right
left/right bottom etc
1 、 Press any available area on the
screen and hold the point upward;
2 、 Press any available area on the
screen and hold the point downward;
3 、 Press any available area on the
1、Climb
Climb/ Decline/
screen and hold the point left;
2、Decline
Turning
4 、 Press any available area on the
3、Rotate to left
screen and hold the point right;
4、Rotate to right
Notice:
(1) Point Holding & Moving distance =
Copter flying speed, the longer the
distance, the bigger the flying speed.
(2) Holding time = flying time
Notice:
Control mode may be switched automatically to Remote Control mode if quitting
attitude mode.
Copyright(C)2012ZeroUAV
28
All Rights Reserved
top,
9 Flight
9.1 Motor Arming
Throttle Unlock: push throttle stick in the bottom position, arm the motors
keeping each stick still over 0.1 second, then motor may be started by pushing
throttle stick within 5 seconds, motor will be locked again if over 5 seconds.
Motor Arming operation: push Rudder stick to the left- most position, elevator
to the bottom position, aileron to right-most position, throttle to bottom position,
keeping each stick still over 0.1 second. For right/left hand throttle, user need to
judge by self
motor arming is V-shaped or reversed V.
Motor may not auto-start after motor arming, push throttle stick a little to start
the motor.
With motor started, the copter does not fly by pushing throttle stick a little and
certain motor may move slowly and even stop, it is normal phenomenon caused
by multi-rotor integral for adjusting attitude. Throttle up then can keep flying
started immediately.
9.2 Oscillate and Wobble
During flight, observe the “Vibrate State” & “Shake State” in “Data” section to
judge the oscillate status of IMU. In stable flight, it is normal when the “Vibrate
State“ &“Shake State ” range from 0~9(display in green), the value over 10
display in red.
The smaller the number, the smaller the oscillate. The number will directly
affect flying performance.
Tips
Copyright(C)2012ZeroUAV
29
All Rights Reserved
Vibrating coefficient: the maximum acceleration of alternate motion (oscillate)
in up/down, left/right, back/forth three directions.
Shaking coefficients: the maximum angular velocity of rotary movement
(wobble) around X/Y/Z three axises.
9.3 manual servo position
The display in “Data” section of GCS include the data below:
manual servo position
When Tx channels calibrated, a Tx stick diagram will display as “Manual Servo
Position” on GCS “ Data” part if the Tx sticks are placed in the middle position,
the left of diagram means “Elevator” and “ Rudder” , and right means “Aileron”
“Throttle”. Stick in neutral position displays green, in other position display red.
Throttle stick in the bottom displays yellow, hovering display green, other status
display red.
Make sure to reverse the channels on transmitter if your actual Tx operation
differ from the screen display. Users can freely adjust Tx mode among Mode 1,
Mode 2, Mode 3, Mode 4, as long as ensuring the Tx operation is the same as
GCS display .
Copyright(C)2012ZeroUAV
30
All Rights Reserved
Press Phone or Tablet “ Menu” ---> “ Set”, the Tx mode can be available to setup,
and you can select the Tx mode according to your operation preference. Then
the Tx stick display on GCS will chang following Tx mode changing.
”---> “Capture Tx Center Point
” to let
If user have done the trim, press “Set
Set”
Point”
autopilot record the correct stick center position if manual servo position is not
in the middle position when releasing the stick.
Copyright(C)2012ZeroUAV
31
All Rights Reserved
Motor balance
If clockwise and anti-clockwise propeller lose balance(as well as
revert-torque), it may display “clockwise/anti-clock propellers are not level” in
the status bar when the copter hover from the ground and maintain the course.
Then keep the corresponding motor flat or change propellers to be better. It is
suggested to carefully check whether motor and propeller are balanced and
symmetrical in level until the motor balance display as “good” when copter
hover in level.
Throttle stick position
It means the average throttle stick position when hover, generally it’s normal
40~65 (display as green), it indicates the copter is lighter and the ESC works in
light load status if the value below 40(display as yellow), it indicates the copter
is heavy and ESC is working in heavy load status caused low battery voltage,
make sure to adjust the load otherwise it will lead motor speed regulation is not
enough resulting in weaker steering and flying failure.
9.4 Auto-takeoff and Auto-landing
A.Semi-auto & manual altitude hold mode takeoff
When get 5 or more GPS satellites locks, switch CH5 to position 3 and CH6 to
position 1, that is the flight status is “auto-hovering”, then push the throttle stick
after moving rod in V shaped, when throttle stick is more than half, aircraft will
take off automatically and auto-hover about 3 meters from the ground and
getting into auto-hovering status.
Copyright(C)2012ZeroUAV
32
All Rights Reserved
Flight status display as “manual altitude hold” when CH5 is switched to position2,
Push throttle stick after motor arming, multi-rotor will auto takeoff if the stick is
more than 50% and lcok the height around 2~3m, but users need to control the
copter’s attiude and location by manual, i.e. FC only get the throttle channel
command.
B. Full-auto takeoff
Notice:
Aircraft can take off fully-automatic only if the aircraft has completed
semi-automatic takeoff and the flying is successful.
Step 1 Wait until get 5 or more GPS satellites locked, put the THR stick in the
minimum position, switch CH5 to GPS mode (position 3 ), CH6 to position 1.
Step 2 Click on “enable insurance”, or move rods as V shaped to make the
throttle unlocked, then continue the next step within 5 seconds.
Step 3 Click on “auto-takeoff ”, the aircraft will be powered on and take off
slowly, hovering in the height of 2~3 meters from ground.
Step 4 If the THR sticks is in the minimum position in auto-takeoff mode, if you
want to control the flying altitude, must move the THR to the neutral position.
Notice:
If there are any unexpected accidents during take-off you can switch to manual
mode by Tx to control the craft .
C. Auto-returning home and Auto-landing
Autopilot will set the returning home position automatically when GPS has
locked or aircraft takes off in manual/auto mode.
In GPS mode, when switch CH6 to position 3 or select “auto-return home &
landing” in the mobile phone and meanwhile click on “OK”,AP will enable
auto-returning home & landing after 5 seconds; and the motor will auto-fly to 20
meters if the altitude is less than 20 meters, when aircraft returns the throttle
servo doesn’t work, the autopilot will descent to the ground automatically when
reaching the start position and can interferes the landing position; After
enabling “auto-returning”, it can’t prevent autopilot from returning and
Copyright(C)2012ZeroUAV
33
All Rights Reserved
auto-landing if switching CH6 back to “auto-hovering ”and “auto-navigation”,
unless switch CH5 to manual position(position1/2) and then
back to holding
position to continue hovering.
Notices:
Click on “motor off” -> “OK” to shut down the motor.
By switching to auto-landing, the copter will return home remaining in current
height rather than climb to 20 meters if the copter flies within 25m from takeoff
position.
9.5 Click & Fly to point
MODE : in GPS auto-hover mode
Step1:
Click any point on the map and it can appear a yellow smile there.
Step2:
Click on “FlyToPP” button in Map page (the button will get gray if there is no click
beyond a few seconds, then need to click on the map again and the yellow smile
will appear ), the yellow round smile will change to purple star smile. The
operation of flying to the next position is same as above.
Remark:
Within 10 meters, craft moves in level ;and beyond 10 meters, the head of craft
faces the target point.
If the point clicked on is too far, the craft will fly out of sight, so user need to be
cautious when using the Fly to Point function.
9.6 Target Lock
MODE: in auto-hover mode
Solution1:
Step1:
It will appear a yellow smile while clicking any point on the map;
Copyright(C)2012ZeroUAV
34
All Rights Reserved
Step2:
Click “PTZLock” button in map page. After yellow round smile changing to purple
star smile, the aircraft head will keep facing the locked point;
Solution2:
Step1:
in any time (including before takeoff or manual/auto mode after takeoff)
fly/take the craft to the target point to be the locked , then within 3 seconds
switch between position1 and position3 on CH6 for three times(that is
1->3->1->3->1->3->1 ), FC will record the longitude&latitude of GPS where
the craft locates as the target point to be locked.
Step2:
in GPS auto-hover mode, within 3 seconds switch between position1 and
position2 on CH6 for three times(do not switch to position3 which is invalid, that
is 1->2->1->2->1->2->1 ), then FC will enter target lock mode.
Tips:
After locking the target with solution1 or solution2, users can operate by
transmitter or by RC mode on phone.
Remark1: When left aileron outputs, the aircraft will hover clockwise around the
target point. When right aileron outputs, it will hover anti-clockwise.
Remark2: Pushing/pull the stick means decrease/increase the hovering radius.
Remark3: Elevator & aileron will be normal if selecting “Quit FlytoPP/PTZ Lock”
in "Tools” page or switching back to manual mode. Switch to manual mode and
immediately back to GPS mode to continue the operation.
9.7 Waypoints Flying
Step1:
In Map page of GCS, click “tools”-> " Design waypoints" to make the waypoints.
One click on map once can get one waypoint, get all waypoints one by one. Click
“Default Tool” to complete the waypoints design.
Tips:
Copyright(C)2012ZeroUAV
35
All Rights Reserved
If the firmware version is later than Sept.15th,2012, each waypoint contains
"Height", "Hovering time","Speed" and other key parameters, so must make
sure that click each waypoint with finger to select "edit waypoint" and correctly
setup.
"Height" indicates the point where craft is staying, which can be set as
negative value below zero(when the takeoff position is too high and the craft
need to fly under the takeoff position). If height between two waypoints are
different ,craft will fly as climbing slop. The default height is”current height”, i.e.
craft will fly according to the height when enter waypoint mode.
"Hovering time" means the time that craft stays in the present position before
going to the next waypoint(the default hovering time in first waypoint is
65535s ).
"Speed" means the flying speed that craft flies to the next waypoint from
present position.
Step2:
After the waypoints design is completed, it can be saved as file which can be
used next time. User can also click on "Upload Waypoints" to upload the
waypoints to Autopilot. Please check whether each waypoint has been changed
to blue to confirm a successful upload (orange indicates the upload is not
successful), and then get into "Target Point" to check whether the number
displays there is the same as uploaded waypoints, if not you need to upload
once more;If any waypoint is not changed to blue, please also upload the
waypoints once more.
Step3:
Click “Remove Waypoints” to make the blue waypoints recover to red; then
Select “Verify waypoint” from “Tool”, download uploaded waypoints to ground
Station for comparing, if all waypoints are blue it means the uploaded waypoints
is the same with that in GCS and waypoints verification is successful. Otherwise
need to upload waypoints once more.
Step4:
Copyright(C)2012ZeroUAV
36
All Rights Reserved
After switching CH5 to position 3 and CH6 to position 2, then click on "enable
skyway" in setting page of GCS, the craft will fly to the first waypoint and hover
There. Fill in "Change Target" with number 2 and upload it, the craft will fly to
waypoint 2、3、4...and fly back to waypoint 1 and hover there after finishing all
waypoints.
Notice:
If waypoints incorrectly uploaded, when switched to auto-navigation mode the
aircraft will fly far away automatically and out of control.
Free control of craft heading:
In normal condition, when it's waypoints fly, craft nose will face fly orientation in
real time. When user need to freely control the course of craft, in waypoints fly
mode can click on "Intelligent course locked" in Setting page of GCS. At that
time the "Intelligent course locked" doesn't present care free function, it
presents free course mode. That is craft will fly according to "waypoints fly",
however, the craft nose will not face the fly orientation in real time, but the
course of craft can be freely controlled by rudder on RC transmitter. Click on
Disable intelligent course locked and confirm, then the craft nose will face fly
orientation again.
skyway Auto-generation
Click Map-Tool-Shyway design to draw four waypoints if skyway is necessary.
Choose the distance between point1 and point2 as the length, distance between
point2 and point3 as width, shown as figure below. Then select “skyway
Auto-generation” in Tool section, the status bar will display as below. Flying
height and speed may determined by user’s need. Skyway’s extend distance is
for multi-rotor turning when it reaches to the end of skyway.
Scanning skyway may be generated by clicking OK, adjust the first and last
waypoint by self, the general skyway length will display on Map interface, then
save the skyway for next time use.
Copyright(C)2012ZeroUAV
37
All Rights Reserved
9.8 Follow Me
This function must be used in the condition that GPS on phone is enabled and
meanwhile GPS of this phone has located showing on “data” page of GCS. In
GPS hover mode, after all the sticks on transmitter are set in the neutral position,
user can click on “enable follow” in “setting”page, the craft can fly following the
mobile phone GPS and lock the craft nose orientation.
If to quit this function, just click on “Disable follow” on “setting” page.
9.9 Care free
In GPS hover mode, "Carefree" can be used.
Option 1
Click on "enable course locked" button in "setting" page, autopilot can record
the current orientation of craft nose. Then users can adjust the orientation of
craft nose with rudder;when users operate the left/right aileron and push/pull
sticks on transmitter, the autopilot will fly to the orientation as
the course was
locked, not the current orientation of craft nose.
Option 2
Within 5 seconds please switch between position1 and position2 on CH6 for five
times(do
not
switch
Copyright(C)2012ZeroUAV
to
position3
38
which
is
invalid,
that
All Rights Reserved
is
1->2->1->2->1->2->1->2->1->2->1 ), then FC will enter intelligent course
locked mode.
To exit "carefree", click on "disable course locked" button in "setting" page or
switch to manual mode. User can switch to manual mode and immediately back
to GPS mode to continue the operation.
——
Blackbox
9.10 Data record
record——
——Blackbox
YS series flight controller have data record function(black box) for analysis in
unexpected accident.The data may be recorded provided flying started without
any external device, but only one minute data may be recorded before crash.
Therefor, please do not takeoff or push throttle after motor arming if you want to
get the last one minute data.
How to get the record data?
Repower flight controller, be sure WIFI and phone are communicated. Then click
button “one min data” in Setting section, then the data sent from FC to phone
shall to be the data in last one minute, and it will keep displaying for one minute.
Later on“1 minute data finished ” may display on GCS and suggest users
outputting the “T-1min.hj”file under index “YShj” and sending it back to
manufacture for analysis.
Copyright(C)2012ZeroUAV
39
All Rights Reserved
10 Parameter Setup
Default Parameters
The Factory Default Parameters are shown as below. It is the Quad-X flying
mode and can be applied to most crafts for direct flying.
Notice:
”Roll Sensitivity” & “Pitch Sensitivity” (default 45)may directly affect
the manual reaction.“Motion compension”(default 80) can improve stabilization
but reduce the reaction. Throttle sensotivity(default 80) may affect Altitude
control sensitivity, choose the max. speed of copter climb or decline among
2m/s、4m/s and 5m/s in “Max. Vertial Speed” bar.
The meaning of other parameters are as below:
Cell Num
The autopilot can calculate the low voltage alert according to the Cell Number
filled in by users. When the mobile vibrates once each 2 seconds, it means the
power is getting low and remind user to note. When the mobile keeps vibrating
it means the power is getting very low and request the craft to land at once.
Ctrl Type
Complete default number 2.
Copyright(C)2012ZeroUAV
40
All Rights Reserved
1. Attitude mode, fit to adjust parameters/dynamic flight.
2. Acceleration mode, fit to static flight(autostability, common mode).
Two cool features are newly added on GCS : Height Limit and Distance Limit
With the two functions enabled (in GCS “Parameter” Page), no matter in manual
or auto mode, the multi-rotor will come back to the pre-set limited range or
distance automatically provided it flies out of the limited height or distance
range.
And the parameters are only can be multiple of 10, e.g. If you fill number 15, the
autopilot will auto make it 20 (multiple of 10). Parameters may range from 10 to
2550. Filling number 0 means
not enable range limit or height limit function.
ation
Magnetic Declin
Declination
Fill in local magnetic declination, deflection to West is Positive/to East is
negative ( most regions in China are deflecting to West).
Aircraft Type
Fill in mix control type, please refer to Chapter 6.
PTZ Roll Sensitivity
PTZ Pitch Sensitivity
EXT1 is the PTZ roll output and EXT2 is the PTZ pitch output. Roll/Pitch
sensitivity is used to adjust the compensation angle of PTZ. If user feel the
compensation angle is small, can fill in bigger number, on the contrary fill in
smaller number, range from -127 to 127 (Note: negative value can be filled in to
be reversed).
When using PTZ, transmitter must be enabled and CH7 is properly set to one
knob switch, making autopilot read the CH7 to output the PTZ position.
Max Speed
Setup of maximum flying speed.
Copyright(C)2012ZeroUAV
41
All Rights Reserved
Acceleration control
The acceleration of craft in GPS hover mode can be selected.
Soft, common and hard are optional. It will auto-change to Hard if max speed is
more than 6m/s.
Notice:
The 4 parameters below need to be filled in when use flight controller
for first time, when filling in the values must make sure the THR stick is in the
bottom; click on “Settings”�“Enter setting “, when “setting status” displays in
“data” interface you can update the parameters. Then click on “send” to give the
command to autopilot and click on “get” to confirm the update is correct. After
verifying, click on
“Settings”�“Exit setting”, the flying can be started.
Remote Control Mode
User can select the options below according to yourself RC mode, do not set up
incorrectly!
Self-adaptive: Do not start FC until turn on Tx when using this function, FC will
auto-judge the radio communicate way(normal, S-BUS, PPM) when started.
Normal: Ordinary FUTABA Receiver, AP CH1 connect to Receiver CH1, AP CH2
connect to Receiver CH2.
S-BUS: connect AP CH7 to the Receiver S-BUS port with only one wire.
PPM: connect AP CH8 to Receiver PPM with only one wire.
Volt Alert Threshold
Fill in the alert voltage of each battery which is been using, need user to fill in
after measuring by self. Usually fill in 3.65.
ESC Type
Fill in the ESC type which is been using.
Fault filling of ordinary ESC and narrow band(e.g XA) will result that the
Copyright(C)2012ZeroUAV
42
All Rights Reserved
propellers go out of control after power connected, dangerous!
Steering gear Frequency
Input the correct value according to your servo type: 50HZ for Analog Servo,
250HZ for digital servo.
Copyright(C)2012ZeroUAV
43
All Rights Reserved
11 Gimbal & Camera Control
EXT1 on MC is for gimbal roll control, EXT2 for pitch control. There are different
ways using different types of gimbal.
(1)Common servo driving gimbal
Power on the servo before using the gimbal. For those servos with bec
function, leave any one of which powered on and others powered off. For the
servos without bec function, connect servo battery to any one port of the
M1~M8.
Connect EXT1 to gimbal roll servo and EXT2 to gimbal pitch servo. “Roll
Sensitivity”& “Pitch Sensitivity”in the Parameter Section(GCS) is for adjusting
the correction angle of gimbal. The Gimbal Sensitivity, range from -127 to
127, may be negative for reversion and modified higher(lower) if correction
angle of gimbal is smaller(bigger).
Power on Tx first before use of gimbal and use no less than 7 channels, set
CH7 to knob switch so that YS-X6 can read the CH7 to export the gimbal pitch
location.
When adjusting Ch7, gimbal pitch location will be adjusted and get
stabilization from new angle. The spare channels may be used for other
applications.
With gimbal roll unset, roll servos will maintain stabilization in the middle
position. With gimbal roll tilt to one side, adjust it by clicking “Enter Setup”in
Setting section(CH5 must in manual,throttle stick in the min. position), after
that CH7’s knob turns for controlling gimbal roll.The gimbal roll’s balance
position may be fixed and saved by clicking “Quit Setup”when gimbal roll is
adjusted to proper position,after that CH7 turns for controlling gimbal pitch
again.
(2) Zero-Steadi470
YS-X6-Steadi470 flight controller supports Steadi470 gimbal, but asking for
Copyright(C)2012ZeroUAV
44
All Rights Reserved
special firmware, gimbal and IMU.
3)Brushless
Brushless Motor driving gimbal
(3
Brushless
motor
driving
gimbal
may
reach
a
superior
stabilization
level(pixel-level), YS-X6 with special firmware built-in supports Brushless motor
driving gimbal series produced by Zero UAV. Separately connect EXT1, EXT2 to
IN1、IN2 channel without any parameter setup.
Brushless motor driving gimbal comes with YS gimbal controller, power and
receiver and is controlled by single operator. Please refer to《Zero UAV brushless
motor driving gimbal control instruction》
4)C
Camera and shutter control
(4
EXT3 output channel of YS-X6 have a function of high low-level eletronic shutter.
FC have eletronic shutter function provided using the firmware released later
than 20130201. Upper pin of EXT3 is signal cable, middle pin no plug, lower pin
is ground cable.
Signal cable outputs 3.3V high-level in general, and outputs 3.3V after shortly
outputting 0V low-level about 400ms if click “manual photos” in “Setting”
section. This high low-level output format supports the camera control such as
Canon series 550D, 600D, 5D mark II etc.
The FC firmware of surveying edition supports skyway auto generation on GCS,
flight controller taking photos in fixed position according to the interval and
photos covering one certain area. Furthermore, when the flying completed,
flight controller will record the data of each photo, such as longitude & latitude,
height, course, attitude, which may be found in the YShj file manager in the
format of TXT by clicking “Photo Data” in “Setting” section.
Copyright(C)2012ZeroUAV
45
All Rights Reserved
12 Power Management module
When YS-X6 is connected with power management module, user can directly
observe the present discharge current and battery consumption in “data ” page
of GCS.
If to use this function, user must first connect power management module with
YS-X6(connect to A1N1 plug on YS-X6), push the throttle stick to the bottom,
then repower YS-X6 on. After powering, FC will zero sensor automatically, the
current discharge (ampere A) and battery consumption(MAH) start to output
according to the detection by power management module.
13 Data Link
Tips
• XB-PRO900 Datalink is used to extend communication distance, making the
GCS control distance avoid from WIFI distance limit.
• XB-PRO900 Data link Technical Specifications
Transmitted power: 100 mW
Frequency : 900 MHZ
Communication Distance: not less than 2 ~ 3 km (open areas).
Physical Port :RS232
Copyright(C)2012ZeroUAV
46
All Rights Reserved
Communication Baud Rate :115200 BPS.
• A pair of XB-PRO900 datalink includes two data links, one is installed on craft
and another is connected to YS-X6. The two may be interchanged.
1)Data Link installed on Multi-rotor
Remove WIFI module from multi-rotor, install one data link on frame referring
to the connection of WIFI module, connect it to YS-X6 COM port.
2)Data Link on ground
Connect WIFI module with another data link using the wire coming with data
link, which can supply power together with wireless router on ground. That is
there are three eletronics on ground:Data Link, WIFI module and Wireless
Router.
Copyright(C)2012ZeroUAV
47
All Rights Reserved
Notice
• No need to use router if WIFI is configurated in PTP(point-to-point) mode.
• Data link and WIFI module both are powered by 3 S ~ 6 S lipo battery(same
as MC), power line is in red-black, red is positive pole and black is negative.
14 Joystick
Joystick is a optiona hardware. Control the multi-rotor in GPS mode with
joystick. With data link not connected, control distance by joystick is up to WIFI
communication distance. With XB-PRO900 datalink connected, the control
distance is up to communication distance of datalink .
Joystick contains two parts: joystick and joystick WIFI.
Notice:
The WIFI here coming with joystick is different from the WIFI above, they can
not be exchanged)
(1)Joystick Connection
The joystick connection is quite simple, just connect joystick WIFI to joystick
according to the figure above, then power it on in a convenient place , joystick
can work automatically .
Note:
Joystick and WIFi both are powered by 3 S lipo battery(same as AP MC), power
Copyright(C)2012ZeroUAV
48
All Rights Reserved
cable is in red-black, red is positive pole and black is negative.
The cable connecting joystick and joystick WIFI is Dupont cable in three colour.
(2)Joystick Instructions
1. In GPS auto-hovering mode, joystick can be used to control the craft . After
power on the joystick, joystick operation equals to the cross operation of RC
interface on phone. To avoid conflicting with phone cross operation, please
disable remote control on phone GCS to cancel the round circle on the cross.
2. When RC is off, the round circles on remote control cross interface of phone
GCS will display once automatically. At this time the joystick can't be used,
otherwise there will be two cross operations at the same time. If need to use
joystick at that time please select “menu” and click on “ RC off” in phone GCS,
to cancel the round circle on RC cross interface, then the joystick can be used.
Copyright(C)2012ZeroUAV
49
All Rights Reserved
15 Multi-rotor Wobble Fix
Step 1
Deviation of installation /vibration/shaking will make the flying status test by
IMU delayed. So user need to check whether the installation direction of IMU is
proper and try to install it in a stable place on craft where there is no resonance.
Notice
The IMU of YS-X6 has damper inside, so there is no need using external damper.
The vibration coefficient and shaking coefficient showing on GCS mean the
wobble status of IMU. Be sure to make balance test before configurating motors
and propellers to reduce the vibration and shaking coefficient smaller than 10 in
auto-hover mode (try to use the smaller properllers to reduce wobble),
otherwise no matter how to change parameters the flying will not get stable.
Softer frame can also result in extra wobble, please use frame with good rigidity.
Step 2
The Multi-rotor attitude is up to motor speed adjustment, so servo sensitivity
will directly affect the accuracy of Multi-rotor attitude. The weight and pitch of
propeller need to be adjusted properly, so that motors may remain in enough
speed to generate enough sterring, meanwhile, choosing lighest properller is
recommended to reduce inertia and improve sterring. It is inevitable the flight
stability may reduce for the craft asking for high efficient configuration, either
flight efficiency or stability;
Step 3
The symmetry of Multi-rotor has significant effect on flying stability. In Chapter
9.3 “Motor Balance”, user can estimate the symmetry of motor and propeller in
level flight. If fail to adjust the symmetry, must spend more energy on frame
and dynamic configuration;
Step 4
Copyright(C)2012ZeroUAV
50
All Rights Reserved
If there is no problem in above steps, adjust [Roll Sensitivity]& [Pitch Sensitivity]
in “ Parameters Setting”, i.e. to set the multi-rotor attitude correction level(P
controlled by Proportional); And adjust [Motion Compensation], i.e to set the
multi-rotor attitude correction damping (D controlled by differential) to realize a
limited adjustment.
Note
1) Control correction with same angular velocity error has been setup in “Toll
sensitivity”&“Pitch sensitivity”, 45 is default, generally 45~60 for multi-rotor.
the higher the sensitivity, the quicker the correction i.e. control is more flexible
by manual. But higher sensitivity may lead to high-frequency wobble, so please
reduce sensitivity for multi-rotor with high-speed (smaller propellers). This
parameter range from 0 to 255.
2) “Motion compensation” is set for wobble correction of low-speed milti-rotor,
default is 80, generally it is 80~200 for multi-rotor. Without this compensation,
if steering is too small (low-speed craft or bigger propellers) , the craft may get
stable after few jerking when sticks on transmitter back to neutral position,
Gradually increase the “Motion Compensation” to get the most stabilization
when servo sticks back to neutral position but craft still wobble. For those
high-speed craft (smaller propellers), decreased the compensation to prevent
highly-frequency wobble. This parameter range from 0(min)-255(max).
Copyright(C)2012ZeroUAV
51
All Rights Reserved
16 Firmware Upgrade
The upgrade of YS-X6 firmware is simple. Before firmware upgrade, please
download the special firmware upgrade tool on Zero UAV official website.
USB Cable Connection: plug one end of USB cable in box to PC USB port , and
the other end to COM1 on MC.
Warning:
COM3 is used for connecting to Data link or WIFI, and COM1 for upgrade. Wrong
connection will lead to upgrade failure.
Step1
Please make sure do not power on FC before upgrade and if FC is powered
please cut off the power supply.
Enable the special programme "YS-X6 PC Firmware Upgrade" for upgrade ,click
on "AP Firmware Upgrade",the software will be enabled and shown as below:
Step2
Select COM port for upgrade (if do not know which COM on PC, please click with
right
mouse
“my
computer”->“attribute”->device
manager”->
“port”(COM/LPT)to have a check).
Copyright(C)2012ZeroUAV
52
All Rights Reserved
Press “open com “ ge to enable it, the button “open”,will get to black from gray.
Step3
” button , and choice the FW , (shown as below diagram).
Press “open
open”
Step4
Repower on FC and the programme will start to auto-upgrade. Power off the FC
when it says in red words “Please Restart AP!”, .
Warning:
1,When all settings are finished, if repower FC the software may not
auto-upgrade, please disable the software and replug the USB cable.
Copyright(C)2012ZeroUAV
53
All Rights Reserved
2,If the below warning is showing when you choose firmware versions, please
redownload the upgrade firmware or update the computer date later than the
date marked in current firmware version (within 30days), then upgrade once
more.
Copyright(C)2012ZeroUAV
54
All Rights Reserved
Appendix 1: LED Description
Flight States
1) GPS unlocated, red light blinks for 3 times in cycle. ●●●
GPS satellites=5, red light blinks for 2 times in cycle. ●●
GPS satellites=6, red light blinks for 1 time in cycle. ●
●
●●● ●●●
●●
●
●●
●
●●
●
●
●●●
●●
●
GPS satellites>7, the Led doesn't blink.
2) Abnormal craft status=White light blinks
When the difference of GPS and attitude is too big, Led blinks in white (craft
status is abnormal).
When craft gets stable after big flying action:
If white light is off, craft can continue to fly;
If white light keeps going on, need to land craft urgently.
3) Altitude hold in the Manual Stabilization Mode=Blue light periodically blinks
Blue light blinks for one time one loop means users is operating;
●
●
●
●
●
●
●
●
●
●
●
Blue light blinks for two times one loop means Altitude hold.
●●
●●
●●
●●
●●
●●
●●
●●
4) GPS mode=Green light periodically blinks
Green light blinks one time one loop means the user is operating;
●
●
●
●
●
●
●
●
●
●
●
Green light blinks for two time one loop means Auto-hover and Altitude Holding.
●●
●●
●●
●●
●●
●●
●●
●●
Low voltage alert
Low voltage alert=Red light blinks fast ; ●●●●●●●●●●●●●●●●●●●●●●●●●●●
Low voltage alert urgently=Red light keeps going on. ▇▇▇▇▇▇▇▇▇▇▇▇▇
Compass Calibration
Attitude error< 3°, light keeps going on, it means can go around to calibrate.
Attitude error> 3°, light will be off, it means the craft is not placed in horizontal
and need to be adjusted to be level.
Copyright(C)2012ZeroUAV
55
All Rights Reserved
After Magnetic data calibration, the Purple light keeps going on during data
reading. LED will get normal when data reading is finished.
Abnormal Electronic Device
Barometer, IMU and GPS abnormal, white light keeps going on.
Copyright(C)2012ZeroUAV
56
All Rights Reserved
Appendix2: Port Description
MC
A/CH1
Aileron-For roll control (left/right)
E/CH2
Elevator-For pitch control (front/back)
T/CH3
Throttle-For throttle control
R/CH4
Rudder-For rudder control
CH5
Manual/Auto Mode Switch
CH6
Auto-Hover/Auto-Navigation/Go home&Landing mode Switch
CH7
For gimbal pitch servo/ Or for S-BUS
CH8
No use currently/ Or for PPM
COM1
Connect RS232 port and to PC for firmware upgrades.
COM2
Extended port
COM3
Connect WIFI /Or Data link
AI0
AI1
Connect Power Calculate Module
LED
Connect LED Indicator
P
To power
IMU1
To IMU power
IMU2
To data
M1
Rotor 1
M2
Rotor 2
M3
Rotor3
M4
Rotor4
M5
Rotor5
M6
Rotor6
M7
Rotor7
M8
Rotor 8
EXT1
Gimbal roll servo
Copyright(C)2012ZeroUAV
57
All Rights Reserved
EXT2
Gimbal pitch servo
EXT3
Extended/ Or for Camera shutter
GPS1
To GPS power
GPS2
To GPS data
Copyright(C)2012ZeroUAV
58
All Rights Reserved
Appendix 3: GCS Interface Introduction
User interface
interface:
Buttons and Functions
No.
Buttons
Functions
1
Remote Control
Default interface (Cross interface) to control the aircraft
2
Data
Real time flight data
3
Map
Real time map or cached map
4
Settings
Setup various states of multi-rotor
5
Parameters
Adjust multi-rotor parameters
6
Cross Interface
General control the flight
7
The Cross
A track to control the craft to Climb up/ Go down/Rotate
8
Round Circle in Cross
A button to control the flight by phone
9
Enable/Disable Control
Used to Enter/Exit phone control mode
10
Quit
Quit from the GCS
11
Enable/Disable Attitude
Used to Enter/Exit phone attitude control mode
12
Net Information
Used to set service information
13
Enable Bluetooth
Used to enable bluetooth
Note: ith data communicated, the Serial No. and Firmware Version will display
on the “Remote Control” interface.
Copyright(C)2012ZeroUAV
59
All Rights Reserved
Data
Get into the "Data" interface by touching the button "Data", shown as below:
It will display "Communication Disconnected" with data uncommunicated.
GPS Data
It shows how many satellites were locked.
Display real time craft altitude during flight.
Course Angle means the directions which the craft head points to. Due North=0
degree, clockwise direction is positive, counterclockwise direction is negative.
For example: Due East=+90 degree, Due West=-90 degree, Due South=+180
degree or -180 degree. Notice: It works only when in GPS mode and flying in
Auto Modes, it will not work when in Manual mode or Attitude mode.
GPS velocity. It displays a value below 10 when the aircraft is static.
Copyright(C)2012ZeroUAV
60
All Rights Reserved
Flight Data
The velocity after Kalman filting. It displays a value between 0-20 and increase
constantly. When the velocity exceeds normal range, LED will be in solid white,
suggest you land the aircraft urgently.
Autopilot Voltage
Battery consumption.
The current of battery
Distance from takeoff position to current position.
Flying time
You can fill the waypoints number which you want the aircraft fly to.
It displays the craft states: Manual, Manual Altitude Hold, Auto Hover, Auto
Navigation, Auto Go Home and Land, setup status.
Display realtime attitude angle during flight.
Vibrations from IMU.
1-10 means your craft is in good condition.
Above 10, it means vibration exceeds limits.
Up& down is the vertical and front/back/left/right is the horizon vibrate of IMU
motor balance capability display.
Copyright(C)2012ZeroUAV
61
All Rights Reserved
Map Interface
Locate
+: Zoom in
- :Zoom out
Map: map mode.
Satellite: satellite mode
Tips:
1 The map which you used last time was saved in default, when you open it next
time, it shows up the saved map.
2 There is no network. Enable WIFI, cached data can be displayed.
Notices:
Cached map: when network is on, enable the software to download the map.
When finish download the cached map, with WIFI enabled the cached map will
display.
Locate Map
After the GPS was located, click this button can find where your aircraft locates.
Copyright(C)2012ZeroUAV
62
All Rights Reserved
Phone/Tablet position. The GPS of Phone/Tablet need to be enabled.
Search the position where you want to check.
Save the current position on map.
Load the saved position on map.
Fly TO PP
Fly to Point Fly. Please check "Fly To Point Fly" page.
PTZ Lock
Target Lock Fly. Please check "Target Lock Fly" page.
Locate FlytoPP/PTZLock: Move Map center to operation area.
Exit FlytoPP/PTZLock: Remove the FlytoPP/PTZLock mode.
Tool
Click it to enter editing waypoints, please check " Waypoints Fly" Page.
Restore the waypoint to be default.
To add more waypoint to map.
To remove the waypoint colour, make the blue waypoints recover to red.
To confirm whether the waypoints are uploaded successfully.
To upload the waypoints to Autopilot.
Copyright(C)2012ZeroUAV
63
All Rights Reserved
To delete the waypoint on map.
To load the waypoints saved in phone memory card to map.
To save the waypoints designed well to phone memory card for next time use.
Waypoint edition
Click on waypoint, there will be a text box display as below:
Used
to
edit
waypoint
attribute,
such
longitude and latitude, altitude and speed.
To upload the waypoint.
To delete the waypoint
Edit Waypoint
Copyright(C)2012ZeroUAV
64
All Rights Reserved
as
Current waypoint number.
The height of current waypoint, unit: meter
Longitude of current waypoint.
Latitude of current waypoint.
Time of hovering, unit is second, zero means no hover.
Optional of camera attribute.
It means the flying speed of craft from present position to next waypoint.
Settings Interface
Notice:
Make sure to setup each function seriously because all options in settings are
vitally important.
Copyright(C)2012ZeroUAV
65
All Rights Reserved
It's used to align channels or complete parameters of craft. After clicking this
button, flight state will display "Settings". After getting into settings, the control
channels for each motor on craft is directly connecting to throttle channel of RC
Transmitter and no any mix control output.
After completing Throttle Alignment and all parameters filled, click this button to
exit from settings.
Enable receiver/ Disable receiver
Notice : It is strongly recommended not to operate with receiver off for primary
learners.
Enable/disable waypoints flying when Tx switched to Auto-navigation mode.
Auto Go Home and Landing. After the aircraft reaches home location, the craft
can be controlled manually.
It's used to change home position or record new home position.
This function can be used only when your phone has GPS hardware and got
more than 5 satellites locked, and in Auto-hover mode. After enabled Follow Me,
the aircraft will fly automatically following mobile GPS location.
Copyright(C)2012ZeroUAV
66
All Rights Reserved
Notice: Generally, phone position has error within 5~10 meters.
In Auto Navigation mode, fill in the new waypoint number which
you will fly to.
Attention:
Fill in a number which is in the range of uploaded waypoints number.
To set target altitude
For camera attribute.
For camera attribute.
Preset PTZ lock
To enable the intelligent course lock. It can be used in GPS auto-hover mode.
To quit intelligent course lock.
In auto-navigation mode, the target point may be changed where multi-rotor
will flying to.
In auto-hover mode, fill in the target altitude. E.g fill in 10, the target height is
10m.
Copyright(C)2012ZeroUAV
67
All Rights Reserved
To unlock throttle. Same as motor arming
Interest pot lock
Refer to Chapter 9.6 for details.
Used for calibrate x channels
Click it enter into "Magnetic Compass" Calibration mode, the status bar over it
display the calibration status.
Click on "installation Guide". User can install the software following the guide
step by step.
User-define the motor output.
With no wind and in manual mode, To get neutral position after flying and trim.
Note: make sure place Tx stick in the middle position, it has nothing to do with
throttle position.
To check out what functions are enabled already.
Click on "Function Limit", the dialog box will show as below:
click "Get",Users can observe the functions which have been opened or not in
yourself FC.
Copyright(C)2012ZeroUAV
68
All Rights Reserved
Used for read the data saved in FC within the last minute of flying. Please refer
to Chapter 9.10 for details.
Only for industrial users, not available for common users
Buttons For Steadi470
TO get the roll calibration data.
To get the pitch calibration data.
To enable calibrating ZERO-Steadi470.
Copyright(C)2012ZeroUAV
69
All Rights Reserved
Appendix 4 Related thread and video links
YS-X6 & YS-X4 Thread
You can find all of the videos and related files and information in the first page
of this thread created by Zero UAV.
YS-X6: http://www.rcgroups.com/forums/showthread.php?t=1697842
YS-X4: http://www.rcgroups.com/forums/showthread.php?t=1774340
---------------------------------------------------------------------------------------
Video links
YS-X4 Promo
http://www.youtube.com/watch?v=6sR8nU2IAKE&hd=1
YS-X4 Installation & Commission
https://www.youtube.com/watch?v=smij7GuW_XE
--------------------------------------------------------------------------------------YS-X6 Promo
http://www.youtube.com/watch?v=7P-VE0F33Zw&feature=relmfu
YS-X6 Installation & Commission
http://youtu.be/MqqpbhFZb7E
YS-X6 Installation Introduction (Step by Step)
Step1
http://youtu.be/j_Owj5STbUU
Step 2
http://youtu.be/I1M94Z12CQ8
Step 3
http://youtu.be/bkko431iziE
Step 4
http://youtu.be/-RTRYO1I0OI
Demonstrations
http://www.youtube.com/watch?v=bt35JsLYiuo
http://www.youtube.com/watch?v=aHH8KfMGozw
http://youtu.be/SnEETKQheJE[/url]
Wifi Configuration Video
https://www.youtube.com/watch?v=Mr-wstSz3as
---------------------------------------------------------------------------------------
Copyright(C)2012ZeroUAV
70
All Rights Reserved
Zero-Steadi470 Promo
http://youtu.be/McSPa1om2XU
http://youtu.be/SnEETKQheJE
ZERO Steadi470 Installation
Part 1
https://www.youtube.com/watch?v=1sIM9b50k8w
Part 2
https://www.youtube.com/watch?v=TfJU-2q7fz0
ZERO-Steadi470 Gimbal Calibration
https://www.youtube.com/watch?v=39CgUdZNPPI
Copyright(C)2012ZeroUAV
71
All Rights Reserved