1
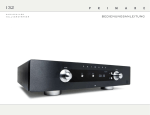
P RE 3 2 USER GUIDE Getting Started Set up your PRE32 in four simple steps: 1 U n p a c k t h e P RE 3 2 Your PRE32 is supplied with the following components: • • • • Mains cable. Trigger cable. C23 remote control. 2 C o n n e c t TO A P O W ER AM P LI F IER The PRE32 is designed to be connected to a power amplifier with either balanced or unbalanced inputs. • Two batteries for the remote control. If any of these items are missing please contact your supplier. We recommend you retain the packaging in case you need to transport the unit at a later date. • If the power amplifier provides balanced inputs, such as the Primare A34.2, connect the PRE3 L and R outputs from the PRE32 to the L and R balanced inputs in the power amplifier, using high quality XLR cables. If the power amplifier only provides unbalanced inputs, connect the PRE1 (or PRE2) L and R outputs from the PRE32 to the L and R inputs on the power amplifier, using high quality RCA cables. 3 C o n n e c t IN P UTS 4 Connect power You can connect up to two balanced sources and up to three unbalanced sources to the analogue inputs on the back panel. • Balanced inputs • Connect the balanced inputs IN1 and IN2 to balanced sources, such as a Primare CD32 CD player, using high quality XLR cables. Unbalanced inputs • Connect the unbalanced inputs IN3, IN4, IN5, and IN6 to unbalanced sources, using high quality RCA cables. Media module Additional inputs are provided by the optional media module. This offers streaming of files from the Internet, NAS, or PCs; Internet radio content; and digital audio input from devices including CD players, smart phones, personal players, and satellite boxes. For more information see the documentation supplied with the upgrade. Plug one end of the mains cable supplied with the PRE32 into the power connector on the back panel, and connect the other end to a wall socket. If this cable is not suitable for your power outlets please contact your supplier for an alternative cable. Note: See Phase, page 8, for information about getting the best sound from your PRE32. • WARNING: Always disconnect the PRE32 from the mains power before connecting or disconnecting any cables. Switch on the PRE32, using the switch on the back panel. The standby indicator will light up on the front panel. To switch on from standby • Press O on the front panel or remote control. The display shows: PRIMARE followed by the currently selected source and volume setting. Press O again to switch to standby.