1
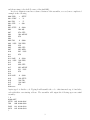
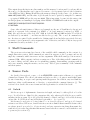
User Manual
for
KRUSADER
Ken’s Rather Useless Symbolic Assembly Development Environment for the Replica 1
or is that Reasonably Useful? You decide!
Ken Wessen
[email protected]
Version 1.3 – December 24, 2007
1
Introduction
KRUSADER is a program written to allow assembly language development on the Replica 1 –
an Apple 1 clone designed by Vince Briel1 , and described in the book Apple 1 Replica Creation:
Back to the Garage by Tom Owad2 . KRUSADER includes a simple shell and editor, a single-pass
symbolic assembler, a disassembler, and a simple interactive debugger, and fits in just under 4K
(so it is small enough to fit in the 8K of Replica 1 ROM along with the monitor and Apple BASIC).
Although designed for the Replica 1/Apple 1, there is very little system dependent code, and since
full source code is provided, KRUSADER can easily be adapted to any other 6502 based system.
However, it’s limitations may mean it is not an appropriate tool in many cases (for example, it
has no concept of a file-system and so would not be particularly suitable for use on an Apple II).
KRUSADER handles a fairly standard and expressive syntax for its assembly source code. For
users who are unfamiliar with the 6502 instruction set, I recommend the introduction by Andrew
John Jacobs at http://www.obelisk.demon.co.uk/6502/. On a Replica 1, KRUSADER can
assemble over 200 lines of code per second, and given its 32K of RAM, the defaults provide space
for around 20K of tokenised source code, 7K of generated code, and up to 256 global symbols.
The KRUSADER distribution is comprised of two source files, one that can assemble and disassemble 6502 code only, and the another that is able to handle the expanded 65C02 instruction set
(see section 6). Both versions include a mini-monitor for interactive debugging (see section 7). In
addition, two binaries of each version are supplied – one to be loaded in high RAM at addresses
$7100-$7FFF, and the other that belongs in ROM from $F000-$FEFF. Since source is provided,
alternative binaries are easy to produce. I use the 6502 simulator by Michal Kowalski3 to assemble
1
http://www.brielcomputers.com
http://www.applefritter.com/replica
3
http://home.pacbell.net/michal k/
2
1
the object code, and test it on the Pom1 simulator4 and my Replica 1. Although the latest version
of KRUSADER supports the 65C02, it contains only 6502 code itself, and this manual will cover
the 6502 features first, saving a discussion of the 65C02 enhancements until section 6. Addresses
quoted in this manual will be for the high RAM version of the code, with the ROM version values
following in brackets, but these values are easily offset for any particular starting address.
2
Sample Session
The best way to give a quick overview of the system and its operation is to work through a
couple of simple examples. First thing is to load the program, and once loaded run it by typing
7100R(F000R). At this point you will be presented with a brief message showing the version of
the assembler you are running, followed by the shell prompt ? . Type N to enter a new program,
and enter the code shown below. The column layout is important, with the source organised in
fields. After the current line number is printed by the editor, the next 6 characters are the label
field, then after a space there is the 3 character mnemonic field, then after a space a 14 character
arguments field, and finally a comments field of maximum 10 characters. Hitting tab or space will
automatically progress you to the next field, and to finish entering code, hit the escape key (hit
return first though, or you will lose the current line). If you make an error typing a line, hitting
backspace will return you to the start of the line (there is no true backspace on the Apple 1, and I
have chosen not to implement the underscore-as-backspace hack used in the Apple 1 monitor and
Apple 1 BASIC since it confuses the syntactically important column layout). If you only notice
an error after hitting return and need to change a line, type E nnn, where nnn is the line number
in question (it is not necessary to enter any leading zeroes). If you missed a line out altogether,
type I nnn to insert at line nnn.
? N
000
001 LOOP
002
003
004
005
006
007<esc>
LDA
JSR
CLC
ADC
CMP
BNE
RTS
#’A’
$FFEF
#$1
#’Z’+1
LOOP
When you have finished entering the source, type L to list the code, and then A to assemble it. You
should see the assembler output 0300-030C, indicating the target memory locations used by the
assembled code. Any errors detected in the code will be displayed at this point, and can be fixed
using either the I and E commands described above, or the X nnn mmm command for deleting
a range of lines (the second argument mmm is optional). Once the code has been successfully
assembled, run it by typing R $300. The program will run and output the string
ABCDEFGHIJKLMNOPQRSTUVWXYZ
4
The original is at http://www.chez.com/apple1/Apple1project/, and a version that fixes various bugs at
http://school.anhb.uwa.edu.au/personalpages/kwessen/apple1. This version also adds the capability to emulate a 65C02-based Replica 1.
2
and then return to the shell (because of the final RTS).
In order to illustrate some more advanced features of the assembler, a second, more complicated
example is the following.
000 ECHO
001 START
002 END
003 STEP
004
005 SETUP
006
007
008
009
00A
00B FWD
00C .LOOP
00D
00E
00F
010
011
012
013 BACK
014 .LOOP
015
016
017
018
019
01A
01B MAIN
01C
01D
01E
01F
020<esc>
.=
.=
.=
.=
$FFEF
’A’
’Z’
$30
.M
LDA
STA
LDA
RTS
$280
#$1
STEP
#START
.M
JSR
CLC
ADC
CMP
BMI
RTS
$300
ECHO
.M
JSR
SEC
SBC
CMP
BPL
RTS
$320
ECHO
.M
JSR
JSR
JSR
RTS
$340
SETUP
FWD
BACK
STEP
#END
.LOOP
STEP
#START
.LOOP
Again, type L to list the code. Typing A will assemble the code – this time made up of 4 modules,
each with their own starting address. The assembler will output the following upon successful
assembly:
? A
0300-02FF
SETUP 005
FWD
00B
BACK
013
MAIN
01B
?
0280-0286
0300-030A
0320-032A
0340-0349
3
This output shows the first source line number and the memory locations used by each module in
the source code (the first line can be ignored because no code is generated prior to the declaration
of the SETUP module). Hitting M will show the memory taken up by the source code, in this case
2000-20E5(2300-23E5), and the value of global symbols can be queried by using the V command
– e.g. typing V MAIN will get the response 0340. This is important, because it is the entry point
for this program, and running it by typing either R $340 or R MAIN will result in the output:
ABCDEFGHIJKLMNOPQRSTUVWXYZYXWVUTSRQPONML
KJIHGFEDCBA
Some other relevant features of this second example are the use of blank lines for layout, and
symbols to represent both constants (e.g. START .= ’A’) and memory locations (e.g. STEP .=
$30). Also note the use of the local label .LOOP in both the FWD and BACK modules. Local labels
are indicated by an initial ‘.’, and have module level scope only. The .= and .M commands are
two directives recognised by the assembler for defining symbols and modules respectively. It is not
necessary to give a memory location argument to the .M directive, and indeed only in very special
circumstances would you wish to do so.
3
Shell Commands
The previous section introduced most of the available shell commands, in the context of a
sample interactive session. Shell commands are entered in response to the ? prompt, and are all
single key commands, with between zero and two arguments. If the shell cannot process an entered
command, ERR: SYN is output to indicate a syntax error. Five of the thirteen shell commands are
for source editing, and the others are for assembling, running, disassembling, querying symbols
and source memory, using the monitor, and recovery. Table 1 gives a summary of all commands
and their syntax.
4
Source Code
As described in section 2, source code in KRUSADER requires strict adherence to a specific
column-based format. The editor both assists and enforces source code entry to match this format
by auto-forwarding on a space and ignoring invalid keypresses. In addition, any non-blank line
must have either a valid mnemonic or directive, or start with the comment character (;). The
sections below describe the source format and the legal entries for each field in detail.
4.1
Labels
Labels are up to 6 alphanumeric characters in length, and may be either global or local in
scope. Local labels are defined for the current module only, whereas global labels are accessible
anywhere in the program. Up to 256 global labels may be defined, and up to 32 local labels in any
one module. Local labels are any labels that begin with a . (i.e. a period).
Labels may be used prior to being defined, i.e. as forward references, and up to 85 forward
references are allowed. However, forward references are more limited than normal labels since they
are always treated as words (i.e. 2 bytes in size), and any expression involving them must also
result in a 2 byte value. In particular this means forward references cannot be used with the < and
> operators (see section 4.5).
4
Command
N
Arguments
I
<nnn>
L
<nnn>
X
nnn <mmm>
E
nnn
M
A
V
R
LABEL
$nnnn or LABEL
D
<$nnnn or LABEL>
!
$
P
<c>
Action
Start a new program. This command will clear any existing source, and prompt for source entry from line 000.
Insert code from line nnn, or at the end if no argument.
If k lines are inserted, existing lines from nnn are shifted
down by k.
List the source starting from line nnn, or the beginning
if no argument. Press any key to stop the listing.
Delete from lines nnn to mmm inclusive. If just one
argument, delete line nnn only. Care must be taken
since this will change the line number associated with
all subsequent source lines. Delete cannot be undone.
Edit line nnn, and insert after. This is equivalent to typing X nnn followed by I nnn, so the existing line is deleted
immediately, and as for the X command, it cannot be
recovered.
Show the memory range used to store the current source
code.
Assemble the current source code.
Show the value of the given label or expression.
Run from address $nnnn. If the program ends with an
RTS, control is returned to the shell. Otherwise, re-enter
the shell at address $711C($F01C).
Disassemble from address $nnnn, or continue from the
last address if no argument. Press any key to stop the
disassembly.
Send the next line typed as a command to the Apple 1
Monitor.
Drop into the Apple 1 Monitor. You can re-enter the
shell at address $711C($F01C).
Panic! This command attempts to recover lost source
(usually due to zero page data corruption). If the first
line of source starts with a label, then give the first letter
of that label as an argument to this command. For more
detail, see the section on source tokenisation 8.2
Table 1: KRUSADER shell commands. Note that any shell commands that use labels are dependent
on the assembler’s global symbol table being intact, specifically the pointer information in zero
page locations $E9, $EA and $EB, and the table data itself (see figure 1). Optional arguments are
indicated by < · · · >.
5
Once any particular module has been assembled, all local labels are cleared and an error is
reported if any forward references involving local labels remain unresolved. However, any forward
references to global labels that remain unresolved are simply held, and will only cause an error if
they are still unresolved once assembly of the entire program has been completed.
KRUSADER will report an error if a global label is redefined, or a local label is redefined within
a module.
4.2
Mnemonics
KRUSADER recognises the standard 3 character mnemonics for all legal 6502 instructions.
These are shown in table 2. Undocumented opcodes are not supported, and the 65C02 support is
discussed in section 6. The editor will not accept any line with an invalid entry in the mnemonic
field. Note that when the 6502 executes a BRK instruction, the return address pushed onto the stack
is PC+2, and so KRUSADER assembles the BRK opcode as two $00 bytes and an RTI will return to
the next instruction. However, the disassembler will show these as consecutive BRK instructions.
Operation
Load/Store
Transfer
Stack
Logical
Arithmetic
Increment/Decrement
Shift
Jump/Call
Branch
Status Flag
Other
Mnemonics
LDA, LDX, LDY,
TAX, TXA, TAY,
PHA, PLA, PHP,
AND, EOR, ORA,
ADC, SBC, CMP,
INC, INX, INY,
ASL, LSR, ROL,
JMP, JSR, RTS
BCC, BCS, BEQ,
CLC, CLD, CLI,
BRK, NOP, RTI
STA,
TYA,
PLP
BIT
CPX,
DEC,
ROR
STX, STY
TSX, TXS
CPY
DEX, DEY
BNE, BMI, BPL, BVC, BVS
CLV, SEC, SED, SEI
Table 2: Recognised mnenomics.
4.3
Arguments
Table 3 shows the argument format for each of the 6502’s addressing modes. In addition, $nnnn
can always be replaced by a label or expression, and similarly $nn so long as the result is a single
byte. (Expressions are introduced in section 4.5 below.) A single byte may also be represented
using ‘c’ for a given printable character when immediate mode is being used. Whenever a word
sized argument actually has a high byte of zero and the corresponding byte size addressing mode
is legal, the byte size mode will be used. In addition, some mnemonics support the absolute,Y
addressing mode but not the zero page,Y mode. In these cases, a byte sized argument will be
increased to word size in order to make the instruction legal. Constants are always hexadecimal.
6
Addressing Mode
Implicit
Accumulator
Immediate
Zero Page
Zero Page,X
Zero Page,Y
Relative
Format
Addressing Mode
Absolute
Absolute,X
Absolute,Y
Indirect
Indexed Indirect
Indirect Indexed
#$nn or #’c’
$nn
$nn,X
$nn,Y
*+/-nn
Format
$nnnn
$nnnn,X
$nnnn,Y
($nnnn)
($nn,X)
($nn),Y
Table 3: Source code syntax for the 13 addressing modes of the 6502.
4.4
Comments
There are two ways to include comments in KRUSADER source. Full line comments may be
entered by typing a ‘;’ character as the first character in the line, followed by a space5 . Then
all line space from the mnemonic field onwards can be used for comment text. Alternatively, the
remainder of any line after the end of the argument field is also reserved for comments, and in this
case, no special character is required to preceed their entry.
Comment entry is the only place where spaces are treated literally, and examples of both kinds
of comments are shown in the code snippet below:
003 ;
004
005
4.5
HERE IS A LONG COMMENT
CMP #’Z’+1
HERE ARE
BNE LOOP
SHORT ONES
Expressions
KRUSADER allows the use of 4 operators in a mnemonic’s argument: +, -, < and > for plus,
minus, low byte and high byte respectively. The plus and minus operators take a constant signed
byte argument only, and unlike other places where constants are employed, the argument requires
no preceeding $. The high and low byte operators are used to extract the relevant single byte from
a word sized constant or label, and have lower precedence than + and -, and so are applied last of
all when evaluating the expression.
For example, if we define the symbols BYTE .= $12 and WORD .= $3456, then the following
expressions are evaluated as listed below:
•
•
•
•
•
BYTE+1
BYTE+80
<BYTE+80
WORD+1
WORD-1
=
=
=
=
=
•
•
•
•
•
$13,
$FF92,
$92,
$3457,
$3455,
WORD+FF
>WORD
<WORD
>WORD+10
<WORD+10
=
=
=
=
=
$3455,
$34,
$56,
$34,
$66.
As described in section 4.1, forward references can be used in expressions involving the + and
- operators, but not in expressions involving the < and > operators.
5
Strictly speaking the space is not required, but if it is absent, the source formatting will be upset.
7
4.6
Directives
In addition to the 6502 mnemonics described in section 4.2, KRUSADER supports a number of
directives for managing symbolic constants, program structure and data. Directives are entered in
the mnemonic field, and always consist of a period followed by a single letter. Each of the available
directives is described in table 4 below.
Directive
LABEL .= $nnnn
LABEL .M <$nnnn>
<LABEL> .B $nn
<LABEL> .W $nnnn
<LABEL> .S ’cc. . .c’
Action
Define a named constant. The label must be global in
scope, and redefinitions are ignored without error. Expressions or a quoted character are allowed.
Define a new module, optionally at the specified address,
or else just continuing on from the previous module.
The label must be global in scope, and redefinitions are
ignored without error. Expressions are not allowed.
Store the byte-sized value $nn at the current PC. Expressions or a quoted character are allowed, but not forward references.
Store the word-sized value $nnnn at the current PC in
little-endian byte order. Expressions are allowed, but
not forward references.
Store the string literal at the current PC. The string
must be 13 characters or less, and may not containt
spaces.
Table 4: Directives supported by KRUSADER. Optional fields are indicated by < · · · >.
5
Errors
Error reporting in KRUSADER is necessarily limited by its size constraints, but nevertheless it
attempts to capture as many errors and ambiguities as possible, and report them in a meaningful
way. Errors can arise in response to a shell command or as a result of an assembly. When
appropriate, the offending line or symbol will be displayed.
Error
ERR: SYN
ERR: MNE
ERR: ADD
ERR: SYM
ERR: OVF
Meaning
Syntax error in either a shell command or a source code line.
An illegal mnemonic code was encountered.
An illegal addressing mode was encountered.
A needed symbol was not found.
Too many symbols has lead to a symbol table overflow.
Table 5: KRUSADER error messages.
8
There are many reasons why an “ERR: ADD” may occur, especially if the offending line involves
symbols. For this reason it can be helpful to query the symbols involved using the V command
(see table 1). If the symbol is indeed the cause of the addressing mode error, the V command will
report a more useful error, specifically “ERR: SYM” if the symbol is undefined, or “ERR: OVF” if
the symbol tables are full.
6
65C02 Support
With version 1.2 of KRUSADER, optional support for the 65C02 processor has been included.
The 65C02 is an enhanced version of the basic 6502 chip, offerring some extra operations and addressing modes, and fixing a few problems with the original design Although these enhancements
are all useful, essentially the changes are a case of “too little, too late” and frequently programmers
choose to stick to pure 6502 code for portability reasons. In addition, 65C02s from various manufacturers have slightly different command sets, thus adding to the confusion. However, since the
65C02 is the CPU in nearly all Replica 1 computers, it makes good sense for KRUSADER to support this chip, and this section describes this support. Nevertheless, no 65C02 specific operations
are used in the KRUSADER code itself.
6.1
Additional Mnemonics
The ten 65C02 instructions supported by KRUSADER are listed in table 6. Each of these is
valid on all versions of the 65C02, and also on the 65C816. No other instructions are supported
– specifically the single bit instructions BBR, BBS, RMB, SMB found on the Rockwell and WDC
versions of the 65C02, and the STP and WAI instructions found on the Rockwell 65C02 only are
not recognised.
Operation
Load/Store
Stack
Logical
Increment/Decrement
Branch
Mnemonics
STZ
PHX, PLX, PHY, PLY
TSB, TRB
INA, DEA
BRA
Table 6: Additional mnenomics supported by the 65C02 version of KRUSADER.
6.2
Additional Addressing Modes
The 65C02 introduced two new addressing modes – zero page indirect and absolute indexed
indirect. The KRUSADER source code syntax for these modes is shown below:
• Zero Page Indirect – ($nn)
• Absolute Indexed Indirect – ($nnnn,X)
9
7
The Mini-Monitor
The 8K of Replica 1 ROM, with Integer BASIC, the Monitor, and KRUSADER, leaves just
enough space for a simple interactive debugger, and this section describes the debugger included
with the ROM version of KRUSADER. By making the IRQBRK vector at $FFFE,F point to the
DEBUG routine at address $FE19 ($FE0A for the 65C02 version), execution of a BRK passes control
to the mini-monitor, and the registers and next instruction are displayed as follows:
A-41 X-FF Y-07 S-FD P-23 CZ
0306
20 EF FF
JSR
$FFEF
The P register is shown both as a value, and as a string from “NVBDIZC” indicating which flags
are set. (In the above example, the zero flag (Z) and the carry flag (C) are set.) The - prompt
indicates that the mini-monitor is waiting for a command. Valid commands are shown in table
7, and are used to change the register values, set the next instruction location, or drop into the
Apple 1 monitor.
Command
Ann
Xnn
Ynn
Snn
Pnn
Lnn
Hnn
R
$
!
T
Action
Put the value $nn into the A register.
Put the value $nn into the X register.
Put the value $nn into the Y register.
Put the value $nn into the S register.
Put the value $nn into the P register.
Set the low byte of the PC for the next instruction to
be executed to the value $nn.
Set the high byte of the PC for the next instruction to
be executed to the value $nn.
Resume execution at the currently displayed instruction.
Enter the Apple 1 monitor.
Enter an Apple 1 monitor command.
Trace execution step by step (6502 version only).
Table 7: Mini-monitor commands.
To return to the mini-monitor from the Apple 1 monitor, type FE23R (or FE0AR if you are
running the 65C02 version). Another useful address to remember is the disassembly routine at
$FAD0 ($FAF8 for the 65C02 version), but bear in mind that using this routine involves changing
the stored PC value at locations $F5 and $F6, and this must be restored, using either the monitor
or the mini-monitor, if you wish to resume the program being monitored.
7.1
Sample Mini-Monitor Session
This section gives a short example of a mini-monitor session. In order to work through this
example, first start the assembler, and enter the following short program that includes a BRK
instruction.
10
F000R
F000: A9
KRUSADER 6502 BY KEN WESSEN
? N
000
LDA #’A’
001
JSR $FFEF
002
SEC
003
BRK
004
JSR $FFEF
005
RTS
006
?
Assemble it and examine the resulting code.
? A
0300-030B
? D $300
0300
A9 41
0302
20 EF FF
0305
38
0306
00
0307
00
0308
20 EF FF
030B
60
...
LDA
JSR
SEC
BRK
BRK
JSR
RTS
#$41
$FFEF
$FFEF
When this program is run, it should print A, set the carry flag (C), and then drop into the minimonitor.
? R $300
A
A-41 X-FF Y-07 S-FD P-21 BC
0308
20 EF FF
JSR
$FFEF
Use the A command to change the value in register A from 41 to 42, confirm the change by checking
the new register display, and then resume the program with the R command. The program will
then print a B, corresponding to the new value in register A, and return to the assembler shell as
normal.
-A42
A-42 X-FF Y-07 S-FD P-21 BC
0308
20 EF FF
JSR
$FFEF
-R
B
?
Now let’s enter a new program, this time involving a subroutine call.
11
? N
000
001
002
003
004
005 SUB
006
007
008
009
?
LDA #’A’
JSR SUB
JSR $FFEF
RTS
.M
BRK
LDA #’Z’
RTS
Assemble it, examine the resulting code, and run. It will break into the mini-monitor on entry to
the subroutine SUB.
? A
0300
SUB
005 0309-030C
? D $300
0300
A9 41
LDA
0302
20 09 03
JSR
0305
20 EF FF
JSR
0308
60
RTS
0309
00
BRK
030A
00
BRK
030B
A9 5A
LDA
030D
60
RTS
...
? R $300
#$41
$0309
$FFEF
#$5A
A-41 X-FF Y-07 S-FB P-24 B
030B
A9 5A
LDA
#$5A
When in the mini-monitor, unroll the stack by adjusting the value in S, and set the PC to $0305.
-SFD
A-41 X-FF Y-07 S-FD P-20
030B
A9 5A
LDA
-L05
A-41 X-FF Y-07 S-FD P-20
0305
20 EF FF
JSR
-
B
#$5A
B
$FFEF
Now resume, and A will be printed rather than Z since lines 007 and 008 were never executed.
Since we also adjusted the stack pointer, the RTS on line 003 will return control to the assembler.
-R
A
?
12
7.2
Tracing Assembled Code
The 6502 version of KRUSADER left just enough space free in the Replica 1 ROM for implementing a single step trace function in the mini-monitor. In the absence of size constraints, this
function can be added to the 65C02 version as well, but it would need a little bit of extra code to
properly handle the BRA instruction and the absolute indirect addressing mode.
To see how the trace function operates, enter the following short program:
? N
000
001
002
003
004
005
006
007
?
BRK
PHP
SEC
LDX #$0
DEX
PLP
RTS
Assemble and run, and it will drop into the monitor right away.
? A
0300-0308
? R $300
A-0D X-01 Y-07 S-FD P-30 B
0302
08
PHP
Now we can use the T command to step through the code. After one step, the current value of the
status register (P = 30) will be pushed onto the stack, and the stack pointer will decrease by 1.
-T
A-0D X-01 Y-07 S-FC P-30 B
0303
38
SEC
As we step through, we can watch the changes in the status flags in response to the execution of
each command. Follow the below to see the carry, zero and negative flags being set.
-T
A-0D X-01 Y-07 S-FC P-31
0304
A2 00
LDX
-T
A-00 X-01 Y-07 S-FC P-33
0306
CA
DEX
-T
A-FF X-01 Y-07 S-FC P-B1
0307
28
PLP
-
BC
#$00
BZC
NBC
13
After one last step, the status register will be restored to its earlier value, so the flags will return to
off, and the stack pointer increased by 1. Then, as usual, the R command will continue execution
of the program, and so the RTS command will return control to the assembler shell.
-T
A-FF X-01 Y-07 S-FD P-30 B
0309
60
RTS
-R
?
7.3
Using the Apple 1 monitor
The minimonitor includes no commands for examining or altering memory. Rather, this functionality is provided via the standard Apple 1 monitor by using the ! command to submit instructions to the monitor as shown in the following example.
A-D2 X-00 Y-01 S-FD P-33 BZC
0002
00
BRK
-!
1000.101F
1000: 00 00 00
1008: 00 00 00
1010: 00 00 00
1018: 00 00 00
A-D2 X-00 Y-01
0002
00
-!
1000:1 2 3 4
00 00 00 00 00
00 00 00 00 00
00 00 00 00 00
00 00 00 00 00
S-FD P-33 BZC
BRK
1000: 00
A-D2 X-00 Y-01 S-FD P-33 BZC
0002
00
BRK
-!
1000.1007
1000: 01 02 03 04 00 00 00 00
A-D2 X-00 Y-01 S-FD P-33 BZC
0002
00
BRK
-
14
8
Low Level Information
This section presents some low-level information about how KRUSADER works, and is not
required for normal use of the assembler. However, there are many situations where this information is quite important for managing source and machine code, and correcting errors. The most
important memory locations are shown in table 8, and discussed in the following sections.
Address
$7100($F000)
$711C($F01C)
Function
Assembler entry
Assembler re-entry (shell)
$7304($F204)
Move memory
(non-overlapping)
$FE14∗
$FE1E∗
Mini-monitor entry
Mini-monitor re-entry
(ROM version only)
$7BCA($FACA)∗
Disassembler
Zero Page Dependencies
$F8 – High byte of assembled code storage area
$F9 – High byte of local/global table boundary
$FE,$FF – Address of source code storage area
$E9,$EA – Global symbol table address
$EB – Number of global symbols
$50,$51 – Source location
$52,$53 – Destination
$54,$55 – Bytes to move
$F0-$F4 – Register storage (S,P,Y,X and A)
$F5,$F6 – Address of next instruction
$0F-$11 – Input buffer
$E0-$E8 – Code buffer for trace function
$F5,$F6 – Address to disassemble from
Table 8: Important function entry points and related memory locations. ∗ The minimonitor addresses are $FE03 and $FE16 in the 65C02 version, and the disassembler address is $FAEA.
8.1
Memory Map
Proper operation of the assembler requires a number of things to reside in the machine’s
memory. There is the assembler code itself, the program source code, the assembled code, and
various symbol tables. The default arrangement for both the high RAM and the ROM versions of
KRUSADER are shown in figure 1. The local symbol and forward reference tables take up a fixed
1K of space, with 256 bytes taken up by the locals, and the remainder for the forward references.
The global symbol table grows downward to a maximum of 2K (corresponding to 256 symbols).
The two most important source locations have both been mentioned already, and are $7100($F000)
for initial program entry, and $711C($F01C) for returning to the shell.
KRUSADER also uses a number of zero page locations, but mostly as an input buffer and
during assembly. The only locations that absolutely must be maintained are $F8, $F9, $FE and
$FF. These hold the high byte of the default assembled code storage location, the high byte of the
local/global symbol table boundary, and the low and high bytes of the source code storage location
respectively (See figure 1 for the appropriate values). Additionally, locations $E9, $EA and $EB
are needed if the shell is to have access to the global symbol table for various commands (see table
1), and locations $0F, $10, $11, $E0 to $E8, and $F0 to $F6 are used by the mini-monitor. If you
wish to use all the features of KRUSADER while developing assembly language programs, it is wise
to avoid using these locations in your programs. Replica 1 users need to beware of Apple 1 BASIC
15
High RAM Version
ROM Version
7FFF
FEFF
KRUSADER code
7100
70FF
6E00
6D00
Forward References
Local Symbols
F000
7FFF
7D00
7C00
Global Symbols
6500
7400
Program Source
1D00
2000
Program Target
0300
0100
0000
Zero Page
0300
0100
0000
Figure 1: Memory map for both the high RAM and the ROM versions of KRUSADER. Note that
the global symbol table starts at the local/global table boundary and grows downwards, whereas
the program source starts at the low address and grows upwards. As mentioned in section 8.1,
the important values are the high byte of the target memory, the high byte of the local/global
symbol table boundary, and the start of the source code storage. For the RAM version, the values
are $03, $6D, $00 and $1D, and for the ROM version they are $03, $7C, $00 and $20. After
initialisation, these values are stored in zero page locations $F8, $F9, $FE and $FF.
because it may overwrite several of these values, so they need to be restored before returning to
the KRUSADER shell6 .
8.1.1
Changing Default Memory Locations
For the RAM based version of KRUSADER, the default values can be altered by changing the
values at memory locations $7101, $7105 and $7109 in the assembler code. For the ROM based
version, the default values can only be altered after the program has been run, and the alternative
values must be entered directly into the zero page locations mentioned above, before resuming
KRUSADER at location $F01C7 .
6
7
The P command is useful for restoring the default values to these zero page memory locations.
The P command will overwrite any values entered in this way.
16
8.2
Source Tokenisation Scheme
Any entered source is stored in a tokenised form in order to save space. The tokenisation
employed is quite simple because there was even less space available in the code to implement
it! Three special codes are employed – $01 as a field terminator, $00 as a line terminator, and
$02 00 to indicate a blank line. Labels, arguments and comments are stored as entered with the
field terminator marking their end, and mnemonics and directives are encoded as a single byte.
Program end is indicated by a line starting with $00. This simple scheme results in a reduction of
the source code size by a factor of 2 to 3.
Also provided in the KRUSADER distribution is C source code for a program that can convert
more general source code formats to the required tokenised form, so that they may be uploaded to
the assembler. However, this simple program does not translate different formats for directives or
addressing mode specification, so if any such changes are required, they must be done manually.
Once you have the converted source data, simply launch KRUSADER as normal, enter the monitor
and load in the tokenised data to the source storage memory, and resume. The source will then be
available to KRUSADER as if you had typed it in as normal. However, syntax and formatting errors
in the source may not be well handled since the error handling is designed around the restrictions
placed on source input in the usual manner.
Unfortunately the binary source tokenisation is incompatible between the 6502 and 65C02
versions of the assembler due to differences in the mnemonic indices and directive encoding. The
‘-C’ command line option may be used with the tokeniser program to specify the 65C02 version
binary format.
One useful thing to keep in mind is the N command simply clears the source program from
memory by putting a $00 as the very first byte of the source storage location. So if N is typed
accidentally, the source can be easily restored. To do this manually, simply enter the monitor using
$, and change this initial byte to either $01 if there was no label, or the first byte of the label,
and then resume KRUSADER as normal with 711CR(F01CR). This process is automated by the P
command. You should note however that there is no way to recover source lines deleted with the
X or E commands since the memory is immediately overwritten.
8.3
Moving Memory
If you want to copy a block of memory to another location (if you are backing up source or
machine code via the expansion interface for example), you can make use of one of the memory
moving subroutines inside the assembler as follows. First work out non-overlapping source and
destination addresses – call these srcL, srcH, destL and destH, and then the size of memory to move
– sizeL and sizeH. (You can do this using the M command for source or watching the output of the
A command for assembled code.) Then drop into the monitor using the $ command, and enter:
50: srcL srcH destL destH sizeL sizeH to set the parameters, and 7304R (F204R) to do the move.
8.4
Testing
KRUSADER comes with a number of sample programs, both in binary and hex dump formats,
and these are useful for verifying its correct operation. The most important sample in this regard is TestSuite.asm, which contains a number of modules for testing the assembler. (For the
65C02 version, there is the pair of source files: TestSuiteC.asm for the pure 6502 tests, and
TestSuite65C02.asm for tests of the 65C02 extensions.) The first test of course is that the source
17
assembles without error, then R MAIN will cause the program to verify its own assembled code and
report any errors. This test suite covers all the 6502 instructions, using all their addressing modes
and various formats for arguments where relevant, as well as each of the available directives. In
addition, both forward referencing and the various kinds of expressions supported by KRUSADER
are tested – both alone and in combination with various addressing modes. A successful run of
this suite of tests is a very good indication that KRUSADER is functioning properly.
Because of the size of the test suite code, it can not be run with the RAM version of KRUSADER
without changing the start address for program source storage as described in section 8.1.1 above
in order to allow enough room for the source code, the assembled code, and the global symbol
table. Specifically, prior to running KRUSADER, the value at address $7101 needs to be changed
to $14, or if KRUSADER is already running, this value of $14 can be loaded directly into the zero
page address $FF.
18
9
Release History
• KRUSADER 1.0 (May 2006)
– First version released.
– Target CPU is 6502 only.
• KRUSADER 1.1 (July 2006)
– Fully tested version - several bug fixes over version 1.0.
– Comes with code for a thorough automated testing of itself.
– Various enhancements over version 1, most notably:
∗
∗
∗
∗
Forward references can cross module boundaries.
Symbol redefinition is reported as an error.
Comment only lines.
Approximately 20% faster assembly.
– This version was added to the Replica 1 SE ROM.
• KRUSADER 1.2 (August 2006)
– Fixes an obscure bug in version 1.1 that prevented assembly of JMP or JSR commands
targetting page zero.
– Improved syntax checking.
– More compact implementation saves more than 200 bytes over version 1.1.
– Extra space used to implement a mini-monitor for interactive debugging.
– Also available is KRUSADER 65C02, a version that supports 65C02 commands in both
the assembler and disassembler.
– Still fits inside the 3840 free bytes of the Replica 1 ROM!
• KRUSADER 1.3 (December 2007)
– Made source and disassembly listings continuous until key pressed.
– Added ‘!’ command to the shell and minimonitor.
– Bundled with the Krusader Toolkit 8 – an integrated editor, terminal and emulator for
the Replica 1.
8
http://school.anhb.uwa.edu.au/personalpages/kwessen/apple1/ktk.zip
19