1
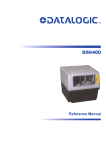
DS6300
Reference Manual
Datalogic Automation S.r.l.
Via S. Vitalino 13
40012 - Lippo di Calderara di Reno
Bologna - Italy
DS6300 Reference Manual
Ed.: 03/2010
© 2003 – 2010 Datalogic Automation S.r.l. ALL RIGHTS RESERVED. Protected to the fullest
extent under U.S. and international laws. Copying, or altering of this document is prohibited without
express written consent from Datalogic Automation S.r.l.
Datalogic and the Datalogic logo are registered trademarks of Datalogic S.p.A. in many countries,
including the U.S.A. and the E.U.
Genius, Step-a-Head, ACR, and ID-NET are trademarks of Datalogic Automation S.r.l. All other brand
and product names mentioned herein are for identification purposes only and may be trademarks or
registered trademarks of their respective owners.
Datalogic shall not be liable for technical or editorial errors or omissions contained herein, nor for
incidental or consequential damages resulting from the use of this material.
22/03/10
CONTENTS
REFERENCES ............................................................................................................vi
Reference Documentation ........................................................................................... vi
Services and Support .................................................................................................. vi
Patents......................................................................................................................... vi
COMPLIANCE............................................................................................................vii
Electrical Safety ...........................................................................................................vii
Laser Safety.................................................................................................................vii
Power Supply..............................................................................................................viii
CE Compliance............................................................................................................ ix
FCC Compliance ......................................................................................................... ix
GENERAL VIEW ..........................................................................................................x
GUIDE TO INSTALLATION ......................................................................................xiii
Point-to-Point Installation............................................................................................xiii
Master/Slave Lonworks Installation ............................................................................xiv
1
1.1
1.2
1.3
1.4
1.5
1.6
1.6.1
1.6.2
1.7
INTRODUCTION ..........................................................................................................1
Product Description ...................................................................................................... 1
Applications ..................................................................................................................2
Model Description .........................................................................................................3
Oscillating Mirror Models ..............................................................................................3
Indicators ...................................................................................................................... 5
Keypad and Display......................................................................................................6
Internal Net ...................................................................................................................6
Test Mode.....................................................................................................................7
Accessories ..................................................................................................................7
2
2.1
2.2
2.2.1
2.2.2
2.2.3
2.3
2.3.1
2.3.2
INSTALLATION ...........................................................................................................9
Package Contents ........................................................................................................9
Mechanical Mounting..................................................................................................10
Mounting the Scanner.................................................................................................10
Mounting the Scanner with Accessories..................................................................... 13
Mounting the Scanner with GFX-60............................................................................15
Positioning the Scanner..............................................................................................17
16° Skew Positioning ..................................................................................................19
45° Skew Positioning ..................................................................................................19
3
3.1
3.2
3.2.1
3.2.2
3.2.3
3.3
3.4
3.4.1
3.5
3.6
CBX ELECTRICAL CONNECTIONS.........................................................................21
Power Supply..............................................................................................................23
Main Serial Interface...................................................................................................23
RS232 Interface..........................................................................................................24
RS485 Full-Duplex Interface.......................................................................................25
RS485 Half-Duplex Interface ...................................................................................... 26
Auxiliary RS232 Interface ...........................................................................................28
Inputs .......................................................................................................................... 29
Code Verifier...............................................................................................................33
Outputs .......................................................................................................................33
User Interface - Host...................................................................................................36
iii
4
4.1
4.2
4.2.1
4.2.2
4.2.3
4.3
4.4
4.4.1
4.5
4.6
CUSTOM CABLE ELECTRICAL CONNECTIONS ................................................... 37
Power Supply..............................................................................................................39
Main Serial Interface...................................................................................................39
RS232 Interface..........................................................................................................40
RS485 Full-Duplex Interface.......................................................................................41
RS485 Half-Duplex Interface ...................................................................................... 42
Auxiliary Interface .......................................................................................................44
Inputs .......................................................................................................................... 44
Code Verifier...............................................................................................................47
Outputs .......................................................................................................................47
User Interface .............................................................................................................49
5
5.1
5.2
LONWORKS CONNECTIONS................................................................................... 50
Network Termination...................................................................................................51
Lonworks Interface .....................................................................................................51
6
6.1
6.2
6.3
FIELDBUS CONNECTIONS ......................................................................................54
Ethernet Interface .......................................................................................................54
DeviceNet Interface ....................................................................................................56
Profibus Interface........................................................................................................57
7
7.1
7.1.1
7.1.2
7.1.3
TYPICAL LAYOUTS ..................................................................................................58
Local Lonworks Network.............................................................................................58
Small Synchronized Network......................................................................................59
Multidata Network .......................................................................................................61
Fieldbus Networks ......................................................................................................62
8
8.1
8.2
8.2.1
8.2.2
8.2.3
8.3
8.3.1
8.4
SOFTWARE CONFIGURATION................................................................................ 64
Genius™ Installation................................................................................................... 64
Guide to Rapid Configuration ..................................................................................... 64
Wizard for Quick Reader Setup .................................................................................. 64
Genius™ Network Setup Through Master..................................................................67
Alternative Slave Address Assignment....................................................................... 72
Advanced Genius™ Configuration ............................................................................. 72
Genius™ Shortcuts for Network Configuration........................................................... 73
Parameter Default Values...........................................................................................75
9
9.1
9.2
9.2.1
9.3
9.3.1
9.4
9.4.1
9.4.2
9.4.3
READING FEATURES...............................................................................................79
Focus Adjustment .......................................................................................................79
Advanced Code Reconstruction (ACR™ 4)................................................................ 81
Tilt Angle for Advanced Code Reconstruction ............................................................ 81
Performance ...............................................................................................................82
Reading Conditions ....................................................................................................82
Reading Diagrams ......................................................................................................84
DS6300 Standard Model ............................................................................................84
DS6300 Oscillating Mirror Model ................................................................................ 88
DS6300 with GFX-60.................................................................................................. 92
10
10.1
10.2
10.3
10.3.1
10.3.2
MAINTENANCE .........................................................................................................94
Cleaning......................................................................................................................94
CBX/SC4000 Backup & Restore ................................................................................94
Automatic Scanner Replacement (ASR) ....................................................................94
ASR Network Configuration........................................................................................ 95
Scanner Replacement Procedure............................................................................... 95
iv
11
TROUBLESHOOTING ...............................................................................................96
12
TECHNICAL FEATURES........................................................................................... 99
A
ALTERNATIVE LAYOUTS ......................................................................................101
Point-to-Point ............................................................................................................101
ID-NET™ Gateway ...................................................................................................103
Pass Through ...........................................................................................................104
RS232 Master/Slave................................................................................................. 105
Multiplexer ................................................................................................................107
GLOSSARY..............................................................................................................108
INDEX.......................................................................................................................110
v
REFERENCES
REFERENCE DOCUMENTATION
The documentation related to the DS6300 management is listed below:
CBX100/CBX500 Installation Manuals
PWR series power supply unit Installation Manuals
Document about the Ethernet connectivity
Document about the Profibus connectivity
GFC-60 90° deflecting mirror
GFC-600 90° deg. mirror close distance
GFX-60 X-pattern mirror
Help On-Line in PDF format
SERVICES AND SUPPORT
Datalogic provides several services as well as technical support through its website. Log on
to www.automation.datalogic.com and click on the links indicated for further information:
PRODUCTS
Search through the links to arrive at your product page which describes specific Info,
Features, Applications, Models, Accessories, and Downloads including the Genius™
utility program, which allows device configuration using a PC. It provides RS232 and
Ethernet interface configuration.
SERVICE
- Overview - Warranty Extensions and Maintenance Agreements
- Sales Network- Listing of Subsidiaries, Repair Centers, Partners
- Helpdesk
- Material Return Authorization
PATENTS
This product is covered by one or more of the following patents:
U.S. patents: 5,992,740; 6,394,352 B1; 6,443,360 B1; 6,688,524 B1; 6,742,710 B2;
7,195,162 B2; 5,028,772; 5,124,538; 5,466,921; 5,548,107; 6,206,289 B1; 6,669,091 B2;
7,000,838 B2.
European patents: 789,315 B1; 959,426 B9; 1,096,416 B1; 1,300,798 B1; 1,217,571 B1.
Japanese patents: 4,376,353.
Additional patents pending.
vi
COMPLIANCE
ELECTRICAL SAFETY
This product conforms to the applicable requirements contained in the European Standard for
electrical safety EN-60950 at the date of manufacture.
WARNING
This symbol refers to operations that must be performed by qualified
personnel only. Example: opening the device.
LASER SAFETY
The following information is provided to comply with the rules imposed by international
authorities and refers to the correct use of the DS6300 scanner.
Standard Regulations
This scanner utilizes a low-power laser diode. Although staring directly at the laser beam
momentarily causes no known biological damage, avoid staring at the beam as one would
with any very strong light source, such as the sun.
Avoid that the laser beam hits the eye of an observer, even through reflective surfaces such
as mirrors, etc.
This product conforms to the applicable requirements of both EN60825-1 and
CDRH 21 CFR1040 at the date of manufacture. The reader is classified as a Class 2 laser
product according to EN60825-1 regulations and as a Class II laser product according to
CDRH regulations.
There is a safety device, which allows the laser to be switched on only if the motor is rotating
above the threshold for its correct scanning speed.
WARNING
Use of controls or adjustments or performance of procedures other than those
specified herein may result in exposure to hazardous visible laser light.
The laser light is visible to the human eye and is emitted from the window on the head of the
scanner (Figure A).
vii
Warning labels indicating exposure to laser light and the device classification are applied
onto the head of the scanner (Figure A):
AVOID EXPOSURE
LASER RADIATION IS EMITTED FROM THIS APERTURE
AVOID EXPOSURE – LASER LIGHT
IS EMITTED FROM THIS APERTURE
Laser Safety Label for Oscillating Mirror and Standard Models
Warning and Device Class Label
The identification label is applied onto the bottom part of the scanner (Figure A, 2):
DATALOGIC S.p.A. Via Candini, 2
40012 LIPPO DI C ALD ERARA DI RENO (BO) ITALY
MANUFACTURED VOLT
Amp.
JANU AR Y 2 005
15-30 DC 1 .3-0.5
MOD EL No.
N2468
SER IAL No.
This product conforms to the applicable requirements
of 21CFR 1040 at the date of manufacture.
Device Identification Label
Disconnect the power supply when opening the device during maintenance or installation to
avoid exposure to hazardous laser light.
The laser diodes used in this device are classified as Class 3B laser products according to
EN 60825-1 regulations and as Class IIIb laser products according to CDRH regulations. Any
violation of the optic parts in particular can cause radiation up to the maximum level of the
laser diode (35 mW at 630~680 nm).
POWER SUPPLY
This product is intended to be installed by Qualified Personnel only.
For all DS6300 models:
This device is intended to be supplied by a UL Listed Power Unit marked “Class 2” or LPS
power source, which supplies power directly to the scanner via the 25/26-pin connector.
This scanner must be supplied by a Class II Power Supply Unit conforming to the
EN 60950 safety regulation.
viii
CE COMPLIANCE
Warning:
This is a Class A product. In a domestic environment this product may cause radio
interference in which case the user may be required to take adequate measures.
FCC COMPLIANCE
Modifications or changes to this equipment without the expressed written approval of
Datalogic could void the authority to use the equipment.
This device complies with PART 15 of the FCC Rules. Operation is subject to the following
two conditions: (1) This device may not cause harmful interference, and (2) this device must
accept any interference received, including interference which may cause undesired
operation.
This equipment has been tested and found to comply with the limits for a Class A digital
device, pursuant to part 15 of the FCC Rules. These limits are designed to provide
reasonable protection against harmful interference when the equipment is operated in a
commercial environment. This equipment generates, uses, and can radiate radio frequency
energy and, if not installed and used in accordance with the instruction manual, may cause
harmful interference to radio communications. Operation of this equipment in a residential
area is likely to cause harmful interference in which case the user will be required to correct
the interference at his own expense.
ix
GENERAL VIEW
DS6300
1
8
2
3
4
5
6
7
Figure A - DS6300
x
1
Laser Safety Label
5
Service Cap
2
Identification Label
6
Connector Panel
3
Warning and Device Class Label
7
Display and Keypad Panel
4
Focus Adjusting Screw
8
Laser Beam Output Window
DS6300
1
2
Figure B - DS6300 Oscillating Mirror Version
1 Laser Safety Label
2 Laser Beam Output Window
5
1
4
3
2
Figure C – Display and Keypad Panel
1
Programming Keypad
4
Power On LED
2
TX Data LED
5
LCD Display
3
Phase On LED
xi
1
2
3
Figure D – Connector Panel for Master/Slave Models
1
Main/Aux. Interface 25-pin D-Sub male connector
2
Lonworks 9-pin male connector
3
Lonworks 9-pin female connector
1
2
3
Figure E – Connector Panel for Ethernet Models
1
Main/Aux. Interface 26-pin D-Sub male connector
2
RJ45 modular connector for Ethernet Interface
3
Lonworks 9-pin female connector
1
2
3
Figure F – Connector Panel for DeviceNet Models
1
Main/Aux. Interface 26-pin D-Sub male connector
2
DeviceNet 5-pin male connector
3
Lonworks 9-pin female connector
1
2
3
Figure G – Connector Panel for Profibus Models
xii
1
Main/Aux. Interface 26-pin D-Sub male connector
2
Profibus 9-pin female connector (white)
3
Lonworks 9-pin female connector
GUIDE TO INSTALLATION
POINT-TO-POINT INSTALLATION
The following can be used as a checklist to verify all the necessary steps to complete
installation of the DS6300 scanner.
1) Read all information in the section “Compliance” at the beginning of this manual.
2) Correctly mount the scanner using the bracket provided according to the information in
par. 2.2 and position it at the correct reading distance according to your model as shown
in par. 2.3 and par. 9.4.
3) Make electrical connections to your DS6300 scanner by:
a) Connecting the DS6300 scanner to the CBX100/CBX500 by means of one of the
CAB-Sxx (or CAB-F0x depending on the model) cables provided as an accessory
(see par. 1.7).
b) Providing correct and complete system cabling through the CBX100/CBX500
according to the signals necessary for the layout of your application (trigger, inputs,
outputs).
Cabling: Power, Interface, Inputs, Outputs, etc. For further details, see chapter 3
(chapter 4 for custom cabling).
Alternative Layouts: Point-to-Point, Pass Through,
Multiplexer. See appendix A for layout references.
RS232
Master/Slave,
4) Configure the DS6300 scanner by installing and running the Genius™ configuration
program from the CD-ROM provided. See chapter 8 and the Help On-Line for details.
The main steps are:
Select the codes to be read
Set-up the communication parameters
Define data formatting parameters
NOTE
Fine tuning of the scanner position for barcode reading can be
accomplished by performing a test through the SPY configuration tool in
Genius™.
5) Exit the configuration program and run your application.
The installation is now complete.
xiii
MASTER/SLAVE LONWORKS INSTALLATION
The following can be used as a checklist to verify all the steps necessary to complete
installation of the DS6300 scanner in a Master/Slave Lonworks network.
1) Read all information in the section “Compliance” at the beginning of this manual.
2) Correctly mount the scanner using the bracket provided according to the information in
par. 2.2 and position it at the correct reading distance according to your model as shown
in par. 9.4.
3) Make electrical connections to your DS6300 scanner by:
a) Connecting the DS6300 Master scanner to the CBX100/CBX500 by means of one of
the CAB-Sxx (or CAB-F0x depending on the model) cables provided as an accessory
(see par. 1.7).
b) Correctly terminating the DS6300 Master reader according to the information given in
par. 5.1 and par. 7.1.
c) Completing the system wiring adding as many slave scanners as required by your
system layout (refer to par. 7.1).
d) Correctly terminating the last DS6300 Slave reader of the network according to the
information given in par. 5.1 and par. 7.1.
4) Install and run the Genius™ configuration program from the CD-ROM provided.
Configure the Local Lonworks Network using one of the procedures given below:
Configure the entire network through the Master as described in par. 8.2.2;
Configure the Master as described in par. 8.2.2 and locally define each slave scanner
address as described in par. 8.2.3.
Define each scanner, master and slaves (with their addresses), by using the scanner
keypad according to the information given in par. 1.6.1.
5) Configure the Master scanner through the Genius™ program. The main steps are:
Select the codes to be read
Set-up the communication parameters
Define data formatting parameters
6) Configure each Slave scanner through the Master scanner using Genius™. The main
steps are:
Select the codes to be read
NOTE
Fine tuning of the scanner position for barcode reading can be
accomplished by performing a test through the SPY configuration tool in
Genius™.
7) Send the configuration to the Master.
xiv
8) Perform the CBX/SC4000 Backup Procedure for system backup purposes (see par.
10.2). For backward compatibility you can perform the ASR Network Configuration
procedure for system backup purposes (see par. 10.3.1).
9) Exit the configuration program and run your application.
The installation is now complete.
xv
xvi
INTRODUCTION
1
1 INTRODUCTION
1.1 PRODUCT DESCRIPTION
The DS6300 is a high performance laser scanner in a complete range of industrial bar code
readers offering an innovative and modular solution in terms of reading performance,
connectivity and maintenance, in addition to a completely new hardware and software
platform.
The DS6300 has been specifically designed for simple installation, easy use and flexibility.
An innovative mechanical design together with the Datalogic patented Step-a-HeadTM feature
make it possible to rotate the reader head and the decoder base independently from each
other. Step-a-HeadTM enables the DS6300 to always be installed in the ideal position, by
modifying the orientation of the connector panel while leaving the laser window in the desired
position. The need for space is minimized and installation is easier.
The DS6300 has an innovative multi-step optic assembly for mechanically adjustable
focusing, providing the scanner with a particularly large reading range of 250 mm to 2,000
mm (10-80 inches). Its key features are excellent reading field at the minimum distance and
outstanding reading performance on low contrast bar codes. These features are a great
benefit in applications such as reading barcodes directly printed on cardboard boxes.
The DS6300 can read all most popular barcodes even in the most difficult conditions, thanks
to a new generation decoder with Intel XScale CPU and code reconstruction technology
(ACR™ 4).
This reader is also offered in a model with an integrated SW programmable oscillating mirror.
Great attention has been given to built-in connectivity for market standards. A Local
Lonworks network for scanner connectivity (all versions), and a Fieldbus network (Ethernet,
DeviceNet, or Profibus) for host connectivity (dedicated versions) have been integrated in the
decoder base.
Some of the main features of DS6300 are listed below:
scanning speed up to 1200 scans/sec;
2 serial communication interfaces
reading all popular codes;
supply voltage from 15 to 30 Vdc;
electrical connection through connectors;
high speed Lonworks connectivity for Master/Slave layout;
Fieldbus models (Ethernet, DeviceNet, Profibus) with built-in connectivity;
programmable in several different operating modes to suit the most various barcode
reading system requirements;
light source: solid state laser diode; the light emitted has a wavelength between
630~680nm.
IP64 protection class of the enclosure (not for Ethernet models).
1
DS6300 REFERENCE MANUAL
1
1.2 APPLICATIONS
The DS6300 barcode reader is specifically designed for industrial applications and for all
cases requiring high reading performance such as:
code reconstruction
reading of codes covered by plastic film
reading of codes with a wide depth of field
reading of high resolution codes positioned at long distances from the reader
code reading on fast moving objects
DS6300 is designed for both single-reader layouts and multi-reader layouts. For typical
layouts see chapter 7 and appendix A.
Feature
Benefit
ACR™
Advanced Code Reconstruction technology
allows the reading of low aspect ratio labels
placed anywhere on a parcel and enhances the
readability of poorly printed or damaged codes.
Modular solution with
separated head and base and
Step-a-Head™ feature
Possibility to select the combination of head and
base that best fits the needs of the application.
Great scalability of the offer.
Down time cost reduction, since the decoder base
works even if the head has been removed.
Easy maintenance. In case of replacement of the
head, all the configuration parameters are stored
in the base, and the scanner is automatically
configured.
Easy installation with the minimum room needed.
Best results in typical manufacturing reading
applications.
Reading performance on low
contrasted or thermal printed
barcodes
Master working as a
Multiplexer on high speed
Lonworks bus
Genius™ Configuration SW
2
Great competitiveness of the offer, since the cost
of an external multiplexer is saved;
High data transfer on an industrial, reliable bus
running at 1.25 Mbit/sec.
Reduced learning time, with an easy wizard
approach;
Multilanguage platform;
All the configuration parameters stored into the
scanner;
The entire scanner setup is managed via SW,
with the possibility to “clone” a customized
scanner by simply downloading a configuration
file.
Not dependent on the Physical interface.
INTRODUCTION
1
1.3 MODEL DESCRIPTION
The DS6300 scanner is available in versions that differ in regard to the following
characteristics:
Optical Model (Head)
Decoder Model (Base)
DS6300 - 10X - 0YY
Decoder Model (Base)
Optical Model (Head)
0 = Standard
5 = Oscillating Mirror
10 = Master/Slave
11 = Profibus
12 = Ethernet
15 = Devicenet
1.4 OSCILLATING MIRROR MODELS
Oscillating mirror models are used when coverage of a large reading area is required, mainly
in picket fence applications.
The DS6300 scanner mounts a dedicated optic head with integrated oscillating mirror driven
by a linear motor. The speed, the precision, the repeatability, and the reliability of this driving
technology assure high level performance.
The oscillating mirror is completely software controlled and software programmable. The
Genius™ software tool allows adjusting the linear motor speed (oscillating frequency) and
the upper and lower limits of the oscillation by defining the top and bottom line limit angles.
When the oscillating mirror is programmed to read barcode labels at very small angles,
position the reader to assure at least 10° for the Skew angle (see par. 2.2.3). This angle refers
to the most inclined or external laser line, so that all other laser lines assure more than 10°
Skew. This avoids the direct reflection of the laser light emitted by the reader.
10°
Figure 1 – Oscillating Mirror Skew Angle
3
DS6300 REFERENCE MANUAL
1
Otherwise, the scanner can be mounted at an angle of inclination of 17.5° in order to attain
symmetrical deflection ranges.
10
7.
5
°
17.5°
Figure 2 - Oscillating Mirror Reading Position
In the above case, the zone where the scan line is perpendicular to the reflecting surface
corresponds to a neutral zone at the center of the reading field.
The mirror can be deflected up to 40°. Oscillation with respect to the output window median
axis is asymmetrical ( see figure below).
37.5
40°
°
-2.5°
0°
Figure 3 - Oscillating Mirror Maximum Aperture and Asymmetry
By configuring the oscillating speed up to the maximum value of 19 Hz, raster emulation can
be performed for reading fast moving objects.
Hz
0-5
6-10
11-15
16-19
Max. Aperture
40°
30°
20°
10°
By limiting the raster width to the minimum necessary, the number of scans
on the reading surface is increased.
NOTE
4
INTRODUCTION
1
Oscillating angles are selected in software where the minimum and maximum angles
correspond to –2.5° and +37.5°.
The scanner can be tilted in order for the 17.5° software setting to correspond with the 0°
horizontal plane.
+37.5°
+17.5°
-2.5°
Figure 4 - Oscillating Mirror Extreme Angle Positions
These models provide higher scanning speed (1200 scans/sec) compared to standard
models and the reading performance is not adversely affected by the oscillating mirror.
The following example represents the selection of an angle of +10° for the bottom line and an
angle of +20° for the top line (see figure below).
+37.5°
+27.5°
+17.5°
Figure 5 - Oscillating Mode
Refer to chapter 2 for more information on scanner mounting and positioning.
1.5 INDICATORS
The DS6300 has three LEDs on the Display and Keypad panel. The indicators have the
following functions:
POWER ON (red)
Indicates the scanner is turned on.
PHASE ON
(yellow)
Indicates the external presence sensor is active.
TX DATA
(green)
Indicates data transmission on the main serial interface.
5
DS6300 REFERENCE MANUAL
1
1.6 KEYPAD AND DISPLAY
The DS6300 keypad allows entering a menu for selection of one of the following functions:
Welcome:
shows the current software release and operating mode;
Autolearn:
starts the procedure making it possible to obtain an automatic, accurate
and fast configuration of DS6300 without the necessity of directly
checking/modifying the relevant parameters;
Internal Net:
defines scanner function within the local Lonworks network (see below);
Ethernet Mode: allows setting the scanner IP address of the Master scanner to be used
within the Host network;
LCD Contrast:
sets the LCD contrast;
Bus:
allows setting the scanner address (value range 0-125) to be used in a
Profibus network;
Test Mode:
allows verifying the scanner reading position and features (see below).
The same settings may be performed by using the Genius™ program (see chapter 8 for
details).
1.6.1
Internal Net
This submenu can be used as an alternative to configuration through Genius™, to assign the
DS6300 scanner within a local Lonworks master/slave network.
It allows defining the scanner function (slave/master) within the Lonworks network and, if
configured as Slave, its address.
To enter the Internal Net submenu and configure the scanner follow the given procedure:
1) Press and hold both the ▲ (up arrow) and ▼ (down arrow) keys for about 2 seconds to
enter the Main menu;
2) Use the ▲ (up arrow) or ▼ (down arrow) key to select the “Internal Net” item, then press
the ENT (enter) key to confirm;
3) Use the ▲ (up arrow) or ▼ (down arrow) key to select the “LonWAddrSel”” item, then
press the ENT (enter) key to confirm;
4) Use the ▲ (up arrow) or ▼ (down arrow) key to select your scanner function among
“Master”, “Slave n”, “Slave jolly”, “Disabled”; then, press the ENT (enter) key to confirm;
5) Use the ▲ (up arrow) or ▼ (down arrow) key to select the “Exit” item, then press the ENT
(enter) key to confirm. Repeat this step again to exit the Main Menu and return to the
scanner current operating mode.
6
INTRODUCTION
1.6.2
1
Test Mode
Test Mode is particularly advised during the installation phase, since it causes the reader to
be continuously activated allowing verification of its reading features and its reading position
with respect to the barcode.
To enter the Test Mode submenu and configure the scanner follow the given procedure:
1) Press and hold both the ▲ (up arrow) and ▼ (down arrow) keys for about 2 seconds to
enter the Main menu.
2) Use the ▲ (up arrow) or ▼ (down arrow) key to select the “Test Mode” item, then press
the ENT (enter) key to confirm. The reader enters Test Mode.
3) Press the ▲ (up arrow) key to exit the Test Mode.
4) Use the ▲ (up arrow) and ▼ (down arrow) key to select the “Exit” item, then press the
ENT (enter) key to confirm. The scanner exits the Main Menu and returns to its current
operating mode.
1.7 ACCESSORIES
The following accessories are available on request for DS6300:
Name
Description
Part Number
Single unit power supply (US)
Single unit power supply (UK)
Single unit power supply (EU)
J-box power unit 110/230 VAC 24 V 120 W
J-box power unit 110/230 VAC 24 V 240 W
J-box power unit 110/230 VAC 24 V 480 W
93ACC1718
93ACC1719
93ACC1720
93ACC1530
93ACC1070
93ACC1850
Bus terminator
9-pin scanner/scanner connection cable 1 m
9-pin scanner/scanner connection cable 2 m
9-pin scanner/scanner connection cable 5 m
9-pin scanner to scanner no power cable 2 m
9-pin scanner to scanner no power cable 5 m
25-pin power cable Fam 6k 5 m
25-pin power cable Fam 6k 10 m
STD cable to CBX 1 m (25-pin to 25-pin)
STD cable to CBX 2 m (25-pin to 25-pin)
STD cable to CBX 5 m (25-pin to 25-pin)
STD cable to CBX 10 m (25-pin to 25-pin)
6K-8K FBUS cable to CBX 1 m (26-pin to 25-pin)
6K-8K FBUS cable to CBX 2 m (26-pin to 25-pin)
6K-8K FBUS cable to CBX 5 m (26-pin to 25-pin)
Fam 6K-8K cross cable 2.5 m (9-pin to 17-pin)
Fam 6K-8K cross cable 5 m (9-pin to 17-pin)
93A051299
93A051220
93A051230
93A051240
93A051224
93A051225
93ACC1768
93ACC1752
93A051351
93A051352
93A051353
93A051354
93A051355
93A051356
93A051357
93A051288
93A051289
Supervisor (up to 5 arrays)
Supervisor (up to 10 arrays)
Supervisor (up to 20 arrays)
Supervisor (up to 32 arrays)
Supervisor (up to 64 arrays)
Supervisor (up to 128 arrays)
Supervisor (up to 256 arrays)
93A101014
93A101015
93A101016
93A101017
93A101018
93A101019
93A101020
Power Supplies
PG6002
PG6001
PG6000
PWR-120
PWR-240
PWR-480A
Cables and Terminators
BT-6000
CAB-6101
CAB-6102
CAB-6105
CAB-6112
CAB-6115
CAB-6305
CAB-6310
CAB-S01
CAB-S02
CAB-S05
CAB-S10
CAB-F01
CAB-F02
CAB-F05
CAB-6502
CAB-6505
Software Management
Datalogic WebSentinel-005
Datalogic WebSentinel-010
Datalogic WebSentinel-020
Datalogic WebSentinel-032
Datalogic WebSentinel-064
Datalogic WebSentinel-128
Datalogic WebSentinel-256
7
DS6300 REFERENCE MANUAL
1
Name
Description
Part Number
90° mirror
90° mirror close distance
X-pattern mirror
93A201100
93A201102
93ACC1730
Compact Connection Box
Modular Connection Box
Gateway Connection Box
Backup Module
DIN Rail Adapters for CBX
Bosch Adapters for CBX
Two Cable Glands Panel
93A301067
93A301068
93A301077
93ACC1808
93ACC1821
93ACC1822
93ACC1847
Photocell kit – PNP (PH-1)
Photocell kit – NPN
Optical encoder kit (10 m cable + spring)
Optical encoder kit + 10 m cable
93ACC1791
93ACC1728
93ACC1770
93ACC1600
Fast bracket kit (2 pcs)
mounting bracket kit (5 pcs) for multisided stations
93ACC1721
890001020
Mirrors
GFC-60
GFC-600
GFX-60
* Connection Boxes
CBX100
CBX500
CBX800
BM100
BA100
BA200
BA900
Sensors
MEP-593
MEP-543
OEK-2
OEK-1
Brackets
FBK-6000
US-60
* DS6300 application software does not support any of the CBX500 Host Interface Module accessories nor the
BM150 Display accessory. Use the CBX800 Gateway for Host Interface Applications, (Fieldbus and non
Fieldbus).
8
INSTALLATION
2
2 INSTALLATION
To install the system follow the given procedure:
1. Select the mounting location for DS6300;
2. Mount the DS6300 scanner;
3. Position the scanner with respect to the barcode;
4. Proceed with system electrical connection;
5. Install the Genius™ program on the PC and configure the scanner.
6. Adjust the focus position to the reading plane of the barcode.
WARNING
When installing several scanners, take care to position them correctly so
that no laser beam enters the reading window perpendicularly and at the
same level of the output beam of the other scanners. This condition could
occur more frequently for side mounted applications. If these precautions
are not followed, it may occur that the laser of the blinded scanner starts
blinking due to an internal circuit which temporarily turns the laser off when
detecting a power anomaly. To resolve this problem, it is sufficient to slightly
change the inclination and position of one of the two scanners involved.
Refer to the Reference Documentation for details on connecting your
DS6300 reader to other devices in the system (i.e. CBX100 etc.).
NOTE
2.1 PACKAGE CONTENTS
Verify that the DS6300 reader and all the parts supplied with the equipment are present and
intact when opening the packaging; the list of parts includes:
DS6300 reader
Installation Quick Reference + barcode test chart
DS6300 configuration CD-ROM
Mounting bracket and screws
Figure 6 - DS6300 Package Contents
9
DS6300 REFERENCE MANUAL
2
2.2 MECHANICAL MOUNTING
2.2.1
Mounting the Scanner
The DS6300 reader can be positioned and installed in the best way possible as a result of
the patented Step-a-Head™ feature. Thanks to the separation between Head and Base, you
can modify the orientation of the decoder base, and therefore display-keypad and connector
panels, while keeping the optic head in the correct reading position. The reading head and
the decoder base can be rotated independently from each other allowing the installation even
in the most critical locations.
Head Screws
Fixing Screw (4)
Figure 7 - Step-A-Head™ Feature
To rotate the head follow the given procedure:
1. detach the head from the base by unscrewing the four fixing screws;
2. rotate the head in the desired position;
3. loosen but don't remove the two screws on top of the head;
4. affix the head onto the base carefully aligning the four fixing screws and progressively
tightening them about half-way;
5. completely tighten the two screws on top of the head;
6. completely tighten the four fixing screws.
10
INSTALLATION
2
The following diagrams give the overall dimensions of the reader standard model, oscillating
mirror model and mounting brackets. They may be used for their installation.
30
1.18
60
2.36
16.5
0.65
85
3.34
74
2.85
99
3.90
30
1.18
76
2.99
113
4.45
mm
inch
110
4.33
Figure 8 - DS6300 Overall Dimensions
42
1.65
10
0.4
4
0.15
50
82 1.96
3.22
82
3.22
25
50
1.96
0.98
20
18
0.78
0.71 N°2
22
0.86
126
4.96
2
N° °2
.1 6 N
4
1
Ø 0.
Ø
106°
50
1.96
72
2.83
100
3.93
=
=
OTS
°2 SL
S
8.5 N °2 SLOT
N
3
.5
0.3
8
Ø .33
Ø0
73.2
2.88
36
1.41
=
=
130
5.12
35
1.37
S
OT S
T
SL
° 4 SL O
N
4
4.5 8 N°
1
0.
mm
inch
Figure 9 – ST-237 Mounting Bracket Overall Dimensions
11
DS6300 REFERENCE MANUAL
60
2.36
30
1.18
2
16.5
0.65
99
3.90
63.5
2.50
104.5
4.11
85
3.35
69
2.72
113
4.45
114
4.48
102
4.01
110.3
4.34
56
2.20
mm
inch
180
7.08
Figure 10 - DS6300 Oscillating Mirror Model Overall Dimensions
42
1.65
22
0.86
4
0.15
35
1.37
5.11
130
82
3.22
50
1.96
20
0.78
50
1.96
25
0.98
18
0.71
10
0.4
Ø4.1
0.16
R1
11
0.43
14
0.55
50
1.96
72
2.83
100
3.93
R5
11
0.43
14
0.55
75
2.95
R22
36
1.41
R36
mm
inch
.5
Ø8
Figure 11 – ST-210 Mounting Bracket Overall Dimensions
12
INSTALLATION
2.2.2
2
Mounting the Scanner with Accessories
The following accessories allow installing the DS6300 reader in the most suitable position for
your network layout:
- ST-237 mounting bracket;
- ST-210 mounting bracket;
- FBK-6000 fast bracket.
The ST-237 is a 106° mounting bracket to be mounted on the reader as displayed in the
image below:
Figure 12 – Mounting the ST-237 Mounting Bracket
The ST-210 is a 90° mounting bracket to be mounted on the reader as displayed in the
image below:
Figure 13 – Mounting the ST-210 Mounting Bracket
13
2
DS6300 REFERENCE MANUAL
The FBK-6000 is a fast bracket kit allowing a quick and easy mounting of the scanner on the
ST-237 bracket.
First, it is necessary to fix the FBK-6000 to the DS6300 scanner by means of the mounting
screws:
Figure 14 – Mounting the FBK-6000 on the Scanner
Then, attach the assembly to the mounting bracket by slipping the hook into the bracket hole.
Finally, fix it by means of the 2 fixing screws:
Figure 15 – Mounting the Assembly on the Bracket
14
INSTALLATION
2.2.3
2
Mounting the Scanner with GFX-60
The GFX-60 is an accessory X-pattern mirror for the DS6300 Series Scanners. The following
procedure describes how to mount the GFX-60.
1. Unscrew the upper cover of the scan head, which houses the scanner output window.
a) Remove the two top head screws.
b) Loosen all four fixing screws.
head screws
fixing screws (4)
c) Carefully remove the scanner output window from the scan head.
2. Mount the GFX-60 onto the scan head paying attention to correctly align the sealing
gasket.
3. Start the four fixing screws and the two head screws partially to assure correct alignment
to the scan head.
4. Completely tighten the two head screws.
5. Completely tighten the four fixing screws.
15
DS6300 REFERENCE MANUAL
2
6. Mount the scanner at an angle of 16°, as indicated in figure below, in order to obtain an
angle of 90° between the two scan lines. This guarantees an omni directional reading of
the barcode, if the code label satisfies the ACR™ 4 conditions (see par. 9.3.1).
Figure 16 – Omni-Directional Reading Position
The DS6300 with the GFX-60 can be mounted over a conveyor in different positions.
The following picture illustrates the suggested position offering the best compromise between
width and height of the reading area:
Figure 17 – Central Reading Position
The Central Reading position allows maximizing the reading distance (height) when the width
of the reading area is not critical (narrow conveyors). In this case a complete reading on the
central part of the conveyor plane is guaranteed.
NOTE
To better exploit the scanner and to optimize its reading performance when
the GFX-60 is mounted, it is recommended to set the focus adjustment to
obtain the desired reading area coverage.
For details about the reading performance of the DS6300 with GFX-60 see par. 9.4.3.
16
INSTALLATION
2
2.3 POSITIONING THE SCANNER
The DS6300 reader is able to decode moving barcode labels at a variety of angles, however
significant angular distortion may degrade reading performance.
When mounting DS6300 take into consideration these three ideal label position angles:
Pitch 0°, Skew 10° to 30° and Tilt 0°.
Follow the suggestions for the best orientation:
The Pitch angle is represented by the value P in Figure 18. Position the reader in order to
minimize the Pitch angle.
P
Figure 18 - "Pitch" Angle
17
DS6300 REFERENCE MANUAL
2
The Skew angle is represented by the value S in Figure 19. Position the reader to assure at
least 10° for the Skew angle. This avoids the direct reflection of the laser light emitted by the
scanner.
For oscillating mirror models, this angle refers to the most inclined or external laser line, so that
all other laser lines assure more than 10° Skew.
S
Figure 19 - "Skew" Angle
The Tilt angle is represented by the value T in Figure 20.
T
Figure 20 - "Tilt" Angle
18
INSTALLATION
2.3.1
2
16° Skew Positioning
The DS6300 scanner is mounted on the ST-237 106° mounting bracket (see Figure 9) which
guarantees a built-in Skew angle (S in the figure below) of 16° with respect to the frame
plane (typically the Skew angle should be between 10° - 20°). This avoids the direct
reflection of the laser light emitted by the scanner. Furthermore, the bracket guides allow
adjusting the Tilt angle (T in the figure below, which is typically 0°) for the best scanner
orientation:
T
S
Conveyor Direction
Figure 21 – Standard Installation
2.3.2
45° Skew Positioning
The DS6300 scanner is mounted on the ST-210 90° mounting bracket (see Figure 11). By
adjusting the mounting bracket guides, reach 45° for the Skew angle (S in the figure below)
to avoid the direct reflection of the laser light emitted by the scanner:
45°
S
Figure 22 – 45° Skew Installation
19
2
CAUTION
DS6300 REFERENCE MANUAL
If using the 45° Skew installation, the scanner reading performance is not
guaranteed to match that measured for the standard installation with Skew
angle between 10° - 20° (see reading diagrams in par. 9.4).
The ST-210 mounting bracket is an accessory of the DS6300 standard
model available in the US-60 kit (890001020).
NOTE
20
CBX ELECTRICAL CONNECTIONS
3
3 CBX ELECTRICAL CONNECTIONS
Each scanner model has the following connectors:
Scanner Model
Master/Slave
Ethernet
DeviceNet
Profibus
CAUTION
Connectors
25-pin male serial interface and I/O connector
9-pin male Lonworks connector (* see caution below)
9-pin female Lonworks connector
26-pin male serial interface and I/O connector
9-pin female Lonworks connector
RJ45 modular connector for Ethernet
26-pin male serial interface and I/O connector
9-pin female Lonworks connector
5-pin male connector
26-pin male serial interface and I/O connector
9-pin female Lonworks connector
9-pin female Profibus connector
* Do not connect an RS232 port to the 9-pin Lonworks Connector. This may
damage your Laptop PC.
DS6300 Master/Slave models can connect their 25-pin male D-sub connector for connection
to the power supply, serial interface and input/output signals to a CBX connection box by
using the dedicated cables (CAB-Sxx).
DS6300 Fieldbus models can connect their 26-pin male D-sub connector for connection to
the power supply, serial interface and input/output signals to a CBX connection box by using
the dedicated cables (CAB-F0x).
We recommend making system connections through one of the CBX connection boxes since
they offer the advantages of easy connection, easy device replacement, filtered reference
signals and Backup and Restore features with the accessory BM100 module.
If you require direct wiring to the scanner the details of the connector pins
and relative connections are indicated in Chaper 4.
NOTE
For Lonworks network connections see chapters 5 and 7.
For Fieldbus connections see chapters 6 and 7.
21
DS6300 REFERENCE MANUAL
3
The table below gives the pinout of the CBX100/500 terminal block connectors. Use this
pinout when the DS6300 reader is connected by means of the CBX100/500:
Group
Name
Vdc
Input Power
GND
Earth
+V
External Trigger
I1A
(PS) Input
I1B
-V
+V
Encoder or
I2A
Generic Input
I2B
-V
+V
-V
O1+
Outputs
O1O2+
O2O3A
O3B
+V
Other I/O
I3A
(CBX500 only)
I4A
-V
I34B
I34B
TX
Auxiliary Interface RX
SGND
REF
ID-NET™
ID+
IDNetwork
Shield
Main Interface
CBX100/500 Terminal Block Connectors
Function
Power Supply Input Voltage +
Power Supply Input Voltage Protection Earth Ground
Power Source – External Trigger
External Trigger A (polarity insensitive) for PS
External Trigger B (polarity insensitive) for PS
Power Reference – External Trigger
Power Source – Inputs
Input 2A (polarity insensitive) for Encoder
Input 2B (polarity insensitive) for Encoder
Power Reference – Inputs
Power Source – Outputs
Power Reference – Outputs
Output 1+
Output 1Output 2+
Output 2Output 3A (polarity insensitive)
Output 3B (polarity insensitive)
Power Source – Other I/O
Input 3A (polarity insensitive)
Input 4A (polarity insensitive)
Power Reference – Other I/O
Input 3B and 4B (common) (polarity insensitive)
Input 3B and 4B (common) (polarity insensitive)
Auxiliary Interface TX
Auxiliary Interface RX
Auxiliary Interface Reference
Reserved
Reserved
Reserved
Network Cable Shield
RS232
RS485FD
TX
TX+
RTS
TXRX
*RX+
CTS
*RXSGND
SGND
RS485HD
RTX+
RTX-
SGND
* Do not leave floating, see par. 3.2.2 for connection details.
CAUTION
Do not connect GND and SGND to different (external) ground references.
GND and SGND are internally connected through filtering circuitry which
can be permanently damaged if subjected to voltage drops over 0.8 Vdc.
CAUTION
DS6300 scanners do not support Host Interface Modules with the CBX500.
Use the CBX800 Gateway for Host Interface Applications, (Fieldbus and
non Fieldbus).
22
CBX ELECTRICAL CONNECTIONS
NOTE
3
To avoid electromagnetic interference when the scanner is connected to a
CBX connection box, verify the jumper positions in the CBX as indicated in
its Installation Manual.
3.1 POWER SUPPLY
Power can be supplied to the scanner through the CBX100/500 spring clamp terminal pins
as shown in Figure 23:
Power Supply
VGND
V+
in
Earth
Ground
Figure 23 - Power Supply Connections
The power must be between 15 and 30 Vdc only. The max. power consumption is 20 W
including startup current.
Datalogic strongly recommends a minimum 24 Vdc supply voltage when using a
master/slave configuration. Several accessory power supplies are available to power the
DS6300 and reading station components. See par. 1.7.
A security system allows the laser to activate only once the motor has reached the correct
rotational speed; consequently, the laser beam is generated after a slight delay from the
power on of the scanner.
DS6300 scanners have power ground GND (25/26-pin connector pin 23, 25, 26) as well as
the cable Shield (25/26-pin connector pin 1) internally connected to the chassis. It is
recommended to connect the device chassis to earth ground (Earth) by setting the
appropriate jumper in the CBX connection box. See the CBX Installation Manual for details.
3.2 MAIN SERIAL INTERFACE
The main serial interface is compatible with the following electrical standards and the relative
signals are available on the CBX spring clamp terminal blocks:
RS232
RS485 full-duplex
RS485 half-duplex
The main interface type and the relative parameters (baud rate, data bits, etc.) can be
set using the Genius™ utility program or the Genius™ based Host Mode Programming
procedure. For more details refer to the section "Main Serial Port" in the Genius™
Help On Line.
23
DS6300 REFERENCE MANUAL
3
3.2.1
RS232 Interface
The main serial interface is used in this case for point-to-point connections; it handles
communication with the host computer and allows both transmission of code data and the
programming of the scanner. This is the default setting.
The following pins are used for RS232 interface connection:
CBX100/500
TX
RX
RTS
CTS
SGND
Function
Transmit Data
Receive Data
Request To Send
Clear To Send
Signal Ground
It is always advisable to use shielded cables. If the shield is tied to ground at the Host, then
leave it floating at the CBX. If it is floating at the Host then tie it to Shield at the CBX. The
overall maximum cable length must be less than 15 m (50 ft).
USER INTERFACE
SGND RXD
TXD
CTS
SCANNER
SGND TX
RTS
RX
RTS
CTS
Figure 24 – RS232 Main Interface Connections Using Hardware Handshaking
+V
RTS
-V
START
OF
TRANSMISSION
END
OF
TRANSMISSION
DATA
TRANSMISSION
+V
TX DATA
-V
DATA
TRANSMISSION
C1 C2
C3
C4
C5
TRANSMISSION
STOPPED
ENABLED
+V
CTS
-V
IDLE
ENABLED
DISABLED
IDLE
Figure 25 - RS232 Control Signals
The RTS and CTS signals control data transmission and synchronize the connected devices.
If the RTS/CTS handshaking protocol is enabled, the DS6300 activates the RTS output to
indicate a message is to be transmitted. The receiving unit activates the CTS input to enable
the transmission.
24
CBX ELECTRICAL CONNECTIONS
3.2.2
3
RS485 Full-Duplex Interface
The RS485 full-duplex (5 wires + shield) interface is used for non-polled communication
protocols in point-to-point connections over longer distances (max 1200 m / 3940 ft) than
those acceptable for RS232 communications or in electrically noisy environments.
If the shield is tied to ground at the Host, then leave it floating at the CBX. If it is floating at
the Host then tie it to Shield at the CBX.
The CBX pinout follows:
CBX100/500
TX+
RX+
TXRXSGND
Function
RS485 Transmit Data +
RS485 Receive Data +
RS485 Transmit Data RS485 Receive Data Signal Ground
USER INTERFACE
RX485+ TX485+
SGND
SCANNER
RX485-
SGND TX+
TX485-
RX+
TX-
RX-
Figure 26 - RS485 Full-duplex Connections
For applications that do not use RX485 signals, do not leave these lines
floating but connect them to SGND as shown below.
NOTE
USER INTERFACE
RX485+
SGND
SCANNER
RX485-
SGND TX+
T X-
Figure 27 - RS485 Full-duplex Connections using Only TX Signals
25
DS6300 REFERENCE MANUAL
3
3.2.3
RS485 Half-Duplex Interface
This interface is provided for backward compatibility. We recommend using
the more efficient Lonworks network for Master/Slave or Multiplexer layouts.
NOTE
The RS485 half-duplex (3 wires + shield) interface is used for polled communication
protocols.
It can be used for Multidrop connections with a Datalogic Multiplexer, (see par. "Multiplexer"
in Appendix A) exploiting a proprietary protocol based on polled mode called MUX32
protocol, where a master device polls slave devices to collect data. The overall maximum
cable length should not exceed 1200 m (3940 ft).
If the shield is tied to ground at the Host, then leave it floating at the CBX. If it is floating at
the Host then tie it to Shield at the CBX.
CBX100/500
RTX+
RTXSGND
Function
RS485 Receive/Transmit Data +
RS485 Receive/Transmit Data Signal Ground
USER INTERFACE
RTX485+
SGND
SCANNER
RTX485-
SGND RTX+
RTX-
Figure 28 - RS485 Half-duplex Connections
This interface is forced by software when the protocol selected is MUX32 protocol.
In a Multiplexer layout, the Multidrop address must also be set via serial channel by the
Genius™ utility or by the Host Programming Mode.
Figure 29 shows a multidrop configuration with DS6300 scanners connected to a Multiplexer.
CAUTION
26
This is an example of multidrop wiring. Consult the multiplexer manual for
complete wiring instructions.
CBX ELECTRICAL CONNECTIONS
3
Main Interface
MULTIPLEXER
HOST
RS232/RS485
120 Ohm
Shield to Earth
Multidrop Multidrop +
Multidrop GND
Shield
PG-6000
VV+
CBX100/500
Scanner
Slave
#0
RTX+
Shield
floating
SGND
Shield
PG-6000
Earth
GND
Vdc
CBX100/500
Scanner
Slave
#1
Multidrop Cable
OFF
1200 m Max Length
RS485 HD
Termination Resistor.
RTX-
*
RTX-
*
Shield
floating
RS485 HD
Termination Resistor.
RTX+
SGND
Shield
OFF
PG-6000
Earth
GND
Vdc
CBX100/500
Scanner
Slave
(up to 31)
RTX-
Shield
floating
RS485 HD
Termination Resistor.
PG-6000
RTX+
SGND
Shield
ON
Earth
GND
Vdc
Figure 29 - DS6300 Multidrop Connection to a Multiplexer
* When using CBX500, the Main interface multidrop network signals: Shield, SGND, RTX+and RTX- are
repeated on terminal connector row 4 to facilitate system cabling.
27
DS6300 REFERENCE MANUAL
3
3.3 AUXILIARY RS232 INTERFACE
The auxiliary serial interface is used exclusively for RS232 point-to-point connections. It is
principally used for scanner configuration from a laptop PC but is also available for LOCAL
ECHO to a monitoring PC or for Pass through layouts. This interface is active when the Data
Tx parameter is enabled.
The parameters relative to the aux interface (baud rate, data bits, etc.) can be defined using
the Genius™ utility program or Genius™ based Host Mode Programming installed from the
CD-ROM.
The 9-pin female Auxiliary Interface connector inside the CBX is the preferred connector for
device configuration or temporary communication monitoring.
1
5
9
6
Figure 30 - 9-pin female connector
If permanent system wiring is required, the following pins are used to connect the RS232
auxiliary interface. The overall maximum cable length should not exceed 15 m (50 ft). In this
case it is advisable to use shielded cables. If the shield is tied to ground at the Host, then
leave it floating at the CBX. If it is floating at the Host then tie it to Shield at the CBX.
CBX100/500
RX
TX
SGND
Function
Auxiliary Interface Receive Data
Auxiliary Interface Transmit Data
Auxiliary Interface Reference
USER INTERFACE
RX
TX
Reference
Figure 31 - RS232 Auxiliary Interface Connections
Do not connect the Aux Interface to the CBX spring clamp connectors and
the 9-pin connector simultaneously.
NOTE
28
CBX ELECTRICAL CONNECTIONS
3
3.4 INPUTS
There are four optocoupled polarity insensitive inputs available on the scanner: Input 1
(External Trigger/PS), Input 2 (Encoder), Input 3 and 4 generic inputs.
The electrical features of the inputs are:
Maximum voltage:
Maximum current Input 1 and 2:
Maximum current Input 3 and 4:
CBX100/500
+V
I1A
I1B
I2A
I2B
I3A (CBX500 only)
I4A (CBX500 only)
I34B (CBX500 only)
-V
30 Vdc
12 mA (scanner) + 12 mA (CBX)
12 mA (scanner)
Function
Power Source - External Trigger
External Trigger A (polarity insensitive) for PS
External Trigger B (polarity insensitive) for PS
Input 2 A (polarity insensitive) for Encoder
Input 2 B (polarity insensitive) for Encoder
Input 3 A (polarity insensitive)
Input 4 A (polarity insensitive)
Common Reference for Inputs 3 and 4 (polarity insensitive)
Power Reference - External Trigger
The active state of all the inputs is selected in software (open or closed). Refer to the
Genius™ Help On Line.
All inputs are optocoupled, polarity insensitive, and driven by a constant current generator;
the command signal is filtered through an anti-disturbance circuit which generates a
debouncing delay which can be set to 5 ms or 500 s. In particular, I1 for PS, I3 and I4 share
the same value which usually corresponds to 5 ms when using a photoelectric sensor, while
I2 is set to 500 s when this input is used for the Encoder. The maximum Encoder frequency
is 2 kHz.
Input 1 (External Trigger/PS) is used in the On-Line operating Mode and tells the scanner to
scan for a code. The yellow Phase On LED (Figure C, 3) which refers to Input 1 is on only
when current flows through the input circuit and therefore when the active state of this input
is set to "active open", the LED lights up when the input corresponds to OFF.
Input 2 is normally used for the Encoder input. The Encoder detects the conveyor speed.
Inputs 3 and 4 can be used as the stop signal for the reading phase.
The debouncing delay value can be changed through the software parameter Debouncing for
Input x, see the "6-8 K Software Configuration Parameter Guide” or Help file.
Powering Inputs
Input devices can be supplied by either scanner power (V+ and V-) or external power
supplies (Vext).
Electrical isolation between the input command logic and the scanner is maintained when
powering the input devices from an external supply voltage (Vext).
29
DS6300 REFERENCE MANUAL
3
The driving logic of the input signals may be powered, for convenience, with the voltage
supply at the CBX terminal block spring clamps (V+) and (V-). In this case, however, the
device is no longer electrically isolated. The voltage available on pins V+ and V-, is physically
the same as the input power for the scanner (Vdc and GND).
INPUT 1 (EXTERNAL TRIGGER/PS) CONNECTIONS USING DS6300 POWER
( brown)
MEP-593 PH-1 Ph oto cell (PNP)
(b lack)
(b lue)
Figure 32 – MEP-593 PH-1 (PNP) External Trigger/PS Using DS6300 Power
Power to
Photocell
In put
Signal
Photoce ll
Reference
NPN Photocell
Figure 33 - NPN External Trigger/PS Using DS6300 Power
INPUT 1 (EXTERNAL TRIGGER/PS) CONNECTIONS USING EXTERNAL POWER
Input
Signal
External Device
Ground Refe rence
Figure 34 - PNP External Trigger/PS Using External Power (i.e. PLC signal)
External D evice
Power Ref erence
Input
Signal
Figure 35 - NPN External Trigger/PS Using External Power (i.e. PLC signal)
30
CBX ELECTRICAL CONNECTIONS
3
INPUT 2 (ENCODER) CONNECTIONS USING DS6300 POWER
( red)
OEK-1 Encoder (PN P)
( black)
(white)
Figure 36 - OEK-1 Encoder PNP Using DS6300 Power
Power to
Input
Inp ut Device Signa l
In put Device (Encoder)
Input Device
Reference
Figure 37 - Encoder NPN Using DS6300 Power
INPUT 2 (ENCODER) CONNECTIONS USING EXTERNAL POWER
Input
Sign al
External De vice
Gr ound Refer ence
Figure 38 - PNP Encoder Using External Power (i.e. PLC signal)
External Device
Power Refer ence
Input
Signal
Figure 39 - NPN Encoder Using External Power (i.e. PLC signal)
31
DS6300 REFERENCE MANUAL
3
Terminal pins I34B are common to both inputs 3 and 4 and therefore these
inputs cannot be driven by opposite polarity devices.
NOTE
INPUT 3 - 4 CONNECTIONS USING DS6300 POWER (CBX500 Only)
Power to
Input Device
Input Device
Input
Signal
Input Device
Reference
Figure 40 - PNP Input 3 - 4 Using DS6300 Power
Power to
Input Device
Input
Signal
Input Device
Input Device
Reference
Figure 41 - NPN Input 3 - 4 Using DS6300 Power
INPUT 3 - 4 CONNECTIONS USING EXTERNAL POWER (CBX500 Only)
Input
Signal
External Device
Ground Reference
Figure 42 - PNP Input 3 - 4 Using External Power (i.e. PLC signal)
External Device
Power Reference
Input
Signal
Figure 43 - NPN Input 3 - 4 Using External Power (i.e. PLC signal)
32
CBX ELECTRICAL CONNECTIONS
3.4.1
3
Code Verifier
If the DS6300 is used as a Code Verifier, the verifier code can be configured in software
through the Genius™ configuration program. However it is also possible to use one of the
inputs to trigger when the scanner should store a code read as the verifier code.
The Code Verifier parameter must be enabled, and the configuration parameters to allow
correct Code Type reading must be saved to the scanner in order to read the verifier code.
When the selected input is activated, the next read code will be stored as the verifier code in
the scanner's non-volatile (Flash) memory.
For more details see the Verifier Parameters in the "6-8 K Software Configuration Parameter
Guide” or Help file.
3.5 OUTPUTS
Three general purpose outputs are available. The electrical features are given below:
Outputs 1 and 2
Maximum Voltage
Collector Current (pulse)
Collector Current (continuous)
Saturation Voltage (VCE)
Maximum Power Dissipation
30 V
130 mA Max.
40 mA Max.
1 V at 10 mA Max.
90 mW at 50°C (Ambient temperature)
Output 3 has different electrical features. It is a bi-directional solid state relay with built-in
current limit protection.
Output 3
Maximum Voltage
Collector Current (pulse)
Collector Current (continuous)
R on
R off
Off-State Leakage Current
Maximum Power Dissipation
CBX100/500
+V
O1+
O1O2+
O2O3A (CBX500 only)
O3B (CBX500 only)
-V
± 100 V (Vext only)
300 mA Max. at 25°C (Ambient temperature)
240 mA Max. at 50°C (Ambient temperature)
200 mA Max. at 25°C (Ambient temperature)
150 mA Max. at 50°C (Ambient temperature)
6 – 15 Ω
> 500 Ω
< 1 µA
550 mW at 50°C (Ambient temperature)
Function
Power Source - Outputs
Output 1 +
Output 1 Output 2 +
Output 2 Output 3 A (polarity insensitive)
Output 3 B (polarity insensitive)
Power Reference Outputs
33
DS6300 REFERENCE MANUAL
3
The function of each output can be defined by the user (No Read, Right, Wrong, etc.). Refer
to the Genius™ Help On Line.
The output signals are fully programmable being determined by the configured
Activation/Deactivation events, Deactivation Timeout or a combination of the two.
By default, Output 1 is associated with the Complete Read event, which activates when all
the selected codes are correctly decoded, and Output 2 is associated with the No Read
event, which activates when the code signaled by the external trigger/PS is not decoded.
Output 3 can be assigned to the same events and it has the advantage of being polarity
insensitive. By default it is not assigned to any event. The CBX500 must be used to connect
this output.
OUTPUT 1 and 2 CONNECTIONS USING DS6300 POWER
Output Device
Power to
Outpu t Device
Output
Signal
Output D evice
Reference
Figure 44 - Open Emitter Output Using DS6300 Power
Output Device
Power to
Outpu t Device
Output D evice
Reference
Output
Signal
Figure 45 - Open Collector Output Using DS6300 Power
34
CBX ELECTRICAL CONNECTIONS
3
OUTPUT 1 and 2 CONNECTIONS USING EXTERNAL POWER
Output Device
Output Device
Power Reference
Output
Signal
Figure 46 - Open Emitter Output Using External Power
Output Device
Output
Signal
Output Device
Groun d Reference
Figure 47 - Open Collector Output Using External Power
OUTPUT 3 CONNECTIONS USING DS6300 POWER (CBX500 Only)
Power to
Output Device
Output
Signal
Output Device
Output Device
Reference
Figure 48 - Output 3 Using DS6300 Power
Power to
Output Device
Output
Signal
Output Device
Output Device
Ground Reference
Figure 49 - Output 3 Using DS6300 Power
35
DS6300 REFERENCE MANUAL
3
OUTPUT 3 CONNECTIONS USING EXTERNAL POWER (CBX500 Only)
Output
Signal
External Device
Power or Ground Reference
Figure 50 - Ouput 3 Using External Power
The command signals are filtered and generate a delay of about 50 µs for Output 1 and 2
and 1 ms for Output 3.
3.6 USER INTERFACE - HOST
The following table contains the pinout for standard RS232 PC Host interface. For other user
interface types please refer to their own manual.
RS232 PC-side connections
1
5
1
6
14
9
9-pin male connector
Pin
2
3
5
7
8
36
Name
RX
TX
GND
RTS
CTS
13
25
25-pin male connector
Pin
3
2
7
4
5
Name
RX
TX
GND
RTS
CTS
CUSTOM CABLE ELECTRICAL CONNECTIONS
4
4 CUSTOM CABLE ELECTRICAL CONNECTIONS
Each scanner model has the following connectors:
Scanner Model
Master/Slave
Ethernet
DeviceNet
Profibus
CAUTION
Connectors
25-pin male serial interface and I/O connector
9-pin male Lonworks connector (see caution below)
9-pin female Lonworks connector
26-pin male serial interface and I/O connector
9-pin female Lonworks connector
RJ45 modular connector for Ethernet
26-pin male serial interface and I/O connector
9-pin female Lonworks connector
5-pin male connector
26-pin male serial interface and I/O connector
9-pin female Lonworks connector
9-pin female Profibus connector
Do not connect an RS232 port to the 9-pin Lonworks Connector. This may
damage your Laptop PC.
DS6300 scanners are equipped with a 25-pin male D-sub connector (Master/Slave models)
or a 26-pin male D-sub connector (Fieldbus models) for connection to the host computer,
power supply and input/output signals. These signals can be wired using a custom cable
according to the application needs.
The paragraphs in this chapter detail the individual signal connections.
For Lonworks network connections see chapters 5 and 7.
For Fieldbus connections see chapters 6 and 7.
37
DS6300 REFERENCE MANUAL
4
The details of the connector pins are indicated in the following table:
13
1
9
1
10
19
18
26
25
14
Figure 51 - 25-pin Connector
Figure 52 - 26-pin Connector
DS6300 25/26-pin D-sub Connector Pinout
Pin
1
20
21
8
22
11
12
16
17
18
19
6
10
14
15
24
9,13
23,25,26
Name
CHASSIS
RX
TX
O1+
O1O2+
O2O3A
O3B
I1A
I1B
I2A
I2B
I3A
I4A
I34B
Vdc
GND
Function
Chassis - internally connected to GND
Cable shield connected to chassis
Receive Data of Auxiliary RS232 (referred to GND)
Transmit Data of Auxiliary RS232 (referred to GND)
Configurable Digital Output 1 - positive pin
Configurable Digital Output 1 - negative pin
Configurable Digital Output 2 - positive pin
Configurable Digital Output 2 - negative pin
Configurable Digital Output 3 - polarity insensitive
Configurable Digital Output 3 - polarity insensitive
External Trigger (polarity insensitive) for PS
External Trigger (polarity insensitive) for PS
Input Signal 2 (polarity insensitive) for Encoder
Input Signal 2 (polarity insensitive) for Encoder
Input Signal 3 (polarity insensitive)
Input Signal 4 (polarity insensitive)
Common reference of Input 3 and Input 4 (polarity insensitive)
Power Supply Input Voltage +
Power Supply Input Voltage Main Interface Connector Pinout
Pin
RS232
2
3
4
5
7
TX
RX
RTS
CTS
GND_ISO
RS485
Full Duplex
TX+
*RX+
TX*RXGND_ISO
RS485
Half Duplex
RTX+
RTXGND_ISO
* Do not leave floating, see par. 4.2.2 for connection details.
Pin 26 is only available for Fieldbus (Ethernet, DeviceNet, or Profibus) models.
38
CUSTOM CABLE ELECTRICAL CONNECTIONS
4
4.1 POWER SUPPLY
The supply voltage for correct operation of the scanner must be between 15 and 30 VDC.
The max. power consumption is 20 W including startup current.
Datalogic strongly recommends a minimum 24 Vdc supply voltage when using a
master/slave configuration. Several accessory power supplies are available to power the
DS6300 and reading station components. See par. 1.7.
A security system allows the laser to activate only once the motor has reached the correct
rotational speed; consequently, the laser beam is generated after a slight delay from the
power on of the scanner.
DS6300 scanners have power ground GND (25/26-pin connector pin 23, 25, 26) as well as
the cable Shield (25/26-pin connector pin 1) internally connected to the chassis.
DS6300
USER INTERFACE
9/13
Cha ssis
VS
23/25
G ND
1
C HASSIS
V+ (20 – 30 Vdc)
V- (Ground)
Earth Ground
Figure 53 – Power Supply Using the 25/26-pin Connector
4.2 MAIN SERIAL INTERFACE
The main serial interface is compatible with the following electrical standards:
RS232
RS485 full-duplex
RS485 half-duplex
The main interface type and the relative parameters (baud rate, data bits, etc.) can be
set using the Genius™ utility program or the Genius™ based Host Mode Programming
procedure. For more details refer to the section "Main Serial Port" in the Genius™
Help On Line.
39
DS6300 REFERENCE MANUAL
4
4.2.1
RS232 Interface
The main serial interface is used for communication with the Host computer and allows both
transmission of code data and configuring the reader. The overall maximum cable length
should not exceed 15 m (50 ft).
The following pins of the 25/26-pin connector are used for RS232 interface connection:
Pin
2
3
4
5
7
Name
TX
RX
RTS
CTS
GND_ISO
Function
Transmit
Receive
Request to send
Clear to send
Main signal ground
DS6300
USER INTERFACE
2
TX
3
RX
4
RTS
5
CTS
R XD
T XD
7
GND_ ISO
1
CHASSIS
SGND Main Isolated
Earth
Groun d
Figure 54 - RS232 Connections
+V
RTS
-V
START
OF
TRANSMISSION
END
OF
TRANSMISSION
DATA
TRANSMISSION
+V
TX DATA
-V
DATA
TRANSMISSION
C1 C2
C3
C4
C5
TRANSMISSION
STOPPED
ENABLED
+V
CTS
-V
IDLE
ENABLED
DISABLED
IDLE
Figure 55 - RS232 Control Signals
The RTS and CTS signals control data transmission and synchronize the connected devices.
If the RTS/CTS handshaking protocol is enabled, the DS6300 activates the RTS output to
indicate a message is to be transmitted. The receiving unit activates the CTS input to enable
the transmission.
40
CUSTOM CABLE ELECTRICAL CONNECTIONS
4.2.2
4
RS485 Full-Duplex Interface
The RS485 full-duplex (5 wires + shield) interface is used for non-polled communication
protocols in point-to-point connections over longer distances than those acceptable for
RS232 communications or in electrically noisy environments. The overall maximum cable
length should not exceed 1200 m (3940 ft).
The following pins of the 25/26-pin connector are used for RS485 full-duplex interface
connection:
Pin
2
3
4
5
7
Name
TX+
RX+
TXRXGND_ISO
Function
RS485 output (+)
RS485 input (+)
RS485 output (-)
RS485 input (-)
Main signal ground
DS6300
USER INTERFACE
2
TX+
4
TX-
3
RX+
5
RX-
7
GND_ISO
1
CHASSIS
+
RX485
+
TX485
SGND Main Isolated
Earth
Ground
Figure 56 - RS485 Full-Duplex Interface Connections
For applications that do not use RX485 signals, do not leave these lines
floating but connect them to GND_ISO as shown below.
NOTE
DS6300
USER INTERFACE
2
TX+
4
TX-
3
RX+
5
RX-
7
GND_ISO
1
CHASSIS
+
RX485
-
SGND Main Isolated
Earth
Ground
Figure 57 - RS485 Full-Duplex Connections using Only TX Signals
41
DS6300 REFERENCE MANUAL
4
4.2.3
RS485 Half-Duplex Interface
This interface is provided for backward compatibility. We recommend using
the more efficient Lonworks network for Master/Slave or Multiplexer layouts.
NOTE
The RS485 half-duplex (3 wires + shield) interface can be used for polled communication
protocols.
It can be used for Multidrop connections with a Datalogic Multiplexer, (see par. "Multiplexer"
in Appendix A) exploiting a proprietary protocol based on polled mode called MUX32
protocol, where a master device polls slave devices to collect data. The overall maximum
cable length should not exceed 1200 m (3940 ft).
The following pins of the 25/26-pin connector are used for RS485 half-duplex interface
connection:
Pin
2
4
7
Name
RTX+
RTXGND_ISO
Function
RS485 input/output (+)
RS485 input/output (-)
Main signal ground
DS6300
MULTIPLEXER
2
RTX+
4
RTX-
7
GND_ISO
1
CHASSIS
RTX485+
RTX485RS485REF
Earth
Ground
Figure 58 – RS485 Half-Duplex Interface Connections
This interface is forced by software when the protocol selected is MUX32 protocol.
In a Multiplexer layout, the Multidrop address must also be set via serial channel by the
Genius™ utility or by the Host Programming Mode.
Figure 59 shows a multidrop configuration with DS6300 scanners connected to a Multiplexer.
CAUTION
42
This is an example of multidrop wiring. Consult the multiplexer manual for
complete wiring instructions.
CUSTOM CABLE ELECTRICAL CONNECTIONS
4
Figure 59 – DS6300 Multidrop Connection to a Multiplexer
43
DS6300 REFERENCE MANUAL
4
4.3 AUXILIARY INTERFACE
The auxiliary serial interface is used exclusively for RS232 point-to-point connections. It is
principally used for scanner configuration from a laptop PC but is also available for LOCAL
ECHO to a monitoring PC or for Pass through layouts. This interface is active when the Data
Tx parameter is enabled. The overall maximum cable length should not exceed 15 m (50 ft).
The following pins of the 25/26-pin connector are used for RS232 full-duplex interface
connection:
Pin
20
21
23
Name
RX
TX
GND
Function
Receive data
Transmit data
Common Ground
DS6300
USER INTERFACE
20
RX
21
TX
T XD
RXD
23
GN D
1
C HASSIS
GND
Earth
Ground
Figure 60 - RS232 Auxiliary Interface Connections
4.4 INPUTS
There are four optocoupled polarity insensitive inputs available on the 25/26-pin connector of
the DS6300 scanner: Input 1 (External Trigger/PS), Input 2 (Encoder), Input 3 and 4 generic
inputs:
The electrical features of these inputs are:
Maximum voltage
Maximum current all Inputs:
Pin
18
19
6
10
14
15
24
Name
I1A
I1B
I2A
I2B
I3A
I4A
I34B
30 Vdc
12 mA
Function
External Trigger (polarity insensitive) for PS
External Trigger (polarity insensitive) for PS
Input Signal 2 (polarity insensitive) for Encoder
Input Signal 2 (polarity insensitive) for Encoder
Input Signal 3 (polarity insensitive)
Input Signal 4 (polarity insensitive)
Common Reference of Input 3 and Input 4 (polarity insensitive)
The active state of all the inputs is selected in software (open or closed). Refer to the
Genius™ Help On Line.
All inputs are optocoupled, polarity insensitive, and driven by a constant current generator;
the command signal is filtered through an anti-disturbance circuit which generates a
debouncing delay which can be set to 5 ms or 500 s. In particular, I1 for PS, I3 and I4 share
44
CUSTOM CABLE ELECTRICAL CONNECTIONS
4
the same value which usually corresponds to 5 ms when using a photoelectric sensor, while
I2 is set to 500 s when this input is used for the Encoder. The maximum Encoder frequency
is 2 kHz.
Input 1 (External Trigger/PS) is used in the On-Line operating Mode and tells the scanner to
scan for a code. The yellow Phase On LED (Figure C, 3) which refers to Input 1 is on only
when current flows through the input circuit and therefore when the active state of this input is
set to "active open", the LED lights up when the input corresponds to OFF.
Input 2 is normally used for the Encoder input. The Encoder detects the conveyor speed.
Inputs 3 and 4 can be used as the stop signal for the reading phase.
The debouncing delay value can be changed through the software parameter Debouncing for
Input x, see the "6-8 K Software Configuration Parameter Guide” or Help file.
Powering Inputs
Input devices can be supplied by either scanner power (Vdc and GND) or external power
supplies (Vext).
Electrical isolation between the input command logic and the scanner is maintained when
powering the input devices from an external supply voltage (Vext).
The driving logic of the input signals may be powered, for convenience, with the voltage
supply between pins 9 (Vdc) and 23 (GND) of the 25/26-pin I/O connector. In this case,
however, the device is no longer electrically isolated. The voltage available on the 25/26-pin
I/O connector, is physically the same as used to power the scanner.
INPUT 1 - 2 CONNECTIONS USING DS6300 POWER
DS6300
EXTERNAL TRIGGER/ENCODER
Vd c
V
A/B
+ 5V
~
+
-
~
B/A
Gro un d
GND
Figure 61 - PNP Command Input Connection Using Scanner Power
DS6300
EXTERNAL TRIGGER/ENCODER
Vdc
A/B
+ 5V
~
+
~
V
-
B/A
GND
Groun d
Figure 62 - NPN Command Input Connection Using Scanner Power
45
DS6300 REFERENCE MANUAL
4
INPUT 1 - 2 CONNECTIONS USING EXTERNAL POWER
DS6300
Vext
EXTERNAL TRIGGER/ENCODER
V
A/B
+ 5V
~
+
-
~
B/ A
Grou nd
Figure 63 – PNP Command Input Connection Using External Power
DS6300
EXTERNAL TRIGGER/ENCODER
Vext
A/B
+ 5V
~
+
V
-
~
B /A
Groun d
Figure 64 - NPN Command Input Connection Using External Power
Terminal pins I34B are common to both inputs 3 and 4 and therefore these
inputs cannot be driven by opposite polarity devices.
NOTE
INPUT 3 - 4 CONNECTIONS USING DS6300 POWER
DS6300
EXTERNAL DEVICE
Vdc
I34B
+ 5V
~
+
V
-
~
I3A
Gro und
EXTERNAL DEVICE
+ 5V
~
+
V
-
~
I4 A
GND
Grou nd
Figure 65 - I3/I4 NPN Input Command using Scanner Power
46
CUSTOM CABLE ELECTRICAL CONNECTIONS
4
INPUT 3 - 4 CONNECTIONS USING EXTERNAL POWER
DS6300
Vext
EXTERNAL DEVICE
V
I3A
+ 5V
~
+
-
~
Grou nd
Vext
V
I4A
+ 5V
~
+
~
-
I34B
Grou nd
Figure 66 - I3/I4 PNP Input Command using External Power
4.4.1
Code Verifier
If the DS6300 is used as a Code Verifier, the verifier code can be configured in software
through the Genius™ configuration program. However it is also possible to use one of the
inputs to trigger when the scanner should store a code read as the verifier code.
The Code Verifier parameter must be enabled, and the configuration parameters to allow
correct Code Type reading must be saved to the scanner in order to read the verifier code.
When the selected input is activated, the next read code will be stored as the verifier code in
the scanner's non-volatile (Flash) memory.
For more details see the Verifier Parameters in the "6-8 K Software Configuration Parameter
Guide” or Help file.
4.5 OUTPUTS
Three general purpose outputs are available. The electrical features are given below:
Outputs 1 and 2
Maximum Voltage
Collector Current (pulse)
Collector Current (continuous)
Saturation Voltage (VCE)
Maximum Power Dissipation
30 V
130 mA Max.
40 mA Max.
1 V at 10 mA Max.
90 mW at 50°C (Ambient temperature)
47
DS6300 REFERENCE MANUAL
4
Output 3 has different electrical features. It is a bi-directional solid state relay with built-in
current limit protection.
Output 3
Maximum Voltage
Collector Current (pulse)
± 100 V (Vext only)
300 mA Max. at 25°C (Ambient temperature)
240 mA Max. at 50°C (Ambient temperature)
200 mA Max. at 25°C (Ambient temperature)
150 mA Max. at 50°C (Ambient temperature)
6 – 15 Ω
> 500 Ω
< 1 µA
550 mW at 50°C (Ambient temperature)
Collector Current (continuous)
R on
R off
Off-State Leakage Current
Maximum Power Dissipation
Pin
8
22
11
12
16
17
Name
O1+
O1O2+
O2O3A
O3B
Function
Configurable digital output 1 – positive pin
Configurable digital output 1 – negative pin
Configurable digital output 2 – positive pin
Configurable digital output 2 – negative pin
Configurable digital output 3 – polarity insensitive
Configurable digital output 3 – polarity insensitive
The function of each output can be defined by the user (No Read, Right, Wrong, etc.). Refer to
the Genius™ Help On-Line for further details.
The output signals are fully programmable being determined by the configured
Activation/Deactivation events, Deactivation Timeout or a combination of the two.
By default, Output 1 is associated with the Complete Read event, which activates when all
the selected codes are correctly decoded, and Output 2 is associated with the No Read
event, which activates when the code signaled by the external trigger/PS is not decoded.
Output 3 can be assigned to the same events and it has the advantage of being polarity
insensitive. By default it is not assigned to any event.
DS6300
USER INTERFACE
Vext 30 Vdc max
+
-
Figure 67 – Output 1 and Output 2 Interface
When the load is powered by an external power supply, the voltage must be less than 30 V.
48
CUSTOM CABLE ELECTRICAL CONNECTIONS
DS6300
4
USER INTERFACE
Vext 100 Vdc max
A/B
B/A
Figure 68 – Output 3 Interface
The command signals are filtered and generate a delay of about 50 µs for Output 1 and 2
and 1 ms for Output 3.
4.6 USER INTERFACE
How To Build A Simple Interface Test Cable:
The following wiring diagram shows a simple test cable including power, external
(push-button) trigger and PC RS232 COM port connections.
25-pin D-sub female
9-pin D-sub female
21
TXAUX
2
RX
20
RXAUX
3
TX
5
GND
23 GND
PC
13 VS
25 GND
DS6300
9
VS
18 EXT TRIG A
19 EXT TRIG B
Power Supply
VS (15 – 30 VDC)
Power GND
Trigger
Test Cable for DS6300
49
DS6300 REFERENCE MANUAL
5
5 LONWORKS CONNECTIONS
CAUTION
Do not connect an RS232 port to the 9-pin Lonworks Connector. This may
damage your Laptop PC.
The local network used by DS6300 exploits a Lonworks standard communication system
requiring only two wires (polarity insensitive) to enable a connection. The connector also
provides a positive and a negative supplying wire. In this way, all the slave readers can be
powered by the master through the Datalogic standard cables.
When working in applications requiring enhanced synchronization capabilities, the DS6300
master reader (output) transmits two system signals named Sys_I/O and Sys_Enc_I/O to the
slave readers (input). For example, when working with applications requiring an encoder the
signal is received by the master and directly transmitted to the slaves through the cable.
The internal circuits generating the system signals are externally supplied by means of the
VS_I/O and REF_I/O pins and are isolated from the reader supply voltage.
The use of these system circuits is not required in all the operating modes. Anyway, for
correct system functioning it is suggested to use Datalogic cables and accessories and follow
the description of the typical layouts (see chapter 7 for details).
1
5
9
6
Female (all models)
5
1
6
9
Male (Master/Slave model)
Figure 69 - 9-pin Local Lonworks Connectors
The following pinout is valid for both connectors.
Pin
1
9
2
6
3
4
5
7
8
50
DS6300 9-pin Lonworks Connector Pinout
Name
Function
CHASSIS
Cable shield internally connected by capacitor to chassis
VS
supply voltage 15 to 30 vdc (positive pin)
GND
supply voltage (negative pin)
VS_I/O
Supply voltage of I/O circuit
Ref_I/O
Reference voltage of I/O circuit
SYS_ENC_I/O System signal
SYS_I/O
System signal
LON A
Lonworks line (polarity insensitive)
LON B
Lonworks line (polarity insensitive)
LONWORKS CONNECTIONS
5
5.1 NETWORK TERMINATION
When building a Lonworks system the network must be properly terminated by positioning
the BT-6000 Lonworks terminator in the DS6300 master reader and in the last DS6300 slave
reader.
Each side of the terminator provides a different connector; thus, it can be inserted either into
the Lonworks 9-pin male connector of the master reader or in the Lonworks 9-pin female
connector of the last slave reader:
Slave
Master
Male
Female
Female
Male
Figure 70 - BT-6000 Network Terminator
For Fieldbus models (Ethernet, DeviceNet, or Profibus), no terminator must
be inserted in the reader, since it is internally integrated.
NOTE
5.2 LONWORKS INTERFACE
The Lonworks network is used for both input and output connection to build a multi-sided or
omni-station system connecting several readers.
The DS6300 master usually employs the 9-pin female connector for output connection to the
first slave, while the 9-pin male connector is terminated by inserting the BT-6000 terminator
(see Figure 70 for details). If creating a T-network configuration, it is necessary to use both
connectors to create the double branch line of slave readers.
Both connectors are always employed when connecting together the slave readers. In
particular, the 9-pin female connector is used for output connection and the male one for
input connection. The female connector in the last slave reader is terminated by the BT-6000
to close the system network.
51
DS6300 REFERENCE MANUAL
5
The following diagram represents the connection between a DS6300 working as master and
a DS6300 working as a slave reader.
The cable shield for LON A/B is connected to pin1 - CHASSIS.
Master
Slave
VS_I/O
4
4
5
5
3
3
LON A
7
7
LON B
8
8
1
1
REF_I/O
CHASSIS
VS
9
AWG 16
9
GND
2
AWG 16
2
CHASSIS
= male connector
= female connector
Figure 71 – DS6300 Master/Slave Lonworks Connection
CAUTION
The maximum current to be propagated to the Slave readers through the
Master is 2 A. For this reason, it is suggested to use a 24 Vdc power supply
capable of supplying up to three readers (Master + 2 Slaves).
The following diagrams represent different network terminations using the BT-6000 Lonworks
terminator. In Figure 73 the BT-6000 terminator is indicated by the
element, while the
figure below shows its electrical circuit in details:
Figure 72 – BT-6000 Electrical Circuit
52
LONWORKS CONNECTIONS
5
The diagram below represents the termination of a DS6300 (Master/Slave model) working as
master by means of the BT-6000.
Master
BT-6000 Female Side
VS
9
9
VS_I/O
6
6
LON A
7
7
LON B
8
8
GN D
2
2
REF_I/O
3
3
T
= male connector
= female connector
Figure 73 – DS6300 Master Termination
The diagram below represents the termination of a DS6300 (Master/Slave model) working as
slave by means of the BT-6000 terminator.
Slave
BT-6000 Male Side
LON A
7
7
LON B
8
8
T
= male connector
= female connector
Figure 74 – DS6300 Slave Termination
The diagram below represents the connection between a DS6300 Fieldbus model, which
always works as master, and a Master/Slave model working as a slave reader.
Fieldbus Master
Slave
VS_I/O
REF_I/O
4
4
5
5
3
3
LON A
7
7
LON B
8
8
CHASSIS
1
1
T
VS
9
AWG 16
9
GND
2
AWG 16
2
CHASSIS
= male connector
= female connector
Figure 75 – DS6300 Fieldbus Master to Slave Lonworks Connection
The Fieldbus master is internally terminated.
53
DS6300 REFERENCE MANUAL
6
6 FIELDBUS CONNECTIONS
6.1 ETHERNET INTERFACE
This connector is only available for DS6300 Ethernet models and allows the Ethernet
connection between the host and the reader.
1
8
Figure 76 – DS6300 RJ45 Female Modular Connector
This interface and the connector pinout (see the following table) are IEEE 802.3 10 BaseT
and IEEE 802.3u 100 Base Tx compliant.
RJ45 Modular Jack Pinout
Pin
1
2
3
6
4, 5, 7, 8
Name
TX +
TX RX +
RX N.C.
Function
Transmitted data (+)
Transmitted data (-)
Received data (+)
Received data (-)
Not connected
In order to meet EMC requirements:
use Eth shielded cable
connect the Ethernet interface cable shield to the plant earth ground
The cable shield must be connected to the chassis of both connectors.
NOTE
54
A ferrite (type Stewart 28A2029-0A0) may also be applied on the scanner
side of the Ethernet cable to reduce electrical noise.
FIELDBUS CONNECTIONS
6
The Ethernet interface (NIC) can be used for TCP/IP communication with a remote or local
host computer by connecting the scanner to a LAN. It can also be connected directly to a
host PC.
The following is an example of a connection to a LAN through a Hub using a straight through
cable:
HUB / SWITCH
DS6300
T X+
1
1
T X-
2
2
RX+
3
3
n. c.
4
4
n. c.
5
5
RX-
6
6
n. c.
7
7
n. c.
8
8
n. c. = not connected
Figure 77 – Straight Through Cable
The following is an example of direct connection to a PC using an inverted cable:
HOST PC
DS6300
T X+
1
3
T X-
2
6
RX+
3
1
n. c.
4
4
n. c.
5
5
RX-
6
2
n. c.
7
7
n. c.
8
8
n. c. = not connected
Figure 78 – Inverted Cable
For further details refer to the “Ethernet Service Guide” document provided as reference
documentation.
55
DS6300 REFERENCE MANUAL
6
6.2 DEVICENET INTERFACE
When using DeviceNet, the Main serial interface is disabled and must not
be physically connected.
NOTE
The 5-pin male connector is only available in the DS6300 DeviceNet model and allows
connection between the host and the reader:
4
3
1
2
5
Figure 79 - DeviceNet 5-pin Male Connector
DS6300 5-pin DeviceNet connector pinout
Pin
2
5
1
4
3
NOTE
56
Name
V+
CAN_L
SHIELD
CAN_H
V-
Function
Supply voltage – positive pin
CAN bus data line – L
Shield
CAN bus data line – H
Supply voltage – negative pin
The power supplied on pin V+ and V- is used only to propagate power to
the section of the DeviceNet board directly connected to the Bus. It is
completely isolated from the DS6300 power which must be supplied on pin
9, 13 and pin 23, 25 of the 26-pin Main/Aux connector.
FIELDBUS CONNECTIONS
6
6.3 PROFIBUS INTERFACE
The 9-pin Profibus female connector (white) is only available in the DS6300 Profibus model
and allows connection between the host and the reader:
1
5
9
6
Figure 80 - Profibus 9-pin Female Connector
DS6300 9-pin Profibus connector pinout
Pin
1
2
3
4
5
6
7
8
9
*
**
Name
Shield*
Free
B-LINE (RxD/TxD-P)
CNTR-P**
DGND
+5 V
Free
A-LINE (RxD/TxD-N)
CNTR-N**
Function
Shield, Protective Ground resp.
Received/Transmitted Data-P
Repeater Control Signal
Data Ground (M5V)
Voltage Plus (P5V)
Received/Transmitted Data
Repeater Control Signal
signal is optional
signal is optional; RS485 level
The Profibus interface is used for communication with an Host and allows expanding the
networking and remote diagnostic capabilities of the scanner.
For further details refer to the “Profibus_Fam6k.pdf” document provided as supplementary
documentation.
57
7
DS6300 REFERENCE MANUAL
7 TYPICAL LAYOUTS
DS6300 scanners are mainly designed to work together on a high performance Lonworks
sub-network to create multi-sided and omnidirectional reading stations that can interface with
Serial or Fieldbus Host networks. This chapter covers the most common Lonworks layouts.
DS6300 scanners can however, be connected in a variety of layouts depending on the
number of scanners used and the required complexity of the reading station. Layouts range
from single Stand Alone to complex alternative networks when Lonworks is not available for
all readers (mixed reader networks). For alternative layouts see appendix A.
Several power supplies are available to power the reading stations.
Photoelectric sensors used as code presence sensors and optical encoders to signal
conveyor speed are also available accessories.
The following typical layouts refer to the system hardware configurations, but they also
require the correct setup of the software configuration parameters (see par. 8.2 for details).
The accessories and cables indicated in the following figures are Datalogic products. We
suggest their use to guarantee the correct system functioning.
7.1 LOCAL LONWORKS NETWORK
A local Lonworks network allows logically connecting a DS6300 master reader with up to 31
DS6300 slaves. Actually, the maximum number of readers to be employed in the network
depends on the system operating conditions; that is, adopted operating mode and amount of
data stream.
When creating your network, always keep in mind the following guidelines:
the Lonworks network logically supports a maximum number of 32 devices (master +
slaves);
it is recommended to adhere to the 8-in-16 rule (not more than 8 devices in any 16 meter
bus segment (branch);
for DS6300 scanners the total bus length may extend up to 130 m (426 ft);
the maximum number of DS6300 readers supported also depends on the type of power
propagation adopted by the system (see the specific power supply installation manual for
details).
Typically the layouts can be divided into Synchronized (single P.S.) or Multidata (multi P.S.)
networks. They can be small (up to 10 scanners) or large (more than 10 scanners).
Contact Datalogic Automation S.r.l., if your network requires a higher number of readers or in
case the application throughput is very high.
For further information on Lonworks network cabling and connections see the “LonWorks®
TPT Twisted Pair Transceiver Module User’s Guide”, available from the website:
www.echelon.com.
58
TYPICAL LAYOUTS
NOTE
7.1.1
7
For some DS6300 Lonworks Network layouts, power is propagated through
the 9-pin scanner connectors. A specific jumper setting is required in CBXs
to pass scanner power to the presence sensor, encoder, etc.
Small Synchronized Network
When building a small local Lonworks network (less than 10 scanners), the DS6300 master
reader must be connected to a local host computer or a CBX connection box by means of a
cable connected to the 25/26-pin D-sub male connector.
The master reader connects to the first slave reader of the system through the local
Lonworks 9-pin female connector. For Master/Slave models, the local Lonworks 9-pin male
connector must be properly terminated by inserting the BT-6000 Lonworks terminator.
Fieldbus models (Ethernet, DeviceNet, or Profibus), are internally terminated.
The slave readers are connected together through the local Lonworks connectors. Only the
9-pin female connector of the last slave reader must be terminated by the BT-6000 Lonworks
terminator.
The presence sensor is connected and powered through the CBX by the scanner and is
unique to the system. There is only a single reading phase and a single message from the
master reader to the Local Host. The On-Line operating mode is used for this layout.
CAB-Sxx
CBX100**
CAB-610x
BT-6000
Local Host
Master
I/O, AUX
Slave 1
P.S.*
BT-6000
CAB-63xx
PWR-120
*
P.S. (Presence Sensor) connected to Input 1 (External Trigger/PS) input.
** CBX100 jumper set to accept scanner power.
Figure 81 – Small Synchronized Network with 2 Readers
59
DS6300 REFERENCE MANUAL
7
The following image shows a system consisting of five readers (mixed 8K and 6K) where the
external signals (trigger, encoder, serial to host, etc.) are connected to the master through
the CBX100.
Note: In a mixed 8K and 6K family scanner network, only the 8K family scanner can be
Master.
The entire system is powered by the PWR-240 where:
Power is distributed through two CAB-63xx cables to avoid excessive current draw.
the master is connected to the CBX100 through the CAB-F0x, and provides power to the
PS and Encoder.
The Master DS8100A is terminated with the BTK-8102 and the last slave DS6300 is
terminated with the BT-6000.
CAB-610x
BT-6000
CBX100**
Slave 3
Slave 4
CAB-610x
Local Host
I/O, AUX, Encoder***
Master
P.S.*
Slave 2
CAB-610x
Slave 1
PWR-240
CAB-650x
CAB-F0x
BTK-8102
CAB-63xx
CAB-63xx
*
P.S. (Presence Sensor) connected to Input 1 (External Trigger/PS) input.
**
CBX100 jumper set to accept scanner power.
***
Encoder connected to Input 2 (Encoder) input.
Figure 82 –Synchronized Network with DS8100A Master and 6K Family Slaves - Serial Host
If a single power source is used, it is not necessary to separate groups of
scanners with CAB-611x "no power" cables.
NOTE
60
TYPICAL LAYOUTS
7.1.2
7
Multidata Network
In this layout, one master and up to 7 DS6300 slave readers have their own P.S. and
therefore multiple reading phases. Each P.S. is connected through a CBX100, which in turn
is connected to its relative scanner through a CAB-Sxx cable.
Typically these systems are reading stations which are located relatively far away from each
other and are therefore usually each powered separately. In this case, the Lonworks network
must use CAB-611x "no power" cables.
The master sends all the individual messages collected from the Lonworks interface as well
as its own to the Local Host through its CBX100.
P.S.*
Slave 3
P.S.*
Slave 2
BT-6000
CAB-611x
PG6000
CAB-Sxx
P.S.*
Slave 1
CAB-611x
PG6000
CAB-Sxx
CAB-611x
PG6000
CAB-Sxx
P.S.*
Master
BT-6000
PG6000
CAB-Sxx
Local Host
CBX100
*
Each P.S. (Presence Sensor) connected to Input 1 (External Trigger/PS) input.
Figure 83 – Multidata Network
61
DS6300 REFERENCE MANUAL
7
7.1.3
Fieldbus Networks
The Fieldbus models (Ethernet, DeviceNet, or Profibus) offer connectivity without any
converter or adapter needed.
The DS6300 Lonworks master communicates as a Fieldbus slave to a remote host (i.e.
remote PC connected via Internet or PLC Fieldbus Master) by means of a cable connected
to the Fieldbus connector provided. It can be activated by a signal generated by the remote
Host or by a physical presence sensor.
The external signals (trigger, encoder) are connected to the master through the CBX100.
The entire system is powered by the PWR-240 where:
Power is distributed through two CAB-63xx cables to avoid excessive current draw.
The master is connected to the CBX100 through the CAB-F0x, and provides power to the
PS and Encoder.
Since the master DS6300 is a Fieldbus model, it is internally terminated. The last slave
DS6300 is terminated with the BT-6000.
The master connects directly to the remote host through its Fieldbus interface.
Fieldbus
CAB-610x
BT-6000
CBX100**
Slave 3
Slave 4
CAB-610x
Remote Host
I/O, AUX, Encoder***
P.S.*
Slave 2
Slave 1
Master*
PWR-240
CAB-610x
CAB-610x
CAB-F0x
CAB-63xx
CAB-63xx
*
P.S. (Presence Sensor) connected to Input 1 (External Trigger/PS) input.
**
CBX100 jumper set to accept scanner power.
***
Encoder connected to Input 2 (Encoder) input.
Figure 84 – Synchronized Network with DS6300 Master and 6K Family Slaves - Fieldbus Host
62
TYPICAL LAYOUTS
7
To interface DS6300 scanners to other Host types (Fieldbus and nonFieldbus), use the CBX800 Gateway with Host Interface Modules.
NOTE
I/O, AUX, Encoder***
CAB-610x
Slave 3
BT-6000
P.S.*
CBX800**
with Host
Interface
Module
Slave 4
Fieldbus
Network
CAB-610x
Remote Host
Slave 2
CAB-610x
Slave 1
Master*
CAB-610x
PWR-240
BT-6000
CAB-F0x
CAB-63xx
CAB-63xx
*
P.S. (Presence Sensor) connected to Input 1 (External Trigger/PS) input.
**
CBX800 jumper set to accept scanner power.
***
Encoder connected to Input 2 (Encoder) input.
Figure 85 – CBX800 Gateway Fieldbus Synchronized Network
The following Host Interface Module accessories are available for the CBX800 Gateway:
NAME
BM200/210
BM300/310
BM400
BM500/510/520
Description
Ethernet TCP/IP Module STD/IP65
Profibus Module STD/IP65
DeviceNet Module IP65
Ethernet/IP Module STD/IP65/IP54
BM600
BM700
BM1100
BM1200/1210
CANopen Module STD
Profinet Module STD
CC-Link Module STD
Modbus TCP STD/IP65
Part Number
93ACC1851, 93ACC1852
93ACC1810, 93ACC1811
93ACC1814
93ACC1812, 93ACC1813,
93ACC1840
93ACC1815
93ACC1816
93ACC1845
93ACC1848, 93ACC1849
63
DS6300 REFERENCE MANUAL
8
8 SOFTWARE CONFIGURATION
8.1 GENIUS™ INSTALLATION
Genius™ is a new Datalogic scanner configuration tool providing several important
advantages:
Wizard approach for new users;
Multi-language version;
Defined configuration directly stored in the reader;
Communication protocol independent from the physical interface allowing consideration
of the reader as a remote object to be configured and monitored.
To install Genius™, proceed as follows:
1) Turn on the PC that will be used for configuration, running either Windows 98, 2000/NT, XP
or Vista;
2) Insert the Genius™ CD-ROM;
3) Wait for the CD to autorun and follow the installation procedure.
8.2 GUIDE TO RAPID CONFIGURATION
8.2.1
Wizard for Quick Reader Setup
After installing the Genius™ software program (see par. 8.1) the following window appears
asking the user to choose the desired configuration level:
Figure 86 - Genius™ Wizard Opening Window
The Wizard option is advised for new users, since it shows a step-by-step scanner
configuration. The parameters to be defined are the following:
- Barcode selection and definition;
- Operating mode selection and definition (see sub-paragraphs for further details);
- Digital Inputs/Outputs configuration;
- Hardware interface selection;
- Output data format configuration.
64
SOFTWARE CONFIGURATION
8
After defining the parameter values the following window appears allowing to complete the
reader configuration as follows:
-
Saving the configuration to disk;
-
Switching to Advanced mode;
-
Sending the configuration to the scanner.
Figure 87 - Genius™ Wizard Closing Window
Test Operating Mode
This operating mode is not available when DS6300 works as slave.
NOTE
Figure 88 - Test Mode Selection
This operating mode causes the reader to be continuously activated allowing verification of
its reading features and its reading position with respect to the barcode. For this reason, it is
particularly advised during the installation phase of the reader.
After 100 scans, the values relative to an internal counter and the decoded code are
displayed and transmitted on the serial interface. The counter reports the percentage of good
reads of the label.
65
DS6300 REFERENCE MANUAL
8
On Line Operating Mode
Figure 89 - On Line Mode Selection
This operating mode causes the reader to be connected to an external Presence Sensor
using I1A and I1B (External Trigger/PS) inputs.
During the active phase of the presence sensor, the DS6300 reader tries to acquire and
correctly decode the code.
In case the decoding phase is successful, the barcode characters are transmitted on the
serial interface. Otherwise, a no read message is sent.
Automatic Operating Mode
Figure 90 - Automatic Mode Selection
This operating mode does not require the connection to an external Presence Sensor.
When working in this mode the reader is continuously scanning. The reading phase is
activated each time a barcode enters the reading zone. The reader stops reading after an N
number of scans without a code. Barcode characters are transmitted on the serial interface.
In case of a failed reading phase no message is sent to the host computer.
66
SOFTWARE CONFIGURATION
8.2.2
8
Genius™ Network Setup Through Master
Network Setup allows configuring your Local Lonworks Network through the Master using
Genius™.
Three different procedures are available to define the number of network slave scanners,
their label and address according to two main conditions:
Condition
Available Procedure
Feature
Unknown Slave Addresses
Net-Autoset
automatically assigns random addresses to
slave or Stand Alone scanners.
Known Slave Addresses
Network Wizard
customizes the network (slave label and
address definition and physical identification
of a specific slave within network), updates
configuration to a file and makes it ready to
be sent to the Master.
Express Network Setup
automatically performs all the operations of
the Network Wizard apart from the physical
identification of a specific slave scanner.
NOTE
The Network Setup procedure as described requires Genius™ software
version 1.06 or later. In addition, the Net-Autoset procedure requires
scanner software version 6.40 or later.
1. The first operation to perform is the configuration of your scanner as "Master" from the
Local Device Network Settings item in the Device Menu, see figure below:
Figure 91 – Local Device Network Settings
67
DS6300 REFERENCE MANUAL
8
The following dialog box appears asking whether to send the configuration to the Local
Device or not:
icon available on the Toolbar to make the
2. Click the "Yes" button, then click on the
“Devices” area appear next to the Parameter Explorer window. By repeatedly clicking the
icon this area will be displayed or hidden.
Figure 92 – Cluster Configuration
Each scanner of the cluster is indicated by the following graphical objects:
68
check box allowing to select/deselect a specific scanner to perform the desired
operations (i.e. program downloading);
icon representing the scanner status;
a label reporting information transmitted by the scanner when connected (the scanner
address, generated errors, scanner description).
SOFTWARE CONFIGURATION
8
3. Then, proceed with the network setup by using one of the icons available on the Tool
Bar according to the procedure to follow:
=
Net-Autoset procedure
=
Network Wizard procedure
=
Express Network Setup procedure
Net-Autoset
This procedure is to be used when all scanner addresses and labels are unknown (typically
when configuring the network for the first time or whenever a network reconfiguration is
required).
icon or selecting the "Net_Autoset" option from the right-click menu, the
By clicking the
Net-Autoset procedure is started allowing automatic assignment of random addresses to all
slave or Stand Alone scanners connected within the network.
Once the procedure has been completed, it is possible to:
define customized addresses and labels through the Network Wizard;
display the scanner default labels through the Express Network Setup.
Express Network Setup
Before performing this procedure, a Lonworks address must be assigned to each slave
scanner. The most practical method is through the Net-Autoset procedure. See par. 8.2.3 for
alternative address assignment methods.
Once all addresses have been assigned, the Express Network Setup is to be used when all
scanner addresses and labels do not need to be modified.
icon or by choosing the related option from the right-click menu, the
By clicking on the
procedure is started which automatically performs the following operations:
-
opening the wizard;
-
polling the network to discover connected scanners;
-
transferring all scanners found to the "Requested Devices" area of the wizard where
your network customization is defined;
-
saving the new network configuration;
Once the procedure has been completed, a dialog box will appear asking whether to send
the configuration to the Master. Choose the “Yes” option to start this procedure.
69
DS6300 REFERENCE MANUAL
8
Network Wizard
Before performing this procedure, a Lonworks address must be assigned to each slave
scanner. The most practical method is through the Net-Autoset procedure. See par. 8.2.3 for
alternative address assignment methods.
Once all addresses have been assigned, the Network Wizard is to be used when one or
more scanner addresses and labels need to be modified.
1. Click on the
button to open the Network Wizard dialog box:
a. if the slave scanners have already been configured and wired to the network, click on
the Autodetect button to start a polling procedure of the current network. All slave
scanners found will be represented in the “Current Devices” area. Then, select the
icon (or
desired slave scanner from the “Current Devices” area and click on the
drag and drop) to transfer it to the “Requested Devices” area where your network
customization is defined. The following dialog box will appear allowing (if necessary)
to change the slave address ("Available Device" field) and label ("Description" field):
b. if the slave scanners have not been configured and wired to the network, click on the
icon to add a new device defining its address and model. The added slave
scanner will be displayed in the “Requested Devices” area. This option in any case
requires that all slave scanners have their address set before the network can
function.
70
SOFTWARE CONFIGURATION
8
2. If desired, select a slave scanner within the "Current Devices" area and click on the
icon (or select the "Show Device" option from the right-click menu) to make the
dialog box appear as follows:
The "Show Device" option is particularly useful after the Net-Autoset procedure or
whenever it is necessary to know which address is assigned to a specific slave
scanner. Indeed, it activates the following signals which physically indicate the
scanner corresponding to the one selected, in particular:
in Network Wizard the icon corresponding to the selected slave scanner starts
blinking red;
in the Physical Network all slave scanner lasers turn off except the one of the
selected scanner which turns on.
3. If desired, select the transferred/added slave scanner within the “Requested Devices”
area and click on the
icon to customize the scanner label and address.
4. Once your network has been customized, close the network wizard. Before closure,
the program will show a dialog box asking whether to send the new configuration to
the Master. Choose the “Yes” option to start this procedure.
71
DS6300 REFERENCE MANUAL
8
8.2.3
Alternative Slave Address Assignment
As alternatives to Network Setup through the Master, each Slave scanner can be assigned
an address through the following methods:
address setting through the Local Device Network Settings item in the Device Menu
with the slave scanner connected to Genius™
manual address setting through slave scanner keyboard (see par. 1.6.1 for details)
8.3 ADVANCED GENIUS™ CONFIGURATION
The ADVANCED selection available when starting the Genius™ program is addressed to
expert users being able to complete a detailed scanner configuration. By choosing this option
it is possible either to start a new scanner configuration or to open and modify an old one.
The desired parameters can be defined in the following window, similar to the MS Explorer:
Figure 93 - Genius™ Parameter Explorer Window
The procedure for setting the scanner parameters is supported by a Help On-Line, which is
displayed in an HTML browser. It can be selected from the Configuration Help option
available in the Help menu. In addition, a context-sensitive help can be enabled by pressing
the <F1> key after selecting the desired parameter.
72
SOFTWARE CONFIGURATION
8.3.1
8
Genius™ Shortcuts for Network Configuration
Once the Network Setup is structured in Genius and the Master is configured, there are a
few shortcuts that Genius offers to quickly configure the slaves.
By right-clicking on a device in the "Devices" area a shortcut menu appears which allows you
to:
Copy the device configuration
Paste a previously copied configuration
Copy the Master device configuration parameters to all Slaves (only common
parameters relative to Slave functioning, i.e. Code Definition, Diagnostics, etc.)
Show Device to physically locate a scanner in the station
These shortcuts are made only in Genius™ and require sending the configurations to
the scanners to be saved.
73
8
DS6300 REFERENCE MANUAL
It is possible to Paste, Send or Load configurations simultaneously 1 to a selected number of
devices by clicking the relative device check box and executing the desired command.
These same functions 2 can be selected from the Edit menu as well.
1
2
Not for Master and Slaves simultaneously.
Not for Master and Slaves simultaneously. If using the "Select All Devices" menu item, uncheck either the Master or all slaves.
74
SOFTWARE CONFIGURATION
8
8.4 PARAMETER DEFAULT VALUES
The following table contains the list of the factory default settings for the DS6300.
Genius™ also allows checking the parameter default values by selecting the "Compare
parameters" option available in the Tools menu and comparing the current scanner
configuration to the default one.
Parameter
Code Definition
Code Combination
No read Message
No Read String
Multiple Read Filters
Code Label Settings #1
Code Symbology
Label Length
Min Code Position
Max Code Position
Check Digit
Decoding Safety
Decoding Severity
Match String Rule
Pattern Match String
Match Direction Rule
Code Label Settings #2
Code Symbology
Label Length
Minimum Label Length
Maximum Label Length
Min Code Position
Max Code Position
Check Digit
Decoding Safety
Decoding Severity
Match String Rule
Pattern Match String
Match Direction Rule
Operating Modes
Operating Mode Selection
On Line Options
Start Input Number
Start Input Active Level
Reading Phase Timeout
Verifier
Reading System Layout
Device Assignment
Modify&Backup Lon Slave Configuration
Enable A.S.R.
Default Setting
Single Label
Global No Read Message
<CAN>
Disabled (unchecked)
Interleaved 2 of 5
8
0
255
Disabled (unchecked)
1
3
Match
Empty
Disable
Code 39
Variable
1
60
0
255
Disabled (unchecked)
1
3
Match
Empty
Disable
On Line
On Line 1 Input
1
Active Closed
Disabled (unchecked)
Disabled (unchecked)
Alone
Disabled (unchecked)
Disabled (unchecked)
75
DS6300 REFERENCE MANUAL
8
Parameter
Reading Parameters
Beam Shutter
Overflow Start Ratio
Overflow Stop Ratio
Reading Mode
Reading Condition
Reconstruction Parameters
Enabled Stacked Code
Extended
Min Match
Position Tolerance
Duration Tolerance
Min Start/Stop Number
Inter Char Gap
Addon Overflow Ratio
Scan Line Amplitude
Amplitude Settings Enable
Data Communication Settings
Host Application Protocol Type
Data Format
Header TX Start
Termination After No Read Message
Message Tx Selection
Format Type
Max Tx Delay After Phase Off
Code Identifier
Parameters
Header String
Code Position
Code Direction Identifier Enable
Termination String
Data Packet Separators
Code Field Length Setting
Main Serial Port
Data Tx
Heartbeat
Parameters
Main Port Communication Mode
Main Port Electrical Interface
Handshake
Baud Rate
Parity
Data Bits
Stop Bits
76
Default Setting
Disabled
5
5
Reconstruction
Standard
Disabled (unchecked)
0
50
50
2
8
2
Disabled (unchecked)
Standard
With data
Enabled (checked)
On Decoding
Standard
Disabled
Disabled
<STX>
Disabled (unchecked)
Disabled (unchecked)
<CR><LF>
<CR><LF>
Variable Length
Enabled (checked)
Disable
Standard
RS232
None
9600
None
8
1
SOFTWARE CONFIGURATION
Parameter
Parameters
Auxiliary Serial Port
Search for CBX BM100 at Device Startup
Data Tx
Heartbeat
Pass Through
Parameters
Baud Rate
Parity
Data Bits
Stop Bits
Digital I/O Setting
Digital Input Lines Setting
Debouncing For Input 1, 3 and 4
Debouncing For Input 2
Input 1 Active Level Overridden by Op. Mode
Input 2 Active Level Overridden by Op. Mode
Input 3 Active Level Overridden by Op. Mode
Input 4 Active Level Overridden by Op. Mode
Output 1
Line State
Activation Event
Alternative Activation Event
Deactivation Event
Alternative Deactivation Event
Deactivation Timeout (ms)
Output 2
Line State
Activation Event
Alternative Activation Event
Deactivation Event
Alternative Deactivation Event
Deactivation Timeout (ms)
Output 3
Line State
Activation Event
Alternative Activation Event
Deactivation Event
Alternative Deactivation Event
8
Default Setting
Enabled (checked)
Enabled (checked)
Disable
Disabled (unchecked)
115200
None
8
1
5ms
500 µs
Active Closed
Active Closed
Active Closed
Active Closed
Normally Open
Complete Read
Wrong
Timeout
None
50
Normally Open
No Read
Partial Read
Timeout
None
50
Normally Open
None
None
None
None
77
DS6300 REFERENCE MANUAL
8
Parameter
Diagnostics
PackTrack Debug Message Tx
Enable
Conveyor Info
Refresh Time
Statistics
Energy Saving
Energy Saving Configuration
User Information Section
End User Name
Device Name
Line Name
78
Default Setting
Disabled (unchecked)
Checked
Not Available
2 sec
Enabled (checked)
Disabled (unchecked)
Empty
Empty
Empty
READING FEATURES
9
9 READING FEATURES
9.1 FOCUS ADJUSTMENT
The DS6300 provides a manual adjustment of the optics to optimize the reading performance
by choosing the best focus between two extreme positions. The focus adjustment is
continuous and not by step; thus, allowing an optimum adjustment around the selected
position. The relative focus positions range from 0 to 100.
The adjustment can be simply made through an external screw placed on the back of the
optic HEAD and protected by a cap (Figure 96). The screw may be rotated either clockwise
or counterclockwise in order to move the scanner internal lenses. In particular, a clockwise
rotation causes a farther focus from the scanner, while a counterclockwise rotation causes a
nearer focus to the scanner.
An internal sensor tracks the exact laser beam focusing position allowing it to be shown on
the reader display or through the Genius™ software program.
Do not stare at the laser beam output window during this operation to avoid
hazardous visible laser light.
WARNING
Refer to the following instructions when adjusting the focus:
1) Remove the regulation screw protecting cap (see Figure 96) positioned on the back of
the optic Head;
2) Press and hold both the ▲ (up arrow) and ▼ (down arrow) key for about 2 seconds to
enter the Main menu;
3) Use the ▲ (up arrow) or ▼ (down arrow) key to select “Test Mode” item, then press the
ENT (enter) key to confirm. The reader enters Test Mode;
4) Press the ENT (enter) key to toggle between the graphical (default) and numerical
visualization of the focus position;
79
DS6300 REFERENCE MANUAL
9
Display Visualization
The first line of the display shows the read code and Good Read percentage. Possible
suspending commas at the end of the code mean that the code is too long to be
displayed.
The second line of the display indicates the value of the focus position according to the
table below. The indications “Too Near” or “Too Far” are represented for values outside
the focus range.
Graphical Visualization
Numerical Visualization
A |---^----------| where ^ indicates the focus position Fxxx where xxx ranges from 000 to 100
B N-------------| where N indicates that the focus TooNear
position is “Too Near”
C |--------------F where F indicates that the focus Fxxx* where xxx is greater than 100
position is “Too Far”
CodeRead… 100%
|------^------------------|
CodeRead… 094%
F034
Figure 94 – Graphical Visualization
Figure 95 – Normal Visualization
5) Rotate the focus adjustment screw to reach the desired focus position. The display is
refreshed with the new values; 3
6) Press the ▲ (up arrow) key to exit the Test Mode;
7) Use the ▲ (up arrow) and ▼ (down arrow) key to select the “Exit” item, then press the
ENT (enter) key to confirm. The scanner exits the Main Menu and returns to its current
operating mode.
Figure 96 - Focus Adjustment Screw
The reader display shows the focus position only when the laser beam is
activated.
NOTE
It is possible to visualize the focus position and the reading percentage on the terminal tool
provided by the Genius™ configuration program (see Genius™ Help On-Line for details).
3
To avoid breakage, do not use excessive force when rotating the focus adjustment screw.
80
READING FEATURES
9
9.2 ADVANCED CODE RECONSTRUCTION (ACR™ 4)
The traditional way of barcode reading could be called “Linear Reading”. In this case, the
laser beam crosses the barcode symbol from its beginning to its end as shown in the
following figure:
Laser Beam
Figure 97 – Linear Reading
In Advanced Code Reconstruction mode it is no longer necessary for the laser beam to cross
the label from the start to the end. With just a set of partial scans on the label (obtained using
the motion of the label itself), the DS6300 is able to “reconstruct” the barcode. A typical set of
partial scans is shown in the figure below:
Code Direction
Figure 98 – Partial Scans
None of the partial scans contains the whole label. The decoder aligns each partial scan
correctly and combines them in order to obtain the entire code.
This alignment is performed by calculating the time difference from one partial scan to
another using a reference code element.
9.2.1
Tilt Angle for Advanced Code Reconstruction
The most important parameter in Advanced Code Reconstruction is the value of the
maximum tilt angle (maximum) under which the code reconstruction process is still
possible.
Laser Beam
0° to max
= tilt angle
Figure 99 – Tilt Angle
81
DS6300 REFERENCE MANUAL
9
The decoder will be able to read the label with a tilt angle between + max and - max as
shown in the following figure:
0°
OK
OK
Conveyor
- +
OK
No Read
No Read
No Read
OK
OK
Laser Beam
Figure 100 – Reading Zones with Max
9.3 PERFORMANCE
The scan rate is 800 scans/sec.
Refer to the diagrams in par. 9.4 for further details on the reading features. These diagrams
are taken on various resolution sample codes at a 25 C ambient temperature depending on
the conditions listed under each diagram.
If standard models do not satisfy specific requirements, contact your nearest Datalogic
distributor, supplying code samples, to obtain complete information on the reading
possibilities.
9.3.1
Reading Conditions
ANSI Grade B minimum
800 scans/sec
The following tables describe the requirements for standard applications.
Conveyor Speed (m/s)
0.25
0.30
2/5 Interleaved
0.33
Code Resolution
0.38
(mm)
0.50
0.72
1.00
0.5
10
12
13
14
18
24
33
Minimum Code Height for ACR Reading (mm)
45°
30°
1 1.5 2 2.5 3 0.5 1 1.5 2 2.5
12 14 16 18 20 7
9 10 12 13
14 15 17 19 21 8
9 11 12 14
14 16 18 20 22 8 10 11 13 14
16 18 19 21 23 9 11 12 14 15
19 21 23 25 26 11 12 14 15 17
25 27 28 30 32 15 16 17 19 20
34 35 36 38 40 20 21 22 23 25
Ratio 3:1
Table 1
82
3
15
15
16
17
18
22
26
READING FEATURES
Conveyor Speed (m/s)
0.25
0.30
Code 39
0.33
Code Resolution
0.38
(mm)
0.50
0.72
1.00
9
0.5
9
10
11
12
15
20
27
Minimum Code Height for ACR Reading (mm)
45°
30°
1 1.5 2 2.5 3 0.5 1 1.5 2 2.5
10 12 14 16 17 6
7
9 10 12
11 13 15 17 18 7
8
9 11 12
12 13 15 17 19 7
8 10 11 13
13 14 16 18 20 8
9 10 12 13
16 17 18 20 22 10 10 11 13 14
21 22 23 24 26 13 13 14 15 17
28 29 30 31 32 17 17 18 19 20
3
13
14
14
15
16
18
21
Ratio 3:1; Interdigit = Module Size
Table 2
Conveyor Speed (m/s)
0.25
0.30
Code 128 – Ean 128 0.33
Code Resolution
0.38
(mm)
0.50
0.72
1.00
0.5
8
8
9
10
12
16
22
Minimum Code Height for ACR Reading (mm)
45°
30°
1 1.5 2 2.5 3 0.5 1 1.5 2 2.5
9 11 13 15 17 5
7
8 10 11
10 12 14 16 18 6
7
9 10 12
11 13 14 16 18 6
8
9 11 12
11 13 15 17 19 7
8 10 11 13
13 15 17 19 21 8
9 11 12 14
17 19 21 22 24 10 11 13 14 16
23 24 25 27 29 13 14 15 17 18
3
13
13
14
14
15
17
20
Table 3
Conveyor Speed (m/s)
0.25
0.30
Codabar
0.33
Code Resolution
0.38
(mm)
0.50
0.72
1.00
0.5
8
9
9
10
13
17
23
Minimum Code Height for ACR Reading (mm)
45°
30°
1 1.5 2 2.5 3 0.5 1 1.5 2 2.5
9 11 13 15 17 5
7
8 10 11
10 12 14 16 18 6
7
9 10 12
11 13 14 16 18 6
8
9 11 12
11 13 15 17 19 7
8 10 11 13
14 15 17 19 21 8
9 11 12 14
18 19 21 22 24 11 12 13 14 16
24 25 26 27 29 14 15 16 17 18
3
13
13
14
14
15
17
20
Ratio 3:1; Interdigit = Module Size
Table 4
Conveyor Speed (m/s)
0.25
0.30
EAN 8-13, UPC-A
0.33
Code Resolution
0.38
(mm)
0.50
0.72
1.00
0.5
7
8
9
10
12
16
22
Minimum Code Height for ACR Reading (mm)
45°
30°
1 1.5 2 2.5 3 0.5 1 1.5 2 2.5
9 10 12 14 16 5
6
8
9 11
9 11 13 15 17 6
7
8 10 11
10 11 13 15 17 6
7
9 10 12
11 12 14 16 18 7
7
9 10 12
13 14 15 17 19 8
9 10 11 13
17 18 19 20 22 10 11 12 13 14
23 24 24 25 26 13 14 15 16 16
3
12
13
13
13
14
16
18
Table 5
83
DS6300 REFERENCE MANUAL
9
9.4 READING DIAGRAMS
9.4.1
DS6300 Standard Model
DS6300-100-0XX - Resolution: 0.20 mm/8 mils
10
0
6
8
0
15
20
25
25
8
20
6
15
CONDITIONS
4
Code = Interleaved 2/5
2
or Code 39
PCS = 0.90
0
Pitch angle = 0°
Skew angle = 10° - 20°
-2
Tilt angle = 0°
10 12 14
Focus
Position = 0
30
35
16
40
18
45
20 22
50
55
24 (in)
60
(cm)
Focus
Position = 40
10
5
0
-5
-4
-10
-6
-15
-8
-20
-10
-25
(in) (cm)
Figure 101 – Standard Model 0.20 mm / 8 mils Reading Diagram
Note: (0,0) is the center of the laser beam output window.
84
READING FEATURES
9
DS6300-100-0XX - Resolution: 0.30 mm/12 mils
0
8
0
20
12
30
10
25
8
20
6
15
4
10
2
5
0
0
-2
-5
-4
-10
-6
-15
-8
-20
-10
-25
-12
-30
10
25
12 14 16
30
35
40
20
18
45
50
22 24
55
60
26 28
65
70
30
75
32 34 (in)
80
85 (cm)
Focus
Position = 0
Focus
Position = 40
Focus
Position = 60
(in) (cm)
Figure 102 - Standard Model 0.30 mm / 12 mils Reading Diagram
CONDITIONS
Code = Interleaved 2/5 or Code 39
PCS = 0.90
Pitch angle = 0°
Skew angle = 10° - 20°
Tilt angle = 0°
Note: (0,0) is the center of the laser beam output window.
85
DS6300 REFERENCE MANUAL
9
DS6300-100-0XX - Resolution: 0.38 mm/15 mils
0
0
16 40
12
30
14
35
16 18
40
45
20
50
22
55
24
60
26 28
65
70
30
75
32
80
34
85
36 38
90
40
95 100 105 110 (cm)
14 35
12 30
10 25
Focus
Position = 0
8 20
6 15
4 10
2
5
0
0
Focus
Position = 100
-2 -5
-4 -10
-6 -15
-8 -20
-10 -25
Focus
Position = 60
-12 -30
-14 -35
-16 -40
(in) (cm)
Figure 103 - Standard Model 0.38 mm / 15 mils Reading Diagram
CONDITIONS
Code = Interleaved 2/5 or Code 39
PCS = 0.90
Pitch angle = 0°
Skew angle = 10° - 20°
Tilt angle = 0°
Note: (0,0) is the center of the laser beam output window.
86
42 44 (in)
READING FEATURES
9
DS6300-100-0XX - Resolution: 0.50 mm/20 mils
24
0
8
0
20
12
30
16 20 24
40
50
60
32
28
70
80
36 40
44
48 52 56
(in)
90 100 110 120 130 140 150 (cm)
60
20
50
16
40
12
30
8
20
4
10
0
0
-4
-10
-8
-20
-12
-30
-16
-40
-20
-50
-24
-60
Focus
Position = 100
Focus
Position = 60
Focus
Position = 0
(in) (cm)
Figure 104 - Standard Model 0.50 mm / 20 mils Reading Diagram
CONDITIONS
Code = Interleaved 2/5 or Code 39
PCS = 0.90
Pitch angle = 0°
Skew angle = 10° - 20°
Tilt angle = 0°
Note: (0,0) is the center of the laser beam output window.
87
DS6300 REFERENCE MANUAL
9
9.4.2
DS6300 Oscillating Mirror Model
DS6300-105-0XX (oscillating mirror) - Resolution: 0.20 mm/8 mils
0
6
8
0
15
20
10
25
8
20
6
15
4
2
10 12 14
25
30
35
Focus
Position = 0
16
40
18
45
20 22
50
55
24 (in)
60
(cm)
Focus
Position = 40
10
5
0
0
-2
-5
-4
-10
-6
-15
-8
-20
-10
-25
(in) (cm)
Figure 105 – Oscillating Mirror Model 0.20 mm / 8 mils Reading Diagram
CONDITIONS
Code = Interleaved 2/5 or Code 39
PCS = 0.90
Pitch angle = 0°
Skew angle = 10° - 20°
Tilt angle = 0°
Note: (0,0) is the center of the laser beam output window.
88
READING FEATURES
9
DS6300-105-0XX (oscillating mirror) - Resolution: 0.30 mm/12 mils
0
8
0
20
12
30
10
25
8
20
6
15
4
10
2
5
0
0
-2
-5
-4
-10
-6
-15
-8
-20
-10
-25
-12
-30
10
25
12 14 16
30
35
40
18
45
20
50
22 24
55
60
26 28
65
70
30
75
32 34 (in)
80
85 (cm)
Focus
Position = 0
Focus
Position = 40
Focus
Position = 60
(in) (cm)
Figure 106 - Oscillating Mirror Model 0.30 mm / 12 mils Reading Diagram
CONDITIONS
Code = Interleaved 2/5 or Code 39
PCS = 0.90
Pitch angle = 0°
Skew angle = 10° - 20°
Tilt angle = 0°
Note: (0,0) is the center of the laser beam output window.
89
DS6300 REFERENCE MANUAL
9
DS6300-105-0XX (oscillating mirror) - Resolution: 0.38 mm/15 mils
0
0
16 40
10
25
12
30
14 16
35
40
18
45
20
50
22
55
24
60
26 28 30
65
70
75
32
34
36
80
85
90
38
12 30
Focus
Position = 0
8 20
6 15
4 10
2
5
0
0
Focus
Position = 100
-2 -5
-4 -10
-6 -15
-8 -20
-10 -25
Focus
Position = 60
-12 -30
-14 -35
-16 -40
(in) (cm)
Figure 107 - Oscillating Mirror Model 0.38 mm / 15 mils Reading Diagram
CONDITIONS
Code = Interleaved 2/5 or Code 39
PCS = 0.90
Pitch angle = 0°
Skew angle = 10° - 20°
Tilt angle = 0°
Note: (0,0) is the center of the laser beam output window.
90
42 (in)
95 100 105 (cm)
14 35
10 25
40
READING FEATURES
9
DS6300-105-0XX (oscillating mirror) - Resolution: 0.50 mm/20 mils
0
8
0
20
24
60
20
50
16
40
12
30
8
20
4
10
0
0
-4
-10
-8
-20
-12
-30
-16
-40
-20
-50
-24
-60
12
30
16 20 24
40
50
60
28
70
32
80
36 40
44
48 52 56
(in)
90 100 110 120 130 140 150 (cm)
Focus
Position = 100
Focus
Position = 60
Focus
Position = 0
(in) (cm)
Figure 108 - Oscillating Mirror Model 0.50 mm / 20 mils Reading Diagram
CONDITIONS
Code = Interleaved 2/5 or Code 39
PCS = 0.90
Pitch angle = 0°
Skew angle = 10° - 20°
Tilt angle = 0°
Note: (0,0) is the center of the laser beam output window.
91
DS6300 REFERENCE MANUAL
9
9.4.3
DS6300 with GFX-60
DS6300 with GFX-60 - Resolution: 0.20 mm/8 mils
Figure 109 – GFX-60 0.20 mm / 8 mils Reading Diagram
Note: 0 value on the X axis is measured from the nose of the GFX-60
0 value on the Y axis is measured from the conveyor plane
focus position = 0
DS6300 with GFX-60 - Resolution: 0.30 mm/12 mils
Figure 110 - GFX-60 0.30 mm / 12 mils Reading Diagram
Note: 0 value on the X axis is measured from the nose of the GFX-60
0 value on the Y axis is measured from the conveyor plane
focus position = 40
92
READING FEATURES
9
DS6300 with GFX-60 - Resolution: 0.50 mm/20 mils
Figure 111 - GFX-60 0.50 mm / 20 mils Reading Diagram
Note: 0 value on the X axis is measured from the nose of the GFX-60
0 value on the Y axis is measured from the conveyor plane
focus position = 100
DS6300 with GFX-60 - Resolution: 1.00 mm/40 mils
Figure 112 - GFX-60 1.00 mm / 40 mils Reading Diagram
Note: 0 value on the X axis is measured from the nose of the GFX-60
0 value on the Y axis is measured from the conveyor plane
focus position = 100
93
DS6300 REFERENCE MANUAL
10
10 MAINTENANCE
10.1 CLEANING
Clean the laser beam output window periodically for correct operation of the scanner (see
Figure A).
Dust, dirt, etc. on the window may alter the reading performance.
Repeat the operation frequently in particularly dirty environments.
Use soft material and alcohol to clean the window and avoid any abrasive substances.
WARNING
Clean the window of the DS6300 when the scanner is turned off or at least
when the laser beam is not active.
10.2 CBX/SC4000 BACKUP & RESTORE
Backup and Restore is vital to all applications in that it provides a method to quickly replace a
reader and return the station to full capacity in the event of a failure. The CBX/SC4000
Backup and Restore procedure is the preferred method since it always provides complete
backup and restore functions (Configuration and Environmental parameters).
When the DS6300 scanner is connected through CBX series connection boxes, Backup and
Restore is provided through the BM100 accessory module installed inside the CBX100 or
CBX500 connection box.
If the DS6300 scanner is integrated into an ID-NET™ network having an SC4000 ID-NET™
controller as Master, then the SC4000 also provides the Backup and Restore procedure.
This procedure can be performed directly from the Genius™ Device menu.
To manually perform the Backup and Restore procedure see the relative BM100 or SC4000
manual for details.
10.3 AUTOMATIC SCANNER REPLACEMENT (ASR)
NOTE
The ASR procedure is available for backward compatibility or for
applications that do not use the CBX/SC4000, however it is not the
preferred method.
The Datalogic Automatic Scanner Replacement (ASR) procedure allows restoring system
functioning automatically after one or more scanners are replaced in a Master/Slave
Lonworks network.
94
MAINTENANCE
10
The ASR procedure restores only a part of the system parameters: common slave
parameters (Code Selection and Reconstruction).
The Master must be prepared at the time of installation in order for this procedure to work
correctly.
10.3.1 ASR Network Configuration
1. On the Master scanner, check the Modify & Backup Lon Slave Scanner
Configuration parameter in Genius™ and configure the Lonworks Slave Scanner
Common Parameters (Code and Reconstruction Parameters).
2. Enable the ASR procedure through the Enable A.S.R. parameter in the Master
configuration.
3. Send the configuration to the Master EEPROM to force the Slave Operating Mode, Code
Reading Symbologies and Reconstruction parameters.
Now the Slave scanners are configured through the Master (ASR parameters stored in
the Master) and the ASR procedure is implemented.
4. Save this configuration to file (.ddc).
10.3.2 Scanner Replacement Procedure
The ASR procedure requires replacing one scanner at a time.
NOTE
Slave
1. Power down the entire system.
2. Replace the Slave scanner with a new one (default settings).
3. Power up the system and wait for initialization.
Master
1. Load the saved configuration from file (.ddc) to a new Master scanner.
2. Power down the entire system.
3. Replace the old Master scanner with the new one.
4. Power up the system and wait for initialization.
The ASR works only if both the Master and Slave devices have software
6.40 or later.
NOTE
95
DS6300 REFERENCE MANUAL
11
11 TROUBLESHOOTING
NOTE
Before contacting your local Datalogic office or Datalogic Partner or ARC, it
is suggested to save the device configuration to a *.ddc file by means of the
Genius™ software configuration program and check the device exact model
and serial number.
TROUBLESHOOTING GUIDE
Problem
Power On:
the “Power On” LED is not lit.
On Line Mode:
the Master’s “Phase On” LED is not lit
(when external trigger activates).
On Line Mode:
the Master’s “Phase On” LED is
correctly lit but nothing happens (no
reading results).
Serial On Line Mode:
the reader is not triggered (no reading
results).
96
Suggestion
Is power connected?
If using an external power supply (like
PG6000), is it connected to the AC source?
If using rail power, does rail have power?
If using CBX100/CBX500, does it have power
(check switch and LED)?
Check if you are referring to the
25/26-pin
connector
or
to
the
CBX100/CBX500 spring clamp connectors.
Measure voltage at pin 13 and 25 (for
25/26-pin connector) or at spring clamp Vdc
and GND (for CBX100/CBX500).
Check carefully if you are referring to the
25/26-pin
connector
or
to
the
CBX100/CBX500 spring clamp connectors.
Is sensor connected to EXT TRIG/PS input?
Is power supplied to photo sensor?
Is power supplied to one out of the two EXT
TRIG/PS (NPN output)?
Is one out of the two EXT TRIG/PS grounded
(PNP output)?
Are the photo sensor LEDs (if any) working
correctly?
Is the sensor/reflector system aligned (if
present)?
Is the software configuration consistent with
the application condition (operating mode,
etc.)?
In the Genius™ software configuration
program select the OPERATING MODES
folder and check for related parameters.
In the Genius™ program select the
OPERATING MODE folder and check if
serial on line is enabled as “On Line options”
parameter value.
Are the Start-Stop string correctly assigned?
Is the serial trigger source correctly
connected and configured)?
TROUBLESHOOTING
11
TROUBLESHOOTING GUIDE
Problem
On Line Mode and Serial On Line
Mode:
the reader does not respond correctly to
the expected external signal end.
Reading:
it is not possible to read the target
barcode (always returns No Read)
Suggestion
In the Genius™ software configuration
program select the OPERATING MODES
folder and check the “Reading Phase
Timeout” parameterization.
Communication:
the device is not transmitting anything to
the host.
Communication:
data do not appear on the terminal.
Communication:
data transferred to the host
incorrect, corrupted or incomplete.
are
Check synchronization of reading pulse with
object to read.
Place barcode in the center of scan line and
run TEST MODE (selectable by Genius™ as
Operating Modes).
If you still have troubles, check the following:
Is the reading distance within that allowed
(see reading diagrams)?
Choose the CODE tab and enable
different
code
types
(except
Pharmacode). LENGTH = Variable.
Is the barcode quality sufficient?
If you had no success, try to perform the test
using the BARCODE TEST CHART included
with the product.
Is serial cable connected?
Is correct wiring respected?
If using MAIN RS232 or RS485 interface, is
the reference ground connected to proper
SGND Main Isolated (also referred to as
GND_ISO)? Be careful that it is not
completely different from GND power ground.
If using CBX100/CBX500, be sure the RS485
termination switch is positioned to OFF.
Are serial host settings equivalent to serial
device settings?
In the Genius™ program enable the DATA
COMMUNICATION
SETTINGS/MAINAUXILIARY PORT\DATA TX parameter.
In the Genius™ program select the DATA
COMMUNICATION
SETTINGS/DATA
FORMAT folder and check for HEADER,
TERMINATOR, SEPARATOR and FILL
CHAR values.
Check the CODE FIELD LENGTH value, too.
Are the COM port parameters correctly
assigned?
97
DS6300 REFERENCE MANUAL
11
TROUBLESHOOTING GUIDE
Problem
Suggestion
How do I obtain my units’ serial The device serial number is printed on a label
that is affixed above the connector panel of
numbers?
the reader.
The serial number is also displayed when
connecting the device through the Genius™
program.
Serial numbers consist of 9 characters: one
letter, 2 numbers, another letter followed by 5
numbers.
98
TECHNICAL FEATURES
12
12 TECHNICAL FEATURES
ELECTRICAL FEATURES
Supply Voltage
Power Consumption
Common Communication
Interfaces
15 to 30 Vdc
1.0 to 0.5 A; 15 W typical
1.3 to 0.5 A; 20 W Max. (including startup current)
Main
Baud Rate
RS232
RS485 full-duplex
RS485 half-duplex
1200 to 115200
Auxiliary
RS232
1200 to 115200
Other
Lonworks
1.25 Mb/s
Model–Dependent Communication Ethernet
100 Mb/s
Interfaces
DeviceNet
up to 500 Kb/s
Profibus
up to 12 Mb/s
Inputs
(optocoupled NPN or PNP)
Ext. Trigger 1, Encoder
2 aux. digital inputs
Outputs
(optocoupled)
3 software programmable digital
outputs
OPTICAL FEATURES
Light Receiver
Avalanche photodiode
Wavelength
630 to 680 nm
Safety Class
Class 2 - EN60825-1; Class II - CDRH
Laser Control
Security system to turn laser off in case of motor slow
down
READING FEATURES
Scan Rate
Maximum Resolution
Max. Reading Distance
Max. Reading Width
Max. Depth of Field
USER INTERFACE
LCD Display
Keypad
LED Indicators
600-1200 scans/s
(see reading diagrams in par. 9.4)
2 lines by 16 characters LCD
3 keys
Power On (red)
Phase On (yellow)
TX Data (green)
99
DS6300 REFERENCE MANUAL
12
SOFTWARE FEATURES
Readable Codes
Code Selection
Headers and Terminators
Operating Modes
Configuration Modes
Parameter Storage
ENVIRONMENTAL FEATURES
Operating Temperature
Storage Temperature
Humidity
Ambient Light Immunity
Vibration Resistance:
EN 60068-2-6
2 hours on each axis
Interleaved 2/5
Code 39 Standard
Codabar
Code 128
EAN 128
Code 93 (standard and full ASCII)
EAN/UPC (including Add-on 2 and Add-on 5)
GS1 DataBar (including Limited and Expanded)
Up to 10 codes during one reading phase
Up to 128-byte headers and 128-byte terminators
On Line, Serial On Line, Automatic, Test, Continuous
Genius™ utility program
Non-volatile internal FLASH
0° to +40 °C (+32° to +104 °F)
-20° to +70 °C (-4° to +158 °F)
90% non condensing
3500 lux
14 mm @ 2 to 10 Hz
1.5 mm @ 13 to 55 Hz
2 g @ 70 to 200 Hz
Shock Resistance:
EN 60068-2-27
3 shocks on each axis
Protection Class – EN 60529
PHYSICAL FEATURES
Mechanical Dimensions
Weight
* IP50 grade for Ethernet versions.
100
30 g; 11 ms
IP64*
Standard Models
Oscillating Mirror Models
110 x 113 x 99 mm
(4.33 x 4.45 x 3.9 in)
1.5 kg. (3.3 lb)
113 x 180 x 104.5 mm
(4.45 x 7.08 x 4.11 in)
2.0 kg. (4.4 lb)
ALTERNATIVE LAYOUTS
A
A
ALTERNATIVE LAYOUTS
POINT-TO-POINT
Using a Point-to-Point layout, the data is transmitted on the Main interface as well as on the
Auxiliary interface. The Main interface can be selected for RS232 or RS485 full-duplex
communications. Two different layouts are available according to the DS6300 reader model
used for the connection.
Standard Models
When On-Line operating mode is used, the reader is activated by an External Trigger/PS
(photoelectric sensor) when the object enters its reading zone. In the following case, the
signal is passed to the DS6300 through the CBX100/CBX500, which also passes power to
the system from the power supply (i.e. PWR-120).
Host
PWR-120
1
CBX
CAB-Sxx
DS6300
Master/Slave model
2
Main Serial Interface
3
(RS232 or RS485 Full-Duplex)
I/O and/or Auxiliary Serial Interface
(Data Tx to Terminal Local Echo) (RS232)
Input 1 (External Trigger/PS input)
Figure 113 – Point-to-Point for Master/Slave Models
101
DS6300 REFERENCE MANUAL
A
Fieldbus Models
In this case no External Trigger is used and the CBX100/CBX500 only passes power to the
reader. The DS6300 Fieldbus models (Ethernet, DeviceNet or Profibus) are connected to a
remote Host. It can be activated by a signal generated by the remote Host or always be
active if working in Automatic operating mode.
PWR-120
Fieldbus
Network
CBX
Remote Host
CAB-F0x
DS6300
Fieldbus
model
Figure 114 – Point-to-Point for Fieldbus Models
102
I/O, AUX
ALTERNATIVE LAYOUTS
A
ID-NET™ GATEWAY
The CBX800 Gateway can be used to integrate a DS6300 reader into a high speed IDNET™ network consisting of different scanners not provided with a Lonworks interface.
In this case the DS6300 uses its main RS232/RS485 interface to communicate with the
CBX800.
ID-NET™ Slave Nodes
CBX800
Power
CBX100
2
6
CBX100
3
3
1
5
DS6300
7
Matrix 400™
DS4800
7
4
ID-NET™
Host 2
Serial (Host)
SC4000
ID-NET™
Master
CBX800 Source Interface (CAB-Sxx)
CBX800 ID-NET™ Interface
Reader ID-NET™ Interface
External Trigger (for On-Line Mode)
Host 1
Ethernet TCP/IP (WebSentinel)
Host Aux for CBX800 Configuration
Source Aux for Source Reader Configuration
Reader Auxiliary Interface for Reader Configuration
Figure 115 – DS6300 Slave/CBX800 Gateway in an ID-NET™ High Speed Network
103
DS6300 REFERENCE MANUAL
A
PASS THROUGH
When Pass Through is activated on the Auxiliary interface, the DS6300 reader can be
integrated in a network consisting of different scanners not provided with a Lonworks
interface.
This connection mode allows two or more devices to be connected to a single external serial
interface. The DS6300 transmits the messages received by its auxiliary interface onto its
main interface. The received data is transmitted "as is", (passed-through), and therefore any
data formatting requirements must be made at each individual reader.
In this configuration a series of scanners can be connected together using RS232 on the
main interface and all messages will be passed through this chain to the host. The reading
phase of each scanner is independent from the others. In Pass Through connections each
scanner is provided with its relative External Trigger (multi P.S.).
Applications can be implemented to connect a device such as a hand-held reader to the
Auxiliary port for manual code reading capability.
For the RS232 connections the maximum cable length is 15 m (50 ft).
The scanners represented in the following figures are configured in Pass Through mode.
1
2
1
2
1
CBX100
DS6300
CAB-Sxx
DS4800
I/O, AUX
P.S.*
P.S.*
P.S.*
Power
Gryphon
Local Host
*
1
Main Serial Interface
2
Auxiliary Serial Interface
P.S. (Presence Sensor) connected to Input 1 (External Trigger/PS) input.
Figure 116 – Pass Through Connection for DS6300 Master/Slave Models
104
ALTERNATIVE LAYOUTS
A
2
1
DS6300
2
1
CBX100
CAB-F0x
DS4800
I/O, AUX
Fieldbus
Network
P.S.*
P.S.*
P.S.*
Power
Gryphon
PLC Host
1
*
Main Serial Interface
2
Auxiliary Serial Interface
P.S. (Presence Sensor) connected to Input 1 (External Trigger/PS) input.
Figure 117 – Pass Through Connection for Fieldbus Models
RS232 MASTER/SLAVE
The RS232 master/slave connection is used to integrate a DS6300 reader in a network
consisting of different scanners not provided with a Lonworks interface.
The Slave scanners use RS232 only on the main and auxiliary interfaces. Each slave
scanner transmits the messages received by the auxiliary interface onto the main interface.
All messages will be transferred towards the master.
The master scanner is connected to the Host PC on the main RS232 serial interface through
the CBX connection box.
In RS232 Master/Slave connections the External Trigger/PS signal is unique to the system
(single P.S.).
NOTE
The DS6300 Standard model, working as Master in an RS232 network,
may be simultaneously connected to a Lonworks network consisting of
DS6300 slave scanners. Be careful when assigning the slave address,
since the number of the first Lonworks slave must be a progressive number
with respect to the address number defined for the last slave scanner of the
RS232 network. For example, if the RS232 network consists of Slave 1 and
Slave 2, the address to be assigned to the first Lonworks slave scanner will
be Slave 3 (not Slave 1).
105
DS6300 REFERENCE MANUAL
A
1
2
2
1
DS4800
Slave 1
3
1
CBX100
CAB-Sxx
DS4800
Slave n
Power
DS6300 Master
Local Host
Main Serial Interface (RS232 only)
Auxiliary Serial Interface (RS232)
Input 1 (External Trigger/PS for On-Line Mode)
Figure 118 – RS232 Master/Slave for DS6300 Master/Slave Models
2
1
2
1
Power
3
DS4800
Slave 1
CBX100
CAB-F0x
DS4800
Slave n
Fieldbus
Network
DS6300 Master
Remote PLC
Main Serial Interface (RS232 only)
Auxiliary Serial Interface (RS232)
Input 1 (External Trigger/PS for On-Line Mode)
Figure 119 – RS232 Master/Slave for DS6300 Fieldbus Models
106
ALTERNATIVE LAYOUTS
A
MULTIPLEXER
The Multiplexer connection is used to integrate a DS6300 slave reader in a Multidrop
network consisting of different scanners not provided with a Lonworks interface.
Each scanner is connected
half-duplex main interface.
to
#0
a
Multiplexer
(MX4000)
with
#1
the
RS485
#31
CBX100
DS6300
CAB-Sxx
DS4800
2
3
Power
1
MX4000
Local Host
Main Serial Interface (RS485 Half-Duplex)
Auxiliary Serial Interface (Local Echo) (RS232)
Input 1 (External Trigger/PS for On-Line Mode)
Figure 120 – Multiplexer for DS6300 Master/Slave Models
The auxiliary serial interface of the slave scanners can be used to visualize collected data or
to configure it using the Genius™ utility.
When On-Line operating mode is used, the scanner is activated by an External Trigger/PS
when the object enters its reading zone.
107
GLOSSARY
ACR™ 4
Each version of the base has the powerful code reconstruction technology (ACR™ 4). The
new fourth generation ACR™ considerably increases the code reconstruction reading
capability in the case of damaged or very tilted barcodes.
Aperture
Term used on the required CDRH warning labels to describe the laser exit window.
Barcode
A pattern of variable-width bars and spaces which represents numeric or alphanumeric data
in machine-readable form. The general format of a barcode symbol consists of a leading
margin, start character, data or message character, check character (if any), stop character,
and trailing margin. Within this framework, each recognizable symbology uses its own unique
format.
Barcode Label
A label that carries a barcode and can be affixed to an article.
Baud Rate
A unit used to measure communications speed or data transfer rate.
CDRH (Center for Devices and Radiological Health)
This organization (a service of the Food and Drug Administration) is responsible for the
safety regulations governing acceptable limitations on electronic radiation from laser devices.
Datalogic devices are in compliance with the CDRH regulations.
EEPROM
Electrically Erasable Programmable Read-Only Memory. An on-board non-volatile memory
chip.
Full Duplex
Simultaneous, two-way, independent transmission in both directions.
Half Duplex
Transmission in either direction, but not simultaneously.
Host
A computer that serves other terminals in a network, providing services such as network
control, database access, special programs, supervisory programs, or programming
languages.
Interface
A shared boundary defined by common physical interconnection characteristics, signal
characteristics and meanings of interchanged signals.
LED (Light Emitting Diode)
A low power electronic device that can serve as a visible or near infrared light source when
voltage is applied continuously or in pulses. It is commonly used as an indicator light and
uses less power than an incandescent light bulb but more than a Liquid Crystal Display
(LCD). LEDs have extremely long lifetimes when properly operated.
108
Multidrop Line
A single communications circuit that interconnects many stations, each of which contains
terminal devices. See RS485.
Parameter
A value that you specify to a program. Typically parameters are set to configure a device to
have particular operating characteristics.
Position
The position of a scanner or light source in relation to the target of a receiving element.
Protocol
A formal set of conventions governing the formatting and relative timing of message
exchange between two communicating systems.
Resolution
The narrowest element dimension which can be distinguished by a particular reading device
or printed with a particular device or method.
RS232
Interface between data terminal equipment and data communication equipment employing
serial binary data interchange.
RS485
Interface that specifies the electrical characteristics of generators and receivers for use in
balanced digital multipoint systems such as on a Multidrop line.
Scanner
A device that examines a printed pattern (barcode) and either passes the uninterpreted data
to a decoder or decodes the data and passes it onto the Host system.
Serial Port
An I/O port used to connect a scanner to your computer.
Signal
An impulse or fluctuating electrical quantity (i.e.: a voltage or current) the variations of which
represent changes in information.
Symbol
A combination of characters including start/stop and checksum characters, as required, that
form a complete scannable barcode.
Trigger Signal
A signal, typically provided by a photoelectric sensor or proximity switch, which informs the
scanner of the presence of an object within its reading zone.
UPC
Acronym for Universal Product Code. The standard barcode type for retail food packaging in
the United States.
Visible Laser Diode
A light source used in scanners to illuminate the barcode symbol. Generates visible red light
at wavelengths between 630 and 680 nm.
109
INDEX
A
Accessories, 7
ACR™ 4, 81
Alternative Layouts, 101
Auxiliary RS232 Interface, 28, 44
C
CBX Electrical Connections, 21
CE Compliance, ix
Cleaning, 94
Code Verifier, 33, 47
Compliance, vii
Custom Cable Electrical Connections, 37
D
DeviceNet Interface, 56
E
Electrical Safety, vii
Ethernet Interface, 54
F
FCC Compliance, ix
Fieldbus Connections, 54
Focus Adjustment, 79
G
General View
DeviceNet Connector Panel, xii
DS6300 Oscillating Mirror Version, xi
Ethernet Connector Panel, xii
Master/Slave Connector Panel, xii
Profibus Connector Panel, xii
Genius™
Advanced Configuration, 72
Installation, 64
Wizard for Quick Reader Setup, 64
Glossary, 108
Guide to Installation, xiii
I
Indicators, 5
Inputs, 29, 44
Installation, 9
Mounting with GFX-60, 15
K
Keypad and Display, 6
L
Laser Safety, vii
110
LEDs, 5
Local Lonworks Network Layouts, 58
Lonworks Connections, 50
Lonworks Interface, 51
M
Main Serial Interface, 23, 39
Model Description, 3
Mounting the Scanner, 10
Mounting with Accessories, 13
N
Network Setup, 67
Network Termination, 51
O
Operating Mode
Automatic, 66
On Line, 66
Test, 65
Oscillating Mirror Models, 3
Outputs, 33, 47
Overall Dimensions, 11
P
Package Contents, 9
Parameter Explorer Window, 72
Parameter Groups
Default Values, 75
Patents, vi
Pitch Angle, 17
Positioning, 17
16° Skew Positioning, 19
45° Skew Positioning, 19
Power Supply, viii, 23, 39
Profibus Interface, 57
R
Reading Diagrams, 84
DS6300 with GFX-60, 92
Oscillating Mirror Models, 88
Standard Models, 84
Reading Features, 79
Reference Documentation, vi
RS232 Interface, 24, 40
RS485 Full-Duplex, 25, 41
RS485 Half-Duplex, 26, 42
S
Scanner Assignment using Keypad, 6
Scanner Replacement, 94
Services and Support, vi
Skew Angle, 18
Software Configuration, 64
T
Technical Features, 99
Terminators, 51
Test Mode using Keypad, 7
Tilt Angle, 18
Troubleshooting, 96
Typical Layouts, 58
111
DECLARATION OF CONFORMITY
EC-008
Rev.: 2
Pag.: 1 di 1
Datalogic Automation S.r.l.
Via S. Vitalino 13
40012 Lippo di Calderara di Reno
Bologna – Italy
www.automation.datalogic.com
declares that the
DS6300; Laser Scanner
and all its models
are in conformity with the requirements of the European Council Directives listed below:
2004 / 108 / EC EMC Directive
2006/95/EC Low Voltage Directive
______________________________________________
This Declaration is based upon compliance of the products to the following standards:
EN 55022 ( CLASS A ITE ), SEPTEMBER 1998:
EN 61000-6-2, SEPTEMBER 2005:
EN 60950-1, DECEMBER 2001 :
EN 60950-1/A11, APRIL 2004 :
EN 60825-1, MARCH 1994 :
EN 60825-1/ A1, JULY 1996 :
INFORMATION TECHNOLOGY EQUIPMENT
RADIO DISTURBANCE CHARACTERISTICS
LIMITS AND METHODS OF MEASUREMENTS
ELECTROMAGNETIC COMPATIBILITY (EMC)
PART 6-2: GENERIC STANDARDS - IMMUNITY FOR INDUSTRIAL
ENVIRONMENTS
INFORMATION TECHNOLOGY EQUIPMENT - SAFETY PART 1 : GENERAL REQUIREMENTS
SAFETY OF LASER PRODUCTS - PART 1 :EQUIPMENT
CLASSIFICATION, REQUIREMENTS AND USER'S GUIDE
EN 60825-1/ A2, MARCH 2001
Lippo di Calderara, July 16th, 2009
Lorenzo Girotti
Product & Process Quality Manager
UNI EN ISO 14001
www.automation.datalogic.com