1
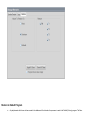
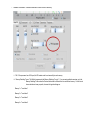
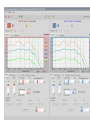
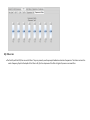
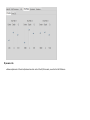
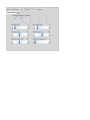
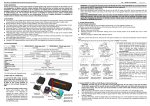
Gravity Fitting Software User's Manual part #: S0273-01 Rev A Using Your Fitting Software This guide provides comprehensive, task-based information about all the fitting software features. You may access this guide thorugh the "Help" menu item or by pressing the F1 key on your keyboard. This guide contains the following sections: Quick Start Guide Software Installation Select a Patient and Session to Work With Add or Edit Patient Information and Audiogram Patient Counseling and Hearing Aid Selection Available Fitting Adjustments Fitting Tips Minimum Requirements: Pentium II Windows XP or newer 128M RAM 800x600 Screen Resolution Recommended: Pentium 3 Windows XP or newer 256M RAM or higher 1024x768 Screen Resolution Copyright ©2011 Sophono, Inc. All Rights Reserved. Quick Start Guide Quick Start Guide Five Steps to First Fitting Success Follow-Up Fittings Replacing a Processor Loaner Processors Restore to Default Program Simulation Mode Five Steps to First Fitting Success 1. Enter Patient Information a. Start the software and connect hearing aids to the computer via the programmer box (HiPro). b. Click c. Enter Patient Information as is available. The "Last Name" field is required. All other fields are optional. d. If desired, add audiogram information by clicking on the Left and Right Audiogram graphs. on the Patient and Session Listing screen. 2. Initial Program a. Every processor comes pre-programmed from the factory with a fitting optimized for conductive loss and SSD patients. b. For most patients, minimal fitting adjustments are required. c. For processors with Direct Audio Input (DAI, often used with FM systems) the processor also comes pre-programmed with the following settings: Program 1 = Microphone Program 2 = DAI + Microphone Program 3 = DAI Only d. For mixed loss patients where more amplification may be desirable, see Fitting Tips. 3. Fitting Adjustments a. Proceed to the Fitting Screen by clicking the button. The software will automatically detect and read the connected devices. b. Adjustments may be made according to patient comments and aided measurements. See Fitting Tips for suggestions on fitting adjustments. c. For young pediatric patients, it may be desirable to disable the volume control. This option is found on the Features tab. For more information, see the Fitting Screen page. d. Also on the Features tab is the option to enable Data Logging. 4. Return to Initial Program a. If at any time you need to go back to the original factory program, follow the instructions for Restore to Default . 5. Program and Save a. Adjustments are only stored in temporary memory until the device has been Programmed. b. From the Fitting Tools button ( c. The Save button ( ) will store the parameters in the fitting software database. d. A printout of the fitting can be made from the File menu. ) choose “Program all valid sides” to store the new parameters permanently in the processor. Follow-Up Fitting 1. Open Patient Session a. Start the software and connect hearing aids to the computer via the programmer box (HiPro). b. If the patient’s processor is connected to the HiPro when the software starts, the software will read out the serial number of the processor and go directly to the f patient. If the fitting session for the desired patient does not open automatically, select the correct patient from the Patient and Session Selection screen. c. LOANER : If the processor is a loaner/test unit that has been programmed for multiple patients, the software may automatically open a session for a patient who this processor. In this case, simply click to go to the Patient and Session Selection screen, and choose the correct patient or create a session for a new 2. Fitting Adjustments a. Proceed to the Fitting Screen by clicking the button. b. Adjustments may be made according to patient comments and aided measurements. See Fitting Tips for suggestions on fitting adjustments. Replacing a Processor 1. When programming a processor which is a replacement for another processor, connect the new processor to the HiPro and open the session for the desired patient. 2. The software will recognize that a different serial number has been detected. Select “Yes” to proceed with the new procesor: 3. The fitting screen will initially show the parameters currently stored in the new processor. If you want to program the new processor with the fitting from the previous processor, select the Manage Memories button . 4. Choose the Restore tab, and select Database, then select the memories you would like to have restored. This restores the fitting to the most recent fitting saved in the patient’s database, i.e. the fitting from the previous processor. Restore to Default Program a. Any adjustments which have not been saved to the database will be lost when the processor is reset to the Default (Factory) program. The Save button ( ) will store the parameters in the fitting software database. ) or choose “Manage Memories under the Fitting Tools button ( b. Select the Manage Memories button ( ). c. Select the Restore tab, and click the Defaults button. Choose the processor Memories which you want to reset to the factory program. Then click “Apply and Close”. d. IMPORTANT: Due to the way the DSP chip works, some factory settings must be restored manually. i. Feedback Cancellation: Feedback cancellation must be turned on manually: ii. DAI: If the processor has a DAI input, the DAI modes must be set manually for each memory. iii. Memory Switching Tones: The Default program sets the Memory Switching Tone to 1. If you are using multiple memories, go to the Memory Switching Tones under the Features tab and set a different tone for each active memory. You are free to choose whichever tones you prefer, however the typical settings are Memory 1 = Tone Index 1 Memory 2 = Tone Index 2 Memory 3 = Tone Index 3 Memory 4 = Tone Index 6 Simulation Mode If the Gravity Software is started and there is no processor connected to the HiPro, or no HiPro connected to the computer, you can still use the software in Simulation Mode, which is useful for exploring the software and the various fitting adjustments without the delays which occur when the software communicates with a processor. Select a patient from the session list or create a new patient. If an existing patient session is selected, the software will proceed directly to the Fitting screen and will be in Simulation mode. If a new patient is created, continue to the Counseling screen, choose a processor and then proceed to the Fitting screen in order to activate Simulation mode. Installation Gravity Fitting Software Version 1.1 Installation Guide HI-PRO INSTALLATION: This software works with the Hi-Pro universal programming interface, made by Otometrics. Please be sure the Hi-Pro is installed and working properly on your computer before installing the Gravity software. More information about Hi-Pro can be found on the Otometrics web site. LATEST GRAVITY SOFTWARE: The latest version of the Gravity software may be downloaded from the Sophono website, in the Clinical section of the website. The password for dowloading is "Gravity". SOFTWARE INSTALLATION: Run the installation file and Gravity will install automatically. It is recommended that you follow the default installation instructions. If you already have a version of Gravity installed and you are installing a newer version, the patient data will be automatically transferred to the new version. You do not need to un-install an older version of Gravity. IMPORTANT NOTE: Due to Windows restrictions, the Gravity patient database is saved according the user name (logon) on the computer. If more than one person will be using the Gravity software, it is highly recommended that you install the software under a shared user account. If a shared account is not used, then each person logging on to the computer will only be able to see the patients they have worked with, not the patients that other users have worked with. Patient-Session Selection Patient and Session Listing The Patient and Session selection screen allows you to browse through all of the existing patients in the data base and see their session history. The session history shows the session date and time as well as the devices selected or connected and saved during that session. What can I do here? Search for a patient by entering text into the search fields at the top of the screen. Select a patient by clicking on their name Select a session by clicking on the session date followed by the button Create a New patient View a session's data by clicking the appropriate button on the left navigation column Notes: Double clicking a session date will also open the default data screen for that session The default data screen is determined by the nature of the data stored within the session If you try to edit an existing session, you will be asked if you would like to create a new session. The buttons shown in the left column allow you to go directly to the screen that you want to work with. The dot beside the navigation buttons indicates the default data screen for the selected session Sessions can be selected by either double clicking the session in the list or by highlighting the session and then clicking either the button (to go to the default screen) or the button on the left side which represents the screen that you would like to work with. The image to the left of the date indicates the type of session. Click to go to the Patient Information screen Click to go to the Couseling screen Click to go to the Fitting screen Patient Info and Audiogram Patient Information and Audiogram The Patient Information screen provides you with a place to record personal information about the patient such as contact information, age, gender and hearing loss information. The fitting software will use this information where ever possible to optimize the fitting to satisfy the patient's needs. What can I do here? Enter Patient Information by typing in the fields at the top of the screen. Add points to the audiogram by simply clicking on the graph using the left button of your mouse. Remove points from the audiogram by right clicking on an existing point on the graph. Click to save your work and continue editing the session Click to cancel any edits and abort the session Click to add a new patient (not available while editing) Notes: The patient's Last Name is a required field. All others are optional. Indicate if the patient has worn hearing aids before, if (s)he will be wearing 2 hearing aids (Binaural Fitting) and their age (Date of Birth). Where can I go from here? Click to add notes to the Patient Journal Click to go to the Patient and Session Selection screen Click to go to the Counseling screen Click to go to the Fitting screen Counseling Screen Counseling Screen The Counseling screen provides the fitter with tools to assist them and the patient decide which hearing aid is appropriate to order. Use the images to show the patient what their new hearing aid looks like. Use the diagram(s) provided to help the patient understand their hearing loss. The difference between the two screens below is that the first screen has "None Selected" for the model; the second screen has "BCHA 675" selected. BCHA 675 is a general product category meaning Bone Conduction Hearing Aid with a 675 battery. The Sophono Alpha is actually the same product as the Alpha 2LE. The new name simply designates that it was manufactured at Sophono in Boulder, CO. Sophono Alpha DAI is the same processor with the addition of the Direct Audio Input (DAI) connector, most commonly used for FM systems. The DAI processor includes a connector which accepts FM receivers that have the baha-type 3 pin connector (but not the 3 pin Euro connector). What else can I do here? Click to save your work and continue editing the session Click to cancel any edits and abort the session Click to see the selected RIGHT hearing aid Click to see the selected LEFT hearing aid Click copy the current hearing aid selection to the other side Notes: When no devices are selected, an image will be shown to assist the patient understand their hearing loss You can manually select a hearing aid to perform a simulated fitting on the fitting screen If you have devices connected, and don't need to provide counseling to the patient, this screen is optional. Where can I go from here? Click to add notes to the Patient Journal Click to go to the Patient and Session Selection screen Click to go to the Patient Information screen Click to go to the Fitting screen Fitting Screen Fitting Screen The fitting screen allows you to view and manipulate the hearing aid parameters to match the response of the device to the patient's hearing loss. If two processors are connected you will see the binaural fitting screen shown below, which allows simultaneous adjustment of both devices. Main Screen Initial Fit tab : Basic fitting adjustments EQ/Crossover Features Main Screen tab: Frequency band gain and channel crossover frequencies tab : Volume control enable/disable; Data logging; Memory Switching beeps What can I do here? Adjust the controls to modify the response of the hearing aid. Clicking on the various graph tabs will allow you to see the device response, the I/O curve or the audiogram (not shown above). Click View 1 or View 2 to easily switch back and forth between 2 sets of parameter configurations to assist the patient in determining which they prefer. Using this feature, you can make some adjustments to the fitting and quickly switch back and forth to determine patient preference, without having to modify another program memory. Once the patient’s preference is determined, leave that View selected and it will become the program for the selected memory. Click the Mute/Unmute button to silence or activate the audio processing in the hearing aid. If the Mute button has a green check mark, this indicates that audio is being processed in that ear. If the button has a red "X", this indicates that the audio has been silenced in that ear. Click Manage Memories to Enable, Disable, Copy and Restore memories. Click Cancel to undo all changes since last save. NOTE: This is not a single step Undo which only removes the last change. All changes since last save will be removed. Parameter Functions Initial Fit tab Gain – adjusts the gain across all frequencies AGCO – Automatic Gain Control (Output) – adjusts the output filter level, i.e. increase/decrease maximum output level Low Cut (kHz) –adjust the frequency where the low cut filter ends, i.e. the lower end of the processor’s bandwidth High Cut (kHz) –adjust the frequency where the high cut filter begins i.e. the upper end of the processor’s bandwidth Noise Reduct. (dB) – this activates and controls a noise reduction program in the firmware. The algorithm monitors signal-to-noise in 128 bands, and adaptively subtracts noise in each band. This is different than Expansion, which applies a constant reduction in gain for all soft sounds. FB Canceller – this activates automatic feedback control in the firmware which is not user adjustable. EQ/Crossover tab Graphic EQ: 16 Adjustable frequency bands at 500 Hz intervals. Adjustments are Gain, in units of dB. Bands can be adjusted individually or in groups, by using the checkboxes across the top and the slider on the far left. These same bands can be adjusted by clicking on the Output/Gain graph and pulling up/down. Crossovers: Allows adjustment of the frequency range of the 8 input/output channels. Features tab Memory Switching Tones and Low Battery Tones: Select desired tones for indication of program memory and low battery. Volume Control Enable/Disable: Clear this check box to disable the volume control. Volume control will be locked at maximum setting. Note: Volume control enable/disable only takes effect after the processor is permanently programmed. The button below the VC Enable box reads the current position of the volume control. Enable the Data Log to record: • Battery level • Volume control setting • Program memory selection • Environment • Ambient sound level • Length of time the hearing aid was powered on <hr size=3 width="100%" align=center> Where can I go from here? Click to add notes to the Patient Journal Click to go to the Patient and Session Selection screen Click to go to the Patient Information screen Click to go to the Counseling screen Fitting Screen- Expanded Controls Expanded Controls The expanded controls give advanced users more options for adjusting the fitting. However, adjustment of these controls is not necessary for most patient fittings. The controls not discussed in the fitting section are outlined here. I/O tab: I/O stands for Input/Output HL Gain: allows the user to adjust the High Level Gain in each of the 8 channels CR: Compression Ratio allows the user to adjust the compression in each of the 8 channels LTh and UTh: Lower Threshold and Upper Threshold (knee points) for compression Expansion Th and Expansion Ratio: Lower Threshold and Upper Threshold (knee points) for compression. EQ Filters tab The Pre-EQ and Post EQ filters are notch filters. They are primarily used to preempt feedback and certain frequencies. The Center value is the center frequency; Depth is the depth of the filter in dB; Q is the sharpness of the filter. A higher Q means a narrower filter. Dynamics tab Allows adjustment of the attack/release times for each of the 8 I/O channels, as well as the AGCO feature. Fitting Tips Tips on Fitting and Adjustment Mixed Loss Patients Feedback Typical Patient Comments Mixed Loss Patients For patients with hearing loss > 25 dB HL, some additional gain may be desirable. This gain may be added using the ”EQ/Crossover” band adjustments on the Fitting Screen Feedback Feedback occurs when the processor’s microphone picks up and amplifies the processor’s output signal. Because the Sophono hearing system delivers vibrational output, feedback can be dependent on the physical placement and stability of the processor. The Sophono processor includes adaptive feedback cancellation as well as some filtering to control feedback. Here are some tips to manage feedback: 1. Feedback Cancellation: Ensure that the Feedback Cancellation algorithm has been enabled, on the Initial Fit tab. 2. Reposition the processor: a. Make sure the processor is sitting flat on the magnetic block. If the processor is not flat and correctly centered over the pin on the block, feedback may occur. b. Make sure the microphone is not touching the ear or the head. Also try to have as little hair as possible contacting the microphone, and make sure there is not hair between the processor’s metal disk and the magnetic block. c. Small adjustments of position can sometimes help with feedback. Try gently turning or wiggling the processor on the block. d. Remind the patient that they can also resolve feedback by slightly reducing the volume via the volume control if necessary. 3. Programming Cable: The programming cable often makes feedback worse with many processors. When adjusting for feedback, make sure the processor has a battery and disconnect the cable to get a realistic assessment of feedback. It is possible to make an adjustment, disconnect the cable to assess feedback, reconnect the cable, and then continue making adjustments. 4. Programming Adjustments: The most common frequencies for feedback to occur with the Sophono processor are approximately 400 Hz and 1100 Hz. There are 2 primary adjustments to manage feedback, available from the “Expanded Controls” of the Fitting Screen a. Frequency bands: From the EQ/Crossover tab, select “Graphic EQ”. Reduce the gain at the frequencies where feedback is occurring. b. Notch filters: The processor has several notch filters which have been pre-programmed at the factory to address the most likely feedback frequencies. Notch filters are for more advanced software users. The “Center” value is the center frequency of the filter (in this example, 425 and 1060 Hz). Pull down on the “Depth” control to increase the filtering of that frequency, if feedback is thought to be at that frequency. Typical Patient Comments Below are some typical comments from hearing instrument users and some suggestions on fitting adjustments. 1. “It sounds like I’m in a tunnel/barrel.” Reduce low frequency gain, starting with the first 3 low frequency bands of the Graphic EQ. If this is not sufficient, try reducing the HL Gain in the lower frequency channels. HL Gain is found on the I/O adjustment tab. 2. “The sound is tinny/metallic.” Reduce high frequency gain using the high frequency bands of the Graphic EQ. 3. “I hear a continuous background noise/static when everything is quiet.” First make sure the patient is not hearing a soft noise in the environment, like a computer fan or the ventilation system. Counsel the patient that they may be hearing soft environmental sounds they are not used to hearing. If the patient continues to be bothered by soft background noise, try setting the Expansion Raito to 1:2. ALL CHANNELS SHOULD BE SET TO THE SAME VALUE. Also be aware that expansion can impact soft speech understanding. 4. “I’m hearing feedback/whistling/chirps of noise.” See section on Feedback. 5. “It’s not loud enough/too loud.” Increase/decrease gain until loudness percept is improved. Frequencies below 1kHz tend to have the greatest impact on loudness perception, but any/all frequencies may require adjustment. Gain can be adjusted from the Graphic EQ tab. 6. “I hear a lot of noise when I’m in a car/train/other vehicle.” Obviously, it is normal to hear significant amounts of noise in a moving vehicle; counsel the patient accordingly. However, unusually loud noise or distortion of other sounds may be a sign that the processor is picking up a lot of very low frequency noise/vibration. Try increasing the Low Cut frequency on the “Initial Fit” tab, and/or reduce the 125 Hz gain on the Graphic EQ tab.