1
FacilitySchedulingDirect
User Manual
Requester Guidelines
Version 2.0
SchoolDude.com, Inc.
SchoolDude Support:
Phone: 1-877-883-8337
Email: [email protected]
Table of Contents:
1. Requester ………………………………………………………………………………………………………………………………..…….1
I. Welcome to FSDirect! Now What? …………………………………………………….………………………1
II. You Are here………………………………………………………….………………………………………..……………….6
III. The Settings Page …………………………………………..…………………………………………..………………..7
IV. The Schedule Request Page…………………………………………….………………………..………..………9
V. My Requests ………………………………………………………………………………………………….………………17
VI. The Help Tab……………………………………………………………………………………………………..………..19
Requester
I. Welcome to FSDirect! Now What?
(A quick word on how to get started.)
MySchoolBuilding.com is where you, as a Requester, will go to make all of your
new scheduling requests. There are two ways that a Requester can be entered into the
system:
•
•
The Administrator can add the Requester into the system.
The Requester can add themselves into the system.
If you are a new Requester (you haven’t been entered into the system before),
follow these steps to set up your Requester name and enter yourself into the system:
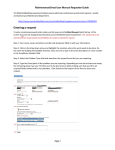
1. Go to www.myschoolbuilding.com.
2. You will see the following page, with your school’s name and logo in the upper
left-hand corner:
3. Enter your email address in the space provided. Click Submit.
1
4. As you are a new Requester, you will then see the following page:
5. Enter your last name into the box provided. Click Submit.
2
6. Next, you will be taken to the page similar to the one below:
Your email address should already be entered into the box provided. If it’s not
correct, however, enter it correctly. Make sure that the circle next to “My name is not
listed” has been clicked and contains a green dot. Click Submit.
3
7. The next page you are taken to will look something like this:
•
•
Fill in your first and last name, as well as any other contact information you wish
to include.
Click Submit.
4
8. You should then be taken to MySchoolBuilding.com, the page where all Requesters
start once they are in the system. Welcome aboard! The MySchoolBuilding page you are
looking at should look like this, depending on what SchoolDude products your
educational facility owns:
5
II. You Are Here…
Across the top of the page, you’ll notice several tabs. These tabs are how you navigate to
the information that you need and for the purposes of this manual, we’ll only look at the
Schedule Request, My Requests, Settings, and Help tabs. In the following sections,
each tab will be explained. You’ll see what they contain and how to use them.
6
III. The Settings Page:
Before we get started making scheduling requests, lets take a moment to check
out the Settings page, which contains your information as entered by the Adminstrator
during the Account Setup process (if you set up your own account, this page will show
the information you entered).
•
Click on the Settings tab at the top of the page.
•
If your facility owns more than one SchoolDude product, you will see the
following “My Settings” page:
•
Click on the Schedule Request link (marked above by the green arrow).
•
This will take you to the My Settings page for FSDirect, which looks like this
(see the following page):
7
• Make any changes you wish to make, enter your password at the bottom, and
click Submit.
OR
• To continue without making any changes, simply click the Back button at the
top of your page or click the Tab of the page you wish to go to next.
If you have made changes, the page will refresh to bring up the same page, only
now, the words “My Settings Saved” will appear in red at the top of the page. Proceed by
clicking the Tab of the page you wish to go to near the top of the screen.
8
IV. The Schedule Request Page: What It Contains and How to
Use It.
To reach the Schedule Request page, simply click on the Schedule Request tab at the
top of the page. See the red arrow below:
The Schedule Request page is where you will fill out and submit your schedule
request forms. Once submitted, your request form will proceed on to the next person it
has been routed to by the Administrator during the Account Setup process. This could
be the Administrator him/herself, who can not only approve a schedule request but can
also activate it. Or it could first go to one, or a series of, Site Administrators who will
then decide whether or not to approve your request. Based on their answer, your request
will proceed on down the path routed for it until it is assigned its final status.
A scheduling request can have one of five statuses during the routing process:
1) Submitted: This is the status that facility scheduling requests hold as soon as
they are submitted and before any decisions have been made concerning their
approval.
2) Approved: Indicates that the request has been approved. However, it may have
only passed through one person and may not have met final approval and
activation yet. (Only Administrators can activate a schedule.)
3) Canceled: This is used when a schedule was active at one time and has since been
canceled. It is always a good idea to include the reason that the schedule was
canceled in the Notes field.
4) Declined: The requested schedule has been declined by the Administrator or the
Site Administrator. We recommend listing a reason in the Notes field.
5) Duplicate: This status indicates that the request has already been entered.
9
Below is a look at the Schedule Request page:
As you can see, there are three types of schedules you can submit:
1. Normal Schedule
2. Recurring Schedule
3. Irregular Schedule
We’ll cover each type of schedule one at a time so that we can discuss in depth how each
one works.
10
1. Normal Schedule: This type of schedule is for any single event that will occur
once or on multiple dates. It also covers events that occur in the same
Area/Location. For this particular type of schedule, you can pick up to twenty
individual dates.
•
•
•
•
•
•
•
•
•
•
•
•
•
•
•
•
•
•
•
•
•
•
•
•
•
•
Click on the Normal Schedule section of the New Schedule page, shown
above.
You will be taken to the New Schedule page (sorry…it’s a bit too long to
show here!), where you will fill out the following fields:
Booked By
Event Title
Area
Location
Building
Rooms
Event Dates (enter them in the box or select from the calendar
provided).
Start Time
End Time
Setup Begin Time
Breakdown End Time
Duration
Check Availability
Tentative Booking?/Through Date
Organization: (who will be using the facility?) Select an Organization
you’ve entered previously from the drop-down box provided or enter a
new organization in the field provided beneath “Organization”.
Organization Type
Contact Name
First Name (if not already listed in “Contact Name”)
Last Name
Email
Day-Time Phone
Evening Phone
Cellular Phone
Billing Address
11
•
•
•
•
•
•
•
•
•
•
•
•
Document Number
PO Number
Insurance Information (Company, Policy No., Coverage, and Coverage
Dates).
Select any required Maintenance or IT Services and include a description
of the service needed in the “Service Description” box provided (Keep in
mind that if you enter a “Required Service” by checking its check-box, you will be
REQUIRED to enter a service description before your scheduling request can be
saved).
Number Attending
Number of Adults
Number of Children
Number of Extra Chairs
Number of Parking Spaces
Other Needs
Enter your Password.
Click Save.
¾ You will see the words “Loading schedule” as you wait for the new page to load.
When it’s finished loading your schedule and the page opens, you will see your
schedule as you just entered it with the words “Schedule has been saved” in red at
the top of the page. Your Schedule ID number will also be showing at the top of
the schedule.
12
2. Recurring Schedule: To create a recurring schedule, most of the information is the
same as a normal schedule. The only difference is in defining event dates (this section
will be highlighted below in red). Instead of defining an event date, you can set a
recurrence schedule for your request.
You can choose between the following choices:
9 Daily: Checking availability to schedule the event every day.
9 Weekly: Checking availability to schedule the event every X-number of weeks
on the selected day or days.
9 Monthly: Checking availability to schedule the event every month. You can
specify which day every X-number of months or decide between various
dropdown options such as the first Monday of every two months. From the first
drop-down option, you can select first, second, third, fourth, fifth, and last. From
the second drop-down option, you can select day, weekday, weekend day, and
Monday-Sunday.
The recurrence schedule will check the availability according to the schedule for the time
between the start recurrence date and the end recurrence date.
•
•
•
•
•
•
•
•
•
•
•
•
•
•
Click on the Recurring Schedule section of the New Schedule page,
shown above.
You will be taken to the New Schedule page (sorry…still too long to show
here!), where you will fill out the following fields:
Booked By
Event Title
Area
Location
Rooms
Start Time
End Time
Setup Begin Time
Breakdown End Time
Duration
Tentative Booking?/Through Date
Start Recurrence: Choose the date on which you would like the
recurring schedule to start by entering it in the empty box provided or
selecting it using the small calendar icon that’s available.
13
•
•
•
•
•
•
•
•
•
•
•
•
•
•
•
•
•
•
•
•
•
•
•
•
•
Recurrence Pattern: Will this schedule reoccur Daily, Weekly, or
Monthly?
End Recurrence: Enter the date on which this recurring schedule will
end.
Click the Check Availability icon to see if your date/time slots are open
for scheduling.
Organization: (who will be using the facility?) Select an Organization
you’ve entered previously from the drop-down box provided or enter a
new organization in the field provided beneath “Organization”.
Organization Type
Contact Name
First Name (if not already listed in “Contact Name”)
Last Name
Email
Day-Time Phone
Evening Phone
Cellular Phone
Billing Address
Document Number
PO Number
Insurance Information (Company, Policy No., Coverage, and Coverage
Dates).
Select any required Maintenance or IT Services and include a description
of the service needed in the “Service Description” box provided (Keep in
mind that if you enter a “Required Service” by checking its check-box, you will be
REQUIRED to enter a service description before your scheduling request can be
saved).
Number Attending
Number of Adults
Number of Children
Number of Extra Chairs
Number of Parking Spaces
Other Needs
Enter your Password.
Click Save.
¾ You will see the words “Loading schedule” as you wait for the new page to load.
When it’s finished loading your schedule and the page opens, you will see your
schedule as you just entered it with the words “Schedule has been saved” in red at
the top of the page. Your Schedule ID number will also be showing at the top of
the schedule.
14
3. Irregular Schedule: This type of schedule is for any events that are going to be in
different rooms at different points during the same day or at different times and different
locations on different days, etc. The New Events section of this form is the main
difference between it and the other two kinds of schedules so we’ve highlighted it in red,
just to further identify it for you. Times are set by event (you’ll choose the event first and
then the times, locations, etc.).
•
•
•
•
•
•
•
•
•
•
•
•
•
•
•
•
•
•
•
•
•
Click on the Irregular Schedule section of the New Schedule page, shown
above.
You will be taken to the New Schedule page (again…too big! No room to
show the whole thing!), where you will fill out the following fields:
Booked By
Event Title
Location
Password
Tentative Booking?/Through Date
Organization: (who will be using the facility?) Select an Organization
you’ve entered previously from the drop-down box provided or enter a
new organization in the field provided beneath “Organization”.
Organization Type
Contact Name
First Name (if not already listed in “Contact Name”)
Last Name
Email
Day-Time Phone
Evening Phone
Cellular Phone
Billing Address
Document Number
PO Number
Insurance Information (Company, Policy No., Coverage, and Coverage
Dates).
Events: This is where you’ll select the Area, Room, and Dates/Times for
your irregular schedule. See “SchoolDude Says” below:
15
SCHOOLDUDE SAYS: If you need to add more than three
Date/Times/Locations for this event, simply fill in your first three and continue
through the form as written below and click Save at the bottom when you are
finished (this is because you can’t complete the fields that follow this section on the
form once you save the schedule so you must complete the form first and then save
it). The page will refresh as described below and the words “Your Schedule has
been saved” will show in red at the top of the form. Scroll back down to the New
Event section of the page to continue adding three more dates/times/locations for
this event. Then click the Save button directly beneath the New Event section. The
page will refresh as before and you will be taken back to the top of the page where
you can continue this process, if necessary.
•
•
•
•
•
•
•
•
Select any required Maintenance or IT Services and include a description
of the service needed in the “Service Description” box provided (Keep in
mind that if you enter a “Required Service” by checking its check-box, you will be
REQUIRED to enter a service description before your scheduling request can be
saved).
Number Attending
Number of Adults
Number of Children
Number of Extra Chairs
Number of Parking Spaces
Other Needs
Click Save.
¾ You will see the words “Loading schedule” as you wait for the new page to load.
When it’s finished loading your schedule and the page opens, you will see your
schedule as you just entered it with the words “Schedule has been saved” in red at
the top of the page. Your Schedule ID number will also be showing at the top of
the schedule.
16
V. My Requests: Keep Track of Your Scheduling Requests.
Follow these steps to view the scheduling requests you’ve submitted:
•
When you click on the My Requests tab at the top of the page, you will be
taken automatically to the My Maint Requests page, shown above.
•
To reach your Scheduling Requests page, click on the My Schedule
Requests link at the top of the page, shown by the red arrow below:
17
•
Clicking on this link will take you to the My Schedule Requests page, which
looks like this before you have submitted any requests:
As you submit scheduling requests, they will be added to the list on this page.
The schedule name will be highlighted in red and serves as a link that you can click on at
any time to view your scheduling request.
(Keep in mind, however, that you will NOT be able to make any changes to a schedule
request once it has been approved, even if it hasn’t been activated by the Administrator
yet.)
18
VI. The Help Tab:
If at any time you find you need help with any questions you may have about FSDirect or
any other SchoolDude products that your facility owns, click on the Help tab. You will
be taken to the page below:
•
On this page, you will find contact names and phone numbers for all the
SchoolDude products owned by your facility, if your Administrator has entered
them into the system. If not, there are links provided here also that will take you
to the Requester manual for each SchoolDude product your facility owns.
19