1
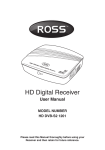
WPCTV3000 Universal Wireless Display and Screen Sharing Adapter User Manual Table of Contents Chapter 1: Product Introduction ................................................................................................................... 4 1-1 Package Contents ............................................................................................................................ 4 (1) PC2TV ...................................................................................................................................... 5 (2) Media Streaming ..................................................................................................................... 5 (3) Miracast ................................................................................................................................... 6 (4) i-Play ........................................................................................................................................ 6 1-3 Highlights ........................................................................................................................................ 6 1-4 Hardware Setup/Installation ........................................................................................................... 7 Chapter 2: Description of Functions ............................................................................................................. 9 2-1 Using WPCTV3000 with NScreenShare ......................................................................................... 10 2-1-1 Basic Usage for windows ................................................................................................... 10 2-1-1-1 Launching NScreenShare ........................................................................................ 11 2-1-1-2 User Interface of NScreenShare ............................................................................. 13 2-1-2 Basic Usage for Mac........................................................................................................... 18 2-1-2-1 Launching NScreenShare ........................................................................................ 20 2-1-2-2 User Interface of NScreenShare ............................................................................. 23 2-2 Using WPCTV3000 with Miracast ................................................................................................. 28 2-2-1 Launching Miracast ............................................................................................................ 28 2-2-2 Basic Usage for Miracast ................................................................................................. 210 2-3 Using WPCTV3000 with i-Play....................................................................................................... 37 2-3-1 Launching i-Play for file streaming .................................................................................... 37 2-4 Using WPCTV3000 for Media Streaming ....................................................................................... 41 2-4-1 Basic Usage for Airfun Utility for APPS .............................................................................. 41 2-4-2 Basic Usage for Airfun Utility for Windows software ........................................................ 43 2-4-3 Advanced Setup ................................................................................................................. 45 2-4-3-1 Network Setting...................................................................................................... 47 2-4-3-2 Audio Setting .......................................................................................................... 49 2-4-3-3 Video Setting .......................................................................................................... 50 2-4-3-4 System Setting ........................................................................................................ 50 Chapter 3: Router Application ..................................................................................................................... 51 Appendex A: Support Resolution ................................................................................................................ 63 Appendex B: Supported Media Formats..................................................................................................... 63 2 Video Format ...................................................................................................................................... 63 Audio Format ...................................................................................................................................... 63 Photo Format ...................................................................................................................................... 64 Appendex C: Miracast-Ready List ............................................................................................................... 64 3 Chapter 1: Product Introduction Thank you for choosing the Diamond Universal Wireless Display and Screen Sharing Adapter. 1-1 Package Contents (1) WPCTV3000 Universal Wireless HDMI Receiver (2) AC Adapter (3) CD-ROM (user guide and software applications) (4) Quick Installation Guide (5) HDMI (M) to HDMI (M) Cable 4 1-2 Hardware Recommendation (1) PC2TV (Mirrors your desktop wirelessly to a HDTV or Projector) The WPCTV3000 is designed to mirror your desktop screen from a PC (Windows 7 /Window 8/ Win 8.1) & Mac (over 10.6) to your HDTV. (whatever you see on your PC desktop is what you will see on your TV) PC or Notebook CPU: Core 2 Duo 2.0 GHz or better Memory: 2.0 GB or better Network: 802.11g/n Wi-Fi and/or 100/1000 Mbps Ethernet (2) Media Streaming Stream photo/music/video from your PC, smart phone or laptop or play back video/Music/photo form USB up to 1080p HD. PC or Notebook CPU: 1.6 GHz or better Memory: 1.0 GB or better Network: 802.11g/n Wi-Fi and/or 100/1000 Mbps Ethernet Smart phone CPU: 800 MHz or better Memory: 256 MB or better Network: 802.11g/n Wi-Fi or better Tablet-PC CPU: 600 MHz or better Memory: 256 MB or better Network: 802.11g/n Wi-Fi or better Recommend software PC: Windows Media Player, AirFun Android OS: AirFun iOS: AirFun、iMediaShare 5 (3) Miracast Screen mirroring from Miracast-ready smart phone/tablet/NB through Miracast technology up to 1080p HD. (4) i-Play Stream video/photo content from iPhone or iPad to your TV 1-3 Highlights The WPCTV3000 enables you to mirror whatever is displayed on your Windows PC/laptop, Mac, Smart phone and or tablet to your HDTV, wirelessly, up to 1080p video. Major features: 802.11 a/b/g/n Wireless compatibility 802.11n 2.4GHz & 5GHz dual band standards Supports both Wireless and Ethernet connectivity HDMI/VGA connection Wireless multimedia streaming up to Full HD 1080p PC contents, movies, photos and more all on your big screen Compatible with Windows, Apple and Android devices Network security 6 1-4 Hardware Setup/Installation (1) Connect your WPCTV3000 device (2) Connect the power adapter and push power button to turn on the WPCTV3000. After few seconds, when you see the below screen: the device is assigned an IP address, the system is in standby mode and ready to do file streaming or screen mirroring from your device. Please connect to WPCTV3000 via Wi-Fi. Note: you can user your computers web browser to access advance setup configurations by typing in the following IP address in the address bar of the browser: This will give you the option to connect the WPCTV3000 to your home network and other advanced settings Note: To turn off the WPCTV3000 push the power button twice. 7 (3)If your device is already connected to the router via wired Ethernet, disconnect the cable and press the power switch twice to turn it off and once to turn it back on, this will put the device back into wireless mode. 8 Chapter 2: Description of Functions The WPCTV3000 is a highly integrated all-in-one receiver, featuring instant and direct peer-to-peer connection. When you see the screen below, the box is ready for connection. Miracast: Screen mirroring from smart phone, or tablet through (Wi-Fi Miracast technology) NScreenShare: The software providing screen mirroring from PC and laptop to bigger screen. DLNA: Stream photo/music/video from your PC, smart phone or laptop. i-Play: Stream photo/video from your iPhone or iPad. 9 2-1 Using WPCTV3000 with nScreenShare 2-1-1 Basic Usage of application software for windows You can install WPCTV3000 nScreenShare application from the provided CD ROM. 10 11 2-1-1-1 Launching nScreenShare Please follow the steps below to run nScreenShare for windows. (1) Search and find the device’s SSID in Wi-Fi list on your notebook. (The sample of “device SSID” in the picture is “WPCTV3000”) (2) Connect to this device SSID. (3) Double click the NScreenShare icon from your desktop. 12 (3) NScreenShare will auto detect ‘Server IP, please input login code which is displayed on your TV screen. (5) If login code is correct, application software will appear. 2-1-1-2 User Interface of NScreenShare 13 Main functions No Name 1 Play/Pause Function Description Start / pause presentation. If paused, a current presentation or stream will freeze. 2 Stop Stops a current presentation or stream and will go back to instruction page. 3 Annotator To start the new sheet for notes taking or on the current slide 4 Menu Access menu list. 5 Login code Show the application login code. 6 Volume Control the slide bar to change the volume. Press the icon to mute. 7 Information/Minimize/Close Minimize and close the Application Software window. Information Menu You can also click ‘Menu’ button to access menu list. (1) Display Mode 14 No Name Function Description 1 Main Display Mirror NB/PC display to the Rx monitor. 2 Extend Display Mirror your extend display to the Rx monitor. (2) Zoom In (This function only can be used when “Main Display” running) You can decide the region you want to zoom in and display to the monitor. Step1. Choose Zoom In→Select a Specific Area Step2. Now you can decide the region you want to display to the monitor. (You can slide the frame and also adjust its size.) When finished, double click the right mouse button. 15 Step3. When finished, press the ”ESC” key to get back to main display function. (3) HDMI Resolution You can change the HDMI output resolutions. 16 (4) Aspect Ratio You can change the Rx monitor ratio. “Auto” means the ratio will follow the display source. “Pan Scan 4:3” means adjust widescreen images so that they can be shown within the proportions of a 4:3. “Letter Box 4:3”means adjust widescreen images so it could be shown within a full 4:3 ratio. The resulting image has mattes (black bars) left and right. (5) Web Page (Airfun) 17 For details, please refer 2-4-3 Advanced Setup (6) Enable Conference Mode Under conference mode, there will be two options to function: (A) Administration Role: If you are the first one to connect with nScreenShare, you will be programed as Administration. You can control and decide from all the clients (computers that are also connected to the same WPCTV3000 and have nScreenShare active but not as Administration) who will be able to project their PC screen as main. 18 To connect as Administrator 1. Click on “Enable Conference Mode” under Menu options 2. A message box will show up and as you to provide below information as shown in picture 3. Type in “admin” for User Name and “adminpwd” for Passwords. 4. After logging in successfully, the control panel will be displayed as below 19 Admin mode control panel No Name 1 Play Function Description Start / pause presentation. If paused, a current presentation or stream will freeze. 2 Stop Stops a current presentation or stream and will go back to instruction page. 3 Annotator To start the new sheet for notes taking or on the current slide 4 Menu Access menu list. 5 User List Show the application login code. 6 Volume Control the slide bar to change the volume. Press the icon to mute. 7 Login code Minimize and close the Application Software window. Information 8 Information/Minimize/Close Start / pause presentation. If paused, a current presentation or stream will freeze. 9 Minimize Stops a current presentation or stream and will go back to instruction page. 10 Close To start the new sheet for notes taking or on the current slide 5. Click OK to enter as Administrator Once logged in, you will see the below image on screen As soon as there are other clients joining in the conference, you will be able to select the designate one to project their image. You will see the list of options as below. Double click on the one that you wish to 20 select and the device will automatically project their PC screen image over. (B) Client Mode If you are connected as client (connecting to the same WPCTV3000 and active the nScreenshare), you could only project the screen image when Administration chooses to. Just simply follow the steps in ScreenShare and you will be able to log in the same conference room with others. As in Client Mode, it will only show below tool bar since only Administration can project the image. 21 (7) Setting No Name Function Description 1 Auto Adjust Resolution Let your pc/notebook resolution changed by Rx monitor resolution. 2 Auto Save After reboot this application, all of the settings will be saved. (8) Exit Exit from nScreenShare application, and go back to instruction page. 22 2-1-2 Basic Usage of application software for Mac (Option) You can install WPCTV3000 nScreenShare for Mac from the included CD ROM. (1) Click twice on the (.pkg) file to start installing. (2) Install progress. 23 You have finished installing the software。 2-1-2-1 Launching NScreenShare Please follow the steps below to run nScreenShare for Mac. (1) Search and connect to the device’s SSID in Wi-Fi list on your notebook. (The sample of “device SSID” in the picture is “WPCTV3000”) 24 (2) Go -> Applications 25 (3) Applications -> NScreenShare then press NScreenShare to start. (4) NScreenShare will auto detect ‘Server IP’, please input login code as shown on instruction page. 26 (5) If login code is correct, application software will appear. 2-1-2-2 User Interface of NScreenShare Main functions No Name Function Description 1 Play Start / pause presentation. 2 Stop Stops a current presentation or stream and go back to instruction page. 3 Menu Access menu list. 4 Minimize/Close Minimize and close the Application Software window. 27 Menu You can also click ‘Menu’ button to access menu list. (1) Display Mode No Name Function Description 1 Main Display Mirror NB/PC display to the Rx monitor. 2 Extend Display Mirror your extend display to the Rx monitor. (2) Zoom In (This function only can be used when “Main Display” running) You can decide the region you want to zoom in and display to the monitor. (3) Streaming Mode (This function only can be used when mirroring) 28 No Name Function Description 1 Presentation Mode Default is presentation mode. 2 Video Mode If play video performance is not good, select option for best performance. (4) Aspect Ratio You can change the Rx monitor ratio. Default is “Auto”, means the ratio will follow the display source. (5) HDMI Resolution 29 You can change the HDMI output resolutions. (6) Web Page For details, please refer 2-1-1 Advanced Setup (7) Auto Adjust Resolution 30 Let’s your pc/notebook’s resolution automatically changeby Rx monitor resolution. (6) Auto Save After rebooting this application, all of the settings will be saved. 31 (7) Enable Conference Mode nScreenShare (Conference Mode) Under conference mode, there will be two options: (A) Administration Role: If you are the first one to connect with nScreenShare, you will be programed as Administration, you would have full control and decide from all the clients (people who also connect to the same WPCTV3000 and have nScreenShare active but not as Administration) who will be able to project their PC screen as main. To connect as Administration 1. Click on “Enable Conference Mode” under Menu options 2. A message box will show up asking you to provide the admin name and password 3. Type in “admin” for User Name and “adminpwd” for Passwords. 4. Click OK to enter as Administrator. Once logged in, you will see the below image on screen 32 After logging in successfully, the control panel will be displayed as below. Admin mode control panel 33 The function description is as below. No Name Function Description 1 Play Start / pause presentation or stream. 2 Stop Stop a current presentation or stream 3 Menu Access menu list. 4 User List List the connected PC’s. The host/teacher can choose the PC from the connected list to project to big screen. 5 Close Close the Application window. (B) Client Mode If you are connected as a client (connecting to the same WPCTV3000 and active the nScreenshare), you could only project the screen image when Administration chooses to. Follow the steps in ScreenShare and you will be able to log in the same conference room with other clients. As in Client Mode, it will only show the below tool bar since only Administrators can project the image. (8) Information Displays the application information, like the Adapter name, IP Address and Version number. (9) Exit 34 Exit from NScreenShare application, and go back to instruction page. 2-2 Using WPCTV3000 on Miracast 2-2-1 Launching Miracast To connect WPCTV3000 (Wi-Fi Miracast), with your smart phone or tablet device must be Wi-Fi Miracast certified. See appendix C at the end of this guide for Miracast supported devices are contact your tablet or smartphone manufacture to confirm Mircast support. Turn on the Miracast function on your smart phone or tablet device, search and connect to the SSID show on monitor. (The sample of “SSID” in the picture is “WPCTV3000”) 35 2-2-2 How To Use Miracast on your Smartphone or Tablet. (Android OS) 1. HTC (New One) (1) “Settings” -> “Media Output” (2) The phone will automatically scan the WPCTV3000 streaming box and display the SSID WPCTV3000. 36 (3) Choose the SSID which you find on the TV, and your phone will connect to the box automatically. (4) Mirroring will begin while your phone connect to streaming box successfully. 2. Samsung (S3 & Note2) (1) “Settings” -> “More settings” 37 (2) “AllShare Cast” (3) Turn “ON” AllShare Cast. Your phone will scan the streaming box, and it will show the SSID of the box. NOTE: it also may show up as “Screen Mirroring” 38 (4) Choose the SSID which you find on the TV, and your phone will connect to the box automatically. (4) Mirroring will begin while your phone connect to streaming box successfully. 39 3. SONY (Xperia TX) (1) “Settings” -> “Xperia” (2) “Screen mirroring” (3) “Turn on Screen mirroring” 40 (4) Your phone will scan the streaming box, and it will show the SSID of the box. (5) Choose the SSID, mirroring will begin while your phone connect to streaming box successfully. 41 4. SHARP (SH-10D) (1) “Settings” -> “Wireless output” 42 (2) Turn “ON” (3) Your phone will scan the streaming box, and it will show the SSID of the box. 43 (4) Choose the SSID which you find on the TV, and your phone will connect to the box automatically. (5) Mirroring will begin while your phone connect to streaming box successfully. 44 2-3 Using WPCTV3000 on i-Play 2-3-1 Launching i-Play for file streaming (1) Search and connect the device’s SSID in Wi-Fi list on your iPhone/iPad first. (The sample of “device SSID” in the picture is “WPCTV3000”) 45 (2) Run “Photos” (3) Choose the photos or videos witch you want to share. (4) Press the icon at left-corner. 46 (5) Press the “Airplay” to show the device list. 47 (6) Select your receiver box and the file will begin streaming. 48 2-4 Using WPCTV3000 on Media Streaming 49 Please follow the steps below to run Media Streaming. 2-4-1 Basic Usage of AIRFUN Utility for APPs 1. Scan the QR code or go to the Google play (App store) to download AirFun. 2. Connect to WPCTV3000 in Wi-Fi list. 3. Press the Airfun icon on your screen. 4. The Airfun start to search the DLNA device. 50 5. If getting DLNA device, you should be able to see the UI bellow. 6. Select this icon to choose the file type which you want to share. 51 2-4-2 Basic Usage of AIRFUN Utility for Windows software 1. You can install Airfun application from the provided CD ROM. 2. Double click the AIRFUN icon from your desktop. 3. The Airfun start to search the DLNA device. If there is no DLNA device, it will show “No device found”. 4. If using a DLNA device, you should be able to see your PC screen on the TV now. 52 5. You can drag the video/photo/music file to Airfun main menu directly. For video files, please drag the files to the right folder. Example; videos go to the video playback folder and phones/Music go to the Photo/Music folder. 6. For photo/music files, please drag files to the left folder. 53 2-4-3 Advanced Setup Please connect your Wi-Fi device to the WPCTV3000 first, and run the Airfun app, you should be able to see the UI bellow. Now you can do basic settings, such as change the SSID, connect to router, or choose the language. If you need advanced settings, please go to the remote control page below, and choose next page, as marked in red. 54 Press the gear icon (marked in red), to enter setup. 55 In the setup page, you can use the virtual remote controller to change the setting. - Select “left/right=> OK” to enter the setting page for Network / Audio / Video / System. - Select “Return” to go to the previous page or standby screen. 2-4-3-1 Network Setting 56 Wired Connection Item Description DHCP IP (AUTO) WPCTV3000 will obtain an IP address from DHCP server automatically. Fixed IP (Manual) Set WPCTV3000 IP address manually. Fill the fields below to setup IP address. Device Name Item Description Device Name (SSID) Change the Device Name (SSID). Default is “WPCTV3000”. 57 Wi-Fi Connection If you are setting for the first time, you will see below screen, click “on”. Then there will show the Wireless AP list on the screen. Please choose the AP you want to connect. The function is to bridge to Internet via another Wireless AP. After successfully connecting, standby screen will show router name on the right bottom corner. If you wish to disconnect with the router, click “off” on the Wi-Fi connection page. 58 More information, please reference Chapter 3. Virtual AP Setup Item Description Wireless Security Open System Disables wireless encryption. WPA Key Enables WPA + WPA2 encryption. Wireless clients must support WPA encryption and know the encryption passphrase you set here. Password If Wireless Security is enables, you can set a wireless password. Radio Band Set the Radio band to 2.4GHz or 5GHz. Please confirm your PC/NB support 5GHz before you set the radio band to 5GHz 5G Preferred Channel If the Radio band is 5GHz now, you can change the 5G frequency. Default channel is 36, 40. Save Change Save the configuration 2-4-3-2 Audio Setting You can adjust the advanced audio setting such as Night mode, HDMI Audio output format, Surround sound setting and Lip Sync setting in this page. 59 2-4-3-3 Video Setting You can adjust the Aspect Ratio, TV out video format, and other video settings in the video setup page. 2-4-3-4 System Setting You can set the OSD language, reset to Factory default, check the firmware version, and do the firmware upgrade in the system setup page. 60 Chapter 3: Router Application By using a router, it provides a solution for users who have trouble to access online contents while their exist Wi-Fi is occupied to connect to WPCTV3000. The WPCTV3000 allows two different ways to connect to a router : Wi-Fi, or Ethernet LAN, giving the flexibility to Internet connection whichever method is most convenient. While connecting WPCTV3000 with router, the original SSID will no longer appear in your Wi-Fi list, you will no longer be able to find the original SSID. If you want to use DLNA, NScreenShare, i-Play, you must first connect your PC/Tablet or Smartphone device to the same router. - Wi-Fi connection Step1: Click and turn on your WiFi connection 61 Step2: The Wireless AP list will show on the screen. Please choose the AP you want to connect. When successfully connected, the UI will change as below: ** Please note! File streaming and screen mirroring performance might be deteriorated by this method due to limited bandwidth. - Wired Connection Step1: Connect LAN to the AP router Step2: WPCTV3000 will auto detect the LAN port. When successfully connected, the UI will change as below: ** Please note! WPCTV3000 is not a router and must connect to AP/router and not directly to your internet providers WAN connection. 62 Appendix A: Support Resolution Interface Output resolution HDMI NTSC,PAL,480p,576p,720p50Hz,720p60Hz,1080i50Hz,1080i60hz,1080p50Hz,1080p60Hz Appendix B: Support Media Format Video Format Format File extension AVI avi MPEG-1 mpg, mpeg MPEG-2 mpg, mpeg MPEG-TS m2t, tts MPEG-4 mp4, mp4v, mpeg4, m4v 3GP 3gp, 3gpp 3GP2 3g2, 3gpp2 MOV mov WMV wmv DVR-MS dvr, dvr-ms Audio Format Format File extension MP3 mp3 LPCM PCM, wav WAV wav MP4 mp4 AAC AAC OGG ogg, oga, ogv 63 Photo Format Format File extension GIF gif JPG jpg, jpeg BMP bmp PNG png Appendix C: Miracast-Ready List Module Google Nexus 4 Google Nexus 5 Google Nexus 7 II HTC New One HTC One mini HTC Butterfly HTC Butterfly S LG Optimus G L180L LG Optimus G L-E973 LG Optimus G L-01E Samsung Galaxy S3 Samsung Galaxy S4 Samsung Galaxy Note2 Samsung Galaxy Note3 Samsung Note 10.1 Samsung Galaxy Tab3 8.0 Samsung Galaxy Tab 10.1 Sony Xperia TX Sony Xperia T Sony Xperia V Sony Xperia Z Sony Xperia Z1 64 Sony Xperia AX/LV Sharp SH-09D Sharp SH-10D ASUS PadFone Infinity CoolPad YL-Coolpad 9960 Xiaomi M2/2A/2S Oppo Find5 Support Options: On-Line Diamond Multimedia Support: http://tickets.diamondmm.com/ On-Line Diamond Multimedia Knowledge base: http://tickets.diamondmm.com/kb/index.php Diamond Multimedia WPCTV3000 Product Page: http://www.diamondmm.com/wpctv3000-diamond-multimedia-wireless-pc-to-tv.html 65