1
Application Note: Embedded Processing
R
XAPP1000 (v1.0.1) May 6, 2008
Abstract
Reference System: PLBv46 Endpoint Bridge
for PCI Express in a ML555 PCI/PCI Express
Development Platform
Author: Lester Sanders
This reference system demonstrates the functionality of the PLBv46 Endpoint Bridge for PCI
Express® used in the Xilinx ML555 PCI/PCI Express Development Platform. The PLBv46
Endpoint Bridge is used in x1 and x4 PCIe® lane configurations. The PLBv46 Endpoint Bridge
uses the Xilinx Endpoint core for PCI Express in the Virtex®-5 XC5VLX50T FPGA. The PLBv46
Bus is an IBM CoreConnect bus used for connecting the IBM PPC405 or PPC440
microprocessors, which are implemented as hard blocks on Xilinx Virtex FPGAs, and the Xilinx
Microblaze microprocessor to Xilinx IP.
A variety of tests generate and analyze PCIe traffic for hardware validation of the PLBv46
Endpoint Bridge. PCIe transactions are generated and analyzed by Catalyst and LeCroy test
equipment. For endpoint to root complex transactions, the pcie_dma software application
generates DMA transactions which move data over the PCIe link(s). For root complex to
endpoint transactions, Catalyst and LeCroy scripts generate PCIe traffic. A Catalyst script
which configures the PLBv46 Endpoint Bridge and performs memory write/read transactions is
discussed. The steps to use Catalyst to measure PCIe performance are given, and
performance results are provided.The principal intent of the performance testing is to illustrate
how performance measurements can be done.
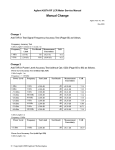
Two stand-alone tools, PCItree and Memory Endpoint Test, are used to write and read PLBv46
Endpoint Bridge configuration space and memory in a PC environment. This is the least
expensive and easiest to use hardware test environment.
The use of the ChipScope™ tool in debugging PLBv46 Endpoint Bridge issues is described.
Included
System
The reference system for the PLBv46 Endpoint Bridge in the ML555 PCI/PCI Express
Development Platform is available at:
http://www.xilinx.com/support/documentation/application_notes/xapp1000.zip
The zip file contains the reference system which is described on page 2 of this application note.
The ml555_mb_plbv46_pcie project uses the PLBv46 Endpoint Bridge configured with four
PCIe lanes. To change this to a reference x1 lane system, change the PLBv46 Endpoint Bridge
C_NO_OF_LANES generic to 1.
Introduction
The PLBv46 Endpoint Bridge is an endpoint instantiated in a Xilinx FPGA which communicates
with a root complex. The reference systems are tested using commercial test equipment from
LeCroy and Catalyst. LeCroy and Catalysts are two Analyzers/Exercisers used to verify PCIe
systems. The Catalyst and LeCroy testers allow generation, analysis, capture, and triggering of
Translation Layer, Data Link Layer, and Physical Layer packets. The reference systems are also
tested in two test environments which are inexpensive and PC based.
The PLBv46 Endpoint Bridge is tested using the LeCroy and Catalyst testers as root complex.
The ML555 Evaluation Board is inserted into the LeCroy or Catalyst PCIe slots for testing.
Sample Catalyst scripts are provided in the ml555_mb_plbv46_pcie/catalyst directory.
Sample Lecroy scripts are provided in the ml555_mb_plbv46_pcie/lecroy directory.
© 2008 Xilinx, Inc. All rights reserved. XILINX, the Xilinx logo, and other designated brands included herein are trademarks of Xilinx, Inc. All other trademarks are the property
of their respective owners.
XAPP1000 (v1.0.1) May 6, 2008
www.xilinx.com
1
R
Hardware and Software Requirements
The tests for the PLBv46 Endpoint Bridge which do not require LeCroy or Catalyst test
equipment are the PCIE Configuration Verification (PCIE CV), PCItree and the Memory
EndPoint Test (MET) tests. These are run using the ml555_mb_plbv46_pcie project configured
as x1 and x4. These tests are quick to setup and costs nothing other than a PC with PCIe slots.
For these tests, the ML555 PCI/PCI Express Development Platform is inserted into the x8 PCIe
slot of a PC (Dell 390). The PC based PCItree and/or MET software are installed. The PCItree
Bus Viewer (www.pcitree.de) and the Xilinx MET tests allow the user to write and read ML555
memory with any pattern, with different lengths. PCItree and the MET do not provide the
capability to analyze PCIe traffic.
Hardware and
Software
Requirements
Reference
System
Specifics
The hardware and software requirements for this reference system are:
•
Xilinx ML555 board (Production Silicon)
•
Xilinx Platform USB or Parallel IV programming cable
•
USB Type A to Type B Interface cable and serial communication utility (TeraTerm)
•
Xilinx Platform Studio 10.1i
•
Xilinx Integrated Software Environment (ISE®) 10.1i
•
Xilinx ChipScope PRO 10.1i
•
Catalyst SPX Series PCI Express Bus Protocol Analyzer/Exerciser
•
LeCroy PETracer Analyzer / PETrainer Exerciser
This reference system includes the MicroBlaze™ Processor, MPMC, XPS BRAM, XPS INTC,
XPS GPIO, XPS UART Lite, XPS Central DMA, and the PLBv46 Endpoint Bridge. Both the
processor and the bus run at a frequency of 125 MHz. The MicroBlaze processor uses 2 KB for
the instruction cache (I-cache) and 4 KB the data cache (D-cache). MPMC runs at a frequency
of 125 MHz and is set up for three ports.
Figure 1 is the block diagram of the reference system.
X-Ref Target - Figure 1
XPS
INTC
XPS
GPIO
XPS
BRAM
XPA Central
DMA
MicroBlaze
Processor
PLBv46
PCIe
XPS
UART Lite
MPMC
MDM
X1000_01_041408
Figure 1:
Block Diagram of Reference System
Table 1 provides the address map of the system.
Table 1: Reference System Address Map
Peripheral
XAPP1000 (v1.0.1) May 6, 2008
Instance
Base Address
High Address
MDM
debug_module
0x84400000
0x8440FFFF
XPS INTC
xps_intc_0
0x81800000
0x8180FFFF
XPS GPIO
xps_gpio_0
0x81400000
0x8140FFFF
XPS BRAM CNTLR
xps_bram_if_cntlr_1
0x8AE10000
0x8AE1FFFF
www.xilinx.com
2
R
Implementation Results
Table 1: Reference System Address Map (Cont’d)
Peripheral
Instance
Base Address
High Address
XPS Central DMA
xps_cdma_0
0x80200000
0x8020FFFF
PLBv46 Endpoint
Bridge
plbv46_pcie_0
0x85C00000
0x85C0FFFF
XPS Uartlite
RS232
0x84000000
0x8400FFFF
LMB Cntlr
ilmb_cntlr
0x00000000
0x00001FFF
LMB Cntlr
dlmb_cntlr
0x00000000
0x00001FFF
MPMC
DDR2_SDRAM_32Mx32
0x90000000
0x9FFFFFFF
In XPS, double click on PCIe_Bridge in the System Assembly View to invoke the PLBv46
_PCIe generics editor. The generics shown in Figure 2 are used to configure the PLBv46
Endpoint Bridge. The Xilinx Device ID = 0x0505 and Vendor ID = 0x10EE are displayed in
many of the PCIe tests done in this application note.
X-Ref Target - Figure 2
X1000_02_041408
Figure 2:
Implementation
Results
PLBv46 Endpoint Bridge Parameters
The resource utilization in the reference design is shown in Table 2.
Table 2: Design Resource Utilization
Resources
XAPP1000 (v1.0.1) May 6, 2008
Used
Available
Utilization (%)
Slice Registers
12003
28800
41
Slice LUTs
12437
28800
43
DCM_ADV
2
12
16
Block RAM
56
60
93
www.xilinx.com
3
R
ML555 Setup
ML555 Setup
Figure 3 shows the ML555 PCI/PCI Express Development Platform. The ML555 has a PCI
connector on one edge of the printed circuit board and a x8 PCIe connector on the other edge.
In the figure, no PCIe adapter is connected to the ML555 x8 PCI edge connector. For PCIe
operation, move switch SW8 to the PCIe position and install a shunt on P18.
X-Ref Target - Figure 3
SW8
Slide Switch SW8
P13: 8-Lane Connector
for PCI Express
P45:
(Configure for PCIe Lane
Width Presence Detect)
P18: (Install Shunts for
PCI Express)
X1000_03_041408
Figure 3:
XAPP1000 (v1.0.1) May 6, 2008
ML555 PCI/PCIe Evaluation Platform
www.xilinx.com
4
R
Interfacing to a Communication Terminal
Put the shunt on P45 to indicate the number of PCIe lanes used in the project, as shown in
Table 3.
Table 3: Selecting the Number of PCIe Lanes on the ML555
No of PCIe Lanes
P45 Shunt Location
1
5-6
4
3-4
8
1-2
Figure 4 shows the x1 and x4 PCIe adapters which connect to the x8 PCIe connector on the
ML555. The adapters are used when inserting the ML555 into PC, Catalyst, or LeCroy test
equipment. The usage of the adapter is generally optional.
X-Ref Target - Figure 4
X1000_04_041408
Figure 4:
Interfacing to a
Communication
Terminal
x1 and x4 PCIe Adapters
Communication terminals are commonly used to display information related to the functionality
of the ML555. The information displayed is usually output from C code running on the
MicroBlaze processor. Many newer PCs do not have a COM port. The ML555 addresses this
by providing an interface to the communication terminal through a USB port. This differs from
earlier Xilinx boards. This eliminates the serial communication cable/null modem/gender
changers used by other Xilinx boards to communicate with a communication terminal.
Installing CP210x USB-to-UART Bridge VCP Drivers
Silicon Laboratories CP210x USB-to-UART Bridge Virtual COM Port (VCP) device drivers
permit a CP210x device to appear to any PC application software as an additional COM port in
addition to any existing hardware COM ports in the PC. Application software running on the PC
accesses the CP210x device as it would access a standard hardware COM port. However,
actual data transfer between the PC and the CP210x device is performed over the USB
interface. COM port applications such as HyperTerminal or TeraTerm transfer data between the
USB to the CP210x device without the need to modify the terminal application software on
either end of the communications interface. The latest CP210x USB-to-UART Bridge VCP
drivers can be downloaded from the Silicon Laboratories website at:
XAPP1000 (v1.0.1) May 6, 2008
www.xilinx.com
5
R
Interfacing to a Communication Terminal
http://www.silabs.com/tgwWebApp/public/web_content/products/Microcontrollers/en/MCU_Do
wnloads.htm.
For technical information and support of the CP210x USB-to-UART bridge controller integrated
circuit and the associated VCP device driver, visit the Silicon Laboratories website at
www.silabs.com.
The ML555 contains a CP210x USB-to-UART bridge controller integrated circuit. To
communicate with the MicroBlaze processor in the Virtex-5 FPGA, the Silicon Laboratories
CP210x USB-to-UART Bridge VCP drivers must first be installed on the PC used to remotely
control the DMA operations. For the installation procedure, it is assumed that:
•
The remote terminal console operates on the same machine that the ML555 board is
plugged into.
•
No previous versions of this driver are installed on the PC running Microsoft Windows XP.
•
The ML555 has been properly configured for PCI Express compliant system power, the
reference design has been programmed into the platform flash configuration device on the
ML555 board, and the ML555 is configured to load the reference design into the FPGA
from platform flash at power-up.
1. With the PC powered off, install the ML555 in an 8-lane or 16-lane PCI Express compliant
add-in card socket in the PC.
2. Connect the USB B-to-A cable between the ML555 USB port (connector J1) and the USB
connector on the PC. The USB cable is not provided with the Virtex-5 FPGA ML555
Development Kit for PCI Express and PCI designs.
3. Power up the PC and ML555 system before continuing with the VCP driver installation.
4. Successful CP210x driver installation consists of five steps:
a. Create an installation directory on the PC and copy the installation files from the ML555
CD-ROM (or downloaded driver from a temporary directory) into the CP210x directory.
b.
With the reference design loaded in the Virtex-5 FPGA and a USB A-to-B cable
connected between the PC and ML555 USB port, install the first of two CP210x
USB-to-UART device drivers on the host PC.
c.
Install the second CP210x USB-to-UART device driver on the host PC.
d. Verify driver installation using Windows device manager.
e. Start a HyperTerminal application to verify communications.
5. Place the ML555 CD-ROM in the CD-ROM drive on the PC. The driver file is named
CP210x_Drivers.exe and is located in the directory
ML555_Support_Files\SiLabs_CP2102_VCOM_Driver.
If the ML555 CD-ROM is not available, download the latest CP210x driver from the Silicon
Laboratories website before continuing.
XAPP1000 (v1.0.1) May 6, 2008
www.xilinx.com
6
R
Interfacing to a Communication Terminal
CP210X Installation Directory Creation
1. Double-click the self-extracting ZIP file. A folder containing various drivers is created in the
C:\SiLabs\MCU\CP210x directory. The InstallShield Wizard is displayed as shown in
Figure 5.
2. Click Next to continue.
X-Ref Target - Figure 5
X1000_05_041408
Figure 5:
Silicon Laboratories CP210x InstallShield Wizard
3. Review the Silicon Laboratories software license agreement. Click Yes to accept all the
terms and conditions of the license agreement, as shown in Figure 6.
X-Ref Target - Figure 6
X1000_06_041408
Figure 6:
XAPP1000 (v1.0.1) May 6, 2008
Silicon Laboratories License Agreement
www.xilinx.com
7
R
Interfacing to a Communication Terminal
4. Click Next to accept the default destination folder as shown in Figure 7.
X-Ref Target - Figure 7
X1000_07_041408
Figure 7:
Default CP210x Driver Destination Directory
After the destination folder is created on the PC and the VCP drivers are copied to this folder,
the Wizard Complete status screen is displayed as shown in Figure 8.
5. Click Finish to continue with VCP driver installation. At this point, the VCP drivers are only
copied onto the host disk drive.
X-Ref Target - Figure 8
X1000_08_041408
Figure 8:
XAPP1000 (v1.0.1) May 6, 2008
CP210x Directory Creation and File Installation Complete
www.xilinx.com
8
R
Interfacing to a Communication Terminal
CP210x USB-to-UART First Driver Installation
The following steps require the reference design to be successfully loaded into the FPGA on
the ML555, and the USB interface cable to be connected between the PC and ML555 J1
connector.
1. The PC recognizes new hardware attached to the computer and displays the Found New
Hardware Wizard as shown in Figure 9. Select No, not this time and click Next to continue
with driver installation.
X-Ref Target - Figure 9
X1000_09_041408
Figure 9:
Found New Hardware Wizard
2. Select Install from a list or specific location (Advanced) as shown in Figure 10. Click
Next to continue.
X-Ref Target - Figure 10
X1000_10_041408
Figure 10:
XAPP1000 (v1.0.1) May 6, 2008
New Hardware Wizard Install from a Specific Location
www.xilinx.com
9
R
Interfacing to a Communication Terminal
3. Select Search for the best driver in these locations and select Include this location in
the search (Figure 11). Browse to the directory containing the CP210x drivers or enter
C:\SiLabs\MCU\CP210x\WIN if the default directory is selected. Click Next to continue.
X-Ref Target - Figure 11
X1000_11_041408
Figure 11:
Search for the Best Driver in these Locations
Driver installation takes one or two minutes to complete. The Completing the Found New
Hardware Wizard status box is displayed (Figure 12). This is the first of two drivers that must be
installed for the PC and ML555 USB port to communicate correctly.
4. Click Finish to continue with VCP driver installation.
X-Ref Target - Figure 12
X1000_12_041408
Figure 12:
XAPP1000 (v1.0.1) May 6, 2008
Found New Hardware Wizard Driver Installation Complete
www.xilinx.com
10
R
Interfacing to a Communication Terminal
CP210x USB-to-UART Second Driver Installation
A second driver must be installed on the PC. The Found New Hardware Wizard is again
displayed on the PC (Figure 13).
1. Select No, not this time and click Next to continue with driver installation.
X-Ref Target - Figure 13
X1000_13_041408
Figure 13:
Found New Hardware Wizard (Second CP210x Driver Install)
2. The driver for the CP210x USB to UART bridge controller must also be installed on the PC.
Select Install from a list or specific location (Advanced) as shown in Figure 14. Click
Next to continue.
X-Ref Target - Figure 14
X1000_14_041408
Figure 14:
XAPP1000 (v1.0.1) May 6, 2008
USB-to-UART Bridge Controller Driver Installation Wizard
www.xilinx.com
11
R
Interfacing to a Communication Terminal
3. Select Search for the best driver in these locations and select Include this location in
the search (Figure 15). Browse to the directory that contains the CP210x drivers or enter
C:\SiLabs\MCU\CP210x\WIN. Click Next to continue.
X-Ref Target - Figure 15
X1000_15_041408
Figure 15:
VCP Driver Directory Location
Driver installation takes one or two minutes to complete. The Completing the Found New
Hardware Wizard status box is displayed for the second time as shown in Figure 16. This is the
second of two drivers that must be installed for the PC and ML555 USB port to communicate
correctly.
4. Click Finish to complete driver installation.
X-Ref Target - Figure 16
X1000_16_041408
Figure 16:
XAPP1000 (v1.0.1) May 6, 2008
Completion of Second CP210x Driver Installation
www.xilinx.com
12
R
Interfacing to a Communication Terminal
Verification of USB-to-UART Driver Installation
Verification of PC to ML555 communication requires the ML555 powered up in the system unit,
the reference design loaded into the Virtex-5 FPGA on the ML555, and a USB cable connected
between the ML555 and the USB port of the PC hosting the remote DMA initiator terminal
console. If the ML555 is connected to the USB port of the PC but the reference design is not
loaded into the Virtex-5 FPGA, the CP210x USB-to-UART bridge controller port is not
recognized by the device manager application software running on the PC.
To determine which COM port has been assigned to the USB-to-UART bridge controller
attached to the ML555 board, the COM port assignments must be known.
1. Go into the Windows device manager by right-clicking on
My Computer > Properties > Hardware > Device Manager > Ports (COM & LPT) to view
the COM port assignments. Knowledge of the COM port assignment for the CP210x
USB-to-UART bridge controller is required when the HyperTerminal or TeraTerm
application is started on the PC. Figure 17 shows a device manager screenshot depicting
the ML555 COM port assigned to COM3.
X-Ref Target - Figure 17
X1000_17_041408
Figure 17:
Windows Device Manager COM Port Assignment
2. To uninstall the Silicon Laboratories VCP drivers from the PC, go to
Start > Control Panel > Add or Remove Programs. Microsoft Windows searches for all
software applications installed on the PC and presents a list of installed applications for
user selection. Scroll down and select the CP210x USB to UART bridge controller driver to
be removed. If installing a newer version of the VCP driver, remove the older driver version
driver before installing a newer driver version on the PC. The reference design was
hardware-verified using version 3.1 of the Silicon Laboratories VCP driver with the
production silicon version of the ML555.
XAPP1000 (v1.0.1) May 6, 2008
www.xilinx.com
13
R
Interfacing to a Communication Terminal
Opening a HyperTerminal Console
1. On the start menu of the PC, run the HyperTerminal application by selecting
Start > All Programs > Accessories > Communications > HyperTerminal. This opens
a connection description window as show in Figure 18. Enter ML555 as the name of the
terminal connection and click OK to continue.
X-Ref Target - Figure 18
X1000_18_041408
Figure 18:
Start HyperTerminal Application on the PC
A Connect To window is displayed as shown in Figure 19.
2. Select Connect Using: COM3 (or COM4 according to the COM port assignment to the
ML555 USB interface). Click OK. Verify COM port assignment for the CP210x port review
information depicted in Figure 17, specific to end user system configuration.
X-Ref Target - Figure 19
X1000_19_041408
Figure 19:
XAPP1000 (v1.0.1) May 6, 2008
Connect Using COM4 or COM3
www.xilinx.com
14
R
Interfacing to a Communication Terminal
UART Lite COM parameters are fixed at the time of reference design compilation. A COM
Properties window is displayed (Figure 20).
3. Enter the port settings properties by selecting 9600 bits per second, 8 data bits, None for
parity, 1 stop bit and None for flow control. Click Apply and OK to open up the terminal
console on the PC. This terminal console is the user control point for the DMA initiator
reference design.
X-Ref Target - Figure 20
X1000_20_042108
Figure 20:
XAPP1000 (v1.0.1) May 6, 2008
HyperTerminal Port Settings for ML555 Communications
www.xilinx.com
15
R
Interfacing to a Communication Terminal
The port number (COM3) is displayed as shown in Figure 21.
X-Ref Target - Figure 21
X1000_21_041408
Figure 21:
Device Manager Communication Port
If there are problems with the communication terminal, review pages 35-44 of XAPP859 for a
step by step description of setting up the ML555 to use a communication terminal.
Figure 22 shows the setup of Tera Term. Using Tera Term or a similar serial communications
utility, set the TeraTerm Port, Baud Rate to 9600, Data Bits to 8, Parity to None, and Flow
Control to None.
X-Ref Target - Figure 22
X1000_22_041408
Figure 22: TeraTerm Settings
XAPP1000 (v1.0.1) May 6, 2008
www.xilinx.com
16
R
Executing the Reference System
Executing the
Reference
System
The sequence of steps to test the PLBv46 Endpoint Bridge reference system differs depending
on whether endpoint to root complex transactions or root complex to endpoint transactions are
run. For endpoint to root complex transactions, the steps must be run in the order below. For
root complex to endpoint transactions, the steps are the same, but there is no elf to download.
Change directories to the ready_for_download directory.
4. Use iMPACT to download the bitstream.
impact -batch xapp1000.cmd
5. Invoke XMD and connect to the MicroBlaze processor.
xmd
connect mb mdm
rst
6. Download the executable.
dow executable.elf
7. Write to the PLBv46 Endpoint Bridge Control Register to enable Bus Master and the BARs.
mwr 0x85C001E0 0x003F0107
8. Use the Catalyst to write the PLBv46 Endpoint Bridge Configuration Space Header.
File -> Open catalyst/cfg_x4.sdc
9. In the Catalyst GUI, click on
Run
10. From the XMD prompt, run
con
XAPP1000 (v1.0.1) May 6, 2008
www.xilinx.com
17
R
Testing the PLBv46 Endpoint Bridge
Testing the
PLBv46
Endpoint
Bridge
The system, including the interface to the LeCroy/Catalyst test equipment, is shown in
Figure 23. The root complex is the Catalyst or LeCroy test equipment, and the endpoint is the
PLBv46 Endpoint Bridge in the ML555 reference system.
X-Ref Target - Figure 23
DDR2
XPS Central DMA
MicroBlaze
M
BRAM
MPMC3
S
PLBv46 PCIe
Rx
Tx
Endpoint
Analyzer
(Catalyst or LeCroy)
Exerciser
Root Complex
(Catalyst or LeCroy)
X1000_23_041408
Figure 23:
Endpoint to
Root Complex
Transactions
PLBv46 Endpoint Bridge System Identifying Root Complex/Endpoint
Endpoint to root complex transactions are tested using XMD commands and C code. Two
software projects, pcie_dma and pcie_mch_dma, generate Direct Memory Access (DMA)
transactions which create PCIe traffic. This code provides an interface to the user which allows
the selection of the number of loops to run and the seed. The code generates and verifies
pseudo random traffic patterns on the PCIe link.
The pcie_dma.c code uses one DMA channel. The pcie_mch_dma.c code allows the
specification of 1-3 DMA channels.
The PLBv46 Endpoint Bridge Configuration Space Header (CSH) must be written for the code
to run correctly. The Catalyst and LeCroy scripts, cfg_x4.sdc and cfg_x4.peg, set up the
configuration space header of the PLBv46 Endpoint Bridge.
The Catalyst PCI Express Bus Protocol Exerciser/Analyzer has memory located at address
0x00000000. In the reference systems, the PLBv46 Endpoint Bridge generic
C_IPIFBAR2PCIBAR_0 is set to 0x00000000. This is different from the Base System Builder
(BSB) value for C_IPIFBAR2PCIBAR_0.
XAPP1000 (v1.0.1) May 6, 2008
www.xilinx.com
18
R
Endpoint to Root Complex Transactions
Figure 24 shows the selection of the pcie_dma software project.
X-Ref Target - Figure 24
X1000_24_041408
Figure 24:
XAPP1000 (v1.0.1) May 6, 2008
Selecting the pcie_dma Software Project
www.xilinx.com
19
R
Endpoint to Root Complex Transactions
pcie_dma. The pcie_dma project runs Direct Memory Access (DMA) operations. The user sets
the source address, destination address, and DMA length. The pcie_dma code is used for DMA
operations between user defined source and destination addresses. Figure 25 shows the
parameters in pcie_dma.c which are edited to test PCIe transactions between different memory
regions. The elf for pcie_dma.c runs on the MicroBlaze processor in the XC5VLX50T FPGA on
the ML555.
pcie_mch_dma. The pcie_mch_dma project runs multi-channel Direct Memory Access (DMA)
operations. The user sets the source address, destination address, and DMA length for each
channel. The pcie_mch_dma code is used for DMA operations between user defined source
and destination addresses. As with the pcie_dma code, The parameters in pcie_mch_dma.c
which can be edited to test PCI transactions between different memory regions are
DMAChannel[*].BAR. The elf for pcie_mch_dma.c runs on the MicroBlaze processor in the
XC5VLX50T FPGA on the ML555.
DMA Transactions
As examples of source and destination addresses in the DMA transactions, the source address
is an address in the ML555 XPS BRAM and the destination address is Catalyst memory across
the PCIe link. Another DMA transaction transfer is data from the source address in one location
in the Catalyst memory to a second location in Catalyst memory.
X-Ref Target - Figure 25
#define MEM_0_BASEADDR 0x8AE10000
#define MEM_1_BASEADDR 0x20000000
DMALength = 1024
X1000_25_041408
Figure 25:
Defining Source and Destination Addresses, Length in pcie_dma.c
The XMD scripts and C code generate DMA operations to transfer data between different
ML555 and Catalyst memory regions. DMA transactions are generated by writing to the
Control, Source Address, Destination Address, and Length registers of the DMA controller.
Table 4 provides the register locations for the XPS Central DMA. In the reference design,
C_BASEADDR is set to 0x80200000.
Table 4: XPS Central DMA Registers
DMA Register
XAPP1000 (v1.0.1) May 6, 2008
Address
Control Register
C_BASEADDR + 0x04
Source Address Register
C_BASEADDR + 0x08
Destination Address Register
C_BASEADDR + 0x0C
Length Register
C_BASEADDR + 0x10
www.xilinx.com
20
R
Endpoint to Root Complex Transactions
The pcie_dma.c code consists of the four functions in the functional diagram in Figure 26. The
Barberpole Region function provides a rotating data pattern in the memory located at the
source address. The Zero Region function sets the memory located at the destination address
to all zeroes. The DMA Region function generates a DMA transaction of data located at the
source address to the memory at the destination address. Following the DMA transfer, the
Verify function verifies that data at the source and destination address are equal.
X-Ref Target - Figure 26
Barberpole
Region
Zero
Region
DMA
Region
Verify
X1000_26_041408
Figure 26:
Functional diagram of pcie_dma.c
Figure 27 show the communication terminal output when running the pcie_dma/executable.elf.
X-Ref Target - Figure 27
Figure 27: pcie_dma.c output
XAPP1000 (v1.0.1) May 6, 2008
www.xilinx.com
21
R
Catalyst Testing
Catalyst Testing
This section discusses testing using Catalyst Enterprises SPX Series PCI Express
Analyzer/Exerciser system. The SPX is a serial bus Analyzer/Exerciser used to analyze and/or
exercise PCI Express data transactions. The SPX4 Analyzer consists of the SPX4 card and
Analyzer software. The Analyzer allows capture and trigger on Transaction and Data LInk Layer
Packets, Physical Layer Ordered Sets, and all bus conditions. The Exerciser generates bus
traffic while operating as either a root complex or endpoint device.
Figure 28 shows a functional diagram of the Catalyst test setup.
X-Ref Target - Figure 28
SPx4 Slot
PC
Catalyst Software
EDK/ISE
PCIe Slot
PXP-100a PCI Express DVT Platform
X1000_28_041408
Figure 28:
Catalyst Test Setup
Figure 29 is a photograph of the Catalyst setup. A x1 or x4 adaptor is attached to the ML555
PCIe edge, and the ML555 is inserted into the PCIe slot. The Platform Cable USB cable is
connected to the ML555 to use Impact, XMD, and GDB. A USB cable connects the PC based
Catalyst software to the SPX4 Analyzer.
X-Ref Target - Figure 29
X1000_29_041408
Figure 29:
XAPP1000 (v1.0.1) May 6, 2008
Photo of Catalyst PCI Express Test Equipment
www.xilinx.com
22
R
Catalyst Testing
In addition to using the Catalyst Bus Protocol Analyzer/Exerciser software discussed
extensively in this application note, the Catalyst SpekChekTM PCI Express Compliance Suite
has been run with this reference design to verify that the PLBv46 Endpoint Bridge meets PCISIG compliance tests. The SpekCheck tests are defined in the SpekChek User Manual Version
6.5.
Several tools, including Impact, XMD, and Catalyst, are used in the setup and testing of this
reference system, and their order of use can affect functionality.
After downloading the bit file into the ML555 FPGA using Impact, the Bridge Control Register
(BCR) of the PLBv46 Endpoint Bridge is written as shown in Figure 30. The BCR enables the
PCIe Bus Master and Base Address Registers (BARs).
X-Ref Target - Figure 30
X1000_30_041408
Figure 30:
XAPP1000 (v1.0.1) May 6, 2008
Writing the Bridge Control Register
www.xilinx.com
23
R
Catalyst Testing
Five tabs are used to setup the Catalyst PCIe Bus Protocol Analyzer/Exerciser. Figure 31
shows Catalyst Capture settings. The option selected is to Capture Everything except Idles.
In the Trigger On tab, select Pattern and Trigger on TLP (Any Type). Select Any Direction.
In the Settings tab, specify the name of the output ssf file.
X-Ref Target - Figure 31
X1000_31_041408
Figure 31:
XAPP1000 (v1.0.1) May 6, 2008
www.xilinx.com
Capture Settings
24
R
Catalyst Testing
Figure 32 shows the setup of the Catalyst Link Settings. The ML555 can be used with either
x1 or x4 lane width. This application note uses x4 lane width. Select the Platform mode (hidden
behind the Link Status pane). Click on the Link Status button to invoke the Link Status pane
displayed. The figure shows a Link Width = 4, so the link is up and trained as x4.
X-Ref Target - Figure 32
X1000_32_041408
Figure 32: Catalyst Link Settings
XAPP1000 (v1.0.1) May 6, 2008
www.xilinx.com
25
R
Catalyst Testing
Figure 33 is a graphical view of the stimuli for configuring the PLBv46 Endpoint Bridge,
including BAR 0. The ml555_mb_plbv46_pcie/catalyst directory contains the
cfg_x4.sdc stimuli file. The cfg_x4.sdc project is loaded using the File -> Open pull down menu.
The *.sdc files are readable text files which contains the transactions used as stimuli.
In cfg_x4.sdc, the Device ID/Vendor ID is read. The Command Status register is written and
read. The Revision ID and Class Code register is read.
In the figure, the Name column provides the type of transaction and the Reg Num column
specifies the register in the Configuration Space Header.
BAR0 is written and read. BAR0 is a 64-bit BAR with the lower 32-bits defined at Configuration
Space Header (CSH) Register Number 4 and the higher 32-bits defined at CSH Register
Number 5.
Packets 10 and 11 are Configuration Writes and packets 12 and 13 are Configuration Reads.
In the Data field in packet 10, the endianess of the data written is swapped
X-Ref Target - Figure 33
X1000_33_041408
Figure 33:
XAPP1000 (v1.0.1) May 6, 2008
Catalyst Configuration Stimuli
www.xilinx.com
26
R
Catalyst Testing
Figure 34 shows the Analyzer output after running cfg_x4. The results are contained in the
cfg_x4.ssf file. Registers in the Configuration Space Header are displayed in packet 0 using
Vendor ID and Device ID symbolic names, with Xilinx 0x10EE and 0x0505 values. The
Command Status Register is read. The SC in the status field indicates successful completion of
the transaction. In the figure, the Revision ID and Class Code Register field is expanded to
provide a readable table of the values in the Data field.
X-Ref Target - Figure 34
X1000_34_041408
Figure 34:
XAPP1000 (v1.0.1) May 6, 2008
Results from Catalyst Configuration
www.xilinx.com
27
R
Catalyst Testing
Figure 35 shows an excerpt of the Exerciser cfg_x4.sdc file. The file contains the stimuli TLPs.
While it is generally easier to read and edit the TLPs using the Catalyst Display Viewer, the text
file is readable and editable, and more details are provided than can be efficiently presented in
the Display Viewer. The figure shows the content of a single Configuration Read TLP.
X-Ref Target - Figure 35
Packet_Type = “Config Read T0”
Framing_Symbol1 = “FB”
Reserved_1 = “0”
Sequence_Number = “000”
Reserved_2 = “0”
Format = “0”
Type = “04”
Reserved_3 = “0”
TC = “0”
Reserved_4 = “0”
TD = “0”
EP = “0”
Attribute = “0”
Reserved_5 = “0”
Length = “001”
Requester_ID = “0000”
Tag = “00”
Last_DW_BE = “0”
First_DW_BE = “F”
Bus_Number = “00”
Device_Number = “00”
Function_Number = “0”
Reserved_6 = “0”
Register_Address = “000”
Reserved_7 = “0”
TLP_Digest = ““
LCRC = “2AC19647”
Framing_Symbol2 = “FD”
Loop_Type = “No_Loop”
Loop_Count = ““
Iterate_After_Trigger = “No”
Delay_Count = “0”
Trigger_Source = “Immediate_Execution”
Disparity_Error = “No”
ZData = “10000000000000000001”
Symbol_View = “Collapse”
Trigger_Output = “No”
Trigger_Output_Type = “Pulse”
Global_Loop
X1000_35_041408
Figure 35: sdc_example
XAPP1000 (v1.0.1) May 6, 2008
www.xilinx.com
28
R
Catalyst Testing
As Root Complex, the Catalyst Exerciser performs memory writes and memory reads to the
ML555 memory. The ML555 reference design contains XPS BRAM and a Multiported Memory
Controller (MPMC) interface to DDR2. Figure 36 shows the memory addressing for Root
Complex (Catalyst) to Endpoint (ML555) transactions.The memory addressed is controlled by
the BAR value written and by the C_PCIBAR2IPIFBAR_* generic(s). In the reference design,
BAR0 is written as 0x0000000060000000. C_PCIBAR2IPIFBAR_0 addresses XPS BRAM at
0x8AE10000, and C_PCIBAR2IPIFBAR_1 addresses DDR2 at location 0x90000000.
X-Ref Target - Figure 36
ML555
XPS
BRAM
0x8AE10000
PLBv46 PCIe
Catalyst
PCIe x4
C_PCIBAR2IPIFBAR0 = 0X8AE10000
C_PCIBAR2IPIFBAR1 = 0X90000000
MPMC/DDR2
0x90000000
Root Complex
End Point
Figure 36:
X1000_36_041408
Catalyst Root Complex
Figure 37 shows the write then read TLPs in the wr_rd_x4.sdc file. In the figure, Packet 0 is a
MWr64 to address 0x0000000060000000 of 128 bytes. The Data Field allows the user to
specify data as Upcount, Walking Bit, or Random pattern, or a user defined pattern such as
0x12345678 can be entered. As exercises in learning to use the PLBv46 Endpoint Bridge, the
data can be varied, and the memory written/read can be changed from XPS BRAM to DDR2.
The Length field is 020H which is 32 doublewords (DWs) or 128 bytes.
Packet 1 is a MRd64 of address 0x0000000060000000, used to verify the written data. The
MRd64 TLP address endianess differs from the CfgWr address endiness used when the BAR
was written with a CfgWr in Figure 33. Bit Order and Endianess can be defined by right clicking
a field to invoke a pop up menu.
X-Ref Target - Figure 37
X1000_37_041408
Figure 37:
XAPP1000 (v1.0.1) May 6, 2008
www.xilinx.com
wr_rd_x4 TLP Stimuli
29
R
Catalyst Testing
Figure 38 shows the results after running a version of wr_rd_x4.sdc in which a pattern of
0xAA55AA55AA55AA55 is transmitted followed by a pattern of 0x1234567812345678.
X-Ref Target - Figure 38
X1000_38_041808
Figure 38:
XAPP1000 (v1.0.1) May 6, 2008
Catalyst wr_rd_x4 Results
www.xilinx.com
30
R
Using Catalyst to test PCIe Performance
Figure 39 shows the use of XMD to read ML555 DDR2 memory to provide a second verification
that the wr_rd_x4.sdc script functioned as intended. The data read in XMD should be the same
as the data in the Analyzer waveform display.
X-Ref Target - Figure 39
X1000_23_041408
Figure 39:
Using Catalyst
to test PCIe
Performance
Verifying Root Complex to Endpoint Transactions with XMD
Catalyst is used for performance testing. This section provides performance tests for Root
Complex to Endpoint transactions, first for read transactions and then for write transactions.
The test setup is defined and then performance results are given for various lengths for 32 and
64 bit transactions.
Figure 40 shows the physical link setup for the performance test. For the
ml555_mb_plbv46_pcie project, change the Physical Layer Settings Link Width to x4.
X-Ref Target - Figure 40
X1000_40_041408
Figure 40:
XAPP1000 (v1.0.1) May 6, 2008
Performance Test Physical Settings
www.xilinx.com
31
R
Using Catalyst to test PCIe Performance
Root Complex to Endpoint Performance Tests
To setup the performance test, the ML555 is inserted into the Catalyst. The bitstream is
downloaded into the FPGA. Use XMD to write 0x003F0107 to the PLBv46 Endpoint Bridge
Bridge Control Register to enable the bus master and the Base Address Register(s).
Root Complex to Endpoint Read Operations
Figure 41 shows the opening of the rc2ep_rd64 performance project. Performance projects use
the spf extension.
X-Ref Target - Figure 41
X1000_41_041408
Figure 41:
Opening a Catalyst Performance Test
The four tabs used in performance projects are the Exercise Program, Performance Items, Link
Settings, and Settings. In Performance Items, the type of performance tests run are defined.
The PCIe traffic used in the performance measurement is defined in the Exercise Program.
XAPP1000 (v1.0.1) May 6, 2008
www.xilinx.com
32
R
Using Catalyst to test PCIe Performance
Figure 42 shows a single TLP used in the performance measurements of Rd64 transactions of
length = 003. Click the TLP button below Performance Items to add the TLP to the Exercise
Program. Using the pop up menu, select Memory → Read Request 64 bits. Fill out the
address and Len fields. Select the Continuous radio button so that the TLP is continuously
transmitted.
X-Ref Target - Figure 42
X1000_42_041408
Figure 42:
Defining MRd64 Performance Stimuli
The next two figures show the performance results of MRd64 transactions, varying the length of
the TLP. The single continuously transmitted TLP stimuli just defined is shown in the pane at the
bottom of the figure. The left pane is a Link Chart which provides the average payload size. The
right pane is a Link Chart which provides the data throughput and the payload throughput.
In the Performance Items tab, Link Usage, Number of Packets, and Latency are unchecked.
Under Report Directions, Aggregate is checked.
In the following tests, Data Throughput is the overall bus traffic of all non-idle packets divided by
the update interval. Payload Throughput is the payload data of TLPs divided by the update
interval. The update interval, defined in the Settings tab, for performance measurements in this
document is 1 s.
The MRd performance is the round trip time including the MRd command and the Completion
with Data packet.
XAPP1000 (v1.0.1) May 6, 2008
www.xilinx.com
33
R
Using Catalyst to test PCIe Performance
Figure 43 shows the performance results of a MRd64 TLP of length 10. The data and payload
throughput are 314.2 MB/s and 163.9 MB/s.
X-Ref Target - Figure 43
X1000_43_041408
Figure 43:
XAPP1000 (v1.0.1) May 6, 2008
MRd64 Performance Results - Length = 10
www.xilinx.com
34
R
Using Catalyst to test PCIe Performance
Figure 44 shows the performance results of a MRd64 TLP of length 100. The data and payload
throughput are 298.5MB/s and 215.1MB/s.
X-Ref Target - Figure 44
X1000_48_041408
Figure 44:
MRd64 Performance Results - Length = 100
The maximum length TLP which can be measured by the Catalyst software at the time of this
measurement is 400 bytes.
XAPP1000 (v1.0.1) May 6, 2008
www.xilinx.com
35
R
Using Catalyst to test PCIe Performance
Figure 45 shows the performance of MRd32 transactions of length = 3.The data and payload
throughput are 114.6MB/s and 15.4 MB/s.
X-Ref Target - Figure 45
X1000_45_041408
Figure 45:
XAPP1000 (v1.0.1) May 6, 2008
MRd32 Performance Results - Length = 3
www.xilinx.com
36
R
Using Catalyst to test PCIe Performance
Root Complex to Endpoint Write Transactions
Figure 46 shows a write transaction. The length field is set to 020H or 128 bytes. The data
written is an Upcount pattern. The Continuous radio button is selected.
X-Ref Target - Figure 46
X1000_46_041408
Figure 46:
XAPP1000 (v1.0.1) May 6, 2008
MWr64 Performance Results, Length = 20
www.xilinx.com
37
R
Using Catalyst to test PCIe Performance
Figure 47 shows the performance results from running a continuous MWr32 transaction. The
data and payload throughput are 508.4 MB/s and 391.3 MB/s.
X-Ref Target - Figure 47
X1000_47_041408
Figure 47:
XAPP1000 (v1.0.1) May 6, 2008
MWr32 Performance Results, Length = 20
www.xilinx.com
38
R
Endpoint to Root Complex Transactions
Endpoint to
Root Complex
Transactions
This section measures the performance of Endpoint to Root Complex transactions. The stimuli
for these transactions are generated using the Xilinx XPS Central DMA Controller in the
reference system. The functionality of the DMA controller is discussed earlier in this application
note. The DMA transaction is from the address specified in the DMAC Source Address register
to the address specified in the DMAC Destination Address register. The length of the DMA
transaction is specified by the value in the DMAC Length register.
Prior to generating the stimuli, the performance test is set up. Figure 48 shows the importing of
the performance test setup file catalyst/pcie_dma.spf. The throughput measurements in
this application note are aggregate throughput.
X-Ref Target - Figure 48
X1000_48_041408
Figure 48:
XAPP1000 (v1.0.1) May 6, 2008
Importing Performance Test Setup
www.xilinx.com
39
R
Endpoint to Root Complex Transactions
To generate stimuli, either C code or an XMD script is used to write the DMAC registers.
Figure 49 shows an XMD script to generate stimuli. Using XMD scripts and commands allows
the relatively quick verification that the operation is functioning correctly. After running a DMA
operation, a mrd command can be used to verify that the data in the source and destination
regions are equivalent. XMD commands may be too slow to give maximum performance
results.
The DMA Status Register is monitored to determine if the DMAC is Busy. When it is not busy,
a DMA transaction is initiated by a write to the DMAC Length register.
X-Ref Target - Figure 49
set outfile [open "dma.txt" "w"]
connect mb mdm
rst
puts $outfile [mwr 0x85C001E0 0x003F0107]
puts $outfile [mwr 0x80200000
puts $outfile [mwr 0x80200030
puts $outfile [mwr 0x80200004
puts $outfile [mwr 0x80200008
puts $outfile [mwr 0x8020000C
0x0000000A]
0x00000003]
0xC0000004]
0x20000000]
0x20002000]
puts $outfile [mwr 0x20000000 0x12345678 100]
puts $outfile [mwr 0x20002000 0x0 100]
set DMASR [mrd 0x80200014 1]
set DMASR_BUSY 0x40000000
puts $outfile "DMA Status Register = $DMASR"
#while {1} {
for {set i 1} {$i<1000} {incr i} {
if {$DMASR != $DMASR_BUSY} {
puts $outfile [mwr 0x80200010 64]
}
}
puts $outfile [mrd 0x20000000
puts $outfile [mrd 0x20002000
100]
100]
close $outfile
exit
X1000_49_041408
Figure 49:
XAPP1000 (v1.0.1) May 6, 2008
www.xilinx.com
dma.tcl
40
R
Endpoint to Root Complex Transactions
Figure 50 shows the Catalyst SPX4 Analyzer/Exerciser output after running the ep2rc_*.spf
performance analyzer project. The payload throughput depends on various factors such as the
size of the transfer, if print statements are included in the source code, and if the verification is
included in the source code. For this run, all print statements are removed, there is no
verification, and length is set to 20. This is a hex value of doublewords, so the TLP lenght is 128
bytes. The transfer is from XPS BRAM to Catalyst memory across the PCIe link. The data
throughput is 19.0 MB/s and the payload throughput is 8.3 MB/s.
X-Ref Target - Figure 50
X1000_50_041408
Figure 50:
XAPP1000 (v1.0.1) May 6, 2008
EP to RC Performance - Length = 20
www.xilinx.com
41
R
LeCroy Testing
Figure 51 shows the performance of an Endpoint to Root Complex transaction using C code
(pcie_dma_0.c) to generate stimuli with the length = 200. The data throughput is 61.8 MB/s and
the payload throughput is 36.8 MB/s. In this test, the Source Address is XPS BRAM, which is
0x8AE10000, and the Destination Address is written to 0x20000000, which translates to
Catalyst memory, across the PCIe link.
X-Ref Target - Figure 51
X1000_51_041408
Figure 51:
LeCroy Testing
EP to RC Performance - Length = 200
Use the LeCroy - ML555 test setup shown in Figure 52 to verify the PLBv46 Endpoint Bridge
using the LeCroy tester as root complex, including configuration and data transactions. The
ML555 is inserted into the host emulator.
The ml555_mb_plbv46_pcie/lecroy directory contains the stimuli files which use peg as
the filename extension.
This section discusses the procedures used in setting up the LeCroy, including defining the
Recording and Generation Options. Root Complex to Endpoint transactions are discussed,
followed by a section on Endpoint to Root Complex transactions.
X-Ref Target - Figure 52
SPx4 Slot
PC
Catalyst Software
EDK/ISE
PCIe Slot
PXP-100a PCI Express DVT Platform
X1000_52_041408
Figure 52:
XAPP1000 (v1.0.1) May 6, 2008
www.xilinx.com
LeCroy Test Setup
42
R
LeCroy Testing
Figure 53 is a photograph of the LeCroy test setup. The ML555 is inserted into the LeCroy Host
Emulator. The Platform Cable USB Programming cable is connected to the ML555 JTAG
connector.
X-Ref Target - Figure 53
X1000_53_041408
Figure 53:
XAPP1000 (v1.0.1) May 6, 2008
www.xilinx.com
LeCroy Test Equipment
43
R
LeCroy Testing
Figure 54 shows the menu for setting Generation Options after selecting Setup -> Generation
Options.
The LeCroy ML test equipment is selected. Link Width is specified as x4. Select Host as the
Interposer.
X1000_54_041408
X-Ref Target - Figure 54
Figure 54:
XAPP1000 (v1.0.1) May 6, 2008
Setting Generation Options
www.xilinx.com
44
R
LeCroy Testing
Figure 55 shows the menu for setting Recording Options after selecting Setup -> Recording
Options. The Simple Mode is used. An Event Trigger is selected.
The Buffer Size is specified as 32 MB and the Trigger Position is set at 90% post triggering.The
x4 Lane Width is selected.
X-Ref Target - Figure 55
X1000_55_041408
Figure 55:
XAPP1000 (v1.0.1) May 6, 2008
Setting Recording Options
www.xilinx.com
45
R
LeCroy Testing
Figure 56 shows using File → Open to open a LeCroy stimuli (peg) file.
The LeCroy PETracer software provides the interface to the PETracer (Analyzer) and PETrainer
(Exerciser). To run an analysis, click on the Record icon (the Sun) in the menu bar. Click the
Traffic Light icon at the bottom left of the GUI. After the status bar indicates Traffic Finished,
click the Stop icon (black filled square next to the Sun). This causes results to be shown in the
Display area. Results files have a pex extension. Like peg files, pex files can be opened using
File -> Open.
X-Ref Target - Figure 56
X1000_56_041408
Figure 56:
XAPP1000 (v1.0.1) May 6, 2008
Opening a LeCroy PEG File
www.xilinx.com
46
R
LeCroy Testing
Figure 57 shows the use of XMD to enable the PLBv46 Endpoint Bridge Bridge Control
Register. The BCR enables the Bus Master and Base Address Registers (BARs).
X-Ref Target - Figure 57
X1000_57_041408
Figure 57: Using XMD Commands to Write the Bridge Control Register
After generation and recording options are specified and the BCR is written, the link must be
trained. The Link State is displayed at the bottom of the PETracer GUI. Prior to training, the Link
State is displayed as Detect.Quiet as shown at the bottom of Figure 56. After training, the Link
State is displayed as L0. To initiate training, click on the Connect icon. To disable a trained link,
click on the Disconnect icon.
XAPP1000 (v1.0.1) May 6, 2008
www.xilinx.com
47
R
LeCroy Testing
Figure 58 shows that the LeCroy - ML555 PLBv46 Endpoint Bridge link is trained with the
LTFSM in L0. If the clocking and resets are correct, link training occurs in less than one second.
If link training is unsuccessful, the LTFSM cycles through training states.
X-Ref Target - Figure 58
X1000_58_041408
Figure 58:
XAPP1000 (v1.0.1) May 6, 2008
LeCroy After Link Trained
www.xilinx.com
48
R
LeCroy Testing
Root Complex to Endpoint Transactions
As Root Complex, the LeCroy Trainer generates memory writes and memory reads to the
ML555 memory. The ML555 reference design contains XPS BRAM and an MPMC interface to
DDR2. Figure 59 shows the memory addressing for Root Complex (Catalyst) to Endpoint
(ML555) transactions.The memory addressed is controlled by the BAR value written and by the
C_PCIBAR2IPIFBAR_* generics. In the reference design, PCI BAR0 is written as
0x0000000060000000. C_PCIBAR2IPIFBAR_0 addresses XPS BRAM at 0x8AE10000, and
C_PCIBAR2IPIFBAR_1 addresses DDR2 at location 0x90000000.
X-Ref Target - Figure 59
ML555
XPS
BRAM
PLBv46 PCIe
LeCroy
PCIe x4
0x8AE10000
C_PCIBAR2IPIFBAR0 = 0x8AE10000
C_PCIBAR2IPIFBAR1 = 0x90000000
MPMC/DDR2
0x90000000
Root Complex
End Point
Figure 59:
X1000_59_041408
LeCroy Complex
The display area shows the TLPs defined in the peg file. Figure 60 shows an excerpt from the
lc_rc2ep_wr_rd.peg file. The lc_rc2ep_wr_rd.peg shown is writes FFFFFFFFs to the six BAR
registers in the Configuration Space header. This is done using the Repeat construct. The first
register written is BAR0, located at offset 0x10.
X-Ref Target - Figure 60
X1000_60_041408
Figure 60: RC to EP Write/Read Test
XAPP1000 (v1.0.1) May 6, 2008
www.xilinx.com
49
R
LeCroy Testing
The next figures show BAR0 configuration packets, followed by write then read operations on
BAR0.
Figure 61 shows the configuration of BAR0 and the read, write, and read transactions. The
address of BAR0 is 0x0000000060000000. Packet 0 is a CfgWr of the lower order address
and packet 2 is a CfgWr of the higher order address. Packets 4 and 5 use CfgRd TLPs to verify
the configuration writes. Packets 6, 7, and 8 are MRd32, MWr32, and MRd32 TLPs used to
read and write BAR0 memory.
Double click on the Data field in packet 7 to display the 1234678 value.
The endianess of the address in the CfgWr0 TLP differs from the endianess of the address in
the MWr32 and MRd32 TLPs.
X-Ref Target - Figure 61
X1000_61_041408
Figure 61: Configuring and Testing BAR0
XAPP1000 (v1.0.1) May 6, 2008
www.xilinx.com
50
R
LeCroy Testing
Figure 62 shows the results after running rc2ep_cfg_wr_rd_bar0.peg. Packet 9 is a MWr32 of
0x12345678 to address 0x0000000060000000. This address is translated using the
generic C_PCIBAR2IPIFBAR0 to the XPS BRAM at 0x8AE10000. In packet 12, the data value
0x12345678 is returned in the CplD packet.
The status fields indicate Successful Completion (SC).
X-Ref Target - Figure 62
X1000_62_041808
Figure 62:
BAR0 Test Results
Figure 63 shows the verification of the Endpoint to Root Complex PCIe transactions using
XMD. In the system.mhs, the PLBv46 Endpoint Bridge generic C_PCIBAR2IPIFBAR0 is
0x8AE10000, the location of XPS BRAM. This shows that the 0x12346578 written by the
LeCroy Root Complex MWr64 TLP is resident in XPS BRAM.
X-Ref Target - Figure 63
X1000_63_041408
Figure 63:
XAPP1000 (v1.0.1) May 6, 2008
XMD Verification of BAR0 Tests
www.xilinx.com
51
R
LeCroy Testing
Figure 64 shows an excerpt of a peg file.
The peg file used as stimuli in LeCroy transactions is readable and editable. In the figure,
templates are defined for Configuration Write and Configuration Read TLPs. The Configuration
Write template is called in the repeat loop to write FFFFFFFFs to the six Configuration Space
Header BARs.
The peg files in ml555_mb_plbv46_pcie/lecroy can be used to test the PLBv46 Endpoint
Bridge on the ML555.
X-Ref Target - Figure 64
template = TLP{
Name = “MyCfgWrite”
; Template name
TlpType = CfgWr0
; Write device Configuration Space
FirstDwBe = 0xF;
First DW Byte Enables
Length = 1
;1 DWORD
Payload = ( 0xFFFFFFFF )
template = TLP
{
Name = “MyCfgRead”
; Template name
TlpType = CfgRd0
; Read device Configuration Space
FirstDwBe = 0xF; First DW Byte Enables
Length = 1
; 1 DWORD
}
; Enumerate all 6 Base Address registers
repeat = Begin { Count = 6 Counter = i }
; Write 0xFFFFFFFF into Base Address register
packet = “MyCfgWrite” {
Register = ( 0x10 + i * 4 )
; Wait for completion received
wait = TLP {
TLPType = Cpl
}
; Read Base Address register
packet = “MyCfgRead” {
Register = ( 0x10 + i * 4 )
}
; Wait for completion received
wait = TLP {
TLPType = CplD
}
repeat = End
X1000_64_041408
Figure 64:
XAPP1000 (v1.0.1) May 6, 2008
www.xilinx.com
PEG Example
52
R
LeCroy Testing
Endpoint to Root Complex Transactions
In Endpoint to Root Complex transactions, the read and write operations originate from the
ML555 and target the LeCroy. The LeCroy model used in this application note (ML) does not
have target memory. For read operations, the peg files are written to respond with read data.
Invoke PETracer and run File → Open lecroy/ep2rc_mrd32_1dw.
Endpoint to Root Complex transactions are generated with XMD commands or C code. Since
the MWr and MRd TLPs originate from the ML555, the LeCroy peg files cause the LeCroy to
wait for the TLP(s) from the ML555. Figure 65 shows the peg for the EP to RC MRd32. The
LeCroy waits for the MRd32 packet from the ML555. When the MRd32 packet is received, the
LeCroy returns a Completion with Data (CplD) packet with a 0x12345678 payload.
X-Ref Target - Figure 65
wait = TLP {TLPType = MRd32 }
Packet=TLP {TLPType=CplD CompleterID = (0:1:0)
Length = 1 ByteCount = 0 LowerAddr = 0x00
Payload = (0x12345678)}
X1000_65_041408
Figure 65:
ep2rc_mrd32
Figure 66 defines the functionality of the LeCroy Root Complex when receiving a MRd32
transaction from the PLBv46 Endpoint Bridge endpoint on the ML555.
X-Ref Target - Figure 66
X1000_66_041408
Figure 66:
XAPP1000 (v1.0.1) May 6, 2008
EP to RC MRd32 Test Stimuli (1 DW)
www.xilinx.com
53
R
LeCroy Testing
Figure 67 shows results from running the EP to RC memory read. The peg is loaded. Start
recording by clicking on the Sun icon in the menu bar. Click the Traffic Light icon. Generate a 1
doubleword read using XMD.
mrd 0x20000000 1
Click the Black Square icon to stop recording and view the results.
X-Ref Target - Figure 67
X1000_67_041408
Figure 67:
EP to RC MRd32 Test Results (1 DW)
Figure 68 shows the ep2rc_mrd32_4dw.peg for a four doubleword Endpoint to Root Complex
MRd32.
X-Ref Target - Figure 68
X1000_68_041408
Figure 68:
XAPP1000 (v1.0.1) May 6, 2008
EP to RC MRd32 Test Stimuli (4 DW)
www.xilinx.com
54
R
LeCroy Testing
Figure 69 shows results from running the XMD command below.
mrd 0x20000000 4
X-Ref Target - Figure 69
X1000_69_041408
Figure 69:
EP to RC MRd32 Test Results (4 DW)
Endpoint to Root Complex Write Transactions
Figure 70 shows the peg for the EP to RC MWr32. As with EP to RC memory reads, start
recording by clicking on the Sun icon, and then click on the traffic light.
X-Ref Target - Figure 70
wait = TLP {
TLPType = MWr32
}
X1000_70_041408
Figure 70: ep2rc_wait_mwr32.peg
Figure 71 shows LeCroy Root Complex setup for analyzing an Endpoint to Root Complex
MWr32 operation.
X-Ref Target - Figure 71
X1000_71_041408
Figure 71:
XAPP1000 (v1.0.1) May 6, 2008
EP to RC - Write Operation
www.xilinx.com
55
R
LeCroy Testing
The xmd command below generates the stimuli for the PLBv46 Endpoint Bridge to transmit the
TLP.
mwr 0x20000000 0x12345678
Figure 72 shows the Analyzer output for an EP to Root Complex Memory Write of 0x1234567.
X-Ref Target - Figure 72
X1000_72_041408
Figure 72:
EP to RC Write Results
The write operation is easily varied using XMD. The XMD command below writes eight
locations.
mwr 0x20000000 0x12345678 8
XAPP1000 (v1.0.1) May 6, 2008
www.xilinx.com
56
R
LeCroy Testing
Figure 73 shows the results from running the eight doubleword Endpoint to Root Complex write
transaction.
X-Ref Target - Figure 73
X1000_73_041408
Figure 73:
XAPP1000 (v1.0.1) May 6, 2008
EP to RC Write Results - 8 DW
www.xilinx.com
57
R
Testing with a PC
Testing with a
PC
Using a Personal Computer (PC) as Root Complex (RC) is an inexpensive method of verifying
PLBv46 Endpoint Bridge functionality. PCItree and the Memory Endpoint Test (MET) run on
PCs. Figure 74 shows the ML555 in a Dell 390 PC. The PC PCIe integrated circuit(s) act as
root complex. The Dell 390 has a x1 connector for PCIe slot 1 and a x8 connector for PCIe slot
4. In the Dell 390, only 4 of the 8 lanes of the x8 connector are active. The Dell 390 runs
Windows XP which has ISE, EDK, and PCItree installed.
The USB Platform Cable is connected to the ML555 JTAG port for Impact, XMD, and
ChipScope operations. A Type A to Type B USB cable is used for communicating to a
communication terminal. In the tests described in this section, the ML555 PCI/PCI Express
Development Platform is inserted into a Dell 390 x8 slot for the ml555_mb_plbv46_pcie project.
X-Ref Target - Figure 74
X1000_74_041408
Figure 74:
PC Test Environment
The ML555 receives power from the PCIe slot, and the power up sequence of the PC affects
the PCIe scan. In order for BIOS to recognize the drivers and PCIe BARs at power up, the
FPGA bit file should be loaded prior to PC power up.
Xilinx recommends writing the XCF32P PROM so that configuration occurs at power up. Xilinx
recommends the use of Master SelectMap mode for configuration.
Configuring the ML555 XC5VLX50T when used in a PC PCIe Slot
The ml555_mb_plbv46_pcie/ready_for_download/ml555_mb_plbv46_pcie.mcs is
the configuration file for this reference design. Because Xilinx recommends configuring from
the PROM, the next figures outline the steps for creating a mcs for the ML555. Users
generating the PROM file for the first time should reference the detailed instructions provided
on pages 101 - 108 of UG201 (v1.4) Virtex-5 FPGA ML555 Development Kit for PCI and PCI
Express Designs.
XAPP1000 (v1.0.1) May 6, 2008
www.xilinx.com
58
R
Testing with a PC
Figure 75 shows the ML555 Boundary Scan chain. The first XCF32P is used to configure the
FPGA. Right clicking on the XCF32P invokes the Prepare PROM GUI.
X-Ref Target - Figure 75
X1000_75_041408
Figure 75:
XAPP1000 (v1.0.1) May 6, 2008
ML555 Boundary Scan Chain
www.xilinx.com
59
R
Testing with a PC
Provide the PROM file name as shown in Figure 76.
X-Ref Target - Figure 76
X1000_76_041408
Figure 76:
XAPP1000 (v1.0.1) May 6, 2008
www.xilinx.com
Defining the PROM File
60
R
Testing with a PC
Specify the XCF32P PROM as shown in Figure 77.
X-Ref Target - Figure 77
X1000_77_041408
Figure 77:
XAPP1000 (v1.0.1) May 6, 2008
Specifying the XCF32P PROM
www.xilinx.com
61
R
Testing with a PC
Select the bit file (download.bit) as shown in Figure 78.
X-Ref Target - Figure 78
X1000_78_041408
Figure 78:
XAPP1000 (v1.0.1) May 6, 2008
www.xilinx.com
Specifying the Bit File
62
R
PCItree Testing
Select Generate File. The generated MCS file is shown in Figure 79.
X-Ref Target - Figure 79
X1000_79_041408
Figure 79:
Selecting Generate File
The recommended configuration mode is Master SelectMap, which is specified when the
configuration Mode Switch (SW5) should be set to M0-0 (ON), M1-0, M2-1.
Use Impact to download the mcs file into the ML555 XCF32 PROM. Select the XCF32P, left
click to invoke a menu, and select Program. Under the Programming Properties menu, check
Parallel Mode under the PROM Specific Properties.
Insert the ML555 into the PCIe slot and power-on the PC. Verify that the DONE LED lights.
It is possible to configure the FPGA after PC power up using the JTAG mode, but a warm reset
is usually required for the ML555 PLBv46 Endpoint Bridge to be recognized in a PCI scan. A
warm reset is a PC Shutdown with Restart.
PCItree Testing
PCItree is shareware available from http://www.pcitree.de. It runs on Windows XP. PCItree can
be used for either PCI or PCIe tests. In the tests described in this section, the ML555 PCI/PCI
Express Development Platform is inserted into a Dell 390 x8 slot for the
ml555_mb_plbv46_pcie project.
Invoke XMD and enable the master and the BARs by writing to the PLBv46 Endpoint Bridge
Bridge Control Register.
mwr 0x85C001E0 0x003F0107
XAPP1000 (v1.0.1) May 6, 2008
www.xilinx.com
63
R
PCItree Testing
Figure 80 shows the XMD output when the PLBv46 Endpoint Bridge configuration space
header registers are read. At power-up, the Device ID is 0x0505 and the Vendor ID is 0x10EE.
BAR0 is 0x0000000C.
X-Ref Target - Figure 80
X1000_80_041408
Figure 80:
XAPP1000 (v1.0.1) May 6, 2008
XMD Read of PLBv46 Endpoint Bridge Registers
www.xilinx.com
64
R
PCItree Testing
After invoking PCItree and running a scan, Figure 81 shows the ML555 PLBv46 Endpoint
Bridge detected as Other; Memory Controller, with Bus Number 3, Device Number 0,
Function Number 0, or BDF = 3.0.0.The Xilinx Vendor ID and Device ID are displayed. In its
Configuration Space Header, BAR0 has a value of 0x0000000C.
X-Ref Target - Figure 81
X1000_81_041408
Figure 81:
PCItree Scan
To edit the registers in the Configuration Space Header (CSH), highlight the register in the CSH
to edit and provide a value in the Edit ConfReg dialog box. As an example, select the
Command Status Register, write 0xFFFFFFFF in the Edit ConfReg dialog box, click Write
ConfReg, and click Refresh Dump to see the new value of the Command Status Register
(CSR) displayed. The new value of the CSR is not 0xFFFFFFFF as some of the CSR bits are
reserved.
XAPP1000 (v1.0.1) May 6, 2008
www.xilinx.com
65
R
PCItree Testing
Click BAR0 and use the edit ConfReg dialog box to change the BAR0 value to xE000000C.
Click Write ConfReg and then Refresh Dump. The new value of BAR0 is displayed. Figure 82
shows the value of BAR0 re-defined to 0xE000000C.
X-Ref Target - Figure 82
X1000_82_041408
Figure 82:
XAPP1000 (v1.0.1) May 6, 2008
www.xilinx.com
Defining BAR0 in PCItree
66
R
PCItree Testing
Figure 83 is XMD output which shows that BAR0 has been written as 0xE000000C. The XMD
mrd also shows that the data in the initial 8 addresses in XPS BRAM is 0x00000000.
X-Ref Target - Figure 83
X1000_83_041408
Figure 83:
XAPP1000 (v1.0.1) May 6, 2008
XMD showing the Configuration Space Header, XPS BRAM
www.xilinx.com
67
R
PCItree Testing
Figure 84 shows the memory test for PCI tree. To run the memory test, click on Mem Test at
the lower left of the BAR Space GUI. Check Auto Read Memory at the top of the BAR Space
GUI to display memory values in the left side of the display. To edit a memory location, highlight
the location to be edited, and enter the value in the Edit memory dialog box. Click Write
Memory. To view the results, click on the Refr. View icon.
X-Ref Target - Figure 84
X1000_84_041408
Figure 84:
XAPP1000 (v1.0.1) May 6, 2008
Running PCItree Memory Test
www.xilinx.com
68
R
PCItree Testing
Figure 85 shows the results of running the memory test. The leftmost column shows the count
pattern used for data. The count increments for even addresses and decrements on odd
addresses. With the PCItree read of BAR0, the data is the count value specified in the PCItree
memory test.The results (No Errors) are provided.
X-Ref Target - Figure 85
X1000_85_041408
Figure 85:
PCItree Memory Test Results
The ML555 memory written/read is the BRAM and/or DDR2 defined in the system.mhs and
addressed with the PLBv46 Endpoint Bridge C_PCIBAR2IPIFBAR_* generics. In this
reference system, two PLBv46 Endpoint Bridge BARs are active. The C_PCIBAR2IPIFBAR_0
generic points to the ML555 BRAM located at 0x8AE10000.
After writing the ML555 BRAM using PCI tree Edit Memory, XMD can be used to verify BRAM
(or DDR2 if the BAR is enabled) from the PLBv46 side.
XAPP1000 (v1.0.1) May 6, 2008
www.xilinx.com
69
R
PCItree Testing
Figure 86 shows verification that the XPS BRAM contains the data written by PCItree using
XMD commands.
X-Ref Target - Figure 86
X1000_86_041408
Figure 86:
XMD Verification of PCItree Write Operation
In the next two figures, XMD is used to write XPS BRAM, which is then re-read by PCItree.
Figure 87 shows the writing and reading of 0x12345678 to the first four locations in XPS
BRAM.
X-Ref Target - Figure 87
X1000_87_041408
Figure 87:
XAPP1000 (v1.0.1) May 6, 2008
Writing XPS BRAM using XMD
www.xilinx.com
70
R
Memory Endpoint Test
Figure 88 shows a PCItree read of XPS BRAM. The first four locations are read as
0x12345678.
X-Ref Target - Figure 88
X1000_88_041408
Figure 88:
Memory
Endpoint Test
PCItree Read of XPS BRAM
The Memory Endpoint Test (MET) is run on a PC with the ML555 inserted into a PCIe slot. MET
provides a simple method of writing and reading memory. Like PCItree, the ML555 memory
written/read is the BRAM and/or DDR2 defined in the system.mhs, and addressed with the
PLBv46 Endpoint Bridge C_PCIBAR2IPIFBAR_* generics.
The MET requires the installation of the Xilinx Virtex-5 PCIe Endpoint Driver. The Xilinx
application note XAPP1022 Using the Memory Endpoint Test (MET) Driver with the
Programmed Input/Output (PIO) Example Design for PCI Express Endpoint Cores provides
instructions on setting up and running the MET. XAPP1022 uses the PCIe Endpoint Block Plus
core driven by the PIO interface. This section uses MET to write and read ML555 memory
using the PLBv46 Endpoint Bridge.
Pages 6-11 of XAPP1022 provide instructions for installing the Xilinx Virtex-5 PCIe Endpoint
Driver.
XAPP1000 (v1.0.1) May 6, 2008
www.xilinx.com
71
R
Memory Endpoint Test
Figure 89 shows the invocation of the Memory Endpoint Test. The values for the Device
Number, Vendor Number and the address indicate that the PLBv46 Endpoint Bridge on the
ML555 is detected.
X-Ref Target - Figure 89
X1000_89_041408
Figure 89:
Invoking the Memory Endpoint Test
Pages 11-15 of XAPP1022 provide detailed instructions on using the MET to test transfers to
PLBv46 Endpoint Bridge memory.
XAPP1000 (v1.0.1) May 6, 2008
www.xilinx.com
72
R
Memory Endpoint Test
Figure 90 shows basic read and write operations using the MET. In the figure, the Display (d),
Location (l), and Set (s) instructions illustrate basic memory read and write transactions.
The command
d 40
causes the values of 40 current memory locations to be displayed. The values displayed
(00000000 FFFFFFFF 00000002 FFFFFFFD ...) are the same as the values displayed by
PCItree in Figure 23 because this test was run shortly after the PCItree tests.
The location command
l 0
moves the address to location 0x00000000. All addresses are offset addresses from the BAR
start address.
The set command
s 12345678
is a memory write to the current address. In the figure, after the write of 0x12345678, the
address pointer is move back to location 0x00000000 (l 0), and the contents of the memory is
re-displayed using d 40. The 0x12345678 value just written at location 0x00000000 is
displayed.
X-Ref Target - Figure 90
X1000_90_041408
Figure 90:
XAPP1000 (v1.0.1) May 6, 2008
Running the Memory Endpoint Test
www.xilinx.com
73
Using ChipScope with the PLBv46 Endpoint Bridge
Using
ChipScope with
the PLBv46
Endpoint
Bridge
R
ChipScope is used to debug hardware problems. Debugging is done at either the system or
PLBv46 Endpoint Bridge level. To analyze PLBv46 Endpoint Bridge internal signals, insert the
ChipScope cores into pcie_bridge_wrapper.ngc. To analyze signals involving multiple cores,
insert the ChipScope cores into system.ngc. The flow for using the two debugging methods
differs. Below, an outline of the steps for debugging at the system level is provided. This is
followed by a detailed list of steps for debugging at the core level.
Inserting ChipScope at the System Level
The following steps insert the ChipScope cores into the system.
1. In XPS, select Hardware → Generate Netlist.
2. From the EDK shell in the implementation directory, run
ngcbuild -i system.ngc system2.ngc
3. Copy chipscope/ml555_mb_plbv46_pcie.cdc file to the project area (usually either
one directory above chipscope or the implementation directory).
4. Invoke ChipScope Inserter. To specify the input in the Input Design Netlist window,
browse to the system2.ngc file created in step 2. Define the Clock, Trigger, and Data
signals in Inserter, and generate the ICON and ILA cores.
5. From ml555_mb_plbv46_pcie/implementation, copy the file displayed in the Inserter
Output Design Netlist window, usually implementation/system2.ngo, to
implementation/system.ngc.
6. In XPS, run Hardware → Generate Bitstream.
Inserting ChipScope in the PLBv46 Endpoint Bridge
The ml555_mb_plbv46_pcie/chipscope/plbv46_pcie.cdc file is used to insert a
ChipScope ILA core into the pcie_bridge_wrapper core. Do the following steps to insert a core
and analyze PLBv46 Endpoint Bridge signals with ChipScope.
1. Invoke XPS. Run Hardware → Generate Netlist.
2. Copy chipscope/plbv46_pcie.cdc file to the project area (usually either one directory
above chipscope or the implementation directory).
3. Run Start → Programs → ChipScope Pro → ChipScope Inserter
XAPP1000 (v1.0.1) May 6, 2008
www.xilinx.com
74
R
Using ChipScope with the PLBv46 Endpoint Bridge
4. From ChipScope Inserter, run File Open → plbv46_pcie.cdc. Figure 91 shows the
ChipScope Inserter setup GUI after File Open → plbv46_pcie.cdc.
X-Ref Target - Figure 91
X1000_91_041408
Figure 91:
XAPP1000 (v1.0.1) May 6, 2008
www.xilinx.com
Opening plbv46_pcie.cdc
75
R
Using ChipScope with the PLBv46 Endpoint Bridge
5. The plbv46_pcie.cdc provides a good starting point for analyzing designs. In most analyses,
additional nets are needed. Figure 92 shows the GUI for making net connections. Click Next
four times to move to the Modify Connections window. Select Modify Connections. The Filter
Pattern is used to find net(s). As an example of using the Filter Pattern, enter *ack* in the
dialog box to locate acknowledge signals such as Sl_AddrAck. In the Net Selections area,
select either Clock, Trigger, or Data Signals. Select the net and click Make Connections.
Correct Clock, Trigger, and/or Data signals displayed in red.
X-Ref Target - Figure 92
X1000_92_041408
Figure 92:
Inserter Data Signals
6. Click Insert to insert the core into pcie_bridge_wrapper.ngo. In the
ml555_mb_plbv46_pcie/implementation directory, copy
pcie_bridge_wrapper.ngo to pcie_bridge_wrapper.ngc.
8. In XPS, run Hardware → Generate Bitstream and Device Configuration → Download
Bitstream. Do not rerun Hardware → Generate Netlist, as this overwrites the
implementation/pcie_bridge_wrapper.ngc produced by the step above. Verify that
the file size of the pcie_bridge_wrapper.ngc with the inserted core is significantly larger than
the original version.
9. Invoke ChipScope Pro Analyzer by selecting
Start → Programs → ChipScope Pro → ChipScope Pro Analyzer
Click on the Chain icon located at the top left of Analyzer’s GUI. Verify that the message in the
transcript window indicates that an ICON is found.
XAPP1000 (v1.0.1) May 6, 2008
www.xilinx.com
76
R
Using ChipScope with the PLBv46 Endpoint Bridge
10. The ChipScope Analyzer waveform viewer displays signals named DATA*. To replace the
DATA* signal names with the familiar signal names specified in ChipScope Inserter, select File
→ Import and browse to plbv46_pcie.cdc in the dialog box.
The Analyzer waveform viewer is more readable when buses rather than discrete signals are
displayed. Select the Sl_rdDBus<*> signals, click the right mouse button, and select Add to
Bus → New Bus. With Sl_rdDBus in the waveform viewer, select and delete the discrete
Sl_rdDBus<*> signals. The signals are displayed as buses in Figure 93.
Note: The Reverse Bus Order operation is useful for analyzing buses in Analyzer.
X-Ref Target - Figure 93
X1000_93_041408
Figure 93:
XAPP1000 (v1.0.1) May 6, 2008
ChipScope Pro Analyzer Waveform
www.xilinx.com
77
R
Using ChipScope with the PLBv46 Endpoint Bridge
11. Set the trigger in the Trigger Setup window as shown in Figure 94. The trigger used
depends on the problem being debugged. Simple triggers are PA_Valid, Sl_AddrAck,
Sl_wrComp.
X-Ref Target - Figure 94
X1000_94_041408
Figure 94: ChipScope Analyzer Trigger Setup
XAPP1000 (v1.0.1) May 6, 2008
www.xilinx.com
78
R
Using ChipScope with the PLBv46 Endpoint Bridge
12. Arm the trigger by selecting Trigger Setup → Arm, or clicking on the Arm icon as shown
in Figure 95.
X-Ref Target - Figure 95
X1000_95_041408
Figure 95:
ChipScope Analyzer with Trigger Armed
13. Run XMD or GDB to trigger patterns which cause ChipScope to display waveform output.
For example, set the trigger to Sl_wrComp, arm the trigger, and run
xmd -tcl xmd_commands/dma.tcl
at the command prompt. This produces signal activity in the Analyzer waveform viewer.
XAPP1000 (v1.0.1) May 6, 2008
www.xilinx.com
79
R
Using ChipScope with the PLBv46 Endpoint Bridge
14. ChipScope results are analyzed in the waveform window, as shown in Figure 96. This figure
shows the bus signals generated in Step 10.
X-Ref Target - Figure 96
X1000_96_041408
Figure 96: ChipScope Pro Analyzer Triggered
To share the results with remote colleagues, save the results in the waveform window as a
Value Change Dump (vcd) file. The vcd files can be translated and viewed in most simulators.
The vcd2wlf translator in ModelSim reads a vcd file and generates a waveform log file (wlf)
file for viewing in the ModelSim waveform viewer. The vcd file is opened in the Cadence Design
System, Inc. Simvision design tool by selecting
File → Open Database.
After running ChipScope, it is sometimes necessary to revise the Trigger or Data nets, or both,
used in a debug operation. Saving Inserter and Analyzer projects simplifies this procedure. The
saved project can be re-opened in Inserter, and edits can be made.
XAPP1000 (v1.0.1) May 6, 2008
www.xilinx.com
80
R
Using ChipScope with the PLBv46 Endpoint Bridge
Figure 97 is the waveform output of a ChipScope inserted into the reference system when
running the endpoint to root complex performance tests. The
chipscope/ml555_mb_plbv46_pcie_scs.vcd file can be used to view all of the signals more
clearly.
X-Ref Target - Figure 97
X1000_97_041408
Figure 97:
System Debugging Using ChipScope Analyzer
As show in Figure 97, memory, XPS Central DMA and PLBv46 Endpoint Bridge transactions
are monitored simultaneously. The trigger is
PCIe_bridge/comp_slave_bridge/sig_request_complete. The
ml555_mb_plbv46_pcie_scs.cdc is included in the chipscope directory.
Table 5: ChipScope Signals in Debugging Reference System
Component
Signal
Trigger
Sl_wrDAck
PCIe_Bridge
Sl_addrAck
comp_slave_bridge/sig_request_complete
SLAVE_ATTACHMENT_I/dma_status_reg[0]
Sl_addrAck
xps_central_dma_0
MPLB_MWrBTerm
M_rdBurst
M_wrBurst
Data
XAPP1000 (v1.0.1) May 6, 2008
www.xilinx.com
81
R
Using ChipScope with the PLBv46 Endpoint Bridge
Table 5: ChipScope Signals in Debugging Reference System (Cont’d)
Component
Signal
PLB_ABus[0:31]
sig_sb_txsof_n
comp_tlif/TxESM/TxEOFn
sig_sb_txeof_n
comp_slave_bridge/sig_ip2bus_wrgo_bar
sigIP2Bus_Cond_Wr_Go
sig_IP2Bus_Cond_Rd_Go
comp_slave_bridge/sig_cmd_rnw
comp_slave_bridge/sig_memory_request
comp_hard_pcie/mim_dll_bwen
comp_hard_pcie/mim_tx_bwen
comp_slave_bridge/sig_cmd_burst
comp_slave_bridge/sig_cmd_bar_num[0]
comp_slave_bridge/sig_cmd_complete
comp_hard_pcie/gt_tx_data_reg[0]
comp_hard_pcie/gt_rx_data_reg[0]
comp_hard_pcie/dst_req_n
comp_tlif/RxESM/PendingWrite
comp_tlif/RxISM/Load
comp_tlif/TxESM/LoadPipe
PCIe_Bridge
comp_tlif/TxESM/TxRdEn
comp_tlif/TxSOFn
comp_tlif/TxEOFn
comp_tlif/TxESM/TxSOPn
comp_tlif/TxESM/TxEOPn
comp_tlif/TxESM/TxSrcRdyN
comp_slave_bridge/sig_completion_request
comp_plbv46_slave/I_SLAVE_ATTACHMENT/bus2ip_rnw_i
comp_registers/sig_bus2ip_rnw
comp_slave_bridge/sig_IP2Bus_WrAck_bar
comp_registers/IP2Bus_WrAck
sig_IP2Bus_Cond_Wr
sig_IP2Bus_Cond_Wr_Go
sig_IP2Bus_Cond_Rd_Go
comp_slave_bridge/sig_ip2bus_wrgo_bar
comp_slave_bridge_ip2bus_rdgo_bar
comp_slave_bridge/sig_rxtlif_completed
comp_slave_bridge/sig_rxtlif_request
XAPP1000 (v1.0.1) May 6, 2008
www.xilinx.com
82
R
Using ChipScope with the PLBv46 Endpoint Bridge
Table 5: ChipScope Signals in Debugging Reference System (Cont’d)
Component
Signal
SPLB0_PLB_ABus[31:0]
DDR2_SDRAM_32Mx32
SPLB0_Sl_rdDAck
SLAVE_ATTACHMENT_I/dma_status_reg[0]
SLAVE_ATTACHMENT_I/dma_status_reg[1]
M_ABus[0:31]
Sl_rdDAck
SPLB_RNW
xps_central_dma_0
MPLB_MWrBTerm
MPLB_MWrDAck
M_wrBurst
Sl_addrAck
MPLB_MAddrAck
XAPP1000 (v1.0.1) May 6, 2008
www.xilinx.com
83
R
Reference Design Matrix
Reference
Design Matrix
The reference design matrix is shown in Table 6.
Table 6: Reference Design Matrix
General
Developer Name
Xilinx
Target devices (stepping level, ES, production, speed grades)
Source code provided
Virtex-5 XC5VLX50T
(Production Silicon)
No
Source code format
Verilog/VHDL
Design uses code/IP from an existing reference design/application
note, 3rd party, or CORE Generator software
No
Simulation
Functional simulation performed
No
Timing simulation performed
No
Testbench used for functional simulations provided
No
Testbench format
N/A
Simulator software used/version (i.e., ISE software, Mentor,
Cadence, other)
N/A
SPICE/IBIS simulations
No
Implementation
Synthesis software
XST
EDK Software
EDK10.1
Implementation software tools used/versions
ISE10.1
Static timing analysis performed
Yes
Hardware Verification
Hardware verified
Yes
Hardware platform used for verification
XAPP1000 (v1.0.1) May 6, 2008
www.xilinx.com
ML555
84
R
References
References
1. UG197: Virtex-5 FPGA Integrated Endpoint Block for PCI Express Designs User Guide
2. UG201: Virtex-5 FPGA ML555 Development Kit for PCI and PCI Express Designs User
Guide (v1.4) March 10, 2008
3. XAPP1022: Using the Memory Endpoint Driver (MET) with the Programmed Input/Output
Example Design for PCI Express Endpoint Cores
4. LeCroy PCI Express Multi-Lane Exerciser User Manual Version 5.0
5. SpekChek User Manual Version 6.5
6. Catalyst - PCI Express Bus Protocol Analyzer/Exerciser User’s Guide
Revision
History
Notice of
Disclaimer
The following table shows the revision history for this document.
Date
Version
04/25/08
1.0
5/6/08
1.0.1
Revision
Initial release.
Made minor non-technical edits.
Xilinx is disclosing this Application Note to you “AS-IS” with no warranty of any kind. This
Application Note is one possible implementation of this feature, application, or standard, and is
subject to change without further notice from Xilinx. You are responsible for obtaining any rights
you may require in connection with your use or implementation of this Application Note. XILINX
MAKES NO REPRESENTATIONS OR WARRANTIES, WHETHER EXPRESS OR IMPLIED,
STATUTORY OR OTHERWISE, INCLUDING, WITHOUT LIMITATION, IMPLIED
WARRANTIES OF MERCHANTABILITY, NONINFRINGEMENT, OR FITNESS FOR A
PARTICULAR PURPOSE. IN NO EVENT WILL XILINX BE LIABLE FOR ANY LOSS OF DATA,
LOST PROFITS, OR FOR ANY SPECIAL, INCIDENTAL, CONSEQUENTIAL, OR INDIRECT
DAMAGES ARISING FROM YOUR USE OF THIS APPLICATION NOTE.
XAPP1000 (v1.0.1) May 6, 2008
www.xilinx.com
85


![訟 NA TW]N](http://vs1.manualzilla.com/store/data/006574871_2-701642caad671571359886c7e3222bf0-150x150.png)