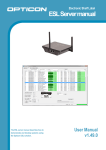
1
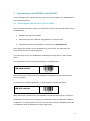
CAUTION: This information is subject to change without prior notice. Copyright 2011, Opticon Sensors Europe BV, all rights reserved. This manual may not, in whole or in part, be copied, photocopied, reproduced, translated or converted to any electronic or machine readable form without prior written consent of Opticon Sensors Europe. THE GENERAL USE AND FUNCTIONING OF THE BAR CODE SCANNER IS DESCRIBED IN THIS DOCUMENT. ALSO GENERAL SETUP INSTRUCTIONS TO GET STARTED ARE DESCRIBED IN THIS DOCUMENT. FOR FURTHER INSTRUCTIONS CONSULT OPTICON OR YOUR LOCAL DEALER. OPN2002/3 batch demo application (Version RFG35415) The batch demo application for the OPN2002/3 demonstrates its capabilities to store barcode data in a file and retrieve this file onto a local PC. The files can either by retrieved by using the OPN2002/3 as USB Mass Storage Device (MSD) or can be received using the NetO protocol by using USB-VCP and/or the CRD2000 multi cradle. Since the OPN2002/3 terminals don't have a display to show any instructions this demo application implements a user interface that consists entirely of using just the 2 keys to scan barcodes. This brief setup guide describes all features as well as handling instructions. More product details, additional support and more configuration options to customize this application to your own preferences (by using the Universal menu book) will be updated at www.opticon.com 1 Capabilities of the Batch demo application The following features are currently supported: Scans and stores barcodes into a database file on the internal RAM disk. Retrieve the barcode data file on a local PC or laptop using the NetO protocol by either USB-VCP or the CRD2000 multi cradle. *new* Use the OPN200/3 as USB Mass Storage Device (MSD) to retrieve the barcode data file. OSE Universal menu book support to configure all barcode decoders, pre- and suffixes, read modes and various other options. Storing of configurations in non-volatile memory to allow all settings to be restored after a reset. Configurable output format of the database file Easy software upgrading by USB -VCP or the CRD-2000 multi cradle (RS232) using Appload. 1 2 System Requirements 2.1 Minimum required OS version For USB-VCP and CRD2000 support, this demo application requires OS version: OPN2002: RBGV0212 (or higher) OPN2003: RBFV0212 (or higher) For USB-MSD (Mass Storage Device) support, this demo application requires the OS version: OPN2002: RBGV0220d (or higher) OPN2003: RBFV0220d (or higher) To check the currently installed OS version it's possible to use Appload (Select: ‘Utilities’ > ‘Show software version’). To check the currently installed application version it is also possible to transmit both the OS and application version by USB-VCP by reading the 'Z1' menu label. (See Universal menu book chapter 7). 2.2 Minimum required NetO32 host application This demo application can use Opticons NetO32 application to be able to transfer files from the OPN2002 or OPN2003 to a remote PC or laptop. This application can be downloaded from our web site. The minimum required NetO32 version is Version 2.07. 2.3 Appload To be able to install this application onto your OPN2002 you'll need to have Appload installed on your PC. Make sure you have the latest version of Appload, which can be found on our web site. Please read the 'Loading of software' section of this manual before downloading any software on the OPN2002/3. 2.4 Software updates In the future more features and bug fixes are likely to be implemented into the OS and this application. To find out if there are software updates available, please check our web site. All available software and documentation for the OPN2002/3 can be found at www.opticon.com in the following section: ‘Service and support' > 'Software' / 'Manuals' > 'OPN2002/3’ 2 3 Customizing your OPN2002 and OPN2003 In the following section a brief overview is given on how to configure your OPN2002/3 for your desired application. 3.1 Selecting the USB interface (VCP or MSD) This batch demo application supports 3 methods of retrieving your barcode data file from the OPN2002/3: USB Mass Storage Device (MSD) USB Virtual Com Port (USB-VCP) using NetO32 to retrieve the file CRD2000 multicradle using NetO32 to retrieve the file (OPN2002 only) After loading this software on the OPN2002/3 for the first time, the application will automatically be reset to USB-VCP default. If you would like to use your OPN2002/3 use USB Mass Storage Device, read the label below. (The labels below can be read without reading any SET/END labels) USB-MSD default More information on how to use your OPN2002/3 as USB Mass Storage Device will be given in chapter 8. To switch back to USB-VCP default (i.e. to load software) read the label below. USB-VCP default More information on how to use your OPN2002/3 as USB-VCP will be given in Chapter 7. Independent of whether you configured your OPN2002 as Mass Storage Device (MSD) or as USB-VCP, it’s allows possible to transmit your barcodes using the CRD2000 multicradle in combination with the NetO32-file transfer application. 3 3.2 OSE Universal Menu Book support * The OPN2002/3 supports the reading of various configuration options that can be found in our Universal menu book**. This makes it possible to customize your application without having to actually change the source code of this demo software. The OPN2002/3 supports (most of the) menu options listed in the following chapters: 1. Defaults (See the supported default label listed above) 3.1 Enabling/disabling readable codes 3.2 Setting of fixed, minimum and maximum lengths of readable codes 3.3 Code specific options (most options are supported except 2D symbology options) 4.1 Case conversion 4.2 Set prefixes 4.3 Set suffixes 5.1 Read modes, add-on wait modes 5.1.1 Multiple read reset time 5.1.2 Quite zone options (margins) 5.2 Read time options 5.4 Redundancy 5.5 Positive and negative barcodes 6.1 Buzzer settings 6.2 Good read LED options 7.1 Diagnostics * This demo application does not implement any of the OPN2002s Bluetooth capabilities. A Bluetooth demo (RFG35312) for the OPN2002 is available on our web site that demonstrates its Bluetooth capabilities. ** The Universal Menu Book can be downloaded from our web site. 4 4 Barcode database file All scanned unique barcodes are stored in a database file with fixed length records. Besides the barcode data, the quantity, serial number of the OPN2002/3 and a date/time stamp can be stored. The default format of each record in the database file is: <Barcode (40 chrs)>,<Quantity (6 chrs)>,<serial #>,<hh:mm:ss>,<dd/mm/yyyy> Example: 8710841030181 8710841090246 9780131103627 , , , 12,003278,14:41:03,23/11/2009 2,003278,14:41:04,23/11/2009 1,003278,14:41:00,23/11/2009 The file name of the database is 'DATA.TXT', which is stored on the OPN2002/3. Depending on the selected interface this file can be retrieved from the OPN2002/3 as file from a Mass Storage Device or transferred by USB-VCP or CRD2000 using the NetO32 application. When using the NetO32 application to retrieve the barcode data, any transmitted data will be appended (by default), so all data of multiple OPN2002s will end up in a single database file. The resulting database file can be imported in various applications as so-called commaseparated file. To customize the output format of the database file, please check Appendix A. If no quantity field is specified in the output format, then each bar code will be stored in a separate record. 5 Scanning barcodes This demo uses the trigger button to enable the laser to scan barcodes. If a barcode is read using the trigger key and good read beep is produced and a green goodread LED is shown. The barcode is then stored in the database with a quantity of '1'. If the same barcode is scanned again the quantity is incremented by one. To decrement the quantity of a barcode that's already in the database the barcode should be read using the small delete key. A short good read beep is produced and an orange red good read LED is shown. 5 If a barcode is scanned using the delete key that isn't present in the database or that already has a quantity of '0' a low error beep is sound and a red led is shown. Negative quantities are by default not supported, but when using the 'Negative quantities' option (see Appendix A) it is possible to scan negative quantities of barcodes. When a specific barcode has a negative quantity the led color changes to from green (add) or orange (subtract) to red on a good read and the sound becomes slightly lower. 6 Deleting the database file from the internal RAM disk It might be possible that your OPN2002/3 has a full or corrupt RAM disk or contains unwanted barcode data that you want to delete from the OPN2002/3. In this situation it is possible to read the label below to erase all files from the RAM disk.* _+-FORMAT-+_ When using the OPN2002/3 in USB-MSD mode, then it’s also possible to delete the file manually using a file browser. * Note: If the battery of the OPN2002/3 goes dry, then the OPN2002/3 won't immediately loose its barcode data. However, after a few days after becoming empty all data on the RAM disk will be lost. Also the internal clock will reset if the battery is completely drained. This requires the correct time to be reconfigured using Appload. 6 7 Installing drivers 7.1 USB-VCP drivers To be able to communicate with the OPN200x terminals using USB-VCP, you will need to have the USB driver installed on your PC. This driver can be found on our web site on the 'Service and Support' page. www.opticon.com/SERVICE-AND-SUPPORT.aspx The driver can be found in the section called 'Software' and then selecting the OPN200x on the following page. USB Drivers Installers.exe USB-VCP driver for Windows 2000 , Windows XP (32bit) & Windows Vista/7 (32bit) USB-VCP driver for Windows XP (64bit) & Windows Vista/7 (64bit) USB driver for the CRD2002 After installing the USB driver, you can connect your OPN2002 or OPN2003 to USB using the mini-USB cable. Windows will then automatically install a virtual COM port on your PC, which can be selected in various applications, like Appload, Hyperterminal and Neto32. 7.2 CRD2000 cradle drivers (OPN2002 only) The CRD200 cradle works either via USB or via RS232 and both interfaces do not require any configuration. The USB-VCP driver pack mentioned above also automatically installs the USB drivers for the CRD2002 cradle. 7 8 Using the Mass Storage Device (MSD) interface When the USB-MSD interface has been selected (see chapter 3) the OPN2002/3 will behave like a portable mass storage device when it is connected to a USB. Any scanned barcodes will be stored in a comma separated file called ‘DATA.TXT’, which can be copied/moved from the OPN2002/3 using a file browser. Due to the limited amount of (RAM) memory inside the OPN2002/3 the size of the file system is rather small, being about 125kB on the OPN2003 and about 900kB on the OPN2002. This is enough space for storing barcodes, but not for using the OPN2002/3 as a portable hard drive. 9 Using the USB-VCP and CRD2000 interface (using NetO32) 9.1 Configuring the host PC or laptop with NetO32 When the USB-VCP interface has been selected (see chapter 3) the OPN2002/3, then the barcode database file can be transmitted to a remote PC or laptop using NetO32. The data is transmitted by either a mini-USB cable (USB-VCP) or by the CRD2000 multi cradle (OPN2002 only). To be able to receive the files on the host, you'll need NetO32 to be installed. The latest version of NetO32 can be downloaded from our web site under 'Service and support' > 'Software' > 'OPN2002/3'. More information about additional Neto32 features that aren't described in this manual can be found the help file of NetO32. Screenshot of the main window of NetO32 8 9.2 Using the CRD2000 When using the CRD2000 multicradle certain configurations have to be made to correctly synchronize multiple OPN2002s that all want to transfer a file to the host at the same time. First of all, the RS232 settings have to be correctly configured, so besides selecting the correct COM-port of the CRD2000, you will also have to select the correct baud rate and other RS232 settings. The correct settings are shown in the screenshot below. RS232 settings in NetO32 when using the CRD2000 cradle When using the NetO-protocol with a multi-cradle the use of terminal IDs is mandatory to make sure that all files will be transferred without collisions and errors. Since the OPN2002 doesn't have a system menu in which a terminal ID can be configured, each OPN2002 has its own unique serial number stored in non-volatile memory. This demo application uses this unique serial number as terminal ID. The serial number of OPN2002s is printed on the back of the terminal, which makes it easy to add the serials numbers in NetO32. 9 The 6-digit serial numbers of all your OPN2002s will have to added at 'Tools > Options > Polling and Timing > Terminals to Poll'. Screenshot of Polling and Timing settings with a list of OPN2002 serial numbers When using the CRD200, don't configure a Poll Speed faster than 0,5s because once an OPN2002 is communicating to the host, the other OPN2002s will be temporarily muted for 250ms by the CRD2000 to avoid data collisions. For this reason an OPN2002 responds to a poll after a random time ranging between 280ms and 480ms. 9.3 Using the mini-USB cable (with NetO32) When using USB-VCP and the mini-USB cable to retrieve your data from the OPN2002/3, the RS232 configuration of NetO32 is limited to selecting the correct COM-port of your OPN2002/3 in the RS232 configuration window of NetO32. However, when using the mini-USB cable it's not possible to keep NetO32 running in the background due to the fact that the USB COM-port won't be present on your system until you've physically connected your OPN2002/3 to your USB port. Also it's not recommended to disconnect or to reconnect your OPN2002/3 without having stopped the NetO-protocol first. For these reasons it's easiest to place a NetO32 configuration file on your desktop that downloads the data from the OPN2002 once and then immediately closes again. This can be done by selecting the following 3 options in NetO32. Protocol > Polling and Timing > Protocol type: Single Protocol > Polling and Timing > Protocol type: Quit after single run Miscellaneous > Appearance > Run protocol on start 10 The correct sequence to retrieve the data from the OPN2002/3 using the mini USB cable would then be connecting your OPN2002/3 to the USB port, clicking on the NetO32 configuration file and then remove the OPN2002/3 from your PC when desired. Don't forget it regularly needs be charged as well. 9.4 Using the mini-USB cable (with OseComm) When the USB-VCP interface has been selected (see chapter 3), the barcode database file can be transmitted to a remote PC or laptop using OseComm32. The data is transmitted by using the mini-USB cable. To be able to receive the files on the host, you'll need Osecomm32 to be installed. The latest version of OseComm32 can be downloaded from our web site under 'Service and support' > 'Software' > 'OseComm'. The serial configuration of OseComm32 is limited to selecting the correct COM-port of your OPN in the Serial port Communication Settings window of OseComm32. Because the serial port of your barcode reader only exists while the barcode reader is connected, choose ‘x times success’ as ‘Protocol type’ to be able to safely disconnect the USB cable after the protocol has finished. Don’t disconnect your OPN while the protocol is still running! Select ‘Run protocol at start’ if you wish to execute the protocol tasks at start-up. To be able to retrieve the barcode file ' DATA.TXT' go to ‘Protocol Tasks’, select ‘Receive File(s)’ under ‘Task Group’ and press ‘Add task’. 11 In the Receive Files(s) Dialog the task can be configured as shown in following image. When done, retrieve the barcode file by connecting your barcode reader and selecting ‘Options’ > ‘Start Protocol’. More information about additional OseComm32 features can be found the help file of OseComm32. Note: Minimal required OS version for OseComm32 is: RBxV0221b 10 Loading software on the OPN2002 and OPN2003 The following chapter will describe how to load new software onto the OPN2002/3. Important note: When installing a new Operating System on the OPN2002/3 any barcode data left on the device might be lost! 10.1 Software codes All OPN2002 and OPN2003 terminals run an OS (operating system) and an application. Both the OS and the application can be loaded by a small PC application called Appload, which can be download from our web site. The OPN200x terminals use an Operating System version that contains an unique 3 letter code. Before you try to load a new Operating System on an OPN200x terminal you have to know which Operating System file (i.e. RBFVxxxx.S2) must be loaded on your terminal. 12 In the table below you can find the software codes for the OPN200x terminals. Terminal OPN2002 OPN2003 OS RBG RBF Application RFG* RFF* * It is often possible to load OPN2002 applications on the OPN2003 and vice versa, because the hardware is mostly the same (besides Bluetooth capabilities and cradle contacts that are only present on the OPN2002). 10.2 Loading software using the mini-USB cable To be able to load software on the OPN200x using the mini USB cable first make sure you’ve selected the USB-VCP interface (see chapter 3.1), because USB-MSD is not yet supported to install software. Also make sure you have the USB-VCP driver installed on your PC (see chapter 7.1). 10.3 Loading software on the OPN2002 To load a new OS or application onto the OPN2002, you'll need a mini-USB cable (which is supplied with the OPN2002) or the CRD2000 cradle. 13 To load an OS or application file, please follow the instructions below. USB Cable Multi Cradle Connect the terminal to your PC or laptop using the mini-USB cable Start Appload and select the (Virtual) COM port of your OPN2002 in Appload. Select the OS or application file in Appload using File > Download Currently isn’t not yet possible to load software on multiple OPN2002s at the same time. Therefore it is mandatory place only 1 OPN2002 in the cradle at a time. To do this, follow the instructions below. Place one OPN2002 in the cradle. Start Appload and select the COM port of the CRD2000 cradle. Select the OS or application file in Appload using File > Download. Wait until the downloading has finished before inserting another OPN2002 in the cradle. IMPORTANT (!): If you try to load multiple OPN2002s simultaneously with Appload, then the end result would be OPN2002s with faulty software that will need to be restored by loading the software again (one at a time). See the 'trouble shooting' section for more information about loading software on OPN2002s with faulty or crashing software. Bluetooth <Currently not supported> 10.4 Loading software on the OPN2003 To load a new OS or application onto the OPN2003, you'll need a mini-USB. Please follow the instructions below. USB Cable Connect the terminal to your PC or laptop using the mini-USB cable Start Appload and select the (Virtual) COM port of your OPN2002 in Appload. Select the OS or application file in Appload using File > Download 14 11 Other available OPN2002 applications Besides this Bluetooth demo application there are 3 other OPN2002 applications available on our web site that might fit your specific application better. Software V3510x: OPN2001 simulation demo application This application turns the OPN2002 into an OPN2001 compatible batch scanner. Besides USB, any stored barcode data can also be retrieved from the OPN2002 by using Bluetooth. Use this OPN2002 application in combination with the OPN2001 Demo application for Windows (or develop your own application using the SDK that's available for the OPN2001). Note: When planning to use the OPN2002 solely as on standard OPN2001, so without Bluetooth or need to run other applications, please note the following (hardware) differences: The battery of the OPN2002 empties quicker than the battery of the OPN2001 when rarely used. Approximately, the OPN2002 can operate normally for about 30 days when it's rarely used. The OPN2002 does not support laser aiming (laser dot) The OPN2002 can’t change its scan angle to shorten the laser line Unlike the OPN2001, the OPN2002 will lose its time and date within 4-5 days after the OPN2002 becomes non-operational due to an empty battery, which is sooner than the OPN2001. When this occurs, this will cause the time to be reset to 1-11970 00:00. If the OPN2002 isn't regularly used, it might be necessary that, before retrieving any barcode data, the current time is read from the OPN2002. If the retrieved time doesn't match the time of the PC, then the correct time can be send to the OPN2002 and incorrect time/date stamps of barcode data can be corrected using the difference between the time of the OPN2002 and the PC. 15 Software V3531x: OPN2002 Bluetooth demo application This application turns the OPN2002 into a Bluetooth barcode scanner, which currently supports the following features: Connecting to a remote device (as master) and transmit its data using a Bluetooth virtual COM port (VCP) Making the OPN2002 connectable (as slave) and discoverable to allow a remote device to connect with the OPN2002 and transmit its data using a Bluetooth virtual COM port (VCP) Use the OPN2002 as a Bluetooth HID device (keyboard) (Limited) Opticon Universal menu book support to configure barcode decoders, preand suffixes, read modes, buzzer/LED settings, change Bluetooth configurations and switch between HID or VCP as Bluetooth interface. Use of the trigger and clear key to connect, disconnect, make discoverable / connectable and reconnect. iPhone / iPad compatibility Note: Source code will be available for editing by using the provided SDK Software V3553x: Advanced Bluetooth application This application has been developed for the OPR3301 barcode scanner, but it also compatible with the OPN2002. This application is very similar to the Bluetooth demo application (V3551x) listed above, but supports more of Bluetooth options that are listed in the Universal menu book. This application is recommended when the OPN2002 is used as replacement for the old OPL2724 / OPL7724 and when memorizing of barcodes is desired, when if the OPN2002 has lost its Bluetooth connection or is out-of-range. Note: No source code will be available for editing 16 12 Trouble shooting Since the OPN200x doesn't have a display, it also doesn't have a system menu to resort to when you've installed a crashing application that prevents you from loading new software on the OPN200x. For this reason the OPN200x has a few escape mechanisms to allow you to restart, halt your application and/or install new software. This can be very useful in case the OPN200x has crashed or is constantly restarting due to a crashing application. 12.1 Restart mechanisms Automatic Manually The OPN200x has a watchdog timer to determine whether the OS is still running or has crashed. This watchdog will cause the OPN200x to restart after 3 seconds if the OS has crashed. This watchdog timer will not cause a restart when only the application has crashed. The OPN200x has a manual restart mechanism that allows you to restart in situations that the OS is still running, but your the application has crashed. In order to activate this mechanism, press and hold the trigger or delete key for at least 20 seconds. After the OPN200x has sounded the restart beep, you can release the key to complete the restart. 12.2 Halting your application Firstly, make sure your battery isn't empty and your mini-USB cable is not connected to the OPN200x. Then restart your application using one of the two restart methods listed above, while keeping the trigger key pressed. While keeping the trigger key pressed, insert the mini-USB cable into the OPN200x to halt the application. If successful, the LED of your OPN200x should now be blinking orange. You should now be able to load new application or OS software. 17 12.3 Halting the Operating System Firstly, make sure your battery isn't empty and your mini-USB cable is not connected to the OPN200x. Then restart your application using one of the 2 methods listed above, while keeping the delete key pressed. While keeping the delete key pressed, insert the mini-USB cable into the OPN200x to halt the Operating system. If successful, the LED of your OPN200x should now be blinking red. You should now be able to load a new OS. 13 Version history RFG35410 RFG35411 RFG35412 RFG35413 RFG35414 RFG35415 RFG35416 RFG35415 First release Added configurable database formatting Fixed very slow storing of barcodes Preliminary addition of USB-MSD Added USB-MSD and updated manual Fixed USB-MSD issue Disable flashing green LED indicator and reenable charge indicator Add OseComm December 7, 2009 December 14, 2009 February 3, 2010 June 10, 2011 June 17, 2011 June 29, 2011 May 21, 2012 April 29, 2013 Please check our web site at www.opticon.com to see if there are updates available for this application, the Operating System, NetO32, OseComm and/or this manual. 18 Appendix A: Database output formatting The default output format of each record in the database file is: <Barcode (40 chrs)>,<Quantity (6 chrs)>,<serial #>,<hh:mm:ss>,<dd/mm/yyyy> However, this application allows you to customize this format to make it suitable for your own application. The following aspects of the output format are configurable. Read the configuration barcodes on the following page to select the various options. Date format 16 date formats are supported (see following page) Time format 2 time formats are supported (hh:mm:ss and hh:mm) Field separator Enable/disable delete key Barcode field size Quantity field size Delete record if quantity=0 Negative quantities allowed/not allowed The field separator is the character that is used to separate the various fields of a database record. 7 different separators can be selected. By default the small delete key can be used to remove a previously read barcode from the database or reduce its quantity by 1. By disabling the delete key this option can be disabled. By default the barcode field size is 40 characters long, but this can be changed between 1 and 99 characters by reading 2 configuration labels on the following page to specify both digits of the desired size. By default the quantity field is 6 characters long, but this can be changed from 1 to 8 characters if desired. By default a record is deleted if a barcode in the database (with a quantity of 1) is read using the delete key. However if you desire to keep a record of all delete actions it is possible to leave the record with a quantity of '0' in the database by disabling this option. By default you can not delete a barcode that's not present in the database. However for some purposes it can be useful to be able to read them anyway to specify a negative quantity. 19 Field output sequence Each record can contain up to 5 fields (barcode, date, time, quantity and serial number). The output sequence can be customized by reading up to 5 labels on the following page. By not specifying a quantity field each barcode will be stored separately in the database. The database also will not be sorted and in case a barcode is read using the delete key the last occurrence in the database will be deleted. It is not allowed to not specify a barcode field in the output sequence. Note: When changing the field sequence, make sure you've downloaded the existing database file from the OPN200x or otherwise formatted the RAM disk. 20 21