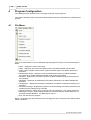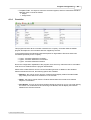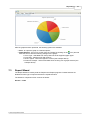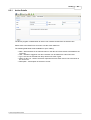
1
Expat Tracker
User Manual
© 2010 HR Systems Limited
Expat Tracker
Assignee Management Software
HR Systems Limited
Expat Tracker
© 2010 HR Systems Limited
All rights reserved. No parts of this work may be reproduced in any form or by any means - graphic, electronic, or
mechanical, including photocopying, recording, taping, or information storage and retrieval systems - without the
written permission of the publisher.
Products that are referred to in this document may be either trademarks and/or registered trademarks of the
respective owners. The publisher and the author make no claim to these trademarks.
While every precaution has been taken in the preparation of this document, the publisher and the author assume no
responsibility for errors or omissions, or for damages resulting from the use of information contained in this document
or from the use of programs and source code that may accompany it. In no event shall the publisher and the author be
liable for any loss of profit or any other commercial damage caused or alleged to have been caused directly or
indirectly by this document.
Printed: November 2010
4
Expat Tracker
Table of Contents
Foreword
0
8
Part I Introduction
1 Key Features
................................................................................................................................... 9
2 Frequently...................................................................................................................................
Asked Questions
9
12
Part II Program Installation
1 Instal Program
................................................................................................................................... 12
Install Screens
.........................................................................................................................................................
13
2 Run Program
................................................................................................................................... 16
19
Part III User Interface And Navigation
1 Home Page
................................................................................................................................... 21
2 System Tools
................................................................................................................................... 22
Toggle Pane
.........................................................................................................................................................
22
24
Part IV Program Configuration
1 File Menu................................................................................................................................... 24
Users
.........................................................................................................................................................
User Details
..................................................................................................................................................
Action Types
.........................................................................................................................................................
Action Type
..................................................................................................................................................
Details
Standard .........................................................................................................................................................
Documents
Standard..................................................................................................................................................
Document Details
Overrides.........................................................................................................................................................
Override ..................................................................................................................................................
Details
Workflows
.........................................................................................................................................................
Workflow..................................................................................................................................................
Details
Workflow..................................................................................................................................................
Designer
Configuration
.........................................................................................................................................................
Company..................................................................................................................................................
Setup
System Configuration
..................................................................................................................................................
Connection
.........................................................................................................................................................
Settings
Change Password
.........................................................................................................................................................
Data Export
.........................................................................................................................................................
/ Import
25
25
26
27
27
28
29
30
30
31
32
33
34
35
36
37
37
2 Tools Menu
................................................................................................................................... 39
To Do List.........................................................................................................................................................
Send Email
.........................................................................................................................................................
Unposted.........................................................................................................................................................
Transactions
Unposted..................................................................................................................................................
Transaction
Import Transactions
..................................................................................................................................................
Post Transactions
..................................................................................................................................................
39
40
40
41
42
43
3 Help Menu
................................................................................................................................... 43
46
Part V Libraries
© 2010 HR Systems Limited
Contents
5
1 Locations
................................................................................................................................... 47
Location Details
.........................................................................................................................................................
48
2 Organisation
...................................................................................................................................
Structures
49
Structure .........................................................................................................................................................
Details
Structure .........................................................................................................................................................
Items
Structure..................................................................................................................................................
Item Details
Part VI People and Assignments
49
50
51
53
1 People ................................................................................................................................... 53
Person Details
.........................................................................................................................................................
Photo
.........................................................................................................................................................
Dependants
.........................................................................................................................................................
Dependants
..................................................................................................................................................
Details
Addresses
.........................................................................................................................................................
Addresses
..................................................................................................................................................
Details
Bank Accounts
.........................................................................................................................................................
Bank Accounts
..................................................................................................................................................
Details
55
57
57
58
59
60
61
61
2 Assignments
................................................................................................................................... 62
Assignment
.........................................................................................................................................................
Details
Compensation
.........................................................................................................................................................
Compensation
..................................................................................................................................................
Details
Transactions
.........................................................................................................................................................
Transactions
..................................................................................................................................................
Details
Workflow.........................................................................................................................................................
Actuals
Add Workflow
..................................................................................................................................................
Workflow..................................................................................................................................................
Phases
Update Workflow
...........................................................................................................................................
Phase
63
65
65
66
67
67
68
69
70
3 Travel Diary
................................................................................................................................... 71
Part VII Reporting
74
1 Reports ................................................................................................................................... 74
2 Graphs ................................................................................................................................... 76
3 Report Wizard
................................................................................................................................... 77
4 Report Publishing
................................................................................................................................... 82
5 Data Views
................................................................................................................................... 83
View Report
.........................................................................................................................................................
Part VIII Sundry
84
87
1 Access Levels
................................................................................................................................... 87
2 Data Grids
................................................................................................................................... 87
3 Data Forms
................................................................................................................................... 89
4 Data Details
................................................................................................................................... 91
5 Action Views
................................................................................................................................... 92
Action Details
.........................................................................................................................................................
New Actions
.........................................................................................................................................................
93
94
6 Document
...................................................................................................................................
Views
95
Document.........................................................................................................................................................
Editor
© 2010 HR Systems Limited
96
6
Expat Tracker
Document.........................................................................................................................................................
Viewer
98
Email Editor
......................................................................................................................................................... 99
New Document
......................................................................................................................................................... 101
Standard.........................................................................................................................................................
Document
102
7 Creating...................................................................................................................................
Organisation Structures
102
Index
103
© 2010 HR Systems Limited
Introduction
Part
I
8
1
Expat Tracker
Introduction
Welcome to the Expat Tracker Assignee Management system.
The Expat Tracker system is is the new way of managing your globally mobile employees.
It stores everything you need to know about your globally mobile employees including:
·
·
·
·
·
·
Immigration information
Family information
Contracts
Document storage
Notes facility
Compensation collector
Expat Tracker also includes an employee travel diary which enables employers to keep track of
their regular business travellers and generate regular reports to satisfy the regulatory authorities
The system is hosted (i.e. the database and controlling logic is stored on a central server) but
access for users is via a user friendly desktop program that contains many advanced features. The
desktop program is simple to install and, given an internet connection, can be run immediately
after installation.
This help and manual documentation is designed to fulfil many roles as follows:
· Online Help - whereby a user can click on the help icon on any loaded program and obtain
immediate and relevant help
· Traditional Help - whereby any user or non user can access the full help system either from
the web or via a Windows help file
· User Manual - whereby any user or non-user can read and study the system without
program or internet access
This documentation is divided into the following main sections:
Introduction - Key Features and Frequently Asked Questions
Program Installation - a guide as to installing and running the desktop program
User Interface And Navigation - a tour around the 'Office' style interface
Program Configuration - for system administrators and advanced users only
Libraries - for advanced users only
Projects Positions And People - the main body of the program where most users will spend
their time
· Reports - how to get data out of the system in a number of formats
· Sundry - these are support pages to the above sections
·
·
·
·
·
·
© 2010 HR Systems Limited
Introduction
1.1
9
Key Features
Expat Tracker is the result of many years of research and development looking at how companies
manage their globally mobile employees. All of the products available on the market today that
help companies manage expats fall into two categories:
· High end systems offered by the Big 4 - generally deal with all aspects of international
assignment management but are expensive, can take a long time to implement and set up,
and generally require a significant on-going commitment to keep them going. They all offer
(and you pay for) a lot of additional features and functionality that most companies don’t
really need.
· Mid end systems offered by niche players - typically payroll bureaus and HR consultancies.
As with the big 4 systems these generally offer very high levels of features but often come
bundled as part of the provider’s core service e.g. Global payroll. The downsides include
over promised functionality, unrealistic implementation times and poor on-going support.
None really focus on the core requirement that all companies have which is for a simple, cost
effective means of tracking their expats in a reliable way i.e. Not using spreadsheets!
Expat Tracker provides you with a highly configurable tracking system without the cost and time to
implement of comparable systems. It includes, as standard, the following features:
·
·
·
·
·
·
·
·
·
·
·
·
1.2
Virtually unlimited number of data elements
Configurable multiple checklists
Reminder system
Advanced, integrated reporting system
On-line document storage
Import / export functionality
Configurable workflow logic
SLA tracking and reporting
Email alerts
Configurable task list logic
Compensation policy setup
Actual compensation costs capture
Frequently Asked Questions
The following are the most commonly asked questions regarding the program (click on the
question to view the answer):
General
Can data be imported into Expat Tracker from my current system?
Yes - the Expat Tracker web site downloads page (Click Here) has an Excel spreadsheet
that enables new companies to enter existing data and the send it to Commercial Software
for FREE importation.
Can I export data out of Expat Tracker?
Yes - Expat Tracker has data export facilities which can be useful if further analysis is
© 2010 HR Systems Limited
10
Expat Tracker
required locally - see Data Export / Import
Can I change the descriptions used by Expat Tracker - for example I want to use the
word NHI Number instead of Social Security Number?
Yes - Expat Tracker has the ability to override most descriptions - see Overrides
Logging On
When logging in I get a message 'Error in Logging-in' - what is wrong?
First you should check that you have a valid internet connection - i.e. does your browser
work? If the internet connection is fine, it is possible that your system firewall is blocking the
attempts to send and receive data to and from the Expat Tracker server. In this case you
can amend the Connection Settings to configure a proxy server and other settings. If this
does not solve the problem, please contact Commercial Software.
When logging on I get a message telling me that my company is not registered, the
registration has expired, or the maximum program usage has been exceeded - what
is wrong?
There could be a number of reasons - firstly you may not have completed the company
registration process. Secondly your 30 day free trial may have expired or your monthly
rental payments have ceased. Finally you may have added more employees than you are
licensed for. In any of events, please contact Commercial Software.
Users
What are Access Levels and can I restrict certain users from parts of the program?
Access Levels determine the ability of each user to access, and perform functions within, all
parts of the program. For a full list of levels and their associated privileges - see Access
Levels
People and Assignments
Can I Email People?
Yes - see Send Email.
Navigation
How do I close a program form?
Individual programs can be closed by clicking on the Close icon ( ) at the far right of the
tab strip. See also Navigation.
Can I hide the navigation pane?
yes - click on the Toggle Pane icon on the system toolbar.
Reports
I need a report that is not listed - can I request one?
Certainly as we encourage requests from users. Indeed many of the reports have resulted
from past user requests. To request a report, click on the Reports navigation pane and then
click the ‘Request A Report’ button which will open the Contact Us page on the Expat
Tracker website allowing the report to be requested.
© 2010 HR Systems Limited
Program Installation
Part
II
12
2
Expat Tracker
Program Installation
As a hosted solution there is no requirement for complicated database or server / network
configuration.
The only requirement to access the program is a fast (Broadband) internet connection and the
installation of a lightweight desktop program.
A link to the installer for the desktop program will be provided and the following sections deal with:
· Installing the desktop program
· Running the desktop program
2.1
Instal Program
A link will be provided to the desktop program installer.
The installation can either be run directly from the link or copied and run locally.
If the user does not have administrator rights, the program should be installed by right clicking on
the file name and selecting 'Run as ...' and entering the administrator’s details.
If the .NET framework 2.0 is not already installed on the computer, a dialog box will appear
allowing the installation of the framework to take place. This installation may require a reboot of the
computer. Most modern computers will already have the .NET framework installed so this process
is unlikely to be required.
The Install Screens page shows the seven dialog screens that will appear, as follows:
· Welcome – click Next to proceed
· User Information – this defaults to the current user and the computer name – click Next to
proceed unless otherwise instructed by your administrator
· Destination Folder – this defaults to C:\Program Files\Expat Tracker but can be changed
to any preferred directory, although this is not recommended
· Ready to Install – click Next to proceed
· Updating System – this may take several minutes
· Successful Installation – assuming there were no problems encountered during the
installation (e.g. disk write privileges) click Finish to complete the installation process
At this point the installation is complete.
© 2010 HR Systems Limited
Program Installation
2.1.1
Install Screens
The seven install dialog screens are as follows:
© 2010 HR Systems Limited
13
14
Expat Tracker
© 2010 HR Systems Limited
Program Installation
© 2010 HR Systems Limited
15
16
2.2
Expat Tracker
Run Program
The Expat Tracker desktop program can be run by double clicking on the icon created on the
desktop as follows:
Or by selecting Start … All Programs … Expat Tracker Database as follows:
Once run, the following Log-in screen will appear:
© 2010 HR Systems Limited
Program Installation
17
The following selections can be made:
Language - by default this is set to English but in future other languages may be available.
Company Code - the code is not case sensitive - i.e. it can be entered as either lower or
upper case.
User Code - this is the login code for the user - this is not case sensitive
Password - this is the login password for the user - this is case sensitive
Clicking the Accept button should log you in to the program.
In there is an error in connection, you should ask your System Administrator to check whether you
have any firewall or proxy issues. The Connection Settings link will enable you to configure your
system accordingly.
© 2010 HR Systems Limited
User Interface And Navigation
Part
III
User Interface And Navigation
3
19
User Interface And Navigation
The Expat Tracker system uses the latest 'Office' style design for ease of use and navigation.
See below for a description of the main elements:
Main Menu (top)
The Main Menu consists of four sub menus:
· File
· Tools
· Libraries
· Help
You can access each of these sub menus by clicking on the main menu item. Clicking on the link
above will show each of the options within each sub menu.
Toolbar (top)
The Toolbar will display icons relevant to the Expat Tracker system and to the specific program
that has focus. The purpose of each icon can be determined by placing the mouse over the icon
and viewing the help tool tip that is displayed.
The toolbar has two sections:
· System Tools - that stay on the toolbar whichever program has focus
· Program Tools - that are relative only to the program that has focus
For details of the System Tools, click the link above. For details of Program Tools, select the
© 2010 HR Systems Limited
20
Expat Tracker
chapter dealing with that program.
NOTE - as any number of programs can be loaded at the same time (see Program Tabs below),
the toolbar will only show specific options relative to the program that has focus - i.e. the one
where the user has either loaded it last or has activated it by clicking on the program tab.
In the example above, the People program has the focus and the toolbar shows only the options
relative to the People program. The options relevant to the Assignments program would be
displayed by clicking on the Assignments tab.
Navigation Pane (top)
The Navigation Pane displays the main modules of the program, together with the individual
programs that relate to each module.
The modules are grouped at the lower part of the pane.
The following modules are available in the above example:
· Expats
· Reports
Each module can be selected by clicking on the module group or name at which point the module
name and individual programs relating to that module are displayed in the upper part of the pane.
In the above example, the Expats module has been selected.
Individual programs relative to each module are categorised as Views (main programs most often
used) and Links (subsidiary programs used less frequently). Each program is loaded by clicking on
its name.
Program Tabs (top)
As each program is loaded, it is allocated a new tab and is given focus. Previously loaded
programs are not unloaded and can be reactivated at any time by clicking on their tabs.
Individual programs can be selected either by clicking on the tab or by selecting the relevant tab
from the View icon ( ) at the far right of the tab strip.
Individual programs can be closed by clicking on the Close icon ( ) at the far right of the tab strip.
As described in the Toolbar section above, the Program Tools available will change as each new
program gets focus.
Program Forms (top)
Program forms are the body of the program that is displayed underneath the tab. Frequently these
will consist of grid views (as in the example above) but may also have data input boxes or other
pieces of information.
For grid views, individual rows can be selected by clicking on the row. Actions relating to the row
can be displayed by a right click of the mouse, and the row data (if relevant) can be displayed by
double clicking on the mouse. See more on the Data Grids.
Status Bar (top)
The Status Bar at the lower part of the screen is divided into seven sections displaying data as
follows:
© 2010 HR Systems Limited
User Interface And Navigation
21
1. User name and login code
2. User number
3. User password level
4. Company code and number
5. Current date
3.1
Home Page
The home page specific to the user logging in is shown when the program loads. The following
data is displayed on this page:
User
· Current User - full name of current user
· Last Login - the date and time the user last logged in to the program
· Refresh - clicking on this link will refresh the page with any updated data (e.g. new 'To Do'
items)
Alerts
· To Do List - the number of items currently in the user's To Do list - clicking on this data will
display the To Do List
· Other items may be added to the alerts in the future
© 2010 HR Systems Limited
22
Expat Tracker
Assignments
· A number of dashboard items showing the current assignees by Status, by Month Started,
by Home Location and by Host location
· Further dashboard items will be available
Help
· Program Help - a reminder to click on the toolbar help icon to obtain immediate help on the
current page
· Online Help - launches the web based help in a separate browser window
· User Manual - clicking on this link will open the User Manual
My Assignees
·
·
3.2
This is a list of all assignees linked to the logged in user as the HR Co-ordinator. The list is
colour coded as follows:
o Red – if the assignment anticipated start date is overdue
o Blue – if the assignment anticipated start date is within 3 months
o Black – if the assignment anticipated start date is within over 3 months
Double click on a particular row and the assignment data form will appear
System Tools
Click on an option above to see the individual help topic, or see the descriptions below:
· Home - displays the user's Home page
· Toggle Navigation Pane - see Toggle Pane
· Help - displays the help on the current page (i.e. current program loaded) in a separate
program tab which can be kept open at the same time as the program
3.2.1
Toggle Pane
Clicking the above icon on the System toolbar will hide / show the Navigation pane.
This can be useful on screens with low resolution when viewing data or entering weekly timesheets
where all columns of the grid need to be viewed and/or accessed without horizontal scrolling.
© 2010 HR Systems Limited
Program Configuration
Part
IV
24
4
Expat Tracker
Program Configuration
The following section describes how to configure the Expat Tracker program.
This section should be read by the system administrators and other responsible for maintaining the
program.
4.1
File Menu
Click on an option above to see the individual help topic (apart from Exit), or see the descriptions
below:
· Home - displays the user's Home page
· Users - displays a list of Users and allows users to be added, deleted and amended
· Action Types - displays a list of Action Types and allows types to be added, deleted and
amended
· Standard Documents - displays a list of the Standard Documents and allows standard
documents to be added, deleted and edited using the Document Editor.
· Overrides - displays the Overrides view which enables the default program descriptions to
be overridden.
· Workflows - displays a list of Milestones and allows milestones to be added, deleted and
amended
· Configuration - displays the Company Configuration and allows configuration settings to be
amended
· Connection Settings - displays the program Connection Settings and allows the web service,
firewall and proxy settings to be amended
· Change Password - allows users to change their own passwords - see Change Password
· Data Export / Import - allows authorised users to download and then upload data from / to
the Expat Tracker database - see Date Export / Import
· Exit - this will close the program
NOTE - Depending upon the password level of the logged in user, not all File menu options will be
visible or enabled.
© 2010 HR Systems Limited
Program Configuration
4.1.1
25
Users
Users are people authorised to log in to the Expat Tracker program.
This program will show all Users together with their details. If a user's details are shown in red,
then they have not logged onto the program for more than 90 days.
Please refer to Data Grids for how to use the Users grid view. In addition to the standard features
described in the link, the following options are available:
· Add New - this can be chosen from the Toolbar and will display a blank User Details page
ready for the data to be entered for a new user.
· Delete - this can be chosen from the Toolbar and will allow the user to be deleted subject to
confirmation
· View Details - this can be chosen by double clicking the mouse on a row and will display
the User Details for the selected user.
4.1.1.1
User Details
The above program is loaded when a User row is double clicked from the Users view.
Please refer to Data Forms for how to use the Users data form.
Depending on the exact configuration of the system, the following data fields may be available for
input / editing:
© 2010 HR Systems Limited
26
Expat Tracker
· User Code - the login code (or user name) - this would normally be an abbreviation of the
user's name or their initials (2 - 15 characters). The login code can contain any valid
characters and is not case sensitive. The code can be changed at any time as may be
required if the user's name changes.
· First Name - user's first name (2 - 35 characters)
· Surname - user's surname or last name (2 - 35 characters)
· Password - this should be the login password for the initial user (2 - 20 characters). The
password can contain any valid characters and is not case sensitive
· User Access Role - this should be selected from the drop down list of available user access
roles. User Access Roles determine what the user can see - from menus, navigation panes
down to columns on grids and even individual fields on data entry forms
· User Data Filter - if required this should be selected from the drop down list of available user
data filters. User Data Filters determine the extent of the data that the user can see
· Email Address - the email address for the user
· Failed Logins - if a user is locked out for bad password access, they can be restored by
setting their failed logins to 0 (zero)
4.1.2
Action Types
This program allows users to categorise actions into types. These types can be used later for
analysis and reporting purposes.
Please refer to Data Grids for how to use the Action Types grid view. In addition to the standard
features described in the link, the following options are available:
· Add New - this can be chosen from the Toolbar and will display a blank Action Type Details
page ready for the data to be entered for a new action type.
· Delete - this can be chosen from the Toolbar and will allow the action type to be deleted
© 2010 HR Systems Limited
Program Configuration
27
subject to confirmation.
· View Details - this can be chosen by double clicking the mouse on a row, or by right clicking
the mouse over a selected row and choosing View Details, and will display the Action Type
Details for the selected type.
4.1.2.1
Action Type Details
The above program is loaded when an Action Type row is double clicked from the Action Types
view.
Please refer to Data Forms for how to use the Action Types data form.
Depending on the exact configuration of the system, the following data fields may be available for
input / editing:
· Source - the object to whom the action applies, these could be as follows:
· People
· Assignments
· Code - a unique one character code for the action type for the source object
· Description - the description of the action type - this can be amended at any time.
4.1.3
Standard Documents
This program allows users to create standard documents that can be used for a variety of
purposes, including Assignment Forms, letters, formal documentation along with templates and
graphics used in reports and charts.
© 2010 HR Systems Limited
28
Expat Tracker
Please refer to Data Grids for how to use the Standard Documents grid view. In addition to the
standard features described in the link, the following options are available:
· Add New - this can be chosen from the Toolbar and will display a blank Standard Document
Details page ready for the data to be entered for a new standard document. This is the
method by which word processing merge documents can be created. For all other document
types use the Upload New Document option (see below).
· Delete - this can be chosen from the Toolbar and will allow the standard document to be
deleted subject to confirmation.
· Edit Document - this will open the standard document in the Document Editor and allow
editing of the document including inserting fields from the chosen Template (e.g. Client
Contacts) that will automatically be converted to data for the relevant Client, Client Contact,
Job or Employee. If the document is in a non word processing format then the program will
attempt to show the document in the default program for the file type (e.g. Adobe Acrobat
Reader for PDF files).
· View Details - this can be chosen by double clicking the mouse on a row, or by right clicking
the mouse over a selected row and choosing View Details, and will display the Standard
Document Details for the selected type.
· Copy - this will create a copy of an existing standard document that can then be edited
4.1.3.1
Standard Document Details
The above program is loaded when a Standard Document row is double clicked from the Standard
Documents view.
Please refer to the Data Forms for how to use the Standard Documents data form.
Depending on the exact configuration of the system, the following data fields may be available for
input / editing:
· ID - a unique ID generated by the program which is not editable
· Title - the title of the document.
· Document Type - there are the following three types of standard document:
· General - these are documents that can be created from standards wherever the 'Add
Document' link is available from a grid view or a 'Documents' tab is available on a data
form
· Letter
· Email
© 2010 HR Systems Limited
Program Configuration
29
· Template Fields - the object to whom the document applies, and from where data should be
obtained, these could be as follows:
· People
· Assignments
4.1.4
Overrides
This program will show all the overrides created for the company. Overrides allow the default
program descriptions to be overridden with text supplied by the user.
In the example above the following based descriptions for Organisation Structures have been
overridden specifically for the company:
· 'Type1' - has been defined as 'Company'
· 'Type2' - has been defined as 'Cost Centre'
· 'Type3' - has been defined as 'Division'
Due to the configuration capabilities of the program, there are many codes that can be overridden a full list can be obtained from the program administrator.
Please refer to Data Grids for how to use the Overrides grid view. In addition to the standard
features described in the link, the following options are available:
· Add New - this can be chosen from the Toolbar and will display a blank Override Details
page ready for the data to be entered for a new override.
· Delete - this can be chosen from the Toolbar and will allow the override to be deleted
subject to confirmation
· View Details - this can be chosen by double clicking the mouse on a row, or by right clicking
the mouse over a selected row and choosing View Details, and will display the Override
Details for the selected override
© 2010 HR Systems Limited
30
4.1.4.1
Expat Tracker
Override Details
The above program is loaded when an Override row is double clicked from the Overrides view.
Please refer to the Data Forms for how to use the Override data form.
The following data fields are be available for input / editing:
·
·
·
·
4.1.5
Code - a unique code used by the Expat Tracker program to identify an item
Text - the replacement description to be used
Plural - the plural of the replacement description
Abbreviated - an abbreviation of the replacement description - this is used in column
headers and other places where space is at a premium
Workflows
This program allows users to create workflows. Workflows are chains of events that are planned to
happen in sequence over a period of time. They can also be used as checklists.
Please refer to Data Grids for how to use the Workflows grid view. In addition to the standard
features described in the link, the following options are available:
· Add New - this can be chosen from the Toolbar and will display a blank Workflow Details
page ready for the data to be entered for a new workflow.
· Delete - this can be chosen from the Toolbar and will allow the workflow to be deleted
subject to confirmation.
© 2010 HR Systems Limited
Program Configuration
31
· View Details - this can be chosen by double clicking the mouse on a row, or by right clicking
the mouse over a selected row and choosing View Details, and will display the Workflow
Details for the selected workflow.
· Workflow Designer - this can be chosen by right clicking the mouse over a selected row
and choosing Workflow Designer, and will display the Workflow Designer for the selected
workflow.
4.1.5.1
Workflow Details
The above program is loaded when an Workflow row is double clicked from the Workflows view.
Please refer to Data Forms for how to use the Workflows data form.
Depending on the exact configuration of the system, the following data fields may be available for
input / editing:
· Object - the object to whom the workflow applies, and from where data should be obtained,
these could be as follows:
· People
· Assignments
· Code - a user defined code for this workflow - this can be amended at any time.
· Name - the name of the workflow - this can be amended at any time.
· Workflow Type - one of the following types:
· Checklist - a simple checklist where users can check all or any items at any time
· Sequence - a simple checklist where items must be checked in strict sequence
· Workflow - a complex workflow allowing sequential checks, looping, emails etc.
· Force Phases - for workflow only, whether all phases must be completed
· Allow Changes - whether the user is permitted to make changes to individual workflows
© 2010 HR Systems Limited
32
4.1.5.2
Expat Tracker
Workflow Designer
The Workflow designer layout will depend on the type of workflow. It is recommended that
Commercial Software we contacted before allowing users to define their own complex workflows.
For checklists (and sequences) the designer will look as follows:
For complex workflows, the designer will look as follows:
The columns are defined as follows:
Column
Description
Phase
Consecutive number 1, 2, 3 …
© 2010 HR Systems Limited
Program Configuration
33
Description
Description of phase (e.g. Hire Approval)
Period Type
D = Days, W = Weeks, M = Months, Y = Years
Period Length
Number of days, weeks, months, years
Default User
Default user (number) allocated to the phase
Action Type
0 = None
1 = Accept / Confirm Action - pass to next phase (in sequence)
2 = Accept / Reject
Phase On Accept
The phase to which to go to if accepted
Phase On Reject
The phase to which to go to if rejected
Email On Accept
Pipe delimited text listing users to whom email will go if accepted (if 0 goes
to accept phase user only, if blank no email is sent)
Email On Reject
Pipe delimited text listing users to whom email will go if rejected (if 0 goes to
reject phase user only, if blank no email is sent)
Action On Accept
Pipe delimited text listing functions to be called if accepted (e.g.
=UPDATEFIELD(Position|PAFApproved|2))
Action On Reject
Pipe delimited text listing functions to be called if rejected (e.g.
=UPDATEFIELD(Position|PAFApproved|1))
In this way, a workflow can be defined to progress through different phases, each phase being
allocated to a default user and its action type defined.
On completion of each action, be it accept or reject, the following events will occur:
· The workflow will move to another phase (as defined in the ‘Phase On Accept’, ‘Phase On
Reject’ fields)
· An email can be sent to one or more users (if defined in the ‘Email On Accept’, ‘Email On
Reject’ fields)
· An action can be performed (if defined in the ‘Action On Accept’, ‘Action On Reject’ fields).
The example shows the update of the ‘PAFApproved’ field in the Positions table, although
other inbuilt functions could be defined in the future.
4.1.6
Configuration
Two types of configuration are permitted as follows:
· Company Setup - the basic data on the company
· System Configuration - the program configuration settings for the company
© 2010 HR Systems Limited
34
4.1.6.1
Expat Tracker
Company Setup
The above program is loaded when the Company Setup row is double clicked from the
Configuration view.
Please refer to the Data Forms for how to use the Company Setup data form.
Depending on the exact configuration of the system, the following data fields may be available for
input / editing:
· Company Code - this is the code generated by the program when the company was created
and cannot be edited
· Name - the name of the company which is used throughout the program mainly for reports
· Address Details - this is currently for information purposes only but may be used in future for
standard documents
· Contact - the main contact person for the company
· Email Address - the email address for the main contact
· Telephone - the telephone number for the main contact
· Fax - the fax number for the main contact
· SMTP Server - the SMTP Server address to use for sending emails from within the system
NOTE - this data will need to be saved, and an exit made from the program, before any changes
made will be activated.
© 2010 HR Systems Limited
Program Configuration
4.1.6.2
35
System Configuration
The above program is loaded when the System Configuration row is double clicked from the
Configuration view.
Please refer to the Data Forms for how to use the System Configuration data form.
Depending on the exact configuration of the system, the following data fields may be available for
input / editing:
General
· Base Currency - the base currency used for the company. It is assumed that all data entered
into the system (e.g. Currency Rates) will be against this currency. Reports can however be
generated in any supported currency.
© 2010 HR Systems Limited
36
4.1.7
Expat Tracker
Connection Settings
This utility program allows the configuration of the connection settings.
These settings include the address of the servers hosting the program (these can either be internal
or external) together with any proxy setting necessary for the program to communicate with the
servers through firewalls.
NOTE - Under Authentication Credentials, your User Name and Password should be those you
use to log in to your computer.
For detailed assistance in using these settings, please contact Commercial Software by email at
[email protected]
© 2010 HR Systems Limited
Program Configuration
4.1.8
37
Change Password
This utility enables any user (irrespective of access level) to change their own password at any
time.
4.1.9
Data Export / Import
This program enables administrative users to export data from Expat Tracker, to amend the data
locally using Excel, and then to import the data from the resultant spreadsheet.
The order in which actions are performed are as set out by the Toolbar as follows:
Displays the Export / Import Options pane (as shown above)
Export to Excel - this will generate an Excel spreadsheet containing the grid
data
Validate the data (post loading spreadsheet)
Import (Upload) data (post validation)
© 2010 HR Systems Limited
38
Expat Tracker
The Action options (which all relate to one of the three data options) are as follows:
· Create Empty Spreadsheet - this purely creates the import spreadsheet with the required
headings. This can then be exported to Excel for entering new data for import (upload).
· Export - Create Spreadsheet - this will create the import spreadsheet and will then load it
will all the current data for the Organization selected. This can then be edited within the
program grid (see example above), or exported to Excel for editing existing data or entering
new data for import (upload). NOTE - editing within the grid is only suggested for limited
changes to existing data.
· Import - Load Spreadsheet - this will enable the user to load an Excel spreadsheet into the
grid which can then be validated and imported (uploaded) back into Expat Tracker.
The Data options are currently limited to the three main data tables as follows:
· People
· Assignments
· People / Assignments
When validating the data, rows will be highlighted as follows:
· Green - existing row - data is valid and will be updated
· Blue - new row - data is valid and will be inserted
· Red - row data is invalid
A summary will be produced at the end of the validation, showing any rows containing invalid data,
as shown below:
NOTES
· Data can only be imported (uploaded) after it has first been validated
· When saving data to an Excel spreadsheet, the program will create a hidden column
(Column A) - this column should never be exposed or edited. Where new data lines are
© 2010 HR Systems Limited
Program Configuration
39
entered into the spreadsheet, this column will be blank to signify that the program should
insert new data (as apposed to amending existing data)
4.2
Tools Menu
Click on an option above to see the individual help topic, or see the descriptions below:
· To Do List - displays the To Do List
· Send Email - displays the Send Email program allowing users to send emails from within the
program
· Import Transactions - a fast and easy way to import cost transaction data into the program see Import Transactions
4.2.1
To Do List
This program will show all Actions marked as 'To Do' categorised as to whether they are Overdue,
Today or set for a date in the Future.
Actions are created by right clicking on People / Assignments Data Grid and selecting 'Add Action'
or from within the Actions tab of the People / Assignments Data Forms.
Please refer to Data Grids for how to use the To Do List grid view. In addition to the standard
features described in the link, the following options are available:
· Delete - this will permanently delete the item - not just from the To Do List but also from the
Actions tab of the Person / Assignment.
· Mark as Done - this can be chosen by right clicking the mouse over a selected row and will
© 2010 HR Systems Limited
40
Expat Tracker
allow an action to marked as not 'To Do' - i.e. it will no longer appear in the To Do List but
will still appear in the Actions tab of the Project / Position / Person / Assignment.
· Edit - double clicking on a row will allow editing of the action - including setting another date
or removing the mark 'To Do' - see Action Details
4.2.2
Send Email
The Send Email program allows users to send emails from within the Expat Tracker program
without having Outlook or another email client installed.
The program opens the Expat Tracker Email Editor
4.2.3
Unposted Transactions
This program shows all transactions imported but not yet posted into the program.
The columns on the data grid should be self evident, although the following may need explanation:
·
·
·
·
·
·
·
·
·
Staff Number - the Person ID (Staff Number) for whom the transaction is being posted
First Name - the first name of the person
Last Name - the last name of the person
Position Title - the title of the assignment to which the transaction was allocated
Date - the effective date of the transaction
Pay Type - the transaction type (as per the Pay Types library)
Currency - the transaction currency (as per the Currencies library)
Value - the transaction value
Error - each row is validated against the database and one or more errors may be reported see below
The following Error statuses may be reported:
· 0 - Blank - No error
© 2010 HR Systems Limited
Program Configuration
41
· 1 - No Value - no (or zero) transaction value given
· 2 - No Currency - the Currency Code imported was not found not found in the Currencies
table
· 3 - No Pay Type - the Pay Type imported was not found not found in the Pay Types table
· 4 - No Transaction Date - no (or invalid) transaction date
· 5 - No Assignment - the Person or an associated Assignment was not found in the
database
Rows with an error status of 0 will be shown as normal (black), otherwise rows with an error
statuses of 1 to 5 will be shown as red. Only rows with an error status of 0 can be imported into the
database.
Please refer to Data Grids for how to use the Import Transactions grid view. In addition to the
standard features described in the link, the following options are available:
· Edit Transaction - this can be chosen by double clicking on an individual transaction row
and will display the Unposted Transaction page relating to the selected transaction. This can
then be used to update the transaction so that it passes the validation tests and can be
posted into the database.
· Import Transactions - this can be chosen from the Toolbar and will display the Import
Transactions dialog screen.
· Post Transactions - this can be chosen from the Toolbar and will display the Post
Transactions dialog screen.
4.2.3.1
Unposted Transaction
The above program is loaded when a Timesheet row is double clicked from the Unposted
Transactions view.
Please refer to Data Forms for how to use the Timesheet data form. In addition to the standard
features described in the link, the following tabs are available:
Depending on the exact configuration of the system, the following data fields may be available for
input / editing:
· Person - this can be selected from the drop down list of persons with assignments
· Assignment - identifying the assignment for which the transaction is being posted - this can
© 2010 HR Systems Limited
42
Expat Tracker
·
·
·
·
4.2.3.2
be selected from the drop down list of assignments
Transaction Date - the date of the transaction
Pay Type - this can be selected from the drop down list of pay types
Currency - this can be selected from the drop down list of currencies
Value - the transaction value
Import Transactions
The above dialog screen is shown when a user clicks on the Import Transactions toolbar button on
the Unposted Transactions View.
The following options are available:
· Import And Append - import transaction data from a Transactions Import Spreadsheet and
add the data to the existing Unposted Transactions
· Import And Clear - import transaction data from a Transactions Import Spreadsheet and
delete any existing Unposted Transactions
· Clear Only - delete any existing Unposted Transactions
For the Import Options, the user must select the Spreadsheet file name by clicking on the ellipses
(...) button.
Once a file name or date has been selected (unless the Clear Only option has been chosen) the
'Import' button can be clicked to perform the chosen action.
Once the action has been performed, the dialog screen will close and any changes will appear on
the Unposted Transactions View.
© 2010 HR Systems Limited
Program Configuration
4.2.3.3
43
Post Transactions
The above dialog screen is shown when a user clicks on the Post Transactions toolbar button on
the Unposted Transactions View.
Posting transactions is extremely simple, just enter a meaningful name for the transaction batch
and click the 'Accept' button.
NOTE - ONLY validated transactions (i.e. those with a status less than 3) will be posted - all other
non-validated transactions will remain on the Unposted Transactions View.
Once the postings have been completed, the dialog screen will close and the new postings will
appear on the Unposted Transactions View
4.3
Help Menu
See the descriptions below:
Contents - launches the web based help in a separate browser window
Index - launches the web based help index in a separate browser window
Search - launches the web based help search in a separate browser window
Help on Current Page - displays the help on the current page (i.e. current program loaded) in
a separate program tab which can be kept open at the same time as the program
· Frequently Asked Questions - displays the Frequently Asked Questions help topic in a
separate program tab
· Support - launches the Expat Tracker web site support page
· About - shows the product version number
·
·
·
·
© 2010 HR Systems Limited
44
Expat Tracker
© 2010 HR Systems Limited
Libraries
Part
V
46
5
Expat Tracker
Libraries
Before the program can be used to control assignee planning, a number of library data tables need
to be populated with data.
Traditionally this will be done in bulk when setting up the company, but routine maintenance will
need to be carried out, with regard to:
· Adding new items
· Deleting old items
· Editing existing items
There are two types of library tables:
· Static libraries - the first 16 items listed above the dividing line. These are tables that just
consist of one or two fields of data
· Complex libraries - the 2 items listed below the dividing line. These are tables that have
subsidiary data for each main data element. For example there can be any number of
Currencies created and each currency created can have any number of date dependant
rates.
It is not intended to show screens for all static libraries, so the following libraries have their own
help pages:
© 2010 HR Systems Limited
Libraries
47
· Locations (as an example of a static library)
· Organisation Structures (see also Creating Organisation Structures)
5.1
Locations
This program allows users to set up Locations. These can be used later for analysis and reporting
purposes.
Please refer to Data Grids for how to use the Locations grid view. In addition to the standard
features described in the link, the following options are available:
· Add New - this can be chosen from the Toolbar and will display a blank Location Details
page ready for the data to be entered for a new location.
· Delete - this can be chosen from the Toolbar and will allow the location to be deleted subject
to confirmation. The deletion will only proceed if the Location is not currently referenced
elsewhere in the system (e.g. by the Positions table)
© 2010 HR Systems Limited
48
5.1.1
Expat Tracker
Location Details
The above program is loaded when a User row is double clicked from the Locations view.
Please refer to Data Forms for how to use the Locations data form.
Depending on the exact configuration of the system, the following data fields may be available for
input / editing:
· Name - the name of the Location
· Region - this can be selected from a drop down of available regions when adding a new
location.
· Country - this can be selected from a drop down of available countries when adding a new
location.
· State / Province - this can be selected from a drop down of available states when adding a
new location. This field is optional as not all countries have states or provinces
· City - an optional name of the city associated with the location.
· Address - the full address of the company location
© 2010 HR Systems Limited
Libraries
5.2
49
Organisation Structures
This program allows users to set up Organisation Structures. These allow different reporting
structures to be defined for each company - for more detail on these structures see Creating
Organisation Structures.
Please refer to Data Grids for how to use the Organisation Structures grid view. In addition to the
standard features described in the link, the following options are available:
· Add New - this can be chosen from the Toolbar and will display a blank Structure Details
page ready for the data to be entered for a new structure.
· Delete - this can be chosen from the Toolbar and will allow the structure to be deleted
subject to confirmation. The deletion will only proceed if the structure does not have any
Structure Items
NOTE - Organisation Structure names can be overridden using the Overrides program - e.g,
Type1 can be defined as Company, Type2 as Division, Type 3 as Cost Centre
5.2.1
Structure Details
© 2010 HR Systems Limited
50
Expat Tracker
The above program is loaded when a Organisation Structure row is double clicked from the
Organisation Structures view.
Please refer to Data Forms for how to use the Organisation Structure data form. In addition to the
standard features described in the link, the following tabs are available:
· Organisation Structure Items - this will show all the Structure Items created for the
selected structure
Depending on the exact configuration of the system, the following data fields may be available for
input / editing:
· Name - the name of the Structure (NOTE - Organisation Structure names can be overridden
using the Overrides program - e.g, Type1 can be defined as Company, Type2 as Division,
Type 3 as Cost Centre)
5.2.2
Structure Items
This program shows all the items created for the individual structure. It also allows users to set up
and edit Organisation Structure Items.
Please refer to Data Grids for how to use the Organisation Structure Items grid view. In addition to
the standard features described in the link, the following options are available:
· Add New - this can be chosen from the Toolbar and will display a blank Structure Item
Details page ready for the data to be entered for a new structure item.
· Delete - this can be chosen from the Toolbar and will allow the structure item to be deleted
subject to confirmation. The deletion will only proceed if the structure item is not currently
referenced elsewhere in the system (e.g. by the Assignments table)
© 2010 HR Systems Limited
Libraries
5.2.2.1
51
Structure Item Details
The above program is loaded when a Structure Item row is double clicked from the Structure Items
view.
Please refer to Data Forms for how to use the Structure Items form.
Depending on the exact configuration of the system, the following data fields may be available for
input / editing:
· Object - the top level Structure for which this item is being created. This field will be
automatically populated when the item is created and cannot be edited.
· Name - the name of the Item.
© 2010 HR Systems Limited
People and Assignments
Part
VI
People and Assignments
6
53
People and Assignments
A company will have the following non-static tables:
· People - these are available to work in any assignment
· Assignments - these represent the physical allocation of a person to an assignment
· Travel Diary - any person (whether or not on assignment) may complete a travel diary
The programs described in this section allow authorised users to perform all routine tasks on these
data elements (e.g. adding new, editing and deleting).
6.1
People
This program allows users to set up and maintain People (Employees).
Please refer to Data Grids for how to use the People grid view. In addition to the standard features
described in the link, the following options are available:
· Add New - this can be chosen from the Toolbar and will display a blank Person Details page
ready for the data to be entered for a new person.
· Delete - this can be chosen from the Toolbar and will allow the person to be deleted subject
to confirmation. The deletion will only proceed if the person does not have any assignments.
· View Details - this can be chosen by right clicking the mouse over a selected row or double
clicking the mouse on a row and will display the Person Details for the selected person.
· Quick View - this can be chosen by right clicking the mouse over a selected row and will
display the Data Details for the selected person.
© 2010 HR Systems Limited
54
Expat Tracker
· Add Assignment - this can be chosen by right clicking the mouse over a selected row and
will display a new Assignment Details form for the selected person.
· Add to Email Recipients - this can be chosen by right clicking the mouse over a selected
row and will add the client (subject to a valid email address) to be added to an email as
either To, Cc or Bcc - see Email Editor. If the Email Editor is closed, a new Email will be
created with the client's email address, otherwise the client's email address will be added to
the list of recipients.
· Send Standard Email - this can be chosen by right clicking the mouse over a selected row
and will display the Standard Document dialog box for selection of a client standard email.
· Send Standard Letter - this can be chosen by right clicking the mouse over a selected row
and will display the Standard Document dialog box for selection of a client standard letter.
· Change Live Status - this can be chosen by right clicking the mouse over a selected row
and will allow a person to marked as Non Live. NOTE - People are never physically deleted
from the database and they may be re-activated from the People (Non Live) view.
· Record Actions - this can be chosen by right clicking the mouse over a selected row and
will display the New Actions dialog box. Actions created will be saved against the person and
can be viewed in the Person's Actions tab. They may also appear in the User's To Do list.
· Add Document - this can be chosen by right clicking the mouse over a selected row and will
display the New Document dialog box. Documents created will be saved against the person
and can be viewed in the Person's Documents tab.
© 2010 HR Systems Limited
People and Assignments
6.1.1
55
Person Details
The above program is loaded when a Person row is double clicked, or the 'View Details' option
selected on a right mouse click, from the People view.
Please refer to the Data Forms for how to use the Person data form. In addition to the standard
features described in the link, the following tabs are available:
· Assignments - this will show all the Assignments for the person - see Assignments
· Dependants - this will show all the Dependants for the person - see Dependants
· Addresses - this will show all the Addresses for the person - see Addresses
· Bank Accounts - this will show all the Bank Accounts for the person - see Bank Accounts
· Documents - this will display any documents saved against the person - see Document
© 2010 HR Systems Limited
56
Expat Tracker
Views
· Actions - this will display all actions for the person - see Action Views
Depending on the exact configuration of the system, the following data fields may be available for
input / editing:
· Staff Number - an identifier for the person - this can be amended at any time
· Photo - clicking on the ellipse button will invoke the Photo Dialog allowing viewing and/or
editing of the persons' photo
· First Name - the person's first name
· Initials - the person's middle initials
· Last Name - the person's last name (surname)
· Maiden Name - the person's maiden name (if relevant)
· Prefix - this can be selected from a drop down list of all Prefixes (these are created using
the Standard Libraries)
· Suffix - this can be selected from a drop down list of all Suffixes (these are created using
the Standard Libraries)
· Gender - this can be selected from a drop down list of Genders
· Marital Status - this can be selected from a drop down list of all Marital Statuses (these are
created using the Standard Libraries)
· Birth Date - the person's birth date
· Birth Place - the person's birth place (normally town)
· Birth Country - this can be selected from a drop down list of all Countries (these are created
using the Standard Libraries)
· Citizenship - this can be selected from a drop down list of all Countries (these are created
using the Standard Libraries)
· Dual Citizenship - this can be selected (if relevant) from a drop down list of all Countries
(these are created using the Standard Libraries)
· Hire Date - the person's hire date
· Organisation Structures - up to nine Organisation Structures can be defined with any
number of items for each structure (these are created using the Standard Libraries Organisation Structures). Please refer to Creating Organisation Structures for more
information on their use.
· IDs - up to five IDs can be defined
· Languages - up to five Languages can be defined together with their skill level. Languages
and Skill Levels can be selected from a drop down list of all Countries (these are created
using the Standard Libraries)
· HR Indicator - this is for use in user data filters where certain persons can only be viewed by
higher access level users
· Emails - these fields are optional
· Notes - these are optional
© 2010 HR Systems Limited
People and Assignments
6.1.2
57
Photo
The photo dialog is displayed when the photo ellipse (...) button is clicked on a Person Details
form.
The following options are available:
· Add Photo from file - an image file can be selected by clicking on the File Name ellipse
button
· Copy Photo to clipboard - this will copy the photo onto the user's clipboard and can then be
pated into other applications
· Accept - saves the image and closes the dialog
· Close - closes the dialog without saving the image
6.1.3
Dependants
This program allows users to set up Dependants for a selected person.
© 2010 HR Systems Limited
58
Expat Tracker
Please refer to Data Grids for how to use the Dependants grid view. In addition to the standard
features described in the link, the following options are available:
· Add New - this can be chosen from the Toolbar and will display a blank Dependants Details
page ready for the data to be entered for a new dependant for the selected person
· Delete - this can be chosen from the Toolbar and will allow the dependant to be deleted
subject to confirmation.
6.1.3.1
Dependants Details
The above program is loaded when a Dependant row is double clicked from the Dependants view.
Please refer to Data Forms for how to use the Dependants data form.
Depending on the exact configuration of the system, the following data fields may be available for
input / editing:
· Person - the Person for whom this dependant is being created. This field will be
automatically populated when the dependant is created and cannot be edited.
· First Name - the dependant's first name
· Middle - the dependant's middle name or initials
· Last Name - the dependant's last name (surname)
· Gender - this can be selected from a drop down list of Genders
· In Full Time Education? - check if yes, uncheck if no
· In Host Country From Date - the date from which the dependant has been resident in the
host country
· In Host Country To Date - the date to which the dependant has been resident in the host
© 2010 HR Systems Limited
People and Assignments
59
country
· Relationship Type - this can be selected from a drop down list of Relationships (these are
created using the Standard Libraries)
· Taxable From Date - the date from which the dependant has been taxable in the host
country
· Taxable To Date - the date to which the dependant has been taxable in the host country
· Student Status - this can be selected from a drop down list of Student Statuses (these are
created using the Standard Libraries)
· Date of Birth - the dependant's date of birth
· Place of Birth - the dependant's place (town) of birth
· Country of Birth - this can be selected from a drop down list of all Countries (these are
created using the Standard Libraries)
· Social Security Number - the dependant's social security number
· Citizenship - this can be selected from a drop down list of all Countries (these are created
using the Standard Libraries)
· Maiden Name - the person's maiden name (if relevant)
6.1.4
Addresses
This program allows users to set up any number of Addresses for the person selected.
Please refer to Data Grids for how to use the Addresses grid view. In addition to the standard
features described in the link, the following options are available:
· Add New - this can be chosen from the Toolbar and will display a blank Addresses Details
page ready for the data to be entered for a new address for the person selected.
· Delete - this can be chosen from the Toolbar and will allow the address to be deleted
subject to confirmation.
© 2010 HR Systems Limited
60
6.1.4.1
Expat Tracker
Addresses Details
The above program is loaded when an Address row is double clicked from the Addresses view.
Please refer to Data Forms for how to use the Addresses data form.
Depending on the exact configuration of the system, the following data fields may be available for
input / editing:
· Person - the Person for whom this address is being created. This field will be automatically
populated when the address is created and cannot be edited.
· Type - this can be selected from a drop down list of Address Types (these are created using
the Standard Libraries)
· Address - the address lines for the address
· City - an optional name of the city associated with the address.
· State / Province - this can be selected from a drop down of available states when adding a
new location. This field is optional as not all countries have states or provinces
· Country - this can be selected from a drop down list of all Countries (these are created using
the Standard Libraries)
· Postcode - the postcode for the address
· Phone - the phone number at the address
· Fax - the fax number at the address
· Speed dial - the speed dial number at the address
© 2010 HR Systems Limited
People and Assignments
6.1.5
61
Bank Accounts
This program allows users to set up any number of Bank Accounts for the selected person.
Please refer to Data Grids for how to use the Bank Accounts grid view. In addition to the standard
features described in the link, the following options are available:
· Add New - this can be chosen from the Toolbar and will display a blank Bank Accounts
Details page ready for the data to be entered for a new bank account for the selected
person..
· Delete - this can be chosen from the Toolbar and will allow the bank account to be deleted
subject to confirmation.
6.1.5.1
Bank Accounts Details
The above program is loaded when a Bank Account row is double clicked from the Bank Accounts
view.
Please refer to Data Forms for how to use the Bank Accounts data form.
Depending on the exact configuration of the system, the following data fields may be available for
input / editing:
© 2010 HR Systems Limited
62
Expat Tracker
· Person - the Person for whom this bank account is being created. This field will be
automatically populated when the bank account is created and cannot be edited.
· Type - this can be selected from a drop down list of Bank Types (these are created using
the Standard Libraries)
· Bank Name - the name of the bank
· Address - the address lines for the bank, including post town and postcode
· Country - this can be selected from a drop down list of all Countries (these are created using
the Standard Libraries)
· Account Name - the name of the bank account
· Account Number - the bank account number
· Sort Code - the bank account sort code
· IBAN - the bank account IBAN number
· Swift - the bank account Swift number
6.2
Assignments
The above program is loaded from the Expats navigation pane (as per example above) or when
the Assignments tab is clicked from the Person Details (when the view is restricted to assignments
for the person selected)
Please refer to Data Grids for how to use the Assignments grid view. In addition to the standard
features described in the link, the following options are available:
· Add New - this can be chosen from the Toolbar and will display a blank Assignment Details
page ready for the data to be entered for a new assignment.
· Delete - this can be chosen from the Toolbar and will allow the assignment to be deleted
subject to confirmation.
· View Details - this can be chosen by right clicking the mouse over a selected row or double
clicking the mouse on a row and will display the Assignment Details for the selected
assignment.
· Quick View - this can be chosen by right clicking the mouse over a selected row and will
display the Data Details for the selected assignment.
© 2010 HR Systems Limited
People and Assignments
63
· Add Workflow - this can be chosen by right clicking the mouse over a selected row and will
display the Add Workflow dialog box. Workflows created will be saved against the
assignment and can be viewed in the Assignment's Workflows tab.
· Change Live Status - this can be chosen by right clicking the mouse over a selected row
and will allow an assignment to marked as Non Live. NOTE - Assignemnts are never
physically deleted from the database and they may be re-activated from the Assignments
(Non Live) view.
· Record Actions - this can be chosen by right clicking the mouse over a selected row and
will display the New Actions dialog box. Actions created will be saved against the
assignment and can be viewed in the Assignment's Actions tab. They may also appear in
the User's To Do list.
· Add Document - this can be chosen by right clicking the mouse over a selected row and will
display the New Document dialog box. Documents created will be saved against the
assignment and can be viewed in the Assignment's Documents tab.
6.2.1
Assignment Details
The above program is loaded when an Assignment row is double clicked, or the 'View Details'
option selected on a right mouse click, from the Assignments view.
Please refer to the Data Forms for how to use the Assignments data form. In addition to the
standard features described in the link, the following tabs are available:
© 2010 HR Systems Limited
64
Expat Tracker
· Compensation - this will show all 'planned' compensation items for the assignment (e.g.
home / host salary, bonus) - see Compensation
· Transactions - this will show all 'actual' payment items for the assignment (e.g. home / host
salary, bonus) - see Transactions
· Documents - this will display any documents saved against the assignment - see Document
Views
· Actions - this will display all actions for the assignment - see Action Views
· Workflows - this will show all the Workflows for the assignment - see Workflows
Depending on the exact configuration of the system, the following data fields may be available for
input / editing:
· Person - the person that the assignment is allocated to - this cannot be changed once the
assignment has been created
· Assignment Title - this is a user defined title for the assignment position
· Performance Rating - a user defined number
· HR Co-ordinator - this can be selected from a drop down list of all User and identifies the
user (HR Co-ordinator) responsible for the assignment
· Assignment Status - this can be selected from a drop down list of all Statuses (these are
created using the Standard Libraries)
· Grade - this can be selected from a drop down list of all Grades (these are created using
the Standard Libraries)
· Effective Date - the effective date for the assignment (this might not be the same as the start
and end dates)
· Start Dates - the anticipated and actual start dates for the assignment
· End Dates - the anticipated and actual end dates for the assignment
· Home / Host Location - these can be selected from a drop down list of all Locations (these
are created using the Standard Libraries)
· Home / Host Organisation Structures - up to nine Organisation Structures can be defined
with any number of items for each structure (these are created using the Standard Libraries
- Organisation Structures). Please refer to Creating Organisation Structures for more
information on their use. NOTE - the above example shows three structures titled
'Company', 'Division' and 'Cost Centre' - however the descriptions associated with these
structures can be changed using the Overrides program
· Home / Host Salary - a ready only view of the Salary Compensation data
· Home / Host Bonus - a ready only view of the Bonus Compensation data
· Notes - these are optional
In addition to the above fields, two sections Person Contract Dates and Person Details show fields
from the Person Details page for the person assigned.
© 2010 HR Systems Limited
People and Assignments
6.2.2
65
Compensation
This program allows users to set up any number of 'planned' Compensation elements for the
selected assignment (e.g. home / host salary, bonus).
Please refer to Data Grids for how to use the Compensation grid view. In addition to the standard
features described in the link, the following options are available:
· Add New - this can be chosen from the Toolbar and will display a blank Compensation
Details page ready for the data to be entered for a new compensation element for the
selected assignment.
· Delete - this can be chosen from the Toolbar and will allow the compensation element to be
deleted subject to confirmation.
6.2.2.1
Compensation Details
The above program is loaded when a Compensation row is double clicked from the
Compensations view.
Please refer to Data Forms for how to use the Compensations data form.
Depending on the exact configuration of the system, the following data fields may be available for
input / editing:
© 2010 HR Systems Limited
66
Expat Tracker
· Assignment - the Assignment for which this compensation item is being created. This field
will be automatically populated when the item is created and cannot be edited.
· Effective Date - the (optional) effective date of the compensation item
· Pay Type - this can be selected from a drop down list of Pay Types (these are created using
the Standard Libraries)
· Currency - this can be selected from a drop down list of Currencies (these are created using
the Standard Libraries)
· Value - the value of the compensation item in the currency selected
6.2.3
Transactions
This program allows users to set up 'actual' Transactions (payments) for the selected assignment
(e.g. home / host salary, bonus)
Please refer to Data Grids for how to use the Transactions grid view. In addition to the standard
features described in the link, the following options are available:
· Add New - this can be chosen from the Toolbar and will display a blank Transactions
Details page ready for the data to be entered for a new transaction item relating to the
selected assignment.
· Delete - this can be chosen from the Toolbar and will allow the transaction to be deleted
subject to confirmation.
© 2010 HR Systems Limited
People and Assignments
6.2.3.1
67
Transactions Details
The above program is loaded when a Transaction row is double clicked from the Transactions
view.
Please refer to Data Forms for how to use the Transactions data form.
Depending on the exact configuration of the system, the following data fields may be available for
input / editing:
· Assignment - the Assignment for which this transaction item is being created. This field will
be automatically populated when the item is created and cannot be edited.
· Transaction Date - the actual date of the transaction item
· Pay Type - this can be selected from a drop down list of Pay Types (these are created using
the Standard Libraries)
· Currency - this can be selected from a drop down list of Currencies (these are created using
the Standard Libraries)
· Value - the value of the transaction item in the currency selected
6.2.4
Workflow Actuals
This program allows users to view Workflows set up for the selected assignment. Workflows can
be create by right clicking on an Assignment in the Assignments view and selecting Add Workflow.
© 2010 HR Systems Limited
68
Expat Tracker
Please refer to Data Grids for how to use the Workflows grid view. In addition to the standard
features described in the link, the following options are available:
· Delete - this can be chosen by right clicking the mouse over a selected row and will allow
the workflow to be deleted subject to confirmation
· View Phases - this can be chosen by right clicking the mouse over a selected row and will
allow the user to view / edit the Workflow Phases
6.2.4.1
Add Workflow
This dialog allows the user to add a workflow - by right clicking on an assignment row in the
Assignments view.
The following data elements can be set:
· Workflow - selectable from a drop down list of available workflows
· Start Date - the intended start date of the first phase of the workflow - all other phase dates
will be calculated from this date based on the Period Type and Period Days - see Workflow
Designer
· Default User - selectable from a drop down list of users. The actual phase updates can be
linked to a specific user.
To add the workflow, click Accept otherwise click Close to cancel the action.
© 2010 HR Systems Limited
People and Assignments
6.2.4.2
69
Workflow Phases
This program allows users to view and edit workflow phases for the selected workflow.
Please refer to Data Grids for how to use the Workflow Phases grid view. In addition to the
standard features described in the link, the following options are available:
· Add New - this can be chosen by right clicking the mouse over a selected row and will add a
phase above the selected row.
· Delete - this can be chosen from the Toolbar and will allow the phase to be deleted subject
to confirmation.
· Update Phase - this will display the Update Phase dialog allowing the user to enter the
action, date and comments
© 2010 HR Systems Limited
70
Expat Tracker
6.2.4.2.1 Update Workflow Phase
This dialog allows the user to update a workflow phase - by right clicking on a workflow phase row
in the Workflow Phases view.
The following data elements can be set:
·
·
·
·
·
·
Action Date - the date of the update action
Action User - the user who performed the update - selectable from a drop down list of users
Action Due - the action (or multiple choice actions) that was due
Action - the actual action performed
Comments - any comments on the action performed
Recalculate Dates - for complex workflows future phase dates can be adjusted based on the
data of the phase being updated
To commit the update, click Accept otherwise click Close to cancel the update.
© 2010 HR Systems Limited
People and Assignments
6.3
71
Travel Diary
The Expat Travel Diary allows authorised users to view and edit the travel diaries for all people.
Traditionally the data will have been added by the people themselves using the web based
Silverlight program and this program will purely be used to view and maybe modify the data
entered.
Any data entered via the Silverlight program will be viewable through this program and also via the
Report Generator - see Reports
To view / edit data, a person must be selected via the 'Select Person' drop down list - this will then
populate the diary with their data.
To enter / edit data, the following elements can be selected:
· Country 1 - mandatory data selectable from the Country drop down list - this will represent
the country in which they were present during the day or date range
· Country 2 - optional data representing a country to which they travelling in the day (e.g.
leaving Country 1 and arriving in Country 2)
· Type - the day type can be identified as
· Workday
· Weekend
· Vacation
· Sick
· Public Holiday
· Force Weekends - this will force weekends to be shown as weekends irrespective of the
Type selected
Once selected the data elements can be applied to one or more days by:
© 2010 HR Systems Limited
72
Expat Tracker
· Clicking on a single day - this is the only option is two Countries have been selected
· Entering the Start and End dates and adding a range
© 2010 HR Systems Limited
Reporting
Part
VII
74
7
Expat Tracker
Reporting
Reporting is at the heart of the Expat Tracker system. Reports fall into the following categories:
· Grids - all Grid Views can be filtered if required and then output either direct to a printer or
an Excel spreadsheet - please refer to Data Grids for how to use the various grid views. This
type of reporting is ideal for printing standard libraries, or filtered listings of projects,
positions, assignments or personnel.
· Reports - a powerful report generator that can produce complex reports based on static and
calculated data - see Reports
· Graphs - a powerful graph generator that can produce illustrative graphs based on static
and calculated data - see Graphs
· Data Views - non formal grid based reports - see Data Views
7.1
Reports
This program allows users to view, create and delete Reports.
The Reports view shows the reports that have been created, either by the user for their own use,
or by other users saved for the use of everyone.
Please refer to Data Grids for how to use the Reports grid view. In addition to the standard
features described in the link, the following options are available:
· Create New Report - this can be chosen from the Toolbar and will display the Report
Wizard dialog.
· Run Report - this can be chosen by right clicking on a selected report (see example above)
allowing that report to be run with options as to the output. This uses the Publish tab of the
Report Wizard.
© 2010 HR Systems Limited
Reporting
75
· Design Report - this can be chosen by right clicking on a selected report (see example
above) allowing that report to be re-designed - i.e. change certain selection elements without
having to create a new report from scratch. This commences with the Publish tab of the
Report Wizard.
· Delete Report - this can be chosen by right clicking on a selected report (see example
above) allowing that report to be deleted subject to confirmation.
All reports will generate a grid view but the following output options exist:
· View - shows the grid view which can then be filtered, sorted and output to a printer or to an
Excel spreadsheet - please refer to Data Grids for how to use the grid views
· Preview - will automatically generate a print preview of the grid. The option exists to change
the page settings (e.g. margins, orientation) before printing
· PDF - will generate a PDF (Adobe Acrobat) file that will be immediately displayed in the
Acrobat Reader (if installed). The file is page size agnostic so that wide reports can be
printed on plotters or other printers To download theAcrobat Reader - go to http://www.
adobe.com/products/acrobat/readstep2.html. See also Report Publishing.
· XPS - will generate a XPS (XML Paper Specification) file that will be immediately displayed
in the XPS Viewer (if installed). The file is page size agnostic so that wide reports can be
printed on plotters or other printers. To download the XPS Viewer - go to http://www.
microsoft.com/whdc/xps/viewxps.mspx. See also Report Publishing.
After the report has been produced, the following options are available:
· Print - to output the report to a selected printer
· Excel - to save the report in Excel format
· Publish - this can be chosen from the Toolbar (by clicking on the
the publish page of the Report Wizard - see Report Publishing
© 2010 HR Systems Limited
icon) and will display
76
7.2
Expat Tracker
Graphs
This program allows users to view, create and delete Graphs.
The Graphs view shows the graphs that have been created, either by the user for their own use, or
by other users saved for the use of everyone.
Please refer to Data Grids for how to use the Graphs grid view. In addition to the standard features
described in the link, the following options are available:
· Create New Graph - this can be chosen from the Toolbar and will display the Report Wizard
dialog.
· Run Graph - this can be chosen by right clicking on a selected graph (see example above)
allowing that graph to be run with options as to the output. This uses the Publish tab of the
Report Wizard.
· Design Graph - this can be chosen by right clicking on a selected graph (see example
above) allowing that graph to be re-designed - i.e. change certain selection elements without
having to create a new graph from scratch. This commences with the Publish tab of the
Report Wizard.
· Delete Graph - this can be chosen by right clicking on a selected graph (see example
above) allowing that graph to be deleted subject to confirmation.
All reports will generate a graph but the following output options exist:
· View - shows the chart which can then be output to a printer (see example below)
· Preview - will automatically generate a print preview of the chart. The option exists to
change the page settings (e.g. margins, orientation) before printing
· PNG, BMP, JPEG, GIF - will generate a graphic file in the specified format that will be
immediately displayed by the appropriate program (if installed).
© 2010 HR Systems Limited
Reporting
77
After the graph has been produced, the following options are available:
· Print - to output the graph to a selected printer
· Graph Options - this can be chosen from the Toolbar (by clicking on the
icon) and will
allow the user to alter the following settings for the graph:
· Chart Type - selectable from a drop down list of all supported graph types
· Pivot Data - switches rows and columns
· Show Legend - shows the legend of colours (see example above)
· Enhanced Tooltips - shows exact data when hovering over a graph element (see
example above)
7.3
Report Wizard
The Report Wizard is used by both the Reports and Graphs programs. Certain features are
disabled for each type of output and these are explained below.
The Wizard is comprised of four screens as follows:
Screen 1 - Data
© 2010 HR Systems Limited
78
Expat Tracker
The following options / input fields are available:
· Data Source - the main source of data for the report. The following sources will be available
but others (including company specific data sources) may also be available:
People
Assignments
Once this screen has been completed, click on the 'Next' button to move to screen 2
Screen 2 - Columns
© 2010 HR Systems Limited
Reporting
79
This screen can be used to select and filter the columns for the report / graph.
The contents of the column listing will depend upon the data source selected in Screen 1, but the
following options are available:
· Select - the available column fields for the data source will be displayed. For reports, one
or more column fields can be selected for inclusion in the report by checking the box to the
left of the column name. For graphs one column only can be selected and this should only
be selected if a stacked graph is required (stacked by the column selected) - for all other
graphs types no columns should be selected.
· Filter - if only a subset of the data is required then a filter can be applied to one or many
fields. To select a filter, click on the required column field (this does not have to be a column
selected for the report) and select one or more values from the available data elements
which will be displayed on the right hand pane. Not all fields have filters in which case a 'No
Filter Available' message will appear. Date fields have a special From Date and To Date
selection pane - either both or one of these dates can be selected - for example if the report
needs only to contain Positions with a start date after a certain date then just enter the Start
Date field. Filter data once selected MUST be stored by clicking the 'Set Filter' button after
which the column field will be shown in red highlighting that a filter has been applied.
Individual column field filters can be cleared by clicking on the 'Clear Filter' button.
Once this screen has been completed, click on the 'Next' button to move to screen 3
Screen 3 - Groupings
© 2010 HR Systems Limited
80
Expat Tracker
This screen can be used to set grouped columns and to change the order of the columns for the
report. For graphs, this screen is only used for showing where one column has been selected for
stacking.
Initially all column fields will be shown in the 'Reporting Columns' pane on the right of the screen.
Individual columns can be highlighted and, using the up - down - left - right buttons, either moved
within the 'Reporting Columns' pane or transferred to / from the 'Grouped Columns' pane.
Once this screen has been completed, click on the 'Next' button to move to screen 4
Screen 4 - Publish
© 2010 HR Systems Limited
Reporting
81
This screen determines what calculated values are to included on the report / graph and details of
the output.
The following options / input fields are available:
· Format - please refer to Reports and Graphs for the available formats. For certain file
formats a file name will be required.
· Template - for reports only to a PDF or XPS format, a standard template can be specified see Report Publishing
· Page Setup - a report / graph specific header and footer can be entered, and for file based
reports only, an end graphic can be specified. Graphics must first be created using a
graphics program (e.g. Paint, SnagIt) and then saved as a Standard Document with type
Graphics' - see Standard Documents.
· Merge Cells - for reports only, adjacent cells with the same data can be merged into one
cell
· Graph Type - for graphs only, one of three types can be selected from the drop down.
However the program will have selected the most appropriate graph type for the selections
made so this only be changed when required.
· Save - the following options are available:
No - does not save the report
Me Only - saves the report so that it will shown on the Reports / Graphs view by the
user creating the report / graph
Everyone - saves the report so that it will be shown on the Reports / Graphs view by
any user
Overwrite - overwrites a previously saved report / graph - this is the default if a saved
report / graph is being run or redesigned
The last three options require the following data to be specified:
© 2010 HR Systems Limited
82
Expat Tracker
· Report Name to be entered - a check that this name is not already being used will be
made before saving any new reports / graphs
· Report User Access Role - if set will restrict the report visibility to only those users with
at least the access role selected - for more information on access roles - see User
Details
· Report Data Filter - if set will restrict the report visibility to only those users with the
data filter set - for more information on data filters - see User Details
Finally, once all selections have been made, click the 'Produce' button to generate the report /
graph.
7.4
Report Publishing
Report Publishing is available from one of three sources:
· Via the Report Wizard
· By clicking the Publish toolbar button on a Report
Publishing Reports uses the Publish (final) page of the Report Wizard and is only available if the
user selects PDF or XPS as the Format.
Once one of these formats is selected, a Template can optionally be chosen. Templates are preset within the program and contain:
· Page sizes
· Color schemes
· Logos and other graphics
· Alternate row shading
Headers and Footers can be chosen together with an end graphic that will appear at the end of the
last page of the report.
© 2010 HR Systems Limited
Reporting
7.5
83
Data Views
The above program shows a list of all Data Views available to the user.
Data Views are non formal grid based reports that are either generic (shared amongst all
companies) or specific to an individual company. They are used both for exception reporting and
for views that can be manipulated and tailored by users for analysis purposes.
To run the view, double click on the view row or click the 'Open Data View button' on the toolbar see View Report
To request a report, click on the Request Report button. This will redirect the user to the Expat
Tracker Contact Us Web Form where 'Request A Report' can be selected as the 'Area Of Interest'
and the report details entered in the Comments box. Commercial Software will normally integrate
any generic report requests into the program either as a Report or a Data View. Company specific
(i.e. non-generic) reports may be subject to a charge.
© 2010 HR Systems Limited
84
7.5.1
Expat Tracker
View Report
The above program is loaded when the Positions Data View is run from the Data Views program.
A feature of this grid is the ability to drag a column header onto the caption 'Drag a column header
here to group by that column' to group by that column. To drag a column header, click on the
header but keep the mouse down and then drag that header onto the caption, as many times as
you require group levels, as per the example below:
This results in the following view:
© 2010 HR Systems Limited
Reporting
85
Please refer to Data Grids for how to use the Report grid view. In addition to the standard features
described in the link, the following options are available:
· Expand All - this allows all groupings to be expanded at once - instead of having to
individually expand them
· Auto Size - this will automatically resize the column widths to fit the longest piece of data in
each column
© 2010 HR Systems Limited
Sundry
Part
VIII
Sundry
8
Sundry
8.1
Access Levels
87
Each user who logs into the program will have an Access Level of between 1 and 9 - see User
Details.
This Access Level will determine their ability to view and edit data within the Expat Tracker
system.
8.2
Data Grids
The key functionality for any displayed grid is as follows:
Toolbar - the main features are as follows:
If displayed, allows a new record (a new Person in the above example) to be
added
If displayed, allows the selected record to be deleted
Refreshes the grid - useful if the underlying data has changed since the grid
was opened
Print - displays a print preview of the grid data - this can then be modified (e.g.
margins, orientation) before actual printing
Export to Excel - this will generate an Excel spreadsheet containing the grid
data and formatting
© 2010 HR Systems Limited
88
Expat Tracker
The number of rows of data in the grid
Header Bar - this can be used to sort any column as follows:
Clicking once on a column header will sort the data in ascending order
Clicking again on a column header will sort the data in descending order
Filter Bar - this can be used to filter the data in the grid - the main features are as follows:
Clears all filter conditions and redisplays all the original rows of data
Will allow searching on the data based on a number of conditions, a
selection of which are shown below:
By starting to type in the cell, the data will be filtered to match the
letters entered - the example shown only rows where the column
contents start with an 'a' will be shown. Using Backspace will clear
the filter.
By clicking in a cell, and clicking on the down arrow, a selection can
be made from the data contained in the column based on exact
matches. In the example shown, all Managers are shown (as the
selection was made from the Manager column in the above grid) by selecting say 'Christopher Planer', only jobs where he is
Manager will be shown.
Grid Rows - the main features are as follows:
Single
Click
Double
Click
Right Click
Will highlight a single row - as shown above
Will display the full data screen for the row - in the above example this should
display the full data for the Job selected
Will display other options available for the row - as shown above
© 2010 HR Systems Limited
Sundry
8.3
89
Data Forms
The key functionality for any displayed form is as follows:
Toolbar - the main features are as follows (note controls with red captions signify that input is
mandatory):
Will force saving of the form data without closing the form
Will save the form data and then close the form
Only available when adding new records - will save the form data and
then clear the form to allow a further addition
Will close the form. If any data has been amended, the user will be
prompted whether to close or not.
Will display the previous record on the underlying grid view. Not available
when adding a new record.
Will display the next record on the underlying grid view. Not available
when adding a new record.
Form Controls - these can be used as follows:
Basic data entry control - subject to a maximum
number of characters
© 2010 HR Systems Limited
90
Expat Tracker
Combo selection control - allows selection from
a drop down list
Form Assistant selection control - when the user
clicks on the button a separate pane will appear
on the right hand side of the screen allowing
search and selection from the underlying table
Date selection control - for date values - these
can either be typed into the control or selected
from the calendar by clicking on the down arrow
Calculator control - for numeric values - these
can either be typed into the control or selected
from the calculator by clicking on the down arrow
Data Form Tabs - any number of additional tabs may be shown at the foot of the data form - these
can be activated by clicking on each tab.
NOTE - when adding new items, the Data tab only will be visible. The other tabs will become
visible once the data has been saved.
© 2010 HR Systems Limited
Sundry
8.4
Data Details
© 2010 HR Systems Limited
91
92
Expat Tracker
The Quick View data report shows the combined data from the Data Form and any Data Tabs
associated with either a Person or an Assignment.
The view can be printed or exported to Excel.
8.5
Action Views
Action Views can be called from the following programs:
·
·
·
·
·
Home Page - To Do List (filtered for actions marked as 'To Do')
Projects - Actions (filtered for selected project)
Positions - Actions (filtered for selected position)
Personnel - Actions (filtered for selected person)
Assignments - Actions (filtered for selected assignment)
The following options are available:
· Add New - this will add a new action for the selected project / position / person /
assignment.
· Delete - this will delete the selected action
· View Details - this can be chosen by double clicking the mouse on a row and will display
the Action Details for the selected code
Once the desired view is obtained, the grid can be printed or exported to an Excel spreadsheet see Data Grids
© 2010 HR Systems Limited
Sundry
8.5.1
93
Action Details
The above program is loaded when an Action row is double clicked from the Actions view.
Please refer to the Data Forms for how to use the Action data form.
The following data fields will be available for input / editing:
· Date - either the date of an historical action or the date of a future action to be added to the
To Do list
· User - defaults to logged in user but a selection can be made from a list of all users
· Type - this can be selected from drop down list of Action Types
· Add to To Do List - check if the action represents a future action and is one to be shown in
the To Do List
· Description - a description of the action or task
© 2010 HR Systems Limited
94
8.5.2
Expat Tracker
New Actions
Apart from creating actions within the Actions views, multiple actions can be created for selected
People and Assignments.
Having selected a Person or Assignment from their respective grid views, the right click option
'Record Actions' will display the above dialog box. The option exists to not only record a current
action but also the next action which will automatically be added to the User's To Do List.
© 2010 HR Systems Limited
Sundry
8.6
95
Document Views
Document Views can be called from the following programs:
·
·
·
·
Projects - Documents (filtered for selected project)
Positions - Documents (filtered for selected position)
Personnel - Documents (filtered for selected person)
Assignments - Documents (filtered for selected assignment)
The following options are available:
· Delete - this will delete the selected document
· Capture New Document - this will open the New Document dialog box and allow a new
document to be created for the selected project, position, person or assignment.
· View / Print / Email - this can be chosen by double clicking the mouse on a row and will will
display the document in the Document Viewer
· Edit Document - if the document saved is an editable document the this will be presented
for editing within the Document Editor
Once the desired view is obtained, the grid can be printed or exported to an Excel spreadsheet see Data Grids
© 2010 HR Systems Limited
96
8.6.1
Expat Tracker
Document Editor
The Expat Tracker Document Editor is a fully featured word processing program, compatible with
Microsoft Word (including the new Word 2007 format).
It is not the purpose of this help file to describe all the word processing features other than the
Fields option from the Main Menu.
Depending on how the editor has been called, the Fields option may appear. In the above
example, a PAF Form has been selected from the Standard Documents grid and the Edit
Document button on the Toolbar clicked.
As the standard document is linked to Positions, the Fields menu option will contain all the
available fields relating to Positions as shown below:
© 2010 HR Systems Limited
Sundry
97
The fields can be placed anywhere within the document and will appear within {} brackets. Once a
field has been placed into a document, it can be deleted by double clicking on it.
When standard documents, emails or letters are produced using the document, the field names
will be replaced by actual data relating to the object (e.g. Position data)
© 2010 HR Systems Limited
98
8.6.2
Expat Tracker
Document Viewer
The Document Viewer program is launched when an document row is right clicked in the
Document Views.
The Viewer shows the document in preview form with any document fields replaced by actual
values from the project, position, person or assignment data.
Toolbars - the following options are available:
Prints the document to a selected printer
Allows multi page previewing of the document
Displays the following dialog box:
This allows the users to determine whether the document should:
· Be Printed (to a selected printer) and / or
· Be Saved (as a document against the Client / Contact / Job / Employee)
and / or
· Create an action that the document was created (against the Client /
Contact / Job / Employee)
Opens a file dialog box allowing the document to be saved as a PDF file
© 2010 HR Systems Limited
Sundry
8.6.3
99
Email Editor
The Expat Tracker Email Editor allows users to send emails from within the Expat Tracker
program without having Outlook or another email client installed. The only requirement is that an
SMTP Server address is provided in the Company Setup.
The Email Editor can be opened from various parts of the program as follows:
· From the main menu (Tools ... Send Email) - this will enable users to send an email to any
recipient - the email will not however be saved nor will it create an action.
· By right clicking on a Client / Contact / Employee (via their grid view) and selecting Add
Recipient ... To / Cc / Bcc - the name and email address will automatically be populated in
the form and the 'Send / Save' button will appear (see below)
· By right clicking on one or more Clients / Contacts / Employees (via their grid view) and
selecting Send Standard Email - the names and email addresses will automatically be
populated in the form, together with the standard email merged with their data, and the
'Send / Save' button, and optionally the Previous / Next buttons, will appear (see below)
For other than the first option above, the following toolbar will replace the one shown above:
© 2010 HR Systems Limited
100
Expat Tracker
The key functionality for the form is as follows:
Toolbar Buttons - the main features are as follows:
Sends the email - the email will not however be saved nor will it create an
action.
Displays the following dialog box:
This allows the users to determine whether the email should:
· Be Sent (to the recipients) and / or
· Be Saved (as a document against the Client / Contact / Employee) and / or
· Create an action that the email was sent (against the Client / Contact /
Employee)
Displays the previous email in 'multi select' standard email
Displays the next email in 'multi select' standard email
Buttons - the main features are as follows:
Displays a dialog box that enables a name and email address combination to be
added to the 'To' list
Displays a dialog box that enables a name and email address combination to be
added to the 'Cc' list
Displays a dialog box that enables a name and email address combination to be
added to the 'Bcc' list
Displays a dialog box that enables selection of documents to be attached to the
email
Enables deletion of the currently selected recipient or attachment
Drop Down Boxes
There can be any number of recipients (of type 'To', 'Cc' or 'Bcc') or attachments and these can be
viewed and selected via the drop down (combo) boxes.
Message Editor
This is a fully featured word processing editor with a standard toolbar and cut and paste facilities
from other editors such as Word.
© 2010 HR Systems Limited
Sundry
8.6.4
101
New Document
Documents of virtually any type can be stored against individual people or assignments.
Documents stored can include:
· External documents - including:
1. Word documents (*.doc)
2. Word 2007 documents (*.docx)
3. Text files (*.txt)
4. Rich Text Format (*.rtf)
5. Hypertext Markup Language (*htm, *.html)
6. Adobe PDF Files (*.pdf)
7. Excel Spreadsheets (*.xls)
8. PowerPoint Presentations (*.ppt, *.pps)
NOTE - external document types 1 to 5 above can be displayed and edited within the program.
Document types 6 to 8 will require the relevant program for viewing and editing.
· Standard documents
Standard documents when stored will convert any document fields into data from the relevant
project, position, person or assignment before being stored.
© 2010 HR Systems Limited
102
Expat Tracker
Standard documents can be created via the Standard Documents program.
8.6.5
Standard Document
Standard Documents can include both standard letters and standard emails.
These must first be created via the Standard Documents program and then edited via the
Document Editor.
Standard documents can be created for any number of selected Clients, Client Contacts, Jobs
(Commercial version) and Employees. Having selected one or more recipients from their
respective grid views, the right click options will allow either Standard Emails or Standard Letters.
Having chosen one of these options, the above dialog box will show all standard documents of the
selected type for the Client, Contact, Job or Employee.
Once accepted, the document will appear in either the Email Viewer or the Document Viewer.
8.7
Creating Organisation Structures
Up to nine levels of organization structure can be defined for an individual company and any
number of Organization Structure Items can be defined per level.
These levels are initially labeled as Type1, Type2 ... Type9 but the labels can be overridden for
each Type using the Overrides program.
© 2010 HR Systems Limited
Index
Index
-MMenus
File 24
Help 43
Tools 39
-AAction Details 93
Action Type Details
Action Types 26
Actions 92
-N-
27
New Actions 94
New Document 101
-C-
-O-
Change Descriptions 29
Company Setup 34
Configuration 33
Connection Settings 36
Override Details
Overrides 29
30
-P-
-D-
Publishing Reports
Data Import 37
Date Export 37
Details 25
Document Editor 96
Document Listings 95
Document Viewer 98
Documents 95
-RReport Publishing
Select Standard Document
Send Email 40
Standard Document 102
Standard Document Details
Standard Documents 27
System Configuration 35
System Tools 22
Email 40, 99
Email Editor 99
-F-
Help Menu
-T9
To Do List 39
Toggle Pane 22
Tools Menu 39
-H43
-K-
-UUsers Listing
Key Features
9
© 2010 HR Systems Limited
82
-S-
-E-
File Menu 24
Frequently Asked Questions
82
25
102
28
103
104
Expat Tracker
-WWorkflow Details
Workflows 30
30, 31
© 2010 HR Systems Limited
Expat Tracker