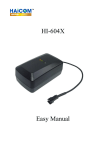
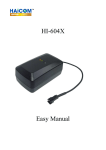
Download HI-602X Easy Manual
Transcript
HI-602X
Easy Manual
INTRODUCTIONS:
HAICOM HI-602X is a very small size (43x69x18mm) GPS/GSM tracker. Inside the tracker,
there are mainly contain: GPS module, GSM module, GPS antenna, GSM antenna,
re-chargeable battery and it is an independent device similar to a regular mobile phone and
completely self-contained. HI-602X uses the most user-friendly program on the air technology
via GPRS data transfer to send back the real time GPS location data directly to another
phone and user can track any moving object live on the map free of charge from our GPRS
web tracking platform. With simply SMS command from any phone, user can easily get the
tracker real time data back anywhere.
With HI-602X multi function tracker, one can track, remote control, tapping any object
globally in real time on the map. User can check the real time location from the GPRS
tracking web site or using the Haicom Tracking software installed on the PC and check the
real time position on the map via the regular dial tone transmission.
HI-602X tracking Device is the best tracking solution for use in the widest range of
applications, from motor homes to mobile home, from cars to caravans, from agricultural
machinery to construction equipment, from containers to golf carts – all the assets that you
feel could be at risk, especially if they do not have their own source of power.
Just place the tracker where there is no metal material on above, user can see his valuable
anytime, anywhere from any computer. The waterproof case allows the tracker still
functioning even though under tough and harsh environment. The build in big battery
provide the independent power supply even if there is no external power supply. The moving
sensor will let the tracker totally switch off (only the microchip standby: 2 mAh) and the
tracker can operate very long, if there is not much movements. With the moving sensor, the
tracker will not drain the car battery when the tracker connected to external battery power.
It is very good personal security and most importantly, parent no need to pay monthly fee
after purchasing the unit. After purchasing, user can put any local GPRS enabled SIM card
(or pre-paid SIM card, etc.) By adjusting the GPRS sending interval, user only need to pay
the phone call charge when someday he wants to do the tracking. Also, by set up the 6
prioritize call back telephone numbers inside HI-602X, user can press the SOS button and the
tracker will immediately send the SMS with GPS location to the preset telephone numbers
about the conditions. User can also press the Geo fencing button so that the tracker will send
the SMS warning when the tracker out of the preset circle area. The Geo fencing is also very
useful for security purpose to restrict your vehicle, moving property movement. For instance,
the tracker will automatically inform you with SMS when your car is out of the preset area
circle.
User can also connect HI-602X to all kinds of optional car kits accessories so that the user can
globally control the vehicle petro supply or electricity by pressing few phone buttons from any
phone. For example,
By connecting the optional vibration sensor, the tracker will also actively warning user when
there is any movement on the vehicle.
By connecting the microphone to the car kit box, user can remotely tap the conversation from
any phone.
GETTING STARTED:
HI-602X main unit overview
Dimension
LED lndicator
LED Color
LED
Status
Amber
On
Charging
Off
Charge Completed
flashing
GPS in 3D fixed
Stay on
GPS not 3D fixed yet
Off
GPS in sleeping mode
Red
On
Battery low
White
Off 3 sec./On 75 micro sec.
GSM stand-by
Off and On 600 micro sec.
Searching GSM network or no SIM
Stay on
GSM network connected
Green
APPLICATIONS:
Real time vehicle tracking
Moving assets security
Personal tracking employee, teens, spouse, fleet, etc.
Child, aged people protection
Pet tracking
Sporting, traveling, recreation tracing
Remotely control vehicle from any where
Tapping the talk around the tracker
Rental car or commercial vehicle management
Features
Haicom Asset Tracking Solution offers you a lot of advantages
Quad band 850/900/1800/1900 MHz GSM system
External SiRF Star III high performance GPS receiver
Internal GSM active antennas
Advanced communication via SMS/TCP/UDP/HTTP
Program, control and the tracker from the OTA (Over the Air) web tracking platform and
also USB configurations
Build in motion sensor for power saving
Support emergency/ over speed/ motion/ power lost alarm
Real time location report on preferred interval and vehicle status monitoring
Premium functions: Fast GPS Fixed/ A-GPS/ Geo-Fencing/ Handsfree Kit/ Anti-Theft/ Data
Logger function with 8MB memory size with 100,000 records or more
Low battery alarm and battery voltage status
• Our GPRS tracking software Platform and server is free; if you have your own server we
can program our tracker with your server protocol
• Worldwide coverage with NO additional programs to buy or install - no additional or hidden
costs!
•
•
•
•
Built-in moving sensor with deep sleeping mode (2mA)
Built in 1,100 mAh battery for independent power
Very high sensitivity GPS fixed
Multi-ways tracking software plate form available
•
•
•
•
•
Customizations for different tracking applications
Comes with strong Magnetic mounting for easy attachment
Stand alone (Internal Antenna - Self Contained Unit)
Worldwide coverage using GSM/GPRS/SMS
allow you to monitor both on demand or at regular intervals
• Ultra low power GPS.
• All-in-one design.
• Provides you 24/7 access to the location of all your assets.
• LIVE real-time tracking, configurable from every 20 second to 72hour GPRS updates!
• Give complete supervision into your operations by seeing how long
assets are sitting around in one place, when they start moving / stop moving etc.
• Establish how long the assets are being used (actual operations time).
• Warns when unauthorised/unwanted movement happens.
• Provides security and accountability.
• Enables the recovery of any stolen assets.
• View asset's history online from any computer
CONNECT TO CAR KIT (OPTIONAL):
By connecting to the optional car kit box and the accessories, user can remotely cut off the
vehicle power or petro from any phone with few phone digits pressed. With connecting the
optional vibration or microwave sensor, the tracker will initiatively send warning SMS to the
preset telephone numbers.
HI-602X car kit set up example
1
GND
2
Vin12V~24V
3
GND
4
ViolationReset
5
GND
6
HelpSw
7
GND
8
GeoFencing
9
RemoteRelay2
10
RemoteRelay2
11
RemoteRelay1
12
RemoteRelay1
Permanent power on installation example
HI-602X connected to car battery via car kit control box
HI-602X Characteristics
Items
Specifications
Specifications
Power Supply
DC 5V
Backup Battery
1100mAh
Normal power consumption
Dimension
46.10mm x 70.7mm x 18.2mm
Operating temperature
-20℃ to 55℃
Humidity
5% to 95% Non-condensing
Frequency
GSM 850/900/1800/1900Mhz
GPS Chipset
latest GPS SIRF-Star III chipset
GPS Sensitivity
-159Db
GPS Frequency
L1,1575.42 MHz
C/A Code
1.023MHz chip rate
Channels
20 channel all-in-view tracking
Position Accuracy
10 meters, 2D RMS
Velocity Accuracy
0.1 m/s
Time Accuracy
1 us synchronized to GPS time
Default datum
WGS-84
Reacquisition
0.1 sec. , average
Hot start
1 sec. , average
Warm start
38sec. , average
Cold start
42 sec. , average
Altitude Limit
18,000 meters (60,000 feet) max.
Velocity Limit
515 meters / second (1000 knots ) max
Interface
One input and one output
Standard Packing
1. HI-602X main unit
2. 1,100mAh battery
3.
4.
5.
6.
18 pin to USB set up cable
AC power adaptor
DC cigarette lighter
mini CD with user manual
The in-build self contained battery
As mentioned, we can not tell you how long the HI-602X battery can last because it is really
depend on how frequent the tracker used and the sleeping mode time.
Anyway, here are the figures:
POWER ON (GPS ON, GSM OFF) mA
GSM connected (GPS on ) 90 mA
GPS OFF, GSM ON 25 mA
GPS OFF, GSM OFF 2 mA
Connect HI-602X to vehicle battery
With the optional car battery cable, user can also connect HI-604 to the vehicle battery for
permanent power supply.
Car battery cable with waterproof jelly bag:
The car battery cable can be connected directly to the vehicle battery (12V or 24V) and
transfer into 5V for the HI-602X. Very important: don’t connect HI-602X USB set up cable
directly to the vehicle battery because the HI-602X 18 pins connector takes only 5V.
GPRS Tracking:
Set up the APN, IP and Port:
1. Connect HI-602X to computer USB port with the set up cable
Setting up
For the initial set up from the retail box, you will need to use the set up program from the
inclusive small CD and perform the set up from your computer. Please make sure to switch off
the power on HI-602X while programming. (User can only program the HI-602X while the
HI-602X on power off status)
1. Connect the 18 pins to USB set up cable from the tracker to your computer USB port:
.
2. Open the tracker set up program:
3. Click the “ Get Parameter “
4. Message will shown: “ GET FINISH “ and all the tracker current set up will appeared:
Please double check with your local telecomm service provider to make sure the SIM card
APN (Access Point Name) and fill in and program to the tracker.
Initial computer set up reminder:
On factory defaults, the basic set up was done.
As soon as you plug in the computer and get parameter, the computer will
automatically get and show the tracker imei # on the program.
You will double check with your SIM card telecomm service provider for the
correspondent APN (Access Point Name) and key in to the APN section (like the
below blue block). The APN could be for instances, “ internet “, “ web. Vodafone
“ or any name.
Also, please double check if the IP and port settings (the below red block) was
correctly set up. (for use with Haicom GPRS web tracking:
http://www.tracking.haicom.com.tw:8090/Default.aspx )
The above settings are the must to make the tracker to start sending data back
to our server and show on the platform. The rest of selections will be set up
depend on individual user’s preferences.
User guides for USB settings and SMS features
1. USB Settings :
A. Press to get the tracker current settings
B. Press to save the settings changed
C. Press to download the GPS data logger records
D. Press to delete and clean out the GPS logger records. To avoid the records capacity too full (the
full capacity is about 257,000 points) and slow down the download time, the records deleting is
recommended after download the GPS data logger.
E. The Password is for the security purposes and the SMS commands can be used after the
password verification.
F. Press to re-flash all settings back to defaults
G. The tracker’s imei#
H. The current firmware version. The file name is based on the data of the generating.
I: The parameter settings for different functions:
1. The continue SMS sending time interval to certain preset phones. The setting is
recommended to set more than 10 (s), 10 seconds, and set “ 0 “ means switch off this function.
2. The continue GPRS GPS coordinates sending time interval to the server. The setting is
recommended to set more than 15 (s), 15 seconds, and set “ 0 “ means switch off this function.
3. The GPS data logger recording time interval. The setting is recommended to set more than 3
(s), 3 seconds, and set “ 0 “ means switch off this function.
4. The geo-fencing setting range (in diameter) The setting is recommended to set more than
500 (m),
500 meters.
5. To temporary disable all the alert functions. The setting is recommended to set less than 300
(s), 300 seconds. During the time, all the alert features will be disabled.
6. The ringing times after the voice tapping function activated.
7. The motion sensor sensitivity. The setting is recommended to set between 21 to 24, The less
the number, the higher the sensibility.
8. The speed limit alert function. The alert will shown after the tracker speed higher than the
speed ( in kilometer per hour)
J: The on/off settings for the alert functions:
1. Turn on or off for the vehicle anti-thief alarm function
2. Turn on or off for the SOS button alarm function
3. Turn on or off for the geo fencing alarm function. The function here is only for testing and
the function will be switched off once the geo fencing function activated (only one time)
4. Turn on or off the alarm when the tracker external power cut off.
5. Turn on or off the alarm when the tracker battery voltage power lower than 3.6V (battery
low)
6. Turn on or off for the motion sensor alarm function. The function here is only for testing and
the function will be switched off once the motion sensor function activated (only one time)
7. Turn on or off for the GPS in 3D fixed inform function. The function here is only for testing
and the function will be switched off once the GPS 3D fixed function reported (only one time)
8. Turn on or off for the over speed alarm function. The function here is only for testing and
the function will be switched off once the over speed function activated (only one time)
K: The settings for the tracker buzzer sound or silent:
1. Buzzer sound or silent every time when the SMS coordinates sending
2. Buzzer sound or silent every time when the GPRS coordinates sending
3. Buzzer sound or silent when the geo fencing alarm sent
4. Buzzer sound or silent when the USB set up completed
5. Buzzer sound or silent after receiving the settings from the web tracking site
6. Buzzer sound or silent after receiving the settings from the phone SMS command
7. Buzzer sound or silent when press the buttons (only available for the HI-602X and the optional
car kit box)
L: Set up the APN (Access Point Name) from the SIM card telecomm service provider
M: Set up the IP/Domain address of the tracking server for the GPRS data to send to
1. Can set up either the IP or the domain name
2. Set up the server receiving data protocol and port (Set TCP if the server protocol is TCP)
3. Set up the server receiving data protocol and port (Set UDP if the server protocol is UDP)
4. Set up the two-way configuration port between the server and the tracker. User can also set
as “ 0 “ to disable the GPRS function (under this mode, the SMS and the data logger functions
still keep on working) User can also set as “ 1 “ to switch off both the server alarm control
function and the two-way configuration function (under this mode, the GPRS coordinates
sending functions still keep on working)
N: Set up the telephone numbers which will receive SMS from all the alarm functions activated and
the tapping voice (except for the SOS)
O: Set up the telephone numbers which will receive SMS when the SOS alarm functions activated
and the tapping voice
P: Set up the telephone numbers which will receive SMS with the continue coordinates and the
tapping voice
Q: Set up the sleeping mode and the times:
1. Full power: Keep on sending coordinates none stop. Highest power consumption and no
need to set up the times.
2. GPS Off: The tracker GPS function will be switched off (based on the ‘Time To Sleep’
colume time) after the tracker no moved. Under this mode, the tracker still stand by to take
the commands from the phone SMS or from the web tracking set up) As soon as the tracker
moved again, the GPS function will start to work again. Under this mode, the tracker
power consumption will be less.
3. All Off: The tracker all functions, GPS, GSM, etc. will be switched off (based on the ‘Time
To Sleep’ colume time) after the tracker no moved. Under this mode, the tracker will not be
able to take any commands from the phone SMS or from the web tracking set up) As soon
as the tracker moved again, all the functions will start to work again. Under this mode, the
tracker power consumption will be lowest.
4. Weak Up: The tracker all functions, GPS, GSM, etc. will be switched off (based on the
‘Time To Sleep’ colume time) regardless of the tracker motion sensor moved or not. Under
this mode, the tracker will not be able to take any commands from the phone SMS or from
the web tracking set up) After the finish the sleep time (based on the ‘Time To Weak UP’
colume time) the tracker will switched on again to work normal. The automatic sleep and
weak up will be cycled continuesly base on the settings. The mode is suitable for the
condition that the user only need to know the tracker updated locations in some fix time and let
the tracker go sleeping mode (switched off) to save power consumption. The ‘Time To Sleep’
set up is recommended to set no less than 3 minutes so that the tracker GPS have enough time
to let the GPS get 3D fixed. In this way, the tracker can send the updated real time location
(GPS 3D fixed location) back to the server.
R: Firmware update: After the firmware updated, delete the GPS log data in the tracker is
recommended to make sure the tracker internal memory stay in complete.
Terms Explanations
System Config:
1. IMEI: Tracker ( International Mobile Equipment Identity number,IMEI# )
2. Version: Tracker firmware version
3. SMS intervals[s]: Interval of tracker send real time position with Google map
hyperlink via SMS
4. GPRS interval[s]: Interval of tracker send real time position to the server via GPRS
5.
6.
7.
8.
LOG interval[s]: Interval of tracker data logging
Geofence[m]: Send warning when tracker out of the Geofencing range
Alarm Reset[s]: Time of all the security functions temporary disabled
Ringing of Call[Times]: Tracker ringing time when user call
SMS Command for X seris
Code Format
Function
100 #0000,100
Request all setting values back
151 #0000,151,0000000000,0000000000,0000000000
Set Security Phone Number.(10 Max.)
152 #0000,152,0000000000,0000000000,0000000000
Set SOS Phone Number (10Max.)
153 #0000,153,0000000000,0000000000,0000000000
Set SMS Phone Number (10 Max.)
154 #0000,154
Get Security Phone Setting
155 #0000,155
Get SOS Phone Setting
156 #0000,156
Get SMS Phone Setting
200 #0000,200,APN,USER,PASS
Set APN
201 #0000,201
Get APN Setting
210 #0000,210,IP,TCP port,UDP port,config port,protocol select
#0000,210,60.250.68.23,9101,9120,1943,0
Set IP and Port
211
Get IP and Port Value
#0000,211
250 #0000,250,SMS,GPRS,LOG,Geo,Alarm,Ring,Speed,Sensor
Set Interval and Parameter
#0000,250,0,30,0,500,60,0,20,10
251 #0000,251
Get Interval Setting
300 #0000,300,Buglar,SOS,PWCUT,LBAT
#0000,300,0,1,1,1
Set Event
301 #0000,301
Get Event Setting
350 #0000,350,SMS_Send,GPRS,GEO,USB,WEB,SMS_Set,KEY
#0000,350,0,0,0,1,1,1,1
Set Buzzer
351 #0000,351
Get Buzzer Setting
400 #0000,400,Mode,Hour1,Minute1,Second1,Hour2,Minute2,Second2 Set Power Saving Mode
#0000,400,1,0,5,0,0,0,0
401 #0000,401
Get Power Saving Mode Setting
01
#0000,01,Pass,Pass
#0000,01,0000,0000
Set Password
10
#0000,10
Get GPS Data
11
#0000,11,Phone Number
Talking Permitted
12
#0000,12,1
Relay #1 On/Off
13
#0000,13,1
Relay #2 On/Off
14
#0000,14
Tracker Reset
15
#0000,15
Inform Tracker send TX000 to Server
16
#0000,16,1
Set GEO Fencing Activate
17
#0000,17,1
Set GPS Fixed Alarm Activate
18
#0000,18,1
Set Moving Alarm Activate
19
#0000,19,1
Set Over Speed Alarm Activate
EXAMPLE:#0000,210,60.250.68.23,9101,9120,1943,0
#
SMS initial code
0000
password (default is 0000)
210 Initial command code
60.250.68.23,9101,9120,1943,0 Varies parameters
Fill in “ * “ between the comma when the above parameters unchanged.
Fill in nothing between the comma to empty the data (originally there are some parameters in
between, such as the APN, USER and the PASS)
Different parameters will divided by comma: “ , “
Explanations to the initial command code:
151 (Set Security Phone Number)
Fill in maximum 10 phone numbers
152 (Set SOS Phone Number)
Fill in maximum 10 phone numbers
153 (Set SMS Phone Number)
Fill in maximum 10 phone numbers
200 (Set APN)
APN:GPRS Access Point Name of the SIM card (check with your telecomm service provider
for the exact APN
USER:APN user name
PASS:APN password
210 (Set IP and Port)
IP:The server IP address which the tracker will send to (Domain name also OK)
TCP port:The destinate server TCP port
UDP port:The destinate server UDP port
Config port:Set up the two-way configuration port between the server and the tracker. User
can also set as “ 0 “ to disable the two way configuration function.
Protocol select:Select the communication protocol between the tracker and server
0 TCP、1 UDP
250 (Set Interval and Parameter)
SMS: The continue SMS sending time interval to certain preset phones. The setting is
recommended to set more than 10 (s), 10 seconds.
GPRS: The continue GPRS GPS coordinates sending time interval to the server. The setting is
recommended to set more than 15 (s), 15 seconds.
LOG: The GPS data logger recording time interval. The setting is recommended to set more
than 3 (s), 3 seconds.
Geo: The geo-fencing setting range (in diameter) The setting is recommended to set more than
500 (m), 500 meters.
Alarm: To temporary disable all the alert functions. The setting is recommended to set less
than 300 (s), 300 seconds. During the time, all the alert features will be disabled.
Ring: The ringing times after the voice tapping function activated.
Speed: The speed limit alert function. The alert will shown after the tracker speed higher than
the speed ( in Km/h kilometer per hour)
Sensor: The motion sensor sensitivity. The setting is recommended to set between 21 to 24, the
less the number, the higher the sensibility.
300 (Set Event)
Buglar: Enable or disable ( 1 → enable, 0 → disable ) to send SMS when the vehicle
anti-thief alarm function activated
SOS: Enable or disable ( 1 → enable, 0 → disable ) to send SMS when the SOS button
pressed
PWCUT: Enable or disable ( 1 → enable, 0 → disable ) to send SMS when the tracker
external power source was cut.
LBAT: Enable or disable ( 1 → enable, 0 → disable ) to send SMS when the tracker internal
battery low (less than 3.6V)
350 (Set Buzzer)
SMS Send: Buzzer sound or silent ( 1 → enable, 0 → disable ) every time when the SMS
coordinates sending
GPRS: Buzzer sound or silent ( 1 → enable, 0 → disable ) every time when the GPRS
coordinates sending
GEO: Buzzer sound or silent ( 1 → enable, 0 → disable ) when the geo fencing alarm sent
USB: Buzzer sound or silent ( 1 → enable, 0 → disable ) when the USB set up completed
WEB: Buzzer sound or silent ( 1 → enable, 0 → disable ) after receiving the settings from
the web tracking site
SMS Set: Buzzer sound or silent ( 1 → enable, 0 → disable ) after receiving the settings
from the phone SMS command
KEY: Buzzer sound or silent ( 1 → enable, 0 → disable ) when press the buttons (only
available for the HI-602X and HI-603)
400 (Set Power Saving Mode)
Mode:Set up the sleeping mode: 0
Full power、1
GPS off、2
all off、3
fixed on/off
time
Hour1:Time setting, hours
Minute1:Time setting, minutes
Second1:Time setting, second ( please consult the above USB setting guides “Time To
Sleep” Q )
Hour2:Time setting, hours
Minute2:Time setting, minutes
Second2:Time setting, second ( please consult the above USB setting guides “Time To
Weak Up” Q )
01 (Set Password)
Pass:Set up the new password (needed to be 4 digits)
Pass:Key in once again the new password (the set up can only success when this 4 digits are
identical
to the above 4 digits)
10 (Get GPS Data)
Request the current GPS coordinates from the tracker
11 (Talking Permitted)
Allow some specific phone to do the phone tapping and the request will only available one
time and user will set another command when once again need such function. For instances, the
telephone number, 0937777777, was not fill in the list of the preset telephone numbers (like, the
SCU, SOS, SMS from the USB column)
When need to do the tapping, send SMS command #0000,11, 0937777777 to the tracker and the
user can use the phone 0937777777 to do the tapping once.
12 (Relay #1 On/Off)
1
cut off relay、0
recover the relay to normal
13 (Relay #2 On/Off)
1
cut off relay、0
recover the relay to normal
14 (System Reset)
Request the tracker re-flesh all settings
15 (Inform Tracker send TX000 to Server)
Request the tracker and the server to perform the two ways synchronize communications
(In order to let the tracker and the server to do the two way settings and information
exchanges, they must stay in connection status. But, under some circumstances, the tracker is
not connected to the server, such as under GPS off mode (sleeping mode) although the GSM is
active but the tracker do not stay connect with the server. With this command, the tracker will
immediately take the server command and react. If not, the tracker will also proactively
connect to the server within 3 minutes)
16 (Set GEO Fencing Activate)
Activate GeoFencing alarm send back,1
enable , 0
disable The function only available
for one time and will set up once again when need it.
17 (Set GPS Fix Alarm Activate)
Activate GPS in 3D fixed message send back,1
enable , 0
disable The function only
available for one time and will set up once again when need it.
18 (Set Moving Alarm Activate)
Activate motion sensor alarm send back,1
enable , 0
disable The function only available
for one time and will set up once again when need it.
19 (Set Over Speed Alarm Activate)
Activate over speed alarm send back,1
enable , 0
disable The function only available for
one time and will set up once again when need it.
The tracker will automatically send SMS message notice that the above settings and control
executed successfully.
SMS GPS coordinates send back guides:
EXAMPLE:
$T120808R1,GPS,A,N,24”59’58.26,E,121”29’21.65,000030.0,182.57,120808,074222*(0124971
23456789),http://maps.google.com/maps?q=24.999518,121.489352
Explanations:
$
SMS initial code
T120808R1
Firmware version
GPS
SMS message type (please consult the below SMS message type list)
A
GPS fixed status (A in 3D fixed ,V not fixed yet)
N,24”59’58.26,E,121”29’21.65
Coordinates (Format: degree" minute' second)
000030.0
182.57
Speed ( Sea mile)
Direction angle ( degree)
120808
GPS time (UTC)
074222
GPS time (UTC)
012497000242432
Tracker imei#
http://maps.google.com/maps?q=24.999518,121.489352
The hyperlink URL to the map Click
the link to see the map
SMS message type:
GPS
the
Upon request with command 10, the tracker will keep on sending (SMS interval)
BUR
BATLOW
POWCUT
GPS coordinates back via SMS
Burglar Alarm activated
Battery power low (less then 3.6V) alarm
Tracker external power cut off alarm
SOS
GPS_OK
GEO
The SOS button press
GPS 3Dfixed report
Geo Fencing activated
VIA
OSA
Vibration Alarm activated
Over Speed Alarm activated
* Update new firmware
1. Decompress the files.
2. Run the TRACKER program
3. Plug the tracker to the computer USB port
4. Press the GET PARAMETER and see the current settings
5. Press the UPDATE
6. Open the firmware (2 files)
7. Show the below message and click OK
8. The firmware start loading
9. The below message shown and press OK
1. Initial registration from the GPRS web tracking platform:
http://www.tracking.haicom.com.tw:8090/
2. New user; please register before login.
3. The tracker imei# is shown on the bottom of the sticker:
4. After login, select the “ Manage “ for Add New Tracker
* Program tracker from Haicom GPRS web tracking web site
1. Make sure the tracker connected to the GSM network and start sending back
the data
2. On the Manage/Device Settings section, select the tracker and press Load
3. Change the prefer settings
4. Press Setup and will show: Device information update successfully
How to generate the detail report print out with address
1. Select the preferred from and to date and click “ Search “
2. Click “ Download “ and the csv file will be saved as Excel file
3. Click “ Address Transfer.zip “ for the transfer program
1. Click “ Address Transfer program icon to run the program “
2. Select the csv Excel file
3. Click “ Transfer Address (3) “
4. After the translate program running, the “ Translate successful ! “ message
will appeared. In the mean time, there will extra Excel file with (Address) saved
on your desktop. Open the file, you will see the retail reports, with
Date/time/long./lat./detail address data like below example shown.
The example of the detail report printout:
How to calculate the historical total travel distance:
1. Click the preferred start point
2. Click the start point icon
3. Click the preferred end point
4. Click the end point icon
5. Click the Distance icon to get the total traveled distance
How to send command from the GPRS tracking platform:
1. Click Manage -> Command Send:
2. Click to send commands from the platform:
Status
Open (0) means the relay is stay connection.
To cut the relay (cut off the ignition, oil pump, power, etc.), select Close (1)
3. Click the Select to see the command sending status:
Set up GeoFencing function steps:
Basically, there are two ways to set up the geo fence function and both ways are
independent to each other. For instance, if you set up the geo fence alarm on the map
radius, the trigger will only report to the tracking site. If you set up the geo fence
function from the Manage -> Device Setting, from the SMS or from the computer set
up program, it will only report the alarm to the phone (and not to the tracking site)
1. Set up geo fence radius on the tracking site:
1. Move the mouse cursor to the preferred geo fencing point and double click it.
The red bubble will appeared:
2. Key in the preferred geo fencing radius range (in km) and click Set.
After the clicking, the blue circle will appeared on the map.
User can select to get the geo fencing alarm when the tracker enter or leave the
radius range.
3. Make sure click “ Yes “ on the Enable section so that the geo fencing function will
work.
Then, click Setup to complete the procedures. In the mean time, the Update Time will
show the time that you set up and show Update Successful on the side:
2. Set up geo fence from the Device Settings:
User can use different ways to set up the geo fence functions:
a. On the GPRS tracking site, go Manage and Device Setting and press “load”:
Set up the geo fence range, say 500 meters radius, the tracker will report to the preset
phones while the feature triggered.
b. Connect the tracker to your computer and set up geo fence from the set up
program:
c. The geo fence will triggered only once and user will set up again from the SMS
command to activate the alarm once again:


