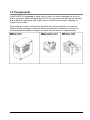
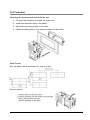
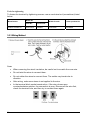
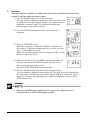
1
GLOBAL NETWORK
Europe
http://www.mew-europe.com/
Germany
North & South America
USA
http://www.aromat.com/
Aromat Corporation
629 Central Ave., New Providence, N.J. 07974 U.S.A.
Tel: 1-908-464-3550 (Headquarters)
Matsushita Electric Works (Europe) AG
Rudolf-Diesel-Ring 2, D-83607 Holzkirchen, Germany
Tel: 49-8024-648-0
Germany
Matsushita Electric Works Deutschland G.m.b.H.
United Kingdom Matsushita Electric Works UK Ltd.
• Ireland
Matsushita Electric Works UK Ltd. Irish Branch Office
Austria
Matsushita Electric Works Austria G.m.b.H.
Switzerland
Matsushita Electric Works Schweiz AG
France
Matsushita Electric Works France S.A.R.L.
Italy
Matsushita Electric Works Italia s.r.l.
Benelux
Matsushita Electric Works Benelux B.V.
Spain
Matsushita Electric Works España S.A.
• Portugal
Matsushita Electric Works España S.A. Portuguese Branch Office
Czech
Matsushita Electric Works (CZ) s.r.o.
Scandinavia
Matsushita Electric Works Scandinavia AB
•
•
•
•
•
•
New Jersey
Georgia
Massachusetts
Illinois
Texas
California
Los Angeles
San Jose
• Michigan
Canada
Aromat Canada, Inc.
VISION SENSOR
AE10
User's Manual
Asia
Singapore
Representative Office
• Indonesia
• Vietnam
• Philippines
• India
• Turkey
• Brazil
Matsushita Electric Works (Asia Pacific) Pte. Ltd.
101 Thomson Road, #25-03/05, United Square, Singapore 307591
Tel: 65-255-5473
Matsushita Electric Works (Malaysia) Sdn. Bhd.
Matsushita Electric Works Sales (Thailand) Co., Ltd.
Matsushita Electric Works (Middle East) FZE.
Matsushita Electric Works (China) Co., Ltd.
Suite 201 Level 2 Tower W3, The Toners, Oriental Plaza, No. 1,
East Chang An Ave., Dong Cheng District, Beijing, 100005 China
Tel: 86-10-8518-1302, 1303
Matsushita Electric Works (China) Co., Ltd.
Matsushita Electric Works (China) Co., Ltd. Shanghai Branch Office
Matsushita Electric Works (China) Co., Ltd. Guangzhou Branch Office
Matsushita Electric Works (China) Co., Ltd. Dalian Branch Office
Matsushita Electric Works (China) Co., Ltd. Shenzhen Branch Office
Matsushita Electric Works (China) Co., Ltd. Chengdu Branch Office
Matsushita Electric Works (Hong Kong), Ltd.
Rm1601, 16/F, Tower 2,
The Gateway, 25 Canton Road,
Tsimshatsui, Kowloon, Hong Kong
Tel: 852-2529-3956
Matsushita Electric Works, Ltd.
Automation Controls Company
1048, Kadoma, Kadoma-shi, Osaka 571-8686, Japan
Tel: +81-6-6908-1050
Malaysia
Thailand
U.A.E.
China
Beijing
Shanghai
Guangzhou
Dalian
Shenzhen
Chengdu
Hong Kong
Japan
Please contact ...
Matsushita Electric Works, Ltd.
Automation Controls Company
Head Office: 1048, Kadoma, Kadoma-shi, Osaka 571-8686, Japan
Telephone: +81-6-6908-1050
Facsimile: +81-6-6908-5781
http://www.nais-e.com/
This manual was created using Adobe Acrobat.
Adobe, the Adobe logo, and Acrobat are trademarks
of Adobe Systems Incorporated.
COPYRIGHT © 2003 All Rights Reserved
Specifications are subject to change without notice.
Printed in Japan
LightPix AE10 User's Manual
ARCT1F384E '03.10
WARNINGS AND CAUTIONS
To be observed at all times to prevent from injury or accident.
Read the manual carefully before installing, running, maintaining or inspecting the equipment.
Understand thoroughly information of the equipment, the safety, warnings and cautions.
This manual uses two safety flags to indicate different levels of danger.
WARNING : A handling error could cause serious physical injury to an operator, and in the
worst case could even be fatal.
CAUTION : A handling error could cause serious physical injury to an operator, or damage to
the equipment.
WARNING
When using the equipment for a purpose that could conceivable result in the physical injury of
an operator and/or damage to the equipment itself, adequate secondary or backup safety
and/or protection mechanisms of one sort or another should also be incorporated into the
system.
Do not use the equipment in an environment that contains combustible gases.
(This may result in an explosion.)
Never open the LightPix AE10. The main unit contains high-voltage components that are
dangerous to touch. Do not loosen the retaining screws.
(This may result in electric shocks.)
CAUTION
Structure the external circuits for the emergency stop or interlock function.
Be certain to use the equipment within its specified ratings and environmental conditions at all
times.
(Failure to do so may cause overheating or the emission of smoke.)
Do not disassemble or restructure the LightPix AE10.
(This may result in electric shocks or in the emission of smoke.)
Do not touch the terminals while the power is ON.
(This may result in an electric shock.)
Tighten the wires using the terminal screws securely
(Failure to do so may result in an abnormal heating or in the emission of smoke.)
Always ground the earth wire.
(Failure to do so may result in an electric shock.)
Contents
1. Features and components of LightPix AE10 ................................... 1
1.1 Features................................................................................................................. 2
1.2 Components........................................................................................................... 3
2. Names and Functions .............................................................. 5
2.1 System Configuration............................................................................................. 6
2.2 Main Unit................................................................................................................ 8
2.3 Operation Unit...................................................................................................... 10
2.4 Finder Unit ........................................................................................................... 11
3. Installation and Wiring ........................................................... 13
3.1 Connection of Units.............................................................................................. 14
3.1.1 Connection of Main Unit and Operation Unit............................................... 14
3.2 Mounting and Removing the Unit......................................................................... 15
3.2.1 Main Unit ..................................................................................................... 15
3.2.2 Operation Unit ............................................................................................. 16
3.2.3 Finder Unit................................................................................................... 17
3.3 Installation Environment....................................................................................... 18
3.4 Input/Output port .................................................................................................. 19
3.4.1 Pin assignments.......................................................................................... 19
3.4.2 How to make an I/O connector.................................................................... 19
3.4.3 Input Port..................................................................................................... 21
3.4.4 Output Port.................................................................................................. 22
3.4.5 Electric Power Supply and Wiring ............................................................... 23
3.4.6 Grounding ....................................................................................................24
3.5 Serial (RS-485) Port .............................................................................................25
3.5.1 Terminal Assingnments ...............................................................................25
3.5.2 Terminal Block .............................................................................................25
3.5.3 Wiring Method..............................................................................................26
4. Settings and An Image Capturing ........................................ 29
4.1 Operation Unit ......................................................................................................30
4.1.1 Indication Area.............................................................................................30
4.1.2 Operation buttons ........................................................................................31
4.2 Mode.....................................................................................................................32
4.3 Environmental configuration mode .......................................................................33
4.4 Protection Setting - Lock Function........................................................................35
4.5 Capturing An Object .............................................................................................36
5. Outlines and Basic Settings of an Inspection ................................ 37
5.1 Color Extraction ....................................................................................................38
5.1.1 Inspection Outline and Setting Procedure ...................................................38
5.1.2 Setting Procedure - Area Measurement ......................................................41
5.1.3 Setting Procedure - Color Discrimination.....................................................43
5.2 Edge Detection .....................................................................................................45
5.2.1 Inspection Outline and Setting Procedure ...................................................45
5.2.2 Setting Procedure - Edge Detection ............................................................48
5.2.3 Setting Procedure - Apex Detection ............................................................51
5.3 Size Measurement................................................................................................53
5.3.1 Inspection Outline and Setting Procedure ...................................................53
5.3.2 Setting Procedure - Size Measurement.......................................................54
ii
6. Input/Output Timing ............................................................... 59
6.1 Input/Output Timing ............................................................................................. 60
6.1.1 Inspection Start ........................................................................................... 60
6.1.2 Switching a Product Type ........................................................................... 61
6.1.3 Switching a Mode........................................................................................ 61
6.1.4 Teaching ..................................................................................................... 62
7. Serial (RS-485) Communication ............................................ 65
7.1 Communication Outline........................................................................................ 66
7.2 Serial Command .................................................................................................. 67
7.2.1 Input format Outline..................................................................................... 67
7.2.2 Input Command List .................................................................................... 68
7.2.3 Response Command .................................................................................. 70
7.2.4 Response to GRV Command - the inspection result load command .......... 72
8. Specifications and Product Numbers................................... 75
8.1 General Specification........................................................................................... 76
8.1.1 General Specification .................................................................................. 76
8.1.2 Main Unit Specification................................................................................ 77
8.1.3 Operation Unit Specification........................................................................ 77
8.1.4 Finder unit Specification.............................................................................. 77
8.2 Product Numbers ................................................................................................. 78
8.3 Dimensions .......................................................................................................... 79
iii
Precautions before Using LightPix
Installation environment
Avoid mounting a main unit, an operating unit and a finder unit in the following locations:
·
·
·
·
·
·
·
·
·
·
Direct sunlight.
Ambient temperatures outside the range of 0 °C to 40 °C.
Ambient humidity outside the range of 35% to 75% RH.
Sudden temperature changes causing condensation.
Excessive vibration or shock.
Weight loads placed on the unit.
Excessive airborne dust, metal particle, salts, greasy fumes or electrically conductive dust.
Corrosive and inflammable gases.
Water, oil or chemicals in any form including spray or mist.
Benzene, thinner, alcohol or other organic solvents, or strong alkaline solutions such as ammonia or caustic
soda.
·
Nearby high-voltage lines (devices), power lines (devices), radio transmissions or transmitters, where the
large power surges occurs.
Static electricity
·
Before touching the unit, always touch a grounded piece of metal in order to discharge static electricity.
Cleaning
·
Do not use thinner based cleaners because they deform the unit case and fade the colors.
Noise Considerations
·
Do not bundle the cables such as Ethernet cables, and input/output signal cables together with motor or
power cables. Ensure that they are at least 100 mm apart. Also ensure that signal cables are kept as short as
possible.
·
Make sure to fit noise suppresses or other noise killers to the load source when direct inductive loads (motors
or relays) are connected to the external equipment, which is connected to the main unit.
·
The lighting for image processing uses high-frequency lights, which can emit extremely high noise level
signals. Pay special attention to the installation of lighting power cables and signal wiring when using the
external lightings.
Before switching on the power
When turning on the power for the first time, be sure to take the following precautions.
·
·
·
·
iv
Do not bundle the cables such as Ethernet cables, and input/output signal cables together with motor or
power cables. Ensure that they are at least 100 mm apart. Also ensure that signal cables are kept as short as
possible.
When performing installation, confirm that there are no scraps of wiring, particularly conductive fragments,
adhering to the unit.
Confirm that the power supply wiring, I/O wiring and power supply voltage are all correct.
Sufficiently tighten the mounting screws and terminal screws.
Chapter 1
Features and components of LightPix AE10
1
1.1 Features
Features
•
•
•
•
2
Stable Detection!
-
By using a high performance 2 dimensional image pick-up device, the
LightPix enables to get more stable detections due to a plane
measurement which can capture the object with wider range compared
with the conventional photoelectric sensor of which optical axis is hard to
be adjusted.
-
The white LED is used for the integral light source, which cannot effect the
color discrimination.
Easy mounting!
-
No need to select the suitable light source or lenses due to its design, a
CPU, a Camera and lights are all in one. The capturing range and the
distance to the target object are already fixed depending on the model. It’s
easy to mount.
-
A plane measurement enables you to mount the unit easier than the point
measurement.
Easy setting!
-
All you need to set three steps to inspect, capturing an image, teaching
and setting tolerance (upper and lower) limits.
-
All operations can be set by eight buttons on the operation unit.
-
Connecting a finder unit allows you to check to set contents for the
inspection as it displays the image on the screen.
...And more!
-
Each model or inspection method has its constant inspection time.
Inspections may not result in the difference by the target object.
-
RS-485 can network up to 31. You can control them from one external
device (the data transmission cable can be extended up to 12m.)
1.2 Components
LightPix AE10 is composed of three units. A main unit that is designed for an all-inone of a camera, white LED lights and a CPU. An operation unit that has an indicator
and enables all operations with eight buttons. A finder unit ensures to display an
image on the screen.
When setting, the main unit and the operation unit (or the operation unit and the
finder unit) are necessary. However, when executing the inspection in case of not
confirming detected data or images, the main unit can work out independently.
3
Chapter 2
Names and Functions
5
2.1 System Configuration
Main unit
Main unit is designed for an all-in-one of a camera, lights and CPU.
All the data of LightPix will be saved in this unit. When you set the
data, you need an operation unit but once you have set, you don’t
need it in case of running an inspection. For communicating with
the peripheral devices, it has a parallel I/O port and a serial RS-485
port. You can connect multiple main units via RS-485 (up to 31)
and control them from one peripheral device.
Operation unit
Operation unit has eight buttons and an indicator. You can set all the
inspection with using those eight buttons. Setting items and options
are displayed on the indicator. Connecting with the main unit while
running the inspection, it indicates the detected data, results and
operating status of the main unit.
Finder unit
Finder unit displays the image captured by the main unit. It can
be used together with an operation unit. It cannot be used to be
connected with the main unit directly.
6
Connecting example
Main unit multiple connection
Main units can be connected up to 31 with RS-485 connection and can be controlled
by one external device such as PLCs or PCs.
For wiring RS-485, refer to 3.5.3Wiring Method.
7
2.2 Main Unit
1: Image capturing part
A camera, a lens and white LEDs are equipped for capturing the image.
2: I/O port (Mini D-sub 15-pin, Female)
An Input/Output port for external devices. It feeds the power (24 V DC) and has
several input or output terminals such as an inspection start trigger signal or
inspection result output signals.
3: Operation unit connection port (RJ-45 connector)
This port is dedicated to connect with the main unit and the operation unit. Use a
commercially available LAN cable (category 5E, strait) to connect.
4: RS-485 port (MC1.5/4-ST-3.5 manufactured by Phoenix Contact Co.)
This port is for communicating with external devices.
5: Indication LEDs
OUT1, 2, and 3
Indicates the status of inspection results. Each LED illuminates when the signal is
output.
READY
It illuminates when the main unit is not running the inspection. The inspection start
signal from the external device (A trigger signal on RUN-mode) can be received when
illuminating.
ALARM
It illuminates when the teaching is not completed.
8
•
Do not connect any devices such as PCs or Hubs other than the operation
unit into the RJ-45 connector port, otherwise it may malfunction
•
When the ALARM is output during the inspection, reboot the LightPix. If it
occurs frequently, it may be a failure. Please contact us.
•
The expect life time of white LEDs is 10,000 hours (at Light amount halfvalue: 25 C, Inspection speed : High, Internal trigger : ON.)
The decrease of illumination may effect the inspection. Check to adjust the
exposure time periodically and redo the teaching.
9
2.3 Operation Unit
1: Indication Area
Indicates the status, inspection mode, results and setting items of the main unit.
2: Operation buttons
All operations are done with these 8 operation buttons.
3: Main unit connection port (RJ-45 connector)
This port is dedicated to connect with the main unit and the operation unit. Use a
commercially available LAN cable (category 5E, strait) to connect.
4: Finder unit connector
This connector is dedicated to connect with the finder unit.
•
10
Do not connect any devices such as PCs or Hubs other than the main unit
into the RJ-45 connector port, otherwise it may malfunction.
2.4 Finder Unit
1: Display screen
Displays the image. (During the Run-mode, the image cannot be displayed.)
2: Operation unit connector
This connector is dedicated to connect with the operation unit.
•
The LCD screen has an operating life of approximately 40,000 hours at an
ambient temperature of 25 degrees centigrade.
In order to save the life, the Backlight OFF Timer function is available.
For setting, refer to 4.3 Environmental configuration mode.
11
Chapter 3
Installation and Wiring
13
3.1 Connection of Units
3.1.1 Connection of Main Unit and Operation Unit
Use a commercially available LAN cable (category 5E, straight) to connect the main
unit and the operation unit.
EMC Directive (Electro-Magnetic Compatibility)
LightPix will comply with the EMC standards (EN61000-6-4, EN61000-6-2) in EMC
Directive (EMC Directive 89/336/EEC). Subject to satisfy the condition, attach the
ferrite cores listed below to I/O cables LAN cables and RS-485 cables.
14
3.2 Mounting and Removing the Unit
3.2.1 Main Unit
Mounting to the mounting bracket
Mount the main unit to the mounting bracket as illustrated below.
Installation angles
When the target object is shiny, it produces the specular reflection. To avoid this, tilt
the main unit as illustrated below.
(A maximum tilt angle: 30 degrees)
•
The wider the mounting angle is, the larger the distortion occurs in the
captured image. Thus, inspection results may vary depending on the
orientation of the target in the field of view. To determine the installation
angle, project the actual object on the screen and confirm.
Spacing
For multiple installation, allow sufficient space according with the table below to avoid
the interference of light.
15
3.2.2 Operation Unit
Using a mounting frame
1. Install the operation unit to the panel.
2. Mount the mounting frame to the operation unit.
3. Fasten screws tightly in the mounting frame to the panel.
Panel Cutout
Use the panel with a thickness of 1 mm to 5 mm.
Single mount
How to remove
16
Multiple mount
3.2.3 Finder Unit
Mounting the operation unit and the finder unit
1. Connect the operation unit with the finder unit.
2. Install the operation unit to the panel.
3. Mount the mounting frame to the units.
4. Fasten screws tightly in the mounting frame to the panel.
Panel Cutout
Use the panel with a thickness of 1 mm to 5 mm.
How to remove
17
3.3 Installation Environment
Avoid mounting the units in the following locations:
•
Direct sunlight.
•
Ambient temperatures outside the range of 0 °C to 40 °C.
•
Ambient humidity outside the range of 35% to 75% RH.
•
Sudden temperature changes causing condensation.
•
Excessive vibration or shock.
•
Weight loads placed on the unit.
•
Excessive airborne dust, metal particle, salts, greasy fumes or electrically
conductive dust.
•
Corrosive and inflammable gases.
•
Water, oil or chemicals in any form including spray or mist.
•
Benzenes, thinner, alcohol or other organic solvents, or strong alkaline
solutions such as ammonia or caustic soda.
•
Nearby high-voltage lines (devices), power lines (devices), radio transmissions
or transmitters, where the large power surges occurs.
Noise Consideration
•
Make sure to fit noise suppresses or other noise killers to the load source
when direct inductive loads (motors or relays) are connected to the external
equipment, which is connected to the main unit.
Radiation Consideration
•
18
In order to radiate heat, mount the operation unit oriented with the LCD facing
upward as illustrated below. (When connecting the finder unit, along with this.)
3.4 Input/Output port
3.4.1 Pin assignments
3.4.2 How to make an I/O connector
Use the lead wires of which thickness is AWG24 or more
19
EMC Directive (Electro-Magnetic Compatibility)
LightPix will comply with the EMC standards (EN61000-6-4, EN61000-6-2) in EMC
Directive (EMC Directive 89/336/EEC). Subject to satisfy the condition, attach the
ferrite cores listed below to I/O cables LAN cables and RS-485 cables.
20
3.4.3 Input Port
Circuits
•
To prevent input signal chattering, use a non-contact input (transistor, etc.).
If chattering occurs, inputs can be missed or input recognition is delayed.
•
Be careful when using only full-wave rectification (including ripples) power
supply for DC input, as it may cause abnormal operation.
•
Input will not turn OFF when current is leaking from the input side. In this
case, connect resistance as seeing the figure below.
•
When the main unit does not turn OFF with two-line photoelectrical sensor
or proximity sensor due to the electrical current leaking, connect bleeder
resistance.
•
Even when LEDs such as lead switches are connected in series to an
input contact point, make sure the main unit’s input terminal receives more
voltage than the ON voltage.
21
3.4.4 Output Port
Circuit
Output: Photo-mos relay
Rated-operating voltage: 5 to 24 V DC
22
•
Use within the range specified on the below figure.
•
When the main unit is OFF, leakage current is less than 100 µΑ.
•
The main unit has only a low capacity to carry current. It takes into
consideration connections with PLCs, etc. Do not connect to a heavy load
such as a directly-connected bulb. When such a requirement exists, pass
it through our Power-Photo relay.
•
The output circuit contains no internal fuse. When it is necessary to
prevent output circuit burnout in the event of an output load short circuit,
attach an external fuse. However, there are cases when internal elements
cannot be protected in the event of a short circuit.
3.4.5 Electric Power Supply and Wiring
Use an insulated power supply including a protection circuit
•
The power supply of the LightPix is noninsulated type. If an abnormal voltage
is impressed, the internal circuit may be damaged. In case of using a power
supply without a protection circuit, use a protective component such as a fuse
to supply the power.
•
Isolate the power supply to the LightPix from other power supplies.
Use power supply having sufficient surplus capacity
•
When the power is turned on, the temporary in-rush current that exceeds the
rated current is impressed. To avoid this, use the power supply having
sufficient surplus capacity (rated at approximately 3 times the steady-state
current.) and check the power supply for proper operation as the power turns
on.
Improving the noise immunity
•
Separate the each system for wiring to the main unit, input devices and output
devices.
•
When there is a particular concern about noise from input/output circuits,
isolate the power supply to the LightPix from the power supply to the
input/output devices.
Turn the power on and off at the primary side
•
Turn the power on and off at the primary side (100 V AC). If you turn the
power on and off at the secondary side (24 V DC), a fuse blow out may be
caused.
Consider the electric power sequence
•
Before turning off the power of LightPix, turn off the power of input/output side
first. Otherwise, the LightPix will detect a change in the input signal level and
may operate abnormally.
•
When turning off the power of LightPix, leave at least 10 seconds before
turning it on again.
23
Momentary power interruptions
•
10 ms or less:
The system continues running.
•
Between 10 ms and 50 ms:
Depending on the conditions, the system may continue running or reset.
•
50 ms or more:
The system resets itself. When the power is supplied again, the system will
start running at the initial status.
Use correctly
•
Before doing any electrical wiring, be sure to turn the power off.
3.4.6 Grounding
Ground to prevent noise
•
Under normal conditions, the inherent noise resistance is sufficient. However,
in situations of excessive noise, ground the instrument to increase noise
suppression.
Use an exclusive ground
24
•
Use an exclusive D ground (the third type). Do not share the ground with other
devices.
•
The point of grounding should be as close to the main unit as possible. The
wires should be as short as possible.
•
Use lines of thickness within 0.5 mm2 to 1.25 mm2 for wiring.
3.5 Serial (RS-485) Port
3.5.1 Terminal Assignments
3.5.2 Terminal Block
The RS-485 terminal block, which is detachable from the main unit, can be fastened
by the screws. Use wires or tools listed below tables for tightening.
Terminal block
•
Manufacturer: Phoenix Contact Co.
•
Model Number: MC1.5/4-ST-3.5
Wires
Conductor
Type
Twisted
pair with
shields
Nonconductor
Diameter
(Approx.)
Size
Resistance
(At 20˚C)
1.25mm2
(AWG16) or
more
Max.
16.8Ω/km
Polyethylene
0.5mm
8.5mm
0.5mm2
(AWG20) or
more
Max.
33.4Ω/km
Polyethylene
0.5mm
7.8mm
Max.
25.1Ω/km
Polyvinyl
chloride
0.6mm
6.6mm
Material
Thickness
(Max.)
2
VCTF
0.75mm
(AWG18) or
more
Equivalents
KPEV-S
1.25mm X 1P
Hitachi Cable,
Ltd.
KPEV-S
0.5mm X 1P
Hitachi Cable,
Ltd.
VCTF 0.75mm
X 2C Hitachi
Cable, Ltd.
•
Do not mix two or more types of wires for wiring.
•
When using twisted pair cables, use shielded ones.
•
In situation of excessive noise, twisted pair cables are recommended.
•
Use a multi-dropped connection method for the multiple main unit connection.
25
Tools for tightening
To fasten the terminal by tightening screws, use an exclusive tool (screwdriver) listed
below.
Model No.
Manufacturer
Phoenix Contact Co.
Parts No.
Product No.
SZS0.4X2.5
1205037
Width of tooth
Order product No.
0.4X2.5mm
AFP0806
3.5.3 Wiring Method
Notes
26
•
When removing the wire’s insulation, be careful not to scratch the core wire.
•
Do not twist the wires to connect them.
•
Do not solder the wires to connect them. The solder may break due to
vibration.
•
After wiring, make sure stress is not applied to the wire.
•
In the terminal block socket construction, if the wire closes upon
counterclockwise rotation, the connection is poor. Disconnect the wire first,
check the terminal hole, and then try to connect them again.
EMC Directive (Electro-Magnetic Compatibility)
LightPix will comply with the EMC standards (EN61000-6-4, EN61000-6-2) in EMC
Directive (EMC Directive 89/336/EEC). Subject to satisfy the condition, attach the
ferrite cores listed below to I/O cables LAN cables and RS-485 cables.
Main unit multiple connection
A main unit can be connected up to 31 units with a multi-dropped connection.
The station number (device number) of the host device such as PC or PLC should be
numbered as 0 (zero) and the station number of main unit should be numbered as 1
through 31. At the end device, attach the terminator enclosed with the main unit
according to the illustration on the top of this page. The transmission cable length is
12 m.
•
Setting the station number of devices is available in the SET mode, refer
to the 4.3Environmental configuration mode.
27
Chapter 4
Settings and An Image Capturing
29
4.1 Operation Unit
4.1.1 Indication Area
1. Mode indicator
Indicates the current mode.
SET : Setting mode.
RUN : Inspection mode.
TEACH : Teaching mode.
VIEW (RUN-VIEW) : Image indication mode. (Indicates an image on the
screen of finder unit when running the inspection.)
2. READY signal status
Illuminates during the READY signal is output.
The READY signal is output in the inspection mode or in the teaching mode.
3. LOCK status
Illuminates when the main unit is locked.
LOCK is the state that any signals other than TRIGGER signals cannot be
received. To set or release LOCK , refer to 4.4Protection Setting - Lock
Function.
4. ALARM signal status
Illuminates during the ALARM signal is output.
The ALARM signal is output when the target object is not detected in the
teaching mode.
5. OUT 1, 2 and 3 signal status
Illuminates during the OUT 1 to 3 signal(s) is(are) output.
6. Measurement units
Indicates the unit of measurement. It varies depending on the model.
Color Extraction : mm2
Edge Detection and Width Measurement : mm
7. Data indication (Upper-row)
8. Data indication (Lower-row)
The contents may vary depending on the mode.
30
•
During the ALARM signal is output, the inspection is not completed.
Reboot the LightPix when the ALARM signal is still output in spite of the
complete teaching.
4.1.2 Operation buttons
1. Mode
Switches the operational modes. (The SET mode cannot be switched.)
Press this button lightly, you can switch RUN to RUN-VIEW modes or RUNVIEW to RUN modes.
Press this button for 3 or more seconds, you can switch in to TEACH
mode.
To return to RUN or RUN-VIEW modes, press this button lightly again.
2. SET
Switches the mode into SET mode.
Press this button for 3 or more seconds, you can set up environmental
configurations.
To switch the RUN or RUN-VIEW mode, press this button lightly again.
3. PRMT (Parameters)
Switches the setting items when the mode is in SET or when setting the
upper/lower limits.
4. TYPE
Switches the product types.
5. TRIGGER
In the RUN or RUN-VIEW mode, it executes one inspection. It is available
when the initial trigger setting (I.TRR) is OFF.
In the TEACH mode, it executes the automatic teaching.
In the SET mode, it saves the data or carries out the initial settings.
6. UP/DOWN
Used to changes a tolerance value or a setting value in the SET mode.
31
4.2 Mode
LightPix has 4 kinds of main modes, Inspection, Teaching, Critical judgement mode
and Environmental configuration mode.
Inspection mode
This mode is to run the inspection. When the power turns on, it starts with this mode.
In the state of Inspection mode, a READY signal is output and then an inspection
start signal (TRIGGER signal) can be received.
However, 2 kinds of mode, RUN mode and RUN-VIEW mode are available in this
mode. These 2 modes are switchable by pressing the SET button lightly.
RUN mode
Runs a high-speed inspection without displaying an image on the screen in
spite of connecting the finder unit.
RUN-VIEW mode
Runs an inspection with displaying an image on the screen of the finder unit.
It takes 300 ms longer than RUN mode when running the inspection.
Teaching mode
This mode is to register the current information as the gauge while capturing an
image of the target object. Depending on the models, the contents to be registered
may vary. You can switch into the teaching mode by pressing the MODE button for 3
or more seconds. In addition, you can switch the inspection mode to teaching mode
by inputting signals from the external devices.
Tolerance mode
This mode is to set up the values or the amount of change in a tolerance registered
by the teaching mode. You can switch into this mode by pressing the SET button
lightly during the inspection mode.
Environmental configuration mode
This mode is to set up the environmental settings. Selecting the inspection methods,
setting the device numbers and transmission speed, and saving the setting items can
be set in this mode. Depending on the model, some setting items are shared and
some are not. For more details, refer to the following clauses.
You can switch into the environmental configuration mode by pressing the SET
button for 3 or more seconds during the inspection mode.
•
32
Switching the modes from inputting the signals from the external devices,
refer to6.1.3Switching a Mode.
4.3 Environmental configuration mode
The following clauses explain what common functions are prepared for each model.
SPEED : Inspection time (H/M/L)
Sets inspection speeds. H means a high-speed. M means a
middle-speed and L means a low-speed. Note that setting H
or M may vary the inspection result because the pixels in
image are enlarged in order to reduce the scanning time.
If your model is Edge Detection type, you cannot set this item
in the edge detection mode.
INI.T : Initial Type(1 to 7)
Sets default type number to be selected when the power is
turned on.
I.TRR : Internal Trigger(1 to 7)
Sets ON/OFF of internal trigger.
ON
When the power is turned on, an inspection starts at
the same time and then inspections are repeated. Any
trigger signals or trigger inputs from the operation units
are not required.
OFF
To start the inspection, a trigger signal or trigger inputs from the operation
units is required with every single inspection.
CAP.D : Capture Delay (0-160)
Sets delay time, after an inspection is started until an image is
begun being captured.
You can set 0 to 160 in step of 20 ms.
OUT.D : Out Delay (0-160)
Sets delay time, after an inspection is completed until the
output signals (OUT1 to 3) are output or the READY signal is
returned.
You can set 0 to 160 in step of 20 ms.
BAUD. R : Transmission speed (9.6 to 57.6)
Sets data transmission speeds of RS-485 communication in
Kbps.
33
ST.NO : Station Number (1 to 31)
Sets station numbers of main unit in case of the multiple
connections. It is required to send commands to a particular main
unit.
A.SAVE : Auto Save (ON/OFF)
ON means to save data contents that have been set automatically
when you switch the modes. Contents are saved automatically in
the main unit after exiting from the setting mode.
Example)
When you exit to RUN mode from the environmental configuration mode.
When you exit to RUN mode from the teaching mode. etc.
L.ON.OFF : Light On/Off switch (ON/OFF)
Sets the integral LED light to be used or not.
ON
Uses the integral LED light.
OFF
Do not use the integral LED light. In case of this, LEDs cannot emit light.
Use other external light
B.L.PTN : Back Light Pattern (ON/OFF10/OFF30/OFF60)
Sets the light off timer of LCD’s back light of the finder unit. Choose to set the light off
timer in minutes after the operation has been done with the operation unit.
ON
The backlight holds lighting.
OFF10/OFF30/OFF60
OFF10 means after 10 minutes, OFF30 means after 30
minutes and OFF 60 means after 60 minutes, the back light will be turned off
automatically.
SAVE : Save manually (SAVE/CANCL)
Saves current setting contents in the main unit manually. Select
SAVE in the indicator and press TRIGGER button for 3 seconds.
When saving is completed, it shows “DONE.”
I.SETT : Initial Setting (CANCL/SET)
Sets to restore all the contents to the factory-shipped settings.
This is called “Initialize.”
Select SET in the indicator and press TRIGGER button for 3
seconds. When the initialize is completed, it shows “DONE.”
34
VER : Version (1.00:00/1.00:SY/1.00:OP/10.8/25.20/50.40/100.80)
Shows the version of LightPix.
1.00:00* : Model version and application version*
*) 00 : Color Extraction
01 : Edge Detection
02 : Size Measurement
1.00:SY : System version
1.00:OP : Operation unit’s software version
10.8, 25.20, 50.40 or 100.80 : Field of view size
4.4 Protection Setting - Lock Function
To protect the setting contents, LightPix has a lock function (LOCK). Once this
function is effective, any methods to change setting items or to switch the types
cannot be accepted. However, only the TRIGGER signal, an inspection start signal
(SST), setting contents saving commands (MMR) and the load commands of each
setting are acceptable.
To lock
1. Switch into the RUN or RUN-VIEW mode.
2. Press MODE button and UP button at the same time for 3 seconds.
The operation unit shows “LOCK” on the indicator and it is locked.
To release
1. Switch into the RUN or RUN-VIEW mode.
2. Press MODE button and UP button at the same time for 3 seconds.
“LOCK” on the indicator disappears and the lock is released.
35
4.5 Capturing An Object
Before capturing an object, be sure to connect each unit correctly and try to follow the
procedure.
1. By pressing the MODE button, switch into the RUN-VIEW mode.
The indicator of the operation unit shows “VIEW” and the finder unit displays
an image on the screen.
2. Place the object in front of the main unit’s capturing part.
The object appears on the screen of the finder unit. If the object is out of focus,
confirm the model number you use and correct distance and mount the main
unit properly.
3. Let the object allow into the field of view as confirming the image on the
screen.
The focus distance and the field of view of LightPix are already fixed
depending on the model and cannot be changed.
In case that LED lights are reflected on the object.
When capturing the shiny objects, the LED lights may reflect on the surface. In this
case, tilt the main unit as illustrated below.
In case that captured images are too bright.
36
•
Exposure time
An image becomes darker when the exposure time is set to be short, and an
image becomes brighter when the exposure time is set to be long. The
teaching mode allows you to change this. The exposure time in Each model
can be described, for more details, refer to Chapter 5. Note that the long
exposure time takes as the same amount of the inspection time.
•
Main unit mounting angles
If the image is still bright despite the exposure time has adjusted. Or you
cannot capture the desired images to be inspected (binary images and color
images). Tilt the main unit as the same as in the case with the reflection of
LED lights.
Chapter 5
Outlines and Basic Settings of an Inspection
37
5.1 Color Extraction
5.1.1 Inspection Outline and Setting Procedure
Inspection outline
One color for one product type (up to 7 colors for 7 types) can be registered. There
are two kinds of inspection method Area Measurement and Color Discrimination.
The Area Measurement counts how many pixels that include the same color
elements in the registered color are there in the image. The Color Discrimination
determines which color is appropriated with the registered color (up to 7 colors.) in
the image.
Inspection time
It varies depending on the setting. The inspection time is a combination time of the
follow three kinds of time. The exposure time (max. 50 ms), the transmission time (4
ms) and the calculation time (varies depending on the inspection method or setting.)
However, in the RUN-VIEW mode, it added 300 ms with these 3 kinds of time.
The calculation time can be selected one from three levels. Higher level affects the
inspection result due to the enhanced pixels in the image. Please make sure to
capture the actual image as confirming the changes of settings and tests.
The calculation time of Color Extraction is explained below table.
Inspection Method
38
SPEED selection (Calculation time)
H (High)
M (Middle)
L (Low)
Area
5 ms
15 ms
30 ms
Color Discrimination
35 ms
105 ms
210 ms
Area Measurement
• Outline
This mode is effective for the presence/absence inspection and the
displacement inspection. Place the target object under the main unit and
register the color (teaching.) Numbers of pixels that include the same color
elements with the registered color are counted and converted into square
millimeters and then the value is output. If the value is within the tolerance
range you have set, the output signal “OUT1” is output. Detected area is
output by the requests of commands from the external devices in square
millimeters via serial (RS-435) port.
•
Procedure
1. Select the inspection method.
Press the SET button and select AREA at OUT.T.
2. Register the color (Teaching).
Press the MODE button for 3 or more seconds. A rectangle appears at the
center of the finder unit’s screen. 5 size (full-screen to 2 by 2 pixels) are
available.
3. Execute a test.
And confirm the value.
4. Set the tolerance range of an area. (upper and lower limits of an area)
5. Execute an inspection.
•
Each product type has its pre-registered color, but when you execute an
inspection, be sure to register the colors on each 7 product type as
capturing the object image.
39
Color Discrimination
• Outline
This mode is effective for the product differential. The captured object is to be
judged by the color correlation among up to 7 colors you have registered.
Register one color for each product type, and set the tolerance value of the
area. Each registered color (up to 7) is counted by the pixels that include the
color elements of each. When the value is within the tolerance range, counted
pixels (area ) can be output by the number with using the parallel 3 bit outputs
(OUT1 to 3.) If the several colors are within the tolerance range, the number
resulting largest value is output. Detected area is output by the requests of
commands from the external devices in square millimeters via serial (RS-435)
port.
•
Procedure
1. Select the inspection method.
Press the SET button and select AREA at OUT.T.
2. Register the color (Teaching).
Press the MODE button for 3 or more seconds. A rectangle appears at the
center of the finder unit’s screen. 5 size (full-screen to 2 by 2 pixels) are
available.
3. Execute a test.
And confirm the value.
4. Set the tolerance range of an area. (upper and lower limits of an area)
5. Execute an inspection.
•
40
Each product type has its pre-registered color, but when you execute an
inspection, be sure to register the colors on each 7 product type as
capturing the object image.
5.1.2 Setting Procedure - Area Measurement
1.
Select the inspection mode.
Select the RUN-VIEW mode by pressing the MODE button. In the RUN mode,
the image cannot be displayed on the screen of the finder unit.
2.
Select the inspection method.
2.1. Press the SET button for 3 or more seconds to switch into the Environmental
configuration mode.
2.2. Press the PRMT button and select OUT.T.
2.3. Press the UP/DOWN buttons to select AREA.
Selecting the area inspection method is completed.
2.4. Press the SET button lightly and return to the inspection mode (RUN-VIEW.)
3.
Teaching.
Teaching means to register the color as capturing the object.
3.1. Press the MODE button for 3 or more seconds.
The product type number is displayed at the upper left. The
exposure time is displayed at the lower right.
3.2. Press the TYPE button and select the type number to be
registered.
3.3. Press PRMT buttons to change the rectangle size in order to
specify the color to be registered.
The LightPix registers the most occupied element color in the
region. Be sure not to be occupied by the unwanted part in the
region when changing the size.
3.4. Press UP/DOWN buttons to adjust the exposure time.
3.5. Press the TRIGGER button.
When the operation is completed, “DONE” is displayed on the
indicator.
3.6. Press the MODE button and return to the inspection mode.
The different type number may be displayed at this time, please make sure to
display the appropriate type number is displayed. If not, press the TYPE button to
set.
41
4.
Set the tolerance range value (upper/lower limits) of an area.
The OUT1 signal is output when the upper/lower limits are resulted within the
range you have set here. The number of pixel values that has the color elements
of registered color is converted in square millimeters.
4.1. Press the SET button lightly.
The product type number is displayed at the upper left. Either
upper limits (H) or lower limits (L) is displayed at the lower
left. The value at the upper right shows the current value, and
at the lower right shows the values to be set.
4.2. Press the PRMT button to select the type number or setting
items to be registered.
4.3. Press the UP/DOWN button to change the value.
4.4. Repeat the step 2 and 3 to complete the setting values of each
product type.
4.5.Press the SET button lightly and return to the inspection mode.
5.
42
Press the TRIGGER button to execute an inspection.
When setting the internal trigger set as OFF, above operation is not
necessary.
Confirm the type number at the upper left and the values of area is displayed on
the lower row, and the status of the OUT1 signal.
5.1.3 Setting Procedure - Color Discrimination
1.
Select the inspection mode.
Select the RUN-VIEW mode by pressing the MODE button. In the RUN mode,
the image cannot be displayed on the screen of the finder unit.
2.
Select the inspection method.
2.1. Press the SET button for 3 or more seconds to switch into the Environmental
configuration mode.
2.2. Press the PRMT button and select OUT.T.
2.3. Press the UP/DOWN buttons to select COLOR.
Selecting the color discrimination method is completed.
2.4. Press the SET button lightly and return to the inspection mode (RUN-VIEW.)
3.
Teaching.
Register the color as capturing the object following to the same steps as the area
method, refer to the previous pages.
•
When teaching in this color discrimination requires the same exposure
time in order to capture images satisfying the same conditions. Otherwise,
the correct inspections may not complete.
4.
Set the tolerance range value (upper/lower limits).
Set the value following to the same steps as the area method, refer to the
previous pages.
5.
Press the TRIGGER button to execute an inspection.
When setting the internal trigger set as OFF, above
operation is not necessary.
Confirm the type number at the upper left and the values
displayed on the lower row, and the status of the OUT1 to 3.
If all the types are not matched with any product types, the indication shows “00”
on the upper row or “--“ marks on the lower row. Type numbers are indicated with
a binary output in combinations of OUT1 to 3. See the table below.
43
Result Output
Outputting the inspection result (type numbers)
The number of types is output with combinations of signals (OUT1 to 3.)
If any signals are not output, it means to be out of any ranges.
44
5.2 Edge Detection
5.2.1 Inspection Outline and Setting Procedure
Inspection outline
There are two kinds of inspection method, Side Detection and Apex Detection. The
Side Detection detects the edge of the object (either X or Y direction). The Apex
Detection detects the apex of the object. Both inspection methods use the binary
image. In the teaching mode, the optimum binary level can be set automatically by
the contrast between the detect point and the back ground.
Inspection time
It varies depending on the setting. The inspection time is a combination time of the
follow three kinds of time. The exposure time (max. 50 ms), the transmission time (4
ms) and the calculation time (varies depending on the inspection method or setting.)
However, in the RUN-VIEW mode, it added 300 ms with these 3 kinds of time.
The calculation time can be selected one from three levels. Higher level affects the
inspection result due to the enhanced pixels in the image. Please make sure to
capture the actual image as confirming the changes of settings and tests.
The calculation time of Edge Detection is explained below table.
Inspection Method
Side Detection
Apex Detection
SPEED selection (Calculation time)
H (High)
M (Middle)
L (Low)
5 ms
15 ms
30 ms
35 ms
Side Detection
• Outline
This mode detects the edge position of the target object. Place the target
object under the main unit and register the current position (teaching.) and
then, set the tolerance range. The distance (either X or Y direction) from the
origin point and the edge detected point are measured and then the value is
output. If the value is within the tolerance range you have set, the output
signal “OUT1” is output. Detected distance (either X or Y direction) is output
by the requests of commands from the external devices in millimeters via
serial (RS-435) port. The edge direction and the binary level can be set
automatically in the teaching mode, but it can also be set manually as required.
45
•
•
Consider the edge direction in the teaching mode, the object to be
registered must be placed correctly so that the each scanning line can
detect the edge of the object. If not, the inspection is not completed. When
the edge direction is X, the origin point is the left side of the screen. When
the edge direction is Y, it is the upper side. The detected point is the
averaged point of all scanning lines.
(See the figure below.)
Procedure
1. Select the inspection method.
Select SIDE at OUT.T.
2. Register the position (Teaching).
Register the edge direction and position, binary level, and exposure time.
3. Set the tolerance range.
Determine the tolerance distance value based on the registered position.
4. Execute an inspection.
Apex Detection
• Outline
This mode detects the apex position of the target object. Place the target
object under the main unit and register the current position (teaching.) and set
the tolerance range. The distance (both X and Y) from the origin point and the
detected apex point (X and Y) are measured and then the value is output. If
the value is within the tolerance range you have set, the output signal “OUT1”
is output. Detected both X and Y distances are output by the requests of
commands from the external devices in millimeters via serial (RS-435) port.
The binary level can be set automatically in the teaching mode, but it can also
be set manually as required.
46
•
•
The apex is determined by the two edges. The object to be registered
must be placed correctly so that the each scanning line can detect both X
and Y edges of the object. If not, the inspection is not completed.
(See the figure below.)
Procedure
1. Select the inspection method.
Select APEX at OUT.T.
2. Register the position (Teaching).
Register the apex position, binary level, and exposure time.
3. Set the tolerance range.
Determine the tolerance distance value based on the registered apex.
4. Execute an inspection.
47
5.2.2 Setting Procedure - Edge Detection
1.
Select the inspection mode.
Select the RUN-VIEW mode by pressing the MODE button. In the RUN mode,
the image cannot be displayed on the screen of the finder unit.
2.
Select the inspection method.
2.1. Press the SET button for 3 or more seconds to switch into the Environmental
configuration mode.
2.2. Press the PRMT button and select OUT.T.
2.3. Press the UP/DOWN buttons to select SIDE.
Selecting the edge detection (side) inspection method is completed.
2.4. Press the SET button lightly and return to the inspection mode (RUN-VIEW.)
3.
Teaching.
Teaching means to register the edge position and direction, the binary levels and
exposure time in order to get the optimum binary image. The edge direction is
determined automatically, thus, the different edge direction cannot be detected in
the inspection.
3.1. Press the MODE button for 3 or more seconds.
The type number is displayed at the upper left. The binary
level is displayed at the upper right in 3 digits. The exposure
time is displayed at the lower right. The finder unit displays
the current image of the current settings.
3.2. Press the TYPE button and select the type number to be registered.
3.3. Press the TRIGGER button.
When the operation is completed, “DONE” is displayed on
the indicator. Confirm the image and if it is correct, go to the
step 5. If not, follow the step 4.
When the ALARM signal is output as showing “FAIL” on the
indicator, follow the step 4.
48
3.4. Adjust the binary level by the PRMT buttons, and adjust the exposure time by the
UP/DOWN buttons until the correct binary image appears on the screen.
3.5. Press the MODE button and return to the inspection mode.
The type number is displayed at the upper left. The edge
direction is displayed at the upper right. The different type
number may be displayed at this time, please make sure to
display the appropriate type number is displayed. If not, press
the TYPE button to set.
4.
Set the tolerance range value.
The OUT1 signal is output when the tolerance range value is satisfied within the
range you have set here.
4.1. Press the SET button lightly.
The type number is displayed at the upper left. The current
tolerance is displayed at the upper right. The value to be set is
displayed at the lower right and its direction, either X or Y is
displayed at the lower left.
4.2. Press the PRMT button to select the type number and the edge
direction to be registered.
You can set the different edge direction values in here, but it
never affects the inspection. Ignore and go to the step 3.
4.3. Press the UP/DOWN button to change the value.
(in 0.01mm units)
4.4.Press the SET button lightly and return to the inspection mode.
•
While the ALARM signal remains to be output, the inspection is not
completed due to the ALARM signal holding.
49
5.
Press the TRIGGER button to execute an inspection.
When setting the internal trigger set as OFF, above operation is not
necessary.
Confirm the type number displayed at the upper left, the
detected edge direction displayed at the upper right, the
position displayed at the lower right, and the status of the OUT1
signal.
•
50
When the edge is not detected, the display shows “-“ sign.
5.2.3 Setting Procedure - Apex Detection
1.
Select the inspection mode.
Select the RUN-VIEW mode by pressing the MODE button. In the RUN mode,
the image cannot be displayed on the screen of the finder unit.
2.
Select the inspection method.
2.1. Press the SET button for 3 or more seconds to switch into the Environmental
configuration mode.
2.2. Press the PRMT button and select OUT.T.
2.3. Press the UP/DOWN buttons to select APEX.
Selecting the edge detection (apex) inspection method is completed.
2.4. Press the SET button lightly and return to the inspection mode (RUN-VIEW.)
3.
Teaching.
Teaching means to register the edge position and direction, the binary levels and
exposure time in order to get the optimum binary image. Refer to the previous
pages for the setting procedure.
4.
Set the tolerance range value.
Set the tolerance range based on the registered apex point. The OUT1 signal is
output when the tolerance range value is satisfied within the range you have set
here. It can be set for each product type as you switch the product type.
4.1. Press the SET button lightly.
The type number is displayed at the upper left. The current
tolerance is displayed at the upper right. The value to be set is
displayed at the lower right and its direction, either X or Y is
displayed at the lower left.
4.2. Press the PRMT button to select the type number and the edge
direction to be registered.
You can set the different edge direction values in here, but it
never affects the inspection. Ignore and go to the step 3.
4.3. Press the UP/DOWN button to change the value.
(in 0.01mm units)
4.4. Press the SET button lightly and return to the inspection mode.
51
5.
Press the TRIGGER button to execute an inspection.
When setting the internal trigger set as OFF, above operation is not
necessary.
Confirm the type number displayed at the upper left, the detected edge direction
displayed at the upper right, the position displayed at the lower right, and the
status of the OUT1 signal.
•
52
When the edge is not detected, the display shows “-“ sign.
5.3 Size Measurement
5.3.1 Inspection Outline and Setting Procedure
Inspection outline
Size Measurement detects the maximum and minimum size (width and height) of the
object. Either Black or White is set for the object color to be registered. Place the
target object under the main unit and register the current size (teaching.) and set the
tolerance range. When the value is within the tolerance range you have set, the
output signal “OUT1” is output. Detected size is output by the requests of commands
from the external devices in millimeters via serial (RS-435) port.
The binary level can be set automatically in the teaching mode, but it can also be set
manually as required.
In the environmental configuration mode, select the object color, BLACK or WHITE at
the “OUT.T” and its direction, X, Y or BOTH at the “DIREC.T.”
If the object color is not detected, “-“ marks are displayed on the indicator.
Regardless of the object color, the detection can be completed. The detection is not
completed when the object color is all in black or white (varies depending on the
setting condition), or the object size is less than 5 pixels in the scanning direction.
See the figure below.
The measured size is indicated in millimeter units. It can be output by the requests of
commands from the external devices via serial (RS-485) port.
53
•
Procedure
1. Select the inspection mode.
2. Select the color of the target object.
Select either Black or White at OUT.T.
3. Set the direction to be measured (X, Y or Both)
Register the object size, binary level, and exposure time.
4. Set the minimum size value to be detected.
5. Register the current size (Teaching).
Register the object size, binary level, and exposure time.
6. Set the tolerance value.
7. Execute an inspection.
Inspection time
It varies depending on the setting. The inspection time is a combination time of the
follow three kinds of time. The exposure time (max. 50 ms), the transmission time (4
ms) and the calculation time (varies depending on the inspection method or setting.)
However, in the RUN-VIEW mode, it added 300 ms with these 3 kinds of time.
The calculation time can be selected one from three levels. Higher level affects the
inspection result due to the enhanced pixels in the image. Please make sure to
capture the actual image as confirming the changes of settings and tests.
The calculation time of Size Measurement is explained below table.
Inspection Method
Side Detection
SPEED selection (Calculation time)
H (High)
M (Middle)
L (Low)
15 ms
25 ms
30 ms
5.3.2 Setting Procedure - Size Measurement
1.
Select the inspection mode.
Select the RUN-VIEW mode by pressing the MODE button. In the RUN mode,
the image cannot be displayed on the screen of the finder unit.
2.
Select the object color, either Black or White.
2.1. Press the SET button for 3 or more seconds to switch into the Environmental
configuration mode.
2.2. Press the PRMT button and select OUT.T.
2.3. Press the UP/DOWN buttons to set the color either BLACK or WHITE.
Setting the object color is completed.
2.4. Press the SET button lightly and return to the inspection mode (RUN-VIEW.)
54
3.
Select the measurement direction (X, Y or Both.)
3.1. Press the SET button for 3 or more seconds to switch into the
Environmental configuration mode.
3.2. Press the PRMT button and select DIRC.T.
3.3. Press the UP/DOWN buttons to set the direction either BLACK, WHITE or Both.
Setting the measurement direction is completed.
4.
Set the minimum size value to be detected.
Set the minimum value of the object. If the value is less than the value you have
set here is not detected. The value you have set here is also available for the
teaching mode.
As you see the right illustration, set the part “a” to be
skipped. Set a value as “15” (a<, <b.) This value allows
to be skipped for detecting and the minimum value in the
X direction is to be 30 (=b).
Follow below steps to set.
4.1. Press the SET button lightly.
The type number is displayed at the upper left. Characters
explain minimum “MIN” and its direction (X or Y) are
displayed at the upper right. The value to be set is displayed at
the lower right.
If the display shows “X” or “Y” and values at the lower row,
press the PRMT button to return selecting.
4.2. Press the PRMT button to select the type.
4.3. Press the UP/DOWN button to change the value.
4.4. Repeat above step 4.2 to 4.3 to set the minimum size value for
each product type.
4.5. Press the SET button and return to the inspection mode.
55
5.
Teaching.
Teaching means to register the object size, the binary levels and exposure time
in order to get the optimum binary image.
5.1. Press the MODE button for 3 or more seconds.
The type number is displayed at the upper left. The binary level
is displayed at the upper right in 3 digits. The exposure time is
displayed at the lower right. The finder unit displays the
current image of the current settings.
5.2. Press the TYPE button and select the type number to be
registered.
5.3. Press the TRIGGER button.
When the operation is completed, “DONE” is displayed on
the indicator. Confirm the image and if it is correct, go to the
step 5. If not, follow the step 4.
When the ALARM signal is output as showing “FAIL” on the
indicator, follow the step 4.
5.4. Adjust the binary level by the PRMT buttons, and adjust the
exposure time by the UP/DOWN buttons until the correct
binary image appears on the screen.
Do not press the TRIGGER button at this time.
5.5. Press the MODE button and return to the inspection mode.
The type number is displayed at the upper left. The edge direction is displayed at
the upper right. The different type number may be displayed at this time, please
make sure to display the appropriate type number is displayed. If not, press the
TYPE button to set.
•
56
While the ALARM signal remains to be output, the inspection is not
completed due to the ALARM signal holding.
6.
Set the tolerance range value.
Set the tolerance range based on the registered size. The OUT1 signal is output
when the tolerance range value is satisfied within the range you have set here. It
can be set for each product type as you switch the product type.
6.1. Press the SET button lightly.
The type number is displayed at the upper left. The current
tolerance is displayed at the upper right. The value to be set is
displayed at the lower right and its direction, either X or Y is
displayed at the lower left.
If the display shows “Min X” or “Min Y”, press the PRMT
button to return selecting.
6.2. Press the PRMT button to select the type.
6.3. Press the UP/DOWN button to change the value.
6.4. Repeat above step 2 to 3, to set the minimum size value for
each product type.
6.5. Press the SET button and return to the inspection mode.
7.
Press the TRIGGER button to execute an inspection.
When setting the internal trigger set as OFF, above operation is not
necessary.
Confirm the type number displayed at the upper left, the detected value and its
direction displayed at the upper right, the position displayed at the lower right,
and the status of the OUT1 signal.
•
When the size is not detected, the display shows “-“ sign.
57
Chapter 6
Input/Output Timing
59
6.1 Input/Output Timing
6.1.1 Inspection Start
An inspection can be started by the TRIGGER signal input from the external devices.
Refer to the timing chart below.
1. : Confirm the READY signal is ON and input the TRIGGER signal.
(T1 : 2 ms or more)
The READY signal and OUT 1 to 3 are OFF.
(Response time, T2 : 2 ms or less)
2. : Inspection time (Image capture time and inspection process time)
When you have set the capture delay time, An image capture is started after
the TRIGGER signal is recognized and the setting time is passed.
3. : Output timing (Outputs the result to OUT1 to 3 signals and returns to the
READY signal OFF to ON)
When you have set the output delay time, The OUT 1 to 3 and the READY
signal are output after the inspection is finished and the setting time is passed.
Output signal status in the inspection results. (depending on the inspection method)
•
60
Regarding with how to set the capture delay and output delay, refer to
4.3Environmental configuration mode.
6.1.2 Switching a Product Type
Switching a product type
Switching a product type means to call out one product type to be registered and
inspected among the 7 product types.
How to set
Specify the number to be called out by inputting the TYPE 1 to 3 signal following to
the table below.
6.1.3 Switching a Mode
Switching a mode
Switching a mode means to change the inspection mode. the RUN mode or the RUNVIEW mode can be switched by the MODE1. The teaching mode and the inspection
mode can be switched by the MODE2. See the table below.
ON
OFF
MODE1
RUN-VIEW mode
RUN mode
MODE2
Teaching mode
Inspection mode
•
The product type and the modes are executed just by changing the signal
status. The status of MODE1 to 2 and TYPE 1 to 3 is always observed.
However, hold the current signal status until the next signal status
although you have switched to the target mode.
•
In the state of LOCK, switching modes or types cannot be executed.
61
6.1.4 Teaching
Only the auto teaching can be input from the external devices. These operations
listed below are not available by the teaching.
The exposure time.(in all models)
Changing the color extraction frame size. (in Color Extraction model)
The binary level.(in Edge Detection and Size Measurement models)
The sequence of teaching varies depending on the internal trigger setting.
-
Timing Chart (When the internal trigger setting is OFF)
1. : Input timing
Confirm the READY signal is ON and input the MODE 2 signal.
2. : T1 : After 2 ms or more have passed, Input the product NO. (TYPE1 to 3.)
3. : T2 : After 2 ms or more have passed, Input the TRIGGER signal.
(T3: 2 ms or more)
T4 : Within 2 ms, the OUT1, the ready signal for the teaching, is output.
When the teaching is completed, the READY signal turns ON. (On the
operation unit, ADJ is indicated.)
4. : T2 : After 2 ms or more have passed, Input the second TRIGGER signal.
(T3: 2 ms or more)
T4 : Within 2 ms, the READY signal is OFF and the auto teaching is done.
When the teaching is completed, the READY signal turns ON and the OUT1
signal turns OFF. If failed, the ALARM signal is output.
5. : Switches into the inspection mode after the MODE2 signal turns OFF.
•
62
In the state that ADJ is indicated on the indicator, pressing the MODE
button cannot be available to switch into the inspection mode. To switch
into the inspection mode, input the OFF signal of MODE2.
Timing Chart (When the internal trigger setting is ON)
1. : Input timing
Confirm the READY signal is ON and input the MODE 2 signal.
2. : T1 : After 2 ms or more have passed, Input the product type (TYPE1 to
3.)
3. : T2 : After 2 ms or more have passed, Input the TRIGGER signal.
(T3: 2 ms or more)
T4 : Within 2 ms, the out teaching, is done. During the execution, OUT 1
signal is output and the READY signal turns OFF.
On the operation unit, ADJ is indicated.
When the teaching is completed, the READY signal turns ON and the OUT1
signal turns OFF. If failed, the ALARM signal is output.
4. : Switches into the inspection mode after the MODE2 signal turns OFF.
•
In the state of LOCK, the teaching cannot be completed. To set or release
the LOCK, refer to 4.4Protection Setting - Lock Function.
•
In case that the ALARM signal is output as a result of the teaching, set the
exposure time and the binary levels manually by the operation unit.
While holding the ALARM signal, the inspection cannot be executed.
63
Chapter 7
Serial (RS-485) Communication
65
7.1 Communication Outline
LightPix can be controlled by the external devices such as PLCs via RS-485
communication with inputting the command. Possible operations are as follows;
•
•
•
•
•
•
Saving current data.
Executing an inspection.
Switching a product type.
Loading an inspection result.
Loading a tolerance value.
Changing a tolerance value.
Specification
Item
Specification
Communication method
half duplex
Synchro system
asynchronous
Transmission distance
12 m (max. extension)
Transmission speed
9600, 14400, 19200, 38400,
57600 bit/s *1
Transmission code
ASCII
Transmission format
Stop bit : 1 bit
Parity : Non
Data length : 8 bit
Terminator : CR (0Dh)
Flow control : Non
Block check
Available *2
*1 : To select the speed, refer to the below.
*2 : The method of block check code (BCC) is the CRC-ITV-T method (8 bits data
error detecting.) When communicating without the block check, input 4 asterisk
“*“ marks (2Ah.)
How to set the transmission speed
It can be set in the environmental configuration mode.
1. Press the SET button for 3 or more seconds.
2. Select the “BAUD.R” by pressing the PRMT button.
3. Select its speed you want to set.
It is indicated in Kbps units. Ex.) 9.6 = 9600bps
4. Press the SET button to return to the RUN or RUN-VIEW mode.
66
7.2 Serial Command
7.2.1 Input format Outline
Input format from the external device to LightPix
Basic format
%
Byte count
1
(10 bytes max.)
%
nn
#
CYA1
nnnn
ccc
t
:
:
:
:
:
:
:
v
bbbb
:
:
:
C
R
nn
#
CYA1
nnnn
ccc
t
v
bbbb
C
R
2
1
4
4
3
(1)
Depends on
commands
4
1
Header
Station number of main unit (No.1 to 31)
Start mark
Symbols of LightPix - unchanging
Numbers of command character (0003 to 0041)
Name of the command
Product type No. (1 to 7)
(Depending on the command type, it is not necessary to be input.)
Values
Block check code (BCC)
Terminator
BCC
The block check code (BCC) of the LightPix is the CRC-ITV-T method (8 bits data
error detecting.) When using the block check, input 4-byte code. If not, input 4-byte
asterisk marks (“*“, 2Ah.)
67
7.2.2 Input Command List
All input command names and their functions are explained as follows.
Note that all commands should be sent in the inspection mode. Otherwise, LightPix
may not receive nor respond to the external devices depending on its timing.
Basic format
%
Byte count
1
(10 bytes max.)
ccc :
t
:
v
:
nn
#
CYA1
nnnn
ccc
t
v
bbbb
C
R
2
1
4
4
3
1
Depends on
commands
4
1
Name of the command
Product type No. (1 to 7)
(Depending on the command type, it is not necessary to be input.)
Values
Common commands
Function
Functional Description
Save
Saves the current settings.
MMR
Start an inspection
Executes the inspection.
(Available only when the READY signal is
ON.)
SST
Switch the product type Switches product types into 1 to 7.
ccc
SID
Input Format
t
v
t
Color Extraction
v
:
Values (Byte counts will vary depending on the value digits.)
Available value digits will vary depending on the model number.
ANE1010 and ANE1020 : 6 digits, including a decimal point. (vvv.vv)
ANE1030 and ANE1040 : 5 digits, integers only. (vvvvv)
Function
Functional Description
Load an inspection
result
Getting the inspection result.*
Load an inspection
method
Getting the inspection method.
- Result
0 = AREA, 1 = COLOR
ccc
Input Format
t
v
GRV *
GOM
Load upper limit values Getting upper limit area values of type “t”
GHA
t
Load lower limit values Getting lower limit area values of type “t”
GLA
t
Set upper limit values
Changing upper limit area values of type “t.”
SHA
t
vvv.vv or vvvvv
Set lower limit values
Changing lower limit area values of type “t.”
SLA
t
vvv.vv or vvvvv
*Regarding with the details of GRV commands, see the page,72.
68
Edge Detection
v
:
Values (Byte counts = 6 bytes)
Available value digits are 6 digits, including a decimal point. (vvv.vv)
Function
Functional Description
Load an inspection
result
Getting the inspection result.*
Load an inspection
method
Getting the inspection method.
- Result
0 = SIDE, 1 = APEX
ccc
Input Format
t
v
GRV *
GOM
Load X tolerance values Getting tolerance values in X direction of type “t.”
GPX
- Results : 6 digits including a decimal.
t
Load Y tolerance values Getting tolerance values in Y direction of type “t.”
GPY
- Results : 6 digits including a decimal.
t
Set X tolerance values
Changing the tolerance values in X direction of
type “t.”
SPX
t
vvv.vv
Set Y tolerance values
Changing the tolerance values in Y direction of
type “t.”
SPY
t
vvv.vv
*Regarding with the details of GRV commands, see the page,73.
Size Measurement
v
:
Values (Byte counts = 6 bytes)
Available value digits are 6 digits, including a decimal point. (vvv.vv)
Function
Functional Description
Load an inspection
result
Getting the inspection result.*
Load an inspection
method
Getting the inspection method.
- Result
0 = BLACK, 1 = WHITE
ccc
Input Format
t
v
GRV *
GOM
Load X tolerance values Getting tolerance values in X direction of type “t.”
GPX
- Results : 6 digits including a decimal.
t
Load Y tolerance values Getting tolerance values in Y direction of type “t.”
GPY
- Results : 6 digits including a decimal.
t
Set X tolerance values
Changing the tolerance values in X direction of
type “t.”
SPX
t
vvv.vv
Set Y tolerance values
Changing the tolerance values in Y direction of
type “t.”
SPY
t
vvv.vv
*Regarding with the details of GRV commands, see the page,74.
69
•
When the main unit is locked, SPY, SHA, SLA, SPX and SID are not
received.
•
If the MMR command is sent in the environmental configuration mode or
the tolerance setting mode, the item to be set is not saved because the
data is saved before switching the each mode.
•
If SLA, SHA, SPX and SPY commands are sent in the environmental
configuration mode or the tolerance setting mode, the data you have set
are invalid.
7.2.3 Response Command
Normal response format from the LightPix to external devices
%
nn
$
CYA1
nnnn
ccc
t
r
v
bbbb
C
R
Byte count
1
(44 bytes max.)
2
1
4
4
3
1
1
Depends on
commands
4
1
Basic format
%
nn
$
CYA1
nnnn
ccc
t
:
:
:
:
:
:
:
Header
Station number of main unit (No.1 to 31)
Start mark (“#” mark is replaced when outputting)
Symbols of LightPix - unchanging
Numbers of command character (0003 to 0041)
Name of the command
Product type No. (1 to 7)
(Depending on the command type, it may not be output.)
r
:
v
bbbb
:
:
:
Result Values
(Depending on the command type, it may not be output.)
Values (Depending on the command type, it may not be output.)
Block check code (BCC)
Terminator
C
R
•
70
If you input commands without block check code, LightPix always outputs
the block check code of 4 bytes.
Abnormal response from the LightPix to external devices.
%
nn
!
ee
bbbb
C
R
Byte count
1
(11 bytes max.)
2
1
2
4
1
Error format
%
nn
!
ee
bbbb
C
R
:
:
:
:
:
:
Header
Station number of main unit (No.1 to 31)
Error mark
Name of the error codes (See the table below.)
Block check code (BCC)
Terminator
Error Code List
Error code
Error type
Possible cause
Measure
01
Data Error
Communication Error
Confirm the block check code.
03
Format Error
Command with undefined
format has sent.
Confirm the command format.
11
Save failed Error
Command MMR is not saved Re-send the MMR command. *1
for some reason.
21
READY signal OFF Error SST command is sent during Confirm to send SST command
the READY signal is OFF.
while the READY signal is ON
22
Abnormal inspection
For some reasons, the
inspection is not completed.
24
Tolerance Error
When upper limits set to be
Confirm the current values and
lower than the lower limits. Or try to set the correct values.
lower limits set to be
exceeding the upper limits.
25
Lock status Error
Commands that can change
the value are sent in the
LOCK state.
Retry the inspection.
Release the LOCK, and try to
send the commands.
*1 If same error occurs repeatedly even when you re-send the commands, the main
unit may malfunction.
71
7.2.4 Response to GRV Command - the inspection result load command
Color Extraction
• Input format
%
•
nn
#
CYA1
0003
GRV
v
bbbb
C
R
Response format from the LightPix to external devices
%
nn
$
CYA1
0010
GRV
r
vvv.vv
bbbb
C
R
%
nn
$
CYA1
0009
GRV
r
vvvvv
bbbb
C
R
or
•
Response description - Common
Item
$
0010 or 0009
GRV
Description
Start mark
Command name
No changing
Block check code
The LightPix always responds the block check code
regardless of whether it was input (including “*”
marks) or not.
Response description
When the inspection method is AREA (Area measurement.)
Item
Description
Inspection result
r
1 = OK
Measured values are within the tolerance range.
6 digits (vvv.vv) = ANE1010, ANE1020
5 digits (vvvvv) = ANE1030, ANE1040
Response description
When the inspection method is COLOR (Color Discrimination.)
Item
r
Description
Changed point
Inspection result
(Detected color)
Values of measured
vvv.vv or vvvvv area in detected color
72
Changed point
0 = NG
Measured values are out of the tolerance range.
Values of measured
vvv.vv or vvvvv area
•
“#” mark is replaced.
Numbers of command The number shows the byte counts of GRV, results
character
and values.
bbbb
•
Changed point
6 digits (vvv.vv) = ANE1010, ANE1020
5 digits (vvvvv) = ANE1030, ANE1040
Edge Detection
• Input format
%
•
nn
#
CYA1
0003
GRV
v
bbbb
C
R
bbbb
C
R
bbbb
C
R
Response format from the LightPix to external devices
%
nn
$
CYA1
0011
GRV
r
%
nn
$
CYA1
0018
GRV
r
X or Y
vvv.vv
or
•
$
0011 or 0018
GRV
Description
Start mark
Y
vvv.vv
Changed point
“#” mark is replaced.
Numbers of command The number shows the byte counts of GRV, results,
character
direction and values.
Command name
No changing
Block check code
The LightPix always responds the block check code
regardless of whether it was input (including “*”
marks) or not.
bbbb
Response description
When the inspection method is SIDE (Side edge detection)
Item
Description
Inspection result
r
X or Y
vvv.vv
•
vvv.vv
Response description - Common
Item
•
X
Changed point
1 = OK
The detected edge is within the tolerance range.
0 = NG
The detected edge is out of the tolerance range.
Direction of a detected
edge
X = X direction
Y = Y direction
Values of detected
distance.
6 digits (vvv.vv)
If the edge is not detected it shows 6 digits of
minus “-“ marks (2Dh).
Response description
When the inspection method is APEX (Apex detection)
Item
Description
Inspection result
r
Changed point
1 = OK
The detected apex is within the tolerance range.
0 = NG
The detected apex is out of the tolerance range.
Values of detected
6 digits (vvv.vv)
Xvvv.vvYvvv.vv distance in both X and
If the edge is not detected it shows 6 digits of
Y direction..
minus “-“ marks (2Dh). ex. ) X------Y------
73
Size Measurement
• Input format
% nn
•
# CYA1 0003
v
$ CYA1 0044 GRV
C
R
r MIdX
v
MAdX
v
MIdY
v
MAdY
v
bbbb
C
R
Response description
Item
$
Description
Start mark
Changed point
“#” mark is replaced.
0044
Numbers of command The number shows the byte counts of GRV, results,
character
direction and values.
GRV
Command name
No changing
Inspection result
1 = OK
The detected size is within the tolerance range.
r
MIdX
v
(vvv.vv)
MAdX
v
(vvv.vv)
MIdX
v
(vvv.vv)
MAdX
v
(vvv.vv)
bbbb
74
bbbb
Response format from the LightPix to external devices
% nn
•
GRV
0 = NG
The detected size is out of the tolerance range.
Minimum value in X
direction
Measured minimum values in the X direction.
Values of measured
distance.
6 digits (vvv.vv)
If the size is not measured it shows 6 digits of
minus “-“ marks (2Dh).
Maximum value in X
direction
Measured maximum values in the X direction.
Values of measured
distance.
6 digits (vvv.vv)
If the size is not measured it shows 6 digits of
minus “-“ marks (2Dh).
Minimum value in Y
direction
Measured minimum values in the X direction.
Values of measured
distance.
6 digits (vvv.vv)
If the size is not measured it shows 6 digits of
minus “-“ marks (2Dh).
Maximum value in Y
direction
Measured maximum values in the Y direction.
Values of measured
distance.
6 digits (vvv.vv)
If the size is not measured it shows 6 digits of
minus “-“ marks (2Dh).
Block check code
The LightPix always responds the block check code
regardless of whether it was input (including “*”
marks) or not.
Chapter 8
Specifications and Product Numbers
75
8.1 General Specification
8.1.1 General Specification
Item
Specification
Rated voltage
24 V DC
Permissible voltage range
21.6 to 26.4 V DC (including ripples)
Permissible momentary power off time
10 ms max.
Raged current consumption
0.5 A max.
Ambient temperature in use
0 to 40 °C
Storage ambient temperature
-20 to +60 °C (No freezing or condensation)
Ambient humidity in use and storage
35 to 75 % RH (No freezing or condensation)
Insulation resistance
100 MΩ min.
Withstand voltage
500 V AC/1 min. (600 V AC/1 sec.) *1
Noise resistance
1000 V, pulse width 50 ns/1 µs
(tested by the noise simulator method)
Vibration resistance
10 to 55 Hz, 1 sweep/1 min. Multiple amplitude 1.5 mm, 30
min. each in X, Y and Z directions.
Shock resistance
196 m/s2, 5 times each in X, Y and Z directions.
Weight
Main unit : approx. 300 g
Operation unit : approx. 200 g
Finder unit : approx. 200g
*1 Evaluation was carried out with the primary side power supply varistor and capacitor removed from
the internal circuit of the device.
76
8.1.2 Main Unit Specification
Item
Specification
Model
ANE101*
ANE102*
ANE103*
ANE104*
Installation distance (mm)
45
105
50
120
Field of view
10 x 8
25 x 20
50 x 40
100 x 80
Resolution (mm)
0.1
0.1
0.2
0.5
Photoreceptor
Color, C-MOS
Valid pixels
352 horizontal x 288 vertical pixels (100,000 pixels)
Exposure time
50 ms max.
Serial
RS-485 port (31 max., Transmission distance : 12 m)
Input
Input/Output Parallel
Mini D-sub
Output
15 pin
Photo-coupler input : 6 points
Dedicated device port
Connection port for operation unit
Image capture light source
White LED
Expected life of capture light source
Light amount half-value, 10,000 hours min. (at 25°C,
Inspection speed : H)
Photo-MOS output : 5 points
8.1.3 Operation Unit Specification
Item
Specification
Indicator
7-segment, 3-color LCD
Number of operation buttons
8 buttons
Dedicated device port
Connection port for main unit *
* Transmission distance :
When a finder unit is mounted : 10 m max.
When a finder unit is not mounted : 3 m max.
8.1.4 Finder unit Specification
Item
Specification
Display
2- inch color LCD
Backlight
White LED
Backlight life
40,000 h (at 25 °C)
Dedicated device port
Connection port for main unit *
77
8.2 Product Numbers
Main Unit
Model
Main unit (Color Extraction)
Main unit (Edge Extraction)
Main unit (Size Measurement)
Field of view
Product Number
10 x 8
ANE1010
25 x 20
ANE1020
50 x 40
ANE1030
100 x 80
ANE1040
10 x 8
ANE1011
25 x 20
ANE1021
50 x 40
ANE1031
100 x 80
ANE1041
10 x 8
ANE1012
25 x 20
ANE1022
50 x 40
ANE1032
100 x 80
ANE1042
Packaged with a main unit
Mounting Bracket x 1, Mounting screw (M3) x 2, A suite of I/O connector (D-sub
15pin), Terminator for RS-485 x 1, Installation manual x 1, User’s Manual x 1.
Operation Unit
Model
Product Number
Operation unit
ANE11
Packaged with an operation unit
Mounting frame x 1, Installation manual x 1.
Finder Unit
Model
Product Number
Finder unit
ANE12
Packaged with an operation unit
Mounting frame for an operation unit and finder unit x 1, Installation manual x 1.
78
8.3 Dimensions
Mounting bracket
79
Operation Unit
Finder Unit
80
Record of Changes
Manual No.
Date
Description
ARCT1F384E
2003.10
First Edition
81
Appendix
For your convenience, use as an indication for getting the field of view correctly.
For your convenience, use as an indication for getting the right distance between the
main unit and the target object.
82
GLOBAL NETWORK
Europe
http://www.mew-europe.com/
Germany
North & South America
USA
http://www.aromat.com/
Aromat Corporation
629 Central Ave., New Providence, N.J. 07974 U.S.A.
Tel: 1-908-464-3550 (Headquarters)
Matsushita Electric Works (Europe) AG
Rudolf-Diesel-Ring 2, D-83607 Holzkirchen, Germany
Tel: 49-8024-648-0
Germany
Matsushita Electric Works Deutschland G.m.b.H.
United Kingdom Matsushita Electric Works UK Ltd.
• Ireland
Matsushita Electric Works UK Ltd. Irish Branch Office
Austria
Matsushita Electric Works Austria G.m.b.H.
Switzerland
Matsushita Electric Works Schweiz AG
France
Matsushita Electric Works France S.A.R.L.
Italy
Matsushita Electric Works Italia s.r.l.
Benelux
Matsushita Electric Works Benelux B.V.
Spain
Matsushita Electric Works España S.A.
• Portugal
Matsushita Electric Works España S.A. Portuguese Branch Office
Czech
Matsushita Electric Works (CZ) s.r.o.
Scandinavia
Matsushita Electric Works Scandinavia AB
•
•
•
•
•
•
New Jersey
Georgia
Massachusetts
Illinois
Texas
California
Los Angeles
San Jose
• Michigan
Canada
Aromat Canada, Inc.
MICRO-IMAGECHECKER
AX30
User's Manual (Hardware, Operations)
Read this with
User's Manual (Color Extraction)
Asia
Singapore
Representative Office
• Indonesia
• Vietnam
• Philippines
• India
• Turkey
• Brazil
Matsushita Electric Works (Asia Pacific) Pte. Ltd.
101 Thomson Road, #25-03/05, United Square, Singapore 307591
Tel: 65-255-5473
Matsushita Electric Works (Malaysia) Sdn. Bhd.
Matsushita Electric Works Sales (Thailand) Co., Ltd.
Matsushita Electric Works (Middle East) FZE.
Matsushita Electric Works (China) Co., Ltd.
Suite 201 Level 2 Tower W3, The Toners, Oriental Plaza, No. 1,
East Chang An Ave., Dong Cheng District, Beijing, 100005 China
Tel: 86-10-8518-1302, 1303
Matsushita Electric Works (China) Co., Ltd.
Matsushita Electric Works (China) Co., Ltd. Shanghai Branch Office
Matsushita Electric Works (China) Co., Ltd. Guangzhou Branch Office
Matsushita Electric Works (China) Co., Ltd. Dalian Branch Office
Matsushita Electric Works (China) Co., Ltd. Shenzhen Branch Office
Matsushita Electric Works (China) Co., Ltd. Chengdu Branch Office
Matsushita Electric Works (Hong Kong), Ltd.
Rm1601, 16/F, Tower 2,
The Gateway, 25 Canton Road,
Tsimshatsui, Kowloon, Hong Kong
Tel: 852-2529-3956
Matsushita Electric Works, Ltd.
Automation Controls Company
1048, Kadoma, Kadoma-shi, Osaka 571-8686, Japan
Tel: 81-06-6908-1050
Malaysia
Thailand
U.A.E.
China
Beijing
Shanghai
Guangzhou
Dalian
Shenzhen
Chengdu
Hong Kong
Japan
Please contact ...
Matsushita Electric Works, Ltd.
Automation Controls Company
Head Office: 1048, Kadoma, Kadoma-shi, Osaka 571-8686, Japan
Telephone: +81-6-6908-1050
Facsimile: +81-6- 6908-5781
http://www.nais-e.com/
COPYRIGHT © 2003 All Rights Reserved
Specifications are subject to change without notice.
Printed in Japan
AX30 User's Manual (Hardware, Operations)
ARCT1F367E '03.04