1
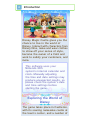
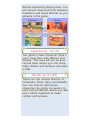
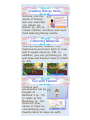
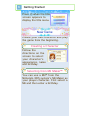
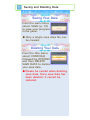
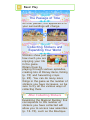
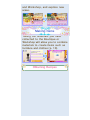
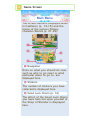
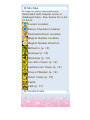
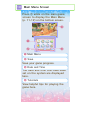
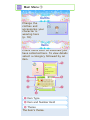
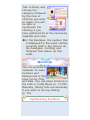
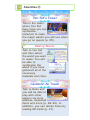
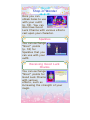
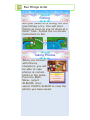
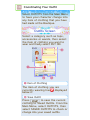
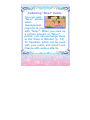
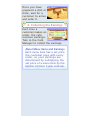
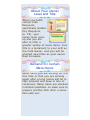
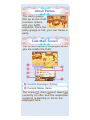
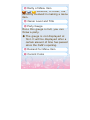
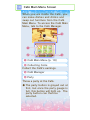
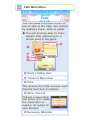
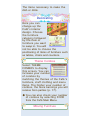
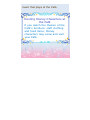
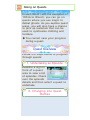
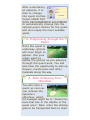
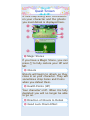
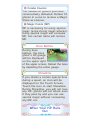
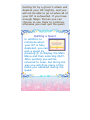
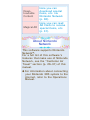
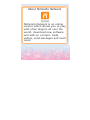
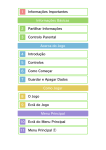
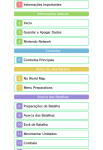
1 Important Information Basic Information 2 Information Sharing 3 Parental Controls First Steps 4 Introduction 5 Controls 6 Getting Started 7 Saving and Deleting Data How to Play 8 Basic Play 9 Game Screen Main Menu 10 Main Menu Screen 11 Main Menu ① 12 Main Menu ② Castleton 13 Amenities ① 14 Amenities ② 15 Fun Things to Do Fun With Fashion 16 Coordinating Your Outfit Café and My Room 17 Opening the Café 18 Café Main Menu Screen 19 Café Main Menu 20 My Room Worlds 21 Cinderella's World 22 100 Acre Wood 23 Alice's World 24 Aladdin's World 25 Going on Quests Castleton Air Travel 26 Wireless Main Menu 27 Local Play and Internet 28 StreetPass 29 SpotPass 30 Add-On Content - Purchase 31 Magical AR Support Information 32 How to Contact Us 1 Important Information Please read this manual carefully before using this software. If the software is to be used by young children, the manual should be read and explained to them by an adult. Before use, please also read the Operations Manual for your Nintendo 3DS system. It contains important information that will help you enjoy this software. ♦ Unless stated otherwise, any references to "Nintendo 3DS" in this manual apply to Nintendo 3DS™ and Nintendo 3DS™ XL systems. Health and Safety Information IMPORTANT Important information about your health and safety is available in the Health and Safety Information application on the HOME Menu. To access this application, touch the icon on the HOME Menu, then touch OPEN and read the contents of each section carefully. When you to have finished, press return to the HOME Menu. You should also thoroughly read the Operations Manual, especially the "Health and Safety Information" section, before using Nintendo 3DS software. For precautions related to wireless communication and online play, please refer to the Operations Manual, "Health and Safety Information". Language Selection The in-game language depends on the one that is set on the system. This title supports five different languages: English, German, French, Spanish and Italian. If your Nintendo 3DS system language is set to one of these, the same language will be displayed in the software. If your Nintendo 3DS system is set to another language, the in-game default language will be English. For instructions about how to change the system language, please refer to the System Settings electronic manual. Age Rating Information For age rating information for this and other software, please consult the relevant website for the age rating system in your region. PEGI (Europe): www.pegi.info USK (Germany): www.usk.de Classification Operations Branch (Australia): www.classification.gov.au OFLC (New Zealand): www.censorship.govt.nz Advisories This software (including any digital content or documentation you download or use in connection with this software) is licensed by Nintendo only for personal and non-commercial use on your Nintendo 3DS system. Your use of any network services of this software is subj ect to the Nintendo 3DS Service User Agreement and Privacy Policy, which includes the Nintendo 3DS Code of Conduct. Unauthorised reproduction or use is prohibited. This software contains copy protection technology to prevent reproduction and copying of content. Your Nintendo 3DS system and software are not designed for use with any existing or future unauthorised technical modification of the hardware or software or the use of any unauthorised device in connection with your Nintendo 3DS system. After the Nintendo 3DS system or any software is updated, any existing or future unauthorised technical modification of the hardware or software of your Nintendo 3DS system, or the use of any unauthorised device in connection with your Nintendo 3DS system, may render your Nintendo 3DS system permanently unplayable. Content deriving from the unauthorised technical modification of the hardware or software of your Nintendo 3DS system may be removed. This software, instruction manual and other written materials accompanying the software are protected by domestic and international intellectual property laws. ©Disney Trademarks are property of their respective owners. Nintendo 3DS is a trademark of Nintendo. The typefaces included herein are developed by DynaComware. This software uses speciallydesigned fonts created under license from Fontworks Inc. Fontworks and font names are trademarks or registered trademarks of Fontworks Inc. Fonts used in-game are provided by Bitstream Inc. All rights reserved. Fonts used in-game are provided by ©Morisawa Inc. All rights reserved. CTR-P-AMQP-00 2 Information Sharing User-generated content, or UGC, is content created by users, such as messages, Mii characters, images, photos, video, audio, QR Code patterns, etc. Exchanging UGC These are general precautions for exchanging UGC with other users. The extent of UGC exchange depends on the software. ● Uploaded content may be seen by other users. It may also be copied, modified and redistributed by third parties. Once sent, you cannot delete such content or limit its usage, so be careful. ● Any uploaded content may be removed without notice. Nintendo may also remove or hide content which is considered to be unsuitable. ● When uploading content or creating content for upload... - Do not include any information that can be used to identify you or a third party personally, such as your or a third party's name, email address, address or telephone number. - Do not include anything which could be damaging or offensive to another person, or make someone uncomfortable. - Do not infringe on the rights of others. Do not use content owned by a third party or that displays a third party (photos, images, videos) without their permission. - Do not include illegal content or any content which aids illegal activity. - Do not include any content which violates public morality. 3 Parental Controls You can use the following Parental Controls to restrict certain features of this software. ♦ For more information about Parental Controls, refer to the Operations Manual. ● StreetPass Restricts the sending/receiving of player data via StreetPass (p. 28). ● Nintendo 3DS Shopping Services Restricts the purchase of Paid AddOn Content (p. 30). ● Online Interaction Restricts online Café visits. ● Friend Registration Restricts the option to register friends. 4 Introduction Disney Magic Castle gives you the chance to live in the world of Disney. Interact with characters from Disney films, make and wear clothes to show off your sense of style, become the owner of a Café and work to satisfy your customers, and more. This software uses your Nintendo 3DS system's internal calendar and clock. Manually adjusting the time and date settings may produce unexpected results, so please check the system's date and time settings before starting the game. Exploring the World of Disney The game takes place in Castleton, with its soaring namesake castle at the town's center, and a number of Worlds inspired by Disney films. You will venture back and forth between Castleton and these Worlds as you advance in the game. Castleton Worlds Castleton (p. 13-15) The game's main character (that's you!) lives here with Mickey and friends. This area will act as your central base where you can shop, make clothes and furniture and open a Café. Worlds (p. 21-25) These are the various Worlds of Cinderella, Pooh, Alice and Aladdin. You can interact with these characters by going on quests to each of their Worlds, where you will also collect materials to make clothes and furniture. Creating Disney Items Venture into the world of Disney and use materials you obtain on quests (p. 25) to create clothes, furniture and even food featuring Disney motifs. Collecting Materials You can harvest flowers, fruit, mushrooms and more both in town and in quest areas (p. 25). In addition, you can go fishing (p. 15) and raise and harvest crops in a field (p. 22). Fun with Fashion Clothes and accessories can be bought at McDuck's (p. 13) or made at the Boutique (p. 13). Show off your sense of style by coordinating your favorite items to make an outfit. Creating Your Very Own Café After becoming the owner, you will be able to style the Café to your own personal tastes by selecting the furniture and choosing which food to put on the menu (p. 17-20). Try throwing parties at the Café every once in a while. You never know, a Disney character might even come and visit! 5 Controls These are the basic controls used in the game. Button Controls Main Screen Controls Controls in red are used during quests (p. 25). Move Greeting (assigned to each direction) Talk, examine, pick up, magic attack, charged magic (long press) Run (while pushing ) Display/Hide the Main Menu Special Magic Completely restore Health Points (HP) and Magic Points (MP) when you have a Magic Stone. Magical Turn Menu Controls Menu Navigation Menu Navigation Confirm Cancel Sort Items Display/Hide Details Touch Controls Menus displayed on the bottom screen can also be navigated by tapping. In addition, you can use touch controls to activate Showtime (p. 25) and in Cinderella's World when you are attending a ball (p. 21). 6 Getting Started Press when the title screen appears to display the title menu. New Game Create your own character and play the game from the beginning. Creating a Character Follow the directions on the screen to select your character's appearance, name and birthday. Selecting from Mii Maker™ You can use a Mii™ from the Nintendo 3DS system's Mii Maker as your player character. First select a Mii and then enter a birthday. Continue Your save data will be displayed and you can continue playing from where you last left off. Select CONTINUE GAME to start playing. Options Options are displayed when save data is present. Change Character Change your character's appearance, name, etc. Delete Save Delete your save Data data. 7 Saving and Deleting Data Saving Your Data From the main menu, select SAVE (p. 10) to save your progress in the game. ◆ Only a single save data file can be created. Deleting Your Data From the title menu, select CONTINUE followed by OPTIONS and then DELETE SAVE DATA to delete your save data. ◆ Please be careful when deleting save data. Once save data has been deleted, it cannot be restored. ● Do not turn the power off, reset the system or remove Game Cards/SD Cards while saving. Make sure not to get dirt in the terminals. These actions could result in permanent data loss. ● Do not use external accessories or software to modify your save data, as this can lead to an inability to progress or loss of save data. Any modification is permanent, so be careful. 8 Basic Play The Passage of Time As time passes, the appearance of your surroundings will change. Collecting Stickers and Expanding Your World Stickers show j ust how much you are enj oying your life in the game. Obtain them by playing through various episodes, creating lots of Disney items, fishing (p. 15) and harvesting crops (p. 22). You can do many more things in the game as the number of stickers you have increases, so be sure to try all the various ways of collecting them. After Collecting Stickers Examining the Magical Number that corresponds to the number of stickers you have collected will allow you to access new amenities (p. 13-15), such as the Boutique and Workshop, and explore new areas. Making Items Taking the materials you have collected to the Boutique or Workshop will allow you to combine materials to create items such as furniture and clothes (p. 13). Obtaining Recipes Recipes are written records of the materials necessary to synthesize a particular item. You can get recipes, for example, by clearing episodes and collecting stickers, and new recipes will allow you to create new clothes and furniture. In addition, if you register a recipe to Recipes (p. 11), you will always be able to check what materials are necessary to synthesize that particular item. 9 Game Screen Main Menu The screen below is displayed when in Castleton (p. 13-15) and the towns of the various Disney character Worlds (p. 21-25). ❶ ❷ ❸ ❹ ❺ ❶ Navigation Hints on what you should do next, such as who to go meet or what particular place to go to, are displayed here. ❷ Stickers The number of stickers you have collected is displayed here. ❸ Good Luck Charm (p. 14) The effect of the Good Luck Charm you have had cast upon yourself at the Shop of Wonder is displayed here. ❹ Mini Map A map of your surroundings illustrated with helpful icons is displayed here. See below for a list of icons. Current Location Disney Character Location Destination/Favor Location Magical Number Location Magical Number Direction McDuck's (p. 13) Boutique (p. 13) Workshop (p. 13) Yen Sid's Tower (p. 14) Castleton Air Travel (p. 14) Shop of Wonder (p. 14) Fishin' Holes (p. 15) Castle Café (p. 17) ❺ Current Coins 10 Main Menu Screen Press while on the main game screen to display the Main Menu (p. 11-12) on the bottom screen. ❸ ❶ ❷ ❹ ❶ Main Menu ❷ Save Save your game progress. ❸ Date and Time The date and time that have been set on the system are displayed here. ❹ Tutorials View helpful tips for playing the game here. 11 Main Menu ① Outfits Change the clothes and accessories your character is wearing here (p. 16). Items Check items such as materials you have collected here. To view details select a category followed by an item. ❺ ❶ ❷ ❻ ❸ ❼ ❹ ❶ Item Type ❷ Item and Number Held ❸ Theme The item's theme. ❹ Return to the Previous Screen ❺ Item Details The item's type and the main locations where it can be obtained are displayed here. ❻ Item Sort Method The current item sort method you are using is displayed here. You can change the sort method by pressing . ❼ Rarity → → denotes, in order, the difficulty involved in obtaining an item. Requests Check Café Requests (p. 19) and favors requested by Disney characters and townspeople here. Recipes Check recipes for synthesizing clothes, furniture, food and more here. To view details select a recipe category followed by a recipe. ◆ When you select a recipe at a shop like the Boutique or Workshop (p. 13), you have the option of registering it to your Recipes. Only recipes registered to your Recipes will be displayed here. ❸ ❹ ❶ ❺ ❷ ❶ Rarity ❷ Theme and Recipe Select a recipe and press to display the menu. There you will be able to check the recipe's details or remove it from your registered Recipes. ❸ List of Materials The materials and quantity necessary to synthesize the item. ❹ Quantity of Materials Held ❺ Coins Necessary for Synthesis 12 Main Menu ② Stickers Choose a sticker category and press , then select a sticker to view the conditions necessary for obtaining the sticker. ❶ ❷ ❸ ❹ ❶ Stickers Stickers you have collected are displayed in color, whereas stickers you have not obtained yet are displayed in gray. ❷ Stickers Held/Total Stickers A crown will be displayed once you have collected all of a certain category of sticker. ❸ Sticker Category ❹ Recommended Stickers Here you can check which stickers it is possible to collect at the current point in the game as well as the conditions for obtaining them. Greetings Here you can assign greetings (p. 15) that you have learned to each of the directions on . Select a greeting and a direction on to assign it to. Albums Here you can view photos (p. 15) you have taken and cards (p. 15) you have obtained. Collection Here you can view information on items you have obtained, such as clothes, furniture and food (p. 17). Select the collection you want to view followed by the item you want to view. 13 Amenities ① As you collect stickers and advance in the game, you will gain access to various amenities and will be able to buy, sell and even make items such as clothes and furniture. McDuck's You can buy and sell items at this department store owned by Scrooge McDuck. You will be able to buy more items as you progress in the game. Buying Items Press while standing in front of an item you are interested in to have Huey, Dewey or Louie come to talk to you, allowing you to view or buy the item. Trying On Before Buying Examine clothing on display for a chance to try it on. If you like what you see, you can buy it and decide to keep wearing it. Selling Items You can sell items by talking to Scrooge upstairs. For the item you want to sell, select the category followed by the item and quantity to sell. Boutique You can synthesize materials to make clothes at this shop run by Daisy. Synthesizing Clothes Talk to Daisy and choose the category followed by the item of clothing you want to make. You will be able to synthesize the clothing if you have gathered all of the necessary materials and coins. ◆ In the Boutique, the number that is displayed for the quest clothes currently held is the total of all the headgear, clothing and footwear that makes up that outfit. Workshop You can synthesize materials to make furniture and fishing rods at this shop run by Chip and Dale. You can place furniture in the Café or in My Room (p. 17-20). Naturally, fishing rods are necessary if you want to do any fishing (p. 15). Synthesizing Furniture Talk to Chip and choose the category followed by the item of furniture you want to make. You will be able to synthesize the furniture if you have gathered all of the necessary materials and coins. 14 Amenities ② Yen Sid's Tower This is the tower where Yen Sid lives. Here you can synthesize materials to make the magic wands you will use when you go on quests (p. 25). Making Wands Talk to Yen Sid and then select the wand you want to make. You will be able to synthesize the wand if you have gathered all of the necessary materials and coins. Castleton Air Travel Talk to Bella and you will be able to play with other players via local wireless, download items and more (p. 26-30). In addition, you can obtain items by reading AR Cards (p. 31). Shop of Wonder Here you can obtain items to use with your outfit (p. 16). You can also have Good Luck Charms with various effects cast upon your character. Sparkles You can exchange "Nice!" points (p. 16) for Sparkles that you can use with your outfit. Receiving Good Luck Charms You can exchange "Nice!" points for Good Luck Charms with various effects, such as increasing the strength of your magic. 15 Fun Things to Do Fishing Get your hands on a fishing rod and give fishing a try. You will start fishing as soon as you sit down at a fishin' hole. Follow the on-screen instructions to fish. Taking Photos When you interact with Disney characters, you will be able to take photos at certain points in the game. From the Main Menu, select ALBUMS, then select PHOTO ALBUM to view the photos you have saved. Collecting Cards You can receive one card by greeting Disney characters. By collecting cards and then going to the castle, you can learn new greetings. From the Main Menu, select ALBUMS, then select CARD ALBUM to check the cards you have obtained. Greetings Once you have learned a greeting, use to try it out on someone. They may share some new information you have not heard from them before. 16 Coordinating Your Outfit Select OUTFITS from the Main Menu to have your character change into any item of clothing that you have had made at the Boutique. Outfits Screen Select a category such as tops, accessories or wands, then select the item of clothing you want to wear and finally select PUT ON. ❹ ❶ ❷ ❸ ❶ Item of Clothing The item of clothing you are displayed currently wearing has below it. ❷ Save Outfit Press to save the current clothing to Saved Outfits. From the Main Menu, select OUTFITS, then select SAVED OUTFITS to check or change into your saved outfits. ❸ Pose Change your character's pose here. ❹ Clothing Details Displayed by pressing . Here you can check the theme, rarity value and effects of your clothing. ◆ During quests (p. 25), wearing quest clothes and carrying wands may grant special effects. Ace Ensembles You can score an Ace Ensemble by wearing the same type of clothing from head to toe. If you meet townspeople while wearing an Ace Ensemble, they will respond with "Nice!" Collecting "Nice!" Points You can gain "Nice!" points when townspeople respond to you with "Nice!". When you save up a certain amount of "Nice!" points, you can exchange them at the Shop of Wonder (p. 14) for Sparkles, which can be used with your outfit, and Good Luck Charms with various effects. 17 Opening the Café As you advance in the game, you will be able to open a Café and become its owner. Make the Café one of a kind by putting your favorite foods on the menu and swapping out the furniture as you see fit (p. 19). Your Job as the Café Owner Follow the steps below to succeed in your j ob as the Café Owner. Refer to the Café's main screen and the Café Main Menu as necessary while you proceed. 1. Preparing Menu Options You can prepare several menu items to serve in the Café (p. 19). You can make snacks, drinks and sweets. 2. Preparing a New Menu Item You can offer a new dish or drink you have prepared to your customers (p. 19). 3. Waiting for Orders Once you have prepared a dish or drink, wait for a customer to arrive and order it. 4. Collecting the Earnings Each time a customer makes an order, the café receives earnings. Talk to the Café Manager to collect the earnings. About Menu Items and Earnings Each menu item has a set price the customer pays with every order, so your earnings are determined by multiplying the set price of a menu item by the number of times it was ordered. About Your Owner Level and Title When you fulfill certain Café Requests, specifically Golden Key Requests, (p. 19), your owner level goes up and you are able to offer a greater variety of menu items. Your title is a testament to your skill as the Café Owner, and you will be granted new titles as your owner level increases. Demand for Certain Menu Items Menu items you are serving for the first time or that you are serving again after a long hiatus will be in high demand and draw in lots of customers. Menu items are stocked in limited quantities, so make sure to prepare another dish after a menu item sells out. About Parties The party gauge fills up as the Café receives orders and you fulfill requests. Once the party gauge is full, you can throw a party. Café Main Screen The screen below is displayed when you are inside the Café. ❶ ❷ ❸ ❹ ❺ ❻ ❼ ❶ Current Earnings (Coins) ❷ Current Menu Items The snack , drink and sweet currently on offer and the respective numbers remaining in stock are displayed here. ❸ Rarity of Menu Item → → denotes, in order, the difficulty involved in making a menu item. ❹ Owner Level and Title ❺ Party Gauge Once this gauge is full, you can throw a party. ◆ The gauge is not displayed at first. It will be displayed after a certain amount of time has passed since the Café's opening. ❻ Demand for Menu Item ❼ Current Coins 18 Café Main Menu Screen When you are inside the Café, you can make dishes and drinks and swap out furniture from the Café Main Menu. To access the Café Main Menu, talk to the Café Manager. ❸ ❶ ❷ ❹ ❶ Café Main Menu (p. 19) ❷ Collecting Coins Collect the Café's earnings. ❸ Café Manager ❹ Party Throw a party at the Café. ◆ The party button is grayed out at first, but once the party gauge is full, this button will light up. The party button can then be selected. 19 Café Main Menu Food You can make food and drinks to put on sale at the Café. Get started by making a snack, drink or sweet. ◆ You will become able to make sweets after advancing to a certain point in the game. ❶ ❺ ❷ ❸ ❹ ❶ Rarity of Menu Item ❷ Theme of Menu Item ❸ Price The amount the Café receives each time the food item is ordered. ❹ Menu Item List Choose a menu item and press to make the menu item or register its recipe to your Recipes. ❺ Necessary Materials The items necessary to make the dish or drink. Decorating Here you can change up the Café's interior design. Choose the furniture category followed by the item of furniture you want to swap in. You will not be able to choose the positioning of items of furniture such as tables, chairs and counters. Theme Combos Select THEME COMBOS to display this screen. You can increase your number of combos by matching the themes of the Café's furniture, staff clothing and menu items. The higher your number of combos, the more earnings you will receive from parties (p. 17). ◆ You can also check your number of combos by selecting FOOD from the Café Main Menu. Moving Furniture Select MOVE/ ORGANIZE to move or put away furniture that is currently placed in the Café. Café Requests Fulfilling the Golden Key Requests that arrive at the Café will increase your owner level. To get started, select the request you want to accept from the list. You can also cancel requests that you have already accepted. Staff You can swap out the staff. You can also change the staff clothing. Café Name You can change the name of the Café. Café BGM You can change the background music that plays at the Café. Hosting Disney Characters at the Café If you match the themes of the Café's furniture, staff clothing and food items, Disney characters may come and visit your Café. 20 My Room Things You Can Do in My Room As you progress through the game, the upstairs of the Café will become your character's room. In My Room, you can swap out furniture j ust as you can in the Café, and you can also change your character's hairstyle and other aspects of their appearance. To get started, examine the room's mirror to access the My Room Menu. Placing Your Bed You can place your bed anywhere in the room that you wish. Changing Your Appearance You can change your hairstyle and hair color by examining the mirror. If your character is a female, you can also change her eye shadow. ◆ If you are using a Mii from Mii Maker, you will not be able to change your character's appearance. Wireless Functions From the My Room Menu, select WIRELESS to access the Wireless Main Menu (p. 26). 21 Cinderella's World Cinderella and Prince Charming call this World home. Try dressing up and attending a ball at Cinderella Castle. Dancing at a Ball After clearing a few episodes, you will be able to attend your first ball. Change into a stylish ball outfit and head to Cinderella Castle. How to Dance at a Ball Match the rhythm of the dance as you tap and slide over the icons on the bottom screen. With each tap and slide you will receive an evaluation of "Very Good!", "Good" or "Miss" that will factor into your final score. ❶ ❷ ❶ Combo Counter Receiving consecutive evaluations of either "Very Good!" or "Good!" will increase your combo counter. ❷ Icons Pause Menu Press to display the Pause Menu. There you will be able to select between Continue Dancing, Start The Song Over and Quit. You can leave the ball before it is finished by selecting QUIT. Your Outfit Evaluation When attending a ball, a dress-up bonus based on your character's clothing will be added to your score. You can get a big bonus by dressing your character in clothing that has a high rarity value. 22 100 Acre Wood Winnie the Pooh, Piglet, Tigger and their friends call this World home. Here you can work with the inhabitants of 100 Acre Wood to raise and harvest vegetables and fruit. You can then use the crops that you harvest as materials for making food in the Café. Raising Vegetables and Fruit Follow the steps below to raise vegetables and fruit in the area's field. 1. Planting Seeds Approach a part of the field that is sparkling with light and press to plant a seed. 2. Watering Your Crops Approach a spot where you planted a seed and press to water it. Your crops will stop growing if the soil they are planted in dries out, so be careful. 3. Harvesting Your Crops Once a vegetable or piece of fruit is fully grown, press to harvest it. 23 Alice's World Have fun going on quests in Alice's World, home to characters such as the White Rabbit, Cheshire Cat and Mad Hatter. Going on Quests in Wonderland Alice's World has two separate quest areas (p. 25). Lilliput Wood Shrink down to a miniature size and defeat ghosts along the way as you proceed through the forest. Hedge Maze Have fun going on quests in this maze-like garden. 24 Aladdin's World This World is home to Aladdin, Jasmine and Abu. Clear episodes to help the town of Agrabah develop. Developing Agrabah As you progress through the game Agrabah will grow as its population increases and its bazaar expands. The number of street stalls and goods for sale will also increase alongside the town's development. 25 Going on Quests In each World (with the exception of 100 Acre Wood), you can go on quests where you use magic to defeat ghosts. As you explore quest areas, you will also have a chance to pick up materials that can be used to synthesize clothing and furniture. ◆ You cannot save your progress during a quest. Quest Overview Follow the steps below to progress through quests: 1. Undertaking an Episode Examine a sign in front of a quest area to view a list of episodes. Check over the episode details and then select a quest to undertake. 2. Changing into Quest Clothes After undertaking an episode, it is time to change into quest clothes. Select HEAD OUT WITH RECOMMENDED EQUIPMENT to automatically change into the optimal quest clothes for the quest and also equip the most suitable wand. 3. Progressing through the Quest Once the quest is underway, ghosts will soon begin to appear. Use your magic wand to defeat the ghosts as you advance through the quest area. You will also have the opportunity to pick up flowers, mushrooms and other materials along the way. 4. After Achieving Your Objective You will clear a quest as soon as you achieve the episode's obj ective, which for example might be to "defeat the boss that lies in the depths of the quest area." Next, enter the shining gate to be transported back to town. Quest Screen A mini-map along with information on your character and the ghosts you must defeat is displayed here. ❶ ❷ ❸ ❻ ❹ ❼ ❺ ❶ Magic Stones If you have a Magic Stone, you can press to fully restore your HP and MP. ❷ Ghosts Ghosts will begin to attack as they close in on your character. They will sometimes drop items and Coins when you defeat them. ❸ Health Points (HP) Your character's HP. When it is fully depleted you will no longer be able to go on. ❹ Direction of Ghosts to Defeat ❺ Good Luck Charm Effect ❻ Combo Counter The number of ghosts you have consecutively defeated. Defeat 10 ghosts in a row to receive a Magic Stone as a bonus. ❼ Magic Points (MP) MP is necessary for using special magic (extra strong magic attacks). Using special magic will consume MP, but certain items will restore MP. Boss Battles During boss battles, the boss ghost's HP gauge will be displayed on the upper right of the upper screen. Defeat the boss by depleting the entire gauge. Showtime If you obtain a certain special item during a quest, an icon will be displayed on the Touch Screen. Touch the icon to start Showtime. During Showtime, you will not lose any HP, ghosts will not attack even if they pass by and you can use special magic without consuming any MP, etc. When Your HP Runs Out Getting hit by a ghost's attack will deplete your HP slightly, and you will not be able to go on when all of your HP is exhausted. If you have enough Magic Stones you can choose to use them to continue, otherwise you must quit the quest. Quitting a Quest In addition to instances when your HP is fully depleted, you can quit a quest by pressing to display the Main Menu and then selecting QUIT. After quitting you will be returned to town, but along the way you will drop many of the items you obtained during the quest. 26 Wireless Main Menu Wireless Communication Mode As you progress in the game, you will become able to play with other players, download items and more via wireless communication. To get started, talk to Bella at Castleton Air Travel in Castleton to bring up the following Wireless Main Menu. ◆ The Wireless Main Menu can also be accessed from My Room (above the Café). Wireless Main Menu Visit/Invite You and one other player can play together via Local Play, or visit Cafés via the internet (p. 27). Settings StreetPass™ and SpotPass™ settings can be set here. The Comment and Greeting your character uses during wireless communication mode can also be set here. Downloadable Content Here you can download special items, etc. via Nintendo Network (p. 30). Here you can read AR Cards to receive Magical AR special items, etc. (p. 31). About Nintendo Network This software supports Nintendo Network™. For a full list of this software's features that make use of Nintendo Network, see the "Castleton Air Travel" section (p. 26-31) of this manual. ♦ For information about connecting your Nintendo 3DS system to the internet, refer to the Operations Manual. About Nintendo Network Nintendo Network is an online service which allows you to play with other players all over the world, download new software and add-on content, trade videos, send messages and much more! 27 Local Play and Internet Playing with Nearby Friends (Local Play) and Internet This software supports multiplayer games via wireless communication. Over local wireless, up to two players can visit each other's Cafés. Each player must have a copy of the software. ◆ Local Play becomes available after advancing to a certain point in the game. ◆ You will not be able to use the café data you have uploaded if you try to access it from another Nintendo 3DS or if you redo initial setup on your system. ◆ This software does not support Sleep Mode when using either Local Play or any in-game Internet features, even when the Nintendo 3DS system is closed. You Will Need: - One Nintendo 3DS system per player - One copy of the software per player Setup Hosting Another Player at Your Café: 1. Talk to Bella at Castleton Air Travel and select VISIT/INVITE from the Wireless Main Menu. ◆ The Wireless Main Menu can also be accessed from My Room (above the Café). 2. Select LOCAL WIRELESS, then INVITE OVER. 3. Select the same meeting place as your guest does, and then the connection will be initiated. Visiting Another Player's Café: 1. Talk to Bella at Castleton Air Travel and select VISIT/INVITE from the Wireless Main Menu. ◆ The Wireless Main Menu can also be accessed from My Room (above the Café). 2. Select LOCAL WIRELESS, then VISIT. 3. Select the same meeting place as your host does, and then the connection will be initiated. How to visit over the Internet 1. Talk to Bella at Castleton Air Travel and select VISIT/INVITE from the Wireless Main Menu. 2. Select INTERNET and then select CONNECT. ◆ The first time you connect to the internet, you will be asked to confirm if you wish to upload your Café data. Select YES to proceed. 3. Select FRIEND LIST to visit the Café of one of your friends, or select RANDOM to visit the Café of a random player from the server. You can also select GUEST to visit the Café of a player who recently visited your Café. 4. Choose a Café you would like to visit from the list. 28 StreetPass Communicating with Nearby People (StreetPass™) This software uses StreetPass (local wireless communication) for exchanging player data. If two players with Nintendo 3DS systems who have the StreetPass feature activated for this software pass in close range of each other, they will automatically exchange player data. Once the data has been received, the character you met through the StreetPass feature will come visit your town. To communicate using this feature, all players must activate StreetPass for this software on their Nintendo 3DS systems. Activating StreetPass Talk to Bella at Castleton Air Travel. Then, from the Wireless Main Menu, select SETTINGS followed by STREETPASS. ◆ The Wireless Main Menu can also be accessed from My Room (above the Café). Deactivating StreetPass To deactivate StreetPass, open the System Settings and select DATA MANAGEMENT, then STREETPASS MANAGEMENT. Touch the icon for this software title, then select DEACTIVATE STREETPASS. 29 SpotPass Receiving Notifications (SpotPass™) You can receive Notifications even when you are not playing by putting the Nintendo 3DS system in Sleep Mode. It will automatically detect nearby wireless LAN access points and receive data. ◆ Data received through SpotPass is saved on SD Cards. As a result, it is recommended that you keep an SD Card inserted in your system at all times. To use SpotPass, you must first: - Accept the Nintendo 3DS Service User Agreement and Privacy Policy - Set up an internet connection - Insert an SD Card into the Nintendo 3DS system For information on these, refer to the Operations Manual. Activating SpotPass Procedure Talk to Bella at Castleton Air Travel. Then, from the Wireless Main Menu, select SETTINGS followed by SPOTPASS. Finally, select YES to activate SpotPass. ◆ SpotPass settings can also be accessed from My Room (above the Café) or from the Title Menu. Deactivating SpotPass You can deactivate SpotPass at any time. Procedure Talk to Bella at Castleton Air Travel. Then, from the Wireless Main Menu, select SETTINGS followed by SPOTPASS. Finally, select YES to deactivate SpotPass. ◆ SpotPass settings can also be accessed from My Room (above the Café) or from the Title Menu. 30 Add-On Content - Purchase Downloadable Content (Paid Add-On Content) This software supports online communication via an Internet connection. You can download special items, etc. Purchasing Downloadable Content Talk to Bella at Castleton Air Travel and select DOWNLOADABLE CONTENT followed by the content you want to download. Downloadable Content can also be accessed from My Room (above the Café). Some downloadable content can only be accessed by purchasing it. Downloadable Content Precautions ● You can check your purchased content in the Account Activity section of Nintendo eShop. ● This content is non-refundable and may not be exchanged for other products or services. ● Once purchased, content can be re-downloaded for free. ♦ This content may no longer be available for re-download if the service is suspended or discontinued, or if you delete your Nintendo eShop account. For details, refer to the Nintendo eShop electronic manual. ● This content will be saved to the SD Card. ● This content is only compatible with the Nintendo 3DS system used to purchase it. If you insert the SD Card into another system, this content will not be available on that system. Adding Funds To purchase downloadable content, you must have the required funds in your Nintendo eShop account balance. If you do not have the required funds, you will be prompted to add funds. Select ADD FUNDS to proceed. One of the following is required to add funds: - Nintendo eShop Card - Nintendo eShop activation code - Credit card ♦ You can save your credit card details on your system. If you do this, you will not need to enter your details every time you add funds. ♦ You can remove your saved credit card details at any time through SETTINGS / OTHER in Nintendo eShop. 31 Magical AR This software supports the reading of AR Cards using the Nintendo 3DS system's camera in some regions. You can obtain special items, etc. Talk to Bella at Castleton Air Travel. Then, from the Wireless Main Menu, select MAGICAL AR. Finally, align your system's camera to read the AR Card. ◆ The Magical AR feature can also be accessed from My Room (above the Café) or from the Title Menu. Refer to the following website for details: www.nintendo.com Receive special items by using the Nintendo 3DS system's camera to read AR Cards. Magical AR-related services may be terminated without any prior notice. 32 How to Contact Us For product information, please visit the Nintendo website at: www.nintendo.com For technical support and troubleshooting, please refer to the Operations Manual for your Nintendo 3DS system or visit: support.nintendo.com