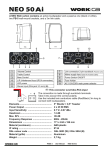
1
USER MANUAL for Neoi 809 NEOi 809 Quick Reference for MMS / GPRS / Wap settings / Einstellungen 1 Example : E-Plus (Germany) MMS settings Instructions MMS Data Account • • • • • • • • • • Navigate to – Menu > Services > Data Account > GPRS Select “Account 1” Edit the Account name from “Account 1” to “ eplus MMS” Press “Option > Done” Edit APN to say “mms.eplus.de” Edit User Name to “mms” Edit Password to “eplus” Set Authority. Type to “Normal” Press “ DONE” Press “Yes” to “Save” the settings. Set Up MMS Account • • • • • • • • • • • Navigate to - Menu > Messages > MMS > Message Settings > Server Profile Select “Profile 1” and press “OK” Select “Edit Profile” Rename “Profile 1” to “ewap MMS” Change Home Page Address to http://mms/eplus Go to “Data Account” and press “Select”, on the next screen, select “GPRS” and press “OK”. From the list navigate to the account named “eplus MMS” and select “OK” Connection Type Select “HTTP” and press “OK” and on the next screen type in the Proxy Address “212.023.097.153” and the Proxy Port “8080”. Press “OK” User name “mms” Password “eplus” Press “Done” 2 • Press “Yes” to save the Settings. Make sure that in Menu > Messages > MMS > Message Settings > Server Profile, the selected profile or Activated Profile is set to eplus MMS. Example: Vodafone MMS settings Access Point Name: wap.vodafone.co.uk Username: wap Password: wap Authentication: Normal Data bearer: GPRS Gateway IP (proxy) address: 212.183.137.012 Session mode: Permanent MMS Message (Relay) Server URL: http://mms.vodafone.co.uk/servlets/mms/ Instructions MMS Data Account Navigate to – Menu > Services > Data Account > GPRS Select “Account 1” Edit the Account name from “Account 1” to “ Voda MMS” Press “Option > Done” Edit APN to say “wap.vodafone.co.uk” Edit User Name to say “wap” Edit Password to “wap” Set Authority. Type to “Normal” Press “ DONE” Press “Yes” to “Save” the settings. Set Up MMS Account Navigate to - Menu > Messages > MMS > Message Settings > Server Profile Select “Profile 1” and press “OK” Select “Edit Profile” Rename “Profile 1” to “Voda MMS” Change Home Page Address to http://mms.vodafone.co.uk/servlets/mms/ Go to “Data Account” and press “Select”, on the next screen, select “GPRS” and press “OK”. From the list navigate to the account named “Voda MMS” and select “OK” Connection Type Select “HTTP” and press “OK” and on the next screen type in the Proxy Address “212.182.137.012” and the Proxy Port “8080”. 3 Press “OK” User name “wap” Password “wap” Press “Done” Press “Yes” to save the Settings. Make sure that in Menu > Messages > MMS > Message Settings > Server Profile, the selected profile or Activated Profile is set to Voda MMS. Nun, wenn Sie Ihren Service Provider anrufen und sich entsprechend die Settings fuer (Vodaphone Deutschland) den Service Provider geben lassen , koennen sie zumindest MMS empfangen. Sollten sie auf auslands Reise gehen, wie in England , so funktioniert es dort , wenn mann das Profile so einstellt. Anbei Einstellungen fuer weitere Service Provier im In-Ausland: ETISALAT MMS Data Account • Navigate to “Services” • Go To “Data Account” • Go To “GPRS” • Select “Account 1” • Edit the Account name from “Account 1” to “ Etisalat MMS” • Press “Done” • Edit APN to say “mms” • Edit User Name to say “ mms” • Edit Password to “ mms” • Set Authority. Type to “Normal” • Press “ DONE” • Press “Yes” to “Save” the settings. Set Up MMS Account • Navigate to “Messages” • Select “MMS” • Select “ Message Settings” • Select “Server Profile” • Select “Profile 1” and press “OK” • Select “Edit Profile” • Rename “Profile 1” to “MMS” • Change Home Page Address to “http://mms/servlets/mms” • Date Account Select “GPRS” Press “OK” then “Select” Etisalat MMS Press “OK” • Connection Type Select “HTTP” • Press “OK” • Proxy Address “010.012.000.030” • Press “OK” • Proxy Port “8080” 4 • Press “OK” • User name “mms” • Password “mms” • Press “Done” • Press “Yes” to save the Settings. Make sure that in Menu > Messages > MMS > Message Settings > Server Profile, the selected profile or Activated Profile is set to Etisalat MMS. Du MMS Data Account • Navigate to – Menu > Services > Data Account > GPRS • Select “Account 1” • Edit the Account name from “Account 1” to “ Du MMS” • Press “Option > Done” • Edit APN to say “mms” • Edit User Name to say “(Leave Blank)” • Edit Password to “(Leave Blank)” • Set Authority. Type to “Normal” • Press “ DONE” • Press “Yes” to “Save” the settings. Set Up MMS Account • Navigate to - Menu > Messages > MMS > Message Settings > Server Profile • Select “Profile 1” and press “OK” • Select “Edit Profile” • Rename “Profile 1” to “Du MMS” • Change Home Page Address to http://mms.du.ae • Go to “Data Account” and press “Select”, on the next screen, select “GPRS” and press “OK”. From the list navigate to the account named “Du MMS” and select “OK” • Connection Type Select “HTTP” and press “OK” and on the next screen type in the Proxy Address “010.019.018.004” and the Proxy Port “9201”. • Press “OK” • User name “(Leave Blank)” • Password “(Leave Blank)” • Press “Done” • Press “Yes” to save the Settings. Make sure that in Menu > Messages > MMS > Message Settings > Server Profile, the selected profile or Activated Profile is set to Du MMS. Orange MMS settings Access Point Name: orangemms Username: Orange Password: Multimedia Authentication: Normal Data bearer: GPRS 5 Gateway IP (proxy) address: 192.168.224.10 Port: 9201 (some users have reported 8080 (WAP) works if 9201 doesn't) Session mode: Permanent MMS Message (Relay) Server URL http://mms.orange.co.uk/ Instructions MMS Data Account • Navigate to – Menu > Services > Data Account > GPRS • Select “Account 1” • Edit the Account name from “Account 1” to “ Orange MMS” • Press “Option > Done” • Edit APN to say “orangemms” • Edit User Name to say “orange” • Edit Password to “multimedia” • Set Authority. Type to “Normal” • Press “ DONE” • Press “Yes” to “Save” the settings. Set Up MMS Account • Navigate to - Menu > Messages > MMS > Message Settings > Server Profile • Select “Profile 1” and press “OK” • Select “Edit Profile” • Rename “Profile 1” to “Orange MMS” • Change Home Page Address to http://mms.orange.co.uk/ • Go to “Data Account” and press “Select”, on the next screen, select “GPRS” and press “OK”. From the list navigate to the account named “Orange MMS” and select “OK” • Connection Type Select “HTTP” and press “OK” and on the next screen type in the Proxy Address “192.168.224.010” and the Proxy Port “8080”. • Press “OK” • User name “orange” • Password “multimedia” • Press “Done” • Press “Yes” to save the Settings. Make sure that in Menu > Messages > MMS > Message Settings > Server Profile, the selected profile or Activated Profile is set to Orange MMS. O2 MMS settings Access point name: wap.o2.co.uk (contract customers) or payandgo.o2.co.uk (pay-as-you-go customers) Username: o2wap (contract customers) or payandgo (pay-as-yougo customers) Password: password Authentication: Normal Data bearer: GPRS Gateway IP (proxy) address: 193.113.200.195 6 Session mode: Permanent Port number: 8080 or 9201 URL address: http://mmsc.mms.o2.co.uk:8002 Instructions MMS Data Account • Navigate to – Menu > Services > Data Account > GPRS • Select “Account 1” • Edit the Account name from “Account 1” to “ O2 MMS” • Press “Option > Done” • Edit APN to say “wap.o2.co.uk” • Edit User Name to say “o2wap” for contract customers and “payandgo.o2.uk” for Pay-as-yougo customers. • Edit Password to “password” • Set Authority. Type to “Normal” • Press “ DONE” • Press “Yes” to “Save” the settings. Set Up MMS Account • Navigate to - Menu > Messages > MMS > Message Settings > Server Profile • Select “Profile 1” and press “OK” • Select “Edit Profile” • Rename “Profile 1” to “O2 MMS” • Change Home Page Address to http://mmsc.mms.o2.co.uk:8002 • Go to “Data Account” and press “Select”, on the next screen, select “GPRS” and press “OK”. From the list navigate to the account named “O2 MMS” and select “OK” • Connection Type Select “HTTP” and press “OK” and on the next screen type in the Proxy Address “193.113.200.195” and the Proxy Port “8080” or “9201”. • Press “OK” • User name “o2wap” • Password “password” • Press “Done” • Press “Yes” to save the Settings. Make sure that in Menu > Messages > MMS > Message Settings > Server Profile, the selected profile or Activated Profile is set to O2 MMS. Vodafone MMS settings Access Point Name: wap.vodafone.co.uk Username: wap Password: wap Authentication: Normal Data bearer: GPRS Gateway IP (proxy) address: 212.183.137.012 Session mode: Permanent 7 MMS Message (Relay) Server URL: http://mms.vodafone.co.uk/servlets/mms/ Instructions MMS Data Account • Navigate to – Menu > Services > Data Account > GPRS • Select “Account 1” • Edit the Account name from “Account 1” to “ Voda MMS” • Press “Option > Done” • Edit APN to say “wap.vodafone.co.uk” • Edit User Name to say “wap” • Edit Password to “wap” • Set Authority. Type to “Normal” • Press “ DONE” • Press “Yes” to “Save” the settings. Set Up MMS Account • Navigate to - Menu > Messages > MMS > Message Settings > Server Profile • Select “Profile 1” and press “OK” • Select “Edit Profile” • Rename “Profile 1” to “Voda MMS” • Change Home Page Address to http://mms.vodafone.co.uk/servlets/mms/ • Go to “Data Account” and press “Select”, on the next screen, select “GPRS” and press “OK”. From the list navigate to the account named “Voda MMS” and select “OK” • Connection Type Select “HTTP” and press “OK” and on the next screen type in the Proxy Address “212.182.137.012” and the Proxy Port “8080”. • Press “OK” • User name “wap” • Password “wap” • Press “Done” • Press “Yes” to save the Settings. Make sure that in Menu > Messages > MMS > Message Settings > Server Profile, the selected profile or Activated Profile is set to Voda MMS. T-Mobile (UK) MMS settings Fuer T-Mobile Deutschland, gehen Sie bitte zur T-Mobile Deutschland Webseite. Access Point Name: general.t-mobile.uk Username: user Password: one2one Authentication: Normal Data bearer: GPRS Gateway IP (proxy) address: 149.254.211.10 (also 149.254.201.135) Session mode: Permanent 8 MMS Message (Relay) Server URL: http://mmsc.tmobile.co.uk:8002/ Instructions MMS Data Account • Navigate to – Menu > Services > Data Account > GPRS • Select “Account 1” • Edit the Account name from “Account 1” to “ T MMS” • Press “Option > Done” • Edit APN to say “general.t-mobile.uk” • Edit User Name to say “user” • Edit Password to “one2one” • Set Authority. Type to “Normal” • Press “ DONE” • Press “Yes” to “Save” the settings. Set Up MMS Account • Navigate to - Menu > Messages > MMS > Message Settings > Server Profile • Select “Profile 1” and press “OK” • Select “Edit Profile” • Rename “Profile 1” to “T MMS” • Change Home Page Address to http://mmsc.tmobile.co.uk:8002/ • Go to “Data Account” and press “Select”, on the next screen, select “GPRS” and press “OK”. From the list navigate to the account named “T MMS” and select “OK” • Connection Type Select “HTTP” and press “OK” and on the next screen type in the Proxy Address “149.254.211.010” or “149.254.201.135” and the Proxy Port “8080”. • Press “OK” • User name “user” • Password “one2one” • Press “Done” • Press “Yes” to save the Settings. Make sure that in Menu > Messages > MMS > Message Settings > Server Profile, the selected profile or Activated Profile is set to T MMS. Virgin MMS settings Note: Virgin must enable MMS for your account. Contact Virgin Customer Services Access Point Name: goto.virginmobile.uk Username: user Password: (leave blank) Authentication: Normal Data bearer: GPRS Gateway IP (proxy) address: 193.030.166.001 Port: 8080 9 Session mode: Permanent MMS Message (Relay) Server URL http://mms.virginmobile.co.uk:8002 Instructions MMS Data Account • Navigate to – Menu > Services > Data Account > GPRS • Select “Account 1” • Edit the Account name from “Account 1” to “ Virgin MMS” • Press “Option > Done” • Edit APN to say “goto.virginmobile.uk” • Edit User Name to say “user” • Edit Password to “(leave Blank)” • Set Authority. Type to “Normal” • Press “ DONE” • Press “Yes” to “Save” the settings. Set Up MMS Account • Navigate to - Menu > Messages > MMS > Message Settings > Server Profile • Select “Profile 1” and press “OK” • Select “Edit Profile” • Rename “Profile 1” to “Virgin MMS” • Change Home Page Address to http://mms.virginmobile.co.uk:8002 • Go to “Data Account” and press “Select”, on the next screen, select “GPRS” and press “OK”. From the list navigate to the account named “Virgin MMS” and select “OK” • Connection Type Select “HTTP” and press “OK” and on the next screen type in the Proxy Address “193.030.166.001” and the Proxy Port “8080”. • Press “OK” • User name “user” • Password “(Leave Blank)” • Press “Done” • Press “Yes” to save the Settings. Make sure that in Menu > Messages > MMS > Message Settings > Server Profile, the selected profile or Activated Profile is set to Virgin MMS. Tesco Mobile MMS settings Access point name: prepay.tesco-mobile.com Username: tescowap Password: password Authentication: Normal Data bearer: GPRS Gateway IP address: 193.113.200.195 Session mode: Permanent URL address: http://mmsc.mms.o2.co.uk:8002 Instructions 10 MMS Data Account • Navigate to – Menu > Services > Data Account > GPRS • Select “Account 1” • Edit the Account name from “Account 1” to “ Tesco MMS” • Press “Option > Done” • Edit APN to say “prepay.tesco-mobile.com” • Edit User Name to say “tescowap” • Edit Password to “password” • Set Authority. Type to “Normal” • Press “ DONE” • Press “Yes” to “Save” the settings. Set Up MMS Account • Navigate to - Menu > Messages > MMS > Message Settings > Server Profile • Select “Profile 1” and press “OK” • Select “Edit Profile” • Rename “Profile 1” to “Tesco MMS” • Change Home Page Address to http://mmsc.mms.o2.co.uk:8002 • Go to “Data Account” and press “Select”, on the next screen, select “GPRS” and press “OK”. From the list navigate to the account named “Tesco MMS” and select “OK” • Connection Type Select “HTTP” and press “OK” and on the next screen type in the Proxy Address “193.113.200.195” and the Proxy Port “8080”. • Press “OK” • User name “tescowap” • Password “password” • Press “Done” • Press “Yes” to save the Settings. Make sure that in Menu > Messages > MMS > Message Settings > Server Profile, the selected profile or Activated Profile is set to Tesco MMS. BT Mobile MMS settings Access point name: mobile.bt.uk Username: user Password: btmms Authentication: Normal Data bearer: GPRS Gateway IP address: 212.183.137.012 or 62.239.21.123 Session mode: Permanent URL address: http://mms.bt.com/servlets/mms or http://mmsc.btmms.co.uk:8002 Instructions MMS Data Account • Navigate to – Menu > Services > Data Account > GPRS • Select “Account 1” • Edit the Account name from “Account 1” to “ BT MMS” 11 • Press “Option > Done” • Edit APN to say “mobile.bt.uk” • Edit User Name to say “user” • Edit Password to “btmms” • Set Authority. Type to “Normal” • Press “ DONE” • Press “Yes” to “Save” the settings. Set Up MMS Account • Navigate to - Menu > Messages > MMS > Message Settings > Server Profile • Select “Profile 1” and press “OK” • Select “Edit Profile” • Rename “Profile 1” to “BT MMS” • Change Home Page Address to http://mms.bt.com/servlets/mms or http://mmsc.btmms.co.uk:8002 • Go to “Data Account” and press “Select”, on the next screen, select “GPRS” and press “OK”. From the list navigate to the account named “BT MMS” and select “OK” • Connection Type Select “HTTP” and press “OK” and on the next screen type in the Proxy Address “212.183.137.012” and the Proxy Port “8080”. • Press “OK” • User name “user” • Password “btmms” • Press “Done” • Press “Yes” to save the Settings. Make sure that in Menu > Messages > MMS > Message Settings > Server Profile, the selected profile or Activated Profile is set to BT MMS. SET UP Instructions Neoi 809 WAP To set up the WAP Browser on the 809 series of Phones please follow this example for Starhub Singapore, but substitute Carrier Specific Settings with YOUR Carriers settings. Please go to the WAP Homepage of your service provider for specific Data and settings. 1.) 2.) 3.) 4.) 5.) 6.) 7.) 8.) From Menu go to SERVICES Enter Select WAP (2) >>> Enter Select SETTINGS (6) >>> Enter Select EDIT PROFILE (1) Select Profile 1…10 >>>Enter Select EDIT PROFILE (2) >>> Enter Follow Menu: 12 a.) Edit Rename Profile to YOUR Carriers Name ( in this Example we use Starhub ) Starhub b.) Edit Insert Home Page Name http://geeselect.starhubgee..com.sg/wap c.) Select Enter Data Account STARHUB GPRS ( Please NOTE! You have to set up FIRST your Carriers GPRS settings, in the Phone’s Service Menu!) d.) Select / Insert Connection Type HTTP e.) Edit Insert Username if required ( Note most SIM Card operators do not require a username anymore, as the SIM card code is the username) f.) Edit Insert Password if required After Save go BACK (1) Activate the appropriate Profile …. OK … Yes … Done …Back Go to Browser Options (1) (2) Timeout 300 Show Images ON OK …Save… Yes … Done Go to Service Message Settings (3) Select ON Go to Clear Cache Clear Cache … Yes ..Done… Go to Clear Cookies Clear Cookies .. YES .. Done Go to Trusted Certificates Select the Certificate (1) or (2) which YOUR carrier recognizes ! Go BACK … to Internet Services Menu Screen (4) Enter Address Enter YOUR Carriers WAP Homepage Go to (1) Homepage and test Settings. Make sure the GPRS Icon appears on the main screen (top). If the Icon does NOT appear then: a.) You do not have a Data service Agreement with Your Carrier b.) You do have a Pre-paid SIM card, ALL pre-paid SIM Cards do NOT have Data services c.) You are Roaming, and the Roaming partner has no data Service agreement with your Home Carrier d.) You bought your Phone from a private shop, who has no contract with a carrier for pre-set services, or your home carroer allows only Data Services from sets bought in their official shop, with official pre settings. 13 e.) Check your Phone’s GPRS settings NOTE: In Your 809 Series settings for GPRS, under (2) GPRS, you MUST have 2 different settings: (1) WAP settings (2) MMS Settings The following are the WAP, GPRS and MMS settings for China Mobile : 1。services ---- Data Account ---- GPRS 作如下配置 Choose Account1 to change: Account name : CHINA MOBILE GPRS APN : cmwap 2. Services ---- WAP --- Settings ---- Edit Profile Choose Profile1 to choose: Rename Profile : china mobile Homepage : http://wap.monternet.com Data Account: CHINA MOBILE GPRS Connection Type : HTTP Proxy Address : 010.000.000.172 Proxy Port : 80 3. MMS settings: Message settings --- Server profile: Rename profile: China mobile MMS Homepage : http://mmsc.monternet.com Data Account : Choose account under WAP settings: CHINA MOBILE GPRS Connection Type : HTTP Proxy Address : 010.000.000.172 Proxy Port : 80 If you have any problems in settings, please contact your next service station thru the Website or eMail to: [email protected] or consult the Website of the concerned Carrier. Neoi 809 Serie Anweisung fuer GPRS , MMS , WAP Settings 14 1.) 2.) 3.) 4.) a.) b.) c.) d.) e.) f.) g.) h.) i.) j.) Bitte zunaechst feststellen ob die SIM Karte des Service Providers ( z.b. T-Mobile, D2 ) mit einem GPRS Konto ausgeruestet ist, nicht jeder SIM Vetrag hat auch ein GPRS Daten Konto ( haengt vom Service Vetrag ab) SIM Karte Einlegen, Battery einlegen, Geraet einschalten. Zuneachst einen Telefon Anruf machen, dann ein SMS versenden, und feststellen ob beides richtig ausgefuehrt wird. Dann.. Menu.... Services... Enter ( 5 weg Taste in der Mitte Druecken) Service Menu erscheint bitte festellen ob das folgende auf dem Bildschirm zu lesen ist: 1 ( Name der SIM Karte , z.b. T-Mobile) 2 WAP 3 Data Account Auf 1 gehen .. Enter ... Es muss nun das Menue des Service Providers angezeigt werden Auf diesem Menu .... Enter .... Nun muessen alle Services des Providers angezeigt werden ( eine lange Liste). Erscheint diese, dann zunaechst einen Service ausprobieren.... wenn das funktioniert, dannist der GSM Daten Fluss in ordnung and man kann das GPRS Daten Konto programmieren ...... zurueck zu Services 3 (Data Account) waehlen und ENTER 2 GPRS waehlen und ENTER.... Neues Account wahlen ( z.b Account 1)... a.) (1) Account Name eintragen ( z.b. T-mobile… bitte bei Service Provider erfragen wie das GPRS Account GENAU heist, ist SEHR wichtig, dad as Geraet spaeter sonst das Account nicht finden kann ueber den eingebauten Browser ! ) b.) (2) APN .... Acess Point waehlen und eintragen ( auch diese rist vom Service provider zu erfahren c.) (3) User Name waehlen und eintragen ( wird vom Service Provider gegeben, kann auch manchmal blank sein) d.) (4) Password eintragen e.) (5) Auth. Type = Normal BACK Taste Druecken , (2) WAP ... ENTER ... a.) (1) Homepage ....ENTER , es sollte nun die Homepage des Service Providers erscheinen, dann ist das GPRS korrekt programmiert b.) Back.... c.) Back.... Sie sind im Haupt Menu 5.) 6.) 7.) Gehen Sie zu MESSAGES .... ENTER Gehen Sie zu (2) MMS Gehen Sie zu (6) Message Settings 15 a.) b.) c.) d.) e.) Gehen Sie zu (5) Server Profile ... ENTER Waehlen Sie ein neues Profil ( z.b. Profil 2) Gehen Sie zi (2) Edit Profil ... ENTER (1) Den ichtigen Profil Namen einsetzen (z.b. mmsc) (2) Die richtige Homepage das MMS Service Providers eintragen f.) (3) Das GPRS Konto welches Sie vorher programmiert haben waehlen g.) (4) Connection Type WAP waehlen h.) (5) User Name ( Benutzer Name) wie vom Service Provider angewiesen eintragen i.) (6) Passwsort eintragen 8.) Dann BACK...... 9.) (1) Activate Profile ....ENTER 10.) Korrektes Profil waehlen ... ENTER 11.) Back.... Back.... Back..... Back.... zur telefon Screen Es sollte nun alles programmiert sein. Das Geraet benutzt das Linux Profil, welches sehr einfach zu programmieren ist, da man im Gegensatz zu Windows nur sehr wenige Informationen benoetigt welche vom Service Provider gegeben werden. Hier im Anhang zum Beispiel die Informationen die man von TMobile bekommt, von denen man dann nur einige wenige benutzt. Es ist leider bekannt, dass Service Providers sogenannte Service Centers wenig Hilfe fuer Kunden geben die das Geraet nicht beim ihm gekauft haben, und immer sagen „Sie kennen das Geraet nicht“. Leider sind diese „Spezialisten“ ueberhaupt nicht ausgebildet. Aber..... Man kann sehr leicht alle Einstellungen usw. Ueber das Internet finden. z.b. http://www.google.de ....... Dann suchen nach - t-mobile gprs wap einstellungen „ ....... Beispiel Ergebnis siehe unten ... Voraussetzung für die Nutzung der t-zones Dienste sind WAP- bzw. GPRSHandys/PDA mit eingebautem Micro-Browser, konfiguriert für t-zones. Sollte Ihr Handy oder PDA nicht bereits vorkonfiguriert sein, dann können Sie es automatisch für t-zones einrichten lassen. Wählen Sie im KonfigurationsCenter einfach Ihr Handymodell aus und schon geht's los! ... zur automatischen Konfiguration Ist Ihr Handy nicht im Konfigurations-Center verfügbar, halten wir für Sie auch Bedienungsanleitungen bereit, womit Sie Ihr Handy Schritt für Schritt für t-zones einrichten können. ... zu den Konfigurationsanleitungen 16 Eine Übersicht der möglichen Konfigurationsdaten finden Sie nachfolgend: GPRS-Verbindung WAP PDA Verbindungsname: DE GPRS WAP DE GPRS WAP Homepage: http://www.tzones.de http://www.tzones.de IP Adresse: 193.254.160.002 193.254.160.001 Passwort abfragen: Nein Nein Datenträger: GPRS GPRS Benutzername: t-d1 t-d1 Passwort: wap wap Name des Zugangspunktes: wap.t-d1.de internet.tmobile Authentifizierung: Normal Normal VerbindungsSicherheit: Nein Nein Session-Mode: Permanent Permanent WAP PDA CSD-Verbindung Verbindungsname: DE CSD DE CSD Homepage: http://www.tzones.de http://www.tzones.de IP Adresse: 193.254.160.002 193.254.160.002 Passwort abfragen: Nein Nein Datenträger: GSM Data GSM Data Telefonnummer: +491712524120 +491712524120 Benutzername: t-d1 t-d1 Passwort: wap wap Authentifizierung: Normal Normal VerbindungsSicherheit: Nein Nein Session-Mode: Permanent Permanent Ruf-Typ: Analog ISDN Geschwindigkeit: 9600 9600 MMS Einstellungen 17 Profilname: T-D1 MMS Verbindungs-URL: http://mms.tmobile.de/servlets/mms Sicherheit: Nein IP Adresse: 193.254.160.003 > Port hierbei: 9201 Benutzername: t-d1 Passwort: mms Name des Zugangspunktes: mms.t-d1.de Proxyserver: 172.028.023.131 > Proxyport hierbei: 8008 WAP 2 Einstellungen Profilname: DE WAP 2.0 Verbindungs-URL: http://wap.t-d1.de Datenträger: GPRS Benutzername: t-mobile Passwort: t-d1 Name des Zugangspunktes: internet.t-mobile Authentifizierung: Normal Login Typ: Automatisch Fuer weitere Informationen gehen Sie bitte zur Webseite http://www.neoi.de 18 19