1
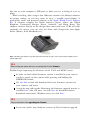
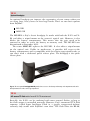
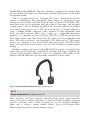
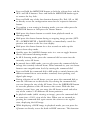
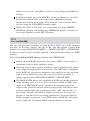
Rico Pfirstinger
[email protected]
Publisher: Gerhard Rossbach
Project Editor: Maggie Yates
Copyeditor: Maggie Yates
Layout: Rico Pfirstinger
Cover Design: Helmut Kraus
ISBN 978-1-492000-30-3
1st Edition 2014
© 2014 by Rico Pfirstinger
Rocky Nook Inc.
802 East Cota St., 3rd Floor
Santa Barbara, CA 93103
www.rockynook.com
Distributed by O‘Reilly Media
1005 Gravenstein Highway North
Sebastopol, CA 95472
All rights reserved. No part of the material protected by this copyright notice may be reproduced or utilized in
any form, electronic or mechanical, including photocopying, recording, or by any information storage and
retrieval system, without written permission of the publisher.
Many of the designations in this book used by manufacturers and sellers to distinguish their products are
claimed as trademarks of their respective companies. Where those designations appear in this book, and Rocky
Nook was aware of a trademark claim, the designations have been printed in caps or initial caps. All product
names and services identified throughout this book are used in editorial fashion only and for the benefit of
such companies with no intention of infringement of the trademark. They are not intended to convey
endorsement or other affiliation with this book.
While reasonable care has been exercised in the preparation of this book, the publisher and author(s)
assume no responsibility for errors or omissions, or for damages resulting from the use of the information
contained herein or from the use of the discs or programs that may accompany it.
This book is printed on acid-free paper.
Table of Contents
AUTHOR
1 Your X-E2 System
1.1 The Basics (1): Things You Should Know About Your Camera
TIP 1 RTFM
TIP 2 Spare Batteries
TIP 3 Battery Charger and Travel Adapter
TIP 4 Firmware
TIP 5 Upgrading Your Firmware
TIP 6 Memory Cards
TIP 7 Reset the Frame Counter
TIP 8 High Performance Mode
TIP 9 Camera Sensor
TIP 10 Do-It-Yourself Sensor Cleaning
1.2 The Basics (2): Things You Should Know About Your Lenses
TIP 11 Samyang Lenses
TIP 12 Zeiss Touit
TIP 13 XF18–55mmF2.8–4 R LM OIS
TIP 14 Optical Image Stabilizer (OIS)
TIP 15 XF23mmF1.4 R and XF14mmF2.8 R
TIP 16 Lens Modulation Optimizer
TIP 17 Digital Lens Corrections
TIP 18 Lens Hood
TIP 19 Lens Protection Filters
TIP 20 39mm Filters
1.3 The Basics (3): Useful Accessories
TIP 21 Optional Handgrips
TIP 22 Off-camera TTL Flash
TIP 23 Remote Shutter Release
2 Using the Fujifilm X-E2
2.1 Ready, Set, Go!
TIP 24 Recommended Settings
TIP 25 Practical Shortcuts
TIP 26 FINE+RAW
TIP 27 Image Format
TIP 28 The Magical Half-press
2.2 Monitor and Viewfinder
TIP 29 Eye Sensor
TIP 30 Instant Review
TIP 31 DISP/BACK
TIP 32 WYSIWYG
2.3 Exposing Right
TIP 33 Metering Method
TIP 34 Live View and Live Histogram
TIP 35 Auto Exposure (AE)
TIP 36 Manual Exposure M
TIP 37 Aperture Priority A
TIP 38 Shutter Priority S
TIP 39 Program AE P and Program Shift
TIP 40 Auto Exposure Bracketing
TIP 41 Long Exposures
TIP 42 ISO Settings
TIP 43 Extended ISO
TIP 44 Auto-ISO
TIP 45 Auto-ISO in Manual Mode M
TIP 46 ISO-Bracketing
TIP 47 Extending the Dynamic Range
TIP 48 Extending the Dynamic Range for RAW Shooters
TIP 49 JPEG Settings for RAW Shooters
TIP 50 Extending the Dynamic Range for JPEG Shooters
TIP 51 HDR Images
2.4 Focusing with the X-E2
TIP 52 CDAF and PDAF
TIP 53 AF-S or AF-C?
TIP 54 Multi vs. Area
TIP 55 AF Frame Size
TIP 56 Manual Focus
TIP 57 Manual Focus Assistants
TIP 58 Magnifier Tool
TIP 59 One-Touch-AF
TIP 60 Pre-AF
TIP 61 Face Detection
TIP 62 AF-Lock
TIP 63 Focusing in Poor Light
TIP 64 Macro
TIP 65 The “Autofocus Trick”
TIP 66 The Focus Trap
TIP 67 AF-Tracking
2.5 White Balance and JPEG Parameters
TIP 68 Custom White Balance
TIP 69 Infrared Photography
TIP 70 WB SHIFT
TIP 71 Film Simulations
TIP 72 Contrast Settings
TIP 73 Skin Tones
TIP 74 Color Saturation
TIP 75 Color Space: sRGB or Adobe RGB?
TIP 76 Custom Settings
TIP 77 Working with the Built-in RAW Converter
TIP 78 Comparing RAW Converters
TIP 79 Displaying EXIF Metadata
2.6 Burst Mode, Motion Panorama, Movies and the Self Timer
TIP 80 Burst Mode
TIP 81 Motion Panoramas
TIP 82 Shooting Video
TIP 83 Self-timer
2.7 Flash Photography
TIP 84 Flash Photography in Modes P and A
TIP 85 Controlling the Surrounding Light Component
TIP 86 Controlling the Flash Light Component
TIP 87 2nd Curtain Flash Synchronization
TIP 88 Flash Synchronization
TIP 89 Red-eye Removal
TIP 90 Little Slave: the EF-X20
TIP 91 Flash vs. Silent Mode
TIP 92 Using Third-Party Flash Units
2.8 Using Adapted Lenses
TIP 93 Lens Adapter
TIP 94 Adapting Third-Party Lenses
TIP 95 Exposing with Adapted Lenses
TIP 96 Focusing with Adapted Lenses
TIP 97 Fujifilm M-mount Adapter
TIP 98 Quality Considerations
TIP 99 Speed Booster
2.9 Anything Else?
TIP 100 Forums, Blogs and Workshops
(...)
1.1 The Basics (1): Things You Should Know About Your Camera
TIP 1
RTFM! Read The Fuji Manual! It is included with your camera and you can choose between the printed
version and an electronic PDF version.
Besides the printed manual, you’ll also find PDF versions of the manual in
different languages on the CD that comes with your camera. Please do
yourself a big favor and thoroughly study this manual in order to get
acquainted with the different functions of your camera, and don’t forget that
your lenses come with a user manual, as well.
This e-book doesn’t replace the X-E2 camera manual; it builds on it.
Beyond the Manual is an enhancement to the existing user manual, with
valuable tips and background information about how to use the various
features and functions of the X-E2 and make the most of your equipment.
In case you have misplaced your printed user manuals and camera CD or
want to update to a newer edition of a manual, you can obtain downloadable
PDF versions in all supported languages by clicking here.
TIP 2
Get a few spare batteries. You can buy suitable batteries either from Fujifilm or from a third party.
The X-E2 is quite a compact camera, which means that the rechargeable
battery is also rather small. Depending on how you use your camera, a fully
charged battery will last for 250 to 500 shots. When the battery indicator
changes from three to two bars, you have already used up more than half of
the battery’s energy. When the indicator shows one remaining red bar, it’s
almost time to replace the battery.
Your X-E2 is using NP-W126 rechargeable batteries. This type of battery
is also used in Fujifilm’s X-T1, X-Pro1, X-E1, X-M1, and X-A1 cameras,
and can be interchanged between these models. You can obtain NP-W126
batteries from Fujifilm or compatible products from a variety of third-party
vendors. Not all aftermarket batteries offer the same quality and capacity as
the original, but third-party batteries tend to be significantly cheaper, so you
can buy more of them.
TIP 3
Get a suitable battery charger and a travel adapter
The aftermarket not only offers spare batteries, but also chargers that work
with regular power outlets, USB ports, or a car’s cigarette lighter jack. This
way, you can charge your batteries not only at home or in your hotel room,
but also on your computer’s USB port or when you are traveling in a car or
plane.
While traveling, don’t forget that different countries use different formats
for power outlets, so you may want to carry a suitable travel adapter. A
particularly small and practical solution is the Apple World Travel Adapter
Kit. It contains adapters for North America, Japan, China, the United
Kingdom, Continental Europe, Korea, Australia, and Hong Kong. The
adapters connect directly to the charger that comes with your X-E2 (no cable
required). Of course, you can also use them with chargers for your Apple
device (iPhone, iPad, MacBook etc.).
Fig. 5: Some third-party chargers can get their power from more than one source, such as power outlets, USB ports, and car
cigarette lighter jacks
TIP 4
Make sure that your camera and lenses are running with the latest firmware
Fujifilm keeps improving the firmware of the X-E2 and XF/XC lenses.
In order to check which firmware version is installed in your camera
and lens, switch on the camera while pressing and holding the
DISP/BACK button.
Use this link to find and download the latest firmware versions for
your cameras and lenses.
A step-by-step video guide illustrating the firmware upgrade process is
available here. Mac OS users can click here for detailed firmware
download instructions. Windows users can click here.
TIP 5
Things to remembers when upgrading your firmware:
If you can’t find a new firmware version on Fuji’s firmware upgrade
page, there’s a good chance that your web browser is still caching an
older version of this page. In this case, either delete your browser
cache or force your browser to reload the webpage from the server.
Make sure that your computer doesn’t change the name of firmware
files you download due to naming conflicts caused by older firmware
versions in your computer’s download folder. The correct file name of
the camera firmware for your X-E2 is FWUP0004.DAT.
Make sure your battery is fully charged when upgrading your
firmware.
Always copy new firmware files for your camera or lenses into the top
directory of your SD memory card, and always use cards that have
been freshly formatted in your camera. After you have copied the
firmware to the card, make sure to properly unmount the card from
your computer. Don’t just remove the card before unmounting it.
If you want to update the firmware for a specific lens, make sure that
lens is attached to the camera when you initiate the upgrade process.
To start the upgrade process for your camera or a lens, switch on the
camera while pressing and holding the DISP/BACK button and follow
the instructions on the screen.
Never switch off the camera during the upgrading process. The camera
will tell you when the upgrade is complete. Only then can you safely
switch it off.
If the firmware of your camera or lens needs to be upgraded due to
compatibility issues, the camera will alert you of this when you switch it on.
If that’s the case, download the new firmware from the website links
provided in Tip 4 and upgrade your camera and/or lens.
TIP 6
Use fast memory cards with at least 80 MB/s write speed
Turbo-charge your camera and its built-in buffer memory by using the fastest
UHS-I memory cards available. SanDisk, Panasonic, and Toshiba offer cards
with nominal write speeds of 80 MB/s or higher.
SanDisk Extreme Pro SD cards are particularly popular among X-series
photographers. Sadly, the latest UHS-II standard, which has even better
transmission speeds, is only supported by the Fujifilm X-T1. When you are
using UHS-II memory cards in your X-E2, make sure that those cards offer a
fast UHS-I compatibility mode.
(...)
Fig. 11: The XF18–55mmF2.8–4 R LM OIS is the standard zoom or “kit lens” of the X-E2. It delivers very good and
sometimes even outstanding results.
TIP 14
The optical image stabilizer (OIS) has its quirks!
As of summer 2014, all XF and XC zoom lenses feature built-in optical
image stabilization (OIS) to enable handheld shots at slower-than-usual
shutter speeds. Switch on the OIS in situations that require shutter speeds that
would otherwise lead to camera shake and blurry images. XF lenses offer a
dedicated OIS on/off switch on the lens barrel. The OIS in XC lenses is
controlled through a camera menu.
An old rule of thumb recommends using shutter speeds for handheld shots
that are at least as fast the reciprocal of the full-frame-equivalent focal length
that is in use. For example, with a 50mm lens and an APS-C crop factor of
1.5, the minimum safe shutter speed for handheld camera use would be [1 /
(50 * 1.5)]s = 1/75s. In other words, when you are shooting handheld with a
50mm lens and don’t want shaky images, you should use shutter speeds that
are at least as fast as 1/75s. Or you can use the OIS to add a few more stops.
Of course, rules of thumb don’t apply to everybody. Some users have quite
steady hands and some have rather shaky hands. The settings and equipment
that work for me may not always work for you. However, the OIS will
always give you a few extra stops of shutter-speed headroom.
You can choose between two basic OIS modes:
OIS mode 1 is the default setting. It’s always stabilizing the image,
even when you are just looking through the viewfinder before you
press the shutter button.
OIS mode 2 only works when you fully depress the shutter button to
take an image.
Please note that the OIS can also introduce camera shake, especially at fast
shutter speeds. This adverse effect is more likely to occur in OIS mode 1 than
in mode 2. However, OIS mode 1 is more effective when used at very slow
shutter speeds such as 1/15s, 1/8s, or even 1/4s.
Fig. 12: The optical image stabilizer in action: Thanks to a slow shutter speed of 1/10s, the landscape outside becomes a
blur, while the interior of the moving train is crisp and sharp. The OIS was able to successfully compensate for any camera shake
caused by my hands and the train.
These are my recommendations for using the OIS:
Only use (switch on) the OIS when necessary. When you are using fast
shutter speeds that don’t require image stabilization, you can safely
turn it off to eliminate the OIS as a potential interference.
Preferably use the OIS in mode 2 (“shooting only”). Mode 1 is useful
at very slow shutter speeds and when you are using very long focal
lengths because the camera will also stabilize the live view image,
making it easier to compose a shot.
Always turn off the OIS when you are working from a tripod or with
shutter speeds that are slower than a second. You should also switch it
off for panning shots.
(...)
TIP 21
Optional handgrips
An optional handgrip can improve the ergonomics of your camera when you
are using large, heavy lenses or have large hands. There are two basic options
from Fujifilm:
HG-XE1
MHG-XE
The HG-XE1 is Fuji’s classic handgrip. It works with both the X-E1 and XE2 and offers a tripod mount on the camera’s optical axis. However, it also
blocks the battery compartment. This means that the grip needs to be
removed in order to access the battery or memory card. The HG-XE1 was
discontinued in December 2013.
The newer MHG-XE replaces the HG-XE1. It also offers a tripod mount
on the optical axis. Unlike its predecessor, it provides full access to the
battery compartment and is compatible with Arca-Swiss-type tripod heads, so
you don’t need a dedicated quick release plate. The handgrip is the quick
release plate.
Fig. 15: The new optional handgrip MHG-XE provides direct access to the battery and memory card compartment and can be
directly mounted on an Arca-Swiss-type tripod head
TIP 22
Off-camera TTL flash with a Canon OC-E3 TTL extension cord
Basically, the X-E2 can be combined with most external flashes, as long as
the flash output is controlled manually. However, Fuji’s automated TTL flash
exposure (called Super Intelligent Flash in a grossly exaggerated fashion)
currently only works with Fujifilm’s own three TTL flash units: the EF-20,
the EF-X20, and the EF-42. This dire situation is supposed to improve with
the new Nissin i40 flash and a Metz-built flash that Fuji plans to sell under
the Fujifilm brand.
TTL is an abbreviation for “Through The Lens,” which means that the
camera is determining the appropriate flash output by measuring a scene
through the lens with a weak pre-flash. In order to work in TTL mode, TTL
flash units have to be connected with the camera’s hot shoe, and strangely
enough, there’s still no Fujifilm-branded TTL extension cable on the market
that would allow you to use a TTL flash off-camera. A simple solution is
using a Canon OC-E3 extension cable, because it’s pin-compatible with
Fuji’s own flash contacts. With such a cable (or a compatible third-party
product), it is possible to use an EF-20, EF-X20, or EF-42 off-camera in
TTL mode. Please note that Canon OC-E3 cables are only compatible with
Fuji’s TTL flash connectors, not with Fuji’s TTL flash protocol. This means
that it isn’t possible to use Canon TTL flash units with an X-E2 in TTL
mode. The protocols won’t match. You can still use them in manual mode,
though.
Fujifilm’s compact (and retro-styled) EF-X20 flash features an optical slave
mode and can be wirelessly triggered by another flash unit (including the
camera’s built-in flash). However, this is no automated TTL mode, so the
output of the EF-X20 has to be manually controlled in slave mode.
Fig. 16: A Canon-compatible TTL extension cord also works with the X-E2
TIP 23
Remote shutter release: three options for the X-E2
Now and then you may encounter situations that require you to remotely
release the shutter without vibration. A quick-and-dirty method is using the
camera’s self-timer with a delay of either two or ten seconds, although a
better way is using a remote shutter release. Your X-E2 features three
different ports to connect remote shutter releases:
A mechanical thread on the shutter button allows you to connect a
traditional cable release.
There’s an RR-90 port (Micro-USB port) that is compatible with a
variety of electronic remote controls.
You can connect electronic remote shutter releases to the camera’s
microphone port (a 2.5mm input).
Electronic shutter releases are available in tethered and wireless versions.
Wireless options always consist of a transmitter and a receiver. The
transmitter sends a trigger signal that is picked-up by the receiver, which
triggers the camera with an electronic cable that’s connected to the RR-90 or
microphone port.
Fujifilm offers a simple RR-90-compatible shutter release cable, but there
are more sophisticated (both tethered and wireless) solutions from third
parties, such as programmable intervalometers.
If you already own an older RR-80-type shutter release (which was the
standard for the X-E1), you can buy a third-party adapter cable that lets you
use RR-80 remote shutter releases with RR-90 cameras. Please note that a
simple USB adapter doesn’t work; you have to ask for a dedicated RR-80 to
RR-90 adapter.
The microphone port of the X-E2 is compatible to a widely used Canon
remote shutter release standard. Among others, it is compatible to the
following camera models: Canon EOS Digital Rebel, Canon EOS 1000D,
Canon EOS 100D, Canon EOS 1100D, Canon EOS 300D, Canon EOS
350D, Canon EOS 400D, Canon EOS 450D, Canon EOS 500D, Canon EOS
550D, Canon EOS 600D, Canon EOS 60D, Canon EOS 60Da, Canon EOS
650D, Canon EOS 700D, Canon EOS Kiss Digital, Canon EOS Kiss F,
Canon EOS Kiss Digital N, Canon EOS Kiss X2, Canon EOS Kiss X3,
Canon EOS Kiss X4, Canon EOS Kiss X5, Canon EOS Kiss X50, Canon
EOS Kiss X6i, Canon PowerShot G1 X, Canon PowerShot G10, Canon
PowerShot G11, Canon PowerShot G12, Canon PowerShot G15, Canon
PowerShot SX50 HS, Canon EOS Rebel SL1, Canon EOS Rebel T1i, Canon
EOS Rebel 70 T2i, Canon EOS Rebel T3, Canon EOS Rebel T3i, Canon
EOS Rebel T4i, Canon EOS Rebel XS, Canon EOS Rebel XSi, Canon EOS
Rebel XT, Canon EOS Rebel XTi, Canon EOS Rebel T5i, Contax 645,
Contax N, Contax N Digital, Contax N1, Contax NX, Hasselblad H1,
Hasselblad H3D, Hasselblad H4D-200MS, Hasselblad H4D-31, Hasselblad
H4D-40, Hasselblad H4D-50, Hasselblad H4D-50MS, Hasselblad H4D-60,
Pentax 645D, Pentax *ist D, Pentax *ist DL, Pentax *ist DL2, Pentax *ist
DS, Pentax *ist DS2, Pentax K-30, Pentax K-5, Pentax K-7, Pentax K-m,
Pentax K10 Grand Prix, Pentax K100D, Pentax K100D Super, Pentax K10D,
Pentax K110D, Pentax K200D, Pentax K20D, Pentax MZ-6, Pentax MZ-L,
Pentax ZX-L, Samsung GX-1L, Samsung GX-1S, Samsung GX-20, Samsung
NX10, Samsung NX100, Samsung NX11, Samsung NX5, Sigma SD1, Sigma
SD1 Merrill, and Sigma SD15.
This list isn’t complete, but it’s a pretty good start. Remote shutter releases
that are compatible with any of the above listed cameras should also work
with the your X-E2.
Triggertrap Mobile is a smart and flexible way to trigger cameras with a
smartphone (Android or iOS). In order to make it work with an X-E2, you
need a dongle and an adapter cable. You can read more about this on
Triggertrap’s official Website.
(...)
To use adapted lenses with your X-E2, you need either Fujifilm’s Leica
M adapter or a suitable third-party adapter. In order to make thirdparty adapters work, you have to select SHOOTING MENU >
SHOOT WITHOUT LENS > ON. This is necessary because adapted
lenses (and third-party lens adapters) do not feature electronic Xmount contacts, so the lens will not register as being connected to the
camera. When you are working with an adapted lens, you should also
enter its focal length in SHOOTING MENU > MOUNT ADAPTOR
SETTING. This ensures that the EXIF data will show the proper focal
length.
Do you sometimes shoot with very slow shutter speeds lasting several
seconds? In this case, I recommend setting SHOOTING MENU >
LONG EXPOSURE NR > ON to improve the quality of your results.
In this mode, the X-E2 performs a so-called dark-frame subtraction to
reduce noise and eliminate hot pixels. By doing so, the total exposure
time is doubled, because the camera is taking the shot twice: once
normally and once with a closed shutter curtain. The second shot is
then subtracted from the first to improve the result.
TIP 25
Avoiding the camera menus: practical shortcuts for your X-E2
Navigating nested camera menus can be cumbersome. That’s why the X-E2
offers the Quick menu (Q button) and four user-configurable Fn keys (Fn,
Fn2, AF, and AE) that provide more direct access to important and frequently
used camera functions and settings.
Beyond that, the X-E2 also offers seven custom user settings (C1 through
C7) that can hold sets of frequently used camera settings. You can select one
of these sets (or profiles) via the Quick menu or an appropriately configured
Fn key. By doing so, you can overwrite the current camera settings with one
of the seven custom user profiles. This means that C1 through C7 aren’t
camera modes, they are just memory locations that conveniently store whole
sets of camera settings. They are simple shortcuts to immediately change your
current camera settings to a predefined set of options.
Speaking of shortcuts—there are more of them, and most of them are
available at your fingertips:
Open the Quick menu, then press and hold the Q button again for a
few seconds to directly open the configuration menu for your custom
user settings (C1 to C7).
Press and hold the MENU/OK button to lock the selector keys and the
AF-L and AE-L buttons. Press and hold the MENU/OK button again
to remove the key lock.
Press and hold any of the four function buttons (Fn, Fn2, AF, or AE)
to directly access the configuration menu for the respective function
button.
To confirm a new setting in shooting mode, you can either press the
MENU/OK button or half-press the shutter button.
Half-press the shutter button to switch from playback mode to
shooting mode.
Half-press the shutter button during an ongoing image preview (SETUP > SCREEN SETUP > IMAGE DISP.) to immediately cancel the
preview and return to the live view display.
Half-press the shutter button for a few seconds to wake-up the
camera from sleep mode.
Quickly press the MACRO button twice in a row to toggle between
macro and normal shooting modes.
In AF-S shooting mode, press the command dial to zoom into the
currently active AF frame.
In manual focus (MF) mode, you can also press the command dial to
enlarge the currently selected frame. When zoomed-in, you can choose
between two magnification levels by turning the command dial.
Press and hold the command dial in MF mode to switch between the
different manual focus assist modes: standard, focus peaking, and
digital split image.
During selection of an AF frame, you can press the command dial to
reset the AF frame to its default size. By turning the command dial,
you can change the size of the AF frame. Press the DISP/BACK button
to reset the position of the AF frame to the center. With the four
selector (arrow) keys, you can move the AF frame around and select
any of the camera’s 49 different AF frame positions.
In playback mode (while viewing an image), press the command dial
to zoom into a 100% view of the shot. When you are zoomed-in,
pressing the command dial again returns the camera to its regular
view, displaying the full image.
While displaying a RAW image in playback mode, you can press the
Q button to directly access the built-in RAW converter. This function
allows you to create new JPEG versions of your image with different
settings.
In playback mode, press the MACRO (arrow up) button to view the
first of four information screens that show additional shooting
parameters and the focus point. This function is not available when
you are using the FAVORITES display mode.
Unlike the X-E1 and X-Pro1, it’s not possible to engage SILENT
MODE by pressing and holding the DISP/BACK button. You have to
access this function via the SET-UP menu.
TIP 26
Always shoot FINE+RAW!
The age-old question of whether to shoot RAW or JPEG isn’t really adequate
for users of X-series cameras like the X-E2. The best option is using both
formats by setting SHOOTING MENU > IMAGE QUALITY > FINE+RAW.
It doesn’t matter if you consider yourself a diehard RAW shooter or JPEG
shooter.
This is how diehard RAW shooters benefit from FINE+RAW:
During external RAW processing, the camera JPEG can be used as a
(sometimes hard to beat) reference image.
Checking critical focus is only possible at 100% magnification, which
only a high-resolution JPEG can provide. The JPEG that’s embedded
in the RAW file for preview purposes is too small to use for checking
critical focus. Make sure you select one of the three available L
(Large) options under SHOOTING MENU > IMAGE SIZE.
The IMAGE SIZE menu isn’t available in RAW-only mode. Different
image formats, such as 1:1 or 16:9, are only available in JPEG-only
mode or in FINE+RAW mode. Autofocus and exposure metering
adapt to the currently selected format (aspect ratio) and deliver more
accurate results when you are shooting with “odd” formats like 1:1.
No worries, though: the RAW is always recorded in its native 3:2
format, so you don’t lose any image information. Using the built-in
RAW converter to generate a new JPEG from a RAW file will always
result in full-size 3:2 format JPEGs with maximum resolution.
(...)
TIP 33
Choosing the right metering method
There are three different metering methods available to measure the amount
of light that goes through the lens and hits the image sensor:
Average metering calculates an unweighted average of the total light
that hits the entire sensor area.
Spot metering, on the other hand, is merely looking at two percent of
the sensor area. The metering area covers about the size of a mediumsized autofocus frame in the center of the image. Please note that the
metering area is not coupled to the size or position you assign to the
active autofocus frame. This means that spot metering will always
cover the same center spot, even when you move the autofocus frame
around or change its size.
Multi or matrix metering calculates a weighted average of the total
light that hits the sensor. The weight is a result of 256 metering areas
(the matrix) that the camera is evaluating and comparing to typical
scenarios. That’s why multi metering is considered “smarter” than the
two other methods. For example, multi metering is designed to
recognize when you are shooting against the sun.
All three metering methods return exposure recommendations based on
middle gray. In other words, when you take a picture of a black wall and
then a picture of a white wall, the result (with all three metering methods)
will look middle gray. This means:
If you want the black wall to actually look black in the resulting
image, you have to manually adjust the exposure downwards.
If you want the white wall to actually look white in the resulting
image, you have to manually adjust the exposure upwards.
Fig. 17: This illustration shows a black and white sheet of paper. Both were photographed with the camera’s spot metering
without any exposure correction. As you can see, the camera delivered a middle-gray exposure in both cases. In order to get an
image that reflects the actual brightness of the subject, the metered exposure has to be adjusted.
Since you have read the owner’s manual, you know that Fujifilm offers a few
recommendations regarding exposure compensation in certain scenarios. For
example, the manual recommends a correction of + 1 EV when you are
shooting in snowfields, or – 2/3 EV when you are shooting subjects in
spotlight. Such rules of thumb are cute, but I recommend a more precise and
more methodical course of action using the live view and the live histogram.
To minimize corrective adjustments, it’s best to select a metering method that
fits the subject or the job at hand:
Multi metering is a general-purpose method. Since it is supposed to be
“smarter” than the two other methods, there’s a good chance that you
won’t have to apply any corrective adjustments to the proposed
exposure of this metering method.
Average metering is quite useful for shooting landscapes and will often
yield a darker exposure than multi metering, at least when sky and
clouds are involved. Average metering is a very neutral metering
method that is less likely to adjust based on small changes in
composition (or framing) than multi metering and spot metering. I
recommend average metering if you want to take a series of shots of
the same subjects under similar conditions. In such cases, average
metering will help you keep the exposure consistent.
Spot metering bases its measurements on one spot of the overall
image. This means that you have to work very precisely to make sure
that you are actually metering the part (spot) of the image that is
important to you. The resulting exposure recommendation will expose
this spot with middle-gray brightness. For example, if you spot meter a
backlit face against the sun, the metered exposure will display the face
with middle-gray brightness (or zone 5 in the famous Ansel Adams
zone system). If that’s too dark for your taste, you can use the
exposure compensation dial to lift the exposure by + 1/3 EV or
+ 2/3 EV. On the other hand, if the person has dark skin, you may
want to reduce the exposure with a correction in the opposite
direction. It’s up to you to choose the zone (brightness) you want
displayed in the spot-metered part of the image.
Spot metering is the most powerful and challenging metering method. It’s
useful when the light is very difficult—too difficult for multi and average
metering. Typical examples are isolated bright objects in front of a dark
background (and vice versa), such as a musician or an actor on a stage, or
strongly backlit subjects. Whenever your exposure has to be “spot on”, spot
metering is your friend.
That said, it’s pretty obvious that spot metering requires you to meter very
precisely. Even small changes of where you are pointing the camera can lead
to dramatic changes in the metered result. This is why it can be useful to
combine spot metering with the camera’s AE-L button. AE-L will lock your
exposure to prevent it from changing as soon as you alter your composition
or your subject starts to move away from the center of the frame.
Alternatively, you can use spot metering in manual mode M . In this mode,
metering doesn’t affect exposure because you are setting all the parameters
(shutter speed, aperture, and ISO) manually. Spot metering in manual mode
helps you determine the brightness level (zone) of any part of your image for
any given exposure. The exposure scale in the left part of the viewfinder or
LCD tells you exactly how much brighter or darker than middle gray (zone
5) the spot metered object would appear in your shot.
Don’t forget to disable Auto-ISO in manual mode M . If you don’t, the
camera will still operate in some kind of AE mode (I call it “misomatic”); in
this mode, the ISO setting will be the variable that’s automatically adjusted.
TIP 34
Using the live view and live histogram
Unlike optical viewfinders in DSLRs, the electronic live view of the X-E2
provides a pretty good simulation of the resulting image. The live preview
encompasses colors, contrast, and exposure.
In custom display mode, this WYSIWYG preview is complemented by a
live histogram. I strongly recommend using the live histogram because it
provides a useful overview of the brightness distribution in your scene. It also
helps you identify areas of over- and underexposure in advance, so you can
take corrective measures:
If bars are piling up like a bell curve at the right end of the histogram
but cut off mid-peak, parts of your shot will be overexposed. If this
affects important parts of your image, you should correct the exposure
downwards. Alternately, you can expand the camera’s DYNAMIC
RANGE by selecting DR200% or DR400% in the respective menu.
If the histogram leans to the left, leaving plenty of space on the right,
the shot might end up underexposed. In this case, you can adjust the
exposure upwards.
(...)
TIP 43
What you should know about extended ISO
You will probably have noticed that in addition to the standard ISO settings
(ISO 200 to ISO 6400), your X-E2 offers three additional settings that are
only available when the camera is in JPEG mode (not recording RAW files):
L (100), H (12800), and H (25600).
H means High: In this mode, a RAW file that has been saved with
ISO 1600 will be digitally pushed three stops to ISO 12800, or four
stops to ISO 25600. The RAW file is then deleted. This results in
correctly exposed JPEG files with ISO 12800 or ISO 25600. This
enormous amplification leads to a visible decrease in quality. This is
why these extended ISO settings should only be used in “emergencies.”
L means LOW: In this mode, an ISO 200 RAW that has been
overexposed by one stop is pulled down one stop during RAW
conversion, resulting in an ISO 100 JPEG. A digital pull is the direct
opposite of a digital push operation: it decreases the exposure of the
resulting image. Once the JPEG has been created, the (overexposed)
RAW file is deleted. The ISO 100 JPEG contains one stop less dynamic
range than a normal ISO 200 JPEG. Hence, ISO 100 is just another
“emergency” mode, because bright image areas can easily be blown.
As a RAW or FINE+RAW user, you can create extended ISO modes yourself:
For ISO 12800 or 25600, you can shoot at ISO 6400 and dial in an
exposure compensation of –1 EV (for ISO 12800) or –2 EV (for ISO
25600) with the camera’s exposure compensation dial. This results in
underexposed RAW files that you can later push one or two stops
with the built-in or an external RAW converter.
Conversely, you can simulate ISO 100 in RAW mode by shooting at
ISO 200 and dialing in an exposure compensation of +1 EV. This
results in an overexposed RAW file that you can later pull down by
one stop with the built-in or an external RAW converter. Like its real
“extended ISO L” cousin, this trick will result in losing one stop of
dynamic range.
The drawback of this do-it-yourself method is that the live view will appear
either too dark or too bright due to the initial under- and overexposure of
the RAW files. After all, the correct exposure is only achieved later during a
manual RAW conversion that includes pushing or pulling the result to the
desired exposure level.
To read more about extended ISO in my X-PERT CORNER blog, click
here.
Fig. 22: Instead of using high extended ISO settings and going without RAW files, you can just as well underexpose RAWs with
lower ISO settings and push the result later in the built-in or an external RAW converter. This example was taken in very low
light with an ISO 5000 setting and then pushed 1 EV to ISO 10000 in the camera’s internal RAW converter.
TIP 44
Auto-ISO and minimum shutter speed
You can automate the task of selecting the best (or lowest) ISO setting
possible for any given shooting situation. Auto-ISO is an option of the ISO
menu and includes a submenu that allows you to set additional parameters
that can be accessed by selecting SHOOTING MENU > ISO > AUTO:
DEFAULT SENSITIVITY: This is the lower ISO limit. The camera will
always try to use this setting as long as the other parameters allow it.
MAX. SENSITIVITY: This is the upper ISO limit. The camera’s AutoISO will never go beyond this point.
MIN. SHUTTER SPEED: Auto-ISO will automatically pick an ISO
setting that ensures the correct exposure using at least the minimum
shutter speed.
Obviously, MIN. SHUTTER SPEED is only relevant in auto exposure (AE)
modes A and P, because the shutter speed is set manually in modes M and S .
(...)
Here are some pros and cons of the misomatic:
Pros: You have full manual control over aperture (depth of field) and
shutter speed (motion blur and camera shake). You can tailor shutter
speed and aperture to the requirements of the task at hand; there will
be no surprises. At the same time, you still enjoy the comfort of
automatic exposure (AE).
Cons: Misomatic (in its current form) doesn’t offer a means to adjust
the camera-metered exposure, since the exposure compensation dial is
inactive in this mode.
That said, you can always use Fuji’s DR mode as a workaround by selecting
at least DR200% in concert with the misomatic. This setting will give you at
least one stop of extra latitude for after-the-fact exposure corrections with
the internal RAW converter or an external RAW converter. Simply use the
PUSH or PULL commands of the internal RAW converter, or move the
exposure slider of your external RAW processing software.
Don’t forget: ISO is just a (mostly digital) amplification of the image
signal. Using the misomatic, the amount of light that reaches the sensor is
solely determined by your manual aperture and shutter speed settings. It
always stays the same, regardless of the automatic ISO setting chosen by the
camera. In misomatic mode, the only exposure variable is the amount of
signal amplification (aka ISO), and with an ISOless sensor, this variable can
also be adjusted later during RAW conversion. In this context, DR200%
ensures that there’s ample leeway for after-the-fact exposure corrections of at
least ± 1 EV.
TIP 46
ISO-Bracketing: It’s just a gimmick!
ISO bracketing (DRIVE button > ISO BKT) is only available in JPEG mode
when the camera doesn’t keep RAW files. It’s just a gimmick: the camera
takes an exposure with the selected ISO setting, then creates two additional
JPEGs with different ISO settings, one higher and one lower than the original
setting.
ISO bracketing is just a digital push and pull operation on the intermediate
RAW file (which is deleted after all three JPEGs have been generated). You
could achieve the same result by shooting a single pic in FINE+RAW mode
and then using the camera’s built-in RAW converter to generate a second
JPEG with the PULL command, and a third one with the PUSH command.
A better alternative to ISO bracketing is DRIVE button > AE BKT. This
option actually takes three different exposures and keeps the corresponding
RAW files.
TIP 47
Extending the dynamic range
If the dynamic range of a subject is larger than the dynamic range of the
camera’s sensor, one of the following phenomena occurs:
The highlights of the image are blown or appear too bright
(overexposed).
Midtones appear too dark (underexposed) and shadows are blocked.
In both cases, the shot’s exposure is imbalanced. Sadly, it’s very difficult (if
not impossible) to restore blown highlights. It’s much easier to lift
underexposed midtones and blocked shadows. This procedure is called tone
mapping. Certain tonal values of the original exposure are reassigned and
changed, either by employing a tone curve or by using a more complex
mathematical procedure known as adaptive tone mapping.
In order to record the full tonal range of a high-contrast subject, it’s best
to expose the image in a way that preserves the color and texture of the
bright parts of the photo. Of course, doing so can lead to an image with
underexposed midtones and blocked shadows that need further processing in
order to look natural and realistic. You can process and correct these issues
with most external RAW converters.
While every RAW converter is different, most programs offer functions to
selectively change the exposure of a shot. For example, you can change the
overall exposure with the exposure slider, and you can restore blown
highlights with a highlight restoration slider. Most converters also offer sliders
that only target shadow tones.
The DR function of the X-E2 can help you automate this procedure. It works
in two stages:
The RAW file is exposed one (DR200%) or two (DR400%) stops
darker in order to preserve bright highlights of a scene.
During the following RAW conversion in the camera, the darkened
shadows and midtones are digitally amplified by one (DR200%) or
two (DR400%) stops to restore their natural brightness, while the
(already correctly exposed) highlights are mostly left alone.
The resulting JPEG from the camera has undergone a selective exposure
correction. The DR function restores the shadows and midtones of a shot that
was initially exposed one or two stops darker to preserve the highlights of the
scene. Looking at the resulting JPEGs, this leads to an effective gain in
(...)
Fig. 30: Macro shots can be quite challenging due to their lack of DOF. That’s why a tripod is highly recommended. With a
little bit of luck, hand-held shots are possible as well, like this snapshot that was taken with an XF60mmF2.4 R.
TIP 65
Focusing on moving subjects (1): the “autofocus trick”
Rule of thumb: Use AF-S (Single) for stationary subjects that don’t move
towards or away from the camera; use AF-C (Continuous) for subjects that
do move towards or away from the camera.
As usual, there’s no rule without an exception. Here is the so-called
“autofocus trick” or “shutter mash” technique.
This is how it works:
Set the focus selector switch to AF-S and the camera to single shot
(DRIVE button > STILL IMAGE). Make sure that high-performance
mode is on (SET-UP > POWER MANAGEMENT > HIGH
PERFORMANCE > ON).
Use Vario-AF and select an AF frame position and size that will
perfectly cover the part of the moving subject that you want to be in
focus. If possible, select one of the nine inner (central) AF frames. As
you know, these AF frames are PDAF-enabled. However, it’s definitely
possible to also use one of the 40 outer frames that only operate with
CDAF. If your composition requires one of the 40 outer frames, go for
it!
Set a suitable exposure and make sure that the shutter speed is fast
enough to avoid unwanted motion blur. Most action shots require
shutter speeds of at least 1/500s.
Follow the moving subject in the viewfinder, making sure that the
selected AF frame always covers the part that needs to be in focus. Do
not half-press the shutter button!
Fully depress the shutter button in one swift motion when you want to
take the shot. The camera will need some time to focus, so make sure
that the AF frame stays positioned over the moving subject while the
camera is focusing. As soon as the camera is able to lock the focus, it
will automatically take the shot. This (the time between fully
depressing the shutter and the camera taking the shot) can take up to
a full second.
The “AF trick” or “shutter mash” is based on the camera’s autofocus priority
logic. When you release the shutter, the camera first attempts to lock the
focus, then take the shot. Since the delay between locking focus and releasing
the shutter is very short, the moving subject ends up being in focus most of
the time. This means that the “AF trick” works best with aperture settings
that offer sufficient depth of field, and with subjects that don’t move too fast
towards the camera.
A negative aspect of this method is the fact that there’s a delay between
fully depressing the shutter button and the camera taking the shot. This delay
is because the camera needs time to establish focus on the subject. This
makes it challenging to hit decisive moments, and requires some amount of
foresight from the photographer.
If the autofocus can’t lock onto a target within a second or so, the camera
will still take the shot, but it’s very likely that it will be out of focus.
Fig. 31: A running horse captured using the “autofocus trick” or “shutter mash” technique. With older X-mount models like
the X-Pro1, X-E1, X-M1, or X-A1, this method is the only way to capture subjects (using the camera’s autofocus) that are
moving towards the camera. This sample image was taken with an X-E1.
TIP 66
Focusing on moving subjects (2): the focus trap
Setting up a focus trap is about pre-focusing on a location that a moving
object will eventually pass through. This method can be useful with sports
and other action that runs along a pre-determined course (track, street, trail
etc.).
Fig. 32: Focus trap: To capture this landing Airbus A330 as it was flying over me at a distance of only a few meters, timing
was essential. Instead of using autofocus, I pre-focused my 18mm lens with sufficient depth of field and waited for the right
moment with my camera primed and shutter half-pressed.
This is how it works:
Set the camera to manual focus (MF) using the focus selector switch.
Pre-focus on the location where you want to capture the moving
subject. Select an aperture with sufficient depth of field (DOF) to make
sure that all relevant parts of the object will be in focus.
Half-press the shutter button when the moving object is approaching
the location that you have in focus. The camera will lock the exposure
and set the working aperture.
(...)
What kind of custom settings may be useful? Here are a few suggestions:
Make sure to save your favorite all-purpose default settings in one of
the seven user profiles (such as C1). This enables you to quickly revert
to your default settings.
You can store different Auto-ISO configurations in different custom
sets. For example, you could configure an action profile with a
minimum shutter speed of 1/500s and an upper ISO limit of 6400.
Diehard RAW shooters can use a RAW shooter profile with dynamic
range set to DR100%, HIGHLIGHT TONE –2, SHADOW TONE –2,
and PRO NEG. STD film simulation.
You could create profiles for black-and-white or infrared shooting.
For example, a black-and-white profile could contain one of the four
B&W film simulations, less noise reduction, additional sharpness, and
additional highlight and shadow contrast.
To quickly edit custom settings, pull up the Quick menu, then press and hold
the Q button again until the editing menu appears.
TIP 77
Working with the built-in RAW converter
The RAW converter in your X-E2 serves two main purposes:
You can create different versions of a shot; for example, a colorful
Velvia version and a gritty black-and-white version of the same image.
Not sure what’s best or what you want? Quickly create multiple
versions with different film simulations and varying JPEG parameters,
then sort them out later at home on your calibrated computer screen.
You can improve your JPEGs after the fact. Since it’s hard (if not
impossible) to set the perfect JPEG settings for each shot in advance,
it’s more convenient to adjust these parameters after the fact when you
have time to look at your results. There’s a good chance that you may
be happy with many of your images, but if not, you can easily make
adjustments to things like white balance, color saturation, contrast
settings, sharpness, or noise reduction. You can also adjust the
exposure and try different film simulations.
Here are a few things you can accomplish with the built-in RAW converter:
Use PUSH/PULL processing to brighten (push) underexposed shots or
darken (pull) overexposed shots.
Use the contrast settings (SHADOW TONE and HIGHLIGHT TONE)
to selectively adjust the contrast of dark or bright parts of your image.
It’s perfectly adequate to combine these functions with PUSH/PULL
processing. To generate JPEGs with maximum dynamic range for
further post-processing on your computer, it may be useful to set both
contrast parameters (shadows and highlights) to –2 (SOFT) and use a
neutral film simulation like PRO NEG. STD.
Adjust the color saturation of your JPEGs with the COLOR
parameter. Reducing the color saturation can recover texture when
one or more of the color channels appear oversaturated.
Use SHARPNESS and NOISE REDUCTION in opposition with each
other: increase sharpness while diminishing noise reduction to obtain
more texture in high-ISO shots.
Adjust the white balance using one of the presets or a Kelvin value to
make your shot look warmer or cooler. Use WB SHIFT to correct or
introduce a color tint.
Want to know what the Lens Modulation Optimizer (LMO) is
actually doing? Take a RAW sample and process JPEGs with and
without LMO in the internal RAW converter. Then, compare the
results on a computer screen. Happy pixel peeping!
Picked the wrong color space? No problem! Just reprocess the shot
with the right color space.
To process RAW files in your X-E2 that aren’t stored on an SD card, you
have to copy them back to a card and place them in the appropriate
directory. If you are using a freshly formatted card, make sure to take at least
one shot in order to create the X-E2’s directory structure.
The directory where you must place your RAW files is located in a folder
named DCIM. It’s named “xxx_FUJI,” with “xxx” being a 3-digit number
that depends on the number of shots you have already taken. An example
would be 104_FUJI.
Please remember that file transfers to the camera aren’t available via USB,
so make sure to insert the SD card directly into your computer or use a card
reader.
By the way, your X-E2 cannot process RAW files from other camera
models, including other X-series models. However, you can process RAW
files from other X-E2 cameras. In this case, your camera will display a parcel
symbol indicating that the RAW file was created with another X-E2.
Fig. 42: The built-in RAW converter in action: The left image shows a sample shot that was processed with the camera’s
default settings. On the right, you can see the same shot processed with a PUSH of 1 EV and reduced shadow contrast (SHADOW
TONE –2).
TIP 78
Comparing RAW converters
So far, we have talked a lot about the built-in RAW converter of the X-E2.
It’s a JPEG shooter’s paradise! If you like Fuji Colors and the JPEG rendering
of your X-E2, the internal RAW converter is the perfect tool to create JPEGs.
It’s also super-easy, because the built-in RAW converter utilizes the same
functions and parameters that are available in the shooting menu. That’s no
surprise, because the built-in RAW converter is the JPEG engine of the
camera! If you are a JPEG shooter, ignoring the internal RAW converter to
create in-camera JPEGs means overlooking the aspects of the camera that
make the X-E2 so special. That’s why even diehard JPEG fans are supposed
to shoot with FINE+RAW. You need the RAW files to feed the JPEG engine
that generates JPEGs with the colors, tonality, and overall look that you like
in your Fuji camera.
Okay, enough already! What about the other half—diehard RAW shooters
who don’t care much about JPEGs, Fuji colors, or in-camera conversion?
Those guys (and I tend to be one of them from time to time) require an
external RAW converter to process the RAW files on a computer. The results
are often saved as uncompressed 16 Bit TIFF files with a size of almost 100
MB each. Such files can be further processed in Photoshop and similar
applications.
In this tip, I am going to compare popular external RAW processors for
the X-E2 (and other X-series cameras) with respect to how they handle
specific features of the X-E2:
RAW File Converter EX came free with your camera (have a look at
the CD). This is version 3 of the Japanese Silkypix RAW processor
that is currently available in version 6. If you want to use this
(...)
TIP 81
Shooting motion panoramas
MOTION PANORAMA is a derivate of burst mode: while you pan the
camera in a horizontal or vertical motion, the X-E2 takes a series if images
and stitches them together to a panoramic JPEG file. You can choose between
two sizes (M and L), and you can specify the direction of your panning
motion (left, right, up, and down).
The maximum size of a motion panorama is 7680 x 2160 pixels. It’s
available when you choose size L and a vertical motion. Of course, you can
use a vertical motion horizontally by holding the camera upright.
Here are a few tips for getting the best results with motion panoramas:
Since MOTION PANORAMA results in only a JPEG file (no RAW),
JPEG parameters such as white balance and film simulation have to be
set before taking the shots.
White balance and focusing remain constant during the recording of a
motion panorama. This applies to all focus modes (AF-S, AF-C and
MF). That’s why it’s important to set a focus distance and depth of
field that work for the entire panoramic scene.
Panoramas tend to extend over a wide area with varying light
conditions and strong changes of contrast. In such cases, it’s smart to
shoot with an extended DR setting, such as DR200% or DR400%. In
addition to that, the exposure should be set in a way that suits the
entire panoramic image, not just a small part of it. The edges of a
panorama are rarely representative; it’s usually better to base your
exposure on the main part of the image in the middle. Motion
panorama works with all four exposure modes, so shooting it in
manual mode M may be the smartest option. Please note that motion
panorama only works with multi metering.
If you decide to not manually set exposure, white balance, and focus,
point the camera towards a representative part of the panoramic scene,
then lock focus, exposure, white balance, and DR by half-pressing the
shutter button. Then pan to the starting point of the panning action
(while holding the shutter button half-depressed), then press the
shutter button and start panning.
Avoid scenes that contain a lot of motion. Moving objects (people,
vehicles, etc.) can lead to ghosting artifacts, which is when moving
objects (partially) appear in more than one spot of the final panorama.
Keep a healthy distance to the panoramic scene. Don’t shoot
panoramas in close quarters. Also make sure that you have sufficient
depth of field. Wide-angle lenses are better suited for this job than
normal or telephoto lenses.
Always pan with the EVF (camera held to your eye), not with the
LCD display (arms stretched in front of you).
While panning, stand parallel to the panoramic scene and always stand
on level ground.
Try to ignore the time delay that may occur between the currently
recorded image and what’s displayed in the EVF. Keep panning the
camera in a smooth motion until the camera stops taking frames.
Vertical banding in the final JPEG can indicate that the shutter speed
was too fast. In this case, try again with a slower shutter speed.
Use a tripod and make sure the camera is leveled to the horizon.
Immediately check your finished panoramas in the camera’s viewfinder
after you have captured them. Look out for stitching errors and
ghosting artifacts. Do this while you are still on location, not at home
when it’s too late to reshoot a panorama that went wrong.
Fig. 45: A standard motion panorama: The camera automatically takes as many frames as it needs to stitch the panoramic
JPEG image. Watch out for ghosting artifacts! They are also present in this sample image and hard to avoid when the scene
contains objects that move around during the panning action.
TIP 82
Shooting video with the X-E2
Selecting MOVIE via the DRIVE button enables the X-E2 to record videos in
HD quality. You can choose between Full HD (1920 x 1080 pixels) and a
lesser HD resolution of 1280 x 720 pixels. Both resolutions are available with
either 30 or 60 frames per second.
(...)
TIP 84
Flash photography in modes P and A: slow shutter speed limits
In modes P and A, the camera automatically selects suitable shutter speeds to
capture the surrounding light component of the scene.
In flash modes FORCED FLASH, 2 ND CURTAIN SYNC, and
COMMANDER, the slowest available shutter speed is the reciprocal
of the focal length divided by 2. For example, shooting with a 55mm
focal length, the slowest available shutter speed will be 1/55s / 2 =
1/110s. This is a hard limit. Another hard limit in these modes is
1/30s. No matter what focal length is in use, the camera will never use
a slower shutter speed than that. These hard limits mean that the
surrounding light component (basically the background) of the shot
can end up underexposed. There are exceptions, though. Exception
number 1: Lenses with built-in and active OIS ignore the reciprocal
rule and only follow the hard minimal shutter speed limit of 1/30s.
Exception number 2: Auto-ISO can overrule both shutter speed limits
for flash photography (the reciprocal limit and the 1/30s minimum) if
you set a slower minimum shutter speed in Auto-ISO, such as 1/15,
1/8, or 1/4s. To achieve even slower shutter speeds in concert with
flash photography, you should use mode S or M .
SLOW SYNCHRO allows the camera to use slower minimum shutter
speeds with flash photography. There’s only one hard limit of 1/8s,
which is independent from the focal length or an active OIS. To
achieve even slower shutter speeds, you should use mode S or M .
TIP 85
Controlling the surrounding light component of flash photography
When you are metering a scene with your X-E2, you will quickly realize that
it doesn’t make any difference whether the flash is turned on or off while
doing so. The metering result will always be the same. In other words, the XE2 is always metering the surrounding light component in the same way,
with or without flash. In case you choose to use a flash, the flash light
component will simply be added to the surrounding light component.
This is important, as it tells us that we don’t have to fear some camera
voodoo that may or may not influence the metering of the surrounding light
as soon as we switch on a flash. Instead, we can be sure that the camera’s
metering will always deliver consistent results. Shooting with flash won’t
change the metering we have grown used to. It also means that it’s our job to
balance both components, for example by reducing the surrounding light
components to make room for more flash light in the composite exposure.
Typically, if you want to use the flash as a fill-in light to brighten a dark
foreground (such as a backlit person), you wouldn’t have to change much, as
the flash light component would brighten the dark foreground simply by
filling in the light that’s missing. However, if you use the flash on a scene
that’s already correctly exposed by natural light, the camera’s TTL flash
metering would come to the conclusion that no additional light is needed.
The forced flash would still fire, of course, but with minimal output; it will
probably be almost invisible in the resulting shot. In order to emphasize the
flash light component, reduce the exposure of the surrounding light
components.
Here’s how it works:
You can control the exposure of the surrounding light components
either with the exposure compensation dial or by setting an
appropriate manual exposure (ISO, aperture, shutter speed). Less
surrounding light will prompt the TTL flash metering to add a
stronger flash light component, since the TTL flash system will always
try to deliver balanced results. Changing the exposure compensation
dial has no effect on the flash component of the shot; it only affects
the exposure of the surrounding light components.
To control the surrounding light components in manual mode M using
the live view and the live histogram, make sure to set SET-UP >
SCREEN SETUP > PREVIEW EXP. IN MANUAL MODE > ON.
In a studio, you often want to minimize the surrounding light
component and illuminate your subject entirely with flash light. In
such cases, I recommend small aperture settings (large aperture
numbers), base ISO 200, and a fast shutter speed. The fastest official
flash synchronization speed of the X-E2 is 1/180s, but some flash
units allow you to go faster, up to 1/250s. In order to view such a
scene with little surrounding light in mode M , set SET-UP > SCREEN
SETUP > PREVIEW EXP. IN MANUAL MODE > OFF. Otherwise, it
will be hard to see anything in the viewfinder. Just darkness.
Sometime the fastest flash sync speed (1/180s) will still overexpose the
surrounding light component, even at base ISO 200. Sure, you could
stop down the aperture, but this would often negate the purpose of
achieving a nice subject-to-background-separation with little depth of
field. In such a case, it’s useful to attach a neutral density filter to the
(...)
Fig. 52: Manually controlled studio flash shot using an Elinchrom Ranger Quadra
2.8 Using Adapted Lenses
Thanks to its short flange-back distance, the X-mount system is able to host
almost every existing full-frame, medium format, or APS-C lens. All you need
is an appropriate adapter ring. This means that in addition to more than a
dozen native lenses, you have access to hundreds of additional modern and
legacy lenses.
TIP 93
Finding the right lens adapter
X-mount lens adapters are available for many old and current mounts. Here
are a few tips to help you find the right adapter for your third-party lens:
Adapters are available at many price and quality levels, and the “You
Get What You Pay For” rule does apply. Don’t buy too cheap or you
may end up buying twice. The German manufacturer Novoflex is
setting the benchmark here, but their adapters can be more expensive
than the lens you are adapting. Asian manufacturers like Kipon or
Metabones enjoy a good reputation, and they all offer adapters for a
wide variety of lens mounts.
Adapted lenses can only be used as manual focus lenses. There is
currently no electronic adapter that can translate between Fuji’s AF
protocol and the AF protocols of popular brands like Canon or
Nikon.
All adapted lenses use manual aperture settings and always operate
with a manually set working aperture. This means that when you are
stopping down the lens, the live view and live histogram of your X-E2
have to contend with the set aperture’s reduced amount of light. Is
also means that adapted lenses can only be used in exposure modes A
or M .
Many modern third-party lenses that don’t feature a manual aperture
ring can still be mechanically adapted to your X-E2, but you can’t
change their aperture while they are connected to your camera via an
adapter. That’s why some adapters feature a mechanical replacement
aperture, but the results produced by these devices will differ from the
results created by the original lens.
Modern electronic features like optical image stabilization (OIS) aren’t
supported since there is no communication between the X-E2 and the
adapted lens. In fact, the camera believes that there’s no lens attached
at all.
Speed Booster from Metabones offers an amazing possibility to attach
full-frame lenses from Contax/Zeiss, Canon FD, Nikon G, Minolta
MD, and Leica R to the X-E2 without changing their angle of view or
cropping the image on your camera’s APS-C sensor. Basically, your
APS-C camera sees what a full-frame camera would see. Speed
Booster is a reduction adapter, basically the opposite of a
teleconverter. It reduces the focal length of the adapted lens by a
factor of 0.71. At the same time, the brightness (speed) of the lens is
increased by about one stop. At 400 to 600 dollars apiece, Speed
Booster adapters aren’t cheap. However, they offer much better quality
than knock-off products like the Lens Turbo by Zhongyi Mitakon.
Fujifilm offers its own adapter for Leica M-type full-frame lenses. This
is a regular adapter (no Speed Booster), but it features electronic
contacts so the camera will recognize it. It also features an Fn button
that provides direct access to the camera’s MOUNT ADAPTOR
SETTING menu. With all other adapters, you have to set SHOOTING
MENU > SHOOT WITHOUT LENS > ON in order to take a picture.
Caution: Don’t use macro lens adapters with electronic contacts. These
cheap adapters from far eastern countries are designed to serve as
macro spacer rings for native X-mount lenses. They promise full AF
functionality thanks to their electronic X-mount contacts. In reality,
these adapter rings are a very bad fit and can damage your camera
and lenses.
Never try to combine more than one adapter. Stacking adapters leads
to a measurable and visible loss in quality. Instead, get the right
adapter for your lens.
TIP 94
Adapting third-party lenses—here’s how...
When you connect third-party lenses to your camera via an adapter, the
camera won’t notice it due to the lack of electronic contacts. The X-E2 will
think there’s no lens attached at all. The only exception is using Fuji’s own
Leica M-mount adapter.
In order to make the camera work with adapted lenses, set
SHOOTING MENU > SHOOT WITHOUT LENS > ON.
Enter the focal length of your adapted lens in the SHOOTING MENU
> MOUNT ADAPTOR SETTING menu. You can either select the
focal length from one of four presets or enter it manually in LENS 5
or LENS 6. Always enter the actual focal length of a lens (as it is
printed on the lens), not its full-frame equivalent for APS-C cameras.
This ensures that the EXIF data will display the correct focal length.
TIP 95
Exposing with adapted lenses
Adapted lenses can be used in exposure modes A (aperture priority) and M
(manual mode). There are also a few notable differences between exposing
with native lenses and adaptive lenses:
Native lenses close to working aperture only when the shutter is halfpressed. Adapted lenses always operate with the aperture set by the
user. As soon as you stop down an adapted lens, less light reaches the
sensor and the camera’s exposure metering.
Stopping down also increases the depth of field in the viewfinder. Since
less light reaches the sensor, the camera has to more strongly amplify
the live view image in order to display an accurate WYSIWYG
simulation of the scene. This decreases the quality of the live view
(...)
over APS-C, the results from both cameras should be equivalent, because the
X-E2 sensor can compensate its smaller size by applying 1 EV less ISO
amplification.
Speed Booster is available for several classic mounts, such as Canon FD,
Nikon G, Contax/Yashica (Zeiss), Minolta MD, Contarex, ALPA, and Leica
R. Sadly, there is no Speed Booster for Leica M, because an M adapter would
be too thin to house the necessary optics.
2.9 Anything Else?
Hopefully, this book was able to answer many of your questions that went
beyond the manual of your camera. However, this isn’t the end: You can
read my X-Pert Corner blog, participate in Fuji X forums, or join one of my
Fuji X Secrets workshops.
TIP 100
Forums, blogs and workshops: be a part of it!
My free X-Pert Corner blog covers a variety of topics about the
Fujifilm X series. You will find everything from service articles that go
beyond this book to First Look previews of new cameras and lenses.
You can read X-Pert Corner here on Fujirumors.
There are several forums that focus on Fujifilm’s X series: Fuji X
Forum, Fuji X-Series Camera Forum and FujiXSpot. The latter forum
contains a special section where I’m personally available to answer
questions or discuss Fuji X-related issues.
For questions and comments that you don’t want to post in public,
you can contact me at [email protected].
Books, blogs, and forums are great, but what about a more personal
touch? Fuji X Secrets is a series of advanced workshops for Fuji Xseries users. My workshops cover topics that are similar to those in
this book, but on a more in-depth level, including practical
demonstrations and plenty of sample images. We work in small groups
of up to seven delegates, and those delegates set the agenda. It’s
everything you always wanted to know about X, but were afraid to
ask.