1
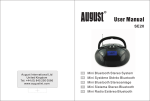
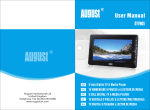
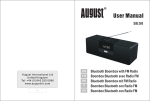
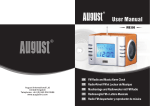
August International Ltd
United Kingdom
Telephone: +44 (0) 845 250 0586
www.augustint.com
EN
FM Radio and Music Alarm Clock
FR
Radio-Réveil FM et Lecteur de Musique
DE
Musikanlage und Radiowecker mit FM Radio
IT
Radiosveglia FM e Lettore Musicale
ES
Radio FM despertador y reproductor de música
User Manual
Thank you for purchasing the August MB300 Mini MP3
Musicbox with FM Clock Radio. This user manual is designed
to familiarize you with all the features of this device. Please take
time to read this user manual carefully, even if you are already
familiar with a similar product.
Safety
To ensure the safety of you and others, please read the Safety
Instructions before using this device.
Please do not disassemble the MB300, it can be unsafe and will
invalidate the manufacturer's warranty.
Disposal
Please ensure the product and accessories are disposed in
compliance with WEEE (Waste Electrical and Electronic
Equipment) Directive and other regulations in your country.
Always check with the environment agency and any other
relevant authorities for current disposal regulations.
Customer Service:
You can contact us by phone on: +44 (0)845 250 0586 or by
email at: [email protected] should you require further
technical support or customer service.
Quick Start Guide
MB300
1. Before using the MB300 for the first time, insert the two AAA batteries into
the compartment at the rear of the unit, these batteries are used to backup
the time and date settings and do not power the speaker or radio.
2. Charge the internal battery for 3 hours by connecting the power adaptor or
USB charging cable to the DC +5v input and the other end to a power
source.
3. To set the time, press and hold SET until the minutes begin to flash. Press
VL+ and VL- to set the minutes. Press SET to cycle through the settings for
minutes, hour, 12/24h mode, year, month and date. Holding VL+ or VLincreases the adjustment speed. Once the settings are complete, press
MODE to confirm.
4. To set the alarm, press MODE whilst in clock mode and the current alarm
time will display on the screen. Whilst the alarm time is displayed, press and
hold SET until the minutes begin to flash. Press VL+ and VL- to set the
minutes. Press SET to cycle through the settings for minutes, hour, and
alarm type. Holding VL+ or VL- increases the adjustment speed. Once the
settings are complete, press MODE to confirm. Pressing mode will return to
clock mode. To activate or deactivate the set alarm, press ALARM, a bell
icon will show on the screen to indicate an active alarm.
5. To use the MB300 as a radio or speaker, first move the switch at the rear of
the unit to the ON position. To play music files from a USB stick or SD
”. To adjust the
card, insert the storage device into the device and press “
volume use the VL+ and VL- and to change the track use the “ ” and“ ”
buttons located on the top of the unit.
”
To use the FM radio, press RADIO. Extend the antenna and hold “
and “
” to search for a radio channel. Adjust the volume by using VL+
and VL-.
To use the MB300 as a speaker for laptops, mobile phones or other source
devices, connect the 3.5mm cable from your source device's headphone or
audio out socket to the Line In socket on the MB300. Whilst connected to a
source device as a speaker, all volume and track controls can only be made
from the source device.
6. For any other queries, please telephone August International Ltd. helpline
+44 (0) 845 250 0586, or email [email protected]
Contents
1. Safety Instructions
Storage and Use
1.Safety Instructions
1
2.Features
2
3.Accessories
3
4.Part Names and Functions
4
5.Remote Control
5
6.Alarm Clock
6
7.FM Radio
7
8.Music Player
8
9.Power Supply
10
Do not expose
to extreme
temperatures.
STR ONG
10
11.Troubleshooting
11
12.Warranty
12
STR ONG
Storage
temperature:
-10゚C ~ 60゚C.
STR ONG
STR ONG
10.Specifications
Operating
temperature:
0゚C ~ 50゚C,
Do not expose
this device to
water or damp
environments.
Do not expose
this device to
dust, oil or
smoke.
Do not drop or
strike this
device.
Always secure
this device
during
transport.
Do not pierce
or scratch this
device with
sharp objects.
Maintenance
Please ensure all cables are unplugged before cleaning this device.
Use a soft cloth
and professional
LCD screen
cleanser to clean
the screen and
casing.
-1-
Alcohol
Never use an
abrasive cloth,
detergent, alcohol
based cleaning
product or any
other chemical
cleaning fluid to
clean this device.
3 . Accessories
2. Features
The MB300 is a feature packed clock radio with an SD/MMC
card reader and USB port for playing your music, and a
3.5mm audio in socket for use as a speaker system for your
laptop, mobile phone or MP3 player.
USB power cable
AC Power Adaptor
Main features:
High Quality Music Player and FM Clock Radio
Room Thermometer with Display in °C and °F
LCD Clock with 12 and 24 hour Display
Alarm with MP3, Beep and FM Radio Mode
Integrated SD/MMC Card Reader
Integrated USB Port and 3.5mm Audio In Socket
FM Radio Tuner: 87.5 – 108 MHz
Internal Rechargeable Battery for 5 Hours Playback
Back Up AAA Battery Power Supply for Clock
AC and USB Power Adaptor and Charger
2x3W, 60mm, High Quality Speakers
Infra Red Remote Control
Dimensions: 130(width)x90(height)x95(depth)mm
Weight: 500g (525g with 2xAAA batteries installed)
Audio cable
User manual
2 x AAA batteries
Remote control
3.1 Interchangeable Plugs
UK
EU
Insertion
Release
2.pull
push
push push
1.push
hole
1
-2-
2
3
-3-
4
4. Part Names and Functions
11
1
2
6
3
7
4
8
5
9
10
Select mode
1. MODE
Set and confirm
2. SET
3. ALARM Set alarm clock and sleep timer
Select radio mode
4. RADIO
5. Remote control sensor
Play, pause and resume music playback
6.
Increase volume and date/time setting
7. VL+
Decrease volume and date/time setting
8. VLActivate LCD back light
9. LT
10.Speakers
11.Telescopic FM antenna
12
13
14
15
16
17
18
19
20
21
22
-4-
12.
13.
14.
15.
16.
17.
18.
19.
20.
21.
22.
Previous
SNOOZE Snooze alarm
Next
SD/MMC card reader
Power LED
USB port
AAA battery compartment
3.5mm audio in
Power On/Off switch
DC 5V power in
For manufacturers use only
5. Remote Control
5
6
7
8
9
10
1
2
3
4
1.
2. SET
3. MODE
4. RADIO
5. ALARM
6. SNOOZE
7. VL+
8. VL9.
10.
Play/Pause
Set and confirm
Mode select
FM radio mode
Set alarm clock and sleep timer
Snooze alarm
Increase volume / time and date setting
Decrease volume / time and date setting
Next
Previous
-5-
6. Alarm Clock
Set Time and Date
Press and hold SET until the minutes begin to flash. Use
VL+ and VL- to set the minutes then use SET to move
through the settings for hour, 12/24h mode, year, month and
date.
Pressing and holding VL+ or VL- will increase the speed of
adjusting.
Press MODE to return to clock mode.
Set Alarm Clock
Press MODE whilst in clock mode to enter alarm settings
mode. The screen will show your current alarm time setting,
press and hold SET until the minutes begin to flash to change
the alarm settings. Pressing MODE will return to the alarm
settings mode.
Use VL+ and VL- to set the minutes then use SET to move
through the settings for hour and alarm tone. Once you have
setup all your settings, press SET to confirm.
If BIBI is selected a beep will be used as your alarm tone.
If MP3 is selected your pre-selected music file will be used
as your alarm tone. (Chapter 8. Music Player for more
details).
If RADIO is selected your pre-selected radio station will
be used as your alarm tone. (see Chapter 7. FM Radio for
more details).
-6-
If BIBI or MP3 is selected as the wake-up mode, the alarm
will automatically stop after 3 minutes. You can press
SNOOZE or LT to reschedule the alarm for an additional
5 minute sleep or press any other key to stop the alarm.
If FM is selected as the wake-up mode, when the alarm is
triggered, the snooze function is disabled.The device will
enter SLEEP mode and start playing your pre-selected radio
station for 30 minutes before turning off. The remaining time
left in SLEEP mode will be displayed on the LCD screen.
The alarm can be disabled and enabled by pressing ALARM
whilst in clock mode. When the alarm is enabled, the alarm
bell icon will show on the LCD screen.Or press MENU
button to stop the alarm.
Sleep Timer
The sleep timer can be set to automatically turn off the radio
or music player after a set time period. The duration can be
set between 10 minutes and 3 hours in 10 minute increments.
The default setting is 30 minutes.
Press ALARM in radio or music player mode and use VL+/
VL- to increase and decrease the time. Press ALARM to
confirm.
Temperature Display
Whilst in clock mode, use VL- to switch between
temperatures displayed in °C and °F.
7. FM Radio
Press RADIO to enter FM mode
and
can be used to
tune the radio, pressing and holding them will increase the
speed of tuning.
-7-
Use VL+ and VL- to adjust the volume.
Press and hold the
to switch between playing from the
memory card and USB stick.
Press and hold SET to save the current station to memory.
Use
or
to play the previous or next track.
A preset number will flash on the screen, use VL+ and VLto select which preset to save the station under then press
SET to confirm. Up to 20 preset stations can be stored.
Use VL+ and VL- to increase and reduce the volume.
Press SET then use VL+ and VL- to choose a preset station.
Press SET then use VL+/VL- to cycle the equalizer through
Rock, Normal, Live, Bass and Classic modes. Press SET
again to confirm.
Press and hold the ALARM button to select the currently
playing radio station as your alarm tone. AL SET will flash
for 2 seconds indicating that it has been successful.
Press ALARM to set up the sleep timer. Use VL+/VL- to
change the time and press ALARM to confirm. Once the set
time has elapsed, the MB300 will stop playing automatically.
Press SET twice then use VL+/VL- to cycle the playback
mode through All, Repeat All, Repeat One and Shuffle
(Random), press SET to confirm.
Press and hold ALARM to set the music currently playing
as the wake-up music for the alarm clock. “AL SET” will
show and flash for 2 seconds.
Press MODE to return clock mode.
8. Music Player
This device can play your mp3 format files from a USB stick
or SD/MMC card.
Press
to enter Music player mode. MB300 will
automatically start playing music if there is a memory card
and/or or USB stick plugged in.
“No Card” will display on the LCD if no memory card or
USB stick is plugged in.
“No Song” will show if there are no MP3 files stored on the
memory card or USB stick.
-8-
Press ALARM to set up the sleep timer. Use VL+/VL- to
change the time and press ALARM to confirm. Once the
set time has elapsed, the MB300 will stop playing
automatically.
Press MODE to return clock mode.
Note: When both a USB stick and SD/MMC card are inserted
into the device, the USB stick will be selected as the default
playback source.
Note: To use the MB300 as a speaker for laptops, mobile
phones and Music Players, connect a 3.5mm cable from the
MB300 to the headphone socket of your source device. This
will override any music playback.
-9-
11. Frequently Asked Questions
9. Power Supply
This device can be powered by the supplied external AC
adaptor, USB cable and built-in Lithium rechargeable
battery.
When an external power supply is connected, it will
automatically charge the Lithium battery.
The internal battery takes approximately 3 hours to fully
charge.
The LED on the top of the device will NOT turn off when
the battery is fully charged.
Power supply to the clock is backed up by 2xAAA batteries.
These ensure that the time does not reset when the internal
battery runs out.
10. Specifications
LCD Display
2.4 inch(6.1 cm)
Speakers
2 x 3 Watts with diameter 50mm
Radio
87.5 – 108 mHz
Music Player
.mp3 format
MP3 Equalizer
Rock, Normal, Jazz, Pop and Classic
Card Reader
Support SD/MMC card up to 32GB
USB Port
Support USB memory stick in FAT format
and up to 8GB
Built-in Battery
800 mAh Lithium-ion rechargeable
Clock Backup Power
2 x AAA batteries
Power Adaptor
Dimensions
5V
130 (W) x 90 (H) x 95(D) mm
Weight
500g (525g with 2 x AAA batteries)
-10-
The problems listed below do not necessarily signify a fault with
the device. Please check this list before requesting repairs.
Problem
Possible Cause
No power
Power adaptor plug loose/ Check power adaptor plug.
faulty or Lithium battery
flat.
No radio
Signal shield or internal
battery flat
Solution
Try different locations or plug
the AC power adaptor on
Music player not Music file(s) format not
compatible or internal
playing
battery flat
Convert music file(s) to .mp3
format or plug the AC power
adaptor on
The memory card/ Music file(s) format not
compatible or memory
USB stick with
music but says no card/ USB stick faulty
song
Convert music file(s) to .mp3
format or try different memory
card/ USB stick
Battery cannot be The internal battery is
too old and needs to be
charged or does
changed
not last long
To get battery changed by an
authorised professional
service provider
Remote control
not working
Change remote control battery
Battery too low
Warning
1.This operation instruction is only intended for reference.
No further notice is available to any modification of all
information contained therein. Due to continuing
improvements, the features and design are subject to
change without notice.
2. No user serviceable components are fitted inside this device.
Do not attempt any repairs, as this will invalidate the warranty.
Any repairs must be carried out by either the manufacturer or
their nominated service centre. Parts inside this device are
subject to high voltage.
-11-
12. Warranty
This product is guaranteed for twelve months from the date of the original
purchase. In the unlikely event of any defect arising due to faulty materials
or workmanship, the unit will be either replaced or repaired free of charge
(where possible) during this period. An alternative product will be offered
in case the product is no longer available or repairable.
This warranty is subject to the following conditions:
The warranty is only valid within the country where the product is
purchased.
The product must be correctly installed and operated in accordance to
the instructions given in this user manual.
The product must be used solely for domestic purposes.
The warranty only covers the main unit, and does not cover the
accessories.
The warranty does not cover the damage caused by misuse, negligence,
accident and natural disaster.
The warranty will be rendered invalid if the product is resold or has
been damaged by inexpert repairs. The manufactures disclaim any
liability for incidental or consequential damages.
Please consult our customer adviser before returning any product; we
are not responsible for any unexpected product returns.
Any faulty product must be kept and returned in the original packaging
with all the accessories and the original copy of the purchase receipt.
The warranty is in addition to, and does not diminish, your statutory or
legal rights.
Customer Service:
Telephone:
+44 (0)845 250 0586
Email:
[email protected]
This product is in compliance with the essential requirements and other
relevant provisions of Directive 1999/5/EC. The declaration of conformity
may be consulted at August International Ltd, Unit
5 Swains Mill, Crane Mead, Ware SG12 9PY, England.
Note: This equipment has been tested and found to comply with the limits
for a Class B digital device, pursuant to part 15 of the FCC Rules. These
limits are designed to provide reasonable protection against harmful
interference in a residential installation. This equipment generates uses
and can radiate radio frequency energy and, if not installed and used in
accordance with the instructions, may cause harmful interference to radio
communications. However, there is no guarantee that interference will not
occur in a particular installation. If this equipment does cause harmful
interference to radio or television reception, which can be determined by
turning the equipment off and on, the user is encouraged to try to correct
the interference by one or more of the following measures:
Reorient or relocate the receiving antenna.
Increase the separation between the equipment and receiver.
Connect the equipment into an outlet on a circuit different from that
to which the receiver is connected.
Consult the dealer or an experienced radio/TV technician for help.
No Unauthorized Modifications: Do not make any changes or
modifications to this product without the prior express written approval of
August International Ltd. Any changes or modifications made without
express written approval could void the user’s authority to operate this
product.
For details of further relevant technical standards, please contact us at the
address above.
-12-