1
Introduction
Bar code technology enables efficient data collection in
various businesses including both commercial office and
industrial automation﹒Importantly﹐bar code technology
also ensures the accuracy of captured data﹒The bar code
readers described in this manual have been developed for
maximum efficiency﹐accuracy and ease of use in various
process scenarios﹒
FCC Statement
The federal communications commission﹙FCC﹚ requires
that all CCD readers must be labeled with FCC
approval﹒
This equipment complies with the requirements in part 15
of FCC rules for a class A computing device﹒These
limits are designed to provide reasonable protection
against harmful interference when the equipment is
operated in a commercial environment﹒This equipment
generates﹐uses and can radiate radio frequency energy
and﹐if not installed and used in accordance with the
instruction manual﹐may cause harmful interface to radio
communications﹒Operation of this equipment in a
residential area may cause unacceptable interference to
radio and TV reception requiring the operator to take
whatever is necessary to correct the interface﹒
1
TABLE OF CONTENTS
Page
Introduction--------------------------------------------- 1
Contents------------------------------------------------- 2
Chapter 1. Technical Data----------------------------- 3
Chapter 2. How to install RDG-2048 Code Reader 4
Chapter 3. Pin Assignment---------------------------- 4~7
Chapter 4. Set up configuration---------------------- 7~8
1. Set Default Configuration------------ 9
2. Interface Options---------------------- 10
3. System Type--------------------------- 11
4. Keyboard Wedge Setting------------- 12
5. RS-232 Setting------------------------ 13
6. WAND Emulation Setting----------- 14
7. Scanning Control---------------------- 15~16
8. Turn On Various Bar Code Format--- 17~18
9. Code Identifier------------------------ 19~20
10. Code 39 Control----------------------- 21
11. Interleaved 2 of 5 Control------------ 22
12. Industrial 2 of 5 Control-------------- 23
13. Matrix 2 of 5 Control----------------- 24
14. Coda Bar/NW7 Control-------------- 25
15. EAN-13 Control----------------------- 26
16. UPC-A Control------------------------ 27
17. EAN-8 Control------------------------ 28
18. UPC-E Control------------------------ 28
19. UPC/EAN Conversion--------------- 29
20. Code 11 Control----------------------- 29
21. Code 128 FNC1 GS Control-------- 29
22. MSI Code Control-------------------- 30
23. Telepen Mode-------------------------- 30
24. Laetus Phamacode Control---------- 30
25. China Postal Code Control---------- 31
26. End of Text Message----------------- 32
27. PC AT Keyboard Nationality-------- 33~34
28. Set Prefix------------------------------- 35
29. Set Suffix------------------------------- 35
30. Data Format---------------------------- 36
31. Other Control-------------------------- 37
Appendix A: Hexadecimal/Decimal Table-------- 38
Appendix B: Hex and Numeric table--------------- 39~42
AT Function Key---------------------- 43~46
2
Chapter 1. Technical Data
This User’s Manual introduces the technical specification
of the bar code readers. The product features are
described in later chapter e.g. installation﹐set-up and
configuration as well as detailed technical specifications.
Main Technical FEATURES
Bar code width
Depth of reading
Working current
:75mm
:0 to 40mm
:Scanning 84mA (with Decoder)
:Stand-by 14mA
Light
:Red LED array 660nm
Interface
:TTL, RS232C, Keyboard Wedge,
WAND, Notebook, USB
Device Selection For:PC AT/XT, PS/2 25, 30, 50, 60,
Keyboard Interface
70, 80, Acer 7300, IBM 5550,
Mac, NEC9800
Bar code selections :Code39, Code32, CIP39
Coda Bar (CLSI)
EAN-13, UPC-A, EAN-8, UPC-E
(Add on 2 of 5)
MSI/Plessey (UK Plessey )
Code 128 (EAN128)
Code 93
Code 11
Interleaved 2 of 5
Industrial 2 of 5
Matrix 2 of 5
China Postal Code
Telepen
Laetus Phamacode
Keyboard nationality:US, French, German, Spanish,
Italian, UK, Swiss, Belgium,
Netherlands, Sweden, Norway,
Denmark, Protugal, Finland,
Slovakia, Japan, Hungary,
Greece, Yugoslavia Cyrillic,
Yugoslavia
3
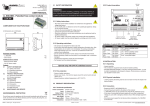
Chapter 2. How to install RDG-2048 Code Reader
Installation:
Step 1. Turn off the power on your terminal device.
Step 2. Connect the bar code reader to the appropriate
outlet on the technical device depending on the
model / interface cable that you have, e.g.
RS232, PS2, ……….
Step 3. Turn on the terminal device, you will hear the
initial welcome music.
Step 4. The reader is now in stand-by mode.
Chapter 3. Pin Assignment
This bar code reader is designed to be connected via
various cable connections, the pin assignments are listed
as below:
1. Keyboard Wedge:
A. 6 DIN and 5 DIN connector
10
2 2
5
6 6
5
3
4 4
3 5
4 4
1 1
2 2
1 3
1 1
M
F
M
5
3
F
Phone DIN-6M DIN-6F
Function DIN-5M DIN-5F
Jack
1
3
3
GND
4
4
2
4
4
VCC
5
5
3
-5
K/B CLK
-1
4
-1
K/B DATA
-2
5
1
-SYS DATA
2
-6
5
-SYS CLK
1
-7
-----8
-----9
-----10
-----3
3
GND shield
4
4
4
2. RS-232 : 9 PIN and 25 PIN female RS-232 connector
5
9
1
13
6
25
9P
Phone Jack
1
2
3
4
5
6
7
8
9
10
1
14
25P
9 Pin (F)
5.1
9
----7
2
8
3
5
25 Pin (F)
7.1
16.25
----4
3
5
2
7
Function
GND
VCC
K/B DATA
K/B CLK
SYS DATA
SYS CLK
CTS
TXD
RTS
RXD
GND Shield
3. WAND Emulation:9 PIN female and 5 DIN、6 DIN
male connector
5
9
Phone
Jack
1
2
8
3
6
3
4
2
4
2
5
1
5
1
1
9P
6
M
M
Dsub Dsub
DIN-5M DIN-6M
9P (F) 9P (M)
GND
7.8
1
3
3
VCC
9
5
1
1
DATA
2
7
2
2
GND Shield
7
1
3
3
Remark
5
4. Apple MACINTOSH:4 PIN female and 4 DIN male
connector
3
1
4
4
3
2
2
1
M
Phone Jack
1
2
3
4
5
6
7
8
9
10
F
Function
GND
VCC
K/B DATA
K/B CLK
SYS DATA
SYS CLK
----GND Shield
DIN-4M
4
3
--1
-----4
DIM-4F
4
3
--1
-----4
5. NEC 9800:8 PIN female and 8 DIN male connector
6
4
7
7
8
8
6
4
3
5
5
3
1
2
2
M
Phone Jack
1
2
3
4
5
6
7
8
9
10
Function
GND
VCC
K/B DATA
K/B CLK
SYS DATA
SYS CLK
----Reset
Retry
--GND Shield
6
F
DIN-8M
2
8
--4
3
----1
5
6
7
2
1
DIM-8F
2
8
4
3
------1
5
6
7
2
6. TTL (CMOS):9 PIN female and 5 DIN、6DIN male
connector
5
9
Phone Jack
1
2
3
4
5
6
7
8
9
10
1
9P
Function
GND
VCC+5V
DATA
INDICATOR
TRIGGER
ENABLE
SCAN
----
6
Dsub 9P (F)
7
9
1
2
3
4
5
---GND Shield
Chapter 4. Set Up Configuration
1. Example:
In order to setup the program for the bar code
reader, you must be familiar with the setup
procedure. Three examples are given below.
Example 1:Setup Code 39 refer page 21
Start
→ Place command to CCD
Code 39 ON
→ Turning on Code39 decoding
Full ASCII
→ Code39 Full ASCII mode selected
Verify Checksum → Code39 mode 43
END
→ Setting procedure completed
7
Example 2:
Start
→ Place command to CCD
Flash mode
→ Turning on Flash mode
Start
→ Place command to CCD
Flash On/Off
→ Turn on Flash on/off time setting
Appendix A "0",”6” → Setting Flash on 0.6 sec
Appendix A "0",”A” → Setting Flash off 1 sec
Example 3:
→ Place command to CCD
Start
Interleaved 2 of 5 On → Turning on Interleaved 2 of 5
Define length
→ Define interleaved 2 of 5
Appendix A "0","A" → Length with is equal to 10
SET
Only length 10 is set
Appendix A "0","C" → Length with is equal to 12
SET
Both length 10 & 12 are set
Appendix A "0","E" → Length with is equal to 14
All 3 length (10,12,14) are set
completely.
No need to scan “SET” again.
You will be able to read the interleaved 2 of 5 code length
which is equal to 10, 12, 14 digits only.
All Appendix A are no need to scan “END”
8
1. SET DEFAULT CONFIGURATION
Default
All programmed settings will be returned to the
manufacture default setting after the scanning process.
Other available option
Show configuration
Show version
Abort setting
Start up code
If the scanner’s light is on, but it can not read. Try to
scan the “start up code”. The scanner may read again.
9
2. INTERFACE OPTIONS
Start
*Keyboard
AT Notebook
RS-232
WAND
End
Read the interface selection code for your particular
application.
Above interfaces, only one can be enabled, other
interfaces will be disabled automatically, ie, scan
“Start”→ “RS232”→ “End”.
Mute
If you scan “Mute”, the initial welcome music will be
on “Mute” mode when power on the terminal device
10
3. SYSTEM TYPE
Start
Apple Macintosh ADB
PC XT
NEC 9800
*PC AT, PS/2 50 60 70 80
IBM 5550
PS/2 25 30
ACER 7300
End
Other system types may be available upon request,
please consult your supplier for details.
11
4. KEYBOARD WEDGE SETTING
Start
*On
Upper/Lower
case
Upper
*Lower
Number Keys
*Alphanum
Number lock
Upper Caps
Lock
*OFF
ON
Alt+Number
*OFF
ON
End
12
5. RS-232 SET UP
Start
On
Baud Rate
1200
*9600
2400
19200
4800
38400
Data Bits
7 bit
*8 bit
Parity
*Disabled
Even
Odd
RS-232 Hand
Shaking
*Disabled
Xon/Xoff RS232
End
RTS/CTS RS232
13
6. WAND EMULATION SETTING
Start
On
Bar
High / Low
*High
Low
Scan Speed
Highest
*High
Low
Lowest
End
14
7. SCANNING CONTROL
Start
Type
LED Light
Bar Code
On-with button pressed
Off-with button depressed
One bar code
On-for 3 seconds
Off-any bar code scanned
One bar code
Trigger pressed
*Trigger on
On-with button pressed, light
on for 3 seconds
One bar code
Off-with button pressed again
Trigger on/off
On-for 30 seconds
Off-automatically after 30
seconds or button pressed
again
One bar code
On-for 120 seconds
Off-automatically after 120
seconds or button pressed
again
One bar code
On-all the time
Off-never off
One bar code
Trigger on 30 sec.
Trigger on 120 sec.
LED on
15
On-all the time
Same bar code
Off-never off or trigger off
Continuous
Saft time Default value is 1 sec read
Continuous reading
Scan “Start”+ “Safety time”+
Safety time 0.8
Appendix A “0”, “8”
Sec
Set value is 0.8 Sec
Safety time setting
After turn ON or finish
reading Barcode will
continue on 60 sec than Flash
Flash Mode
Default On 0.3sec,Off 0.2sec
Scan “Start”→ “Flash on/off Flash on 1 sec
time” AppendixA→“0”,“A” ,
Flash off 0.6
“0”, “6” the flash on 1 sec,
sec.
flash off 0.6sec.
Flash on/off time
Auto Scan
Flash on/off range 0.3~25.5sec
Scan “Start”+ “Auto Scan”+
Light on time 3
Appendix A “0”, “3”,
Set light on is 3 sec (Default). Sec
Auto scan will be light on
range 3sec to 255sec
16
8. TURN ON BAR CODE FORMATS
Start
OFF
ON
Code 39*
*Interleaved 2 of 5
*Industrial 2 of 5
*Matrix 2 of 5
Coda Bar*
EAN-13*
UPC-A*
EAN-8*
UPC-E*
17
OFF
ON
*EAN/UPC
Add-on 2/5
Code 128*
Code 11*
*MSI/Plessey
*Telepen
*China Postal
Code
*Code 93
*Laetus
Phamacode
All Barcodes
Turn On
Turn Off
(except Laetus
Pharmacode)
End
18
9. CODE IDENTIFIER
Start
AIM
*Off
On
USER
Code 39
Interleaved 2 of 5
Industrial 2 of 5
Matrix 2 of 5
Coda Bar
EAN-13
EAN-8
UPC-E
Code 11
MSI
19
Code 128
Code 93
Plessey
TELEPEN
UPC-A
Please refer the Appendix B-ASCII table for the ID
character you need, for example:scan appendix A “5”
“3” for S or scan “5” “0” for P.
There is only one code identifier allowed on the
specific type bar code.
End
20
10. CODE 39 CONTROL
Start
Turn On/Off
Off
*On
C32 Italian
Pharma Code
*Off
On
CIP39
*Off
On
Code Type
*Standard
Full ASCII
Gap Range
Check
*No
Yes
Transmit
start/stop
character
*No
Yes
Verify MOD 43
checksum
*No
Yes
Transmit check
character
No
*Yes
Lengths
Range (01~23)*
3 fixed
You may set up to 3 fixed bar code lengths or bar code
min and max data lengths range if necessary.
3 fixed bar code lengths Please refer to page 8.
Range example:
scan “START” “Range” “0” ”4” “0” “A”
You will be able to read the code 39 length which is
04~10 data only
End
21
11. INTERLEAVED 2 OF 5 CONTROL
Start
Turn On/Off
*Off
On
Verify MOD 10
checksum
*No
Yes
Transmit check
digit
No
*Yes
Lengths
Range (04~46)*
3 fixed
You may set up to 3 fixed bar code lengths or bar code
min and max data lengths range if necessary.
3 fixed bar code lengths Please refer to page 8.
Range example:
scan “START” “Range” “0” ”4” “0” “A”
You will be able to read the interleaved 2 of 5 code
length which is 04~10 data only
End
22
12. INDUSTRIAL 2 OF 5 CONTROL
Start
Turn On/Off
*Off
On
Verify MOD 10
checksum
*No
Yes
Transmit check
digit
No
*Yes
Lengths
Range (04~23)*
3 fixed
You may set up to 3 fixed bar code lengths or bar code
min and max data lengths range if necessary.
3 fixed bar code lengths Please refer to page 8.
Range example:
scan “START” “Range” “0” ”4” “0” “A”
You will be able to read the industrial 2 of 5 code
length which is 04~10 data only
End
23
13. MATRIX 2 OF 5 CONTROL
Start
Turn On/Off
*Off
On
Verify MOD 10
checksum
*No
Yes
Transmit check
digit
No
*Yes
Lengths
Range (04~39)*
3 fixed
You may set up to 3 fixed bar code lengths or bar code
min and max data lengths range if necessary.
3 fixed bar code lengths Please refer to page 8.
Range example:
scan “START” “Range” “0” ”4” “0” “A”
You will be able to read the Matrix 2 of 5 code length
which is 04~10 data only
End
24
14. CODA BAR / NW7 CONTROL
Start
Turn On/Off
Off
*On
Transmit
Start/End
*No
ABCD/ABCD
Yes
Start/End
Transmit
type
ABCD/TN*E
ABCD/tn*e
*ABCD/abcd
Gap Range
Check
*No
Yes
Verify MOD 16
checksum
*No
Yes
Transmit check
character
*No
Yes
MOD 10-CLSI
*No
Yes
Lengths
Range (01~29)*
3 fixed
You may set up to 3 fixed bar code lengths or bar code
min and max data lengths range if necessary.
3 fixed bar code lengths Please refer to page 8.
Range example:
scan “START” “Range” “0” ”4” “0” “A”
You will be able to read the Coda bar length which is
04~10 data only
End
25
15. EAN-13 CONTROL
Start
Turn On/Off
Off
*On
Truncate
leading digit
*No
Yes
Truncate
leading 0
*No
Yes
Transmit check
digit
No
*Yes
End
26
16. UPC-A CONTROL
Start
Turn On/Off
Off
*On
Truncate
leading digit
*No
Yes
Transmit check
digit
No
*Yes
End
27
17. EAN-8 CONTROL
Start
Turn On/Off
Off
*On
Truncate
leading digit
*No
Yes
Transmit check
digit
No
*Yes
End
18. UPC-E CONTROL
Start
Turn On/Off
Off
*On
Truncate
leading digit
*No
Yes
Transmit check
digit
No
*Yes
End
28
19. UPC/EAN CONVERSION
Start
UPC-A To
UPC-E
*Off
On
UPC-E To
UPC-A
*Off
On
UPCA To
EAN13
*Off
On
EAN8 To
EAN13
*Off
On
ISBN
*Off
On
20. CODE 11 CONTROL
Turn On/Off
Off
*On
Verify
checksum
1
*2
Transmit check
digit
No
*Yes
End
21. CODE 128 FNC1 GS CONTROL
FNC1 GS character
Default FFhex No output
any character
Please refer to Appendix B
29
22.MSI CODE CONTROL
Start
MOD 10
No
*Yes
MOD 10/
MOD 10
*No
Yes
MOD 11/
MOD 10
*No
Yes
*1
2
Transmit check
digit
*Yes
No
End
23.TELEPEN MODE
Numeric
Alphanumeric
Note:
To read these commands the telepen family MUST be enabled.
24.LAETUS PHAMACODE CONTROL
Please refer Appendix B
Define Laetus phamacode
number of bars
Number of BARS
30
25. CHINA POSTAL CODE CONTROL
Start
Turn On/Off
*Off
On
Verify MOD 10
check digit
*No
Yes
Transmit check
digit
No
*Yes
Lengths
Range (04~39)*
3 fixed
You may set up to 3 fixed bar code lengths or bar code
min and max data lengths range if necessary.
3 fixed bar code lengths Please refer to page 8.
Range example:
scan “START” “Range” “0” ”4” “0” “A”
You will be able to read the China Postal code which is
04~10 data only
End
31
26. END OF TEXT MESSAGE
Start
None
*CR
LF
(for RS232 only)
CR/LF
(for RS232 only)
Space
Tab
Esc
Ctrl-C
End
32
27. PC AT KEYBOARD NATIONALITY
Start
*US
UK
French
Belgium
Sweden
Denmark
Germany
Netherlands
Norway
Spanish
Italian
Protugal
Japan
Hungary
33
Greece
Swiss
Finland
Slovakia
Yugoslavia
Yugoslavia Cyrillic
End
34
28. SET PREFIX
Start
Prefix
Please refer to Appendix B regarding the prefix string.
You may add up to 12 characters as prefix.
29. SET SUFFIX
Start
Suffix
Please refer to Appendix B regarding the suffix string.
You may add up to 12 characters as suffix.
35
30. DATA FORMAT
Code ID number:
EAN13
EAN8
UPC E
Code 39
Codabar
Matrix 25
Industry 25
Interleved 25
Code 128
00
01
02
03
04
05
06
07
08
Code 93
Code 11
MSI
China Post
UK Plessy
Telepen
UPC A
All
09
0A
0B
0C
0D
0E
10
FF
Example:
Data
0 0 9 4 7 3 8 2 7 1 9
Reserve 01 02
03
01
04
Output 0 × × 4 7 3 × 2 7 1 9
Delete 01 02
03
01
04
Output × 0 9 × × × 8 × × × ×
0
01
×
01
0
Start
Reserve
Appendix A "0","3" →
Reserve
Delete
Reserve
Delete
Reserve
Delete
Appendix A "0","1"
Appendix A "0","2"
Appendix A "0","3"
Appendix A "0","1"
Appendix A "0","4"
Appendix A "0","1"
*
*
*
*
*
*
Delete
To set Code
39 data format
Delete
Reserve
Delete
Reserve
Delete
Reserve
Scan Please refer to the hexadecimal table in Appendix A
*Finish Reserve or Delete to Scan “SET”
36
31. OTHER CONTROL
Start
*Highest
Buzzer tone
frequency
Medium
Mute
Low
Buzzer duration
*50msec
*Fastest
20msec
Keystroke /
Character
Medium
Fast
Slow
Character inter delay time Default to 1msec
Please refer to the hexadecimal table in Appendix A
Hex 00~FF (00~255msec unit 1msec)
End
37
Appendix A:Hexadecimal / Decimal Table
0
9
1
A
2
B
3
C
4
D
5
E
6
F
7
SET
8
38
Appendix B:Hex and Numeric table
(To read the desired hex and numeric selections)
DEC HEX PC ASC II DEC HEX PC & ASCII
0
00 (Null) NULL
37
25
%
1
01
☺
SOH
38
26
&
2
02
☻
STX
39
27
'
3
03
♥
ETX
40
28
(
4
04
♦
EOT
41
29
)
5
05
♣
ENQ
42 2A
∗
6
06
♠
ACK
43 2B
+
7
07
h
BEL
44 2C
,
8
08
◘
BS
45 2D
−
9
09
º
HT
46 2E
.
10 0A
▀
LF
47
2F
/
11 0B
♂
VT
48
30
0
12 0C
♀
FF
49
31
1
13 0D
♪
CR
50
32
2
14 0E
♫
SO
51
33
3
15
0F
☼
SI
52
34
4
16
10
▶
DLE
53
35
5
17
11
◀
DC1
54
36
6
18
12
↕
DC2
55
37
7
19
13
‼
DC3
56
38
8
20
14
¶
DC4
57
39
9
21
15
§
NAK
58 3A
:
22
16
SYN
59 3B
;
23
17
↨
ETB
60 3C
<
24
18
↑
CAN
61 3D
=
25
19
↓
EM
62 3E
>
26 1A
→
SUB
63
3F
?
27 1B
←
ESC
64
40
@
28 1C
∟
FS
65
41
A
29 1D
↔
GS
66
42
B
30 1E
▲
RS
67
43
C
31
1F
▼
US
68
44
D
32
20
Space
69
45
E
33
21
!
70
46
F
34
22
"
71
47
G
35
23
#
72
48
H
36
24
$
73
49
I
39
DEC
74
75
76
77
78
79
80
81
82
83
84
85
86
87
88
89
90
91
92
93
94
95
96
97
98
99
100
101
102
103
104
105
106
107
108
109
110
111
112
HEX PC & ASC II
4A
J
4B
K
4C
L
4D
M
4E
N
4F
O
50
P
51
Q
52
R
53
S
54
T
55
U
56
V
57
W
58
X
59
Y
5A
Z
5B
[
5C
\
5D
]
5E
^
5F
_
60
`
61
a
62
b
63
c
64
d
65
e
66
f
67
g
68
h
69
i
6A
j
6B
k
6C
l
6D
m
6E
n
6F
o
70
p
40
DEC
113
114
115
116
117
118
119
120
121
122
123
124
125
126
127
128
129
130
131
132
133
134
135
136
137
138
139
140
141
142
143
144
145
146
147
148
149
150
151
HEX PC & ASCII
71
q
72
r
73
s
74
t
75
u
76
v
77
w
78
x
79
y
7A
z
7B
{
7C
|
7D
}
7E
~
7F
∆
80
Ç
81
ü
82
é
83
â
84
ä
85
à
86
å
87
ç
88
ê
89
ë
8A
è
8B
ï
8C
î
8D
ì
8E
Ä
8F
Å
90
É
91
æ
92
Æ
93
Ô
94
ö
95
Ò
96
û
97
ù
DEC
152
153
154
155
156
157
158
159
160
161
162
163
164
165
166
167
168
169
170
171
172
173
174
175
176
177
178
179
180
181
182
183
184
185
186
187
188
189
HEX PC & ASCII DEC HEX PC & ASCII
98
ÿ
190 BE
╛
99
Ö
191 BF
┐
9A
Ü
192 C0
└
9B
¢
193 C1
⊥
9C
£
194 C2
┬
9D
¥
195 C3
├
9E
₧
196 C4
―
9F
ƒ
197 C5
┼
A0
á
198 C6
╞
A1
í
199 C7
╟
A2
ó
200 C8
╚
A3
ú
201 C9
╔
A4
ñ
202 CA
╩
A5
Ñ
203 CB
╦
A6
a
204 CC
╠
A7
o
205 CD
=
A8
¿
206 CE
╬
A9
┌
207 CF
╧
AA
┐
208 D0
╨
AB
½
209 D1
╤
AC
¼
210 D2
╥
AD
¡
211 D3
╙
AE
«
212 D4
╘
AF
»
213 D5
╒
B0
░
214 D6
╓
B1
▒
215 D7
╫
B2
▓
216 D8
╪
B3
│
217 D9
┘
B4
┤
218 DA
┌
B5
╡
219 DB
█
B6
╢
220 DC
▄
B7
╖
221 DD
▌
B8
╕
222 DE
▐
B9
╣
223 DF
▀
BA
║
224 E0
α
BB
╗
225 E1
β
BC
╝
226 E2
Γ
BD
╜
227 E3
π
41
DEC
228
29
230
231
232
233
234
235
236
237
238
239
240
241
242
243
244
245
246
247
248
249
250
251
252
253
254
255
HEX PC & ASCII
E4
Σ
E5
σ
E6
μ
E7
Υ
E8
Φ
E9
θ
EA
Ω
EB
δ
EC
∞
ED
ψ
EE
ε
EF
∩
F0
≡
F1
±
F2
≧
F3
≦
F4
⌠
F5
⌡
F6
÷
F7
≈
F8
○
F9
●
FA
•
FB
√
FC
η
FD
²
FE
■
FF
(Bland)
42
HEX
81
82
83
84
85
86
87
88
89
8A
8B
8C
8D
8E
8F
90
91
92
93
94
95
96
97
98
99
9A
9B
9C
9D*
9E*
9F*
A0
A1
A2
A3
A4
A5
A6
KEY
Home
End
Page up
Page down
Insert
Delete
Numeric Keypad +
Back Space
Tab
Enter
←
→
Numeric Keypad Enter
↑
↓
F1
F2
F3
F4
F5
F6
F7
F8
F9
F10
F11
Esc
F12
Left Shift+1 character
Left Ctrl +1 character
Left Alt +1 character
Numeric Keypad Numeric Keypad *
Numeric Keypad /
Caps Lock
Num Lock
Left Alt
Left Ctrl
43
AT SCAN CODE
E0 6C E0 F0 6C
E0 69 E0 F0 69
E0 7D E0 F0 7D
E0 7A E0 F0 7A
E0 70 E0 F0 70
E0 71 E0 F0 71
79 F0 79
66 F0 66
0D F0 0D
5A F0 5A
E0 6B E0 F0 6B
E0 74 E0 F0 74
E0 5A E0 F0 5A
E0 75 E0 F0 75
E0 72 E0 F0 72
05 F0 05
06 F0 06
04 F0 04
0C F0 0C
03 F0 03
0B F0 0B
83 F0 83
0A F0 0A
01 F0 01
09 F0 09
78 F0 78
76 F0 76
07 F0 07
12 “C” F0 “C” F0 12
14 “C” F0 “C” F0 14
11 “C” F0 “C” F0 11
7B F0 7B
7C F0 7C
E0 4A E0 F0 4A
58 F0 58
77 F0 77
11 F0 11
14 F0 14
HEX
A7
A8
A9
AA
AB**
AC**
AD**
AE**
KEY
Left Shift
Right Alt
Right Ctrl
Right Shift
Left Alt Make
Left Alt Break
Left Ctrl Make
Left Ctrl Break
AT SCAN CODE
12 F0 12
E0 11 E0 F0 11
E0 14 E0 F0 14
59 F0 59
11
F0 11
14
F0 14
E0 12 E0 7C E0 F0 7C E0
Print Screen
AF
F0 12
Shift Tab
12 0D F0 0D F0 12
B0
B1*** Alt +Numeric 11 “C” F0 “C” F0 11
B2
Windows Apple LGUI Make E0 1F
B3
Windows Apple LGUI Break E0 F0 1F
B4
Windows Apple RGUI Make E0 27
B5
Windows Apple RGUI Break E0 F0 27
B6
Windows Apple App Make
E0 2F
B7
Windows Apple App Break
E0 F0 2F
ASCII “A” make code is 1C
* Example
“Start” “Prefix” ”9” ”E” ”4” ”1” “SET”
Scanner will transmit 14 <1C F0 1C > F0 14
** Example
“Start” “Prefix” ”A” ”B” ”4” ”1” ”A” ”C”
“SET”
on “Lower case” Scanner will transmit
11 <12 1C F0 1C F0 12> F0 11
on “Upper case” Scanner will transmit
11 <1C F0 1C> F0 11
*** Show ASCII Example
“Start” “Prefix” ”B” ”1”
”6” ”4” =>ASCII “d” DEC “1” ”0” ”0”
“SET”
Scanner will transmit
11 <69 F0 69> <70 F0 70> <70 F0 70 > F0 11
“1”
“0”
“0”
44
Start
Barcode
Function key
*Off
On
End
To scan a function key barcode with input data, please
refer for function key value table (page 43,44)
refer for function key barcodes (page 45,46)
Home
End
Page up
Page down
Insert
Delete
Numeric Keypad+
Back Space
Tab
Enter
←
→
Numeric Keypad Enter
↑
↓
F1
45
F2
F3
F4
F5
F6
F7
F8
F9
F10
F11
Esc
F12
Numeric Keypad -
Numeric Keypad *
Numeric Keypad /
Caps Lock
Num Lock
Print Screen
Shift Tab
46