1
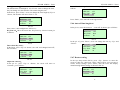
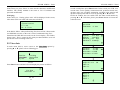
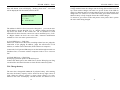
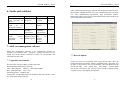
ST332B ADSL2+ Tester
ST332B ADSL2+ Tester
Contents
1. Summary............................................................1
2. Main functions and specifications…………….2
ST332B ADSL2+ Tester
V1.0 (II)
2.1. xDSL specifications....................................... 2
2.2. Dialing test function ...................................... 3
2.3. Modem parameters setting............................. 3
2.4. Modem emulation.......................................... 3
2.5. Data storage and browse................................ 3
2.6. DMM test....................................................... 3
2.7. Ping test ......................................................... 4
2.8. Data upload.................................................... 4
2.9. System parameters setting ............................. 4
2.10. Dimension & Weight ................................... 4
3. Structure & Appearance………………………5
4. Precautions……………………………………6
5. Operation introduction………………………..7
User
Manual
5.1. Turn on the tester ........................................... 7
5.2. Turn off the tester........................................... 7
5.3. Adjust LCD contrast ...................................... 8
5.4 Backlight function .......................................... 8
5.5 Initiate modem ................................................ 8
5.6 System setting................................................. 9
5.6.1 xDSL mode setting .............................. 9
5.6.2 Username modification...................... 11
5.6.3 VPI and VCI modification................. 13
5.6.4 Choose PPP mode.............................. 15
5.6.5 Regular setting ................................... 15
5.6.6 Auto off time length set ..................... 17
5.6.7 Restore setting ................................... 18
5.7 xDSL test………………………………………18
5.7.1 Physical layer parameter test……………19
5.7.2 Save test records.......................................21
5.7.3 Display bit chart…………………………22
1
ST332B ADSL2+ Tester
5.8 Dialing test....................................................23
5.8.1 PPPoE dialing setting ........................23
5.8.2 Wan ping test......................................24
5.9 Browse records (View data)..........................26
5.10 DMM test....................................................29
5.10.1 DC voltage test.................................30
5.10.2 AC voltage test.................................31
5.10.3 Resistance test..................................31
5.10.4 Capacitance test .............................31
5.10.5 Insulation test...................................32
5.11 Modem emulation .......................................32
5.12 Data upload .................................................33
5.13 LAN ping test .............................................34
5.14 Charge battery.............................................36
6. Faults and solutions ................................... 37
7. Management software................................ 37
7.1 Operation environment .................................37
7.2 Software features ..........................................38
7.3 Record upload ...............................................39
7.4 Real-time data. ..............................................39
7.5 Parameter revise............................................43
7.5.1 VPI/VCI revise ..................................43
7.5.2 Authentication revise .........................43
7.5.3 Ping destination address revise ..........43
7.6 Record analyze..............................................43
7.7 Attention........................................................45
8. Accessories ................................................ 45
ST332B ADSL2+ Tester
1. Summary
ST332B ADSL2+ Tester is specially designed to meet the urgent
requirement of xDSL testing, including ADSL, ADSL2+, and READSL
as well; it is particularly used by the field operator for the
telecommunication installation and maintenance.
At present, most of the xDSL testers in the market are so complicated
which require the operators to occupy rich signal emulation knowledge
and network analysis ability. Additionally the prices are generally high.
The ISP could only afford a few sets and turn help to the professional
network analysis engineer to operate. In fact they are not the suitable
equipments for the installation and maintenance operator.
With the rapid development of broadband service, the field operators of
installation and maintenance have to face much more and complicated
workload than ever before, as a result, the equipment which is simple,
portable and money-saved is eagerly wanted.
ST332B ADSL2+ Tester could not only test the physical parameters but
also help to judge whether the line is fit for xDSL service and evaluate
the quality of service. In fact the field operators do not need to know so
many line parameters and specifications. To them, the most important is
to determine the quality of service and locate the fault points. With the
help of ST332B every forefront workman is prepared to the task.
Further more, it could also make PPPoE/PPPoA dialing through the
built-in Modem and validate the connection between the user and ISP
through emulating the user PC + Modem.
ST332B adopts LCD display and menu operation. It could display the
test results directly and intuitively. It is the ideal tool for the field
technician installing and maintaining ADSL/ADSL2+ service.
2. Main functions and specifications
2.1 xDSL specifications
ADSL2+
1) Standards: ITU G.992.1 (G.dmt), ITU G.992.2 (G.lite), ITU
G.994.1(G.hs), ANSI T1.413 issue #2, ITU G.992.5(ADSL2+) Annex L.
2
1
ST332B ADSL2+ Tester
Maximal connecting distance is 6.5km; Compatible with ADSL,
ADSL2 and READSL
2) DSL transmission parameters:
¾
DSL up/down max speed;
¾
DSL up channel speed: 0 ~ 1.2Mbps;
¾
DSL down channel speed: 0 ~ 24Mbps;
¾
DSL up/down attenuation: 0 ~ 63.5dB;
¾
DSL up/down noise margin: 0 ~ 32dB;
¾
DSL up/down output power;
¾
Error test for CRC, FEC, HEC, NCD, LOS;
¾
Display DSL connection mode;
¾
Determine service quality;
¾
Display the channel bit chart.
ADSL
1) Standards: ITU G.992.1 (G.dmt), ITU G.992.2 (G.lite), ITU
G.994.1 (G.hs), ANSI T1.413 Issue # 2
2) DSL transmission parameters:
¾
DSL up/down max speed;
¾
DSL up channel speed: 0 ~ 1Mbps;
¾
DSL down channel speed: 0 ~ 8Mbps;
¾
DSL up/down attenuation: 0 ~ 63.5dB;
¾
DSL up/down noise margin: 0 ~ 32dB;
¾
DSL up/down output power;
¾
Error test for CRC, FEC, HEC, NCD, LOS;
¾
Display DSL connection mode;
¾
Determine service quality;
¾
Display the channel bit chart.
ST332B ADSL2+ Tester
software or by buttons on the tester.
2.4 Modem emulation
ST332B can replace the user Modem completely. And the user could
take ST332B as modem to dial and login to Internet to test if there is
any problem of subscriber’s Modem.
2.5 Data storage and browse
ST332B has memory capacity of 50 records. The records include line
parameters, channel bit chart and error test. User could browse the
records through entering different record number.
2.6 DMM test
ST332B can test such items as follows:
AC Voltage: 0 to 400 V; Resolution: 0.1V
DC Voltage: 0 to 290 V;
Capacitance0 to 1000nF, Accuracy:0―10nF ±2 nF, 10nF-1000nF
±2 %±2 nF
Loop Resistance: 0 to 20KΩ;
Accuracy:0-100 ±3%±4Ω, 100—500 ±3%, 500—2000±2%,
2000—20K ±2%
Insulation Resistance: 0 to 50MΩ;Accuracy:0—1.0 ±0.1 MΩ, 1.0—30
±10%±0.5 MΩ
2.7 PING test
2.2 Dialing test functions
You can fulfill the function of Perform PPP dialing to user twisted-pair
(WAN port). After successful dialing, it could get this terminal IP,
opposite terminal IP, chiefly DNS server IP and subordinate IP address.
The dial function includes PPPoE and PPPoA.
It can perform the WAN PING Test and LAN PING Test. LAN PING
Test can judge if the connection with IP addresses success or not and
also confirm LAN work OK or not. WAN PING test can Ping website
addresses directly toward Local WAN, and check the connectivity of
WAN Line.
2.3 Modem parameters setting
2.8 Data upload
Operator can set current modem standard and choose ADSL2Plus Auto
or Multi mode. What is more, the operator can also revise PPPoE
attribute (PAP/CHAP), user name and password by management
Users can upload data to PC trough RS232 port, which is convenient
for users to save and manage the data.
2
3
ST332B ADSL2+ Tester
2.9 System parameters setting
ST332B ADSL2+ Tester
3. Structure & Appearance
Users can set the lighting length of backlight. The default time is 15s,
and the utmost time is 99S. The default Auto-off time is 8 minutes;
users can set the time length from 5—59 minutes. The key-press sound
can be set need, or not need, and the buttons can modify the username
and password, VPI, VCI, adjust contrast and Modem work mode and
PPPoA or PPPoE dial mode or restore the original setting etc.
2.10 Dimension & Weight
Dimension (mm): 180 × 93 × 48
Weight: < 500g
16
15
1.
2.
3.
4.
5.
6
7.
8.
9.
10.
11.
12.
4
17
On button
OFF button
Weaken contrast button
Deepen contrast button
Down button
Up button
Enter button
Back button
LCD
Backlight button
Ethernet LED
PPP LED
5
ST332B ADSL2+ Tester
13.
14.
15.
16.
17.
Link LED
Power LED
LAN Port (RJ45)
Charge Port
xDSL Port(RJ11)
LED introduction
ETH LED: Shining - Ethernet link in normal condition.
Flicker - There is data flux in Ethernet.
Link LED: LED flicker slowly - finding central office,
LED flicker rapidly - xDSL Modem is doing the xDSL
handing;
Shining - Link connected and work normally.
PPP LED:
Shinning - successful PPPoE dialing or PPPoA
dialing;
4. Precautions
¾
¾
¾
¾
¾
¾
For the first time use, please make sure that the battery is fully
charged before initiating machine. (refer to 5.12)
If there is any abnormal phenomenon during operation, please
restart the instrument.
To ensure the normal operation, please press the operation buttons
for 0.5 second until you hear the tone. When you pressing the
operate buttons please press it for a while (about 0.5 second until
you hear button tone). It could ensure normal operation.
The test result will be affected if the user terminal is in use when
testing. Please disconnect the user terminal before make a test.
Please confirm username, password, VPI/VCI and PAP/CHAP
before making PPP dialing.
If there is ▲ or ▼ on screen, please operate as it indicates.
5. Operation introduction
5.1 Turn on the tester
Pressing ON button for 1 second, the power LED will shine. After
hearing “Di…” sound, the LCD will display the main menu that
6
ST332B ADSL2+ Tester
means the tester has been started, the PIC.1 as follows:
XDSL Test
Dial Test
View Data
Sys Set
DMM test
LAN Ping
Modem Emu
Upload
Pic 1
5.2 Turn off the tester
¾ When ST332B is in normal working mode, press OFF button to
turn off the tester step by step.
¾ Press OFF button last a long time about 4 or 5 seconds, you also
can switch of the tester obliged.
¾ When the battery is in low voltage, it will power off automatically.
¾ If there is no any operation of the tester for 8 minutes, ST332B
will power off automatically.
5.3 Adjust LCD contrast
When the tester is “ON”, users can enter into “Sys set” interface, then
enter” Regular setting”, through the Weaken contrast button and
Deepen contrast button, users can adjust the contrast of LCD.
5.4 Backlight function
During the operation, the operator can press “Backlight” button to turn
on or turn off the backlight. In normal condition if there is no any
operation on keyboard after 15 seconds, the tester will shut off
automatically.
5.5 Initiate modem
After power on, the tester will enter into the main menu, see pic as
follows. Press “Enter” to perform xDSL Test. Firstly, the tester will
initialize the Modem. If the modem initialization fails, the system will
make the Modem reposition, if also failed, the tester will back to the
main menu.
7
ST332B ADSL2+ Tester
XDSL Test
Dial Test
View Data
Sys Set
DMM test
LAN Ping
Modem Emu
Upload
Modem Initializing…
02S.
Pic 2
5.6 System setting
In main menu, please move the cursor to the Sys Set (system setting in
PIC.3) item by pressing ▲ or ▼ according to indication. And press the
Enter button to display Modem setting parameters. (PIC.4)
xDSL Test
Dial Test
View Data
Sys Set
DMM test
Ping Test
Modem Emu
Upload
Pic.3
Sys Set
xDSLMode
PPP Mode
User Name
Regular
PVCn
Res set
ST332B ADSL2+ Tester
5.6.1 xDSL mode setting
xDSL Mode Set
Adsl2+ Mode
ADSL MultiMode
Pic.5
If it is the first time to enter xDSL mode set window, the selected item
is current xDSL mode setting as PIC.5 shows, the current Modem
collocation is Adsl2+ Mode, If the selected one is Multi mode it means
the current Modem collocation is ADSL Multimode.
Adsl2+ Auto: If selected, it the Modem will be in the ADSL2+
self-adapting mode
Multi: If selected, the Modem will be set in ADSL mode
In the PIC.5, according to the indication, you can move the cursor to
the item you want to set pressing ▲ or ▼. Press Enter button, then the
setting information will be displayed on the screen. If there is nothing
to change, press Enter button and the tester will display the following
as PIC.6
Mode Unchanged
Please exit
Pic.6
If the mode is revised, press Enter button, and the tester will display
the follows.
Setting……
Please Wait.
Configure succeed
Pic.4
Pic7
8
9
ST332B ADSL2+ Tester
5.6.2 Username modification
In the following pic4, move the cursor into “Username”, press “Enter”
to enter into the modification interface. The length username is 1-49, the
length of password is 0-49.
AuthMode: PAP CHAP
UserID: zba3586428@e
Passwd:
Setting:
Pic8
A. “Keyboard”appears
Move the cursor into “UserID”, Press “Enter”, the keyboard comes out
in the screen.
Zba3586428@e
Pic9
B. Modify characters
Press ▲ or ▼, the characters moves in the screen, the following pic will
be displayed:
gba3586428@e
Pic10
Based on PIC10, press <Right> button, the character will move into the
next character, users can use same method to modify the next character.
Pic as follows:
hba3586428@e
ST332B ADSL2+ Tester
C. Modify the next character
Based on the previous operation, press “Enter” for a little while,, then
users can modify the next character.
hba3586428@e
Pic12
D. Exit the modifications of characters
Press” Cancel” for more than 1.5s, the modification of user ID is
completed.
Input the password:
Move the cursor into ‘Passwd”, modify the password through the same
method as the userID modification.
AuthMode:
Choose the “PAP” or “CHAP” by moving the cursor.
PAP (Password Authentication Protocol)
CHAP (Challenge Handshake Authentication Protocol)
Save the modification:
After all the modification completed, press “Enter”, the tester will
display” changing…please wait”. When the notification vanishes, the
final setting will be completed.
5.6.3 VPI/VCI modification
In the Sys Setup menu (PIC.4), move the cursor into “PVCn”, and then
press “Enter” button to enter into VPI VCI modification interface as
shown in PIC.13:
PVC1:
PVC2:
PVC3:
VPI
0
0
0
Pic11
Pic 13
10
11
VCI
0 set
0 set
0 set
ST332B ADSL2+ Tester
Open the PIC 14 by <Up> <Down> <Left> <Right>:
PVC4:
PVC5:
PVC6:
PVC7:
0
0
0
0
0 set
0 set
0 set
0 set
Pic14
VPI modification:In Pic 14, press” enter” to modify the VPI number,
Press <Up> <Down>, the following 0pic will be displayed:
PVC4:
PVC5:
PVC6:
PVC7:
2
0
0
0
0 set
0 set
0 set
0 set
ST332B ADSL2+ Tester
PVC4: 12
PVC5: 0
PVC6: 0
PVC7: 0
02
0
0
0
0 set
0 set
0 set
0 set
Pic 16
The following pic is the result of the modification
PVC4:
PVC5:
PVC6:
PVC7:
12
0
0
0
0 set
0 set
0 set
0 set
Pic17
Exit the VPI modification: Press back,users can exit the VPI
modification, the following Pic will be displayed in the screen:
12
set
set
set
set
Pic 18
Save VPI:
After a group of VPI VCI parameters modification, press<Left> or
<Right> button, the cursor will move to “Set”, press ‘enter”, after 4-7s,
the data will be saved in the Modem.
PVC4:
PVC5:
PVC6:
PVC7:
Pic15
Press <Left> button, we can modify the “0” into “0~9”
PVC4:
PVC5:
PVC6:
PVC7:
0
0
0
0
12
6
35
0
0
0
0
0
set
set
set
set
Pic19
5.6.4 Choose PPP mode
PPP Mode
PPPoE PPPoA
Pic20
Move the cursor into “PPP Mode”, Press “Enter” to choose the suitable
Dial Mode.
5.6.5 Regular setting
In the Sys Setup menu (PIC.4), move the cursor to “Regular”, then press
“Enter” button to enter into the regular setting interface.
Auto Off
Bklt Time
Key Tone
Contrast
08m
15S
Open
20
Pic 21
13
ST332B ADSL2+ Tester
Backlight time set:
The default time of backlight is 15S. If users want to change the time ,
they can change it in this interface. The utmost length is 99s.
In the Pic21, press “Enter”, users can change the time length by<Up>or
“Down’, The number will moves from 5~99:
Auot Off 08m
Bklt Time 15S
Key Tone Open
Contrast
20
Pic 22
Press “enter”, the backlight time will be set.。
Key Tone set:Move the cursor into “Key Tone: by <Down> button, pic
as follows:
Auot Off 08m
Bklt time 15S
Key Tone Open
Contrast
20
Pic23
Turn off the Key Tone:
In the Pic23, press <Up> Or ‘down”, the ‘ON’ will changed into”Off”,
Pic as follows:
Auoto Off 08m
Bklt time 15S
Key Tone Shut
Contrast
20
Pic 24
Pic 26
Press “Back”, users can back to the upper menu。
5.6.6 Auto off time length set
In the pic 21, move the cursor to “Auto off” by button, pic as follows:
Auot Off
Bklt Time
Key Tone
Contrast
08m
15S
Shut
20
Pic 27
In the pic 27, press “Enter”, users can change the time by <Up> and
<Down>
Auot Off
09m
Bklt Time 15S
Key Tone
Shut
Contrast
20
Pic 28
5.6.7 Restore setting
08m
15S
Shut
20
In the Sys Setup menu (PIC.4), press <Up> <Down> to move the
cursor to “Res Set’, then press “enter”, there will be “Are you sure to
restore factory setting?” press “Enter”, then the LCD will display
manufacturing default settings as shown in PIC.29
Auot Off 08m
Bklt time 15S
Key Tone
on
Contrast
20
Pic 25
Pic29
14
15
Adjust the contrast:
In the pic 21, press <Up> or <Down>, the cursor will move to
“Contrast”, pic as follows:
Auot Off
Bklt time
Key Tone
Contrast
ST332B ADSL2+ Tester
Press “Enter”, change the number “20” by <Up> or <Down>, pic as
follows:
Auoto Off 8m
Bklt time 15S
Key Tone
Shut
Contrast
21
ST332B ADSL2+ Tester
Notice:All the parameters in Modem restore to the factory original
setting.
5.7 xDSL test
Press ▲ or ▼ to move the cursor to the xDSL Test option and press
Enter button to enter the xDSL test window as shown in Pic31
xDSL Test
Dial Test
View Data
Sys Set
DMM Test
LAN Ping
Modem Emu
Upload
Pic 30
ST332B ADSL2+ Tester
up/down noise margin(NoiseMar) and up/down output power(Output
PU/D). Please refer to PIC.12. The parameters are divided into 2 groups.
Bars on left show the parameters before synchronization while bars on
right the parameters after synchronization.
Fitful LNK LED shinning - Modem is not in synchronization and
current state is “connecting”.
Steady LNK LED shinning - Modem is synchronizing and current state
is “connected”.
Before Modem synchronization
After Modemsynchronization
State: Linking…
QoS :
Link Mode: Adsl2Plus Auto
State:
QoS:
Link Mode:
Showtime
OK
G . dmt
Up Rate :
Dn Rate :
Max RateU:
Max RateD:
Up Rate:
Dn Rate:
Max RateU:
Max RateD:
512 kbps
2048 kbps
912 kbps
8308kbps
Modem Initializing…..
01S..
State: Linking
Qos:
Standard: Multimode
Pic.31
0
0
0
0
Up Atten:
0.0
Dn Atten:
0.0
Noise Mar U: 0.0
Noise Mar D: 0.0
kbps
kbps
kbps
kbps
dB
dB
dB
dB
Up Atten:
13.5
Dn Atten:
27.0
Noise Mar U: 15.0
Noise Mar D: 27.5
dB
dB
dB
dB
Press Back button to exit xDSL test and return main menu.
5.7.1 Physical layer parameter test
In xDSL test window you could browse many parameters by pressing
▲ or ▼ according to the indication. The parameters include current
state (State), Quality of Service (QoS), Link mode, up/down stream rate
(Up/Dn rate), up/down max rate, up/down attenuation(Up/Dn Atten),
16
Output PU:
Output PD:
CRC u:
CRC d:
0.0
0.0
dB
dB
Output PU:
Output PD:
CRC u: 0
CRC d: 0
17
12.3
19.4
dB
dB
ST332B ADSL2+ Tester
HEC u:
HEC d:
FEC u:
FEC d:
HEC u:
HEC d:
FEC u:
FEC d:
NCD u:
NCD d:
LOS u:
LOS d:
NCD u:
NCD d:
LOS u:
LOS d:
0
0
2
0
ST332B ADSL2+ Tester
Save record?
Enter: Save Back: Exit
0
0
0
0
Pic32
Link mode:
ADI:
ADI mode of ADSL;
G.DMT:
ADSL G.DMT mode, ITU-T G992.1 standard
compliance;
G.LITE:
ADSL G.LITE mode, ITU-T G992.2 standard
compliance;
T1.413:
ADSL T1.413 mode, ANSI T1.413 issue1 & Issue
2 standard compliance.
G.DMT.BIS:
ADSL2 G.DMT.BIT mode, ITU-T G992.3 standard
compliance;
G.DMT.BISPLUS: ADSL2+ G.DMT.BISPLUS mode, ITU-T G992.5
standard compliance.
ADSL2/2+:
ADSL2+G.dmt.bisplus mode, ITU-T G992.5
compliance.
Service quality: ST332B has 4 levels to show the service quality,
that is, to show whether the line is fit for xDSL
service and evaluate current service quality. They
are: Excellent, Good, OK and Poor.
5.7.2 Save test records
Saved
Record No.:15
Pic.33
Press Back button to refuse to save record and return main menu;
While press Enter button to save record and its record number will be
displayed as the right bar shows (PIC.33).
Additionally ST332B has a memory capacity of 50 records. Once a
record is saved, the record No. will increase by one automatically.
When the user tries to save 51th record into ST332B, the first record
will be overlapped.
5.7.3 Display bit chart
In the window of PIC.12, press ▼ button, if the modem isn’t
synchronized, then there will not be any graph.
Pic.34
Press ▼ Button, the bit chart with first 102 channels will be displayed,
and then next until all 512 channels are displayed; press Back button to
return to the main menu. The number of channel bit chart will be
different due to the difference of user line.
In PIC.13, please click Back button to return main menu if Modem is
not in synchronization. If the modem has been in synchronization and
ST332B will display following content.
18
19
ST332B ADSL2+ Tester
ST332B ADSL2+ Tester
5.8 Dial test
In main menu (PIC.2), press ▲ or ▼ to select Dial Test option.
XDSL Test
Dial Test
View Data
Sys Set
DMM Test
LAN Ping
Modem Emu
Upload
Pic .35
Press Enter button and PIC.36 will appears:.
PPP Dial
Dial Test
WAN Ping
Pic.36
5.8.1 PPP dial
Press Enter button. The following pic37 will be displayed:
Self:
Peer:
DNS1:
DNS2:
Self:
Peer:
DNS1:
DNS2:
Self IP Address;
Remote IP Address;
Primary DNS Server address;
Secondary DNS Server address.
5.8.2 WAN ping
Move the cursor to “WAN Ping”,Press “Enter”, the following pic will
be displayed.
Recommend Web
www.google.com
www.yahoo.com
www.sina.com
Pic 39
Move the cursor to the third item, the screen will display” Mdfy” “ Test”
Edable web Mdfy
www.google.com
www.yahoo.com
www.sina.com
0.0.0.0
0.0.0.0
0.0.0.0
0.0.0.0
Pic37
Press Back button to return the upper menu.
If dialing is successful, the LCD will display dialing result (PIC.38).
Self:
Peer:
DNS1:
DNS2:
Pic.38
Now you could browse the dialing information by pressing ▲ or ▼
(PIC.18). And you could also press Back button to return upper menu.
60.215.224.116
221.1.0.20
218.56.57.58
202.102.137.68
Pic 40
Move the cursor to “Test” by button:
Edable web Mdfy
www.google.com
www.yahoo.com
www.sina.com
Pic 41
20
Test
21
Test
ST332B ADSL2+ Tester
Modify the web
In the above pic, press “Enter” to enter into the characters modification
interface. The modify method is the same as 5.6.2: UserName and
password modification.
WAN ping :
In the above pic, “Testing, please wait” will be displayed in the screen,
after about 8s the test result will comes out as follows:
4 packets transmitted
4 packets received
0 % loss
IP:71.5.7.191
Pic 42
If the Dial is failure, when perform Ping Test, there will be “Please make
sure PPP Dial succeeds, or the web is correct, and then do Ping Test”.
Sometimes the PPP Dial succeeds, but the screen display “Test failure,
please retest”. This is caused by the serial port data unstable; users can
operate the tester according to the note.
ST332B ADSL2+ Tester
Now the selected record No. is the newest record number. If you want
to read record please press Enter button. In the record you could view
current state, service quality, connection mode, up/down streams rate,
up/down max rate, up/down attenuation, up/down noise margin and
up/down output power and error test by pressing ▲ or ▼ (PIC.25)
In PIC.44 window, the user could select the other record number by
pressing ▲ or ▼. After that, please press Enter button to browse the
selected record.
Current State: connected
Qos :Good
Link Mode: G . dmt
Up Rate:
512 kbps
Dn Rate:
2048 kbps
Max Rate U: 912 kbps
Max Rate D: 8308kbps
5.9 View data
In main menu (PIC.2), move cursor to the View Data option by
pressing ▲ or ▼, please refer to following pic:
xDSL Test
DMM Test
Dial Test
View Data
Sys Set
LAN Ping
Modem Emu
Upload
Pic.43
Press Enter button, and the LCD will display the picture as follows.
View Data
Record No: 15
Pic .44
22
Up Atten:
13.5 dB
Dn Atten:
27.0 dB
Noise Mar U: 15.0 dB
Noise Mar D: 27.5 dB
Output P U: 12.3
Output P D: 19.4
CRC u: 0
CRC d: 2
HECup:0
HECdn:0
FECup:1
FECdn:1
dB
dB
23
ST332B ADSL2+ Tester
ST332B ADSL2+ Tester
5.10 DMM test
NCDup:0
NCDdn:0
LOSup:0
LOSdn:0
Built-in digital multimeter can test the DC and AC voltage, resistance,
capacitance, insulation resistance parameters. Maintenance personnel
can use these functions to test if there is danger voltage, or the existence
of 48 V voltage on the telephone line.
In the main menu , move the cursor to the DMM Test by
<Up>, <Down>, <Left> and <Right> button as Pic46 shows:
xDSL Test
Dial Test
View Data
Sys Set
DMM Test
LAN Ping
Modem Emu
Upload
Pic46
After click the Enter button, the LCD
Pic47 shows.
AC(V) Test::
DC (V) Test:
LR Test::
Cap Test:
will display the following as
V
V
Ω
nF
Pic47
Now the as Pic47 shows, the AC currency is measured, and the value
will be refurbished every 0.5 second, In addition to testing AC voltage,
if the lines have more than two volts of alternating current on it, the
tester will prompt, this means can not do the tests.. You can see the next
page by the movement of ▲ or ▼.
Pic45
Please press Back button to stop browsing and return the main menu.
Ins Test:: Out of 50MΩ
Pic48
24
25
ST332B ADSL2+ Tester
Then press <OK> button to begin testing insulation, the screen will
display the screen shown in Picture 48. Press OK button to confirm data
measurement. In AC voltage, DC voltage, resistance test, it is automatic
test. For other items, please press OK button to confirm the test.
While withdrawing from the DMM test, if the line voltage is higher than
safe voltage, in order to protect circuits, tester is not allowed to
withdraw from DMM test, there will be "larger than the online voltage
safe voltage, can not withdraw from the DMM test" tips. Only the
elimination of voltage or line voltage is less than the security voltage
can be returned to the main interface. Usually, to withdraw from the
DMM test is to remove the test line. "Safe voltage": DC to 80 V, AC to
50 V, between AC50V to AC80V is a critical state, sometimes can
directly withdraw from DMM test, and sometimes can not. But if the
voltage is more than 80 V , can not withdraw from DMM test.
5.10.1 DC voltage test
Use the voltage test, can test the exist of the signal. For ordinary
telephone services bundled in the xDSL lines, if the line voltage is low
or 0 V, means the line can not use or have bad insulation, short circuit or
open circuit, need to check the line.
In this test, the DC voltage range is -400 V ~ +400 V. When beyond the
range of testing, the equipment will be prompted to " out of range ".
5.10.2 AC voltage test
Use AC voltage test, to test the high-voltage alternating current in the
lines, to protect to lineman, If the high-voltage alternating current exist,
please remove the test nips carefully to avoid electric shock.
The test is limited to the AC voltage test range of 0 ~ 290 V. When test
beyond this range, the equipment will be prompted to "out of range ".
5.10.3 Resistance test
Use resistance test function can determine the length of cable.
Conversely, if you know the length of the cable, the resistance test result
will show whether the cable connection is good or not.
Calculation formula:
L = RL / RO (Km )--------------------------- ①
①: RL is resistance measurements result (Ω), RO is the resistance (Ω)
per kilometer.
General specifications for the 0.32 mm of copper RO = 435.2 Ω,
specifications for the 0.4 mm copper RO = 278.5 Ω, specifications for
26
ST332B ADSL2+ Tester
the 0.5 mm copper RO = 178.3 Ω.
If the course of testing equipment tips "out of range," which shows test
nips not connected or cable not looped or , or out of resistance range,
please check the test nips or retest after loop the cable again.
In this test, if the line have voltage (voltage greater than 2 V), the tester
will prompt " voltage!" means this line have electricity , can not test
the resistance. Please check the lines and test after cutting the electricity.
5.10.4 Capacitance test
Use of capacitance test function can determine the length of lines. If
there is no bridge tap or waterishlogged , we can get the length from the
test result of the capacitance.
Calculation formula:
L = Cab / CO (Km). ---------------------------------- ②
②: Cab for capacitance test result (nF), CO capacitance result (nF)per
kilometer.
Commonly use telephone cable capacitance per kilometer : CO = 51nF.
If the tester prompts "out of range", that means capacitance out of
range or the cable have faults, please re-test after checking the lines.
Conducting this test, if the line have voltage (voltage more than 2 V),
the tester will prompt " voltage! ", and then return to the test menu. This
means the line have electricity and can not test the capacitance, please
check the line and retest after cutting the electricity.
5.10.5 Insulation test
Insulation test can test the insulation status of the line . If the
insulation resistance value is small, means the insulation is bad, this will
the make quality of the transmission very bad, need to repair. General
for ADSL lines, insulation resistance value should be more than 10 M Ω.
In this test, if the line have voltage (voltage more than 2 V), Tester will
prompt "voltage!." This means the line have electricity and can not test
the insulation, please check the line and retest after cutting the electricity.
If the line resistance out of value range, the tester will show "Out of
50MΩ”, that means the insulation is good.
Attention: When testing insulation, tester will bring a 100V’s
voltage, please operate it very carefully and do not touch the test
nips by hand!
27
ST332B ADSL2+ Tester
5.11 Modem emulation
In the main menu (Pic49), moves the cursor to the Modem Emu by
<Up>, <Down>, <Left> and <Right> button as Pic49 shows:
XDSL Test
Dial Test
View Data
Sys Set
DMM Test
LAN ping
Modem Emu
Upload
Pic49
Then press OK button,tester will display “Setting…Please wait”,after
4 seconds the tester will display “In Modem emulation state”:
In modem emulation
State
Pic50
When ST332B is in operation, it could be used as xDSL Modem. And
user could make dialing or logon the Internet by ST332B to see if there
is any fault in user Modem.
During Modem emulation the ST332B works under RFC1483 Bridge
mode.
5.12 Data Upload
In the main menu (Pic49), moves the cursor to the Upload by <Up>,
<Down>, <Left> and <Right> button as Pic51 shows:
xDSLTest
Dial Test
View Data
Sys Set
DMM Test
LAN Ping
Modem Emu
Upload
Pic51
28
ST332B ADSL2+ Tester
Then press OK button,tester will display “Waiting for handshaking
signal” :
Waiting for
handshaking signal
Pic52
Data line connection:
Now connect the RJ45 point on the "data line" to the LAN port, another
point connect to the computer.
Open management software, switch to upload interface, click "receive
data" button, then the tester will quickly display "Uploading the XX
data”, as shown in Pic53:
Uploading the XX data
Handshaking succeed
Pic53
After uploading, the test will display "upload succeed", and enter into o
upload interface again. After successful data uploading, through
management software can do the data analysis, static display each set of
data.
5.13 LAN ping test
In the main menu (Pic49), moves the cursor to the LAN Ping by <Up>,
<Down>, <Left> and <Right> button as Pic54 shows:
xDSL Test
DMM Test
Dial Test
LAN Ping
View Data Modem Emu
Sys Set
Upload
Pic54
Then press OK,tester will display Pic55:
Website Revise Test
192.168.0.25
192.168.0.1
192.168.1.1
Pic55
29
ST332B ADSL2+ Tester
Press OK button, tester will display“Testing, please wait”,test result
will be displayed after 8seconds,as Pic56 shows:
4 packets transmitted
4 packets received
0 % loss
IP:192.168.0.25
ST332B ADSL2+ Tester
voltage”
Charge method: Insert the charger into the charge jacket which is on the
top. Then connect charger with 220V AC power socket. If the LED on
charger is shinning and red it means that the tester is being charged. And
charge time is 6~7 hours or so. If the LED turns green from red it means
that the battery is fully charged. Please take off the charger.
To ensure to get correct results and protect tester please don’t operate
the tester when being charged.
Pic56
The address in PIc55 is fixed, can not be changed. If you want to enter
the IP address, operate through <Up> or <Down> button, the first line
tips shows the status of the current site: can be modified or fixed
address.Pic55 shows that the current site can be modified, press <Left>
or <Right >button on Pic55 can revise URL, character modification
method see 5.6.2 user name/ password revise.。
(1) LAN PING test -> LAN ping
PING tests conducted on the LAN, according to data loss rate, judge the
connection of the pinging IP address, judge the effectiveness of IP
address, to confirm LAN connection (In the absence of computer).
Connect the LAN port and Ethernet port on the hub through network test
line(direct line). If connect with the computer need to use a cross-test
line.
(2) WAN PING test -> WAN ping
WAN ping operations please see the dial-up test.
Connect the ADSL port to the ADSL line to do the Wan ping test. Ping
a website IP to the WAN direction to check WAN connectivity links.
5.14 Charge battery
The tester has a chargeable 2800mAh Li-polymer battery. After starting
the tester the battery capacity will be shown in the top right corner of
LCD. When the battery symbol is empty please charge it in time,
otherwise the tester will display “Switch off after one minute as low
30
31
ST332B ADSL2+ Tester
ST332B ADSL2+ Tester
7.2 Software Features
6. Faults and solutions
Faults
Nothing displayed
after powering on
tester.
Link LED and PPP
LED
are
in
abnormal condition.
PPP dialing failed.
PPP dialing failed
with
correct
username
and
password
Reasons
LCD contract is
not proper.
Solutions
Adjust
contrast
Low voltage.
Charge
battery.
Wrong
username
or password
Parameters
abnormal on the
modem register
Input correct
username
or password.
Enter into the
Sys
set,
restore
factory
settings
Notes
Refer
to 5.3.
After connecting with the port, software will display the physical layer,
data statistics, channel bit chart, VCI VPI, authentication, may revise the
VCI VPI, authentication information, ping destination address.
Instruments will be read in the records and documents stored in the form
of local and analysis the records.
7. xDSL test management software
xDSL test management software is the management software of
ST332B, read real-time data , parameter setting, read and save the
record and record analyse functions to help you conveniently and
efficiently use this tester.
7.1 Operation environment
We need a PC with port a RS232 connection cable.
Recommended configuration of the PC:
CPU:More than 1G Memory:More than 512Mb
HD:More than 20G Port:One
Operating system:Windows XP
Connecting:Put the DB9 outlet on the RS232 line into the port on the
PC, RJ45 insert to the LAN port.
32
Pic57 Main menu
7.3 Records upload
Choose the port you connected, click “Open Serial Port”, then the
connection will be successful. Choose “Upload Record”, then click “Set
up Path” to enter into the save record window, enter (the default for the
current date DSL - year - month -date _ hour-minute – second, Make
sure the file extension is .dsl), click on "Save" button to upload records.
"Upload success" will display after upload.
33
ST332B ADSL2+ Tester
Pic58 Save record
ST332B ADSL2+ Tester
Pic60 Data statistics
7.4 Real-time data
Click Real-time data will display the current data. Click properties page
button to view different data.
Pic61 Channel Bit Chart
Pic59 Physical Layer
34
35
ST332B ADSL2+ Tester
ST332B ADSL2+ Tester
Pic64 Ping
Pic62 VPI VCI
7.5 Parameter revise
Choose “Real-time Data”, click relevant page to revise the data
7.5.1 VPI VCI revise
Click VPI VCI page,revise the data after the software displayed the data
( Note : There can not be 2 exactly same data in the 7 groups),click
relevant “set” button, revise succeed after display “Save PVC
successful”, See Pic62 .
7.5.2 Authentication revise
Pic63 Authentication
Click authentication revise page, revise the data after the software
displayed the saved data, then click “commit” button, after successfully
revise the DSL setting, please restart the tester. See Pic63.
36
37
ST332B ADSL2+ Tester
ST332B ADSL2+ Tester
7.5.3 Ping destination address revise
Click Ping page,revise ping destination address,click “Modify” button,
setting finished after revise succeed. See Pic64.
7.6 Record analyze
When analyse the record, please keep the port closed.
Click “choose file” button, Pic65 will come out, choose the file and
click “open” to load. Click “first group” “previous group” “next group”
“last group” to check relevant record.
Pic66 Check record
7.7 Attention
If the PC have more than one network card, please use only one before
connect with the tester. The IP address is 192.168.1.* (* ranged in
2-254) and forbid other network card.
8. Accessories
Pic65 Choose Record
38
Direct Ethernet line
Cross Ethernet Line
RS232 line
Test line
Charger
User manual
Management software CD
1
1
1
1
1
1
1
39
ST332B ADSL2+ Tester
40