1
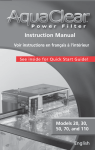
AP160
Steam Shower
User/Installation Manual
Spare Parts & Service Tel: 0844 884 9556
Aftersales Dept.: 0844 884 9686
Fax: 0844 824 3145 Web: www.apd.name
Technical Dept.: 0844 884 9680*
* Please note we can try to help but offer no guarantee or accept liability from any advice given, you are requested to qualify via an independant professional
2
AP160 Steam Shower - User Manual
WARNING:
1) This product MUST be installed by qualified personnel, otherwise it will invalidate any guarantee supplied.
2) The power supply of this product must be earthed, it is recommended you install an RCD. Power input is
AC 220V±10%,50Hz.
3) The water pressure to the AP160 shower must be equal and between 2-4 bar and the temperature of hot
water supplied to the bathtub should be no higher than 70oC.
4) Do not operate the water pump with no water present as this will damage the pump seal gasket.
5) Please disconnect the shower from the mains before undertaking any maintenance.
6) Children, elderly people and the impaired must be supervised at all times when using this shower.
7) Only after strictly checking water intake pipes, steam pipes and connecting power cables and confirming
all pipes and connections are in order should the product be switched on.
8) Electrical equipment not recommended by the manufacturers should NOT be connected to the machine.
Unauthorised disassembling and repacking the already fixed wirings in the machine or removing and
inserting new wirings and non approved parts is strictly prohibited.
9) It is recommended that a water softener should be fitted in hard water areas to prevent the build up of scale.
10) In hard water areas, the main steam generator should be cleaned and water scale cleared regularly. It is
suggested that the main steam engine be checked every three months and cleaned according to the
build-up. The procedure to clean is as follows: dilute 5-10 grams of citric acid with 1.4 litre warm water,
dismantle the pipe connecting to the outlet of the main steam generator, add the citric acid solution,
connect the steam pipe, leave for 60 minutes, then switch on the steam generator and heat for 30
minutes, finally switch off the steam generator and empty it.
11) The shower should be installed in strict accordance with local authority regulations and by qualified
personnel.
12) The tub must be completely water tested before the start of any installation, otherwise warranty will
become void.
13) Fixtures and fittings may become loose during transit. Please ensure that these are fully tightened before
completing installation.
14) The guarantee covers part only and not labour costs.
15) Rack and shelves are not designed to take heavy loads
16) A pump, or pressure equalising valve, or water softener may be required on some installations.
17) The unit must be fully tested for any leaks before finalising installation.
Aquaplus claim no responsibility for any faults that may arise should
users violate the provisions of the instructions provided.
Spare Parts & Service Tel: 0844 884 9556
Aftersales Dept.: 0844 884 9686
Fax: 0844 824 3145 Web: www.apd.name
Technical Dept.: 0844 884 9680*
* Please note we can try to help but offer no guarantee or accept liability from any advice given, you are requested to qualify via an independant professional
3
BATHTUB:
1) The hot and cold feed should be connected to full
bore lever ball valves. Please make sure these are
connected correctly at time of installation. Waste
water is drained via the drainage hose that should be
connected to your waste pipe (fig a). Ensure that the
bath tub is level.
FIG A.
to waste pipe
2) The bath’s electricity supply is protected by a cut-off
switch which uses air pressure to operate the switch
and isolate the power in the event of any contact
with water (fig b).
FIG B.
SWITCH
3) If you wish to use the foot massager whilst
showering, place the foot massage unit in the
bathtub,lift the cover, then turn the control knob to
the position marked
to turn on the water jets. Rub
your foot to and fro on the massage rollers in the unit
to experience a relaxing foot massage.
4) The bath has 2 control knobs - the first is the electric
pump control switch. This switches the water
circulating pump on and off. Press once to start the
pump, and press again to stop. The second control
knob is the water intensity regulator dial, turn it
clockwise and the water current increases, turning it
anti clockwise decreases the intensity (fig c).
PUMP
FIG C.
PUSH
PUMP CONTROL SWITCH
5) The bath contains a number of fully adjustable spray
nozzles (fig d) for an underwater masage experience.
The spray direction can be adjusted by rotating the
central nozzle and you can adjust the intensity of the
spray through the water current control knob on the
side of the bath.
FIG D.
ADJUSTABLE
NOZZLE
TWIST
WATER CURRENT
CONTROL
FIG E.
6) To drain the bath, rotate the knob (fig e) clockwise
(about 30° - 45°), the water will drain out completely.
To close the drain valve, rotate the knob anti
clockwise to the same degree.
To clear the waste, lift up the plug, then the waste
cover, clean and drop back into place. (fig f).
Spare Parts & Service Tel: 0844 884 9556
Aftersales Dept.: 0844 884 9686
FIG F.
Fax: 0844 824 3145 Web: www.apd.name
Technical Dept.: 0844 884 9680*
* Please note we can try to help but offer no guarantee or accept liability from any advice given, you are requested to qualify via an independant professional
4
SHOWER:
1) This shower features a hand-held shower nozzle with
six different spray styles as well as built-in high
powered body jets for an all over hydrotherapy style
massage (fig g).
The six different spray styles are clearly marked on
the hand shower - to change style, simply rotate the
outer ring of the shower head to the desired position.
The built-in body jets are also fully adjustable, you
can position the nozzle to any direction required.
2) The steam function of this shower can be used with
essential oils, herbs, etc. for a true aromatherapy
experience, using the built-in ‘medicine box’.
Simply open the medicine box, version A or B
depending on your shower (fig h), place in your oils
or herbs and then switch on the steam function. The
aromatherapy fragrance will combine with the steam
and envelop the shower.
3) The shower is controlled by a single lever tap and a
water distribution switch. To turn on the shower, lift
the lever outwards towards you (fig i).
FIG G.
HAND
SHOWER
BODY JET
FIG H.
B
PLACE
HERBS/OILS
N HERE
PLACE
HERBS/OILS
N HERE
A
FIG I.
on
To adjust the hot and cold temperature turn the
handle. Turn left for more hot water and right for cold
(fig j).
FIG J.
hot
The water distribution switch controls where the
water is diverted to in the shower, turn the knob so
that the arrow points the outlet you wish to use overhead shower, hand shower, body jets or foot
massager (fig k)
Spare Parts & Service Tel: 0844 884 9556
Aftersales Dept.: 0844 884 9686
off
cold
FIG K.
Fax: 0844 824 3145 Web: www.apd.name
Technical Dept.: 0844 884 9680*
* Please note we can try to help but offer no guarantee or accept liability from any advice given, you are requested to qualify via an independant professional
5
AP160 Steam Shower - Control Panels
Key
POWER ON/OFF
LIGHT
FAN
TELEPHONE
STEAM
TEMPERATURE SET
SET UP
BODY JETS
RADIO
TV/AV/MP3/MP4
TIME SET
ZOOM
ENTER
PLAY / PAUSE
STOP
STEAM HEATER
BACK
NEXT
VOLUME +
VOLUME -
UP
DOWN
LEFT
RIGHT
Spare Parts & Service Tel: 0844 884 9556
Aftersales Dept.: 0844 884 9686
Fax: 0844 824 3145 Web: www.apd.name
Technical Dept.: 0844 884 9680*
* Please note we can try to help but offer no guarantee or accept liability from any advice given, you are requested to qualify via an independant professional
6
AP160 Steam Shower
OPERATING INSTRUCTIONS:
1) System Booting:
Press the Power On/Off button to switch on the shower. The LCD screen will light up, indicating the current
screen room temperature, the lights will come on and the system will be in stand-by status.
2) Steam Function:
Press the Steam button to switch the steam function on and off. The LCD screen displays a steam symbol,
indicating its working status. Please note: steam will not function normally in water shortages - a warning
symbol will be displayed by the LCD screen in such instances.
3) Temperature Setting:
Press the Temperature setting button and the dynamic screen will display the previously set temperature for
the steam shower. To adjust the shower to the required temperature, repeatedly press the temperature
button, each press will increase the temperature by 2oC. The LCD screen usually shows ambient temperature
of the shower. If the actual temperature is higher than the set temperature the steam function will fail to
start.
4) Water Pump and Steam Heat up Function:
To start the water pump function press the Power on/off button.The LCD screen displays a water pump
symbol indicating the pump is working correctly. Press the STEAM HEATER button to heat up the water.
When the temperature is 38oC or lower, the heater can be switched to constant. In this mode, when the water
temperature reaches 42oC the steam heater will be automatically switched off.
5) Time Setting:
The steam generator can also be run for a set length of time. To do this, press the Time setting button, the
LCD screen will display the current time left for the steam shower and the time unit -min- (default value
20min). Continue press Temperature setting button to adjust required time for the steam shower, each press
of the button increases the time by 5 minute increments.
6) Spray Function:
The system has three spray modes: body jets (upper, mid, lower), overhead shower, and circulating spray
mode. Press the Spray button once to start the upper body jets, the LCD screen will display the
corresponding symbol; press the Spray button the second time to start the mid body jets, again the LCD
screen will display the mid jet symbol; press the Spray button the third time to start the lower jets - the
symbol on the LCD screen will change to the corresponding icon.
To start the circulating spray mode simply press the Spray button a fourth time, the body jets will spray in
rotation (upper, mid, lower) every five minutes. Press the Spray button for the fifth time to start the overhead
shower and finally, press the Spray button a sixth time to turn off all spray/shower jets and the LCD screen.
7) Light Function:
Press the Light button to turn the light on and off. The LCD screen will display the light symbol and its current
working status.
8) Fan Function:
Press the Fan button to switch the fan on/off. The LCD screen will display the fan symbol indicating that the
fan is currently on and working.
9) Telephone Function:
The shower cabin has a built-in telephone with hands free answer function. When the phone rings, the
system will shut down any audio output from the showers speakers and the phone will ring. Press the
telephone button to directly answer the call. When the call is over, press the Telephone button again to shut
down the telephone function and return to the audio output.
Spare Parts & Service Tel: 0844 884 9556
Aftersales Dept.: 0844 884 9686
Fax: 0844 824 3145 Web: www.apd.name
Technical Dept.: 0844 884 9680*
* Please note we can try to help but offer no guarantee or accept liability from any advice given, you are requested to qualify via an independant professional
7
AP160 Steam Shower
10) Radio/TV Function:
To switch on the radio and TV functions, press the Radio/TV button on the control panel. Press once for
radio, press a second time for television and press a third time to turn on the ‘Play Media File’ function. A
fourth press will switch off all the radio and tv functions. The LCD screen displays the corresponding
symbols to indicate which function you’re using. Aquaplus cannot be held responsble if the radio fails
because of lack of reception.
11) Radio Function:
The shower comes with a built in stereo FM radio with frequency display, digital tuning and automatic search
function. To search for a radio station, simply press the Left/Right direction button when the FM radio
function is on and the system will scan for radio stations between 88.0MHz~108.0MHz.
12) TV Function:
With the TV function selected, press the TV Channel +/- button to select channels, press TV Vol +/- button
to adjust the volume and press TV/AV button to switch between TV and AV. Pressing the TV Menu button
will bring up a menu of function settings for the TV. In the TV function settings, press TV Channel +/- button
to choose the TV functions that are required and press TV Vol +/- to adjust and confirm the function.
13) MP3/MP4 Function (Optional):
In the ‘Play Media File’ function, press the MP3/MP4 button once to start the MP3 player function; press the
MP3/MP4 button a second time to turn off the MP3 and turn on MP4 player function; press the MP3/MP4
button for a third time to turn off the MP4 player. The LCD screen displays corresponding symbols to
indicate its working status.
14) MP3/MP4 basic operatation:
1) Autoplay: Insert a USB memory stick/flash drive into the USB port on the control panel, then turn on
the power and press the MP3/MP4 button. The system will automatically play the files on the device (on
repeat) until the power is switched off.
2) Priority play order: If the USB memory stick/flash drive contains multiple media sources such as video,
images and MP3, the priority of play order is video>images>MP3.
3) Choosing a File: Press the stop button during the autoplay process to stop whatever is currently playing
and display a list of files on your USB memory stick/flash drive. Press Up/Down/Left/Right direction
button to choose file, then press the Enter button to play the selected file.
4) Function setting: Press the setup button to enter the function settings menu. Press Up/Down/Left/Right
direction buttons to choose a menu item, then press Enter button to set. To exit, choose ‘exit setup’.
5) Other operations: Press Play/pause to play or pause a media file; press back and next to move between
files currently playing; press Repeat to repeat your media file; press Zoom to zoom the image in or out.
6) Supported file formats: MPEG1 (VCD),file extension *.MPG/*.DAT; MPEG2 (DVD),file extension
*.VOB/*.MPG; and MPEG4 ( DivX / XviD coding),file extension *.AVI.
7) Volume Adjustment: Press Vol +/- button to adjust volume of MP3, radio, TV and telephone.
8) Shower System Power Off: Press the Power On/Off button when the system is working to shut down
all functions and displays. The system will open the drainage valve of the steamer in 30 seconds, close
the drainage in 3 minutes, automatically switch on ozone function and switch it off in 10 minutes.
15) Remote control:
The effective working distance of this remote control is affected by the operating environment. Avoid using
in strong light and/or strong radiation. Obstructions in both the shower and the containing bathroom can
cause the remote control to lose efficiency and shorten the effective working distance.
Spare Parts & Service Tel: 0844 884 9556
Aftersales Dept.: 0844 884 9686
Fax: 0844 824 3145 Web: www.apd.name
Technical Dept.: 0844 884 9680*
* Please note we can try to help but offer no guarantee or accept liability from any advice given, you are requested to qualify via an independant professional
8
AP160 Steam Shower
MAINTENANCE:
1) Your shower can be safely cleaned with liquid detergent and a soft cloth. Do not use acetone or ammonia
based cleaners and materials containing organic solvent when cleaning your shower. Use of these products
can deteriorate the surface of your bath or base unit.
2) If the surface of your shower base/bath has slight mark on it’s surface, firstly polish it with waterproof
abrasive paper NO.1200 first, then use NO.2000 waterproof abrasive paper for a smoother polish. Finally
use toothpaste as a final mild abrasive polish.
3) To maintain the chrome plated parts of your shower, wipe the parts lightly with a cotton flannel, make sure
not to polish with a coarse cloth as these will mark the chrome.
4) Cleaning the underwater massage system: Fill the bathtub with hot water (approx 40oC) to a level just above
the spray jets, add the correct amount of sanitizer and run the massage jets for about 5 minutes. Stop the
pump and drain off the water, then turn on the water and run the massage jets for a further 3 minutes. Stop
the pump and drain off the water. Make sure you do not use any foaming cleansers when cleaning the
pumps as this may lead to a build-up which may jam the nozzles.
5) Any teak-decorated sheet or teak seat board should be wiped clean with a dry cloth after each shower. If you
plan on not using the shower for any length of time these should be removed and stored in a cool dry place.
6) Please keep the bottom base clean, regularly unscrew the cover of the drain and remove any hair or dirt as
this will impair the efficiency of the drainage system.
7) It is recommend you clean the steam generator after every 30 hours of use. To clean, add 5-10 grams of citric
acid to 1.5-2.0 litres of warm water, and pour into the steam generator via the rubber tube. Leave for 8-12
hours then switch on the steam generator and allow it to discharge the fluid via the steam process.
8) After each use of your shower it is recommended that you lightly wipe down the interior of the unit with soft
cotton towels and let the surfaces dry naturally. When undertaking any cleaning make sure that any water or
cleaning products do not come into contact with the electrical circuits of your shower otherwise a circuit
fault may occur, rendering your shower useless.
NOTICE:
1) The instructions contained in this manual may not all apply to this particular model and configuration.
2) As we constantly strive to improve our products we reserve the right to update this model without notice.
Spare Parts & Service Tel: 0844 884 9556
Aftersales Dept.: 0844 884 9686
Fax: 0844 824 3145 Web: www.apd.name
Technical Dept.: 0844 884 9680*
* Please note we can try to help but offer no guarantee or accept liability from any advice given, you are requested to qualify via an independant professional
9
AP160 Steam Shower - Installation Manual
PARTS LIST
Part
No.
Part
No.
Part
No.
1
10
19
2
11
20
3
12
21
4
13
22
5
14
23
6
15
24
7
16
25
8
17
26
9
18
27
28
Spare Parts & Service Tel: 0844 884 9556
Aftersales Dept.: 0844 884 9686
Fax: 0844 824 3145 Web: www.apd.name
Technical Dept.: 0844 884 9680*
* Please note we can try to help but offer no guarantee or accept liability from any advice given, you are requested to qualify via an independant professional
10
INSTALLATION:
1) Using a spirit level check the tub is level to your
bathroom floor (fig 1). If the tub is not level, adjust the
legs under the base (fig 2).
FIG 1.
FIG 2.
2) Connect the drainage pipe (35mm) to the waste
outlet. We recommend you use a compression fitting
to adapt to a 40mm or 50mm waste pipe (fig 3).
3) Affix the H-shaped rubber seal (part no. 21) to the
black glass panels on the top and side of the panel
only (fig 4), and also attach the glue bars to the clear
glass panels.
FIG 3.
FIG 4.
Spare Parts & Service Tel: 0844 884 9556
Aftersales Dept.: 0844 884 9686
Fax: 0844 824 3145 Web: www.apd.name
Technical Dept.: 0844 884 9680*
* Please note we can try to help but offer no guarantee or accept liability from any advice given, you are requested to qualify via an independant professional
11
INSTALLATION:
4) Attach the storage rack, towel rail, showerhead
handle and foot massage connectors to the glass
panels (fig 5) - parts no.s 12, 17 and 18.
FIG 5.
5) Install the central wall using part no.s 1, 2 and 10 to
attach it to the tub (fig 6).
FIG 6.
6) Before installing the shower ceiling it is necessary to
disconnect the metal transit locks, in order to later
connect the front struts (fig 7).
FIG 7.
7) To install the shower top cover use part no.s 1, 2
and 10 to attach it to the central wall (fig 8).
FIG 8.
Spare Parts & Service Tel: 0844 884 9556
Aftersales Dept.: 0844 884 9686
Fax: 0844 824 3145 Web: www.apd.name
Technical Dept.: 0844 884 9680*
* Please note we can try to help but offer no guarantee or accept liability from any advice given, you are requested to qualify via an independant professional
12
INSTALLATION:
8) To install the doors, first clamp and bolt the doors to
the roof of the shower (fig 9a). Dont no tightenen
bolts until posts have been installed.
FIG 9a.
Feed any wires up the struts onto the ceiling (fig 9b)
FIG 9b.
Attach the H shaped rubber seal (part no. 21) to the
bottom edges of the doors (fig 9c).
FIG 9c.
Finally tighten the bolts (fig 9d).
FIG 9d.
Spare Parts & Service Tel: 0844 884 9556
Aftersales Dept.: 0844 884 9686
Fax: 0844 824 3145 Web: www.apd.name
Technical Dept.: 0844 884 9680*
* Please note we can try to help but offer no guarantee or accept liability from any advice given, you are requested to qualify via an independant professional
13
INSTALLATION:
9) Before installing the shower, first remove the cables
from the aluminum strut which holds the external
small control panel (fig 10).
FIG 10.
10 ) In order to connect the external small control panel
to the main control panel and the TV set, these two
cables need to be run through the celing to the
back control panel (fig 11).
FIG 11.
11) Install the back glass walls, using part no.s 3, 4 and
10 (fig 12).
FIG 12.
12) Install the two fixed glass panels to the front
aluminum strut that holds the small external control
panel (fig 13).
FIG 13.
Spare Parts & Service Tel: 0844 884 9556
Aftersales Dept.: 0844 884 9686
Fax: 0844 824 3145 Web: www.apd.name
Technical Dept.: 0844 884 9680*
* Please note we can try to help but offer no guarantee or accept liability from any advice given, you are requested to qualify via an independant professional
14
INSTALLATION:
13) Affix the left side aluminum strut (fig 14), followed by
the right side strut (fig 15). Use part no.s 2, 3 and 10
to attach. Don’t forget to lock the struts in place on
the underside of the tub with the nuts supplied (part
no. 2).
FIG 14.
FIG 15.
14) Attach the magnetic door bar - part no. 27, if the bar
is too long trim down as necessary (fig 16).
FIG 16.
15) Adjust the doors until they are level, then fix in place
(fig 17). Once the doors are level and secure, tighten
and fix all the screws on the panels and the tub.
16) Before proceeding, unbundle all the connection
wires.
FIG 17.
Spare Parts & Service Tel: 0844 884 9556
Aftersales Dept.: 0844 884 9686
Fax: 0844 824 3145 Web: www.apd.name
Technical Dept.: 0844 884 9680*
* Please note we can try to help but offer no guarantee or accept liability from any advice given, you are requested to qualify via an independant professional
15
INSTALLATION:
17) Connect the solenoid to the junction box and then the
water supply (fig 18).
FIG 18.
18) Connect the power cable for the two control panels to
the junction box, the first is on the back panel of the
shower, the second is the small external control panel
on the front strut. These connections should be made
on the top of the shower (fig 19).
FIG 19.
19) Connect the signal cable for the TV set. Connecting
the cable between the small external control panel
and the TV on the back panel of the shower (fig 20).
FIG 20.
20) Connect the TV power cable (fig 21), one set of
cables will come from the TV, connect these to the
corresponding cables from the junction box.
FIG 21.
Spare Parts & Service Tel: 0844 884 9556
Aftersales Dept.: 0844 884 9686
Fax: 0844 824 3145 Web: www.apd.name
Technical Dept.: 0844 884 9680*
* Please note we can try to help but offer no guarantee or accept liability from any advice given, you are requested to qualify via an independant professional
16
INSTALLATION:
21) To hook up the TV, first connect the two aerial
cables. One set of cables will come from the TV, the
other from the junction box (fig 22).
FIG 22.
22) Then connect the audio and video input and output
(fig 23), again one set of cables will come from the
TV, connect these to the corresponding cables from
the junction box.
FIG 23.
23) Connect the power cable to the junction box, the
power cable comes from the main control panel on
the back wall of the shower (fig 24).
FIG 24.
24) Release all the cables on the ceiling, these are for
the lights, Ozone (O3), speakers and fan (fig 25).
FIG 25.
Spare Parts & Service Tel: 0844 884 9556
Aftersales Dept.: 0844 884 9686
Fax: 0844 824 3145 Web: www.apd.name
Technical Dept.: 0844 884 9680*
* Please note we can try to help but offer no guarantee or accept liability from any advice given, you are requested to qualify via an independant professional
17
INSTALLATION:
25) Begin by connecting the two speakers. The speaker
cables (fig 26) should be connected to the
corresponding cables on the junction box.
FIG 26.
26) Next connect the Fan. Again one set of cables will
come from the fan, and you should connect these to
the corresponding set on the junction box (fig 27).
FIG 27.
27) Next up, using a screwdriver, connect the cables
between the lights and the junction box (fig 28).
FIG 28.
28) Connect the cables from the Ozone (O3) unit, to the
cables on the junction box (fig 29).
FIG 29.
Spare Parts & Service Tel: 0844 884 9556
Aftersales Dept.: 0844 884 9686
Fax: 0844 824 3145 Web: www.apd.name
Technical Dept.: 0844 884 9680*
* Please note we can try to help but offer no guarantee or accept liability from any advice given, you are requested to qualify via an independant professional
18
INSTALLATION:
29) Connect the two movable showerheads on to the
ceiling. The water is fed via the divertor valve on the
back of the main shower panel (fig 30).
FIG 30.
30) Connect the monsoon rain shower head onto the
ceiling. The water is fed via the solenoid on the
back of the main shower panel (fig 31).
FIG 31.
31) Use a screwdriver to connect the light on the back
panels of the shower (fig 32).
FIG 32.
32) Connect the bathtub temperature sensor to both the
main control panel on the wall of the shower, and to
the bath tub (fig 33).
FIG 33.
Spare Parts & Service Tel: 0844 884 9556
Aftersales Dept.: 0844 884 9686
Fax: 0844 824 3145 Web: www.apd.name
Technical Dept.: 0844 884 9680*
* Please note we can try to help but offer no guarantee or accept liability from any advice given, you are requested to qualify via an independant professional
19
INSTALLATION:
33) Using a screwdriver, connect the shower’s
temperature sensor from the main control panel to
the wall of the shower (fig 34).
FIG 34.
34) There are two antennas from the junction box for
receiving radio signals, attach them to a suitable
place on the shower walls (fig 35).
FIG 35.
35) To install the adjustable shower jets (part no. 28),
connect the poles to the top of the ceiling first, and
then connect the other ends to the control taps on
the tub (fig 36/37).
FIG 36.
FIG 37.
Spare Parts & Service Tel: 0844 884 9556
Aftersales Dept.: 0844 884 9686
Fax: 0844 824 3145 Web: www.apd.name
Technical Dept.: 0844 884 9680*
* Please note we can try to help but offer no guarantee or accept liability from any advice given, you are requested to qualify via an independant professional
20
INSTALLATION:
36) Connect the cold water pipe to the steam generator
(fig 38).
FIG 38.
37) Connect the foot massager - part no.s 14, 15 and
16 (fig 39).
FIG 39.
38) Connect the door handles, part no.13 (fig 40).
FIG 40.
39) Standing inside the shower, affix the provided
plastic seals (part no. 22) around all the glass
panels of the shower (fig 41).
FIG 41.
Spare Parts & Service Tel: 0844 884 9556
Aftersales Dept.: 0844 884 9686
Fax: 0844 824 3145 Web: www.apd.name
Technical Dept.: 0844 884 9680*
* Please note we can try to help but offer no guarantee or accept liability from any advice given, you are requested to qualify via an independant professional
21
INSTALLATION:
40) Seal the interior of the shower (fig 42) with
waterproof sealant (not provided).
FIG 42.
41) Put on the green (or grey) pillows. Part no.19 (fig 43).
FIG 43.
42) Connect the shower hose (part no.14) and shower
head (part no. 20) to the sliding rail (fig 44).
FIG 44.
43) Put on the drain cover (part no. 26) in place. Please
note that, in order to let the waste water flow-out
smoothly, the drain should be adjusted to a suitable
level (fig 45).
FIG 45.
Spare Parts & Service Tel: 0844 884 9556
Aftersales Dept.: 0844 884 9686
Fax: 0844 824 3145 Web: www.apd.name
Technical Dept.: 0844 884 9680*
* Please note we can try to help but offer no guarantee or accept liability from any advice given, you are requested to qualify via an independant professional
22
ELECTRICAL SPECIFICATIONS:
Input Voltage: 220v 30amp circuit | Steam Generator: 3000 Watts | Water Pump Motor: 750W
AP160 Steam Shower - Schematics
Optional items vary on different models. Specification subject to change. E&OE.
Spare Parts & Service Tel: 0844 884 9556
Aftersales Dept.: 0844 884 9686
Fax: 0844 824 3145 Web: www.apd.name
Technical Dept.: 0844 884 9680*
* Please note we can try to help but offer no guarantee or accept liability from any advice given, you are requested to qualify via an independant professional