1
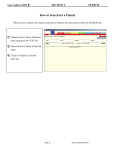
! picoCMS Client Training - A pico-cms.com Find Our User Manual at http://pico-cms.com/user-manual Login: URL(domain name/login) Layout to training: I. Overview about pico II. Users a. Adding a User b. Edit Existing User III. Content a. Edit Interior Pages b. Basic Toolbar c. Adding text d. Links e. Images f. Linking PDFs g. Blog IV. Pages V. Support & Help ! 1! ! Overview about pico Toolbar is at the bottom of the page: Three Main Areas Navigate = dropdown to quickly go to page pico is made of boxes Boxes = components Content = striped areas Example: ! 2! ! • Add New Content = New content box to page (green lines around striped boxes • Edit Content = Edit current content (blue lines around striped boxes) • Remove Content = Removes a content box itself not the content inside (red lines around striped boxes) • Add Existing Content = Adds new existing content box to page (green lines around striped boxes) • Move Content = Move boxes around the page (yellow lines around striped boxes) ICON%KEY:% • Up%&%Down%Arrows%=%adjust!order% • Red%X%=%Deletes!from!navigation!only!(not!from!Site)% • Green%+%=%Adding!a!Sub<navigation% • Side%Arrow%=%Hides!or!Shows!pages!within!Navigation% % % ! % 3! ! II. Users ! Adding a User 1. User > Add New User 2. Fill Out: (passwords are case sensitive) User Access = Level of Responsibility • Administrator • Moderator • Author • Registered User ! 4! ! Edit Existing User 1. User>Manage Current Users 2. Select User = click Green arrow Red arrow to delete current user 3. Fill Out: (passwords are case sensitive) User Access = Level of Responsibility ! 5! ! III. Content Editing Interior Pages 1. Content!/!Edit!Content! ! ! **Select Edit Content again to get out of editing mode** 2. Click!on!gray!striped!area!of!editable!box!! **Always select stripes & not links** Basic Toolbar: Source: computer code Cut = must use short hand Copy = must use short hand Paste = must use short hand Paste as Plain Text Paste from Word Search Replace Select All Remove Format Insert Image Insert Table Insert horizontal line Special characters Undo, redo Bold, Italics, Underline, Strikethrough Numbers, Bullets, Indent, Un-indent, Block Quote Right justify, Center, Left justify, Justify Link, Unlink, Anchors Styles - don’t need to change Format (Heading 2) - to change fonts Size - (20) Font size ! 6! ! Adding Text: Clipboard Options: 1. Type directly into box. It will automatically set the correct font/size. • Header: set to H1, keep uniform on every page. • Other: use H2, H3 and Normal 2. Paste as plain text: Removes styling & outside code: SAFEST WAY 3. Paste from Word: Removes excess coding that word documents carry, but keep most of the formatting. Font styles/colors often different from website settings. 4. Copy and paste directly into content box. • Clear formatting using remove format icon. This takes out the styling elements, but keeps basic structure and links. ! 7! ! Links: 1.!Content>edit!content!!! ! ! 2.!Click!content!box!you!are!adding!link!to!(stripped!boxed!area)! 3.!In!editing!window:!Highlight!text!you!want!to!link! 4.!Clink!Link!Icon!(on!the!toolbar)!! ! ! 6.!Link!box!appears,!copy!and!paste!link! ! ! ! 7.!Click!target!tab!and!select!New!Window!!!(when!finished!click!OK)! ! ! ! 8! ! Link to address outside site: Type in or copy and paste the URL • Select Target: Choose from drop down menu: (usually new window in this case) • Select Advanced: to put advisory title if desired. • Link within site. Type: /name of page on site (example: /about; /teamsisarina) • Protocol will automatically switch to “other” Images: 2 Step Process: Step 1 1. Click image button on toolbar 2. Image Properties Window Appears: • ! Browse server: takes you to images already on your server o Click Browse again to upload a new image 9! ! • • • • • • Create folders for categories of images: example: blog images o Open to the desired folder before you upload new images To check and adjust image properties click camera on upper right Options to resize or manually enter dimensions Click resize, save and add. Rename image accordingly Click on name of image to add to page. Step 2: To Upload a new image • • • • • • • • • Open to the appropriate folder Click Browse Click Open Alternative text: important to add 1. SEO-if image is broken people see text and still linked 2. Google searches based on words, not images 3. Blind people using readers Sizing/alignment Link to add url; set target Advanced to add advisory title Can type in URL, but recommend upload images to server for more control Make sure not to have any spaces in image name Notes: ! 10! ! Linking PDFs 1. Highlight the text you want to link 2. Select the link button 3. click Browse Server 4. (a new box appears) click Browse Server again 5. select correct PDF 6. (it will now appear in the list of images) select it ! 11! ! 7. (the URL will now be filled in) 8. click on the tab that says Target and select New Window from drop down 9. click OK ! 12! ! Blog 1. Content!/!Edit!Content! ! ! 2. Opens Blog Editing Window 3. Click green arrow next to existing post OR Start new post 4. Same editing window as regular content boxes ! 13! ! • • • Advanced: add author/categories/tags Saves: to restore to previously saved versions Image: to add a thumbnail image to the blog summary • • • • • Bottom Right Navigation Preview to show appearance of post before publishing Save Save & Publish Back to All Posts Blog: Right Side of Page • • Content>Edit Content Under Recent Posts to select number of entries Content>Edit Content on Search to change order or hide what appears Notes: ! ! ! ! ! ! ! ! ! ! 14! ! ! picoCMS Client Training Checklist: Here!is!the!link!for!your!site!while!on!our!development!server:! ! ! 1. ____!I!have!been!told!about!using!Firefox!or!chrome!and!NOT!using!Internet! Explore!as!my!browser.! 2. ____!I!have!been!told!about!clearing!my!cache.! 3. ____!I!was!told!about!updating!PICO!and!the!importance!of!doing!this!on!a! regular!basis.! 4. ____!I!have!been!setup!as!an!Admin!user!in!picoCMS.! !! ! Username:!! Password:!(case!sensitive)! 5. ____!I!feel!comfortable!setting!up!additional!users!if!needed.! 6. ____!I!feel!comfortable!navigating!through!the!Basic!Toolbar.! 7. ____!I!am!capable!of!creating!a!link!within!my!website.! 8. ____!I!am!aware!of!the!size!requirements!when!uploading!images!and!the!!! problems!that!can!occur!if!these!requirements!are!not!followed.! i. Images)should)be)no)larger)then)800)pixels)/)1MB.) 9. ____!I!understand!and!feel!comfortable!creating!tables.! 10. ____!I!am!comfortable!cloning!pages.! 11. ____!I!have!setup!my!account!for!using!support.sisarina.com!services!and!I!feel! comfortable!with!starting!a!support!ticket!if/when!needed.! ! _______________________________________:!Domain!Name!!!!!!_______________:!Pin! ! ! ! 15! ! Sign:_________________________________________!! ! ! Date:__________________________! 16! picoCMS Client Training (2) pico-cms.com Tables 1. Click on table icon 2. 3. 4. 5. Set number of columns and rows Width/Height adjustable Headers Border size 0 = Borders become invisible Once Table is created: 1. Right click = table properties a. Add cells/add rows/add columns 1 Pages 1. Pages / Edit This Page Edit This Page: (Filled out for every page) Page Name = Change/Add Page Name URL Alias = What appears in the search plane <title> tag = What appears on the window tab on the browser Meta Keywords = Helps with SEO Meta Description = not SEO, Snippet of text that appears under URL in a Google search Reminders: **Ignore everything below Meta Description** **Remember to Click Edit Page to save changes** 2 Creating a New Page: ** DO NOT SELECT Add New Page** Only clone interior pages Cloning pages with modules (blog page) breaks them. 1. Go to Inner page 2. Click Clone This Page 3. Window appears 4. 5. 6. 7. Add page name Tab out of window Click “Clone Page” Create internal links to this new page where desired a. Reference training Document 1 if you need help 3 ADDING A PAGE TO THE NAVIGATION 1. Content / Edit Content ** Click on the Navigation bar, but do not click on a link** **Your Site Hierarchy will appear** ICON KEY: • Up & Down Arrows = adjust order • Red X = Deletes from navigation only (not from Site) • Green + = Adding a Sub-‐navigation • Side Arrow = Hides or Shows pages within Navigation 4 ADDING A PAGE TO THE NAVIGATION cont’d 2. Select Heading your adding a sub navigation to (the lighter gray area) 3. Select desired page from List on Right 4. Click Add (It will now appear in the darker gray area) ** You DO NOT NEED TO FILL OUT Name & URL** 5 Adding Video Adding a link to a video is the same as creating any other link on your site. 1. Content>edit content 2. Click content box you are adding link to (stripped boxed area) 3. In editing window: Highlight text you want to link 4. Clink Link Icon (on the toolbar) 6. Link box appears, copy and past url of the video 7. Click target tab and select New Window (when finished click OK) 6 Don’t Forget You can always go to http://pico-‐cms.com/user-‐manual with questions or if you need guidance. • It offers tutorials & Frequently Asked Questions You can Get there right from PICO: ALSO Use http://support.sisarina.com if you need submit a ticket for help. ** Directly connects you to our developer ** **Provides time stamps showing when a project is being worked on** 7