1
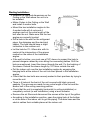
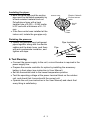
Starting Installation:
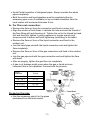
• Measure the required dimensions on the
Ceiling or the Wall where the unit is to
be installed.
• Make 4 holes in the Ceiling or the Wall
and install 4 anchor bolts.
• Mount the two installation angles to the
4 anchor bolts with 4 nuts and 4
washers and cut the extra length of the
bolt after the nut. Make sure that the two
angles are correctly leveled.
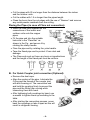
• Drill a hole in the wall for the refrigerant
pipes, the drainpipe and the electrical
cables. The hole should have a slight
inclination to the outdoor unit.
• Let the hole be 70 - 80mm dia. with its
center at the intersection of the arrows
marked on the sides of the installation
angles.
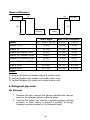
• If the wall is hollow, you must use a PVC sleeve to support the hole to
prevent dangers caused by mice biting the connecting cables. Drill the
hole as mentioned. Insert the sleeve through the wall. Fix the bushing of
the sleeve. Extend the sleeve length by 10-15mm outside the wall.
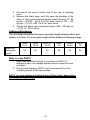
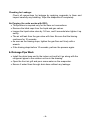
• Put the indoor unit over the two installation angles by engaging the
hanging bolts at the sides of the unit into their places in the installation
angles.
• Check that the two bolts are securely seated in their positions by trying to
move the unit.
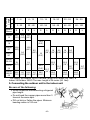
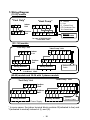
• There is 4 holes at the back of the unit covered with black grooved
gaskets. The grooves are made for any extra length of the nut and the
anchor bolt in the ceiling mounting position.
• Check that the unit is completely horizontal (in ceiling installation) or
completely vertical (in wall installation) using a level indicator.
• Remove the air filters and disconnect the screws at the top of the grilles.
• According to the installation position, open the piping hole at the bottom
or at the side of the indoor unit to get the piping. The drain hose and the
electric cables their suitable places at the indoor unit.
-2-