1
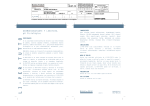
PI3101-EVAL1 Cool-PowerTM Series PI3101-EVAL1 High Density DC-DC Converter Evaluation Board User Guide Contents Cool-PowerTM Series Introduction-----------------------------------------Page 1 PI3101 Product Description--------------------Page 2 Evaluation Board I/O Description------------Page 3 Evaluation Board Schematic Diagram------Page 4 Evaluation Board Bill Of Materials ----------Page 5 Initial Test Set-up----------------------------------Page 6 Testing Procedure --------------------------------Page 7 Typical Performance Characteristics-------Page 9 Thermal Considerations------------------------Page 10 PCB Artwork ---------------------------------------Page 11 Evaluation Board Mechanical Drawing----Page 12 Figure 1 PI3101-EVAL1 Evaluation Board featuring the PI3101 Isolated 48V-3.3V 60W High Density DC-DC Converter Warranty---------------------------------------------Page 13 The PI3101-EVAL1 Evaluation Board is intended to acquaint the user with the benefits and features of the Cool-PowerTM Series of advanced, very high density DC-DC power converters. It is not designed or intended to be used in end product applications. Please read this document prior to the connection of test equipment and refer to the product datasheet for device specifications, descriptions and characteristics. Remember to follow good lab safety practices and use safety glasses at all times. PI3101-00-HVIZ 36V-75V In , 3.3V Out , 18A Introduction The PI3101-EVAL1 evaluation board allows the user to test the basic operating principles of the PI3101 very high density DC-DC power converter and experience the performance and value of this Picor Corporation • picorpower.com solution compared to alternate conventional solutions. Each evaluation board is populated with the components that could be used in a final design. Additional component footprints are made available to allow the user to test different design PI3101-EVAL1 Rev 1.0, Apr 15th, 2010 Page 1 of 13 configurations that may be required to meet their end needs. The PI3101 EVAL1 is configured to support one single input (36V-75V) and one single output (3.3V@18A). Each board offers pin strap options for trimming the output voltage up and down, turning the converter on and off and adding EMI system “Y” capacitors. Additional parts are included to compensate for line impedance associated with long leads from the bench power supply to the converter. Kelvin type test points are included to allow for easy and convenient connections of testing instruments for evaluation of efficiency, line/load regulation and transient response. A low impedance oscilloscope connection using a Johnson jack is included for ripple measurement and evaluation of the output voltage during transient events. Each demo board is equipped with a heatsink to allow high power operation with a small amount of air flow and to allow operation of the board over various temperature extremes. Cool-PowerTM PI3101 Product Description The Cool-PowerTM PI3101 is a very high density isolated DC-DC converter implementing a high efficiency soft-switching power architecture. The PI3101 operates over a wide range input of 36V to 75Vdc, delivering 60W output power (3.3Vout @ 18A), yielding an unprecedented power density of 400W/in3. The PI3101 is available in a space saving surface mountable 0.87” x 0.65” x 0.265” Power – System –in – a – Package (PSiP), achieving ~50% space reduction versus alternative solutions. The switching frequency of 900kHz allows for small input and output filter components which further reduces the total size and cost of the overall system solution. The output voltage is sensed and fed back to the internal controller using a proprietary isolated magnetic feedback scheme which allows for high bandwidth and good common mode noise immunity. The PI3101 requires no external feedback compensation and offers a total solution with a minimum number of external components. A rich feature set is offered, including +/- 10% output voltage trim capability, remote enable, over-voltage protection, adjustable soft-start, dual over-current protection with auto-restart to protect against both short circuit and overload and over and under input voltage lockout. A unique temperature monitor and protection circuit is included that provides an analog voltage proportional to the internal die temperature, as well as over temperature shutdown, restart and over temperature fault alarm signal. Picor Corporation • picorpower.com PI3101-EVAL1 Rev 1.0, Apr 15th, 2010 Page 2 of 13 Evaluation Board Terminals Description And Pin Strap Options Pin Name Type Description IN+ Input/Lug Primary side positive input voltage terminal. IN- Input/Lug Primary side negative input voltage terminal. OUT+ Output/Lug Isolated secondary DC output voltage positive terminal. OUT- Output/Lug Isolated secondary DC output voltage negative terminal. TM Test/Pin Temperature measurement output pin with respect to SGND. 3V=300°K 10mV/°K SGND Test/Pin Signal ground, primary side referenced. TRIM/SS Test/Pin Monitor pin for the soft start voltage and trim voltage reference with respect to SGND. ENABLE Test/Pin Allows for monitoring of the ENABLE signal with respect to SGND. INN Test/Pin Kelvin sense connection for input supply (-) and input voltage measurement test point. INP Test/Pin Kelvin sense connection for input supply (+) and input voltage measurement test point. YN Output/Pad Optional test pad for connection of optional “YN” capacitor to external system ground. YP Output/Pad Optional test pad for connection of optional “YP” capacitor to external system ground. OUTP Test/Pin Kelvin sense connection for output voltage (+) and output voltage measurement test point. OUTN Test/Pin Kelvin sense connection for output voltage (-) and output voltage measurement test point. OUT Test/PIn PCB test jack for low noise measurement of the output voltage. Table 1 PI3101-EVAL1 Input-Output Pin Description Name ENABLE TRIM_UP TRIM_DN OPT1 OPT2 Description If strap is installed, unit is turned off. If strap is removed, unit will be enabled. If strap is installed, PI3101 trims output voltage up 10% If strap is installed, PI3101 trims output voltage down 10% Allows optional connection of heat sink assembly to secondary return (-IN) Allows optional connection of heat sink assembly to secondary return (-OUT) Table 2 PI3101-EVAL1 Evaluation Board Pin Strap Description Figure 2 PI3101-EVAL1 Evaluation Board Length 3.10 inches X Width 3.10 inches Name IN+ INOUT+ OUTTRIM_DN OPT1 OPT2 OUT INP INN ENABLE TRIM/SS SGND TM OUTP OUTN Max Voltage 100V 100V 10V 10V 10V 10V 10V 10V 10V 10V 10V 10V 10V 10V 10V 10V Max Current 20A 20A 50A 50A 100mA 100mA 100mA 100mA 100mA 100mA 100mA 100mA 100mA 100mA 100mA 100mA Table 3 PI3101-EVAL1 Evaluation Board Maximum I/O Ratings Picor Corporation • picorpower.com PI3101-EVAL1 Rev 1.0, Apr 15th, 2010 Page 3 of 13 Figure 3 PI3101-EVAL1 Schematic Diagram IN- IN+ F1 1uF 100V C20 3A 125V C21 1uF 100V 470n L1 1uF C1 1uF C2 1uF C3 1uF C4 47uF C5 TRIM_UP TRIM_DN VINN VINP R1 301k R3 90.9k C6 ENABLE 390pF TRIM/SS ENA DNP C7 SGND 100 R4 PC SC 100k R2 SG INP INN TM TM OPT1 6 5 4 3 2 1 PI3101-EVAL1 HS 4700pF CY3 -IN ENABLE TRIM/SS TM SGND +IN 4700pF CY1 YP YN YN PI3101 YP HS Picor Corporation • picorpower.com Rev 1.0, Apr 15th, 2010 Page 4 of 13 4700pF CY4 -OUT +OUT 4700pF CY2 7 8 C8 OPT2 10uF C9 10uF OUTN OUTP C10 10uF C11 10uF 10uF C12 C13 10uF C14 10uF 10uF C15 10uF C16 10uF C17 C18 10uF 10uF C19 Scope OUT OUT- OUT+ Item Qty Ref Des Part # Value U/M 1. 1 U1 PI3101-00-HVIZ NA EA 2. 12 10u F Murata X7R Ceramic Capacitor 6.3V or equiv. 3. 6 1u F Murata X7R Ceramic Capacitor 100V or equiv. 4. 4 4700p F Murata X7R Ceramic Capacitor 1kV or equiv.. 5. 1 L1 FP3-R47-R 470n H Coilcraft Inductor 6. 1 C6 08055C391KAT2A 390p F Kemet X7R Ceramic Capacitor 50V 0805 7. 1 C5 EEU-FC2A470 47u F Panasonic Electrolytic Capacitor 100V 8. 1 R1 MCR10EZPF9092 90.9k Ohm Rohm Resistor 0805 1% or equiv 9. 1 R3 MCR10EZPF3013 301k Ohm Rohm Resistor 0805 1% or equiv 10. 1 R2 MCR10EZPF1003 100k Ohm Rohm Resistor 0805 1% or equiv 11. 1 R4 MCR10EZPF1000 100 Ohm Rohm Resistor 0805 1% or equiv 12. F1 0154003DR 3 13. 1 8 14. 1 C8-C19 GRM21BR71A106KE5 C1-C4, GRM31CR72A105KE1 C20-C21 CY1-CY4 GRM31BR73A472K 5015KCT-ND 131503100 A Description Picor PI3101 High Density PSiP Littlefuse Fuseblock 3A SMT Digi-Key SMT PC Test Point Tektronix Test Jack Assembly Table 4 PI3101-EVAL1 Evaluation Board Bill Of Materials (as installed) Picor Corporation • picorpower.com PI3101-EVAL1 Rev 1.0, Apr 15th, 2010 Page 5 of 13 Figure 4 Initial PI3101-EVAL1 Test Setup Picor Corporation • picorpower.com PI3101-EVAL1 Rev 1.0, Apr 15th, 2010 Page 6 of 13 Initial Test Setup Continued Recommended Test Equipment Qty. (1) Isolated DC Power Supply 0-100V DC 3A Minimum With Current Limit Capability Qty (2) Digital Multimeters 0-10A Qty (1) Digital Storage Oscilloscope DC-20Mhz BW Qty (1) Isolated Differential Amplifier Qty (1) DC Current Probe 20Mhz BW Qty (1) DC Electronic Load 30A Minimum Qty (1) Small bench fan capable of 200LFM minimum Input/Output cables appropriately sized PI3101 Product Datasheet Safety glasses Procedure 1. Connect Test Equipment 1.1. Connect the input DC power supply to the target board as shown in Figure 4 above. The negative terminal should be wired to – IN and the positive terminal should connect to the positive terminal of the DMM wired as a DC Ammeter. Be sure that the proper sized wires are used to allow minimum voltage drop for a maximum input current of 3A. Use ring lugs mated to the included fasteners on the evaluation board. If your input power supply has remote sense capability, it can be wired to the INN and INP test points if desired. This is a convenient way to regulate the input to the PI3101 during testing. 1.2. Connect the positive terminal of the DMM to the +IN lug on the evaluation board. 1.3. Connect the primary side DMM (for measuring the input voltage) to INN and INP respectively. 1.4. Connect the oscilloscope as shown in Figure 4 if you are planning to measure both primary and secondary signals at the same time. If you do not have an isolated Picor Corporation • picorpower.com differential amplifier, it is important to note that simultaneous measurement of both primary and secondary referenced signals using an oscilloscope with a grounded chassis is not recommended, as it will short circuit the primary to secondary isolation barrier. Floating the oscilloscope is also not recommended due to the large capacitance introduced by this long standing practice. The best practice is to use an isolated differential amplifier or use an oscilloscope with isolated channels. That is, the input returns are isolated from each other and earth ground. 1.5. Connect the output DC DMM to the test points OUTN and OUTP. These test points are done in a Kelvin type manner so that they have no high current flowing in them. 1.6. Connect the DC Load to the output lugs OUT+ and OUT-. It is critical for this connection to be low inductance. The PI3101 is capable of providing in excess of 20A DC. Such a load current requires a low inductance connection, especially if transient testing is to be performed. The distance between the load and the power supply can accumulate significant inductance even with copper foil leads. The best connection would be to bolt the evaluation board lugs to the load lugs directly. In many cases, this is not practical so some trade offs may be required. It may be necessary in some cases to use one load for DC steady state measurements and an external fast transient test circuit which can be soldered very close to the converter for transient testing. 2. Default Pin Strap Configuration 2.1. Ensure the pin straps are in the following default locations before proceeding: 2.1.1. ENABLE = Not Used (enabled) 2.1.2. TRIM_UP = Not Used 2.1.3. TRIM_DN = Not Used 2.1.4. OPT1 = Not Used 2.1.5. OPT2 = Not Used 3. Power Up Testing 3.1. After putting on your safety glasses, set the input supply PS1 to 0V and turn on the line power. Configure the current limit of the input supply to about 3A DC. This should give a good measure of soft start for the source and limit the inrush current in any input capacitors. The evaluation board has no inrush limiting and the installed fuse is for steady state operation. PI3101-EVAL1 Rev 1.0, Apr 15th, 2010 Page 7 of 13 3.2. Set the DMM’s for measuring the appropriate values. The Ammeter should be set for 3A at high range and the input voltage DMM should be set to measure as high as 80V DC. The output voltage DMM should be set to 4V scale maximum. 3.3. Configure the oscilloscope to measure the appropriate values. If measuring output voltage with the oscilloscope, set to DC and limit the bandwidth to 20MHz. Add an offset of 3.3V and use a 50mV/div scale. This way ripple and noise can be measured along with the DC value. An alternative would be to use AC coupling for ripple measurements and DC coupling for DC values. If using the differential probe, refer to its user manual for the scaling factors as these can vary depending on the model used. 3.4. Set the DC load to the desired value between 0-18A. Turn on the bench fan and orient it so that some small air flow occurs over the top of the PI3101 assembly. 3.5. At this point, all configuration straps should be at the default values, the input supply should be on and set to zero, the load is on and set to the desired load current and all measurement equipment is properly adjusted. 3.6. Set the oscilloscope to trigger on the output voltage, rising edge with the time base set to 100us. Use a trigger level of 1V or so. Set the sweep type for single shot mode. 3.7. Increase the input voltage until the voltage reads 36V DC. Observe the turn on characteristics similar to that shown in Figure 5. 3.8. Increase the input supply to 48V. Move the positive differential probe to the test point ENABLE and the negative differential probe to SGND. Trigger the scope on the falling edge of ENABLE. Add the ENABLE strap while the unit is running. This should result in turn off of the converter and produce a waveform like that shown in Figure 6. Remove the enable strap and allow the converter to turn back on. Set the load to 18A and configure the oscilloscope for measurement of 50mV/div with a time base set to 1us. Set the trigger value on a positive slope with a value of about 15mV. Make sure that the bandwidth is set to 20MHz. The resulting ripple waveform should look something like that shown in Figure 5. 4. Trimming Picor Corporation • picorpower.com 4.1. Set the input supply to zero. Add the strap to the TRIM_UP pin strap. Power on the input supply and increase the input voltage to 48V. Observe that the output voltage is now 10% greater than 3.3V @ 3.63V (+/1.5%). 4.2. Power down the input supply and remove the TRIM_UP strap and add the TRIM_DN strap. 4.3. Power up the input supply and observe that the output voltage has now trimmed down 10% (+/-1.5%) to 2.97V. 4.4. Power down the input supply and set all configuration straps back to the default position. 5. Dynamic Turn On/Off 5.1. For those with an isolated oscilloscope arrangement, set the scope to trigger on the output voltage with a rising edge with a trigger level at 1.2V. Set the time base to 40ms /div and align the record position to record pre-trigger information. 5.2. Turn the output enable switch off on the input supply. Set the output voltage to 36V and then turn on the enable switch. The input voltage should rise at some controlled rate determined by the current limit setting and the inrush current. The scope should capture the turn on waveform like that shown in Figure 8. 5.3. Change the trigger slope on the oscilloscope from rising to falling. Set the input voltage to 48V the turn off the enable switch on the input supply. Observe the waveform shown in Figure 9. 5.4. Repeat steps 5.1 to 5.3 at different line and load combinations. 6. Dynamic Load Step 6.1. Set the dynamic load to step from 25% load to 50% load with a 0.1A/us slew rate. This slew rate is achievable with most dynamic loads and moderate impedance connections. 6.2. Use the current analog output signal from the load or a current probe to measure the output load current step. This signal will be used as a trigger for the oscilloscope. 6.3. Turn on the enable switch and record the transient response of the PI3101. It should like the the plot in Figure 10. 6.4. Change the trigger slope on the oscilloscope and repeat the test to capture the 50%-25% step results. The plot should look like that shown in Figure 11. PI3101-EVAL1 Rev 1.0, Apr 15th, 2010 Page 8 of 13 Typical Performance Characteristics Figure 8 Turn On Time Vin=36V (Ch2 = Vin 50V/div Ch4 = Vout 1V/div) Figure 5 Start Up 36V (Ch4 = Vout 1V/div Ch2 = Vin 50V/div) Figure 6 Turn Off W/ Enable Strap (Ch2 = ENABLE 5V/div Ch4 = Vout 1V/div) Figure 7 Output Ripple @ 18A Load (Ch4=50mv/div) Picor Corporation • picorpower.com Figure 9 Turn Off Delay 48V (Ch2 = Vin 50V/div Ch4 = Vout 1V/div) Figure 10 Transient Response 25%-50% 0.1A/us (Ch2 = Iout 5A/div Ch4 = Vout 100mV/div AC) PI3101-EVAL1 Rev 1.0, Apr 15th, 2010 Page 9 of 13 Figure 11 Transient Response 50%-25% 0.1A/us (Ch2 = Iout 5A/div Ch4 = Vout 100mV/div AC) Thermal Considerations The PI3101-EVAL1 is supplied with optional heatsinks. At present, Picor offers four different heatsink options to accommodate the customers space and cooling needs. Heatsinks are available in two sizes, one with 6.3mm fins and the other with 11mm fins. Each of those heatsinks can be ordered with a specific air flow direction in mind, both cross flow and longitudinal are supported. In order to guide the user during technical evaluations of our products, here are some general guidelines for output power versus the amount of flow required for various ambient temperatures. Figure 13 Maximum Output Power 6.3mm Heat Sink Vs Ambient Temperature Vs Flow Rate Figure 14 Maximum Output Power 11mm Heat Sink Vs Ambient Temperature Vs Flow Rate Figure 12 Maximum Output Power Without Heat Sink Vs Ambient Temperature Vs Flow Rate Picor Corporation • picorpower.com PI3101-EVAL1 Rev 1.0, Apr 15th, 2010 Page 10 of 13 PCB Artwork Plots Figure 15 Top Layer Artwork 3 Oz Copper Figure 17 Midlayer 2 Artwork 2 Oz. Copper Figure 16 Midlayer 1 Artwork 2 Oz Copper Figure 18 Midlayer 3 Artwork 2 Oz. Copper Picor Corporation • picorpower.com PI3101-EVAL1 Rev 1.0, Apr 15th, 2010 Page 11 of 13 PCB Artwork Plots (continued) Figure 19 Midlayer 3 Artwork 2 Oz. Copper Figure 21 Mechanical Drawing Figure 20 Bottom Layer Artwork 3 Oz. Copper Picor Corporation • picorpower.com PI3101-EVAL1 Rev 1.0, Apr 15th, 2010 Page 12 of 13 Warranty Vicor products are guaranteed for two years from date of shipment against defects in material or workmanship when in normal use and service. This warranty does not extend to products subjected to misuse, accident, or improper application or maintenance. Vicor shall not be liable for collateral or consequential damage. This warranty is extended to the original purchaser only. EXCEPT FOR THE FOREGOING EXPRESS WARRANTY, VICOR MAKES NO WARRANTY, EXPRESS OR LIMITED, INCLUDING, BUT NOT LIMITED TO, THE WARRANTY OF MERCHANTABILITY OR FITNESS FOR A PARTICULAR PURPOSE. Vicor will repair or replace defective products in accordance with its own best judgment. For service under this warranty, the buyer must contact Vicor to obtain a Return Material Authorization (RMA) number and shipping instructions. Products returned without prior authorization will be returned to the buyer. The buyer will pay all charges incurred in returning the product to the factory. Vicor will pay all reshipment charges if the product was defective within the terms of this warranty. Information published by Vicor has been carefully checked and is believed to be accurate; however, no responsibility is assumed for inaccuracies. Vicor reserves the right to make changes to any products without further notice to improve reliability, function, or design. Vicor does not assume any liability arising out of the application or use of any product or circuit; neither does it convey any license under its patent rights nor the rights of others. Vicor general policy does not recommend the use of its components in life support applications wherein a failure or malfunction may directly threaten life or injury. Per Vicor Terms and Conditions of Sale, the user of Vicor components in life support applications assumes all risks of such use and indemnifies Vicor against all damages. Vicor’s comprehensive line of power solutions includes high density AC-DC and DC-DC modules and accessory components, fully configurable AC-DC and DC-DC power supplies, and complete custom power systems. Information furnished by Vicor is believed to be accurate and reliable. However, no responsibility is assumed by Vicor for its use. Vicor components are not designed to be used in applications, such as life support systems, wherein a failure or malfunction could result in injury or death. All sales are subject to Vicor’s Terms and Conditions of Sale, which are available upon request. Specifications are subject to change without notice. Vicor Corporation 25 Frontage Road Andover, MA 01810 USA Picor Corporation 51 Industrial Drive North Smithfield, RI 02896 USA Customer Service: [email protected] Technical Support: [email protected] Tel: 800-735-6200 Fax: 978-475-6715 Picor Corporation • picorpower.com PI3101-EVAL1 Rev 1.0, Apr 15th, 2010 Page 13 of 13