1
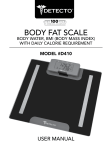
DIGITAL
GLASS SCALE
MODEL #D401
USER MANUAL
Table of Contents
INTRODUCTION .................................................................................................................3
NOTES ON SAFETY ............................................................................................................3
PRECAUTION NOTICE .......................................................................................................4
PRODUCT DESCRIPTION ...................................................................................................4
.
FRONT VIEW .........................................................................................................4
.
LCD DISPLAY .........................................................................................................5
FEATURES & KEY ASSIGNMENTS..........................................................................5
.
ITEMS INCLUDED IN THE PACKAGE ...................................................................6
BACK VIEW ...........................................................................................................6
PREPARATION BEFORE USE .............................................................................................7
OPERATION ........................................................................................................................8
.
WEIGHING-MODE.................................................................................................8
.
MEMORY RECALL MODE .....................................................................................9
USER SETTING MODE.........................................................................................10
.
CLOCK MODE .....................................................................................................10
CLOCK EDIT MODE.............................................................................................11
UNIT CHANGE MODE .........................................................................................11
MESSAGE DISPLAY ..............................................................................................11
ADVISE FOR USE AND CARE ............................................................................................11
Congratulations! You have purchased a precision health monitoring
product that should provide you with years of accurate use. To assure
you obtain the best performance please read the following set-up and
use instructions carefully before using the scale.
INSTRUCTION MANUAL
Note: Read this Instruction Manual carefully and keep it handy for future reference
NOTES ON SAFETY
Please read this section carefully to familiarize yourself with features and operations
before using the unit.
• The warning signs and the sample icons shown here are listed in order for you to use
this product safely and correctly as well as to prevent product damage, risk and injury
to you and others.
• The icons and meanings are as follows:
PRECAUTION NOTICE
Indicates the right conditions to use the
product and to prevent damage, risk
and injury.
IMPORTANT NOTICE TO USERS
Indicates important notices users should
read before using the product.
CARE AND MAINTENANCE
Indicates matters in which the possibility of
damage may happen as a result of incorrect
handling and improper maintenance.
3
PRECAUTION NOTICE
• T
his product is intended for adults and children (ages 10 to 85).
• M
ake sure use only the type of battery stated (see section “PREPARATION BEFORE USE”).
• Be
sure there is a clear line of sight between the Infrared Transmitter (on the Scale)
and the Infrared Receiver (on the Remote Display Unit).
PRODUCT DESCRIPTION
FRONT VIEW
Infrared Transmitter
SET
LCD Display
Infrared Receiver
3
1
2
9
1. Male Icon
2. Female Icon
3. Wieght indication
4. Daily Calorie
4
FEATURES
1.
2.
3.
4.
5.
6.
7.
8.
4 x 7-segment characters LCD display
Weight capacity: 182kg/400lb with 0.1kg/0.2lb graduation
Unit change between LB/KG/ST (EEPROM option: default LB).
4 user memories to store user records
User input includes Gender, Age, Height
Information output includes Weight, and Daily Calorie Consumption
Battery low detection function
Clock and Temperature (0C~50C)/(32F-122F) function
KEY ASSIGNMENTS
Unless otherwise specified, below are the functions of the keys.
[UP]
- to increment the numeric value
- to toggle the user selection
- to recall user memory
[DOWN] - to decrement the numeric value
- to toggle the user selection
- to recall user memory
[SET]
- to change the unit(LB/KG/ST)
- to go to User Setting Mode
ITEMS INCLUDED IN THE PACKAGE
Scale unit
1 pc remote display unit
1 pc wall mounting bracket
4 pcs plastic wall plugs
4 pcs M3x25 screws
BACK VIEW
Battery Compartment
(Scale Unit)
CR2032 Lithium Battery Compartment
(Remote
Display
Unit)
2 pcs AAA Alkaline Battery Compartment
5
PREPARATION BEFORE USE
1. Insert the Battery
Open the battery cover on the back of the scale unit.Insert 3 pieces AAA
alkaline batteries (not included).
Open the battery cover on the back of the wireless remote display
unit. Insert 2 pieces AAA alkaline batteries separately in two battery
compartment (not included). Remove the red strip from CR2032
lithiumbattery compartment in first use or insert the battery after
replacement.
Be sure that the polarity of the batteries is set
properly for proper function. If you do not intend to use this unit
fora prolonged period of time, it is advisable to remove the
batteries before storage.
Open the battery door Scale
3 pieces AAA
alkaline batteries
1.5V AAA
1.5V AAA
+
+
-
- 1.5V AAA +
-
+ 1.5V AAA
1. Replace batteries
in the scale unit,
when Lo is
displayed.
2. Replace batteries
in the remote
display unit, when
bAtt is displayed.
3. Do not remove the
CR2032 lithium
battery and 3 pcs
AAA batteries at
the same time,
otherwise clock
and memory
must be reset
again.
Direction of the
CR2032 battery
Direction of 4 pcs
AAA batteries
-
Open the battery door Remote
TIPS
IMPORTANT NOTICE TO USERS!
1. C hoose the location to mount the display on the wall. The location should be
free of temperature extremes and water. It should be where the display can
be easily viewed and operated. Keep away from direct sunlight and where the
operator easily reaches the display.
2. M ake sure the structure and mounting hardware is solid enough to support
the display. The mounting brackets should be securely fastened to the wall so
that it cannot loose from the mounting surface.
6
1. Fix the Wall Mounting Bracket
a. D
rill two holes on the wall with the distance in between two holes is 58mm (Fig.1) Make sure the height of the holes is between 140cm and 180cm from floor (Fig.2).
Hole on the wall
Wall plug
58mm
M3 x 25 screw
140-180cm
15-55cm
Wall bracket
b. Insert two plastic wall plugs into the holes until they are flush with the wall. Place the bracket against the wall and insert two M3x25 screws through the holes into the wall plug. Use screwdriver to tighten the screws (Fig.1).
c. Hang the remote display unit in the bracket on the wall.
3. Set the Right Position
Use the scale on a flat and hard floor surface. And make sure the scale in front of the remote
with the distance from 15cm to 55cm (Fig.2).
4. Start-up the Scale
Press lightly on the scale platform to start-up the scale, the display shows “0000” and will
cyclic show on screen. Then display returns to clock mode. The scale is ready for use.
OPERATION
1. Having inserted the battery in remote device, the remote state is still in clock mode. After insert
the battery for base scale, tap on the base scale, it asks the remote displays “oooo” and then
step off the scale, it ask the remote to display running “o” to indicate that it is measuring the zero
weight (Fig.2).
(Fig. 2: First auto zero)
7
2. If the base scale detects battery low, it will ask the remote to display “ Lo ” on LCD (Fig 3a).
If the battery low is in remote control itself, it will show “bAtt”(Fig 3b).
(Fig. 3a)
(Fig. 3b)
3. If the user steps onto the scale, the scale turns on and goes to Weighing Mode directly unless
it is the first time after the battery insertion or no valid zero weight is stored before. The scale
measures the zero weight and then sleep.
Weighing Mode
1. During the base scale is OFF, when the user step onto the base scale, it wakes up the remote
display to have animation as in Fig.4.
(Fig. 4: Weight trigger)
2. The base scale measures the weight. After a
stable weight is obtained, it asks the remote
to display the weight value (Fig.5).
(Fig. 5: Weight obtained and locked)
3. The scale starts measuring the zero weight if the user steps off the scale. Then, the scale turns off.
Memory Recall Mode
1. During the remote is in Clock mode, press [UP] or [DOWN] key to go into this
Memory Recall Mode, the user number will be flashed (Fig.6)
(Fig. 6:User select)
8
2. User press [UP] or [DOWN] to select the user memory and confirm the selection for idle
2 seconds operation. Then the user information will be shown (Fig.7)
(Fig. 7: User recall)
3. User steps on the base scale and trigger the weight such as 4.2.
4. After the weight is stable and locked, the base scale transmits the value to the remote, the
remote displays among the weight, and the calorie for 2 times with each reading shown for
about 3 seconds (Fig.8).
(Fig.8: weight
result display)
5. If the user steps off the scale, the scale starts measuring the zero weight and asks the remote to
display running zero animation. (Fig.9).
(Fig.9: auto zero)
6. If the zero weight is different with previous zero value, the base scale tells the remote to display
“Err0” (Fig 10) and then go back to the clock mode.
(Fig.10: auto zero)
9
7. If the user does not step off the scale, the scale will go back to clock mode automatically.
User Setting Mode
1. During the remote is in Memory Recall Mode, press [UP]/[DOWN] keys to select user and press
[SET] key to go into this User Setting Mode in order to edit the user record.
2. User may set the height, age, and gender (Fig11.).
1. Having entered all items, the data is stored into the EEPROM.
Clock Mode
(Fig.11:User Setting)
1. The clock and the temperature will be displayed toggle every 5 seconds as Fig.12
(Fig.9: Clock and temperature
)
2. Press <CLOCK> to toggle the display of 12/24hour (optional)
or Fahrenheit/Celsius(Fig.13).12
hours and Fahrenheit are default setting
(Fig.13 12/24 with C/F toggle)
10
Clock Edit Mode
In the clock mode, press and hold <CLOCK> for 2 seconds to edit the clock, the hour will be
flashed, press <UP> and <DOWN> to increment or decrement the hour, press <SET> to confirm
hour setting and then minutes will be flashed, press <UP> and <DOWN> to increment or
decrement the minute, press <SET> to confirm whole clock setting and go back to the Clock mode.
Unit Change Mode
In the clock mode, press and hold <SET> for 2 second to edit the unit, press <UP> and <DOWN>
to toggle the unit between LB/KG/ST. (EERPOM setting for no-unit/ 2-units/ 3-units) Press <SET>
again to confirm this setting and go back to clock mode.
Message Display
1.
2.
3.
4.
5.
“----” represents the weight is negative.
“ Err0” represents that the zero weight is not accurate.
“ Err1” represents instable weight measured.
“ Err2” represents overloaded.
“ Err3” represents that measurement error.
Advice for use and care
1. The glass platform will be slippery when it is wet. Keep dry.
2. Keep standing still during the course of weighing.
3. Treat the scale with care as it is a precise instrument.
4. C
lean the scale with a damp cloth and avoid water getting inside the scale. DO NOT use
chemical/abrasive cleaning agents.
5. Keep the scale in cool place with dry air.
6. If scale fails to turn on, check whether battery is installed properly, or battery power is low.
Insert or replace new battery. Do not mix old and new batteries or different types of batteries
(alkaline, carbon zinc, rechargeable).
7. If there is error on display or the scale will not turn off for a long period of time, please take out
the battery for about 3 seconds, then install it again to correct error. If you cannot resolve the
problem, please contact Detecto Customer Service for consultation.
8. Do not use for commercial purposes.
11
LIMITED LIFETIME WARRANTY
Your DETECTO product is warranted to the original consumer only, for the lifetime of the product,
to be free from defects in materials and workmanship under normal use. This product is designed for
personal use only. DETECTO, a division of Lava Lite LLC reserves the right to nullify the Warranty
Agreement should the product be used in a commercial environment. This warranty is void if the
product has been tampered with, misused, abused or modified. Our obligation under this Warranty
is limited solely to the charge of repairing the product, including the cost of parts, or, at our option,
replacing the product with an equivalent model. There are no express or implied warranties except
as listed above. DETECTO, A DIVISION OF LAVA LITE LLC IS NOT LIABLE FOR INCIDENTAL
OR CONSEQUENTIAL DAMAGES FOR FAILURE OR MALFUNCTION OF THE PRODUCT AND ANY
RECOVERY MAY NOT BE GREATER THAN THE PURCHASE PRICE PAID FOR THIS PRODUCT.
EXCEPT TO THE EXTENT PROHIBITED BY APPLICABLE LAW, ANY IMPLIED WARRANTY OF
MERCHANTABILITY OR FITNESS FOR A PARTICULAR PURPOSE ON THIS PRODUCT IS LIMITED
TO A PERIOD OF ONE (1) YEAR FROM THE PURCHASE DATE. Some states do not allow limitations
on how long an implied warranty lasts, or the exclusion or limitation of incidental or consequential
damages, so the above limitations may not apply to you. This Warranty gives you specific legal rights
and you may have other rights which vary from state to state.
To obtain warranty service, you must return the product freight pre-paid, in either its original packaging
or packaging affording an equal degree of protection, to DETECTO, a division of Lava Lite LLC at
1200 Thorndale Avenue, Elk Grove Village, IL 60007.
For additional information regarding this
product or its warranty, please contact us:
Distributed by
Detecto
A Division of Lava Lite LLC
1200 Thorndale Avenue
Elk Grove Village, IL 60007
1-800-336-5282
email: [email protected]
© 2013, DETECTO is a registered trademark of DETECTO Ltd. in the U.S.A and other