1
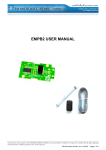
EMUFDD 4.0 – USER MANUAL
Section 1. Hardware Installation:
EMUFDD installation works like any other real floppy drive installation:
• 1.1) connect the power supply
=
+12V power supply (not connected)
Optional
=
two GND lines (joined, connect one or both)
Required
=
+5V power supply
Required
• 1.2) connect the 34pin flat cable
=
pin-1 mark (flat cable / connector)
[!!]
Be sure to match the connector pin-1 mark with the flat cable pin–1 mark
[!!]
Sometimes flat cables are inverted! Please check wether the cable is
coloured/marked at pin-1 (standard) or pin-34 (inverted)
No system driver or additional software needs to be installed on the host system.
MILO S.N.C.
SW & HW per Automazione - Industrial Automation SW & HW
Via Ruggiero Grieco 1/C, 41011 Campogalliano (MO), Italy
Codice Fiscale / Fiscal Code: 03373570369 - P.IVA / VAT: 03373570369
Tel. 059/528512 - Fax. 059/520131 - Email: [email protected] - Web: www.milosrl.it
EMUFDD 4.0 – USER MANUAL - LAST REVISION DEC. 2011
1
Section 2. On-Line Mode / Floppy Disk Emulation:
EMUFDD is equipped with 1.5MB of internal FRAM non-volatile memory:
• no need to keep the USB key plugged in;
• top-quality data storage and memory reliability (1014 read/write cycles)
More than 50 years of non-stop read/write emulation at full speed (1.4MB – HD).
At power-on EMUFDD immediately (less than 500ms) begins its emulation cycle:
• the emulation engine waits for reading or writing requests from the host system,
and any read/write floppy disk access will turn the ACT_LED on;
•
the display continuously shows the On-Line sequence: [– ] / [ –] / [NN], where
NN is the current floppy disk number, (from 00 to 99).
Snapshot of a display On-Line sequence (NN = 01).
EMUFDD 4.0 – USER MANUAL - LAST REVISION DEC. 2011
2
Section 3. Off-Line Mode / Loading from USB into EMUFDD's Memory:
Data can be loaded into EMUFDD's memory from any USB1 / USB2 key, using:
•
•
full Subdirectory-to-DOS-FAT12 translation;
standard ISO floppy images files.
X:\emufddNN.dir\*
X:\emufddNN.img
If both subdirectory NN and image NN exist, image NN will be loaded.
Subdirectory-to-DOS-FAT12 translation:
USB key
X:\emufddNN.dir\dir1\file1.ext
X:\emufddNN.dir\dir2\file2.ext
X:\emufddNN.dir\file3.ext
X:\emufddNN.dir\file4.ext
...
EMUFDD (floppy NN)
A:\dir1\file1.ext
A:\dir2\file2.ext
A:\file3.ext
A:\file4.ext
...
• translation is available only for 720KB, 1.2MB and 1.44MB floppy disks;
• translation is available only for loading;
• filenames will be truncated to 8+3 short form (Longname.ext → longna~1.ext);
• please ask for the translation feature to be enabled at purchasing time.
Standard ISO floppy image file:
USB key
X:\emufddNN.img
EMUFDD (floppy NN)
floppy: track0/side0/sector1
floppy: track0/side0/sector2
...
floppy: track79/side1/sector18
Floppy image files:
• are available for both loading and saving;
• are a low-level snapshot of the floppy disk surface;
• allow emulation of any floppy disk (system, bootable, custom, …);
• can be directly mounted as virtual floppy drives by free software VFD.
EMUFDD 4.0 – USER MANUAL - LAST REVISION DEC. 2011
3
Step-by-step loading:
• 3.1) plug the USB key in and go Off-Line: press SAVE or LOAD;
•
3.2) OFF-LINE_LED turns on and the display shows [CH] while checking the
USB key for floppy image files (and subdirectories, if translation is on).
Should no USB device be plugged in, the displays shows [nd] and
EMUFDD switches automatically back to On-Line mode;
•
3.3) the display shows the current floppy number. Select the floppy to be loaded
changing the current number (short DOWN/UP pressure = –1/+1, long
DOWN/UP pressure = fast rewind/forward). Missing floppies are shown as
[NN], existing floppies are shown as [N.N.].
Only existing floppies can be loaded, pressing LOAD;
•
3.4) the display, while loading, shows [LO] and LOAD_LED / ACT_LED turn
on, until loading end. Any loading error immediately stops loading and
display shows [Er]. Successful loading ends with display showing again
current floppy number and LOAD_LED / ACT_LED turned off;
[!!]
Plugging the USB key off while loading will not damage the USB key but will
force EMUFDD to reset with an incomplete/inconsistent internal memory.
• 3.5) being no button pressed, after 5 seconds, EMUFDD automatically switches
back to On-Line mode. Feel free to plug the USB key safely off.
[!!]
Loading completely/partially overwrites EMUFDD's internal memory. Previous
current floppy data, if not saved before loading, can't be recovered.
EMUFDD 4.0 – USER MANUAL - LAST REVISION DEC. 2011
4
Section 4. Off-Line Mode / Saving from EMUFDD's Memory into USB:
Data can be saved from EMUFDD's memory into any USB1 / USB2 key, using:
•
standard ISO floppy images files.
X:\emufddNN.img
Step-by-step saving:
• 4.1) plug the USB key in and go Off-Line: same as (3.1 & 3.2);
4.2) the display shows the current floppy number. Select the floppy to be saved
changing the current number (short DOWN/UP pressure = –1/+1, long
DOWN/UP pressure = fast rewind/forward). Missing floppies are shown as
[NN], existing floppyies are shown as [N.N.].
Both missing and existing floppies can be saved, pressing SAVE (missing ones
are created, existing ones are overwritten);
•
•
4.3) the display, while saving, shows [SA] and SAVE_LED / ACT_LED turn
on, until saving end. Any saving error immediately stops saving and display
shows [Er]. Successful saving ends with display showing again current
floppy number and SAVE_LED / ACT_LED turned off;
[!!]
Plugging the USB key off while saving will damage the USB key and force
EMUFDD to reset, but will not affect internal memory.
• 4.4) being no button pressed, after 5 seconds, EMUFDD automatically switches
back to On-Line mode. Feel free to plug the USB key safely off.
Load + Save can be used to create, without using a PC, multiple copies of an existing
floppy on the USB key. For example: load NN and save it as NN+1, NN+2, NN+3, ...
EMUFDD 4.0 – USER MANUAL - LAST REVISION DEC. 2011
5
Section 5. Off-Line Mode / Formatting EMUFDD's Memory and USB:
Formatting:
• is available only for 720KB, 1.2MB and 1.44MB floppy disks;
• creates an empty FAT12 floppy into internal memory and USB (current floppy).
• 5.1) plug the USB key in and go Off-Line: same as (4.1);
• 5.2) select the floppy to be formatted and press SAVE+LOAD: similar to (4.2);
•
5.3) the display, while formatting, shows [FO] and SAVE_LED / LOAD_LED /
ACT_LED turn on, until formatting end. Any formatting error immediately
stops formatting and display shows [Er]. Successful formatting ends with
display showing again current floppy number and SAVE_LED /
LOAD_LED / ACT_LED turned off;
[!!]
Plugging the USB key off while formatting will damage the USB key and force
EMUFDD to reset, but will not affect internal memory.
• 5.4) being no button pressed, after 5 seconds, EMUFDD automatically switches
back to On-Line mode. Feel free to plug the USB key safely off.
EMUFDD 4.0 – USER MANUAL - LAST REVISION DEC. 2011
6
Section 6. EMUFDD Configuration:
EMUFDD configuration is plug'n'play and absolutely jumper-free:
• 6.1) Load a valid “emufdd4.cfg” file into a USB key;
Configuration files for any machinery/floppy drive/floppy disk will be provided for free,
only after purchasing, writing to the customer support (Eng. Cosimo Oliboni, 7/7 direct
line with the designer of EMUFDD) at [email protected]
•
6.2) plug the USB key in and go Off-Line: same as (4.1);
• 6.3) wait until auto-reset (all leds blink very fast);
•
6.4) load a valid floppy into memory (Section 3) or, if format is supported
(720KB, 1.2MB and 1.44MB floppy disks), format EMUFDD's memory
(Section 5).
EMUFDD 4.0 – USER MANUAL - LAST REVISION DEC. 2011
7
Appendix. EMUFDD4 Tech info:
Designer's EMUFDD tech homepage : http://embeddedsw.net
Manufacturer's EMUFDD homepage : http://milosrl.it
Floppy disk configurability: Encoding, Rotation speed and drive geometry.
Floppy drive configurability: FDC host interface.
EMUFDD 4.0 – USER MANUAL - LAST REVISION DEC. 2011
8