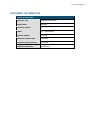
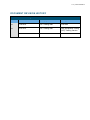
1
v 1.0 - posted 07/05/2014 CASELO AD USER MANUAL Prepared By: CSC 7701 College Blvd Overland Park, KS 66210 Prepared For: Crossroads Staff Submitted To: Crossroads Staff v 1.0 - posted 07/05/2014 THIS PAGE INTENTIONALLY LEFT BLANK v 1.0 - posted 07/05/2014 DOCUMENT INFORMATION Document Information Document Title Caseload User Manual Project Name Caseload Document Version 2.0 Author CSC Training Staff Contract Number 02476-09 Document Creation Date 01/20/2012 Document Current Version 02/23/2013 Purpose of Document User Manual v 1.0 - posted 07/05/2014 DOCUMENT REVISION HISTORY Document Revision History Version Date Author(s) Description 1.0 01/20/2012 CSC Training Staff First Draft 2.0 02/23/2013 CSC Training Staff User Acceptance Testing (UAT) Training Version v 1.0 - posted 07/05/2014 TABLE OF CONTENTS 1- OVERVIEW ................................................................................................................. 1-1 2- ALLOCATE CASELOAD ............................................................................................ 2-1 Assign State Caseload .............................................................................................. 2-1 Task A. Assigning State Caseload ............................................................................................. 2-2 Task B. Updating State Caseload............................................................................................... 2-5 Assign Clinic Caseload ............................................................................................. 2-7 Task A. Calculating Clinic Caseload Using a Calculation Method ............................................. 2-8 Task B. Allocating Caseload to Clinics ..................................................................................... 2-13 Assign Agency Caseload ........................................................................................ 2-14 Task A. Calculating Agency Caseload Using a Calculation Method ........................................ 2-15 Task B. Allocate Caseload to Agencies .................................................................................... 2-18 Task C. Allocating Clinic Caseload (Based on Agency Assignment) ....................................... 2-20 Task D. Reallocating Agency Caseload ................................................................................... 2-23 Manage Over or Under-Achieving Agencies.......................................................... 2-26 Task A. Managing Over or Under-Achieving Agencies ............................................................ 2-27 3- ALLOCATE CASELOAD AND NSA FUNDING .......................................................... 3-1 Allocate Caseload and NSA Funding ....................................................................... 3-1 Task A. Allocating Caseload and NSA Funding ......................................................................... 3-2 4- MONITORING CASELOAD ........................................................................................ 4-1 Monitor Caseload ...................................................................................................... 4-1 Task A. Selecting the Caseload Monitoring Parameters ............................................................ 4-2 Task B. Reviewing Caseload Statistics ...................................................................................... 4-4 Task C. Reviewing Participation by Category ............................................................................ 4-6 Task D. Reviewing Caseload Monitoring Chart .......................................................................... 4-7 5- MANAGE ELIGIBILITY DATA .................................................................................... 5-1 Manage Eligibility Data .............................................................................................. 5-1 Task A. Search for Existing Eligibility Data Sets ........................................................................ 5-2 Task B. View, Edit, or Delete Existing Eligibility Data................................................................. 5-3 Task C. Upload Existing Eligibility Data ...................................................................................... 5-6 Task D. Add Eligibility Data Manually ......................................................................................... 5-8 Task E. Compare Eligibility Data .............................................................................................. 5-11 6- WAIT LIST AND CASELOAD RESTRICTION LIST CRITERIA .................................. 6-1 Maintain Caseload Restriction Criteria .................................................................... 6-1 Task A. Creating a Caseload Restriction Definition.................................................................... 6-2 v 1.0 - posted 07/05/2014 Maintain Wait List Criteria ......................................................................................... 6-6 Task A. Configuring the Wait List Criteria Settings ..................................................................... 6-7 Task B. Creating the Wait List Definition .................................................................................... 6-9 v 1.0 - posted 07/05/2014 1- OVERVIEW This manual will aid WIC staff in learning about the function and use of the Caseload module of the Crossroads WIC System. The Caseload module is a comprehensive solution to help WIC staff manage a variety of tasks such as assigning state and agency/clinic caseloads, reallocating caseloads, managing over-under achieving agencies, and creating wait list and caseload restriction criteria. Major functions of this module include the following: Assigning Caseload – Used to assign caseload at the state-wide level or at the agency/clinic level. Updating Caseload – Used to update state-wide caseload based on changes in costs or funds of food. Reallocating Caseload – Used to reassign agency and clinic caseloads using state-defined formulas. Managing Over- or Under-Achieving Agencies – Used to recommend new caseloads based on Year-to-Date performance for an agency. Manage Eligibility Data - Used to manage potential eligibility data and compare to actual participation. Creating Wait List and/or Restriction Criteria – Used to manage the caseload when a WIC program has reached maximum caseload. Manual Content This manual includes the following sections: Table of Contents (TOC) – Lists each documented training scenario included in this manual. The TOC is organized to complement the delivery of instructor-led, classroom training. Similar scenarios are grouped together by major system functions. Use the TOC to look up training scenarios first by function and then by scenario title. Training Manual Overview – Outlines the content of this manual and explains how this manual can be used. It includes information about the general structure of this manual and tips to help you get the most out of it. Training Scenarios – Covers situations that one might encounter in a typical day. Each scenario walks you through an entire process. Scenarios connect the individual tasks necessary to complete a process. The scenarios were written and organized to facilitate an instructor-led training session, but the scenarios can be used as reference guides after your training is complete. Conventions and Features This manual follows certain conventions that make it easy for you to use the materials presented and includes the following features that help you identify similar information from one topic to another: Training scenarios are grouped together by major system functions, so that you can locate the desired scenario more easily. Each training scenario begins with an Overview section that includes an explanation of what is covered within the scenario, so you'll know from the start what you'll be learning. Training scenarios are documented using Tasks and Steps. A Task is a major activity in a larger process and indicates a substantial portion of the overall process whereas a Step is one of several user actions within a Task. v 1.0 - posted 07/05/2014 The manual provides Tasks and Steps for differing levels of detail. You can follow the list of Tasks (less detail) or you can go deeper and follow each Step of the process, click by click and action by action (more detail). Buttons you'll need to click and data you'll need to enter are accented in bold to help them stand out on the page, so that you can identify these items more easily. Pictures of application screens are included within each training scenario to help familiarize you with the screens. Data displayed in the pictures is intended for illustrative purposes only and does not represent live data. During classroom training, use the data supplied by the instructor. Outside of classroom training, enter the appropriate data as necessary to complete the task at hand. Callout boxes help you find specific types of information quickly. The callout boxes are displayed and defined below. Notes The notepad-and-pencil icon displays to the left of paragraphs that provide additional, and usually more detailed, information about the application. Sometimes the notes give you additional information about the screen you're working with, and sometimes the notes inform you where to find additional information elsewhere. Either way, it is well worth your time to watch for these helpful icons. Using This Manual This manual can be used as a training manual during instructor-led, classroom training or as a reference guide once training is concluded. Use the table of contents (TOC) to locate a training scenario. Once you've located a specific training scenario, review the Overview section (at a minimum) to find out important details surrounding the scenario such as the starting point, type of data needed, and a summary of the Task(s) to be completed in the overall process. You can follow the associated Steps for more detail as needed. State-Specific Functionalit y The Crossroads WIC System requires some initial setup before it can be used. Setup for the User Manual includes the following: Features – Certain features of the User Manual are set up using the System Administration module. These features must be set up before the system is used to ensure the system functions as expected. Please refer to the Manage System Settings section of the System Administration Module DFDD for additional information about state-defined features. The following is a list of applicable system settings: Apply Caseload Direct To Clinics - Controls whether caseload allocation is assigned at the local agency level or assigned directly to clinics. North Carolina (NC) Caseload Calculation Low Threshold - If the specified computation of participation to caseload falls below the NC Caseload Calculation Low Threshold, the new caseload is computed by multiplying the current caseload by the NC Caseload Calculation Low Multiplier. Only applicable to North Carolina NC Caseload Calculation High Threshold - If the specified computation of participation to caseload falls above the NC Caseload Calculation High Threshold, the new caseload is computed v 1.0 - posted 07/05/2014 by multiplying the current caseload by the NC Caseload Calculation High Multiplier. Only applicable to North Carolina. NC Caseload Calculation Low Multiplier - If the specified computation of participation to caseload falls below the NC Caseload Calculation Low Threshold, this defines the multiplier used against the current caseload to compute the new caseload. Only applicable to North Carolina. NC Caseload Calculation High Multiplier - If the specified computation of participation to caseload falls above the NC Caseload Calculation High Threshold, this defines the multiplier used against the current caseload to compute the new caseload. Only applicable to North Carolina. State FIPS Codes to Filter By – Uses the FIPS Code(s) to define the geographical regions defined by the state. If multiple codes are specified, they should be separated by a semicolon. (i.e. 35;36) In the Caseload module, these codes can be used in the Eligibility Data screens. v 1.0 - posted 07/05/2014 THIS PAGE INTENTIONALLY LEFT BLANK v 1.0 - posted 07/05/2014 2- ALLOCATE CASELOAD Assign State Caseload The Crossroads System will allow entry of the state-wide caseload, which may be derived by the state from the forecast model and other external information. States may configure Crossroads to apply the historic seasonal participation factor to derive a monthly caseload assignment. Statewide threshold alerts for caseload will be defined. Assignment of state-wide caseload is required. The total allocation of caseload to agencies (or total allocation of caseload to clinics, if configured for clinics) cannot exceed the state caseload. States may choose to update the state-wide caseload based on changes in food costs or food funds. This is an optional process. Each time any updates are made, the system logs the change history along with the reasons for change. This process includes the following tasks: Task A. Assigning State Caseload ........................................................................... 2-2 Task B. Updating State Caseload ............................................................................. 2-5 v 1.0 - posted 07/05/2014 Task A. Assigning State Caseload Complete the following steps to perform this task: 1. From the Home screen, go to Finance Caseload Allocate Caseload. The Caseload Allocation screen displays. 2. Select the state in the State/Local Agencies dropdown, in order to assign caseload at the state and agency levels (or at the state and clinic levels if configuration is set to assign at the clinic level). Please note that if the system is set to assign first to agencies, it will be possible to further assign to clinics based on agency allocation. This is different than having the system set to do the initial allocation directly to clinics, where agency allocation is rolled up from the clinics. v 1.0 - posted 07/05/2014 3. Select the Fiscal Year for allocating caseload (FFY, SFY, or Calendar). 4. Select the year for the caseload assignment. The current configuration assigns a uniform monthly caseload for the selected fiscal year. If the system is configured to use a seasonal participation curve, the monthly caseload assignment numbers will be calculated by multiplying the state-wide assigned caseload with the seasonal participation factor for each month. 5. Enter a value in the Total Caseload field. For an initial state caseload for the federal fiscal year, this value may be based on the caseload provided by FNS for the selected fiscal year. v 1.0 - posted 07/05/2014 6. After entering the Total Caseload, click Save. A status message displays indicating the state agency caseload was saved. v 1.0 - posted 07/05/2014 Task B. Updating State Caseload Complete the following steps to perform this task: 1. From the Home screen, go to Finance Caseload Allocate Caseload. The Caseload Allocation screen displays. 2. Select the state from State/Local Agencies. 3. Choose the Fiscal Year (FFY, SFY, and Calendar). v 1.0 - posted 07/05/2014 4. Indicate the year for the current caseload. 5. Type the new value into the Total Caseload field. 6. After updating the Total Caseload, click Save. A status message displays indicating the state agency caseload was saved. Congratulations! You have successfully completed the Assign State Caseload process. v 1.0 - posted 07/05/2014 Assign Clinic Caseload If Crossroads is configured to Apply Caseload Direct to Clinics, when the state is selected in the State/Local Agency dropdown all of the clinics in the state are displayed in the Monthly Caseload Allocation grid. This scenario will describe the steps to assign to the clinics, then the agencies will have caseloads that are rolled up from the clinics. This process is used to assign each clinic its respective caseload. Caseload assignment can be done both by the system and manually. Threshold alerts will be sent to notify staff if the clinic is outside of state-defined caseload performance metrics. Caseload performance is evaluated and alerted on months for which the last day of the month is 30 days past. The clinic-level caseload recommendation can be determined by a state-defined calculation. Placeholders will be maintained by Crossroads to allow states to create custom formulas to compute the caseload for a clinic. This also allows WIC staff to modify clinic assigned caseloads at any time during the year. This process includes the following tasks: Task A. Calculating Clinic Caseload Using a Calculation Method ......................... 2-8 Task B. Allocating Caseload to Clinics .................................................................. 2-13 v 1.0 - posted 07/05/2014 Task A. Calculating Clinic Caseload Using a Calculation Method Complete the following steps to perform this task: 1. From the Home screen, go to Finance Caseload Allocate Caseload. The Caseload Allocation screen displays. The configuration has been set to Apply Caseload Direct to Clinics. Therefore clinics are listed in the Monthly Caseload Allocation grid. 2. Select the state from State/Local Agencies. 3. Choose the Fiscal Year (FFY, SFY, and Calendar). v 1.0 - posted 07/05/2014 4. Select the year for the caseload assignment. 5. The Total Caseload value may be entered if not done in assigning the state caseload. 6. To assign an Under Threshold Percentage value to each agency in the state, enter the percentage to the Global Under-Threshold % field, then click the corresponding Apply button. v 1.0 - posted 07/05/2014 7. To assign an Over Threshold Percentage value to each agency in the state, enter the percentage to the Global Over-Threshold % field, then click the corresponding Apply button. An alert is sent if the actual participation is over or under the assigned threshold percentage. This happens 30 days after the month has been closed. 8. If a calculation method has not been created, click the Add button ( to create a new formula. The Manage Calculation screen displays. ) under Calculation Formula v 1.0 - posted 07/05/2014 9. Under Manage Calculation click on the Add button ( ) to name a new formula. 10. Enter a Name for the new calculation formula and click Save. The Formula section is blank and ready for a new calculation formula. 11. Create the formula using Placeholders, Functions, Operators, and Constant Operand. Calculations used for allocating to Clinics can only use Clinic placeholders. Calculations used for allocating to Local Agencies can only use Local Agency placeholders. Trying to use a calculation with the wrong placeholder will display an error message. Full functionality of the Manage Calculations screen is covered in the Finance User Manual. v 1.0 - posted 07/05/2014 12. Click Save. A status message indicates the formula was saved successfully. 13. When the formula is saved click Cancel to return to the Caseload Allocation screen. 14. Under Caseload Allocation Calculation, select the formula to use and click Calculate. Each clinic will show a calculated allocation based on the formula used. v 1.0 - posted 07/05/2014 Task B. Allocating Caseload to Clinics Complete the following steps to perform this task: 1. For each clinic, either select the Calculated Caseload to assign by clicking on the Right Arrow button ( ) to move the figure into the Assigned Caseload field, or enter an assigned caseload manually into the Assigned Caseload field. Click the Right Arrow button ( ) in the column header to assign the Calculated Caseload to all clinics. The Monthly Caseload Allocation table updates to show the clinics with the calculated caseloads. 2. Click in the checkbox to the left of each clinic’s row to have the caseload assignment published, or click in the top checkbox to publish all clinics. 3. Enter a date in the Publish Reminder Date field, if you do not plan to immediately publish the allocation results. Congratulations! You have successfully completed the Assign Clinic Caseload process. v 1.0 - posted 07/05/2014 Assign Agenc y Caseload If Crossroads is not configured to Apply Caseload Direct to Clinics, when the state is selected all of the agencies in the state are displayed in the Monthly Caseload Allocation grid. This scenario will cover state-wide assignment to agencies. This process is used to assign each agency and clinic its respective caseload. Caseload assignment can be done both by the system and manually. Threshold alerts will be sent to notify staff if the agency or clinic is outside of state-defined caseload performance metrics. Caseload performance is evaluated and alerted on months for which the last day of the month is 30 days past. The agency-level caseload recommendation can be determined by a state-defined calculation. Placeholders will be maintained by Crossroads to allow states to create custom formulas to compute the caseload for an agency. Crossroads supports the use of a 3-year weighted participation formula as requested by some states. This also allows WIC staff to modify agency and clinic assigned caseloads at any time during the year. Reallocating Agency-Clinic Caseload: This function is used to reassign each agency and clinic its respective caseload using state-defined formulas. It allows for threshold alarms to be changed in order to alert staff if the agency or clinic is outside of state-defined caseload performance metrics. Caseload performance is evaluated and alerted on months for which the last day of the month is 30 days past. This process includes the following tasks: Task A. Calculating Agency Caseload Using a Calculation Method .................... 2-15 Task B. Allocate Caseload to Agencies ................................................................. 2-18 Task C. Allocating Clinic Caseload (Based on Agency Assignment) .................. 2-20 Task D. Reallocating Agency Caseload ................................................................. 2-23 v 1.0 - posted 07/05/2014 Task A. Calculating Agenc y Caseload Using a Calculation Method Complete the following steps to perform this task: 1. From the Home screen, go to Finance Caseload Allocate Caseload. The Caseload Allocation screen displays. 2. Select the state from State/Local Agencies. Under Monthly Caseload Allocation the agencies display as shown above in step 1. 3. Choose the Fiscal Year (FFY, SFY, and Calendar). v 1.0 - posted 07/05/2014 4. Select the year for the caseload assignment. 5. The Total Caseload and the two Global Under and Over Threshold values may be entered if this was not done in assigning the state caseload. 6. If a calculation method has not been created, click the Add button ( to create a new formula. The Manage Calculation screen displays. 7. Under Manage Calculation click on the Add button ( ) under Calculation Formula ) to name a new formula. 8. Enter a Name for the new calculation formula and click Save. The Formula section is blank and ready for a new calculation formula. v 1.0 - posted 07/05/2014 9. Create the formula using Placeholders, Functions, Operators, and Constant Operand. 10. Click Save. A status message indicates the formula was saved successfully. 11. When the formula is saved click Cancel to return to the Caseload Allocation screen. 12. Under Caseload Allocation Calculation, select the formula to use and click Calculate. The Monthly Caseload Allocation table updates to show the agencies with the calculated caseloads. Each agency will show a calculated allocation based on the formula used. v 1.0 - posted 07/05/2014 Task B. Allocate Caseload to Agencies Complete the following steps to perform this task: 1. For each agency, either select the Calculated Caseload to assign by clicking on the Right Arrow button ( ) to move the figure into the Assigned Caseload field, or enter an assigned caseload manually into the Assigned Caseload field. Click the Right Arrow button ( header to assign the Calculated Caseload to all agencies. ) in the column Caseload Allocated represents the total caseload that is currently assigned to agencies. 2. Click in the checkbox to the left of each agency’s row to have the caseload assignment published, or click in the top checkbox to publish all agencies. v 1.0 - posted 07/05/2014 When the caseload is published it is available to the local agencies (or clinics) to view. A task is created alerting the staff that the caseload allocation has been published. 3. Enter a date in the Publish Reminder Date field if you do not plan to publish all the assigned agencies immediately. v 1.0 - posted 07/05/2014 Task C. Allocating Clinic Caseload (Based on Agenc y Assignment) Complete the following steps to perform this task: 1. From the Home screen, go to Finance Caseload Allocate Caseload. The Caseload Allocation screen displays. 2. Select a local agency from State/Local Agencies. 3. Select a formula from the Calculation Name dropdown that will calculate allocation to clinics. v 1.0 - posted 07/05/2014 4. Click Calculate. 5. The values in the Calculated Caseload column update to show the new suggested caseload, based on the calculation formula that was just executed. Review the caseload allocation calculation suggested caseload for the clinics. v 1.0 - posted 07/05/2014 6. To accept the Calculated Caseload value, click on the associated Right Arrow button ( ) for the desired Clinic to move the value into the Assigned Caseload field, or click the Right Arrow button ( ) in the header row to assign the Calculated Caseload value to all clinics. 7. When all clinics have been assigned, click Save. A status message indicates caseloads have been assigned. v 1.0 - posted 07/05/2014 Task D. Reallocating Agenc y Caseload Complete the following steps to perform this task: 1. From the Home screen, go to Finance Caseload Allocate Caseload. The Caseload Allocation screen displays. 2. Select the state from the State/Local Agencies dropdown. 3. Select a caseload reallocation formula from the Calculation Name dropdown. v 1.0 - posted 07/05/2014 4. Click Calculate. 5. The values in the Calculated Caseload column update to show the new suggested caseload, based on the calculation formula that was just executed. Review the calculated caseload reallocation suggested caseload for the agencies that were under or over the threshold values. 6. To accept the Calculated Caseload value, click on the associated Right Arrow button ( ) for the desired agency to move the value into the Assigned Caseload field. You may also manually enter a new assigned caseload. v 1.0 - posted 07/05/2014 7. A Sticky Note is available for documenting the reasons for reallocating caseload. Click the icon and the Sticky Note popup window is displayed. 8. Click Save. A status message indicates the new assigned caseload has been saved. Congratulations! You have successfully completed the Assign Agency Caseload process. v 1.0 - posted 07/05/2014 Manage Over or Under-Achieving Agencies At times it may be necessary to modify the caseload assignment for one or more agencies that are over or under-achieving. This is an optional process and can be used as applicable or desired. Crossroads provides the functionality to define a calculation that will recommend a new caseload based on the agency’s year-to-date performance. The calculation can determine what caseload allocation would result in a 100% achievement rate (approximately), based on historical participation. If the system is configured to utilize seasonal variation as defined in the forecast model, the system will take it into account to recommend caseload values. States may choose to not apply a seasonal participation curve within the forecast model without negating this process. Recommended caseload values for agencies can be calculated so that no net-change occurs at the state (or agency) level. Likewise, manually entered values will not be allowed to affect an increase or decrease in the state (or agency) total caseload. This process includes the following tasks: Task A. Managing Over or Under-Achieving Agencies ......................................... 2-27 v 1.0 - posted 07/05/2014 Task A. Managing Over or Under-Ac hieving Agencies Complete the following steps to perform this task: 1. From the Home screen, go to Finance Caseload Allocate Caseload. The Caseload Allocation screen displays. An alert is sent when an agency falls below the Under Threshold Percentage or above the Over Threshold Percentage. Use this process to calculate an Assigned Caseload value or manually enter a new one. v 1.0 - posted 07/05/2014 2. Select a Calculation Name, and then click Calculate. 3. Review the system Calculated Caseload values based on the calculation that was applied (as shown in the outlined box below). v 1.0 - posted 07/05/2014 4. To accept the recommended Calculated Caseload value for an agency, click on the corresponding Right Arrow button ( ). 5. To accept the recommended Calculated Caseload value for all agencies, click on the Right Arrow button ( ) in the column header. The Assigned Caseload for all agencies is populated from the Calculated Caseload values. It would still be possible to change one or more agency’s Assigned Caseload manually. v 1.0 - posted 07/05/2014 6. To adjust the Assigned Caseload value manually, delete the existing value and type in a new one. 7. Click Save. A status message indicates caseload was assigned successfully. Congratulations! You have successfully completed the Manage Over or Under-Achieving Agencies process. v 1.0 - posted 07/05/2014 3- ALLOCATE CASELOAD AND NSA FUNDING Allocate Caseload and NS A Funding The following scenario describes the process of allocating caseload and NSA funding. This process includes the following task: Task A. Allocating Caseload and NSA Funding ...................................................... 3-2 v 1.0 - posted 07/05/2014 Task A. Allocating Caseload and NSA Funding Complete the following steps to perform this task: 1. From the Home screen, go to Finance Caseload Allocate Caseload and NSA Funding. The Caseload and NSA Allocation screen displays. 2. Select an option in the State/Local Agencies drop-down list. Please note that if the system is set to assign first to agencies, it will be possible to further assign to clinics based on agency allocation. This is different than having the system set to do the initial allocation to clinics, where the agency allocation is rolled up from the clinics. v 1.0 - posted 07/05/2014 3. Select the Fiscal Year for allocating caseload (FFY, SFY, or Calendar). 4. Select the year for the caseload assignment. The current configuration assigns a uniform monthly caseload for the selected fiscal year. If the system is configured to use a seasonal participation curve, the monthly caseload assignment numbers will be calculated by multiplying the state-wide assigned caseload with the seasonal participation factor for each month. 5. If applicable, select a Calculation Name and click Calculate. 6. Enter the Total Caseload. For an initial state caseload for the federal fiscal year, this value may be based on the caseload provided by FNS for the selected fiscal year. 7. Enter the Fund Amount Per Case. 8. Enter the State Fund Allocation. v 1.0 - posted 07/05/2014 9. For each agency, select the Right Arrow button ( ) next to the Calculated Caseload column to copy the calculated caseload into the Assigned Caseload column, or manually enter the Assigned Caseload directly into the column. Click Right Arrow button ( ) in the column header to assign the calculated caseload for all records in the Monthly Allocation grid. 10. For each agency, select the Right Arrow button ( ) next to the Calculated Funding column to copy the calculated caseload into the Assigned Funding column, or manually enter the Assigned Funding directly into the column. Click Right Arrow button ( ) in the column header to assign the calculated funding for all records in the Monthly Allocation grid. 11. In the header of the Monthly Allocation grid, select the Publish check box to publish caseload and funding for all records in the grid. v 1.0 - posted 07/05/2014 When the caseload is published it is available to the local agencies (or clinics) to view. A task is created alerting the staff that the caseload allocation has been published. 12. Click Save. A status message displays indicating that the state agency caseload was saved. Congratulations! You have successfully completed the Allocate Caseload and NSA Funding process. v 1.0 - posted 07/05/2014 THIS PAGE INTENTIONALLY LEFT BLANK v 1.0 - posted 07/05/2014 4- MONITORING CASELOAD Monitor Caseload Crossroads provides a screen to monitor caseload at the clinic, agency or state level throughout the fiscal year. Caseload can be monitored on the basis of caseload statistics or participation by category. This scenario will describe the parameter option settings that can be selected and the resulting monitoring views resulting from the options selected. If the selection is made to view state data, totals for all agencies are used for all the statistics and for the chart display. If the selection is made to view an agency, either the totals of all clinics or data for a specific clinic is displayed. This process includes the following task: Task A. Selecting the Caseload Monitoring Parameters......................................... 4-2 Task B. Reviewing Caseload Statistics .................................................................... 4-4 Task C. Reviewing Participation by Category ......................................................... 4-6 Task D. Reviewing Caseload Monitoring Chart ....................................................... 4-7 v 1.0 - posted 07/05/2014 Task A. Selecting the Caseload Monitoring Parameters Complete the following steps to perform this task: 1. From the Home screen, go to Finance Caseload Monitor Caseload. The Monitor Caseload screen displays. 2. Select the state or a local agency from State/Local Agencies. If the state is selected for State/Local Agencies, the Forecast Model field is displayed for the selection of a specific model. However, if an agency is selected, the Clinic field is displayed for the selection of all clinics or a specific clinic. Forecasting is only at the state level. v 1.0 - posted 07/05/2014 3. Select the Fiscal Year type (FFY, SFY, or Calendar) and year. The data will be grouped by the twelve months corresponding to the selected fiscal year. 4. If the state is selected for State/Local Agencies, select a Forecast Model. If an agency is selected for State/Local Agencies, select a specific clinic or select all clinics. For details on defining a forecast model, refer to the Defining a Forecast Model scenario within the Finance User Manual. v 1.0 - posted 07/05/2014 Task B. Review ing Caseload Statistics Complete the following steps to perform this task: 1. Under Caseload Statistics, review the 11 statistics provided for each month plus the YTD Average (Year to Date Average). Caseload data are provided for the following: • Assigned Caseload: This is the assigned and funded caseload. Closeout data is displayed for months that are closed and is indicated by a Locked Indicator ( ). Current data is displayed for months not closed, without an indicator. The Forecasted Caseload shows projected participation for future months based on the Forecast Model used. v 1.0 - posted 07/05/2014 • Participation: The number of persons who received supplemental foods or food instruments during the reporting period (including: 1- infants not receiving supplemental foods or food instruments whose breastfeeding mothers received supplemental foods or food instruments during the reporting period, and 2- breastfeeding mothers not receiving supplemental foods or food instruments whose infants received supplemental foods or food instruments during the reporting period). • Previous Year Participation: Persons who received supplemental foods or food instruments during the previous year reporting period • Caseload Variance: Participation (defined above) minus Assigned Caseload (defined above). • Achievement Rate: Participation (defined above) divided by Assigned Caseload (defined above). • Forecasted Caseload: Assigned Caseload adjusted by the forecasting model selected on screen. • Forecasted Caseload Variance: Participation (defined above) minus Forecasted Caseload (defined above). • Forecasted Achievement Rate: Participation (defined above) divided by Forecasted Caseload (defined above). • Non-Participation Rate: Enrollment Count minus Participation Count divided by Participation Count. • Enrollment Count: Count of certified persons. • Participation to Enrollment: Participation (defined above) divided by Enrollment Count (defined above). v 1.0 - posted 07/05/2014 Task C. Review ing Participation by Categor y Complete the following steps to perform this task: 1. Under Participation by Category, review the statistics for all eight WIC categories (Pregnant, Fully Breastfeeding Women, Partially Breastfeeding Women, Postpartum Women, Fully Breastfeeding Infants, Partially Breastfeeding Infants, Fully Formula-Fed Infants, and Children). This Participation by Category grid displays the percent breakdown for each of the eight WIC categories for every month with data. The previous year counts and percentages are displayed to provide a comparison between the current and previous year reporting period. v 1.0 - posted 07/05/2014 Task D. Review ing Caseload Monitoring Chart Complete the following steps to perform this task: 1. Expand the Caseload Monitoring Chart section by clicking the expand/collapse arrow. 2. Review the Caseload Monitoring Chart. The chart displays the Assigned Caseload, Participation, Forecast Caseload (if state is the selected level), and Enrollment. Hover over a data point to see the detailed statistics for that data. Congratulations! You have successfully completed the Monitor Caseload process. v 1.0 - posted 07/05/2014 THIS PAGE INTENTIONALLY LEFT BLANK v 1.0 - posted 07/05/2014 5- MANAGE ELIGIBILITY DATA Manage Eligibility Data Potential eligible population is defined as people who may be eligible for WIC benefits. The Manage Eligibility Data screen provides the following functions: Allows for input (manual or file import) of potential eligible population data Allows the view, edit and deletion of existing data Allows for comparison of potential eligibility data to historical actual data within Crossroads Allows exporting a data set in a predefined format that could be used by a Geographic Information System (GIS) This process includes the following tasks: Task A. Search for Existing Eligibility Data Sets ..................................................... 5-2 Task B. View, Edit, or Delete Existing Eligibility Data ............................................. 5-3 Task C. Upload Existing Eligibility Data................................................................... 5-6 Task D. Add Eligibility Data Manually ...................................................................... 5-8 Task E. Compare Eligibility Data ............................................................................ 5-11 v 1.0 - posted 07/05/2014 Task A. Search for Existing Eligibility Data Sets Complete the following steps to perform this task: 1. From the Home screen go to Finance Caseload Manage Eligibility Data. The Manage Eligibility Data screen displays. 2. To search for existing data select the following: • Data Level (leave blank if a specified level is not desired) • Start Date – representing the Tracking Date of the Data Set • End Date – representing the Tracking Date of the Data Set 3. Click Search. If there are data sets meeting the criteria, they will be displayed in the Search Results grid. If no data set exists matching the search criteria, a status message will indicate no data is available. v 1.0 - posted 07/05/2014 Task B. View , Edit, or Delete Existing Eligibility Data Complete the following steps to perform this task: 1. To view or edit the data set click on the Edit button ( displays. ). The Update Eligibility Data screen The Eligibility Data displays in the grid. In this example, in the first row the box outlines the potential eligible population of pregnant women for the Shenandoah Clinic jurisdiction. The details for the data are shown in the Data Set Details group box. v 1.0 - posted 07/05/2014 2. If there are several pages of data, you can filter by Clinic or WIC Category. 3. The Tracking Date (date associated with the data), the Represented Year, and the Description can be edited. 4. The row of data can be deleted by clicking on the Delete button ( ) at the left side of the row. 5. To add additional data click Add Eligibility Data. The Add Eligibility Data screen displays. v 1.0 - posted 07/05/2014 6. Add data by clicking in the fields and selecting a value or enter the Unit Population value directly and hit enter on your keyboard. 7. When all the rows of data are entered select Save. v 1.0 - posted 07/05/2014 Task C. Upload Existing Eligibility Data Complete the following steps to perform this task: 1. From the Home screen go to Finance Caseload Manage Eligibility Data. The Manage Eligibility Data screen displays. The Update Eligibility screen provides a way to upload an external file of eligibility data. This method uses data not already within the Crossroads database, whereas Task A presented a way to retrieve data sets that reside within the Crossroads database. 2. From the Manage Eligibility Screen click Add Data. The Update Eligibility Data screen displays. 3. In the Upload File group box click Browse. The Open window displays. v 1.0 - posted 07/05/2014 4. Select the file to upload and click Open. The data set is uploaded to Crossroads. If it fails to load, an error message displays, requiring correction of the data format before it can be loaded. v 1.0 - posted 07/05/2014 Task D. Add Eligibility Data Manually Complete the following steps to perform this task: 1. From the Home screen go to Finance Caseload Manage Eligibility Data. The Manage Eligibility Data screen displays. v 1.0 - posted 07/05/2014 2. From the Manage Eligibility Data screen click Add Data. The Update Eligibility Data screen displays. 3. Under Update Data, enter a data set name in the Data Set Name field. 4. Under Data Set Details provide the following: • Tracking Date (date used to search data) • Represented Year (year data collected) • Data Level (Local Agency, State, County, ZIP, ZIP +4, ZCTA, Census Tract) • Description (data set description) v 1.0 - posted 07/05/2014 5. Enter rows of data under the Eligibility Data grid. The first column will list the data level selected under Data Set Details. Hit enter when a row of data is entered. 6. Continue to enter data rows until complete, then hit a final enter. In this example the data set is called Clinic Potential Eligible Data 2012. It uses the Clinic as the data level and data for four WIC categories are shown for the Shenandoah Clinic. 7. When the data entering is complete, click Save. v 1.0 - posted 07/05/2014 Task E. Compare Eligibility Data Complete the following steps to perform this task: 1. From the Manage Eligibility Data screen search for and select a data set (refer to Task A. Search for a Data Set). v 1.0 - posted 07/05/2014 2. Click Compare Data. The Compare Eligible and Historical Caseload Data window displays. The Potential Eligible data is compared to the Participation data. 3. Click Show Fiscal Years to display the Year Selector if a different year is to be compared. 4. To export the Potential Eligible data set click on Export Data, navigate to the location to save the data and click Save. A status message indicates the export was successful. 5. Select cancel to return without saving. Congratulations! You have successfully completed the Manage Eligibility Data process. v 1.0 - posted 07/05/2014 6- WAIT LIST AND CASELOAD RESTRICTION LIST CRITERIA Maintain Caseload Restriction Criteria A caseload restriction approach to manage maximum caseload is a way to prevent certification of applicants based on their WIC category and/or age group for as long as the restriction is in place. States may choose to place the applicant on a call list so they can be notified if/when the restriction is lifted. This process includes the following task: Task A. Creating a Caseload Restriction Definition ................................................ 6-2 v 1.0 - posted 07/05/2014 Task A. Creating a Caseload Restriction Definition Complete the following steps to perform this task: 1. From the Home screen, go to Finance Caseload Maintain Caseload Restriction Criteria. The Maintain Caseload Restriction Criteria screen displays, listing any currently defined restriction definitions. When a caseload restriction definition is ‘deleted’, by selecting the red X, it is marked as inactive. To include inactive, or ‘deleted’ definitions, select the Include Inactive checkbox. v 1.0 - posted 07/05/2014 2. To select criteria to define a caseload restriction click Caseload Restriction Definition. The Caseload Restriction Definition screen displays. The Caseload Restriction Definition screen initially displays for the entire state, listing the current enrollment of each category in the current enrollment window. This shows the current distribution of participants across categories. v 1.0 - posted 07/05/2014 3. To determine the scope of the definition, under Select Local Agency/Clinic, select State, Agency, or Clinic as the program level for the caseload restriction definition. 4. Under Caseload Restriction Details do the following: • Enter the Effective Date – The date the caseload restriction becomes effective. • Select the Category – This determines the category to be restricted. Note that all categories listed above that category in the Current Enrollment window will also be included in the restriction. (i.e. if the restriction is defined at the Child level, all participants in the NonBreastfeeding category would also be included). The categories are listed in ascending order of priority. • Enter the Age – Enter the age by Year, Month, and Day of children that would be caseload restricted. Entering a specific age range is optional. 5. Click Refresh. The Estimated # field and Current Enrollment window are updated with the number of participants the system estimates would be affected by this caseload restriction. If an Age was specified, each category can be expanded to show the estimated participants in the specified age range. 6. Caseload Restriction Details can be changed and the screen refreshed until the desired Estimated # is achieved. 7. When the definition is set, click Save. A status message indicates the caseload restriction criteria were saved. The definition above shows the state is the target of the caseload definition. The caseload restriction has an effective date of February 25, 2013, includes children, aged three and older, and non-breastfeeding women. v 1.0 - posted 07/05/2014 Congratulations! You have successfully completed the Maintain Caseload Restriction Criteria process. v 1.0 - posted 07/05/2014 Maintain Wait List Criteria The establishment of a wait list is a way to manage caseload when a WIC program has reached a maximum caseload. Crossroads allows a wait list to be defined for the state, agency or clinic. Applicants belonging to the affected WIC defined wait list criteria as a result of passing through the certification process are put on the wait list instead of issued benefits. This process includes the following tasks: Task A. Configuring the Wait List Criteria Settings ................................................ 6-7 Task B. Creating the Wait List Definition ................................................................. 6-9 v 1.0 - posted 07/05/2014 Task A. Configuring the Wait List Criteria Settings Complete the following steps to perform this task: 1. From the Home screen, go to Finance Caseload Maintain Wait List Criteria. The Maintain Wait List Criteria screen displays, listing any wait list definitions. When a Wait List definition is ‘deleted’, by selecting the red X, it is marked as inactive. To include inactive, or ‘deleted’ definitions, select the Include Inactive checkbox. 2. Click Settings. The Waiting List Criteria Settings pop-up window displays. v 1.0 - posted 07/05/2014 3. Under the Active column, check the boxes for the criteria categories that will apply to the wait list criteria. 4. For each Active box checked, assign a Ranking with the highest rank as 1. In this example, Priority is selected to be ranked first, Participant Category 2nd, and Age 3rd. This means the priority status of a participant will be the first determinant of whether the participant is put on the wait list, etc. 5. Click Save. The waiting list criteria settings are now established. v 1.0 - posted 07/05/2014 Task B. Creating the Wait List Definition Complete the following steps to perform this task: 1. After the waiting list criteria settings are established, click Waiting List Definition. The Wait List Definition screen displays. 2. Determine the scope of the wait list by selecting State, Local Agency, or Clinic. 3. To establish a wait list definition do the following (based on settings from Task A): • Enter the Effective Date – The date the wait list becomes effective. • Select the Priority level criteria – Participants with this priority and lower priorities will be put on the wait list. • Select the Category – This applies only to the Priority selected. • Enter the Age – Enter the age by Year, Month, and Day of children that would be put on the wait list it they are older that the age stated. 4. After the scope of the wait list is selected, click Refresh. The numbers of current enrollment for each of the criteria ranked as #1 are displayed in the Current Enrollment window. The numbers of currently enrolled can be used to determine how to define the wait list criteria. If an agency manager determined that the agency was a certain number of enrollees over their maximum caseload, they could make a determination of where to set the wait list criteria to adjust their caseload to approximately match their maximum caseload. The definition above is based on the selection and rankings of the criteria as defined in Task A. It would look different if different criteria or rankings were selected in Task A. v 1.0 - posted 07/05/2014 5. Waiting List Details can be changed and the enrollment data refreshed until the desired Estimated # is reached. 6. Click Save. A status message indicates the wait list criteria were saved. Congratulations! You have successfully completed the Maintain Wait List Criteria process. v 1.0 - posted 07/05/2014 Task C. Submitting the TIP Report to Food and Nutrition Service (FNS) Complete the following steps to perform this task: 1. While still on the Vendor TIP Report screen, select the file to be submitted by clicking on the row in the TIP Report Results grid. 2. Click Generate FNS TIP File. A standard Windows Create File screen displays. The file is saved as a TXT file. 3. Click Save. A success message displays and the Status column displays a status of Submitted. Congratulations! You have successfully completed the Manage TIP Report process. v 1.0 - posted 07/05/2014 THIS PAGE INTENTIONALLY LEFT BLANK