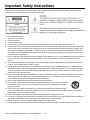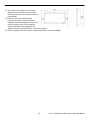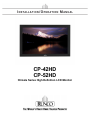
1
CP-42HD
CP-52HD
Climate Series High Definition LCD Monitor
ii
Runco CP-42HD/CP-52HD Owner’s Operating Manual
RuncoCareTM One Year Limited Warranty
For North America
Congratulations on your purchase of a Runco® product! With proper installation, setup and care, you should enjoy many
years of unparalleled video performance.
This RuncoCare One Year Limited Warranty is provided free of charge by Runco International, LLC (“Runco”) with the
purchase of a covered Runco product.
The following terms and conditions of the RuncoCare One Year Limited Warranty represent a contract between us,
Runco, and you, the customer, who has purchased a Runco product. This contract applies to purchases of covered
Runco products occurring on or after the effective date printed at the bottom of this document. Runco reserves the right
to change the terms of this contract, and such changes shall apply to purchases of covered Runco products that occur on
or after any future effective date.
RuncoCare 1 Year Limited Warranty Features
1-Year protection from defects in material and workmanship
Access to 24x7 phone support
Complimentary, 2nd day one-way shipping
Warranty Coverage
Runco warrants its products to be free from defects in material and workmanship during the warranty period provided
below. If, in Runco‟s sole determination, a product proves to be defective in material or workmanship during the warranty
period, Runco will repair the product, replace the product with a substantially similar new or like new product, or refund a
prorata share of the purchase price (calculated based on the remainder of the warranty period and the then-current
MSRP2 of a similar product), if repair or replacement of the product is determined by Runco to not be feasible. Runco has
sole discretion in determining whether a same or like model is offered, and what constitutes as „substantially similar
model‟.
Length of Warranty
Runco products are warranted for one (1)-year from the date of shipment from Runco. Lamps are warranted six (6)
months from the date of shipment or 1000 hours of use, whichever comes first. All other accessories, which include but
are not limited to, cables, remotes, carrying cases, lens cap and other peripherals sold with the Runco product, are
warranted for ninety (90) days from the date of the original shipment of the accessory.
Eligibility
This RuncoCare One Year Limited Warranty is valid only for the first customer who purchases the covered product from
an authorized Runco dealer or distributor. This warranty is not transferable. You may be required to provide proof of
purchase in order to receive warranty services.
1.
2.
Runco may update this list of products excluded from this warranty from time to time at Runco’s sole discretion, but updates to the list of
covered products will not apply on a retroactive basis.
MSRP is defined as the most recent product price listed on Runco’s price list.
Runco CP-42HD/CP-52HD Owner’s Operating Manual
iii
RuncoCare Claim Procedure
In the event of a product defect, please follow the warranty claim procedure provided below:
The customer is required to contact a Runco dealer or Runco Technical Support via email at [email protected] or
via phone at (toll free) 800-23-RUNCO (800-237-8626). If the customer is located outside North America, call +3589
4200 554 in Europe for product service.
Be prepared to provide the date of purchase, the place of purchase, serial number, product model number,
description of the problem and troubleshooting steps already attempted.
Runco Technical Support staff will attempt to correct any minor issues that may be causing the problem. If Runco is
unable to resolve the problem through troubleshooting, a Return Material Authorization (RMA) number will be issued
for the exchange of the defective product if it is determined that the claim was made within the coverage period of the
Standard Limited Warranty.
If it is determined that the Standard Limited Warranty applies to the claim, the customer will need to return the
defective product to the Runco repair depot location specified by the Runco technical support representative. The
customer will need to properly package the defective product, consisting of the product only, and not include any
accessories (e.g., cables, remotes, carrying cases, lens, lens cap and other peripherals) and return it to the Runco
repair depot specified by the technical support representative. It is the customer‟s responsibility to properly package
the hardware, include all appropriate materials, and return it to the location specified by the Runco technical support
department. The customer will need to address and resolve any shipping damage claims directly with the shipping
company.
The customer is responsible for providing a suitable box to ship the defective product to an authorized Runco repair
depot. Boxes may be purchased from a Runco technical support representative.
The customer is responsible for paying freight charges to ship the defective product to an authorized Runco repair
depot.
For in-warranty repairs, Runco will pay freight charges to return the repaired/replacement product (which shall not
include accessories--e.g., cables, remotes, carrying cases, lens cap and other peripherals sold with the Runco
product) to the customer from the Runco repair depot.
Once an RMA has been created, the customer may contact [email protected] for follow-up questions or
confirmation status of the claim process.
Warranty Exclusions
This RuncoCare Standard Limited Warranty does not include or is limited by the following:
1. Products not purchased from an authorized Runco dealer
2. Rental costs incurred by the customer in the event of product defect or failure
3. Any product with a defaced, modified, or removed serial number
4. Damage, deterioration, or malfunction resulting from:
a. Accident, abuse, misuse, neglect, improper ventilation, fire, water, disaster, lightning, or other acts of nature,
smoke exposure (cigarette or otherwise), unauthorized product modification (including use of an unauthorized
mount), or failure to follow instructions supplied with the product
b. Repair or attempted repair by anyone not authorized by Runco
c. Any damage to the product due to shipment
d. Removal or installation of the product
e. Causes external to the product, such as electric power fluctuations or failure
f. Use of supplies or parts (including lamps) that are not purchased from Runco or do not meet Runco‟s
specifications
g. Normal wear and tear
h. Expected lamp degradation and normal decrease in lamp output over a period of time or as the lamp is consumed
i. Customer caused defects, including but not limited to, scratched/defaced/altered plastics
j. Failure to follow maintenance procedures as outlined in the product‟s user guide where a schedule is specified for
regular cleaning of the product
k. Opening the product and/or tampering with internal circuitry
l. Products lost, stolen or discarded
iv
Runco CP-42HD/CP-52HD Owner’s Operating Manual
5.
6.
7.
8.
m. Any damage or dissatisfaction associated with latent images, “burn-in,” or any other damage determined by
Runco to be the result of customer use patterns
n. Any other cause, which does not relate to a product defect in material or workmanship
Removal, installation, and set-up service charges are excluded from this Standard Limited warranty
Black uniformity issues or other LCD issues associated with usage outside the Runco recommended guidelines and
specifications for the product
Bright or dark sub pixels that are characteristic of LCD technology and considered by Runco to be acceptable and
within Runco‟s manufacturing specifications. (See Sub Pixel Policy below)
Second day shipment delivery time and availability may vary based on origin and destination and Runco is unable to
deliver to PO Box and FPO Box addresses
Sub Pixel Policy
It is not uncommon for one or more sub pixels to become bright or dark during or after the manufacturing process. A
bright sub pixel is one that remains in the on position, and a dark sub pixel is one that appears black or off. The sub
pixels are usually hard to see and will not detract from the display quality or usability at normal viewing distance. The
following are Runco‟s criteria for identifying bright or dark sub pixels that would be considered unacceptable: a) the
number of bright or dark sub pixels; b) the location of the bright or dark sub pixels; c) the color of the bright sub pixels; and
d) the Runco model size. If sub pixels have been identified as unacceptable by Runco the LCD will be deemed faulty and
will be replaced if reported within the warranty period. If there are issues with bright or dark sub pixels, gather the
information listed above and call or email [email protected].
Other Terms and Conditions
1. Runco will not accept returned Product unless an RMA number has been issued by Runco.
2. If an Advance Exchange return occurs, it is the customer‟s responsibility to properly package the defective product
and ship it to the address provided by the Runco technical support representative with the RMA number prominently
displayed. If the defective product is not properly packaged and is damaged in transit during its return to Runco, you
may be invoiced for either the repair costs, if repairable, or the MSRP of a replacement product and shipping costs
incurred by Runco.
3. The repaired or replaced product will assume the remainder of your original product‟s RuncoCare Service Plan term
or 90 days from the date the repaired unit is shipped, whichever is longer.
4. If a replacement product is sent, the customer agrees to retain the replacement for the product you purchased and
your defective product becomes the property of Runco.
Extended Service Options
Runco offers extended and expanded service plans. For information on additional product protection, please email
[email protected] or call (toll free) 800-23-RUNCO (800-237-8626).
Online Product Registration
Please visit http://www.runco.com/support/product-registration/ to register product.
Limitation of Implied Warranties
RUNCO PROVIDES NO WARRANTIES, EXPRESS OR IMPLIED, EXCEPT THOSE EXPRESSLY PROVIDED HEREIN.
RUNCO EXPRESSLY DISCLAIMS ALL OTHER WARRANTIES, INCLUDING THE IMPLIED WARRANTIES OF
MERCHANTABILITY AND FITNESS FOR A PARTICULAR PURPOSE.
Runco CP-42HD/CP-52HD Owner’s Operating Manual
v
Exclusion of Damages
RUNCO‟S MAXIMUM AGGREGATE LIABILITY HEREUNDER IS LIMITED TO THE COST OF REPAIR OR
REPLACEMENT OF THE PRODUCT.
1.
2.
3.
RUNCO SHALL NOT BE LIABLE FOR DAMAGE TO OTHER PROPERTY CAUSED BY ANY DEFECT IN THE
PRODUCT, DAMAGES BASED UPON INCONVENIENCE, LOSS OF USE OF THE PRODUCT, LOSS OF TIME,
LOSS OF PROFITS, LOSS OF BUSINESS OPPORTUNITY, LOSS OF GOODWILL, INTERFERENCE WITH
BUSINESS RELATIONSHIPS, OR OTHER COMMERCIAL LOSS, EVEN IF THE CUSTOMER HAS BEEN
ADVISED OF THE POSSIBILITY OF SUCH DAMAGES.
RUNCO SHALL NOT BE LIABLE FOR ANY CONSEQUENTIAL, INCIDENTAL, INDIRECT, SPECIAL, OR
PUNITIVE DAMAGES ANY OTHER DAMAGES, WHETHER INCIDENTAL, INDIRECT, CONSEQUENTIAL OR
OTHERWISE.
RUNCO SHALL NOT BE LIABLE FOR ANY CLAIM AGAINST THE CUSTOMER BY ANY OTHER PARTY.
Effect of Local Law
This warranty gives you specific legal rights, and you may have other rights, which vary from locality to locality. Some
localities do not allow limitations on implied warranties and/or do not allow the exclusion of incidental or consequential
damages, so the above limitations and exclusions may not apply to you.
COPYRIGHT AND TRADEMARKS
© Copyright 2009 Runco International, LLC (“Runco”). This document contains proprietary information protected by
copyright, trademark and other intellectual property laws. All rights are reserved. No part of this manual may be
reproduced by any mechanical, electronic or other means, in any form, without prior written permission of Runco.
The trademarks reproduced in this Runco Owner‟s Manual and used on the Runco Products are either owned by Runco
or are licensed by Runco. You may not reproduce or use the trademarks without the prior written consent of Runco.
Runco Products are manufactured under one or more of the following patents: US. Patent 6755540 and Other Patents
Pending.
vi
Runco CP-42HD/CP-52HD Owner’s Operating Manual
Important Safety Instructions
Thank you for your purchase of this quality Runco video product! For the best performance, please read this manual
carefully as it is your guide through the menus and operation.
1.
2.
3.
4.
5.
6.
7.
8.
9.
10.
11.
12.
13.
14.
15.
16.
17.
Read these instructions.
Keep these instructions.
Heed all warnings.
Follow all instructions.
Do not block any of the ventilation openings. Install in accordance with the manufacturer‟s instructions.
Do not place your LCD monitor on an unstable stand, shelf or table. Serious bodily injury and/or damage to the LCD
monitor may result if it should fall. Your sales person can recommend an approved wall mounting kit. A special wall
mounting kit is available for this model. To prevent injury, the LCD monitor must be securely attached to the wall in
accordance with the installation instructions provided with the mounting kit. Always mount using recommended and
substantial fixture and fittings.
Do not install near any heat sources such as radiators, heat registers, stoves, or other apparatus (including amplifiers)
that produce heat. Do not mount near an open flame source. Open flames must never be used near this LCD
monitor.
This monitor surpasses IP56 weatherproof standards. It is not protected against temporary or continuous immersion
in liquid. Do not submerge this monitor in liquid.
Do not defeat the safety purpose of the polarized or grounding type plug. A polarized plug has two blades with one
wider than the other. A grounding type plug has two blades and a third grounding prong. The wide blade or the third
prong is provided for your safety. When the provided plug does not fit into your outlet, consult an electrician for the
replacement of the obsolete outlet.
Protect the power cord from being walked on or pinched particularly at plugs, convenience receptacles and the point
where they exit from the apparatus. Do not allow anything to rest on the power cord and do not locate this LCD
monitor where the cord will be damaged by people walking on it.
Only use the attachments/accessories specified by the manufacturer.
Use only with a cart, stand, tripod, bracket or table specified by the manufacturer or sold with
the apparatus. When a cart is used, use caution when moving the cart/apparatus to avoid
injury from tip-over.
This LCD monitor should be operated only from the type of power source indicated on the
monitor or as indicated in the Operating Instructions. If you are not sure of the type of power supply, consult your
sales person or your local power company.
Unplug this apparatus during lightning storms or when unused for long periods of time.
Do not use immediately after moving the LCD monitor from a low temperature to a high temperature environment, as
this causes condensation, which may result in fire, electric shock, or other hazards.
Before cleaning, be sure to unplug the power cord from the power outlet.
Do not apply liquid cleaners or aerosol cleaners directly onto the LCD monitor. Use a damp cloth for cleaning.
Runco CP-42HD/CP-52HD Owner’s Operating Manual
vii
18. This LCD monitor should have a minimum
distance of 5cm away from the wall and the
monitor should have 10cm distance around the
top and sides.
19. Refer all servicing to qualified service
personnel. Servicing is required when the
apparatus has been damaged in an way, such
as power supply cord or plug is damaged,
objects have fallen into the apparatus, the
apparatus does not operate normally, or has been dropped.
20. Keep the packing material in case the equipment should ever need to be shipped.
viii
Runco CP-42HD/CP-52HD Owner’s Operating Manual
Compliance Information
FCC PART 15:
NOTE: This equipment has been tested and found to comply with the limits for a Class B digital device, pursuant to Part
15 of the FCC Rules. These limits are designed to provide reasonable protection against harmful interference in a
residential installation.
This equipment generates, uses and can radiate radio frequency energy and, if not installed and used in accordance with
the instructions, may cause harmful interference to radio communications. However, there is no guarantee that
interference will not occur in a particular installation. If this equipment does cause harmful interference to radio or
television reception, which can be determined by turning the equipment off and on, the user is encouraged to try to correct
the interference by one or more of the following measures:
Reorient or relocate the receiving antenna.
Increase the separation between the equipment and receiver.
Connect the equipment into an outlet on a circuit different from that to which the receiver is connected.
Consult the dealer or an experienced radio/TV technician for help.
INDUSTRY CANADA (ICES-003)
This Class B digital apparatus complies with Canadian ICES-003.
Cet appareil numérique de la classe B est conforme á la norme NMB-003 du Canada.
IMPORTANT RECYCLE INSTRUCTIONS
Lamp(s) inside this product contain mercury. This product may contain other electronic waste that can be
hazardous if not disposed of properly. Recycle or dispose in accordance with local, state, or federal Laws.
For more information, contact the Electronic Industries Alliance at WWW.EIAE.ORG.
For lamp specific disposal information check WWW.LAMPRECYCLE.ORG.
DISPOSAL OF OLD ELECTRICAL AND ELECTRONIC EQUIPMENT (Applicable throughout
the European Union and other European countries with separate collection programs)
This symbol found on your product or on its packaging, indicates that this product should not be
treated as household waste when you wish to dispose of it. Instead, it should be handed over to an
applicable collection point for the recycling of electrical and electronic equipment. By ensuring this
product is disposed of correctly, you will help prevent potential negative consequences to the
environment and human health, which could otherwise be caused by inappropriate disposal of this
product. The recycling of materials will help to conserve natural resources. This symbol is only valid in
the European Union. If you wish to discard this product, please contact your local authorities or dealer
and ask for the correct method of disposal.
Runco CP-42HD/CP-52HD Owner’s Operating Manual
ix
x
Runco CP-42HD/CP-52HD Owner’s Operating Manual
Table of Contents
RuncoCare™ Standard One Year Limited Warranty ........................................ iii
Important Safety Instructions ........................................................................... vii
Compliance Information .................................................................................... ix
1. Introduction .................................................................................................... 1
About This Manual ........................................................................................... 1
Target Audience......................................................................................... 1
If You Have Comments About This Manual ............................................... 1
Textual and Graphic Conventions.............................................................. 1
Using This Manual ........................................................................................... 2
Description, Features and Benefits .................................................................. 3
Key Features and Benefits......................................................................... 3
Parts List .................................................................................................... 3
2. Controls & Functions .................................................................................... 5
Climate Series LCD at a Glance ...................................................................... 5
Controls and Indicators .............................................................................. 5
Climate Series LCD Inputs and Outputs .................................................... 7
Climate Series LCD Remote Control ............................................................... 9
3. Installation .................................................................................................... 12
Remote Control .............................................................................................. 12
PET Film Removal ................................................................................... 12
Battery Installation ................................................................................... 12
Notes on Remote Control Operation........................................................ 12
Quick Setup ................................................................................................... 13
Installation Considerations ............................................................................. 14
Wall-Mounting the Climate Series LCD ................................................... 14
Connections to the Climate Series LCD ........................................................ 14
Input/Output Connection Panel Access ................................................... 14
Connecting the Climate Series LCD to Source Components .................. 15
Connecting External Speakers (Optional) ................................................ 18
RS-232 Controller Connection ................................................................. 18
Antenna/Cable TV Connection ................................................................ 19
Runco CP-42HD/CP-52HD Owner’s Operating Manual
xi
Table of Contents
4. Operations .................................................................................................... 21
Turning on the Power .................................................................................... 21
Changing the OSD Language ........................................................................ 21
Setting the PC Display Properties ................................................................. 22
Using the On-Screen Menus ......................................................................... 23
Picture ...................................................................................................... 25
Audio ........................................................................................................ 26
Time ......................................................................................................... 27
Setup........................................................................................................ 28
Lock ......................................................................................................... 29
Channel.................................................................................................... 30
Stereo Sound/SAP ......................................................................................... 31
5. Maintenance and Troubleshooting ............................................................ 33
Cleaning ......................................................................................................... 33
Cleaning the Display, Panel Body and Remote Control .......................... 33
Cleaning the Air Filters and Vents ........................................................... 33
Trouble Shooting Tips .................................................................................... 33
6. Specifications .............................................................................................. 35
Climate Series LCD Specifications ................................................................ 35
Climate Series LCD Dimensions ................................................................... 36
xii
Runco CP-42HD/CP-52HD Owner’s Operating Manual
Runco CP-42HD/CP-52HD Owner’s Operating Manual
xiii
List of Figures
2-1. Climate Series LCD Controls and Indicators ................................. 5
2-2. Climate Series LCD Inputs and Output Interfaces ......................... 7
2-3. Climate Series LCD Remote Control ............................................. 9
3-1. HDMI Connections ...................................................................... 15
3-2. Analog RGB Connections ............................................................ 16
3-3. Component Video Connections ................................................... 17
3-4. Composite and S-Video Connections .......................................... 17
3-5. External Speaker Connection ...................................................... 18
3-6. RS-232 Control System Connection ............................................ 18
3-7. Air/Cable Connection ................................................................... 19
4-1. Climate Series LCD OSD Menu Structure ................................... 24
6-1. CP-42HD Dimensions (Front/Side/Rear) ..................................... 36
6-2. CP-52HD Dimensions (Front/Side/Rear) ..................................... 37
xiv
Runco CP-42HD/CP-52HD Owner’s Operating Manual
Runco CP-42HD/CP-52HD Owner’s Operating Manual
xv
1.
This Owner‟s Manual describes how to Install, set up and operate a
Runco Climate Series Model CP-42HD and CP-52HD Weatherproof FlatPanel LCD. Throughout this manual, the Runco CP-42HD and CP-52HD
are referred to collectively as the “Climate Series LCD.” The information
in this manual applies to both products, except where otherwise indicated.
Runco has prepared this manual to help home theater installers and end
users get the most out of the Climate Series LCD.
Introduction
1.1
About This Manual
Target Audience
Runco has made every effort to ensure that this manual is accurate as of
the date it was printed. However, because of ongoing product
improvements and customer feedback, it may require updating from time
to time. You can always find the latest version of this and other Runco
product manuals on-line, at www.Runco.com.
Runco welcomes your comments about this manual. Send them to
[email protected].
Text Conventions: The following conventions are used in this manual.
In order to clarify the information and instructions provided:
Remote and built-in keypad button identifiers are set in upper-case
bold type; for example, “Press EXIT to return to the previous menus.”
Computer Input (commands you type) and output (responses that
appear on-screen) is shown in monospace (fixed-width) type; for
example:
“To change the aspect ratio to Letterbox, type op aspect = 1
<Enter>.”
All keys with functional names are initial-capped, set in bold type and
enclosed in angle brackets. These keys are the following: <Enter>,
<Spacebar>, <Control>, <Esc> and <Tab>.
<Enter> indicates that you may press either the RETURN or ENTER
key on your keyboard if it has both keys.
In addition to these conventions, underlining, boldface and/or italics are
occasionally used to highlight important information, as in this example:
A carriage return must be used after each command or string.
Runco CP-42HD/CP-52HD Owner’s Operating Manual
1
If You Have Comments
About This Manual…
Textual and Graphic
Conventions
Introduction
Graphic Conventions: These symbols appear in numerous places throughout
the manual, to emphasize points that you must keep in mind to avoid problems
with your equipment or injury:
TIPS highlight time-saving short cuts and helpful guidelines
for using certain features.
NOTES emphasize text with unusual importance or special
significance. They also provide supplemental information.
CAUTIONS alert users that a given action or omitted action
can degrade performance or cause a malfunction.
WARNINGS appear when a given action or omitted action
can result in damage to the equipment, or possible non-fatal
injury to the user.
DANGER appears when a given action can cause severe
injury or death
1.2
Using This Manual
Use the following table to locate the specific information you need in this manual.
…Turn to page:
If you need…
Information about obtaining service
iv
General information about the CP-42HD and CP52HD Flat-Panel LCDs
3
Installation instructions
12
First-time configuration instructions
21
Troubleshooting Tips
33
Specifications for the CP-42HD and CP-52HD FlatPanel LCDs
35
2
Runco CP-42HD/CP-52HD Owner’s Operating Manual
Introduction
The Climate™ Series LCD offers legendary Runco® product quality and
attention to detail housed inside a slim, yet rugged, weatherproof cabinet.
Best of all, this display is finished with the same clean and elegant look
and style that distinguishes all Runco flat panels.
Rain or shine, the Climate Series LCD will enhance your luxury outdoor
lifestyle. This full high-definition widescreen flat-panel monitor utilizes
advanced LCD technology in an enclosure designed to withstand the
elements. Featuring 1920 x 1080 native resolution and reflection-rejection
glass, the Climate Series LCD‟s image quality is impressive.
The enclosure has been engineered for maximum durability. We have
gone to great lengths to ensure protection from adverse environmental
conditions including temperature, exposure to moisture, dust, oils, and
even intermittent direct water spray.
Engineered into the monitor is an internal setting that allows operation in
colder temperatures (down to 0º F) so you can enjoy viewing year round.
The aluminum cabinet is sealed to ensure protection from the elements
and features a specially-designed internal ventilation system to provide
adequate cooling when needed. The ThermoCare™ internal thermostat
activates a cooling system regardless of whether the TV is on or off, to
avoid damage to the display in hot weather. As a result, the Runco
Climate Series LCD surpasses IP56 weatherproof standards, which
accommodates leaving it outdoors 365 days a year, without worry.
Installation options are limited only by the imagination. Patios, barbeques,
gazebos, pools, hot tubs, gardens, tennis courts, putting greens – literally
anywhere you want amazing video in a sleek flat-panel design.
The Climate Series LCD is a Runco, offering all the user-friendly features
you‟ve come to expect from the brand that prides itself in providing the
world‟s finest home theater products. Custom installation capabilities
include an RS-232 automation interface with discrete on/off, input
selection and aspect ratio control. These models also features Runco‟s
exclusive Vivix® video processing for outstanding imagery, artifact-free
scaling and superb reproduction of both native film and native video
formats.
A wide variety of inputs include two HDMI signals and a range of video
inputs for gaming, internet surfing and other computer activities. The
Climate Series LCD has an exceptionally wide viewing angle of 176
degrees to make enjoyment possible for a large number of viewers with
widely dispersed seating positions.
Runco invites you to enjoy the world of true luxury outdoor living with the
Climate Series LCD.
Runco CP-42HD/CP-52HD Owner’s Operating Manual
3
1.3
Description, Features
and Benefits
Introduction
Key Features and Benefits
The Climate Series LCD offers these key feathers and benefits:
Full HD Native Resolution: 1920 x 1080
Anti-Reflective Glass that helps to reduce glare and reflection for easy
viewing in direct sunlight as well as protect the LCD from being
damaged by sunlight.
Engineered into the monitor is an internal setting that allows operation
in colder temperatures (down to 0º F) so you can enjoy viewing year
round.
The ThermoCare™ internal thermostat activates a cooling system
regardless of whether the TV is on or off, to avoid damage to the
display in hot weather.
The Runco Climate Series LCD surpasses IP56 weatherproof
standards, which accommodates leaving it outdoors 365 days a year,
without worry.
Includes an RS-232 automation interface with discrete on/off, input
selection and aspect ratio control.
Features Runco‟s exclusive Vivix® video processing for outstanding
imagery, artifact-free scaling and superb reproduction of both native
film and native video formats.
Has a wide variety of inputs including two HDMI signals and a range
of video inputs for gaming, internet surfing and other computer
activities.
Has an exceptionally wide viewing angle of 176 degrees to make
enjoyment possible for a large number of viewers with widely
dispersed seating positions.
Comes with a waterproof remote that is able to float.
Parts List
Your Climate Series LCD is shipped with the following items. If any items
are missing or damaged, please contact your Runco dealer or Runco
Customer Service rep at (800) 23-RUNCO.
Climate Series LCD Panel: Model CP-42HD (part number 997-615600) or CP-52HD (part number 997-6157-00)
Remote Control unit and (1) Lithium CR2032 battery
AC Power Cord
CP-42HD/CP-52HD Installation/Operation Manual (this document)
Optional Accessories:
Outdoor Wall Mount Kit (part number 955-0203-00)
Table Stand (part number 955-0202-00)
ColourPalette Outdoor (standard 997-6174-00 and premium match
997-6175-00)
4
Runco CP-42HD/CP-52HD Owner’s Operating Manual
2.
Controls & Functions
2.1
Climate Series LCD at a
Glance
Figure 2-1 shows the locations of the Climate Series LCD controls and indicators
(shown with stand).
Figure 2-1 shows the Climate Series LCD Side/Front/Back/Bottom View
Runco CP-42HD/CP-52HD Owner’s Operating Manual
5
Controls and Indicators
Controls and Functions
1. HANDLES
Always use the handles when carrying the display. DO NOT touch or
hold the screen face.
2. KEYPAD
You can use the keypad instead of the remote control unit to operate the onscreen display (OSD) controls. The keypad operates as follows:
VOLUME DOWN / MENU LEFT
Use this button to increase sound volume. When a menu is
visible on-screen, this button operates identically to the Left Key
on the Climate Series remote control unit.
VOLUME UP / MENU RIGHT
Use this button to increase sound volume. When a menu is
visible on-screen, this button operates identically to the Right
Key on the Climate Series remote control unit.
CHANNEL DOWN / MENU DOWN
Use this button to adjust the channel up. When a menu is
visible on-screen, this button operates identically to the Down
Key on the Climate Series remote control unit.
CHANNEL UP / MENU UP
Use this button to adjust the channel down. When a menu is
visible on-screen, this button operates identically to the Up Key
on the Climate Series remote control unit.
SOURCE
To select a source, press the SOURCE button repeatedly (with
no menu available on-screen).
MENU
Press this button to access the on-screen display (OSD), or to
exit the current menu and return to the previous one.
POWER
Use this button to turn the unit on and off.
3. IR SENSOR / STATUS LED
Infrared (IR) Sensor that receives signals from the remote control. Status
LED lights red to indicate that the Climate Series LCD is in standby mode or
if the main power switch is set to off; green during normal operation.
4. DISPLAY STAND
Included with the Climate Series for table-top installations.
5. INTAKE VENTS
Internal fans draw cool air into the monitor through these vents.
6. BACK PANEL INPUT/OUTPUT COVER
Input/Output connections are recessed in the back of the monitor and have a
cover engineered to keep connections dry.
7. EXHAUST VENT
Warm air exits the monitor through these vents. Ensure that they are not
blocked.
6
Runco CP-42HD/CP-52HD Owner’s Operating Manual
Controls and Functions
Figure 2-2 shows the Climate series Input and Output Interfaces.
Figure 2-2. Climate Series LCD Input/Output Interfaces
1. HDMI 1 (Digital)
HDCP-compliant digital video inputs for connecting an HDMI or DVI source.
2. HDMI 2 (Digital)
HDCP-compliant digital video inputs for connecting an HDMI or DVI source.
3. RS-232
A female, 9-pin D-sub connector for interfacing with a PC or home theater
automation/control system.
4. PC LINE
Connect the audio output from a personal computer here.
5. RGB/VGA P.C.
Provides a standard, 15-pin VGA-style connection to either an RGB or
component high-definition source, or to a personal computer.
6. COMPONENT 2
Standard- or high-definition (up to 1080p), YPrPb component video and stereo
audio input.
7. COMPONENT 1
Standard- or high-definition (up to 1080p), YPrPb component video and stereo
audio input. Also provides RGB input for RGBS sources.
Runco CP-42HD/CP-52HD Owner’s Operating Manual
7
Climate Series LCD Inputs
and Outputs
Controls and Functions
8. VIDEO INPUT (Composite or S-Video + Stereo Audio)
Standard, composite or S-video input and stereo audio input for connecting a
VCR, camcorder, laser disc player, Super VHS (S-VHS) VCR or other
composite or S-video source.
9. DIGITAL AUDIO OUTPUT
Connects the TV audio out to the digital audio input of an amplifier.
10. AIR/CABLE
Connect your antenna or cable television source here.
11. SPEAKER OUTPUT (LEFT + RIGHT)
For connecting external speakers with an impedance of 4 ohms.
8
Runco CP-42HD/CP-52HD Owner’s Operating Manual
Controls and Functions
Figure 2-3 shows the Climate Series LCD remote control, and the paragraphs
that follow describe its functionality.
Figure 2-3. Climate Series LCD Remote Control
Runco CP-42HD/CP-52HD Owner’s Operating Manual
9
2.2
Climate Series LCD
Remote Control
Controls and Functions
1. REMOTE SENSOR
2. SOUND MODE
Press this button to select sound mode, Standard, Music, Movie, or Personal.
3. DISPLAY INFORMATION
Press this button to view input signal information (source and resolution).
4. MUTE ON/OFF
Press this button to mute the audio output to the speakers.
5. MTS
Press this button to scroll through the available MTS settings.
6. VOLUME UP
Use this button to increase sound volume.
7. DOT
Press this button when entering the channel number for direct tuning to a
digital TV channel.
8. 0 - 9
Use these keys to enter numeric characters.
9. CHANNEL UP
Use this button to adjust channel up.
10. VOLUME DOWN
Use this button to decrease sound volume.
11. C.C. KEY
Press this button to activate Closed Caption function. Supports CEA608B
and CEA708B.
12. CHANNEL RETURN
Press this button to return to the previous channel selected.
13. CHANNEL DOWN
Use this button to adjust channel down.
14. SOURCE INPUT
Press this button to select the input you would like. Use the Up/Down Keys
to highlight the input source and then press OK. / ENTER.
15. LEFT KEY
Use this button to select items or settings.
16. MENU / EXIT
Press this button to show or hide the OSD controls, to save menu item
setting(s) or exit the current menu and return to the previous one.
17. AUTO FUNCTION
Press this button to auto-scan input sources.
18. PICTURE MODE
Press this button to select picture mode, Normal, Wide, Zoom, or Cinema.
19. UP KEY
Use this button to select items or settings.
20. RIGHT KEY
Use this button to select items or settings.
21. DOWN KEY
Use this button to select items or settings.
22. O.K. / ENTER
Press to select a highlighted menu item or confirm a changed setting.
23. HDMI 1 & 2
Press to select an HDMI input.
24. COMPONENT 1 & 2
Press to select a Component input.
10
Runco CP-42HD/CP-52HD Owner’s Operating Manual
Controls and Functions
25. COMPOSITE
Press to select the Composite input as the source.
26. T.V
Press this button to switch to the antenna/DTV/CATV input.
27. S-VIDEO BUTTON
Press to select the S-Video input as the source.
28. VGA BUTTON
Press to select the VGA input as the source.
29. DIGITAL BUTTON
Press this button to switch to the Digital Video input.
30. ASPECT BUTTON
Use this button to select Aspect Ratio, 4:3, Letterbox, or 16:9, Anamorphic.
31. NC
Reserved button
32. SLEEP BUTTON
Press this button to set the sleep mode function.
33. EPG
Switches the Electronic Program Guide (EPG) on/off.
34. NC
Reserved button
35. POWER ON
Use this button to turn the display on.
36. FAV
Use this button to select stored favorite channel. To store favorite channel,
select Favorite from the Channel menu (see page 30).
37. POWER OFF
Use this button to turn the display off.
Runco CP-42HD/CP-52HD Owner’s Operating Manual
11
3.
Installation
3.1
Remote Control
PET Film Removal
Battery Installation
For the first time use of the remote control, please pull out the PET Film.
To change the battery in the remote control:
1. Remove the six screws on the back of the remote.
2. Remove the battery and replace with another Lithium CR2032 Battery.
3. Please follow the drawing to remove the screws and replace the battery.
Notes on Remote Control
Operation
Make sure that there is nothing obstructing the infrared beam between the
remote control and the IR receiver on the projector.
If the effective rage of the remote control decreases, or it stops working,
replace the battery with a new one.
Ambient conditions may possibly impede the operation of the remote control.
If this happens, point the remote control at the monitor, and repeat the
operation.
This remote control is waterproof and floats.
12
Runco CP-42HD/CP-52HD Owner’s Operating Manual
Installation
Table 3-1 gives a quick overview of the Climate Series LCD installation process.
The sections following this one provide detailed instructions.
Installation should be performed by a qualified custom video
installation specialist.
Table 3-1. Installation Overview
Step
Procedure
For Details, Refer
to page…
1
Mount the Climate Series LCD on a wall
(optional)
14
2
Connect signal sources to the Climate Series
LCD
14
3
Connect external controller to RS-232 port
(optional)
18
4
Apply power to the Climate Series LCD
21
5
Change the OSD language
21
6
If using the Climate Series LCD with a PC,
adjust PC display properties
22
7
Display calibration: adjust the following for
each input; save settings when finished:
Contrast
Brightness
Color level
Tint
Sharpness
25
Runco CP-42HD/CP-52HD Owner’s Operating Manual
13
3.2
Quick Setup
Installation
3.3
Installation
Considerations
Wall-Mounting the Climate
Series LCD
Proper installation of your Climate Series LCD will ensure the highest possible
picture quality. Whether you are installing the Climate Series LCD temporarily or
permanently, you should take the following into account to ensure that it performs
optimally.
You can either place the Climate Series LCD on a table or in an entertainment
center, or mount it on a wall.
If you do decide to wall-mount the Climate Series LCD, ensure that the wallmount bracket is installed according to the instructions included with it. The wall
must be capable of supporting a redundant weight factor three (3) times the
weight of the display, or be reinforced.
Runco recommends that this be done by a customer installation specialist.
Use only the Runco-approved wall-mount kit designed for your
display.
Other considerations and tips that can help improve your installation:
Keep the Climate Series LCD away from devices that radiate
electromagnetic energy such as motors and transformers. Common sources
of these include slide projectors, speakers, power amplifiers and elevators.
3.4
Connections to the
Climate Series LCD
Proceed as follows to connect the Climate Series LCD to your video sources,
external controller(s) – if present – and AC power.
When connecting your equipment:
Turn off all equipment before making any connections.
Use the correct signal cables for each source.
Ensure that the cables are securely connected. Tighten the thumbscrews on
connectors that have them.
Use the left audio input when connecting mono audio sources.
Input/Output Connection
Panel Access
To access the rear input/output connectors, loosen the two captive screws on the
input/output cover and remove the input/output connector cover.
14
Runco CP-42HD/CP-52HD Owner’s Operating Manual
Installation
Connect your video sources to the Climate Series LCD as shown and described
in the sections that follow.
HDMI Connections: The Climate Series LCD has two HDMI inputs for
connecting a BD/HD-DVD/DVD player, DTV decoder, personal computer or any
other device with an HDMI or DVI output. Connect such devices as shown in
Figure 3-1.
Use the HDMI inputs whenever possible. This ensures the
highest video quality because the signal is carried in the digital
domain throughout the entire signal path, from source component
output into the display.
This Climate Series LCD supports the VESA Display Data
Channel (DDC) standard. This standard provides “Plug and Play”
capability; the display and a VESA DDC-compatible computer
communicate their setting requirements, allowing for quick and
easy set-up.
In order for Plug and Play to work correctly, you must turn on the display before
you turn on the connected computer.
Figure 3-1. HDMI Connections
Runco CP-42HD/CP-52HD Owner’s Operating Manual
15
Connecting the Climate
Series LCD to Source
Components
Installation
RGB Connections: The Climate Series LCD has an RGB input and a stereo
audio input for connecting a personal computer; see Figure 3-2.
Figure 3-2. Analog RGB Connections
1. Refer to Supported Timings on page xx for a list of computer signals compatible
with the Climate Series LCD. Use with signals other than those listed may cause
some functions not to work.
2. Some Macintosh computers may require a Macintosh video adapter. Contact
your nearest authorized service center or dealer.
3. This Climate Series LCD may not be able to display images from notebook
computers in simultaneous (CRT/LCD) mode. Should this occur, switch the
notebook computer to “CRT only” mode. If you are unsure how to do this, refer to
your notebook computer’s user manual.
16
Runco CP-42HD/CP-52HD Owner’s Operating Manual
Installation
Component Video Connections: If you have a DVD player, DTV decoder with a
component (YPbPR) output or other component video source, connect it to the
COMPONENT 1 or COMPONENT 2 input as shown in Figure 3-3.
Figure 3-3. Component Video Connections
Composite/S-Video Connections: The Climate Series LCD has one (1)
Composite video input and an S-Video input for connecting a VCR, camcorder,
laser disc player or DVD player; see Figure 3-4.
If you connect an S-Video source to the Video 2 input, the Composite input on
Video 2 is inactive.
Figure 3-4. Composite and S-Video Connections
Runco CP-42HD/CP-52HD Owner’s Operating Manual
17
Installation
Connecting External
Speakers (Optional)
Connect the
(positive) and
(negative) speaker wires to the SPEAKER-R
and SPEAKER-R terminals; see figure 3-5. Maintain the correct polarity. For
more information, refer to the owner‟s manual for your speakers.
Figure 3-5. External Speaker Connection
RS-232 Controller
Connection
Use a straight-through RS-232 cable with a 9-pin make connector to connect a PC
or home theater control/automation system (if present) to the RS-232 port on the
Climate Series LCD; see Figure 3-6.
Figure 3-6. RS-232 Control System Connection.
18
Runco CP-42HD/CP-52HD Owner’s Operating Manual
Installation
Use a coaxial RF cable to connect your cable box or antenna to the Tuner port
on the Climate Series LCD; see Figure 3-8. This input accepts the following
formats: NTSC, ATSC-VSB, QAM64 and QAM256.
Figure 3-7. Air/Cable Connection.
Runco CP-42HD/CP-52HD Owner’s Operating Manual
19
Antenna/Cable TV
Connection
20
Runco CP-42HD/CP-52HD Owner’s Operating Manual
4.
1. Turn on your source components.
2. Plug the female end of the supplied power cord into the AC receptacle inside
the back input panel of the Climate Series LCD (AC 100V ~ 240 V).
3. Connect the other end to your AC power source.
Operations
4.1
Turning on the Power
4. Press the ON button (
) on the remote control
to turn on the display (or press the power button
(
) on the side of the display). The power
indicator turns off.
5. After a brief warm-up period (approximately 10
seconds), the Climate Series LCD will display an
image.
The Climate Series LCD OSD language is initially set to English, but can also
display the menus in French or Spanish. To change the OSD language:
1.
2.
3.
4.
Press MENU.
Select Setup from the Main Menu.
Select Menu Language from the Setup Menu.
Press
or
to highlight the desired language and press O.K. The change
takes effect immediately.
Runco CP-42HD/CP-52HD Owner’s Operating Manual
21
4.2
Changing the OSD
Language
Operations
4.3
Setting the PC Display
Properties
To maximize image quality when using the Climate Series LCD with a personal
computer, you may need to adjust the display properties of your PC Video Card.
To do this:
1. Choose Settings from the Windows Start
menu and click on “Control Panel.”
2. Double click on the Display icon.
3. Click the Settings tab on the display
dialog box.
4. Set the Screen area to 1400x1050 pixels.
5. Click the Advanced button and click the
Monitor tab on the dialog box. Set the
Refresh Frequency to 60 Hz and click OK.
22
Runco CP-42HD/CP-52HD Owner’s Operating Manual
Operations
1. The maximum available resolution and vertical frequency is
1920x1200/60Hz or the maximum supported by your video
card, whichever is lower.
2. The Climate Series LCD supports 8-bit color (16,777,216
possible colors).
Many functions are controlled through the menu function, using the remote
control handset or keypad on the side of the display.
To use the on-screen menus:
1. Press MENU to display the Main Menu.
2. To select a menu item, use the left- or right-arrow buttons ( , ) on the
remote to control to highlight it.
3. Press the down-arrow button ( ) to access that menu.
4. Use the up- or down-arrow buttons ( , ) to select the setting you want to
change. Then, press the right-arrow button ( ).
5. Press the right- or left-arrow button ( , ) to change that setting.
6. To return to the previous menu, press MENU or ( ).
The Climate Series LCD OSD menus are arranged hierarchically, as shown in
Figure 4-1. Depending on the selected input source and/or signal characteristics,
some menu options may not be available.
Runco CP-42HD/CP-52HD Owner’s Operating Manual
23
4.4
Using the On-Screen
Menus
Operations
Picture Mode
Picture
Contrast
Brightness
Color
Tint
Sharpness
Color Mode
Sound Mode
Standard
Dynamic
Personal
Menu
Language
Transparency
0~100
Zoom Mode
-50~+50
0~100
Normal
Warm
Cool
Standard
Music
Movie
Personal
Noise
Reduction
Setup
English
French
Spanish
Off / On
Normal
Wide
Zoom
Cinema
Off
Weak
Middle
Strong
Advanced
CC Mode
Bass
Treble
Balance
Audio
0~100
Surround
Off / On
AVC
SPDIF Type
Off / On
PCM / RAW
Closed
Caption
MISC Setup
Restore
Default
English
Audio Language
French
Sleep Timer
Time
Time Zone
Daylight Savings
Time
Clock
Lock
Spanish
Off, 5 min ~ 240
min
Pacific
Alaska
Hawaii
Eastern
Enter
Password
Air/Cable
Basic
Selection
Advanced
Selection
Option
XVS On / Off
Reset to
Factory
Setup
default
On
Off
CC on
mute
CC1
CC
Service 1
Air / Cable
Auto
Auto Scan
Channel Favorite
Central
Show/Hide
Mountain
Channel No.
Off / On
Channel Label
Auto
DTV Signal
STD
IRC
HRC
FAV channel
Channel On
/ Off
Figure 4-1. Climate Series LCD OSD Menu Structure
24
Runco CP-42HD/CP-52HD Owner’s Operating Manual
Operations
Use the controls in the Picture Menu to calibrate your Climate Series LCD for
optimum picture quality.
Picture Mode: To set the Picture Mode, select Picture Mode from the Picture
menu and press the left- or right- arrow buttons to select Standard, Dynamic or
Personal. Press O.K. or MENU to confirm your selection.
Contrast: To adjust the Contrast, select Contrast from the Picture menu and
press the left- or right- arrow buttons to adjust. Press O.K. or MENU to confirm
your selection.
Brightness: To adjust the Brightness, select Brightness from the Picture menu
and press the left- or right- arrow buttons to adjust. Press O.K. or MENU to
confirm your selection.
Color: To adjust the Color, select Color from the Picture menu and press the leftor right- arrow buttons to adjust. Press O.K. or MENU to confirm your selection.
Tint: To adjust the Tint, select Tint from the Picture menu and press the left- or
right- arrow buttons to adjust. Press O.K. or MENU to confirm your selection.
Sharpness: To adjust the Sharpness, select Sharpness from the Picture menu
and press the left- or right- arrow buttons to adjust. Press O.K. or MENU to
confirm your selection.
Color Mode: To set the Color Mode, select Color Mode from the Picture menu
and press the left- or right- arrow buttons to select Normal, Warm or Cool. Press
O.K. or MENU to confirm your selection.
Runco CP-42HD/CP-52HD Owner’s Operating Manual
25
Picture
Operations
Audio
To adjust the Climate Series LCD audio setting, select Audio from the Main Menu
and press the up- or down-button to select the setting you want to change.
Sounds Mode: To set the Sound Mode, select Sound Mode from the Audio
menu and press the left- or right- arrow buttons to select Standard, Music, Movie
or Personal. Press O.K. or MENU to confirm your selection.
Bass: To adjust the Bass, select Bass from the Audio menu and press the left- or
right- arrow buttons to adjust. Press O.K. or MENU to confirm your selection.
Treble: To adjust the Treble, select Treble from the Audio menu and press the
left- or right- arrow buttons to adjust. Press O.K. or MENU to confirm your
selection.
Balance: To adjust the left/right speaker balance, select Balance from the Audio
Menu and press the left- or right- arrow buttons to make one channel louder than
the other.
Surround: To turn the Surround Sound on or off, select Surround from the Audio
Menu and press the left- or right- arrow buttons to change setting. When finished,
press O.K. or MENU.
AVC: To turn the AVC on or off, select AVC from the Audio Menu and press the
left- or right- arrow buttons to change setting. When finished, press O.K. or
MENU to confirm your selection.
SPDIF Type: To set the SPDIF Type, select SPDIF Type from the Audio menu
and press the left- or right- arrow buttons to select PCM or RAW. Press O.K. or
MENU to confirm your selection.
Audio Language: To change the Audio Language, select Audio Language from
the Audio menu and press the left- or right- arrow buttons to select English,
French or Spanish. Press O.K. or MENU to confirm your selection.
26
Runco CP-42HD/CP-52HD Owner’s Operating Manual
Operations
To set the Climate Series LCD Time functions, select Time from the Main Menu
and press the up- or down-button to select the setting you want to change.
Sleep Timer: Use the Sleep Timer to turn off the Climate Series LCD after a
specified interval.
To set the Sleep Timer:
Select Sleep Timer from the Time menu and press the left- or right- arrow
buttons to change setting.
-ORPress the SLEEP button on the remote control.
Use the left- or right- arrow buttons to turn Sleep Timer off or select 5min ~
240min. Then, press O.K. or MENU.
Time Zone: To set the local (North American) time zone, select Time Zone from
the Time menu and press the left- or right- arrow buttons to select Pacific,
Alaska, Hawaii, Eastern, Central or Mountain. Press O.K. or MENU to confirm
your selection.
Daylight Saving Time: To turn the Daylight Saving Time setting on or off, select
Time Zone from the Time menu and press the left- or right- arrow buttons to
change setting. When finished, press O.K. or MENU.
Clock: To set the Climate Series LCD internal clock, select Clock from the Time
menu and press ENTER. Clock should automatically update based on the digital
channel‟s time source. When finished, press O.K. or MENU.
Runco CP-42HD/CP-52HD Owner’s Operating Manual
27
Time
Operations
Setup
Use the controls in the Setup menu to perform advanced image quality
adjustments and access various other Climate Series LCD Display functions.
Menu Language: Select Menu Language from the Setup menu and press the
left- or right- arrow buttons to select English, French or Spanish. Press O.K. or
MENU to confirm your selection.
Transparency: To turn the Transparency of the Menu on or off, select
Transparency from the Setup Menu and press the left- or right- arrow buttons to
change setting. When finished, press O.K. or MENU.
Zoom Mode: Select Zoom Mode from the Setup menu and press the left- or
right- arrow buttons to select Normal, Wide, Zoom or Cinema. Press O.K. or
MENU to confirm your selection.
Noise Reduction: Select Noise Reduction from the Setup menu and press the
left- or right- arrow buttons to select Off, Weak, Middle or Strong. Press O.K. or
MENU to confirm your selection.
Closed Caption: Select Closed Caption from the Setup menu to control the
display of closed captions when watching programs that contain them.
Restore Default: Restore Default setting returns your Climate Series LCD to the
original Factory Default setting.
28
Runco CP-42HD/CP-52HD Owner’s Operating Manual
Operations
Use the Lock Menu to set your own password and use this password to lock your
Climate Series LCD. Password default is set to 0000.
Runco CP-42HD/CP-52HD Owner’s Operating Manual
29
Lock
Operations
Channel
Use the controls in the Channel menu to adjust Channel settings and access
various other Climate Series LCD Display functions.
Air/Cable: Use the Air/Cable setting in the Channel menu to select Air or Cable.
Auto Scan: Use the Auto Scan to select the Cable system. Press the left- or
right- arrow buttons to select Auto, STD, IRC or HRC.
Favorite: Select Favorite from the Channel menu to set the favorite channel
associated with the FAV button on the Climate Series remote control.
Show/Hide: Select the Show/Hide from the Channel menu to show or hide a
specific channel.
Channel No.: Allows you to tune up and down through various channels to
select channel options.
Channel Label: Select this Channel setting to enter customer names for
individual channels.
DTV Signal: Shows the format of the currently tuned channel.
30
Runco CP-42HD/CP-52HD Owner’s Operating Manual
Operations
The Climate Series LCD supports Multichannel Television Sound (MTS), the
broadcast audio standard that allows transmission of both stereo and
Secondary Audio Program (SAP) content.
The SAP is usually a foreign-language translation. However, it can also be used
for other purposes such as Described Video Services (DVS0, which provide
descriptive narration of key visual elements in programs for the benefit of the
visually impaired.
You can select sound options depending on
the broadcast signal by pressing the MTS
button on the remote control.
Runco CP-42HD/CP-52HD Owner’s Operating Manual
31
4.5
Stereo Sound/SAP
32
Runco CP-42HD/CP-52HD Owner’s Operating Manual
5.
Maintenance and Troubleshooting
Regular cleaning will extend the life and performance of the Climate Series LCD.
Before cleaning, be sure to unplug the power cord from the power outlet.
Do not under any circumstances use solvents such as benzene or thinner to
clean the Climate Series LCD. Doing so may cause deterioration or peeling of
paint from the display or remote control unit.
5.1
5.1
Cleaning
Cleaning
Cleaning the Display,
Panel Body and Remote
Control
For cleaning the weatherproof protective front glass or remote control, use a mild
household glass cleaner with a non abrasive soft cloth. If using a cleaner for the
first time, we suggest using a test spot in a corner before cleaning the entire
surface.
For cleaning the body, use a mild household cleaner with a non abrasive with a
soft cloth. If using a cleaner for the first time, we suggest using a test spot on the
back of the TV before cleaning the entire surface.
It is recommended that you clean the air filters located at the bottom of the
Climate Series LCD every six (6) months. To remove the filters, simply unscrew
the two (2) screws. Wash the filter with warm water. Do not use chemicals of any
sort. Allow to dry before reinstalling.
Cleaning the Air Filters
and Vents
As a general rule, use a vacuum cleaner about once a month to clean the vents
on the rear panel of the display of dust buildup (set the vacuum cleaner to its
weakest setting when doing this). If not removed, accumulated dust can cause
the internal temperature to increase, resulting in possible breakdown or fire.
5.2
Troubleshooting Tips
Table 5-1. Troubleshooting Chart
Symptom
The display does not turn
on after initial installation.
Possible Cause(s)
The Climate Series LCD is
not plugged in or the AC
outlet is not active.
The remote control battery
has run out.
The display is on, but there
is no picture.
Incorrect source selection.
Source component is not
turned on.
Source component is
connected incorrectly or not
at all.
Runco CP-42HD/CP-52HD Owner’s Operating Manual
33
Solution
Ensure that the
Climate Series
LCD is plugged in
and that the AC
outlet is active.
Replace the
battery.
Select the correct
source.
Turn on the source
component.
Check video
connections to the
source component.
Troubleshooting
Table 5-1. Troubleshooting Chart (continued)
Symptom
Picture is okay, but there
is no sound.
Possible Cause(s)
Audio output is muted.
Volume setting is too low.
Source component is
connected incorrectly or not
at all.
Speakers are connected
incorrectly or not at all.
Audio settings are incorrect
Image is too bright and/or
lacks definition in the
bright areas of the image.
Image appears “washed
out” and/or dark areas
appear too bright.
Colors in the image are
swapped; for example,
reds appear blue or vice
versa.
The image is too large or
too small.
34
Contrast is set too high.
Solution
Press the MUTE
button on the
remote control.
Turn up the
volume.
Check audio
connections to
source component.
Check speaker
connections
(Figure 3-5).
Check the setting
for SPDIF Type
(page 26). For
HDMI audio
sources, ensure
that the SPDIF type
is “PCM” (refer to
the manual for the
source
component).
Lower the contrast
setting.
Brightness is set too high.
Lower the
brightness setting.
The Red/Pr, Green/Y, or
Blue/Pb outputs from the
source are connected to the
wrong inputs on the Climate
Series LCD.
Image size needs adjusting.
Ensure that the
source outputs are
connected to the
correct Climate
Series LCD input.
Adjust the image
size (refer to the
Zoom Mode on
page 28).
Runco CP-42HD/CP-52HD Owner’s Operating Manual
6.
Table 6-1 lists the Climate Series LCD specifications.
6.1
Climate Series LCD
Specifications
Table 6-1. Climate Series LCD Specifications
Native Resolution:
Screen Size:
Screen Aspect Ratio:
Available Aspect Ratios:
DTV Compatibility:
Contrast Ratio:
Data/Graphics
Compatibility:
1920 x 1080 (full high definition)
CP-42HD = 42 in. (diagonal)
CP-52HD = 52 in. (diagonal)
16:9
4:3, Letterbox, 16:9, Anamorphic
480i, 480p, 720p, 1080i, 1080p
2,000:1
Up to 1920x1200 at 60 Hz
Response Time (typical):
CP-42HD = 6.5 ms
CP-52HD = 6 ms
Vivix Processing:
RTR™: Real Time Refresh 60Hz panel and
processing, Vivix 3:2 pull down
Video/Audio Inputs:
(1) Composite, (1) S-video, (2) component,
(2)HDMI, (1) VGA (15-pin D-sub)
Outputs:
(1) Digital Audio RCA, (1) Speakers out (amplifier
recommended)
Discrete IR Control:
Power Requirements:
Source, power and aspect ratios via RS-232 or
remote
AC 100~240V 50~60Hz 5A max
Power Consumption
(typical):
CP-42HD = 350W
CP-52HD = 500W
Operating Environment:
Operation temperature 0 degrees C to 40 degree
C.
Dimensions (w/o stand):
CP-42HD = 40.9" (1,040mm) x 4.6" (116.5mm) x
25.2" (640mm)
CP-52HD = 50.4" (1,280mm) x 5.3" (135mm) x
30.5" (775mm)
Weight (w/o stand):
CP-42HD = 73.1 lbs (33.2 Kg)
CP-52HD = 121 Lbs (55 Kg)
(1) One year RuncoCare parts and labor from the
date of delivery to the end user. RuncoCare™ and
Runco RedCarpet™ plans are also available.
Limited Warranty:
Specifications are subject to change without notice.
Runco CP-42HD/CP-52HD Owner’s Operating Manual
Specifications
35
Specifications
6.2
Climate Series LCD
Dimensions
Figure 7-1 and Figure 7-2 show the Climate Series LCD dimensions (all
dimensions are in millimeters).
Figure 6-1. CP-42HD Dimensions (Front/Side/Rear)
36
Runco CP-42HD/CP-52HD Owner’s Operating Manual
Specifications
Figure 6-2. CP-52HD Dimensions (Front/Side/Rear)
Runco CP-42HD/CP-52HD Owner’s Operating Manual
37
SERIAL NUMBER
020-1065-00 Rev. A
July 2010
Runco International
1195 NW Compton Drive
Beaverton, OR 97006 Ph (503) 748-1100 / (800) 23-RUNCO / Fax (503) 748-1244
www.runco.com
38
Runco CP-42HD/CP-52HD Owner’s Operating Manual