1
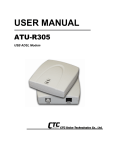
User Manual ATU-R303 ADSL USB Modem Table of Contents ABOUT THIS MANUAL......................................................................................................................................... 1 PREFACE.............................................................................................................................................................. 2 ATU-R303 ADSL USB MODEM MANUAL ......................................................................................... 2 CHAPTER 1: OVERVIEW..................................................................................................................................... 3 ABOUT ADSL................................................................................................................................. 3 PROTOCOL AND DEVICE DRIVER SELECTION ...................................................................................... 3 FEATURES ...................................................................................................................................... 5 CHAPTER 2: ADSL USB MODEM INSTALLATION AND SOFTWARE SETUP................................................... 6 SYSTEM REQUIREMENTS .................................................................................................................. 7 Windows.................................................................................................................................. 7 MODEM HARDWARE INSTALLATION ................................................................................................... 8 SOFTWARE SETUP FOR WINDOWS XP ............................................................................................. 10 SOFTWARE SETUP FOR WINDOWS 2000 .......................................................................................... 20 SOFTWARE SETUP FOR WINDOWS 98 AND 98 SECOND EDITION ........................................................ 28 SOFTWARE SETUP FOR WINDOWS ME ............................................................................................ 34 CHAPTER 3: CUSTOMIZING COMMUNICATION SETTINGS.............................................................................. 75 CHAPTER 4: CONTROL PANEL APPLICATION FOR WINDOWS...................................................................... 77 CHAPTER 5: SOFTWARE UNINSTALL ............................................................................................................. 79 APPENDIX A: MODIFYING TCP/IP NETWORKING OPTIONS ........................................................................... 81 WAN USB DRIVER ....................................................................................................................... 81 Windows 98 and Windows 98 Second Edition............................................................................ 81 Windows XP & 2000.................................................................................................................. 84 Microsoft Windows ME .............................................................................................................. 86 LAN USB DRIVER ........................................................................................................................ 88 Microsoft Windows 98, First and Second Editions ...................................................................... 88 Microsoft Windows XP & 2000................................................................................................... 90 Microsoft Windows ME .............................................................................................................. 92 ATM USB DRIVER FOR MICROSOFT WINDOWS 98 SECOND EDITION ................................................. 95 ATM USB Driver for Microsoft Windows XP & 2000 ................................................................... 97 ATM USB Driver for Microsoft Windows ME .............................................................................. 99 APPENDIX B: POINT-TO-POINT PROTOCOL OVER ETHERNET ................................................................... 101 APPENDIX C: SPECIFICATIONS...................................................................................................................... 103 ATU-R303 ADSL USB MODEM CONNECTOR ............................................................................... 103 DATA TRANSFER RATES .............................................................................................................. 103 POWER REQUIREMENTS ............................................................................................................... 105 SOFTWARE REQUIREMENTS ......................................................................................................... 107 Operating System.................................................................................................................... 107 HARDWARE REQUIREMENTS ......................................................................................................... 107 Processor................................................................................................................................ 107 APPENDIX D: FCC/INDUSTRY CANADA REQUIRED INFORMATION ........................................................... 108 FCC REQUIRED INFORMATION: .................................................................................................... 108 INDUSTRY CANADA REQUIRED INFORMATION ................................................................................. 109 APPENDIX E: ABBREVIATIONS ..................................................................................................................... 110 APPENDIX F: PRODUCT SPECIFICATION ......................................................................................................111 About This Manual This manual provides a comprehensive user’s guide and installation manual for ATU-R303 ADSL USB Modem. In order to ensure optimal comprehension, the following list provides brief descriptions of the formatting styles used throughout this manual. Commands: Commands are always referred to by using the word “click” before them. These commands are always shown as bold-faced words. For example, click Next, click OK, or click Cancel. Names of Windows (Dialog Boxes): The names of the windows (also referred to as dialog boxes) that appear on the PC screen are always referred to in quotes. For example, the “Setup Complete” window. Names of Options in Windows: The names of options to choose from inside the windows that appear on the PC screen are always referred to in italics. For example, choose the Yes, I want to restart my computer now option from the window. Notes: In some cases, preparatory or cautionary information is needed before proceeding onto the next step in an installation process. This kind of information is provided in the form of notes, which are always referred to in bold-faced and italicized letters. For example, Note: To access the Control Panel, the driver must be running. Also, make sure the USB cable is plugged into the modem. 1 Preface Xentrix X7005 ADSL USB Modem Manual This manual contains information regarding the installation, operation, and configuration of the ATU-R303 ADSL USB Modem. Additionally, it outlines the use of the Control Panel Application. The following chapters are included in this manual: • Chapter 1: “Overview” offers a brief description of ADSL, protocol and device driver selection, and the features of the ADSL USB Modem. • Chapter 2: “ ADSL USB Modem Installation and Software Setup” describes the steps for installing the ADSL USB Modem and details the software installation procedure. • Chapter 3: “Customizing Communication Settings” provides detailed steps for altering the ATM Virtual Path ID (VPI), ATM Virtual Circuit ID (VCI), Encapsulation type and/or Modulation type values previously defined. • Chapter 4: “ Control Panel Application” describes how to configure and check the performance of the ADSL USB Modem and the ADSL connection. • Chapter 5: “Software Uninstall” provides detailed steps for removing the ADSL USB Modem software from the PC. 2 Chapter 1: Overview Chapter 1: Overview About ADSL Asymmetric Digital Subscriber Line (ADSL) technology provides high-speed data access across regular phone lines (copper wires) by making use of previously unused frequency bandwidth above the voice band. By placing the ADSL signal above the frequency of the voice signal, ADSL service is able to coexist on the same line with your telephone service. ADSL is asymmetric in the sense that it provides a higher data rate in the downstream (receive) direction than in the upstream (transmit) direction. Asymmetric operation is ideal for typical home and small office use where files and information are downloaded more frequently than uploaded. There are several standard types of ADSL modulation techniques including Discrete MultiTone (DMT) and Carrierless Amplitude and Phase (CAP). The ADSL USB DSL Modem is capable of supporting the following DSL standards: ANSI T1.413 Issue 2, ITU G.992.1 (G.DMT), ITU G.992.2 (G.lite), CAP (T1 TR-59), and ITU G.992 Annexes A, B, and C as applicable. Protocol and Device Driver Selection The ATU-R303 ADSL USB Modem can be easily connected to a USB port on the PC via a standard USB cable. The ATU-R303 ADSL USB Modem is fully software upgradeable so that new features and updates may be added by simply loading a new version of the device driver onto your PC. ADSL modems employ ATM (Asynchronous Transfer Mode) framing. ATM is a protocol that divides packets into small fixed sized cells for rapid transmission over high-speed networks. The ATM protocol allows various types of traffic (e.g. data, voice, and video) to be securely and efficiently carried over the same network. ATM is being widely deployed by telecommunications carriers in their backbone networks. Two type of ATM connections are possible, PVC (Permanent Virtual Circuit) and SVC (Switched Virtual Circuit). Several different protocols are used on top of ATM. The protocol required in your configuration depends on the equipment deployed by your DSL service provider. There are several possibilities: 1. Point to Point Protocol (PPP) Over ATM (RFC 2364) - PPP provides session setup, user authentication (login), and encapsulation for upper layer protocols such as IP (Internet Protocol). The use of PPP makes the modem appear as a dial modem to the operating 3 Chapter 1: Overview system. Dial-Up Networking is used to establish a connection. PPP is supported by either the WAN (Wide Area Network) driver or the ATM driver. 2. Bridged/Routed Ethernet/IP over ATM (RFC 1483) – This protocol makes the modem appear as a local area network (LAN) device to the operating system. 3. RFC 1577 – this is another local area network like protocol for IP address and ATM address mapping. 4. PPP Over Ethernet (RFC 2516) - This protocol makes the modem appear as a LAN device to the operating system. It allows multiple computer users on an Ethernet to share a common DSL connection to the Internet. Three types of device drivers are provided for the ATU-R303 ADSL USB Modem, WAN, LAN, and ATM. Note that all three drivers support ATM protocol. In addition, the ATM driver works with ATM services that are available in recent Windows operating systems. The proper choice of driver depends on the combination of Windows operating system and protocol. 1. WAN driver – this driver causes the modem to resemble a dial-up modem. Call establishment is performed through Dial-Up Networking. This driver supports RFC 2364 with PVC connections and PPPoE. It can be used with Windows 98, Windows 98 SE, Windows 2000, Windows XP and Windows ME. 2. LAN (RFC 1483) driver - this driver makes the modem appear as a LAN or Ethernet device. Connection establishment is automatic. This driver supports RFC 1483 with PVC connections. Additionally, RFC 1577 is supported. It can be used with Windows 98, Windows 98 SE, Windows 2000, Windows XP and Windows ME. 3. ATM driver – this driver works in conjunction with ATM services provided by Windows. RFC 2364 is supported. The ATM driver uses Dial-Up Networking to create a PVC or SVC connection to establish a PPP (RFC 2364) connection. This driver can be used with Windows 98 SE, Windows 2000, Windows XP and Windows ME. The device driver choices are summarized in the table below: Driver Type Protocol Windows OS LAN RFC 1483 Windows XP, ME, 2000, 98, RFC 1577 98 SE RFC 2364 Windows XP, ME, 2000, 98, PPPoE 98 SE RFC 2364 Windows XP, ME, 2000,98 SE WAN ATM 4 Chapter 1: Overview Features The ATU-R303 ADSL USB Modem provides the following features: • Compliant with Universal Serial Bus Specification Revision 1.1 • USB bus-powered; an external power supply is not required • Supports three device drivers: Microsoft NDIS 4.0 WAN Miniport, NDIS 4.0 LAN Miniport or NDIS 5.0 ATM Miniport • Compatible with all T1.413, G.DMT, and G.lite compliant CO DSLAM equipment as well as the vast majority of deployed CAP RADSL CO equipment • Software upgradeable • ATM driver supports up to sixteen simultaneous ATM virtual connections • Includes a Microsoft Windows control panel monitoring program for configuring the adapter and checking the status of the connection • Provides an RJ-11 connector for connection to the telephone line • Supports DSL downstream data rates up to 8 Mbps (125 times faster than standard 56K modems) • Supports DSL upstream data rates up to 1024 Kbps 5 Chapter 2: ADSL USB Modem Installation and Software Setup Chapter 2: ATU-R303 ADSL USB Modem Installation and Software Setup The following information may be required for software installation. Contact your DSL service provider before proceeding with software installation. • IP Address Settings – the software installation process allows the server to dynamically assign IP Address settings. If your application requires static setting of specific address information you will need to know: • • IP Address • Subnet Mask (for Bridged Ethernet applications only) • Default Gateway (for Bridged Ethernet applications only) Domain Name Server Information – the software installation process allows the server to dynamically assign Domain Name Server Address settings. If your application requires static setting of specific address information you will need to know: • • Primary DNS Address • Secondary DNS Address Type of Driver to be Installed – WAN, LAN and ATM software drivers are supported. Note: Required if not using default value • ATM Virtual Path ID (VPI) Note: Required if not using default value • ATM Virtual Circuit ID (VCI) Note: Required if not using default value • Encapsulation type Note: Required if not using default value • Modulation type Note: Required if not using default value 6 • User Name (for PPP applications only) • Password (for PPP applications only). Chapter 2: ADSL USB Modem Installation and Software Setup System Requirements Windows The following specifications are the minimum required for optimum performance of this ADSL modem: • PC with Pentium, Celeron, Xeon or compatible processor • USB V1.0 or V1.1-compliant bus • At least 32 MB RAM • 10 MB of free hard drive space • TCP/IP protocol stack installed • Microsoft Windows 98/98SE, Windows Millennium (ME), Windows 2000, Windows XP CD-ROM, or the appropriate CAB files. • Internet Explorer 4.x (or later) or Netscape Navigator 4.x (or later) installed 7 Chapter 2: ADSL USB Modem Installation and Software Setup Modem Hardware Installation IMPORTANT! Do NOT connect the USB modem to the computer until instructed to do so in the software driver installation procedure for your operating system. Install the Xentrix X7005 ADSL USB Modem by following steps with the PC running: 1. Locate a telephone wall outlet. 2. Unplug any telephone cable that is connected to the outlet. 3. Plug one end of the telephone/ADSL cable into the wall outlet. 4. Plug the other end into the ADSL jack of the modem. 8 Chapter 2: ADSL USB Modem Installation and Software Setup 5. Insert the Installation CD into your CD-ROM drive. If the installation doesn’t automatically start, go to Windows Explorer -> CD-ROM Drive -> SETUP.EXE to run the setup program. 6. Insert the square end of the USB cable into the USB port of the ADSL USB Modem, when prompted. 7. Insert the rectangular end of a USB cable into the USB port of your PC. Macintosh Users: The USB modem must be plugged into a USB port on the computer itself or a powered hub, not into keyboard port. 9 Chapter 2: ADSL USB Modem Installation and Software Setup Software Setup for Windows XP IMPORTANT! Do NOT connect the USB modem to the computer until instructed to do so in the software driver installation procedure for your operating system. Note: In order to properly setup software, please strictly follow the procedure: 1) After Windows is running, first insert the installation CD, 2) Run the ADSL USB Modem installation driver. If the installation doesn’t automatically start, go to Windows Explorer -> CD-ROM Drive -> SETUP.EXE to run the setup program. 3) Plug the USB modem into the PC to when install the basic USB driver. 10 Chapter 2: ADSL USB Modem Installation and Software Setup 1. When the Installation CD is inserted, a “Configuration “window allows you to select different configurations. A list of pre-configured alternatives and Manual Configuration is displayed. Highlights the one you would like to choose and click Next. 2. Select the driver type you want to install, you should get this information from your service provider. Highlights the driver type and click Next. 11 Chapter 2: ADSL USB Modem Installation and Software Setup 3. The “Configuration” window allows you to select different configurations. A list of preconfigured alternatives and Manual Configuration is displayed. Highlights the one you would like to choose and click Next. 4. Select the driver type you want to install, you should get this information from your service provider. Highlights the driver type and click Next. 12 Chapter 2: ADSL USB Modem Installation and Software Setup 5. On the “Communication Settings” window, ATM VPI, ATM VCI, Encapsulation type and Modulation type are displayed. Check them and correct them if you use different values. Click Next. 6. The “Start Copying Files” window will be displayed. You may review the current settings and click Customize or Back to change the settings, or click Next to accept it. A message will be displayed indicating that files are being copied. 13 Chapter 2: ADSL USB Modem Installation and Software Setup 7. The “Start Copying Files” window may appear warning that the installation software is not passed Windows Logo testing. It is not necessary; The ADSL USB Modem has been tested the software with Windows XP. Click Continue Anyway to allow the installation to continue. 8. The “Setup Complete” window indicates that files have been copied. Click Finish to complete the installation. 14 Chapter 2: ADSL USB Modem Installation and Software Setup 9. Installation program searches the USB modem now, and “ADSL Installer” window prompts you to plug in the USB modem. Plug it in now. 10. The “Found New Hardware Wizard” Windows XP found Xentrix USB ADSL Loader. Chose “Install the software automatically and Click Next to allow the installation to continue. 15 Chapter 2: ADSL USB Modem Installation and Software Setup 11. The “Found New Hardware Wizard” window may appear warning that the installation software is not passed Windows Logo testing. It is not necessary; The ATU-R303 ADSL USB Modem has been tested the software with Windows XP. Click Continue Anyway to allow the installation to continue. 16 Chapter 2: ADSL USB Modem Installation and Software Setup 12. A message will confirm that the device driver software has been installed; click Finish. 13. The “Found New Hardware Wizard” Windows XP found Xentrix USB ADSL Modem. Chose “Install the software automatically and Click Next to allow the installation to continue. 17 Chapter 2: ADSL USB Modem Installation and Software Setup 14. The “Found New Hardware Wizard” window may appear warning that the installation software is not passed Windows Logo testing. It is not necessary; The ATU-R303 ADSL USB Modem has been tested the software with Windows XP. Click Continue Anyway to allow the installation to continue. 18 Chapter 2: ADSL USB Modem Installation and Software Setup 15. A message will confirm that the device driver software has been installed; click Finish. 16. Now you have successfully installed the modem software! 19 Chapter 2: ADSL USB Modem Installation and Software Setup Software Setup for Windows 2000 IMPORTANT! Do NOT connect the USB modem to the computer until instructed to do so in the software driver installation procedure for your operating system. Note: In order to properly setup software, please strictly follow the procedure: 1) After Windows is running, first insert the installation CD, 2) Run the ATU-R303 ADSL USB Modem installation driver. If the installation doesn’t automatically start, go to Windows Explorer -> CD-ROM Drive -> SETUP.EXE to run the setup program. 3) Plug the USB modem into the PC to when install the basic USB driver. 20 Chapter 2: ADSL USB Modem Installation and Software Setup 17. When the Installation CD is inserted, a “Welcome” message will appear. Click Next. 18. A “Software License Agreement” message will be displayed; click Yes. 21 Chapter 2: ADSL USB Modem Installation and Software Setup 19. The “Configuration” window allows you to select different configurations. A list of preconfigured alternatives and Manual Configuration is displayed. Highlights the one you would like to choose and click Next. 20. Select the driver type you want to install, you should get this information from your service provider. Highlights the driver type and click Next. 22 Chapter 2: ADSL USB Modem Installation and Software Setup 21. On the “Communication Settings” window, ATM VPI, ATM VCI, Encapsulation type and Modulation type are displayed. Check them and correct them if you use different values. Click Next. 22. The “Start Copying Files” window will be displayed. You may review the current settings and click Customize or Back to change the settings, or click Next to accept it. A message will be displayed indicating that files are being copied. 23 Chapter 2: ADSL USB Modem Installation and Software Setup 23. The “Digital Signature Not Found” window may appear warning that the installation software is not a digitally signed version. A digital signature is not necessary; The ADSL USB Modem has been tested the software with Windows 2000. Click Yes to allow the installation to continue. 24. The “Setup Complete” window indicates that files have been copied. Click Finish to complete the installation. 24 Chapter 2: ADSL USB Modem Installation and Software Setup 25. Installation program searches the USB modem now, and “ADSL Installer” window prompts you to plug in the USB modem. Plug it in now. 26. The “Digital Signature Not Found” window may appear warning that the installation software is not a digitally signed version. A digital signature is not necessary; The ADSL USB Modem has tested the software with Windows 2000. Click Yes to allow the installation to continue. 25 Chapter 2: ADSL USB Modem Installation and Software Setup 27. A message will confirm that the device driver software has been installed; click Finish. 28. After informational messages are displayed, the “System Settings Change” window will give you the opportunity to reboot the system. Remove all disks from their drives; click Yes, and the PC will be automatically restarted. 26 29. WAN and ATM applications may ask you to provide location information when the PC has rebooted. Enter the information and click OK. 30. Now you have successfully installed the modem software! 27 Chapter 2: ADSL USB Modem Installation and Software Setup Software Setup for Windows 98 and 98 Second Edition IMPORTANT! Do NOT connect the USB modem to the computer until instructed to do so in the software driver installation procedure for your operating system. Note: In order to properly setup software, please strictly follow the procedure: 1) After Windows is running, first insert the installation CD, 2) Run the ADSL USB Modem installation driver. If the installation doesn’t automatically start, go to Windows Explorer -> CD-ROM Drive -> SETUP.EXE to run the setup program. 3) Plug the USB modem into the PC to install the basic USB driver. 28 Chapter 2: ADSL USB Modem Installation and Software Setup 1. When the Installation CD is inserted, a “Welcome” message will appear. Click Next. 2. A “Software License Agreement” message will be displayed. Click Yes. 29 Chapter 2: ADSL USB Modem Installation and Software Setup 3. The “Configuration” window allows you to select different configurations. A list of preconfigured alternatives and Manual Configuration is displayed. Highlight the one you would like to choose and click Next. 4. Select the driver type you want to install, you should get this information from your service provider. Highlights the driver type and click Next. 30 Chapter 2: ADSL USB Modem Installation and Software Setup 5. On the “Communication Settings” window, ATM VPI, ATM VCI, Encapsulation type and Modulation type are displayed. Check them and correct them if you use different values. Click Next. 6. The “Start Copying Files” window will be displayed. You may review the current settings and click Customize or Back to change the settings, or click Next to accept it. A message will be displayed indicating that files are being copied. 31 Chapter 2: ADSL USB Modem Installation and Software Setup 7. The “Setup Complete” window indicates that files have been copied. Click Finish to complete the installation. 8. Installation program searches the USB modem now, and “ADSL Installer” window prompts you to plug in the USB modem. Plug it in now. Note: You may need the Windows CD to complete the installation 32 Chapter 2: ADSL USB Modem Installation and Software Setup 9. After informational messages are displayed, the “System Settings Change” window will give you the opportunity to reboot the system. Remove all disks from their drives; click Yes, and the PC will be automatically restarted. 10. WAN and ATM applications may ask you to provide location information when the PC has rebooted. Enter the information and click Close. 11. Now you have successfully installed the modem software. 33 Chapter 2: ADSL USB Modem Installation and Software Setup Software Setup for Windows ME IMPORTANT! Do NOT connect the USB modem to the computer until instructed to do so in the software driver installation procedure for your operating system. Note: In order to properly setup software, please strictly follow the procedure: 1) After Windows is running, first insert the installation CD, 2) Run the ADSL USB Modem installation driver. If the installation doesn’t automatically start, go to Windows Explorer -> CD-ROM Drive -> SETUP.EXE to run the setup program. 3) Plug the USB modem into the PC to install the basic USB driver. 34 Chapter 2: ADSL USB Modem Installation and Software Setup 1. When the Installation CD is inserted, a “Welcome” message will appear. Click Next. 2. A “Software License Agreement” message will be displayed; click Yes. 35 Chapter 2: ADSL USB Modem Installation and Software Setup 3. The “Configuration” window allows you to select different configurations. A list of preconfigured alternatives and Manual Configuration is displayed. Highlights the one you would like to choose and click Next. 4. Select the driver type you want to install, you should get this information from your service provider. Highlights the driver type and click Next. 36 Chapter 2: ADSL USB Modem Installation and Software Setup 5. On the “Communication Settings” window, ATM VPI, ATM VCI, Encapsulation type and Modulation type are displayed. Check them and correct them if you use different values. Click Next. 6. The “Start Copying Files” window will be displayed. You may review the current settings and click Customize or Back to change the settings, or click Next to accept it. A message will be displayed indicating that files are being copied. 37 Chapter 2: ADSL USB Modem Installation and Software Setup 7. The “Setup Complete” window indicates that files have been copied. Click Finish to complete the installation. 8. Installation program searches the USB modem now, and “ADSL Installer” window prompts you to plug in the USB modem. Plug it in now. 38 Chapter 2: ADSL USB Modem Installation and Software Setup 9. After informational messages are displayed, the “System Settings Change” window will give you the opportunity to reboot the system. Remove all disks from their drives; click Yes, and the PC will be automatically restarted. 10. WAN and ATM applications may ask you to provide location information when the PC has rebooted. Enter the information and click Close. 11. Now you have successfully installed the modem software. 39 Chapter 2: ADSL USB Modem Installation and Software Setup If USB Modem is plugged in first Important: We strongly recommend that you plug in the USB modem AFTER the software installation. Note: If you plug USB modem into the PC prior to insert the installation CD, you may follow the installation procedure below. Windows XP 1. After USB modem is plugged into the PC, a “Found New Hardware Wizard” window will be displayed indicating that new drivers are required; Choose the Install form a list or specific location (Advanced) option by clicking the check box; click Next. 40 Chapter 2: ADSL USB Modem Installation and Software Setup 2. You will be required to specify a location or the new driver software. Click the CD-ROM drives check box. Insert the ADSL USB Modem Installation CD into the CD drive and click Next. 3. Found ADSL Modem and click Finish. 41 Chapter 2: ADSL USB Modem Installation and Software Setup 4. The “Configuration “window allows you to select different configurations. A list of preconfigured alternatives and Manual Configuration is displayed. Highlights the one you would like to choose and click Next. 5. Select the driver type you want to install, you should get this information from your service provider. Highlights the driver type and click Next. 42 Chapter 2: ADSL USB Modem Installation and Software Setup 6. On the “Communication Settings” window, ATM VPI, ATM VCI, Encapsulation type and Modulation type are displayed. Check them and correct them if you use different values. Click Next. 7. The “Start Copying Files” window will be displayed. You may review the current settings and click Customize or Back to change the settings, or click Next to accept it. A message will be displayed indicating that files are being copied. 43 Chapter 2: ADSL USB Modem Installation and Software Setup 8. The “Start Copying Files” window may appear warning that the installation software is not passed Windows Logo testing. It is not necessary; The ADSL USB Modem has been tested the software with Windows XP. Click Continue Anyway to allow the installation to continue. 9. The “Setup Complete” window indicates that files have been copied. Click Finish to complete the installation. 44 Chapter 2: ADSL USB Modem Installation and Software Setup 10. Installation program searches the USB modem now, and “ADSL Installer” window prompts you to plug in the USB modem. Plug it in now. 11. The “Found New Hardware Wizard” Windows XP found USB ADSL Loader. Chose “Install the software automatically and Click Next to allow the installation to continue. 45 Chapter 2: ADSL USB Modem Installation and Software Setup 12. The “Found New Hardware Wizard” window may appear warning that the installation software is not passed Windows Logo testing. It is not necessary; The ADSL USB Modem has been tested the software with Windows XP. Click Continue Anyway to allow the installation to continue. 46 Chapter 2: ADSL USB Modem Installation and Software Setup 13. A message will confirm that the device driver software has been installed; click Finish. 14. The “Found New Hardware Wizard” Windows XP found USB ADSL Modem. Chose “Install the software automatically and Click Next to allow the installation to continue. 47 Chapter 2: ADSL USB Modem Installation and Software Setup 15. The “Found New Hardware Wizard” window may appear warning that the installation software is not passed Windows Logo testing. It is not necessary; The ADSL USB Modem has been tested the software with Windows XP. Click Continue Anyway to allow the installation to continue. 48 Chapter 2: ADSL USB Modem Installation and Software Setup 16. A message will confirm that the device driver software has been installed; click Finish. 17. Now you have successfully installed the modem software! 49 Chapter 2: ADSL USB Modem Installation and Software Setup Note: For WAN and ATM applications, will connect to the Internet. Go to Desktop and click ADSL Dial-Up ppp Connection to enter your user name & password and click Dial . Windows 2000 1. After USB modem is plugged into the PC, a “Found New Hardware Wizard” window will be displayed indicating that new drivers are required; click Next. 50 Chapter 2: ADSL USB Modem Installation and Software Setup 2. A window will be displayed which allows you to specify the location of the driver software to be installed. Choose the Search for a suitable driver for my device (recommended) option by clicking the check box; click Next. 3. You will be required to specify a location or the new driver software. Click the CD-ROM drives check box. Insert the ADSL USB Modem Installation CD into the CD drive and click Next. 51 Chapter 2: ADSL USB Modem Installation and Software Setup 4. A message will indicate that the system finds the installation file and is ready to install the device driver; click Next. 5. A message will confirm that the device driver software has been installed; click Finish. 52 Chapter 2: ADSL USB Modem Installation and Software Setup 6. Then the PC will automatically run the SETUP.EXE in the root directory of installation CD. If the installation doesn’t automatically start, go to Windows Explorer -> CD-ROM Drive -> SETUP.EXE to run the setup program. A “Welcome” message will be displayed; click Next. 7. A “Software License Agreement” message will be displayed; click Yes. 53 Chapter 2: ADSL USB Modem Installation and Software Setup 8. The “Configuration” window allows you to select different configurations. A list of preconfigured alternatives and Manual Configuration is displayed. Highlights the one you would like to choose and click Next. 9. Select the driver type you want to install, you should get this information from your service provider. Highlights the driver type and click Next. 54 Chapter 2: ADSL USB Modem Installation and Software Setup 10. On the “Communication Settings” window, ATM VPI, ATM VCI, Encapsulation type and Modulation type are displayed. Check them and correct them if you use different values. Click Next. 11. The “Start Copying Files” window will be displayed. You may review the current settings and click Customize or Back to change the settings. Click Next to accept the current settings; a message will be displayed indicating that files are being copied. 55 Chapter 2: ADSL USB Modem Installation and Software Setup 12. The “Digital Signature Not Found” window may appear warning that the installation software is not a digitally signed version. A digital signature is not necessary; The ADSL USB Modem has tested the software with Windows 2000. Click Yes to allow the installation to continue. 13. The “Setup Complete” window indicates that files have been copied. Click Finish to complete the installation. 56 Chapter 2: ADSL USB Modem Installation and Software Setup 14. Installation program searches the USB modem now, and “ADSL Installer” window automatically installs USB driver. 15. The “Digital Signature Not Found” window may appear warning that the installation software is not a digitally signed version. Click Yes to allow the installation to continue. 57 Chapter 2: ADSL USB Modem Installation and Software Setup 16. A message will indicate that the system must be rebooted for the new settings to take effect. Click Finish. 17. After informational messages are displayed, the “System Settings Change” window will give you the opportunity to reboot the system. Remove all disks from their drives; click Yes. 58 Chapter 2: ADSL USB Modem Installation and Software Setup 18. WAN and ATM applications may ask you to provide location information when the PC has rebooted. Enter the information and click OK. Note: For WAN and ATM applications, will connect to the Internet. Go to Desktop and click ADSL Dial-Up ppp Connection to enter your user name & password and click Dial . 59 Chapter 2: ADSL USB Modem Installation and Software Setup If USB Modem is plugged in first… Important: We strongly recommend that you plug in the USB modem AFTER software installation. Note: If you plug USB modem into the PC prior to insert the installation CD, you may follow the installation procedure below. Windows 98 and Windows 98 Second Edition (SE) 1. After USB modem is plugged into the PC, an “Add New Hardware Wizard” window will be displayed indicating that new drivers are required, click Next. 60 Chapter 2: ADSL USB Modem Installation and Software Setup 2. A window will be displayed which allows you to specify the location of the driver software to be installed. Choose the Search for the best driver for your device. (Recommended) option by clicking the check box; click Next. 3. You will be required to specify a location or the new driver software. Click the CD-ROM drives check box. Insert the ADSL USB Modem Installation CD into the CD drive and click Next. 61 Chapter 2: ADSL USB Modem Installation and Software Setup 4. A message will indicate that the system finds the installation file and is ready to install the device driver; click Next. 5. A message will confirm that the device driver software has been installed; click Finish. 62 Chapter 2: ADSL USB Modem Installation and Software Setup 6. Then the PC will automatically run the SETUP.EXE in the root directory of installation CD. If the installation doesn’t automatically start, go to Windows Explorer -> CD-ROM Drive -> SETUP.EXE to run the setup program. A “Welcome” message will be displayed; click Next. 7. A “Software License Agreement” message will be displayed; click Yes. 63 Chapter 2: ADSL USB Modem Installation and Software Setup 8. The “Configuration” window allows you to select different configurations. A list of preconfigured alternatives and Manual Configuration is displayed. Highlight the one you would like to choose and click Next. 9. To select the driver type you want to install, you should get this information from your service provider. Highlights the driver type and click Next. 64 Chapter 2: ADSL USB Modem Installation and Software Setup 10. On the “Communication Settings” window, ATM VPI, ATM VCI, Encapsulation type and Modulation type are displayed. Check them and correct them if you use different values. Click Next. 11. The “Start Copying Files” window will be displayed. You may review the current settings and click Customize or Back to change the settings. Click Next to accept the current settings; a message will be displayed indicating that files are being copied. 65 Chapter 2: ADSL USB Modem Installation and Software Setup 12. The “Setup Complete” window indicates that files have been copied. Click Finish to complete the installation. 13. Installation program searches the USB modem now, and “ADSL Installer” window automatically installs USB driver. Note: You may need the Windows CD to complete the installation 66 Chapter 2: ADSL USB Modem Installation and Software Setup 14. After informational messages are displayed, the “System Settings Change” window will give you the opportunity to reboot the system. Remove all disks from their drives; click Yes. 15. WAN and ATM applications may ask you to provide location information when the PC has rebooted. Enter the information and click Close. Note: For WAN and ATM applications, dial-up is connect to the Internet. Go to My Computer -> Network and Dial-up Connections -> Dial-Up PPP Connection to enter your user name & password and click Connect. Please keep the default value in “Phone number” box. 67 Chapter 2: ADSL USB Modem Installation and Software Setup If USB Modem is plugged in first… Important: We strongly recommend that you plug in the USB modem AFTER the software installation. Note: If you plug USB modem into the PC prior to insert the installation CD, you may follow the installation procedure below. Windows ME 1. After USB modem is plugged into the PC, an “Add New Hardware Wizard” window will be displayed indicating that new drivers are required. Choose the Automatic search for a better driver (Recommended) option by clicking the check box and insert the Xentrix X7005 ADSL USB Modem Installation CD into the CD drive; click Next. 68 Chapter 2: ADSL USB Modem Installation and Software Setup 2. The “Select Other Driver” window may ask you to select the driver from a list of drivers. If asked, highlight the root directory GROOTUSB.INF in the “Location” column, and click OK. 3. A message will confirm that the device driver software has been installed; click Finish. 69 Chapter 2: ADSL USB Modem Installation and Software Setup 4. Then the PC will automatically run the SETUP.EXE in the root directory of installation CD. If the installation doesn’t automatically start, go to Windows Explorer -> CD-ROM Drive -> SETUP.EXE to run the setup program. A “Welcome” message will be displayed; click Next. 5. A “Software License Agreement” message will be displayed; click Yes. 70 Chapter 2: ADSL USB Modem Installation and Software Setup 6. The “Configuration” window allows you to select different configurations. A list of preconfigured alternatives and Manual Configuration is displayed. Highlight the one you would like to choose and click Next. 7. Select the driver type you want to install, you should get this information from your service provider. Highlights the driver type and click Next. 71 Chapter 2: ADSL USB Modem Installation and Software Setup 8. On the “Communication Settings” window, ATM VPI, ATM VCI, Encapsulation type and Modulation type are displayed. Check them and correct them if you use different values. Click Next. 9. The “Start Copying Files” window will be displayed. You may review the current settings and click Customize or Back to change the settings. Click Next to accept the current settings; a message will be displayed indicating that files are being copied. 72 Chapter 2: ADSL USB Modem Installation and Software Setup 10. The “Setup Complete” window indicates that files have been copied. Click Finish to complete the installation. 11. Installation program searches the USB modem now, and “ADSL Installer” window automatically installs USB driver. 73 Chapter 2: ADSL USB Modem Installation and Software Setup 12. After informational messages are displayed, the “System Settings Change” window will give you the opportunity to reboot the system. Remove all disks from their drives; click Yes. 13. WAN and ATM applications may ask you to provide location information when the PC has rebooted. Enter the information and click Close. Note: For WAN and ATM applications, dial-up is required to connect to the Internet. Go to My Computer -> Network and Dial-up Connections -> Dial-Up PPP Connection to enter your user name & password and click Connect. Please keep the default value in “Phone number” box. 74 Chapter 3: Customizing Communication Settings Chapter 3:Customizing Communication Settings Once the ATU-R303 ADSL USB Modem and software have been installed, the communication settings may be easily updated by performing the following steps: 1. From your PC desktop click Start -> Programs -> Xentrix ADSL Modem -> Configure. A notification message will appear indicating that the setup process has begun. 2. Click Settings from the “ADSL Modem Configuration Panel” window. 75 Chapter 3: Customizing Communication Settings 3. The “Communication Settings” window will be displayed. Make the necessary changes to the VPI, VCI, Encapsulation type and/or Modulation type and click Apply. 4. The “Setup Complete” window indicates successful completion of the customization process. Select the Yes, I want to restart my computer now option, remove any disks from their drives, and click Finish. Your PC will reboot. 76 Chapter 4: Control Panel Application Chapter 4: Control Panel Application For Windows The ATU-R303 ADSL USB Modem control panel program provides a quick and easy way to configure and check the performance of the modem and the ADSL connection. When open, the monitor window updates the performance every 2 seconds. Note: The following screen shots of the ATU-R303 ADSL USB Modem Control Panel are preliminary as the Control Panel functionality is continually being upgraded and improved. 1. There are two methods to access the ATU-R303 ADSL USB Modem control panel: • From the “Control Panel” window (Start -> Settings -> Control Panel), double click the Xentrix ADSL USB Modem icon. • From the PC Toolbar, double click the ATU-R303 ADSL USB Modem icon in the system tray. Note: To access the Xentrix X7005 ADSL USB Modem Control Panel, the driver must be running. Also, make sure the USB cable is plugged into the modem. 2. The “Physical Link” tab of the “Xentrix X7005 ADSL USB Modem” window (Control Panel) allows you to review the current state of the ATU-R303 ADSL USB Modem and connection. The green indicator in the Link Status field signifies that a connection has been made. This indicator blinks while a connection is being established. Individual flashing yellow indicators show the Transmitting and Receiving data activity separately. 77 Chapter 4: Control Panel Application 3. The “System Info” tab displays the release number of the ATU-R303 ADSL USB Modem driver, the firmware release number, and the control panel version that you are currently using. 4. The “Configuration” tab offers driver appropriate Modulation, Encapsulation, and VPI and VCI values. If you are using a WAN or ATM driver, only the Modulation type will be displayed and may be modified. LAN driver applications will be able to view and modify the Modulation type, Encapsulation type, and VPI and VCI values. 78 Chapter 5 Software Uninstall Chapter 5: Software Uninstall Software Uninstall for Windows Note: The USB cable should not be unplugged until after the uninstall process has been completed. For Windows 98 applications, the cable must be unplugged immediately following Step 6 as below. 1. From your PC desktop click Start -> Programs -> Xentrix ADSL Modem -> Uninstall. A notification message will appear indicating that the setup process has begun. 2. Click Remove from the “ADSL Modem Configuration Panel” window. 3. A message will be displayed asking you to confirm the removal of the USB ADSL modem software, click Yes. 79 Chapter 5 Software Uninstall 4. The “Information” window will be displayed reminding you not to unplug the USB cable until the uninstall process has been completed. Click OK. 5. A message will be displayed indicating the software is being removed. 6. The “Setup Complete” window indicates successful completion of the uninstall process. Remove any disks from the drives, select the Yes, I want to restart my computer now option by clicking in the circle to the left, and click Finish. Note: The screen for Windows 2000 applications will not ask the user to reboot the system. Click Finish to complete the Uninstall process. 7. Unplug the USB cable from the PC. The uninstall process is complete. Note: The USB cable must be unplugged before the system is rebooted. For Windows 98 applications the cable must be unplugged immediately as the reboot process was begun in Step 80 Appendix A: Modifying TCP/IP Networking Options WAN USB Driver Windows 98 and Windows 98 Second Edition TCP/IP settings are automatically set up during the software installation process. The following procedure may be used to change TCP/IP settings, if necessary. 1. From your PC desktop, double click the My Computer icon. 2. From the “My Computer” window, double click the Dial-Up Networking icon. 3. From the “Dial-Up Networking” window, right click on the Dial-Up PPP Connection icon and click Properties. 81 4. From the “Server Types” tab of the “ Dial-Up PPP Connection” window, select TCP/IP (marked with a check in the box to the left) and click TCP/IP Settings. 5. The “TCP/IP Settings” window is used to modify the IP address, Domain Name Server addresses and/or default gateway as follows: 82 • Change the IP address to a user defined address by selecting Specify an IP address (click inside the circle to the left of it) and typing the address in the space provided • Change the Domain Name Server addresses to user defined addresses by selecting Specify domain name server addresses (click inside the circle to the left of it) and typing the addresses in the spaces provided • Change the default gateway by leaving the box blank to the left of Use default gateway on remote network. Click OK. 6. The “ ADSL Dial-Up PPP Connection” window will be redisplayed. Click OK to end the modifying TCP/IP options session. 83 Windows XP & 2000 TCP/IP settings are automatically set up during the software installation process. The following procedure may be used to change TCP/IP settings, if necessary. 1. From your PC desktop, right click the My Network Places icon and select Properties. 2. From the “Networking” tab of the “ ADSL Dial-Up PPP Connection Properties” window, select Internet Protocol (TCP/IP) and click Properties. 84 3. The “Internet Protocol (TCP/IP) Properties” window is used to modify the IP address and DNS Server addresses: • Change the IP address to a user defined address by selecting Use the following IP address (click inside the circle to the left of it) and typing the address in the space provided • Change the DNS Server addresses to user defined addresses by selecting Use the following DNS server addresses (click inside the circle to the left of it) and typing the addresses in the spaces provided. Note: The “Advanced” button of the “Internet Protocol (TCP/IP) Properties” window may be used to alter DNS addresses, WINS addresses and IP security settings. 7. Click OK from the “Internet Protocol (TCP/IP) Properties” window. 8. The “ ADSL Dial-Up PPP Connection Properties” window will reappear. Click OK to end the modifying TCP/IP options session. 85 Microsoft Windows ME TCP/IP settings are automatically set up during the software installation process. The following procedure may be used to change TCP/IP settings, if necessary. 1. From your PC desktop, open the Dial-Up Networking window (Start -> Settings -> Dial-Up Networking). 2. From the “Dial-Up Networking” window, right click on the ADSL Dial-Up PPP Connection icon and click Properties. 3. From the “Networking” tab of the “ ADSL Dial-Up PPP Connection” window, select TCP/IP (marked with a check in the box to the left) and click TCP/IP Settings. 86 4. The “TCP/IP Settings” window is used to modify the IP address, Domain Name Server addresses and/or default gateway as follows: • Change the IP address to a user defined address by selecting Specify an IP address (click inside the circle to the left of it) and typing the address in the space provided • Change the Domain Name Server addresses to user defined addresses by selecting Specify name server addresses (click inside the circle to the left of it) and typing the addresses in the spaces provided • Change the default gateway by leaving the box blank to the left of Use default gateway on remote network. Click OK. 5. The “ Dial-Up PPP Connection” window will be redisplayed. Click OK to end the modifying TCP/IP options session. 87 LAN USB Driver Microsoft Windows 98, First and Second Editions TCP/IP settings are automatically set up during the software installation process. The following procedure may be used to change TCP/IP settings, if necessary. 1. From the “Control Panel” window (Start -> Settings -> Control Panel) double click on the Network icon. 2. Select TCP/IP -> ADSL USB LAN Modem from the “Configuration” tab of the “Network” window. Click Properties. 3. From the “IP Address” tab of the “TCP/IP Properties” window, select either the Obtain an IP address Automatically or Specify an IP Address option, depending on your network setup. If you select Specify an IP address, type the IP Address and Subnet Mask in the spaces provided. Consult with your network administrator to determine which option best suits your 88 individual needs. 4. The “Gateway” tab allows you to add or remove gateways. Consult with your network 89 administrator to determine the appropriate addresses for your individual needs. • To add a new gateway, type the address in the New gateway field and click Add. The new gateway will appear in the Installed gateways list. • To remove a previously installed gateway, highlights the entry to be removed in the Installed gateways list and click Remove. The gateway will no longer appear in the Installed gateways list. 5. Click OK from the “TCP/IP Properties” window. 6. The “Network” window will reappear. Click OK to end the modifying TCP/IP options session. 7. If you have made changes to TCP/IP properties, you will be asked to restart/reboot your PC. Click Yes, and your PC will restart. Microsoft Windows XP & 2000 TCP/IP settings are automatically set up during the software installation process. The following procedure may be used to change TCP/IP settings, if necessary. 1. From the PC desktop, right click the My Network Places icon and select Properties. 2. Double click the Local Area Connection icon from the “Network and Dial-Up Connections” window. 3. Select Internet Protocol (TCP/IP) from the “General” tab of the “Local Area Connection Properties” window. Click Properties. 90 4. The “Internet Protocol (TCP/IP) Properties” window is used to modify the IP addresses and DNS Server addresses: 91 • Change the IP address to a user defined address by selecting Use the following IP address option (click inside the circle to the left of it) and typing the addresses in the spaces provided • Change the DNS Server addresses to user defined addresses by selecting Use the following DNS server addresses (click inside the circle to the left of it) and typing the addresses in the spaces provided. Note: The Advanced button of the “Internet Protocol (TCP/IP) Properties” window may be used to alter IP settings, DNS server addresses, WINS addresses, IP security options, and TCP/IP filtering options. 5. Click OK from the “Internet Protocol (TCP/IP) Properties” window. 6. The “Local Area Connection Properties” window will reappear. Click OK to end the modifying TCP/IP options session. Microsoft Windows ME TCP/IP settings are automatically set up during the software installation process. The following procedure may be used to change TCP/IP settings, if necessary. 1. From the PC desktop, right click the My Network Places icon and select Properties. 2. Select TCP/IP -> ADSL USB LAN Modem from the “Configuration” tab of the “Network” window. Click Properties. 92 3. From the “IP Address” tab of the “TCP/IP Properties” window, select either the Obtain an IP address Automatically or Specify an IP Address option, depending on your network setup. If you select Specify an IP address, type the IP Address and Subnet Mask in the spaces provided. Consult with your network administrator to determine which option best suits your individual needs. 93 4. The “Gateway” tab allows you to add or remove gateways. Consult with your network administrator to determine the appropriate addresses for your individual needs. • To add a new gateway, type the address in the new gateway field and click Add. The new gateway will appear in the Installed gateways list. • To remove a previously installed gateway, highlight the entry to be removed in the Installed gateways list and click Remove. The gateway will no longer appear in the Installed gateways list. 5. Click OK from the “TCP/IP Properties” window. 6. The “Network” window will reappear. Click OK to end the modifying TCP/IP options session. 7. If you have made changes to TCP/IP properties, you will be asked to restart/reboot your PC. Click Yes, and your PC will restart. . 94 ATM USB Driver for Microsoft Windows 98 Second Edition TCP/IP settings are automatically set up during the software installation process. The following procedure may be used to change TCP/IP settings, if necessary. 1. From your PC desktop, double click the My Computer icon. 2. From the “My Computer” window, double click the Dial-Up Networking icon. 3. From the “Dial-Up Networking” window, right click on the ADSL Dial-Up PPP Connection icon and click Properties. 4. From the “Server Types” tab of the “ ADSL Dial-Up PPP Connection” window, select TCP/IP (marked with a check in the box to the left) and click TCP/IP Settings. 95 5. The “TCP/IP Settings” window is used to modify the IP address, Domain Name Server addresses and/or default gateway as follows: • Change the IP address to a user defined address by selecting Specify an IP address (click inside the circle to the left of it) and typing the address in the space provided • Change the Name Server addresses to user defined addresses by selecting Specify name server addresses (click inside the circle to the left of it) and typing the addresses in the spaces provided • Change the default gateway by leaving the box blank to the left of Use default gateway on remote network. Click OK. 6. The “ ADSL Dial-Up PPP Connection” window will be redisplayed. Click OK to end the modifying TCP/IP options session. 96 ATM USB Driver for Microsoft Windows XP & 2000 TCP/IP settings are automatically set up during the software installation process. The following procedure may be used to change TCP/IP settings, if necessary. 1. From your PC desktop, right click the My Network Places icon and select Properties. 2. From the “Network and Dial-Up Connections” window, right click on the ADSL Dial-Up PPP Connection icon and click Properties. 3. From the “Networking” tab of the “ADSL Dial-Up PPP Connection Properties” window, select Internet Protocol (TCP/IP) and click Properties. 97 4. The “Internet Protocol (TCP/IP) Properties” window is used to modify the IP address and DNS Server addresses as follows: • Change the IP address to a user defined address by selecting Use the following IP address (click inside the circle to the left of it) and typing the address in the space provided • Change the DNS Server addresses to user defined addresses by selecting Use the following DNS server addresses (click inside the circle to the left of it) and typing the addresses in the spaces provided. Note: The “Advanced” button of the “Internet Protocol (TCP/IP) Properties” window may be used to alter DNS address, WINS address and IP security settings. 5. Click OK from the “Internet Protocol (TCP/IP) Properties” window. 6. The “ ADSL Dial-Up PPP Connection Properties” window will reappear. Click OK to end the modifying TCP/IP options session. 98 ATM USB Driver for Microsoft Windows ME TCP/IP settings are automatically set up during the software installation process. The following procedure may be used to change TCP/IP settings, if necessary. 1. From your PC desktop, open the Dial-Up Networking window (Start -> Settings -> Dial-Up Networking). 2. From the “Dial-Up Networking” window, right click on the ADSL Dial-Up PPP Connection icon and click Properties. 3. From the “Networking” tab of the “ ADSL Dial-Up PPP Connection” window, select TCP/IP (marked with a check in the box to the left) and click TCP/IP Settings. 4. The “TCP/IP Settings” window is used to modify the IP address, Domain Name Server addresses and/or default gateway as follows: • Change the IP address to a user defined address by selecting Specify an IP address (click inside the circle to the left of it) and typing the address in the space provided 99 • Change the Name Server addresses to user defined addresses by selecting Specify name server addresses (click inside the circle to the left of it) and typing the addresses in the spaces provided • Change the default gateway by leaving the box blank to the left of Use default gateway on remote network. Click OK. 7. The “ ADSL Dial-Up PPP Connection” window will be redisplayed. Click OK to end the modifying TCP/IP options session. 100 Appendix B: Point-to-Point Protocol over Ethernet PPPoE is a specification for connecting multiple computer users on an Ethernet to a remote site through common customer premises equipment. PPPoE can be used to have an office or building-full of users share a common DSL (Digital Subscriber Line) connection to the Internet. PPPoE combines the Point-to-Point Protocol commonly used in dialup connections, with the Ethernet protocol, which supports multiple users in a LAN. The PPP Protocol information is encapsulated within an Ethernet frame. 1. From your PC desktop, double click the ADSL Dial-Up PPP Connection icon. 101 2. 102 Enter your user name & password and click Dial Appendix C: Specifications ATU-R303 ADSL USB Modem Connector The ATU-R303 ADSL USB Modem is connected to your PC via a USB cable. The rectangular end of the USB cable inserts into the USB port of your PC while the square end of the cable inserts into the USB port of the ATU-R303 ADSL USB Modem. An RJ-11 connector is provided for connection to the telephone line. Data Transfer Rates CAP Data Rates The following CAP bit rates are supported as shown in Table 1 and Table 2: Table 1: Downstream Channel Bit Rate per Constellation Size (kb/s) Bit Rate per Constellation Size (kb/s) Symbo l Rate (kbaud s) 256 uncod 256 128 64 32 16 8 1088 952 816 680 544 408 272 1024 896 768 640 512 384 256 2560 2240 1920 1600 1280 960 640 5120 4480 F/A 3200 F/A 1920 F/A 7168 6272 F/A 4480 F/A 2688 F/A ed 136 w/o RS 136 with RS 340 with RS 680 with RS 952 with RS Note: RS = Reed-Solomon forward error correction F/A = Future Availability 103 Table 2: Upstream Channel Bit Rate Per Constellation Size (kb/s) Bit Rate per Constellation Size (kb/s) Symbo l Rate (kbaud s) 256 uncod 256 128 32 16 8 40 27 8 2* 20 13 4* 6* 8ER ed 136 1088 952 816* 68 544* 476* 408* 17 136** Note: 64 68 0 34 0* 119* 102* 85* * * * 544* 272* 68** 90.6* 45.3* 51* 34* 11.3* * * * ER = Extended Reach (upstream only) * Future availability with 680 and 952 kbauds downstream symbol rates ** Only available for 136 kbauds downstream 104 ANSI T1.413 / ITU G.992.1 Data Rates Data rates for DMT mode are partitioned at 32 kb/s increments for both the upstream and downstream data rates adhering to the DMT Standards. The downstream data rates extend from 32 kb/s to 8.064 Mb/s. The upstream data rates extend from 32 kb/s to 1024 kb/s. Table 3: ANSI T1.413 Payload Bit Rates Bit Rate (kb/s) Min Max 32 8064 32 1024 Downstream Upstream ITU G.992.2 Data Rates Data rates for G.992.2 (G.lite) mode are likewise partitioned at 32kb/s increments. The downstream data rates extend from 64 kb/s to 4 Mb/s. The upstream data rates extend from 32 kb/s to 1024 kb/s. Table 4: G.992.2 Payload Bit Rates Bit Rate (kb/s) Min Max Downstream 64 4000 Upstream 32 1024 Power Requirements Table 5: CP USB Modem Power Consumption CP USB Modem Power Consumption Power Supply +5V Digital Data Mode 0.100 W 105 +5V Analog 0.250 W +3.3V 0.995 W +12V 0.896 W Total: 2.241 W 106 Software Requirements Operating System • Microsoft Windows 98 • Microsoft Windows 98 SE • Microsoft Windows 2000 • Microsoft Windows ME • Microsoft Windows XP Hardware Requirements The ATU-R303 ADSL USB Modem is a complete reference design. Substitution of components specified by CTC Union with unspecified components may cause degradation in performance. CTC Union cannot guarantee performance when components have been substituted,thus altering the reference design. Processor Intel-compatible 80486 or higher, including Pentium and Pentium Pro. 107 Appendix D: FCC/Industry Canada Required Information FCC Required Information: 1. This equipment complies with Part 68 of the FCC rules. This unit bears a label, which contains the FCC registration number and ringer equivalence number (REN). If requested, this information must be provided to the telephone company. 2. This equipment uses the following standard jack types for network connection: RJ11-6 3. This equipment contains an FCC compliant modular jack. It is designed to be connected to the telephone network or premises wiring using compatible modular plugs and cabling which comply with the requirements of FCC Part 68 rules. 4. In the unlikely event that this equipment causes harm to the telephone network, the telephone company can temporarily disconnect your service. The telephone company will try to warn you in advance of any such disconnection, but if advance notice isn’t practical, it may disconnect the service first and notify you as soon as possible afterwards. In the event such a disconnection is deemed necessary, you will be advised of your right to file a complaint with the FCC. 5. From time to time, the telephone company may make changes in its facilities, equipment, or operations, which could affect the operation of this equipment. If this occurs, the telephone company is required to provide you with advance notice so you can make the modifications necessary to maintain uninterrupted service. 6. If a user experience difficulties, check your connection and software configurations. There are no user repairs that can be done on the unit. 108 Industry Canada Required Information EQUIPMENT ATTACHMENTS LIMITATIONS To ensure that certified equipment is attached correctly and only to the networks of participating carriers, the following statement shall accompany each unit of certified equipment offered for sale. This statement must be included conspicuously in written or electronic format, at or near the front of each copy of the operating manual, or accompany other technical information, or be included as a separate sheet. The required statement is: “NOTICE: The Industry Canada label identifies certified equipment. This certification means that the equipment meets telecommunications network protective, operational and safety requirements as prescribed in the appropriate Terminal Equipment Technical Requirements documents(s). The department does not guarantee the equipment will operate to the user’s satisfaction. Before installing this equipment, users should ensure that it is permissible to be connected to the facilities of the local telecommunications company. The equipment must also be installed using an acceptable method of connection. The customer should be aware that compliance with the above conditions might not prevent degradation of service in some situations. Repairs to certified equipment should be coordinated by a representative designated by the supplier. Any repairs or alterations made by the user to this equipment, or equipment malfunctions, may give the telecommunications company cause to request the user to disconnect the equipment. Users should ensure for their own protection that the electrical ground connections of the power utility, telephone lines and internal metallic water pipe system, if present, are connected together. This precaution may be particularly important in rural areas. Caution: Users should not attempt to make such connections themselves, but should contact the appropriate electric inspection authority, or electrician, as appropriate.” An explanatory note on Ringer Equivalence Numbers (see Section 10.0) and their use must be provided for the terminal equipment user in the information accompanying the terminal equipment. A notice similar to the following would be suitable: “NOTICE: The Ringer Equivalence Number (REN) assigned to each terminal device provides an indication of the maximum number of terminals allowed to be connected to a telephone interface. The termination on an interface may consist of any combination of devices subject only to the requirement that the sum of the ringer equivalence Numbers of all the devices does not exceed 5.” 109 Appendix E: Abbreviations ADSL Asymmetric Digital Subscriber Line ATM Asynchronous Transfer Mode CAP Carrier-less Amplitude and Phase DMT Discrete Multi-tone DSL Digital Subscriber Line G.DMT ITU G.992.1 G.lite ITU G.992.2 IP Internet Protocol LAN Local Area Network PPP Point-to-Point Protocol PPPoE Point-to-Point Protocol over Ethernet PVC Permanent Virtual Circuit SVC Switched Virtual Circuit VCI ATM Virtual Circuit ID VPI ATM Virtual Path ID Rev. 2.01 Appendix F: Product Specification DIMENSIONS Height: 1.6 in (4.06 cm), Width: 7.5 in (19.05 cm), Depth: 6.25 in (15.88 cm) WEIGHT Approx. 2.20 lbs (1.02 kg) ENVIRONMENTAL Ambient Operating Temperature – +32 to +131°F (0 to +45°C Relative Humidity – 5 to 95%, non-condensing POWER REQUIREMENTS 5 VDC Source from PC USB port, Less than 3 watts typical from 5 VDC CONNECTORS ADSL LINE – 6-pin modular jack RJ-11 USB – USB Connector DSL ADSL Line Code – Discrete MultiTone (DMT) ADSL TRANSMISSION RATES Downstream DMT: 32 kbps to 8.0 Mbps Upstream DMT: 32 kbps to 800 Kbps TRANSPORT AND APPLICATION PROTOCOL SUPPORT RFC 1483 Bridge Protocol ATM SUPPORT Supports ATM traffic shaping where soft SAR supports individual PCR control for each VC Full 16-bit address range for both VPI and VCI supported. Supports PVC connections. DEVICE DRIVER AND SOFTWARE SPECIFICATIONS Driver is LAN type network driver and is Network Driver Interface Specification (NDIS) 4.0 compliant. 111 Windows 98, Windows 98 Second Edition, Windows 2000 EMC FCC, Part 15, Class B; EN50081-1, Class B; EN50082-1 SAFETY UL 1950, cUL, EN60950 REGULATORY APPROVAL UL, CSA, CE