1
Table of Contents
ABOUT THIS MANUAL .......................................................................................................................... 1
PREFACE ................................................................................................................................................ 2
THE USB ADSL MODEM ATU-R301 MANUAL ........................................................................................ 2
CHAPTER 1: OVERVIEW ...................................................................................................................... 3
ABOUT ADSL......................................................................................................................................... 3
PROTOCOL AND DEVICE DRIVER SELECTION ............................................................................................ 3
FEATURES.............................................................................................................................................. 5
CHAPTER 2: USB ADSL MODEM ATU-R301 INSTALLATION AND SOFTWARE SETUP .............. 6
MODEM HARDWARE INSTALLATION .......................................................................................................... 7
SOFTWARE SETUP .................................................................................................................................. 8
CHAPTER 3: CUSTOMIZING COMMUNICATION SETTINGS .......................................................... 17
CHAPTER 4: UPDATING THE USB ADSL MODEM ATU-R301 SOFTWARE.................................. 18
CHAPTER 5: CONTROL PANEL APPLICATION............................................................................... 19
CHAPTER 6: SOFTWARE UNINSTALL ............................................................................................. 23
CHAPTER 7: TROUBLE SHOOTING ……………………………………………………………………...26
About This Manual
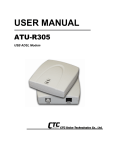
This manual provides a comprehensive user’s guide and installation manual for USB modem
ATU-R301. It has been organized in such a way to make it easy to follow by users
worldwide. In order to ensure optimal comprehension, the following list provides brief
descriptions of the formatting styles used throughout this manual.
Commands: Commands are always referred to by using the word “click” before them.
These commands are always shown as bold-faced words. For example, click Next, click
OK, or click Cancel.
Names of Windows (Dialog Boxes): The names of the windows (also referred to as
dialog boxes) that appear on the PC screen are always referred to in quotes. For
example, the “Setup Complete” window.
Names of Options in Windows: The names of options to choose from inside the
windows that appear on the PC screen are always referred to in italics. For example,
choose the Yes, I want to restart my computer now option from the window.
Notes: In some cases, preparatory or cautionary information is needed before
proceeding onto the next step in an installation process. This kind of information is
provided in the form of notes, which are always referred to in bold-faced and italicized
letters. For example, Note: To access the Control Panel, the driver must be running. Also,
make sure the USB cable is plugged into the modem.
CTC Union
1
Preface
The USB ADSL Modem ATU-R301 Manual
This manual contains information regarding the installation, operation, and configuration of
the USB ADSL Modem ATU-R301. Additionally, it outlines the use of the Control Panel
Application.
The following chapters are included in this manual:
•
Chapter 1: “Overview” offers a brief description of ADSL, protocol and device driver
selection, and the features of the USB ADSL Modem ATU-R301.
•
Chapter 2: “USB ADSL Modem ATU-R301 Installation and Software Setup” describes
the steps for installing the USB ADSL Modem ATU-R301 and details the software
installation procedure.
•
Chapter 3: “Customizing Communication Settings” provides detailed steps for altering
the ATM Virtual Path ID (VPI), ATM Virtual Circuit ID (VCI), Encapsulation type and/or
Modulation type values previously defined.
•
Chapter 4: “Updating the USB ADSL Modem ATU-R301 Software” details the
procedure for updating to a new version of the modem software.
•
Chapter 5: “Control Panel Application” describes how to configure and check the
performance of the USB ADSL Modem ATU-R301 and the ADSL connection.
•
Chapter 6: “Software Uninstall” provides detailed steps for removing the USB ADSL
modem ATU-R301 software from the PC.
•
2
Chapter 7: “Trouble Shooting” answers some problems that might be encountered in
installation and manipulation.
Chapter 1: Overview
Chapter 1: Overview
About ADSL
Asymmetric Digital Subscriber Line (ADSL) technology provides high-speed data access
across regular phone lines (copper wires) by making use of previously unused frequency
bandwidth above the voice band. By placing the ADSL signal above the frequency of the
voice signal, ADSL service is able to coexist on the same line with your telephone service.
ADSL is asymmetric in the sense that it provides a higher data rate in the downstream
(receive) direction than in the upstream (transmit) direction. Asymmetric operation is ideal for
typical home and small office use where files and information are downloaded more
frequently than uploaded.
There are several standard types of ADSL modulation techniques including Discrete
Multitone (DMT) and Carrierless Amplitude and Phase (CAP). The USB ADSL Modem ATUR301 is capable of supporting the following DSL standards: ANSI T1.413 Issue 2, ITU
G.992.1 (G.DMT), ITU G.992.2 (G.lite), CAP (T1 TR-59), and ITU G.992 Annexes A, B, and
C as applicable.
Protocol and Device Driver Selection
The USB ADSL Modem ATU-R301 can be easily connected to a USB port on the PC via a
standard USB cable. The USB ADSL Modem ATU-R301 is fully software upgradeable so
that new features and updates may be added by simply loading a new version of the device
driver onto your PC.
ADSL modems employ ATM (Asynchronous Transfer Mode) framing. ATM is a protocol that
divides packets into small fixed sized cells for rapid transmission over high-speed networks.
The ATM protocol allows various types of traffic (e.g. data, voice, and video) to be securely
and efficiently carried over the same network. ATM is being widely deployed by
telecommunications carriers in their backbone networks. Two type of ATM connections are
possible, PVC (Permanent Virtual Circuit) and SVC (Switched Virtual Circuit).
Several different protocols are used on top of ATM. The protocol required in your
configuration depends on the equipment deployed by your DSL service provider. There are
several possibilities:
1. Point to Point Protocol (PPP) Over ATM (RFC 2364) - PPP provides session setup,
user authentication (login), and encapsulation for upper layer protocols such as IP
(Internet Protocol). The use of PPP makes the modem appear as a dial modem to
the operating system. Dial-Up Networking is used to establish a connection. PPP is
supported by either the WAN (Wide Area Network) driver, or the ATM driver.
2. Bridged/Routed Ethernet/IP over ATM (RFC 1483) – This protocol makes the modem
appear as a local area network (LAN) device to the operating system.
CTC Union
3
Chapter 1: Overview
3. RFC 1577 – this is another local area network like protocol for IP address and ATM
address mapping.
4. Point to Point Protocol (PPP) Over Ethernet (RFC 2516) - This protocol makes the
modem appear as a local area network (LAN) device to the operating system. It
allows multiple computer users on an Ethernet to share a common DSL connection
to the Internet.
Three types of device drivers are provided for the ADSL USB modem ATU-R301, WAN, LAN,
and ATM. Note that all three drivers support ATM protocol. In addition, the ATM driver works
with ATM services that are available in recent Windows operating systems. The proper
choice of driver depends on the combination of Windows operating system and protocol.
1. WAN driver – this driver causes the modem to resemble a dial-up modem. Call
establishment is performed through Dial-Up Networking. This driver supports RFC
2364 with PVC connections. It can be used with Windows 98, Windows 98 SE,
Windows 2000, and Windows Me.
2. LAN (RFC 1483) driver - this driver makes the modem appear as a LAN or Ethernet
device. Connection establishment is automatic. This driver supports RFC 1483 with
PVC connections. Additionally, PPPoE is supported. It can be used with Windows 98,
Windows 98 SE, Windows 2000, and Windows Me.
3. ATM driver – this driver works in conjunction with ATM services provided by
Windows. Both RFC 1577 and RFC 2364 are supported. The ATM driver uses DialUp Networking to create a PVC or SVC connection to establish a PPP (RFC 2364)
connection. This driver can be used with Windows 98 SE, Windows 2000, and
Windows Me.
The device driver choices are summarized in the table below:
Driver Type
LAN
Protocol
RFC 1483
WAN
RFC 2364
ATM
RFC 1577
RFC 2364
4
Windows OS
Windows 98
Windows 98 SE
Windows 2000
Windows Me
Windows 98
Windows 98 SE
Windows 2000
Windows Me
Windows 98 SE
Windows 2000
Windows Me
Chapter 1: Overview
Features
The USB ADSL Modem ATU-R301 provides the following features:
•
Compliant with Universal Serial Bus Specification Revision 1.1
•
USB bus-powered; an external power supply is not required
•
Supports three device drivers: Microsoft NDIS 4.0 WAN Miniport, NDIS 4.0 LAN Miniport
or NDIS 5.0 ATM Miniport
•
Compatible with all T1.413, G.DMT, and G.lite compliant CO DSLAM equipment as well
as the vast majority of deployed CAP RADSL CO equipment
•
Software upgradeable
•
ATM driver supports up to sixteen simultaneous ATM virtual connections
•
Includes a Microsoft Windows control panel monitoring program for configuring the
adapter and checking the status of the connection
•
Provides an RJ-11 connector for connection to the telephone line
•
Supports DSL downstream data rates up to 8 Mbps (125 times faster than standard 56K
modems)
•
Supports DSL upstream data rates up to 1024 Kbps
•
Supports PPP over Ethernet (PPPoE) clients
CTC Union
5
Chapter 2: USB ADSL Modem ATU-R301 Installation and Software Setup
Chapter 2: USB ADSL Modem ATU-R301
Installation and Software Setup
The following information may be required for software installation. Contact your DSL service
provider before proceeding with software installation.
•
IP Address Settings – the software installation process allows the server to
dynamically assign IP Address settings. If your application requires static setting of
specific address information you will need to know:
IP Address
Subnet Mask (for Bridged Ethernet applications only)
Default Gateway (for Bridged Ethernet applications only)
•
Name Server Information – the software installation process allows the server to
dynamically assign Name Server Address settings. If your application requires static
setting of specific address information you will need to know:
Primary DNS Address
Secondary DNS Address
Primary WINS Address
Secondary WINS Address
•
Type of Driver to be Installed – WAN, LAN and ATM software drivers are supported.
Note: Required if not using default value
•
ATM Virtual Path ID (VPI)
Note: Required if not using default value
•
ATM Virtual Circuit ID (VCI)
Note: Required if not using default value
•
Encapsulation type
Note: Required if not using default value
•
Modulation type
Note: Required if not using default value
6
•
User Name (for PPP applications only)
•
Password (for PPP applications only).
CTC Union
Chapter 2: USB ADSL Modem ATU-R301 Installation and Software Setup
Modem Hardware Installation
Install the USB ADSL Modem ATU-R301 by following these steps with the PC running:
1. Insert the rectangular end of a USB cable into the USB port of your PC.
2. Insert the square end of the USB cable into the USB port of the USB ADSL Modem ATUR301.
Note: The USB ADSL Modem ATU-R301 will be detected and informational messages will be
displayed.
CTC Union
7
Chapter 2: USB ADSL Modem ATU-R301 Installation and Software Setup
Software Setup
Note: The software setup process for all supported operating systems is described in this section
with operating system specific differences noted. The USB ADSL Modem ATU-R301 should be
connected to your PC prior to installing the software. No other Windows programs should be
running on your PC during the software install process.
1. For Windows 98, Windows 98 SE, and Windows 2000 applications, a window will be
displayed indicating that new drivers are required, click Next to start the installation
procedure.( as Figure 1)
Figure 1. New driver required
8
CTC Union
Chapter 2: USB ADSL Modem ATU-R301 Installation and Software Setup
2. A window will be displayed which allows you to specify the location of the driver software
to be installed. Insert the USB ADSL Modem ATU-R301 installation CD into the CD drive;
choose the option that allows the system to search for the best driver for your device by
clicking inside the circle to the left of it; click Next.( as Figure 2 )
Figure 2. Specify driver location
Note: The appearance of the window and the wording of the options will be different for
each operating system but the same procedure applies. The “recommended” option will
always search for the appropriate driver software.
3. For Windows 98, Windows 98 SE, and Windows 2000 applications, you will be required
to specify a location for the new driver software. Select the CD_ROM drive option (a
check will appear in the box next to the selected option) with no other options selected
and click Next.
CTC Union
9
Chapter 2: USB ADSL Modem ATU-R301 Installation and Software Setup
4. For Windows 98, Windows 98 SE, and Windows 2000 applications, a message will
indicate that the system is ready to install the device driver; click Next. (as Figure 3 )
Figure 3. Windows is ready to install driver
5. For Windows Me applications, the “Select Other Driver” window may ask you to select
the driver from a list of drivers. If asked, highlight the root directory, identified with
“GROOTUSB.INF” in the Location column, and click OK.
6. A message will confirm that the device driver software has been installed; click Finish.
10
CTC Union
Chapter 2: USB ADSL Modem ATU-R301 Installation and Software Setup
7. The “Welcome” window provides an opportunity to quit the setup process to exit all
Windows programs before continuing. If the Windows programs were previously closed,
click Next. (as Figure 4 )
Figure 4. Welcome window
Note: If you quit this process, run setup.exe from the CD-ROM to resume the installation.
8. The “Select ISP” window allows you to specify your DSL service provider. A list of
service providers is displayed. Default values for the Type of Driver, ATM Virtual Path ID
(VPI), ATM Virtual Circuit ID (VCI), Encapsulation type and Modulation type are provided
for each DSL service provider listed in the window. (as Figure 6 )
CTC Union
11
Chapter 2: USB ADSL Modem ATU-R301 Installation and Software Setup
Figure 6. Select ISP window
If your DSL service provider is listed and you would like to accept the default values,
highlight the provider’s name and click Next. Continue with Step 10 below.
If your DSL service provider is listed and you would like to change the default values,
highlight the provider’s name and click Customize. Continue with Step 9a below.
If your DSL service provider is not listed select Other Service Provider and click Next.
Continue with Step 9a below.
12
CTC Union
Chapter 2: USB ADSL Modem ATU-R301 Installation and Software Setup
a) Select the type of driver to be installed from the “Select Driver Type” window
and click Next. ( as Figure 7 )
Figure 7. Select Driver Type window
CTC Union
13
Chapter 2: USB ADSL Modem ATU-R301 Installation and Software Setup
b) Enter the VPI, VCI, Encapsulation type and Modulation type from the
“Communication Settings” window and click Next. (as Figure 8 )
Figure 8. Communication Settings window
Note: Encapsulation types vary depending upon the application.
14
CTC Union
Chapter 2: USB ADSL Modem ATU-R301 Installation and Software Setup
9. The “Start Copying Files” window will be displayed. You may review the current settings
and click Customize or Back to change the settings. Click Next to accept the current
settings; a message will be displayed indicating that files are being copied. ( as Figure 9 )
Figure 9. Start Copying Files window
10. For Windows 2000 applications, the “Digital Signature Not Found” window may appear
warning that the installation software is not a digitally signed version. A digital signature
is not necessary. Click Yes to allow the installation to continue.
CTC Union
15
Chapter 2: USB ADSL Modem ATU-R301 Installation and Software Setup
11. The “Setup Complete” window indicates that files have been copied. Click Finish to
complete the installation. ( as Figure 10 )
Figure 10. Setup Complete window
Note: You may need the Windows CD to complete the installation
12. Windows 2000 applications will display a message indicating that the system must be
rebooted for the new settings to take effect. Click Finish.
13. After informational messages are displayed, the “System Settings Change” window will
give you the opportunity to reboot the system. Remove all disks from their drives; click
Yes.
14. Windows 98 WAN and ATM applications will ask you to provide telephone number and
location information when the PC has rebooted. Enter the information and click Close.
NOTE: If it is necessary to change TCP/IP settings, please refer to the user manual of your PCs
windows operation system.
16
CTC Union
Chapter 3: Customizing Communication Settings
Chapter 3: Customizing Communication Settings
Once the USB ADSL Modem ATU-R301 and software have been installed the
communication settings may be easily updated by performing the following steps:
1. From your PC desktop click Start – Programs –DSL Modem – Configure. A notification
message will appear indicating that the setup process has begun.
2. Click Settings from the “DSL Modem Installer” window.
3. The “Communication Settings” window will be displayed. Make the necessary changes to
the VPI, VCI, Encapsulation type and/or Modulation type and click Apply.
4. The “Setup Complete” window indicates successful completion of the customization
process. Select the Yes, I want to restart my computer now option, remove any disks
from their drives, and click Finish. Your PC will reboot.
CTC Union
17
Chapter 4: Updating The USB ADSL Modem ATU-R301 Software
Chapter 4: Updating The USB ADSL Modem ATUR301 Software
Once the USB ADSL Modem ATU-R301 has been installed, updating to a new version of the
software is a simple process as detailed below.
1. From your PC desktop click Start – Programs –DSL Modem – Configure. A notification
message will appear indicating that the setup process has begun.
2. Click Update from the “DSL Modem Installer” window.
3. A message will be displayed asking you to confirm the update, click Yes.
4. The “Select installation location” window will be displayed. Indicate the location of the
Setup files and click OK.
5. Since updating the modem software requires removing the old version and installing a
new one, a message will be displayed informing the user not to unplug the USB modem
cable until the uninstall process has been completed. Click OK.
6. A message will be displayed indicating the software is being removed.
7. The “Setup Complete” window indicates successful completion of this portion of the
updating process; click Finish.
8. Unplug the USB modem cable.
9. Processing will continue with Step 7 of the Software Setup process. Please turn to page
11, Step 7 to complete the installation portion of the updating process.
18
CTC Union
Chapter 5: Control Panel Application
Chapter 5: Control Panel Application
The USB ADSL modem ATU-R301 control panel program provides a quick and easy way to
configure and check the performance of the modem and the ADSL connection. When open,
the monitor window updates every 2 seconds.
1. There are two methods to access the control panel:
•
From the “Control Panel” window (Start – Settings – Control Panel), double click
the DSL Modem icon, or
•
From the PC desktop, double click the icon in the system tray.
Note: To access the Control Panel, the driver must be running. Also, make sure the USB cable
is plugged into the modem.
CTC Union
19
Chapter 5: Control Panel Application
Figure 11. Physical Link window
2. The “Physical Link” tab of the “DSL Modem” window (Control Panel) allows you to review
the current state of the USB ADSL Modem ATU-R301 and connection. The green
indicator in the Link Status field signifies that a connection has been made. This indicator
blinks while a connection is being established. Individual flashing yellow indicators show
the Transmitting and Receiving data activity separately. (as Figure 11 )
20
CTC Union
Chapter 5: Control Panel Application
Figure 12. System Info window
3. The “System Info” tab displays the release number of the DSL modem driver, the
firmware release number, and the control panel version that you are currently using. ( as
Figure 12 )
CTC Union
21
Chapter 5: Control Panel Application
Figure 13. Configuration window
4.
22
The “Configuration” tab offers driver appropriate Modulation, Encapsulation, and VPI
and VCI values. If you are using a WAN or ATM driver, only the Modulation type will be
displayed and may be modified. LAN driver applications will be able to view and modify
the Modulation type, Encapsulation type, and VPI and VCI values. (as Figure 13 )
CTC Union
Chapter 7: Trouble Shooting
Chapter 6: Software Uninstall
Remove the USB ADSL Modem ATU-R301 software drivers by performing the following
steps.
Note: The USB cable should not be unplugged until after the uninstall process has been
completed. For Windows 98 applications, the cable must be unplugged immediately following
Step 6.
1. From your PC desktop click Start – Programs –DSL Modem – Uninstall. A notification
message will appear indicating that the setup process has begun.
2. Click Remove from the “DSL Modem Installer” window.
3. A message will be displayed asking you to confirm the removal of the USB ADSL modem
software, click Yes.
4. The “Information” window will be displayed reminding you not to unplug the USB cable
until the uninstall process has been completed. Click OK.
5. A message will be displayed indicating the software is being removed.
6. The “Setup Complete” window indicates successful completion of the uninstall process.
Remove any disks from the drives, select the Yes, I want to restart my computer now
option by clicking in the circle to the left, and click Finish.
Note: The screen for Windows 2000 applications will not ask the user to reboot the system.
Click Finish to complete the Uninstall process.
CTC Union
23
Chapter 6: Software Uninstall
7. Unplug the USB cable from the PC.
Note: The USB cable must be unplugged before the system is rebooted. For Windows 98
applications the cable must be unplugged immediately as the reboot process was begun in Step
6.
24
CTC Union
Chapter 7: Trouble Shooting
Chapter 7: Trouble Shooting
1.
If the LED of ‘PWR’ is dark :
Please check – is the USB cable connected well ?
-- is the PC powered on ?
-- is the PC USB interface workable ?
If the LED is still dark, please call your local agent for further help.
2.
If the LED of ‘ACT’ is flashing :
It indicates the connection of the modem is fail.
Unplug-plug the USB cable to restart the modem. When there is a valid connection,
the ‘ACT’ LED will remain solid. If the LED is still flashing, please call your local
agent for help.
3.
If the modem is installed as ‘Modem Hardware Installation’ of chapter 2 and the
followed ‘Software Setup’ is not finished.
This indicates the plug and play of your PC does not function well. Unplug your
ATU-R301 and then run setup program from your USB ADSL Modem ATU-R301
installation CD. Follow the steps of Software Setup in chapter 2 to complete the
software installation, and then a DSL Installer message will pop-up to ask you to
plug in the USB cable to the modem.
CTC Union
25