1
Navigating DAISI – Instructor Guide (Page 1/8)
Index
Page 2 – Instructor Homepage Screen – Outline of accessible tabs
Page 3 – Instructor Homepage Screen Overview
Page 4 – Class Details Screen Overview
Page 5 – Class Roster Screen Overview
Page 6 – Student Information Overview
Page 7 – Student Information Overview (cont) and sample reports overview
Page 8 – Attendance Screen Overview
Instructor Guide for navigating DAISI
DAISI (Data and Information System – Illinois) is the Illinois Community College Board’s data collection
system for Adult Education. Within the DAISI system, various roles can be assigned to users based on their
duties within the adult education program where they are employed. This guide is for those who are granted
access as an instructor.
For instructors, access in DAISI is limited to classes for which the individual is the instructor of record in the
system. By that same logic, access to information about students is limited to students enrolled in those classes.
There are two roles for instructor level access in DAISI. These include the following:
1) Instructor – View Only (This level allows the instructor to view all classes for which they are an
instructor of record. It also allows the instructor to view information on students enrolled in those
classes).
2) Instructor – Enter Attendance (This role has the same access as View Only, but also allows the instructor
to enter attendance for their students).
All users are required must have a unique e-mail account to be granted access to the system. After access is
granted, the system will automatically generate a temporary password and login. This information will be sent
to the e-mail address recorded in the system for the instructor. You can login on the DAISI system at
www.iccbdaisi.org.
DAISI Login Screen
1) Use the Login and temporary password assigned by the system for your initial login.
2) In the future, if you forget your password you can click this area and the system will reset your existing
password and grant you a new temporary one.
Navigating DAISI – Instructor Guide (Page 2/8)
DAISI Instructor Homepage Screen – Accessible Tabs
None of the navigational tabs marked with the lock icon are accessible with an instructor level
access.
The checkmark icon represents navigational tabs that are accessible with instructor level access.
The “Home” tab will always, regardless of the page being viewed, return you to the Instructor
Homepage Screen.
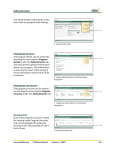
The “Administration” tab
provides another menu.
Instructors can access the
following sub-menus.
1) Allows you to view
Given/Unscheduled
days.
2) Allows you to change
the fiscal year to view
class information from
other fiscal years.
Navigating DAISI – Instructor Guide (Page 3/8)
DAISI Instructor Homepage Screen
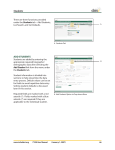
1) You can access the Help area at any time by clicking the Help button.
a. The Help area provides contact information for DAISI support from CAIT (Center for Applied
Information Technologies and from the ICCB)
2) If you wish to change your password in the future, you can do so through the “Change Password” link.
3) This section shows all the class sections you are teaching during this fiscal year. You can access
information about any class (and the students enrolled in that class) by clicking on the Class/Section No
hyperlink.
a. Class/Section No. information is determined by each program. For many the Class Section No.
will be a set of numbers used to distinguish various classes. Check with your local program staff
to get additional information about the Class/Section No. used at your program.
4) In the future, this area will outline classes you have taught in other fiscal years.
When clicking a Class/Section No link, you will be directed to the Class Details page.
Navigating DAISI – Instructor Guide (Page 4/8)
DAISI Class Details Screen – Overview
The arrow points to the Class Details link. The underlined link indicates the page you are currently viewing.
1) This link takes you to the Class Roster. The roster lists all students enrolled in the class.
2) This link takes you to the Attendance grid for the class. Instructors with View Only access can see the
attendance that has been entered for their students, but can’t alter it in anyway. Instructors with Enter
Attendance access can record the attendance for their students.
3) The Student Generation Report (when available) will show the amount and percent generated by the
Class/Section No.
Navigating DAISI – Instructor Guide (Page 5/8)
DAISI Class Roster Screen – Overview
1) This column provides an alphabetical list of all the students enrolled in the class. You are able to view
information about the student by clicking on the student’s name. Each student enrolled in the class is
accessible for the instructor.
a. For more information outlining what information can be viewed for each student, please refer to
the next section.
2) This column provides the date the student started the class. For open-entry classes, this is often different
than the start date for the class.
3) This column indicates which instructional category was attached to the student.
4) This column indicates the Funding Source used to support the student’s instruction in the class. This is
determined at the time the student enrolls, but programs have the discretion to change this if needed.
5) Once a student exits a class, the exit date and reason are recorded in the system and displayed in these
columns. If a student drops from a class, then returns and re-enrolls in the same class, the Exit Date and
Reason become null until another drop is recorded in the system.
6) The Update and Delete options are not accessible for those with Instructor Level access.
Navigating DAISI – Instructor Guide (Page 6/8)
DAISI Student Information – Overview
When clicking on a student’s name on the Class Roster screen, you will be taken to the Student’s Bio/Demo
page. From this page, you can access information from various student screens as outlined in the above
numbers.
The record indicator navigation feature is a counter displayed on all student information screens. It
represents the number of students enrolled in the class currently being viewed. This feature allows
you to move directly through the students listed on the class roster by clicking the << or >> links.
1) Status – This link provides information about the student’s employment and public assistance status. It
also indicates if the student is enrolled in other programs.
2) Test Info – This link provides information about testing completed by the student. This includes TABE,
CELSA, Best Plus and Best Literacy. Information is also provided about the GED and Constitution Test
(if applicable).
Navigating DAISI – Instructor Guide (Page 7/8)
3) Class Info – This link provides the attendance and enrollment hours as well as the units earned by the
student in each instructional category. It also outlines all classes for the student for the fiscal year.
4) Goals/Achievements – This link shows the student’s goals for the fiscal year. Any achievements attained
by the student are recorded here by program staff.
5) Student Notes – This screen is used to record notes by Data Entry and Administrative staff regarding the
student.
6) Custom Fields – This link provides access to any custom fields created by the program to track
information on students. This area was provided to programs to allow them to customize the date fields
for students beyond those fields required for submission of state reports.
SPECIAL NOTE:
While not displayed on the student screens outlined above, there are two reports that instructors will find
helpful. These reports can be generated as PDF and sent to you. They include the following:
1) Student Testing Report – This report provides information on student pre and post-testing.
2) Student Hours Report – This report provides various information by Class/Section No.
SPECIAL NOTE: During FY09 instructors will gain the ability to run the Student Hours Report.
Navigating DAISI – Instructor Guide (Page 8/8)
DAISI Class Attendance Screen – Overview
1) This area indicates the Class/Section No being reviewed. When in “Month View” mode, it also shows
which month is currently being viewed. For programs with Stacked Classes, the other Class Section No's
stacked with this class are also displayed here.
2) There are 3 icons available in this area.
a. Clock Icon - For Instructor Level access, this icon can not be accessed. This icon provides a link
to change the class schedule.
b. PDF Icon – This link allows you to print out an attendance sheet for the class currently being
viewed. There are several options for the format of the sheet.
c. Star Icon – This icon allows you to change your preferences on how the attendance grid loads on
the page when viewed. When set, the page will automatically load that way until preferences are
changed.
3) This links allow you to navigate through the months when in the Month View mode.
4) The Help icon provides a quick reference to the various attendance codes used in DAISI.
5) This box controls how the grid is currently being viewed. Unlike changing personal preferences using
the Star icon, the changes made here are not saved, but apply only to the current viewing. (Page 60 - 63
of the DAISI user manual provides more detailed explanation of each display mode).
6) This area allows you to automatically insert attendance for all students or a group of students. This can
be helpful for an Unscheduled or Given Day. If you wish to use this feature, record the Start Date and
the End Date to indicate when you want the attendance code automatically inserted. If “All Students”
are selected, it will apply to all students. If you want it to just apply to select students, leave “Checked”
selected and then check the box to the left of the Student’s Name who it will apply to. If no Given or
Unscheduled days are planned for the date(s) indicated, the system will generate “E” or “P” for those
days. Be sure to change the “P” codes to “A” codes if applicable.
7) This area gives you the current status of the student’s attendance. A legend for interpreting the different
symbols is available at the top of the page.