Download DYE-SUBLIMATION - Australian Graphic Supplies
Transcript
DYE-SUBLIMATION
Transfer Instructions
Revised date – 1 May 2011
Contents
General Instructions & Tips
Getting Started
Tips & Techniques
Substrates
Metal
UniSub
Plastic
Cardboard – Jigsaw Puzzles
Ceramic & Porcelain
Polyester Fabric
MagMates – Magnetic
SubliMates – Adhesive Vinyl
Glass
SubliCrylic
PromaSub Flock
Common Problems…Solved!
Page
2
3
3
6
6
7
7
8
9
9
10
10
10
10
11
>> Technical Support, Downloads and more
You will find a range of general information, Frequently Asked Questions, downloads
and installation assistance on our website. From the Home Page click on the Tech
Support icon (as featured to the right). This is always the best place to go when you
need assistance as you will have most of the answers at your finger tips.
>> Contact Us
Technical Support Email: [email protected]
Technical Support Phone: (07) 3823 6043
General Enquiries & Orders: 1300 132 677
This Booklet is a Guide Only. Different settings may be applicable for different model printers. Please consult your user manual
for your printer for specific instructions. Power Digital takes no responsibility for the information contained in this booklet.
Each model is different and this guide has been created to suit most models, however due to the diversity of printers and
printing systems it is to be used as a common guide only.
page 1
General Instructions and Tips
Heat Pl at en
ted
Prin sfer
n
a
Tr
er
es t
Poly duct
Pro
Teflon
Mat
Hea
t Pr
Ba s e ss
e
General Instructions
1. Print the transfer using the appropriate driver and ICC Profile.
2. Set the correct Time, Temperature and Pressure on your heat press.
3. Cover the base of the press with a protective sheet, preferably a Teflon Heat Mat.
4. Remove the plastic coating from substrate. This is found on most metal, plastic and UniSub
products.
5. Tape the transfer paper to the substrate using Heat Tape.
6. Place in press face up (ie. Transfer on top of substrate)
7. Press with Temp/Time/Pressure settings.
All images should be printed onto the transfer paper in mirror image (except Glass products) using
either the correct printer driver and ICC Profile installed in your graphics software.
The printed transfer paper is taped to the job using heatproof tape. When taping the job down try to
ensure that the heatproof tape does not encroach over the print area as this could cause a lighter
patch where the tape is on the image.
In a flat press the job should be placed on the Teflon mat with the unprinted side of the transfer
paper facing up towards the heated press platen. The job is then pressed at the recommended
temperature, time and pressure. The press should be opened gently so as not to cause a vacuum and
lift the paper causing ghosting and streaking.
The following is a guide and times and temperatures may vary depending on your press, inks and size
of substrate. For tips on getting the best results and trying different variations please refer to Tips and
Techniques below.
page 2
Getting Started
ICC Profiles: ArTainiumn & SubliJet-R inks require the installation of an ICC software profile designed
for the specific printer used to imprint the sublimation transfer paper. As with the printer driver,
changing the printer model of the printer almost always will entail changing of the profile.
Both profile and drivers must be loaded in the appropriate portion of the Windows operating system.
Profiles ship with instructions on how to load and install into the respective operating system.
Instructions for loading profiles into CorelDraw and Adobe PhotoShop are also included on the profile
CD.
Transfer Paper: The paper we recommend is TexPrint XP which is also recommended by ArTainium
and Accuplot with SubliJet-R inks. In order to sublimate, special photo quality paper is required.
Without this paper the ink will not transfer onto the substrate. Store the transfer paper in its original
black packaging. If the transfer paper is exposed to light for an extended period of time it can fade
and damage the paper, affecting the quality of the transfer.
Teflon Mats: It is recommended that a Teflon mat be used under the job, on the base of the press.
This protects the rubber mat on the press and makes it a lot easier to clean up any residue from ink or
adhesives.
This is especially important when sublimating double sided FR plastic.
Heat Proof Tape: It is essential that heat proof tape is used to tape the image to the substrate.
Ensure that the heat proof tape does not encroach over the print area as this could cause a lighter
patch where the tape is on the image.
Tile/Mug Heat Mat: The tile/mug mat is required when pressing ceramic tiles and ornaments. It is
also recommended, but not essential, to be used with the plate puck when pressing plates. The
tile/mug mat is a green silicon rubber mat that acts as a heat conductor to evenly distribute the heat
throughout the substrate.
Sacrificial Mug: A sacrificial mug must be placed in all mug presses when not in use. Keep the
sacrificial mug in the press when it is heating up and cooling down. Take the sacrificial mug out of the
press to sublimate your mug and replace it immediately once the sublimating process is complete. This
will maintain the shape and quality of the heating element.
Tips & Techniques
Preparing the Substrate: Remember to peel the transparent protective film off of the surface of the
substrate (if applicable) and check to see that you are working with a clean, lint-free surface. Adding a
“bleed” to your artwork will help you to align your transfers. To create a bleed, enlarge your
background artwork so that it is 2-5mm larger than your blank substrate. You will know that the blank
piece is properly align when you can see an even amount of ink all they way around the edge.
Sometimes a “double image” results when the transfer moves across the sublimatable surface while it
is still hot, usually when the press is lifted or while removing the transfer from the sublimation surface.
To prevent this, it is recommended to always use a transfer sheet that is larger then the surface you
are sublimating onto.
Ideally, the paper should be large enough to secure it to the backside of your sublimation blank with
heat resistant tape.
When pressing MDF plaques, ready signs and paper weights, do not tape over the foiled edge as it may
pull the foil off when removed. If possible allow the piece to cool slightly before removing the transfer
and tape.
Printing the Transfer: No matter which printer you use, it is always best to do a nozzle check each
time you turn the printer on. Use a piece of normal copying paper (not sublimation paper). Place it in
your printer and using the Driver to perform a nozzle check. If you experience a bad nozzle check then
you may need to proceed with a clean. Print the nozzle check again. If you are still experiencing a bad
nozzle check then repeat the process until you achieve good results. You should never do more than
3-4 cleans in a row. If the nozzle check is still not perfect after these cleans, call our technical support
for more information.
page 3
Tips & Techniques cont.
Temperature and Pressing Times: A temperature of 200°C is recommended for all products. Unless
specified otherwise, use moderate to heavy pressure, however different products require a light
pressure. Time and temperature may vary depending on your heat press and the thickness of your
blank material. Pressing times can be increased or reduced in 5-10 second increments until you find
the time that results in the clearest image.
All times shown for ‘face-up sublimation’ transfer on top of the substrate. When testing different times
and temperatures open the press and lift a corner of the transfer ensuring that you do not move the
transfer, if the results are not what is expected the press can be closed again for the desired time.
Please exercise extreme caution when removing finished items from your heat press. We recommend
using an oven mitt or rag when removing products from your heat press. Warping can be minimised by
allowing products to cool face down on a firm surface and by placing a weighted object on the back of
the product. If warping is severe, the sublimated piece can be heated a second time from the back side
and allowed to cool. Do not bend products while they are still hot, as this can damage the substrate
and your sublimated image.
Moisture in the Paper: Moisture in the paper will usually cause a milky colour in the solid colour
areas and blurring. Absorbent backing paper is recommended when sublimating some products to
reduce the problems associated with moisture. This can be light cloth or non-ribbed paper towel. It
absorbs moisture that might be in the paper. This is placed on top of the job after it is placed on the
press (prior to pressing). Transfer papers can also harbour moisture harmful to the transfer process. In
this instance moisture can be removed by placing the printed transfer paper under an open heat press
for a minimum of 10 seconds. Depending on the moisture content, drying time may be increased.
Benchmarks for recognising when the paper is sufficiently dried include the moment when the paper
either bows in the middle or the edges of the paper begin to curl.
Storage of Paper: Moisture in the paper is most commonly caused by incorrectly storing the paper. It
is highly recommended that the paper be kept stored in the packet it comes in, in a dry place such as a
cupboard or drawer. DO NOT keep the paper in the printer.
Moisture and humidity will cause undesirable results (colour shifts, bleeding and uneven transfers) with
the sublimation process. To avoid these problems all papers and water-absorbing substrates, such as
shirts and mouse pads must be kept as dry as possible. Hand in hand with the recommendations above
and the instructions below, pre-heating the product prior to transferring will help resolve most
problems associated with moisture and humidity at the point of contact with the heat press.
If you have experienced heavy rain or increased moisture in the air it is recommended that you follow
the above instructions on drying the paper and pre-heating the substrate before printing and pressing.
Sublimating: Place the taped product and transfer gently into your press and commence the
sublimation. Once the time is up your press should sound an alarm, now carefully open the press.
Sometimes the press may create a vacuum when pressing glass or thin substrates such as metal and
shirts. This causes ghosting on the imaged surface. To avoid this open the press in 2 motions; 1 to
break contact with the substrate and 1 to fully open the press. Pressure can also be a culprit. If press
suction after pressing is pervasive, slightly lighten the pressure and see if this cures the problem
without affecting the image.
Protecting Your Press: To make the alignment of the substrate to a full-bleed transfer easier, it is
recommended that you make the transfer slightly larger than the substrate. For example, if you are
pressing a 76 x 25mm name plate, make your transfer 78 x 27mm. This will create a “border” to
which you can align your substrate. While this makes the alignment easier and allows for full colour
coverage, it also poses a problem. For this we always recommend using a Teflon Mat to avoid excess
in staining your press.
Cutting Recommendations: Although we stock many pre-cut blanks FR Plastic sheet stock can be
cut, routed or bevelled either before or after sublimation using carbide tooling. We recommend using
either a router bit designed for acrylic or a multi-tooth saw blade designed for plastic. Ask your
engraving supplier about bits designed to cut FR (Fibre re-enforced) plastic material. We do not
recommend shearing or laser cutting FR plastic. The peel coating or masking should be left on the
product until after cutting.
page 4
Tips & Techniques cont.
Colour Matching: For easier colour matching, we recommend that you print a colour chart and
sublimate it to whatever substrate you are using. This will provide a quick reference for matching
logos, PMS colours etc. It will also take out the “guess work”.
Double-sided Substrates: It is essential that you use a Teflon mat. Sublimate one side as normal.
Let it cool. To do the other side, line up the substrate with the transfer. Cut a strip of paper and tape
to either side of the transfer making sure you do not tape the substrate. Do not tape over the transfer
image otherwise you may experience fading where the tape is placed.
Larger areas: For large areas such as an A4 size Ultracoat metal plaque or Unisub wood clipboard
you must ensure that the transfer paper is secured tightly with tape. While with most jobs it is
advisable to get the transfer paper off the job fairly quickly but we have found that with the two items
mentioned above, that letting it cool for about 20 seconds prior to removing the paper helps greatly.
While this could change colours very slightly it ensures the sublimation dyes are not still in a gaseous
state while the paper is being removed thus preventing flaring of solid colours.
With wetsuit-rubber type products it is essential to get the paper transfer off as quickly as possible. As
rubber expands with heat, when the press is raised the expansion can cause ghosting of images and
text.
Storing finished products: Special care must be taken when storing or packaging finished
sublimated products. If sublimated pieces are placed in direct contact with other sublimatable materials
or with any type of synthetic material, the inks will migrate from the sublimated piece to the synthetic
material over time. Do not stack finished pieces face-to-face, either when hot or cold. Do not
wrap finished pieces in shrink wrap or place them in plastic bags for shipping. We recommend that you
use a paper sheet between stacked items, or wrap pieces in paper for shipping.
Outdoor Durability: While many of these sublimatable products feature UV absorbers to extend
outdoor life, they are not generally intended for permanent outdoor use. Fading will occur over time
depending on the brand of sublimation ink used and outdoor environment. Laboratory research has
shown that using a longer dwell time can extend out door life, allowing the sublimation inks to
penetrate the sublimatable coating to the maximum extent possible. However, some fine image detail
may be lost as a result of the longer dwell time. For the longest lasting UV durability we recommend
the Gradess Metal (3yr outdoor) with the ArTainium UV+ Sublimation
inks. Contact us for the latest information.
Jigsaw Puzzles: Use the cardboard backing supplied to flip the puzzle face down onto the transfer.
Secure the puzzle with tape and then use the cardboard backing to flip back so the transfer is on top.
Slide the puzzle onto the press, keeping the transfer on top, and slide out the cardboard backing.
Once pressed, slide the puzzle to the edge of the press and slide onto the cardboard backing, flip and
remove the tape and transfer paper. Allow for the puzzle to cool before putting back into plastic
packaging.
page 5
Substrate
UltraCoat Metal*
Gradess – PL G.P
Gradess – General
Travel Thermos Mug
Aluminium Water Bottle
Ultimate Cooler Can – mug press
Ultimate Cooler Can – oven wrap
Ultimate Wine Cooler – wrap
Jewellery
Bookmarks – all sizes (face down)
Metal Substrates
Temp
Time
200oC
45 seconds
190oC
2 – 3 minutes
190oC
60 seconds
200oC
120 seconds
200oC
120 seconds
205oC
45 seconds
205oC
6 minutes
205oC
8 minutes
200oC
45 seconds
200oC
60 seconds
Pressure
Light/Medium
Light/Medium
Light/Medium
Medium
Medium
Light
Light
Light
Medium
Medium
*Includes: zippo lighters, all metal inserts (for products such as keyrings, compact mirrors, organisers etc)
PRODUCT NOTES
UltraCoat Metal
• Ensure the plastic protective coating is removed prior to taping down transfer.
• For adhesive backed metal, use a Teflon mat to protect the base of your press.
• To eliminate paper residue on white or mirror UltraCoat press at 1700C for 70 seconds with the
transfer on the base of your press and the substrate on top (upside down to normal).
Gradess Metal (*PL G.P refers to PL Graffiti Proof Gradess)
• Leave the plastic coating on the metal when pressing to prevent paper marks, although this can
slightly blur small text.
Ultimate Coolers
• Remove the neoprene lining from the cooler, and replace once pressed and cooled.
• Ensure only a light pressure is used as too much pressure can crush or deform the shape.
• When using the oven-wrap, place upside down in the pre-heated oven.
Substrate
UniSub Coasters
UniSub Jigsaw Puzzles
UniSub Desk Clocks
UniSub Mini Basketball Hoops
UniSub Wall Clocks
UniSub Clipboards
UniSub Place Mats
UniSub Paperweights
ChromaLuxe PhotoPanels
ChromaLuxe Action Panels
UniSub Wood - Hardboard
Temp
Time
200oC
60 seconds
200oC
60 seconds
200oC
60 seconds
200oC
70 seconds
200oC
70 seconds
200oC
70 seconds
200oC
70 seconds
200oC
80 - 90 seconds
200oC
60 - 70 seconds
200oC
1 min 15 seconds
Pressure
Medium/Heavy
Medium/Heavy
Medium/Heavy
Medium/Heavy
Medium/Heavy
Medium/Heavy
Medium/Heavy
Medium/Heavy
Medium/Heavy
Medium/Heavy
PRODUCT NOTES
• Ensure the protective plastic coating is removed before taping the transfer.
• For larger sizes such as place mats and clip boards, tape the transfer very well and allow it to cool
for at lease 20 seconds before removing the transfer.
ChromaLuxe Photo Panels
• Before pressing, ensure that the image is lined up in the correct direction that you want the photo
to display. This is most important for the hinged panels and easel panels.
page 6
Substrate
FR Plastic
Plastic Coffee Mugs
Plastic Substrates
Temperature
Time
200oC
45 seconds
200oC
120-130 seconds
Pressure
Medium/Heavy
Light/Medium
PRODUCT NOTES
FR Plastic (abrv. FRP)
• Ensure the plastic protective coating is removed prior to taping down transfer.
• Ensure the base of press is clean as any marks can press onto the back of the FRP.
• When pressing double sided FRP it is essential that a clean Teflon mat be used to prevent any over
print. Clean down the Teflon mat using Spray N Wipe after each side is pressed.
Plastic Coffee Mugs
The successful sublimation of any substrate depends upon balancing the variables of pressure,
temperature and time. Your combination of ink, paper and mug press is unique to you, and will require
adjustments to obtain optimum results with the Plastic mug.
• Pressure - The Plastic mug is an injection-moulded polymer with a uniform tight tolerance
surface. As a result, there is no need for high pressure to achieve good contact between the
transfer and the mug. No matter which mug press you are using you should set the pressure as
low as possible. High pressure can cause deformation of the mug, ghosting of the outline of the
transfer paper and impression from the heating element.
• It is a good practice to make your transfer paper size either 89 x 216mm or 89 x 235mm,
regardless of the size of the image, to eliminate the potential for ghosting. This also helps with the
proper alignment of the image on the mug.
• Depending on your mug press, you may be able to get a full top-to-bottom print due to the
straightness of the mug.
• Some mug press heating elements have a pattern on the surface which can transfer to the mug.
The use of a Teflon sheet can prevent such transfer. The design of one mug press is such that the
compression of the heating element is elliptical instead of round and deforms the mug regardless
of the pressure setting.
• Temperature - The Plastic mug has a melting temperature of 221° C (430° F). If you are melting
the surface of the mug you are well above the temperature required for sublimation to occur and
should adjust your settings downward. Remember, the temperature setting of the mug press
reflects the design of the controls and the position of thermocouples, and does not necessarily
reflect the actual temperature at the surface of the mug.
• Time - The Plastic mug heats up faster than a ceramic mug as it is 1/3 the weight of a ceramic
mug. In general, the time to sublimate a Plastic mug is less than a ceramic mug
• Note - The above settings are only intended to give you a reasonable point to begin to determine
the best settings for your system.
Substrate
Jigsaw Puzzles
Cardboard Substrates
Temperature
Time
200oC
45 seconds
Pressure
Medium
PRODUCT NOTES
• Too much pressure can affect the laminate coating of the puzzle, use medium pressure.
• Use the cardboard backing supplied to flip the puzzle face down onto the transfer. Secure the
puzzle with tape and then use the cardboard backing to flip back so the transfer is on top. Slide
the puzzle onto the press, keeping the transfer on top, and slide out the cardboard backing.
• Once pressed, slide the puzzle to the edge of the press and slide onto the cardboard backing, flip
and remove the tape and transfer paper.
• Allow for the puzzle to cool before putting back into plastic packaging.
page 7
Ceramic & Porcelain Substrates
Substrate
Temperature
Time *
Pressure
* Instructions for below in mug press - NOTE: If you are using the new Ultimate Mug Press please refer
to the instructions that came with the press.
Ultimate Mug
200oC
2 min 30 seconds
Medium/Heavy
Flare Mug
200oC
2 minutes
Medium/Heavy
All other ceramic coffee mug
200oC
2 min 30 seconds
Medium/Heavy
Jars & Candle Holders
200oC
2 min 30 seconds
Medium/Heavy
* Heat Transfer Mat (Tile Mat) must be used for pressing below
Tiles – 4”
200oC
4 minutes
Light/Medium
Tiles – 6”
200oC
6 minutes
Light/Medium
Tiles – 8”
200oC
8 minutes
Light/Medium
Ornaments & Magnets
200oC
2 minutes
Light/Medium
o
Dog Bowls (oven wrap)
205 C
10 minutes in oven
Firm
PRODUCT NOTES
All Mugs, Jars and Candle Holders
• Tape the image to the mug ensuring there is no tape over the printed image area.
• It is essential that a sacrificial mug be used in the press at all times when not in use. This will keep
the shape and quality of the heating element. Once the pressing is complete, remove the mug
from the press and the transfer paper from the mug and place in a bucket of room temperature
water to cease the sublimation process. Place the sacrificial mug back in the heat press
immediately.
• If mugs crack when placed in water either increase the temperature of your water or wipe them
over with a very damp Chux or tea towel before placing in water. Different geographic influences
can cause this to occur.
Tiles, Ornaments and Magnets
• DO NOT place in water once pressed!
IMPORTANT: A tile/heat transfer mat must be used when pressing tiles, ornaments and magnets.
This is assist in wrapping the image around the edge of the tile as well as preventing it from
cracking.
• All ornaments are double sided (see Tips & Techniques)
Dog Bowl Tips
• Pre heat oven to 205 degrees Celsius.
• Place bowl in oven with wrap firmly secured with transfer.(mirror imaged )
• Set timer to 10 minutes and place bowl in oven.
• NOTE: Be sure to use oven mitts when removing bowl.
• Remove transfer and place Bowl in room temperature water to cease sublimation.
Ceramic Plates using the Plate Puck in a flat heat press
1. Pre-heat Puck in Flat press. Pre-heat for 10 minutes at 200°C. The press pressure will need to
opened right up to accommodate the puck.
ALWAYS put paper or Teflon between the Puck and the heating platen of the Flat press
to avoid damage to the Teflon coating on the Platen.
2. Tape 4.75 inch diameter transfer to centre of the plate. Image area should be limited 4.25’’
diameter.
3. CAREFULLY remove puck from Flat press with a pair of pliers and set directly over the transfer.
4. Put plate and Puck in Flat press and press for 3 minutes at 204°C. DO NOT forget paper between
Puck and platen!
5. Using oven mitts, remove plate and Puck from Flat press. Remove Puck from plate using pliers and
set back in Flat press.
6. Immediately remove transfer from plate. CAUTION, plate will be HOT! Immerse plate under room
temperature water to cease the sublimation process.
• We have found that by placing a tile/heat transfer mat between the plate and the puck (while
pressing) can eliminate any gaps in the print.
page 8
Substrate
T-shirts
Wallets, Bags & Pencil Cases
Rubber (Neoprene)*
Thongs
Sew on Patches
Table/Counter Mats/Bar Mats
Polyester Fabric Substrate
Temperature
Time
200oC
45 seconds
200oC
45 seconds
200oC
45 seconds
200oC
60 seconds
200oC
45 seconds
200oC
45 seconds
Pressure
Medium/Heavy
Heavy
Medium/Heavy
Heavy
Medium/Heavy
Medium/Heavy
PRODUCT NOTES
• It is essential that a clean Teflon mat be used to prevent any over print. Clean down the Teflon
mat using Spray N Wipe after each press as any excess or stray ink can mark the garment.
• Trim the transfer as close to the image as possible to prevent any stray ink from the printer from
marking the garment.
• Tape the transfer to the substrate ensuring no tape is adhered over the image area.
• Once pressed, remove the transfer as quickly and steadily as possible to prevent the image from
shadowing and double imaging. (see Tips & Techniques)
• Polyester fabric is a water-adsorbing substrate. It is recommended to pre-press the substrate for
10 seconds prior to sublimating.
T-shirts
• Use a Teflon sheet or piece of flat cardboard (no corrugated) inside the shirt to prevent blow
through ink.
Purses, Wallets, Bags, Pencil Cases
• Only place the flap on the press, and keep the remainder of the item outside of the press.
• Pre-press the flap prior to taping on the transfer to flatten the seams.
• Press with heavy pressure and ensure the print covers the entire flat. When pressing on to the
coloured bags, tape the area between where the print over laps the bag to prevent transferring.
Rubber (Neoprene)
* includes – mouse mats, stubby coolers, coasters and sunglass straps
• When printing for full colour coverage, add a 2mm bleed area on the print as the neoprene can
expand when heated. (see Tips & Techniques)
• Pre-press the Velcro stubby coolers to flatten the seam marks.
Sew on / Pocket Patches
• As the pocket patches have raised stitching, full cover coverage is not recommended as the edge
of the image will not get equal heat. If you require a full colour coverage, place a small piece of
Teflon mat then a piece of cardboard cut to the inside shape of the patch. This will raise the print
area to the same height as the seam.
Table/Counter Mats & Bar Mats
• When printing for full colour coverage, add a 2mm bleed area on the print. (see Tips &
Techniques)
Substrate
SubliMates
SubliMates – Adhesive Vinyl
Temperature
Time
200oC
20 - 40 seconds
Pressure
Light/Medium
PRODUCT NOTES
• It is recommended that a Teflon mat or sacrificial piece of paper be placed on top of the transfer
when pressing. It is well advised that a Teflon mat be used on the base of the press also.
• When cutting SubliMates in a vinyl cutter use a 30o to 60o blade and 80 – 110 grams down
pressure. Start at a relatively slow speed and increase until you find the optimal speed for your
machine.
• Can also be laser cut on a 25watt laser starting at 100% power, 40% speed, 500DPI and 750DPI.
page 9
Substrate
Glass Mug
Glass Stein
Cutting Boards
Ovals
Rectangles
Clock Faces
Glass Substrates
Temperature
Time *
200oC
3 min 30 seconds
200oC
4 min 50 seconds
200oC
2 min 45 seconds
200oC
2 min 45 seconds
200oC
2 min 45 seconds
200oC
6 minutes
Pressure
Medium
Medium
Medium
Medium
Medium
Medium
NOTE: If you are using the new Ultimate Mug Press please refer to the instructions that came with the press.
PRODUCT NOTES
• IMPORTANT: De-Select the Mirror Image option in your print driver.
• Apply your transfer to the white side of the glass.
• We have found for best results, press with the transfer on the bottom of the press and add an
additional minute to the pressing time. This will give a more even and accurate result.
• *Times will vary depending on the size of the glass object.
Glass Steins & Mugs
• DO NOT place in water once pressed!
• Place the steins in your mug press upside down for optimal results.
• Steins may require longer pressing times due to the large density of the item, especially if there is
images at the base of the stein.
Substrate
Acrylic Piece
•
•
SubliCrylic
Temperature
Time *
o
200 C
7 min 30 seconds
Pressure
Medium
IMPORTANT: De-Select the Mirror Image option in your print driver.
Apply your transfer to the white side of the acrylic.
Substrate
PromaSub Flock
PromaSub Flock
Temperature
Time
200oC*
40 seconds
Pressure
Light/Medium
1. Print your sublimation paper as you normally would for fabric.
2. Place the paper face down on the flock and press as normal @ 200 degrees Celsius for 40sec.
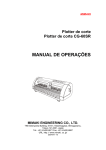
3. The images can be cut by hand. The easiest way is to use a vinyl cutting plotter with automatic
registration mark detection such as the Mimaki CG and SR series.
The newly released Mimaki CG60SR is an ideal unit for desktop sublimators.
4. Peel the cut sticker from the backing paper and place on the item in a heat press.
• If you are sublimating a large area you may need to cut the edges to separate the flock from
the backing.
5. Press at 155oC for 12 to 15 seconds.
page 10
Common Problems….Solved!
Problem
Incorrect colours
transferred
Cause
Colours will vary from what is on
your screen to what is printed.
Colour management may not be
properly applied.
Ensure you are pressing the item
with proper times and temps.
Verify that all colours are printing
correctly.
I cannot print solid black
You are using the incorrect colour
model.
My Printout is really light on
paper
This is not a problem. Sublimation
print outs naturally looks muted
before transferring the image.
My Image looks good but it
washes out
Ensure you are using the correct
time and temperatures.
Ensure you are using the correct
transfer paper and the correct side
My finished product is
blurred
Sublimation is only suitable for
products with a polyester coating
or content.
Garments made from natural
fibres such as cotton, are not
compatible with sublimation.
Pressing for too long
Your press is too hot
My finished product is faint
Not pressing long enough
Not enough pressure
There is paper residue on
my finished product
Too much pressure
There is ghosting on my
finished product
The transfer paper has been
partially lifted the laid back down
on the substrate while the ink is
still active.
Action
Print a colour chart and sublimate it to
whatever substrate you are using.
If you are using ArTainium or
SubliJet-R Inks be certain that the
Colour Profiles have been selected and
installed correctly through the
Graphics Software and print driver.
Refer to the transfer instructions and
ensure your heat press is in proper
working order.
Run the nozzle check utility located in
the maintenance section of the print
driver and clean the head if required.
Ensure you are using an RGB Colour
Palette with R-0, G-0, B-0 as the
black.
The fluid that is laid on the paper is
just the carrier of the dye. The carrier
stays on the paper, it is only the dye
that migrates from the paper to your
substrate. The dye has little or no
colour until heated.
If so, try pressing longer to ensure
that the dyes are penetration the
fibres sufficiently.
There are two sides to the Accuplot
Paper – a cream side and a white
side. You need to be printing on the
white side. The TexPrint paper has
their logo on the non-printing side.
Check the content/coating of your
product.
Ensure your substrate has either a
polyester coating or content of more
then 65% polyester.
Decrease the pressing time by around
30 seconds depending on severity.
If your temperature is too high this
will burn your image and blur it.
Decrease your temp by 10C.
Increase the pressing time by around
30 seconds depending on severity.
A medium pressure is required – it
should take some effort to close the
press
Reduce the pressure on the press. If
onto white or mirrored metal, place
under the press with the transfer on
the base and press at 170C for 70sec.
Ensure the transfer is lifted steadily
and quickly away from the substrate
while it is still hot. Ensure you are
sufficiently taping the product to the
transfer.
page 11
page 12


