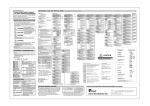
Download Mac OS 9 Scanning Instructions for Epson Expression
Transcript
Quick Ceph® Systems
Epson Expression 1600 Scanner Setup
Unlocking Scanner and Transparency Adapter
1
Make sure your scanner and transparency adapter are unlocked. They should only be locked for storage or transport.
Unpack the scanner and attach the transparency adapter. Plug in the scanner and attach the cable from the scanner
If you purchased your computer
through Quick Ceph Systems, the scanner software will be installed and ready to use. Skip the software installation
section and go to “Setting Up The Scanner Interface”.
2 to the appropriate port (FireWire, USB, or SCSI) on the computer or USB hub.
Installing Scanner Software
1
Now that you have connected the
scanner to the computer, it is time
to install the scanner software.
Insert the “Scanning Tools” CDROM found on
the back of the
Expression manual. An icon will
appear on your
desktop. Double
click on this icon.
3
After the initial installation, the
Epson Screen Calibration application will automatically open. Use
the arrows to adjust the image until
the two gray colors match each
other. Epson recommends a setting
of 1.8.
5
Open the Adobe Photoshop 5.0 LE
folder when the computer has
rebooted. Click once on the application icon to select it. Go to the
File menu and select “Make Alias”.
The computer will make an “alias”
(or “Shortcut”) of the Photoshop
program. Place this alias on the
desktop.
2
The folder shown to the
right will open. Double
click on the icon labeled
“EPSON TWAIN Pro”.
Click on the appropriate
language and then click
on the installer icon to
install the TWAIN software. Click on “Restart”
when prompted.
4
6
Create a new folder on
the desktop by clicking on
the File menu an selecting “New Folder”.
Rename the “Untitled
Folder” to “Scanned
Images”. This folder will
be used to contain your
scanned X-rays.
You should also create
and place an alias of the
Quick Ceph program on
the desktop.
http://www.quickceph.com/docs/1030Expression_Setup.pdf
When the computer boots up again, place the
PhotoShop LE CD-ROM into the computer to
install the software. Locate the Adobe
Photoshop 5.0 LE folder. Double click on this
folder and locate the “Install Photoshop® LE”
icon. Double click to install. Follow the installation directions, and restart when prompted.
Page 1
Your desktop should resemble
the one shown above when the
software installation has concluded.
Doc ID# 1030Expression_Setup - Revision 12-1-00
Quick Ceph® Systems
Epson Expression 1600 Scanner Setup
Once the software for the Epson Expression 1600 has been installed, you can begin scanning x-rays.
The following section covers the recommended settings for Quick Ceph Image Pro and Quick Ceph 2000.
Setting up the Scanner Interface
Lateral X-ray Orientation
Panoramic X-ray Orientation
NOTE: For correct orientation, patient identification on the x-rays
should face the scanner bed.
1
Place the x-ray on the scanner bed as shown
above. Close the lid and double click on the
Photoshop alias, as shown below.
3
Change settings to match those with the arrows.
At this point, both the “Source” and “Target” settings are inaccessible.
2
The scanner software will launch.
Click on the File
menu and scroll
down to Import.
Then, select Twain
Acquire. The
scanner settings
will appear.
Selct this setting to activate the
Transparency Adapter
Change to 8-bit Gray
Select or type in the resolution required for your specific
program:
Quick Ceph Image Pro: 72 dpi Quick Ceph 2000: 144 dpi
Change to pixels
Make sure this value is always 100%
4
http://www.quickceph.com/docs/1030Expression_Setup.pdf
Click on the Preview button when the changes have been
made. Once the image has been previewed, you will be able
to change the Source and Target settings.
Page 2
Doc ID# 1030Expression_Setup - Revision 12-1-00
Quick Ceph® Systems
Epson Expression 1600 Scanner Setup
Setting up the Scanner Interface (cont..)
5
After the Preview button has been
clicked, the scanner will launch
the Preview Window. This window allows you to adjust the
image to gain the most clarity.
6
Marquee Button:
Click here first to create a marquee.
Image Controls Button:
Allows you to modify the exposure,
gamma, highlight, shadow, and
threshold settings for the image.
Tone Correction Button:
Allows you to manually adjust the
tone settings on image.
7 Resizing the Marquee
Horizontal Adjustment
Move mouse to a vertical line
until cursor displays horizontal
arrows. Click mouse and drag
to desired marquee size.
Vertical Adjustment
Move mouse to a horizontal
line until cursor displays vertical arrows. Click mouse and
drag to desired marquee size.
Simultaneous Adjustment
To move both, click and drag
the cursor at the vertice.
The Resolution and marquee settings should be changed according to the Quick Ceph program
you are using.
Marquee window - The image inside the
dashed lines will be captured.
Cursor turns into a hand when placed inside marquee
window. This allows you to move the marquee window.
Make sure all soft tissue and landmarks are visible
within the marquee.
Recommended Settings for
Recommended Settings for
Quick Ceph Image Pro
Quick Ceph 2000
NOTE: Values for Target and
Source should be identical for a
1:1 scaling. When settings are
correct, click on icon to “Lock”.
8
If the image needs adjustment,
you can use both the Image
Controls or the Tone Correction
features.
For Dark X-rays:
Image Controls Window
Increase Exposure slightly
Increase Gamma
Reduce Shadow slightly
Tone Correction Window
Click on the Tone Curve Name
and select “Lighten”.
http://www.quickceph.com/docs/1030Expression_Setup.pdf
Tone can also be manually adjusted by dragging on
the tone boxes.
Page 3
Doc ID# 1030Expression_Setup - Revision 12-1-00
Quick Ceph® Systems
Epson Expression 1600 Scanner Setup
Scanning with the Epson Expression
1
After the settings are correct, you
should create a custom setting for
Quick Ceph. Click on the “Settings”
button circled below. The window
shown to the right will open.
3
Once the settings have been
selected, you can click on the
“Scan” button to begin scanning. The scanner will place
the scanned image on the
screen.
2
4
Type in the name you would like to
call this setting, then click on Save,
as shown below. The dimensions,
resolution, and image changes will
be saved in this setting.
Click on the File menu and select “Save As”. A
save dialog box will open. You should save all
scanned files to the “Scanned Images” folder on
the desktop.
If the image is satisfactory, proceed to step 4.
Otherwise, close the window and make further adjustments to the image before scanning again.
5
Patient Name, lateral
After the images have been saved, you can drag and
drop them onto Quick Ceph. You should create a
Quick Ceph alias icon on your desktop for easier
access.
We recommend naming the files with the name
of the patient, followed by the type of x-ray. This
allows for easier identification.
Quick Scanning Tutorial
Once you have saved the scanner settings, scanning will become much faster. You will not have to reinput the settings.
Follow the instructions below for quick scanning instructions.
1
Open the Photoshop application. Go to the File menu
and select “Import”, then “Twain Acquire”. Click on the
“Preview” button on the window that appears.
The scanner will bring up a previewed image on the screen.
The resolution, Source, and
Target settings will be reset to
the default settings.
3
The settings should change to the correct values for
Quick Ceph. You can then adjust the image using
either the Image Controls or the Tone Correction features. When the image is satisfactory, click on the
“Scan” button.
4
After the image is scanned, you can drag and drop it
onto Quick Ceph .
http://www.quickceph.com/docs/1030Expression_Setup.pdf
2
Click on the
“Settings” icon and
select the name of
the saved settings.
In this case, we will
choose “Quick
Ceph Image Pro
Settings”. Once
selected, click on
“OK”.
For more information about dragging and dropping x-rays
onto Quick Ceph, please consult the User Manual.
Page 4
Doc ID# 1030Expression_Setup - Revision 12-1-00
Quick Ceph® Systems
Epson Expression 1600 Scanner Setup
Scanning Panoramic X-rays with the Epson Expression
1
Place the panoramic x-ray lengthwise on the scanner bed with the image face down, as shown on
page 2. You should leave a border on both sides.
2
Click on the Preview button shown below. An
image will appear in the preview window.
3
Click on the lower left Marquee button to create a
marquee around the image. Use the Image Control
and Tone Corrections features if the image needs
adjustment.
4
Click on the Scan button to begin scanning the
image into the program.
the Panoramic X-Ray
5 Rotating
To rotate the image after it is scanned, click on the Image
Menu and select the “Rotate Canvas” option. The program
allows you to rotate the image depending on the original orientation. The example shown above would be rotated “90º
CW”.
Save the scanned image as described on page 4.
6
Entering the Panoramic X-Ray into QCIPro and QC2000
To enter the panoramic x-ray, hold down the “option” key on
the keyboard and drag the image onto the QCIPro or
QC2000 icon. The window with the cropping tools will
appear as before, but the x-ray image will be centered
between two horizontal white borders, one above and one
below. Crop the image using the cropping square for the
larger image as shown. Once the image is cropped, click
outside the cropping window to capture. Click on the Extra 1
x-ray image in the Input Dialog Box to store the image.
Use this square to resize the cropping
window for panoramic x-rays.
http://www.quickceph.com/docs/1030Expression_Setup.pdf
Page 5
Doc ID# 1030Expression_Setup - Revision 12-1-00
Quick Ceph® Systems
Epson Expression 1600 Scanner Setup
Scanning 3-layers with the Epson Expression
At times, you may require more clarity in your x-rays. This page explains how to capture 3 different layers of the x-ray necessary
for the 3 x-ray layer enhancement capability of QCIPro and QC2000. Please note that x-rays vary in density so the settings we provide are to be used only as guidelines. TIP: Scan the Medium Layer first. Then, make corrections for light/dark layers.
MEDIUM LAYER
This layer should be scanned first.
The Gamma setting should be left at
the default setting. The medium setting emphasizes the cranial bone
structure.
Click the “Scan” button and save the
image. Make sure the file name is
unique (i.e. Jane Doe, Medium).
LIGHT LAYER
Click on the circled arrow or drag the
slider on the Gamma setting to the
right to lighten the image. You
should make sure the image displays
the soft tissue adequately.
Click the “Scan” button and save the
image. Make sure the file name is
unique (i.e. Jane Doe, Light).
DARK LAYER
Click on the circled arrow or drag the
slider on the Gamma setting to the
left to darken the image. You should
notice a considerable increase in the
clarity of the teeth.
Click the “Scan” button and save the
image. Make sure the file name is
unique (i.e. Jane Doe, Dark).
After scanning, select all three images from the “Scanned
Images” folder and drag them onto the QCIPro or QC2000
icon. One of the three images will appear. Frame the
image, but do not resize the window, as this will distort the
calibration of the x-ray. Click outside the image window
after you finish framing. The Input Dialog Box will appear.
Make sure the “three x-ray layers” option is checked, then
click on the lateral x-ray. The three images will be entered into
the program. Click on the Enhancement tool to combine all 3
layers of the x-ray for an enhanced and easy to trace image.
http://www.quickceph.com/docs/1030Expression_Setup.pdf
Page 6
Doc ID# 1030Expression_Setup - Revision 12-1-00


