1
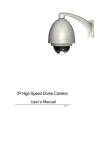
USER'S MANUAL
WDR(Wide Dynamic Range)
COLOR DAY & NIGHT CAMERA
WIDE DYNAMIC RANGE
WDR
WDR is a Powerful and Ultra advanced Technology to Capture
Cleaner , Superior High Resolution pictures at the same time even
the Dark part when observing the objects under a strong back ligh
WDR OFF
WDR ON
SPOTLIGHT BLC FUNCTION
BLC
Spotlight BLC function is especially effective to Read the number
plate of the vehicles in the street or parking lot at night time.
Especially users can adjust and select the special required area
to Observe the target object under the strong spots of lights exist.
NORMAL
SPOTLIGHT BLC
3D FILTERING METHOD ADVANCED DNR TECHNOLOGY
3D DNR
Newly Developed 3D filtering method of DNR enhances Excellent
Efficient at night time. 3D Filtering of the video signal optimizing the
Signal to noise, allowing the much better visibility and it enhances
increasing powerfully SENS - UP to 256 times in low light condition.
DNR OFF
DNR ON
Precautions for use
☞ Please read this manual enough before using this camera to obtain the skill
Of correct operation.
Cautions when using
☞ Do not open the camera body and touch to prevent electric shock.
☞ Do not insert other object into camera body to prevent hazards of fire and electric shock.
☞ Do not touch with wet hands to prevent electric shock.
☞ Do not pull out by taking power cord when plug out from the outlet.
☞ Must pull out by taking plug socket.
☞ If the camera has burning smells, please plug out and ask to shop where you bought
It or the nearest A/S center.
Cautions when Install
☞ Plug on after installation of all device.
☞ Do not install the camera face to strong light directly.
☞ Do not install or use the camera in places where the humidity is high.
☞ Do not install near the cooling device or heating device.
☞ Do not install the camera where is high humidity or heavy dust.
☞ Do not install the camera to the place where it has physical shocks.
☞ Do not expose the camera to rain or moisture.
☞ This products must have use DC adaptor for power.
2
C O N T E N T
Camera Parts & Function
P1
Precautions
P2
Content
P3
General Features
P4
How To Operate Camera Menu
P5
Special Menu
P6
Menu Setup
P7
MENU SET UP
P7
LENS SET UP
P8
EXPOSURE
P9
WHITE BAL.
P11
BLC
P12
SSNR
P14
DAY & NIGHT
P15
IMAGE ADJ.
P16
SPECIAL
P18
CAMERA TITLE
P18
P21
SYNC
MOTION DET.
P21
PRIVAC
P2
DIS
P2
COMM ADJ.
P2
P23
LANGUAGE
EXIT
P23
How to Install
P24
Troubleshooting
P25
3
GENERAL FEATURES
◈
-
WDR (Wide Dynamic Range)
Camera has very strong compensation performance in WDR. It always shows obvious,
Clear and perfect light contrast picture in environment.
◈
-
560TV Lines
Unification of DNR Technology and Sony Super HAD CCD image sensor provides Clear & Superior
High resolution of 560 TV lines.
◈
-
Day & Night
Up to the lighting conditions, the video automatically switching to color mode in bright zone
And Monochrome mode in dark zone making to achieve safe and perfect 24 hours surveillance.
◈
-
Illumination
Ultra Advanced DNR technology enhanced incredibly minimum illumination of amazing 0.00006 Lux
With capture of good image under the extremely low light conditions.
◈
-
Illumination
DNR technology solved removing the trouble of ghost figures and displaying clearer, superior
High resolution even in extremely low light circumstance.
◈
-
Disk Saving Effects
Upmost and advanced DNR technology camera picture quality has a disk saving effects due to
Image sizes are smaller than standard CCTV camera image.
◈
DNR DSP Chip
-
DNR is superior DSP chipset enhanced various and powerful function of high resolution,
Day & Night, Removing camera noise and sense up, as well. It is the highest and
Advanced technology that is unified Up-most necessary functions by one DSP chipset
Enhanced powerful surveillance functions.
◈
Additional Functions
OSD is available (Support Multi- Languages of 8 Country)
Privacy Masking Funtion(8 Zones)
Sens-up( X256)
Digital Zoom(X 10)
4
SPECIFICATION
Setup Menu
SET UP MENU
① LENS
DEFAULT SET
MENU
DC ONLY
SHUTTER : A.FLK
MANUAL(x 256 ~ 120K)
② EXPOSURE
SHUTTER : AGC : LOW
SENS_UP : OFF
ESC(BRIGHTNESS : Level Selectable)
AGC : OFF / LOW / HIGH
SENS_UP : OFF / AUTO(2~256 Level Selectable)
RETURN
INDOOR / OUTDOOR / AWC / ATW
③ WHITE BAL.
ATW
MANUAL(RGAIN : Level Selectable,
BGAIN : Level Selectable)
WDR : LOW / MIDDLE / HIGH
④ BACKLIGHT
OFF
BLC : TOP / DOWN / LEFT / RIGHT
OFF
⑤ DNR
ON
ON(LIMIT : 0 ~ 32 Level Selectable) / OFF
COLOR / B/W / AUTO / EXTERNAL
⑥ DAY / NIGHT
COLOR
DWELL TIME : 5 ~ 60SEC
DURATION TIME : SLOW / FAST
FREEZE : ON / OFF
⑦ IMAGE
FREEZE : OFF
V-REV : OFF
H-REV : OFF
DZOOM : OFF
SHARPNESS : ON
V-REV : ON / OFF
H-REV : ON / OFF
DZOOM : ON / OFF (0 ~ 255 Level Selectable)
SHARPNESS : ON / OFF (1 ~ 31 Levlel Selectable)
RETURN
⑧ SPECIAL
⑨ EXIT
Refer to the next page
Save all the SETUP Menu and then exits
5
SPECIAL MENU
SEPECIAL MENU
DEFAULT SET
① CAMERA TITLE
OFF
② SYNC
INT
MENU
ON / OFF
INT / LL
(PHASE : 0 ~ 259 Level Selectable, MODE : OFF / TRACE)
SENSITIVITY : AREA 1
AREA MODE : OFF
SEL POS : L_TOP
③ MOTION DET
OFF
XPOS : Level Selectable
YPOS : Level Selectable
FILL → SET
RETURN
AREA SEL : AREA 1
AREA MODE : TOP / DOWN / LEFT / RIGHT
④ PRIVACY
OFF
MASK COLOR : GREEN / RED / BLUE
BLACK / WHITE / GRAY
TRANSP. : Level Selectable
RETURN
⑤ DIS
OFF
CAM ID : 0
BAUDRATE : 38400
⑥ COMM ADJ.
⑦ LANGUAGE
PARITY : 8-N-1
OFF / ON
CAM ID : ID Selectable
BAUDRATE : 2400 / 4800 / 9600 / 1920 / 38400 / 57600
PARITY : 8-N-1
RET PKT : ENABLE
RET PKT : ENABLE
DISP CAM ID : OFF
DISP CAM ID : OFF
ENGLISH
⑧ RESET
−
Returns to the level which was set by manufacturer for shipmen
⑨ RETURN
−
Return to the SETUP menu
6
MENU SETUP
Menu could be adjusted by the OSD button of the camera
1. Press the setup button.
Setup menu will be displayed on the monitor
SETUP
LENS
EXPOSURE
WHITE BAL
BACKLIGHT
DNR
DAY / NIGHT
IMAGE ADJ
SPECIAL
DC
ATW
WDR
ON
AUTO
EXIT
2. Move and Select to function what you want to control by the button.
Move the arrow indicator UP or Down to indicate onto desired feature by pressing the UP or Down button
SETUP
Select desired
Feature
LENS
EXPOSURE
WHITE BAL
BACKLIGHT
DNR
DAY / NIGHT
Change the adjustment
DC
By Left or Right
ATW
WDR
ON
AUTO
Button
IMAGE ADJ
SPECIAL
EXIT
3. Menu Setting Up change by Left or Right Button
Available value or Status will be displayed by pressing the Left or Right button. Please press the
Button until desired features appears.
4. After complete the adjustment, move the arrow indicator to “EXIT” and press the “SET” button to Exit.
CAUTION
Moving available to submenu by moving
arrow to desired feature
Access are not available to submenu on the mode of " -----".
7
LENS(
L EOption
N S () O
PTION)
It’s function of control the picture brightness.
1. Move to arrow indicator to “LENS” by pressing of UP or Down button on the Set Up menu screen.
2. Select the desired lens type by pressing of Left or Right button.
SETUP
LENS
DC
EXPOSURE
WHITE BAL
ATW
BACKLIGHT
DNR
WDR
ON
DAY / NIGHT
AUTO
IMAGE ADJ
SPECIAL
EXIT
DC / VIDEO : DC Auto IRIS Lens
CAUTION
Available to control the brightness when selected DC. Brightness control range will be
LENS
BRIGHTNESS
1--------1---------1 35
Press Set to
MANUAL:Manual Lens
3. Press the SETUP button to return previous menu.
8
EXPOSURE
EXPOSURE
It’s a function of selecting the Automatic shutter speed control or Manual shutter speed control.
1. On the Set Up menu screen, select " EXPOSURE" by using of UP or Down button.
2. Select desired shutter mode by pressing of Left or Right Button.
SETUP
LENS
DC
EXPOSURE
WHITE BAL
ATW
BACKLIGHT
DNR
WDR
ON
DAY / NIGHT
AUTO
IMAGE ADJ
SPECIAL
EXIT
● FLK : Select “FLK” mode when it has flickering by unmatched of electric lights and radio waves.
● ESC : Available automatic shutter speed control. Brightness could be automatically controlled when
Selected “ESC” mode.
● MANUAL : Shutter speed could be controlled by manually.
EXPOSURE SETUP
SHUTTER
AGC
HIGH
SENS - UP
OFF
RETURN
9
CAUTION
To produce better results with A.FLK, do not use it in conjunction with WDR
mode of the BACKLIGHT menu
When the SHUTTER is set to ESC after selecting the internal Syncronization type.
the picture may become unstable if the camera faces a bright fluorescent light.
So there is needed take care when choosing the installation position
ESC and MANUAL modes are only available together when the lens is set to
MANUAL.
When the SHUTTER is set to MANUAL or A.FLK mode, SENS-UP will be disabled.
AGC(AUTO GAIN CONTROL):
The higher the gain level, the brighter the screen makes the highter noise.
OFF : Deactivates the AGC function
LOW : Allows automatic gain control from "0 ~ 30dB.
HIGH : Allows automatic gain control from "0 ~ 42dB.
LIMIT
AUTO
Press
X2
SET
to Return
SENS-UP :
When it is night and/or dark condition, the camera automatically detects the light level
and maintains a clear picture if this mode is activated.
OFF : Deactivates the SENS-UP function.
AUTO : Activates the SENS-UP function.
RETURN
Select this is to save the changes in the EXPOSURE menu and return to SETUP menu.
CAUTION
If press the SET button in "AUTO" mode, the brightness could be adjusted by
increasing or decreasing the shutter speed. (X2 ~ X256)
Note that the higher zoom level, the brigher the screen, but the more likely it is that
an after - image will appear.
Although Noise, Spots and Whitish symptoms may occur in SENS-UP operation
when the zoom level is increased, this is normal operation.
10
WHITE
W HBALANCE
ITE B
A L A N CE
Use the White Balance function when need to color control on the screen.
1. Move the arrow indicator to ‘WHITE BAL’ by pressing of SET button on the SETUP Menu screen.
2. Select desired mode by using of Left or Right button.
SETUP
LENS
DC
EXPOSURE
WHITE BAL
ATW
BACKLIGHT
DNR
WDR
ON
DAY / NIGHT
AUTO
IMAGE ADJ
SPECIAL
EXIT
* Select one of the following 5 modes for user's purpose.
● ATW : It is suitable in the color temperature ranges from 1,800˚ K to 10,500˚ K
INDOOR : Select this mode when the color temperature is between 4500°K and 8500°K
OUTDOOR : Select this mode when the color temperature is between 1800°K and 10500°K
●
AWC → SET : To find the optimal setting for the current luminance environment in this mode, set the point
set the point the camera towards a sheet of white paper and press the SET button.
If the environment changes, readjust it.
● MANUAL : Select this to fine-tune White Balance manually, Set White Balance first by using the
ATW or AWC, Select the Manual mode and press the SETUP button to increase or
Decrease the value of R-Gain(RED) and B-Gain(Blue) while watching the color of image.
MANUAL
RED
50
BLUE
50
Press
SET to Return
CAUTION
Proper White Balance may not be worked under the following conditions. In that case,
Select the AWC mode
When the scene of object has most high color temperature.( Ex: Blue Sky, Sunset )
When the scene of object is so dim
When install the camera in place of the changing illumination and / or faces directly to
Fluorecent lights.
11
BACKLIGHT ( BLC )
BACK
L I G H T ( B LC )
This camera provide intelligent light level control to overcome the severe Backlight condition.
1. Move the arrow indicator to ‘BACKLIGHT’ by pressing of UP or Down button on the SETUP Menu screen.
2. Select the desired mode by pressing of Left or Right button.
SETUP
LENS
DC
EXPOSURE
WHITE BAL
BACKLIGHT
DNR
ATW
OFF
ON
DAY / NIGHT
AUTO
IMAGE ADJ
SPECIAL
EXIT
WDR : When there are both of bright & dark areas at the same time, this mode makes both areas distinctiv
OFF : WDR function will not operated.
BLC : Enables a user to directly select a desired area from a picture and to view the area clearly.
WDR
OFF
12
3. Select a desired mode using the Left and Right buttons and press the SET button.
Select "WDR" to adjust the WDR LIMIT and LEVEL.
LIMIT : Adjust the WDR Sensitivity by selecting LOW, MIDDLE or HIGH.
LEVEL : Adjust the WDR Brightness by controlling the bar fro 0 ~ 100.
WDR LIMIT
LIMIT
MIDDLE
LEVEL
Press
50
SET to Return
Select " BLC " to adjust the area to be enhanced and enhancement level.
B L C SETUP
TOP
27
BOTTOM
82
LEFT
42
RIGHT
42
LEVEL
MIDDLE
Press
SET to Return
CAUTION
You cannot use the WDR mode when MANUAL or A.FLK mode in " SHUTTER "
menu is selected.
Since the following symptoms may occur according to the ambient illumination when
WDR is selected, set it to OFF.
Color or Screen changes unnatually.
Noise appears in the bright part of the screen.
Since the performance of the WDR function may be affected by the area of the bright
part of the screen, optimize the installation angle for the best WDR performance.
If you increase LIMIT, the screen display may be distorted.
For the performance of WDR function, using DC IRIS lens rather than manual lens is
recommended
13
SSNR
D N R
This function reduce the background noise in a low luminance environment.
1. When the SETUP menu screen is displyed, select " DNR " by using the UP and DOWN buttons
SETUP
LENS
DC
EXPOSURE
WHITE BAL
BACKLIGHT
DNR
ATW
WDR
ON
DAY / NIGHT
AUTO
IMAGE ADJ
SPECIAL
EXIT
2. Select a desired mode using the Left and Right buttons.
ON
: Activates DNR, Noise is reduced.
OFF : Deactivates DNR, Noise is not reduced.
3. Set the DNR mode to " ON " and press the SET button to adjust noise reduction level.
DNR
LEVEL
Press
20
SET to Return
CAUTION
You cannot set the DNR to "ON" or "OFF" when the AGC mode of the EXPOSURE
menu is " OFF "
When the adjusting the noise reduction level of the DNR mode, REMEMBER that
the higher the level set, the more noise level will be reduced but that after image
may also occur.
14
DAY / NIGHT
DAY / NIGHT
The pictures could be displyed in color of black and white.
1. Select " DAY/ NIGHT" using of UP or Down button on the SETUP the screen.
SETUP
LENS
DC
EXPOSURE
WHITE BAL
BACKLIGHT
DNR
ATW
WDR
ON
DAY / NIGHT
AUTO
IMAGE ADJ
SPECIAL
EXIT
2. Select a desired mode using the Left and Right buttons according to the picture displyed you want.
COLOR : The picture is always displyed in color.
B/W : The picture is always displyed in black and white
AUTO : The mode is automatically switches to " COLOR " in normal condition
But it switches to " B/W " mode when ambient illumination is low.
To Set the switching time or speed for AUTO mode, press the SET button.
AUTO SETUP
DWELL TIME
10
DURATION
Press
SEC
FAST
SET to Return
DWELL TIME : Duration time could be selected by changing the DAY / NIGHT mode.
→ 5s, 7s, 10s, 20s, 30s, 40s, 50s, 60s.
DURATION : Brightness of the illumination could be selected by changing the DAY / NIGHT mode.
Color → B/W
B/W → Color
Fast
2.5 Lux
4 Lux
Slow
0.8 Lux
6 Lux
* The brightness of illumination is changeable by installed environment.
15
EXTERN : This mode allows you to apply a desired filter to external signals.
CAUTION
When using a Video Auto Iris Lens, if you set the lens level to low, it automatically
switching between Color and Black and White may not occured.
You cannot control the DAY / NIGHT menu when AGC in the EXPOSURE menu is
"OFF" . At this time, the exchange between DAY mode and NIGHT mode operates as
like selecting " COLOR" mode.
The OSD key does not working for 3 seconds when switching to COLOR or B/W to
ensure stable camera operation.
The camera may focus less well under infrared illumination than under normal
illumination
Since the camera may not focus as well under infrared illumination at night as it does
under normal illumination, install an Extra-Low dispersion Lens to obtain sharp pictures.
IMAGE ADJ.
IMAGE
A D J.
1. When the SETUP menu screen is displyed, select "IMAGE ADJ." by using the UP and
Down buttons to adjust " IMAGE ADJ."
SETUP
LENS
DC
EXPOSURE
WHITE BAL
ATW
BACKLIGHT
DNR
WDR
ON
DAY / NIGHT
AUTO
IMAGE ADJ
SPECIAL
EXIT
2. Select the desired mode by pressing of UP or Down buttons.
IMAGE SETUP
1. FREEZE
OFF
2. V - REV
OFF
3. H - REV
OFF
4. D - ZOOM
5. SHARPNESS
OFF
ON
6. RETURN
16
FREEZE : You can see still or moving pictures.
V - REV : You can flip the picture vertically on the screen.
H - REV : You can flip the picture horizontally on the screen.
D - ZOOM : You can use a digital zoom of x1 ~ x10.
D - ZOOM
LEVEL
Press
5
SET to Return
SHARPNESS : As you increase this value, the picture outline becomes stronger
and clearer. Adjust this value appropriately depending on the
sharpness of the picture.
SHARPNESS
LEVEL
Press
10
SET to Return
RETURN : Select this to save the settings for the IMAGE ADJ. menu and to return
to the SETUP menu.
CAUTION
When H - REV or V - REV is selected, any text in the picture also will be flipped
horizontally or vertically.
If you increase SHARPNESS level too high, the picture may become distorted or
noise may appear.
17
SPECIAL
SPECIAL
1. When the SETUP menu screen is displayed, select " Special " by using the UP and
Down buttons to control the SPECIAL menu.
SETUP
LENS
DC
EXPOSURE
WHITE BAL
BACKLIGHT
DNR
ATW
WDR
ON
DAY / NIGHT
AUTO
IMAGE ADJ
SPECIAL
EXIT
2. Select a desired mode using the UP and DOWN buttons.
SPECIAL
1.CAM TITLE
OFF
2.SYNC
3.MOTION DET
4.PRIVACY
5.DIS
INT
OFF
OFF
OFF
6.COMM ADJ.
7.LANGUAGE
8.RESET
9.RETURN
1. CAM TITLE : If inputted CAM TITLE, CAM TITLE will be displayed onto the screen.
1-1)
Move the arrow indicator to ‘Camera ID’ by pressing of UP or Down button on the SETUP
Menu screen
1-2)
Set “ON” by using of Left or Right button.
CAUTION
When Cam Title is set to"OFF", The Camera ID will not displayed onto the monitor.
18
1-3)
Press the SETUP button
Camera ID
ABCDEFGHIJKLMNOP
QRSTUVWXYZ
abcdefghIjklmnopqr
stuvwxyz
123456789
CLR
1-4)
①
POS
ID could be entered up to 15 characters.
Move the cursor to character enter location by using of Left or Right button.
Camera
ABCDEFGHIJKLMNOP
QRSTUVWXYZ
abcdefghIjklmnopqr
stuvwxyz
123456789
CLR
②
POS
Select the desired character in A, B~Y, Z, a, b~y, z, 0, 1~8, 9 by using of Up, Down, Left
And Right button.
③
Set the desired character by pressing of SETUP button.
- The cursor will moved to next position after character select by pressing SETUP button.
④
Repeat above steps until created the desired full name .
CAUTION
In Case of Wrong Camera ID Input…...
Move the cursor to "CLR" and press the SETUP button from right to left to erase
The characters. And repeat above steps to correct the characters again.
19
1-5) Select the position at camera ID should be located on the screen.
① Move the cursor to”POS” and press the SET button.
Camera ID
ABCDEFGHIJKLMNOP
QRSTUVWXYZ
abcdefghIjklmnopqr
stuvwxyz
123456789
CLR
POS
SHOP
② Created Camera name will be displayed.
SHOP
③ Select the position by using of the 4Directional button, then press the SET
Button to confirm the position
SHOP
1-6) Move the cursor to “END” and press the SET button after completed the above processing.
20
2.
SYNC : In areas where the supply is at 60Hz, you can syncronize the output phase of multiple
cameras using the power syncronization function(Line-Lock) without using a syncronization
signal generator.
LINE LOCK
PHASE
255
MODE
OFF
Press
SET to Return
INT : Internal Syncronization Type
L/L : Power Syncronization Type, Line - Lock
Press the SET button.
You can select a desired phase from 0 ~ 359 when select "phase".
You can decide a syncronization between luminance and color signal when select the "MODE"
CAUTION
When using AC Power at 60Hz frequency, you can use the L/L type syncronization.
When the power is DC 12V, the SYNC. menu is fixed to the " INT " mode
3. MOTION DET.:
If you connect an alarm device to this camera, you can monitor activity
more efficiently, because a signal is generated by the camera whenever motion
is detected.
The motion detection signal is output through the MD OUT port.
MOTION DET
1. AREA SEL
2.AREA MODE
ON
3.SEL POS
L - TOP
4.YPOS
l
5.XPOS
6.FILL
l
l
→ SET
2
l
l
3
7. Return
3-1) When the special menu screen is displyed, press the UP and Down buttons
to adjust " MOTION DET.".
21
3-2) Set up the mode using the 4 direction buttons.
① SENSITIVITY : You can select up to 8 MD areas. When SENSITIVITY number is high,
Motion detection sensitivity in increase to recognize even small movement.
② AREA MODE : Determines whether to use the MD area selected in SENSITIVITY.
③ SEL POS : Detemines which of the 4 vertice of each MD area is to be used.
④ YPOS : Determines the coordinate of the vertical axis for SEL POS.
⑤ XPOS : Determines the coordinate of the horizontal axis for SEL POS.
⑥ FILL → SET : Fills in a selected MD area. The color of filling is sequentially selected
as brown, orange, blue, cyan, yellowish green, yellow and red.
⑦ RETURN : Select this to save the MOTION DET menu settings and return to the SPECIAL menu.
CAUTION
MD areas show just MOTION DET menu. MD areas doesn't disply on the monitor screen.
4. PRIVACY
Hide an area you want to hide on the screen.
4-1) When the SPECIAL menu screen is displayed, press the UP and DOWN buttons to adjust " PRIVACY "
PRIVACY
1. AREA SEL
2.AREA MODE
ON
3.MASK COLOR
GRAY
4.TRANSP.
l
l
0
5. Return
4-2) Set up the area mode using the 4 direction buttons
① AREA SEL.: You can select up to 8 MD areas.
② AREA MODE :
Determines whether to use the area selected in the AREA SEL, and the size
and the position of the area.
AREA SETUP
1.TOP
l
l
12
2.BUTTOM
l
l
27
3.LEFT
l
l
45
3.RIGHT
l
l
30
Press
SET
to Return
22
③ MASK COLOR : Determine area color. You can select Gray, Green, Red, Blue, Black, White.
④ TRANSP.: Determine the transparency of selected area as controlling number 0 ~ 3.
⑤ RETURN: Select this to save the PRIVACY menu settings and return to the SPECIAL menu.
5. DIS (Digital Image Stabilizer)
This function mitigates any picture movement due to external factors such as wind.
CAUTION
The chance of resolution decrease is existed DIS function uses the digital zoom.
DIS doesn't operate when background illumination is too low.
DIS doesn't operate when object pattern is monotonic as like sky or white wall
6. COMM ADJ.(Communication Adjustment) :
This function sets up the camera communication status when controlling the camera
thorugh an external control device.
COMMINICATION SETUP
1. CAM ID
2. BAUD RATE
3. UART MODE
4. RET PKT
5. DISP CAM ID
1
9600
8-N-1
ENABLE
6-1) When the SPECIAL menu screen is displayed, press the UP and DOWN buttons to adjust "COMM ADJ".
6-2) Set up the mode using the 4 direction buttons.
① CAM ID : Determines the camera's identification number (between 0 and 25 ).
② BAUD RATE : You can select 2400/ 4800/ 9600/ 19200/ 38400/ 57600 bps.
③ UART MODE : You can select NONE, EVEN, ODD for parity bits.
④ RET PKT : Determines whether to send a command back to the controller device
When a communication control command is sent to the camera.
⑤ DISP CAM ID : Display camera title on top left of the screen.
7. LANGUAGE : You can select the menu language according to your requirements
Through multi language.
8. RESET : Resets the camera settings to the factory defaults.
9. RETURN : Select this to save the SPECIAL menu settings and return to the SPECIAL menu.
EXIT
Press the SET button in the EXIT menu to save the current settingd and exit the SET menu
23
TROUBLESHOOTING
PROBLEM
SOLUTION
● Check the power cable and line connection
Nothing appears on
the screen
Between the camera and monitor.
● Check that you have properly connected the
VIDEO cables
● Is the camera lens stained with dirt?
Clean the lens with a soft and clean cloth.
The image on the
screen is dim.
● Adjust the monitor as required.
● If the camera is exposed to very strong light,
Change the camera position.
● Adjust the lens focus properly.
The image on the
screen is dark.
The camera is not
working properly
and the surface of
the camera is hot.
MOTION DETECTION
function is not active.
The color of the
picture is not
matched.
The image on the
screen flickers.
● Adjust the contrast feature of the monitor
● If you have an interediate device, set the
75Ω / Hi-z properly.
● Check that you have properly connected the
Camera to an appropriate power source.
● Have you set " MOTION DET" menu to off?
● Have you set " MD AREA " properly?
● Check that you have properly set the "WHITE- BAL" menu
● Is the camera facing direct sunlight or fluorecent
lighting? Change the camera position.
● Check the AGC of EXPOSURE SETUP is "OFF".
The SENS - UP function
does not work
●
Check the SHUTTER OF EXPOSURE menu is "A.FLK" or
"MANUAL".
25