1
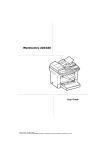
WorkCentre 220
User Guide
Date en cours : 23 March 2005
C:\Documents and Settings\G097447\Bureau\MFF 251963782A LU WorkCentre220_Australie\00_cover.fm
All product/brand names are trademarks or registered trademarks of the respective holders.
Damage related to computer virus
Fuji Xerox is not responsible for any breakdown of machines due to infection of
computer virus or computer hacking.
Important
(1) This manual is copyrighted with all rights reserved. Under the copyright laws, this manual
may not be copied or modified in whole or part, without the written consent of the
publisher.
(2) Parts of this manual are subject to change without prior notice.
(3) We welcome any comments on ambiguities, errors, omissions, or missing pages.
(4) Never attempt any procedure on the machine that is not specifically described in this
manual. Unauthorized operation can cause faults or accidents. Fuji Xerox is not liable for
any problems resulting from unauthorized operation of the equipment.
Xerox and The Document Company are registered trademarks.
Date en cours : 23 March 2005
C:\Documents and Settings\G097447\Bureau\MFF 251963782A LU WorkCentre220_Australie\00_cover.fm
Contents
CONTENTS
1
BEFORE
USING THE MACHINE
Preface
Related information sources
Using this guide
Prerequisite knowledge
Organization
Conventions
Safety notes
Warning - Electrical safety information
Laser safety information
Operational safety information
Maintenance information
Ozone safety information
For consumables
Product safety certification
The objective of the International Energy Star Program
Sleep Mode feature (Eco Energy)
Legal notice
Console
2
INSTALLATION
Installing your terminal
Installation requirements
Operational precautions
Unpacking the box
Unpacking the additional paper tray (optional)
Description
Installing the removable parts
Installing the scanner paper tray
Installing the printer output stacker
Installing the printer paper tray
Loading paper
Adjusting the original document output tray
Loading paper in manual mode
Installing the second paper tray (optional)
Connections
Power line connection and switch on
3
GETTING
STARTED
Navigation methods
Presentation
1-1
1-1
1-2
1-2
1-2
1-2
1-3
1-4
1-5
1-5
1-6
1-7
1-8
1-8
1-8
1-9
1-9
1-10
1-11
2-1
2-1
2-1
2-2
2-4
2-5
2-6
2-7
2-7
2-8
2-9
2-10
2-12
2-12
2-14
2-16
2-17
3-1
3-1
3-1
3-1
3-2
The navigator
Moving within the menus
-1-
Date en cours : 23 March 2005
C:\Documents and Settings\G097447\Bureau\MFF 251963782A LU WorkCentre220_Australie\workcentre220TOC.fm
Contents
The display screen
3-3
3-3
3-3
3-4
3-4
Access to functions
Menu-driven access
Direct access by number
Guide to function list
4
SETTING
YOUR MACHINE
Main Settings
4-1
4-1
4-1
4-2
Geographical settings
Technical parameters
5
OPERATION
Copying
Document depositing
Scanner
From the flat scanner.
Local copy
Standard copy
"Sophisticated" copy
Specific copy settings
Scanner settings
Other functions
Printing the functions list
Printing the machine settings
Counters
Lock
Entering the locking code
Locking the keyboard
Scan to PC
6
MAINTENANCE
Maintenance
General
Replacing the consumables (toner and drum )
Replacing cartridges
Cleaning
Cleaning the scanner’s reading devices
Cleaning the printer
Servicing
Scanner calibration
Incidents
Error messages
Printer paper jam
Paper jam at the feeders and trays
Scanner incidents
Scanner paper jam
-2-
Date en cours : 23 March 2005
C:\Documents and Settings\G097447\Bureau\MFF 251963782A LU WorkCentre220_Australie\workcentre220TOC.fm
5-1
5-1
5-1
5-1
5-2
5-2
5-2
5-2
5-3
5-3
5-5
5-5
5-5
5-6
5-6
5-6
5-6
5-7
6-1
6-1
6-1
6-2
6-2
6-14
6-14
6-15
6-17
6-17
6-17
6-17
6-18
6-20
6-21
6-21
Contents
Miscellaneous incidents
Machine packing and transportation
Characteristics
Unit characteristics
-3-
Date en cours : 23 March 2005
C:\Documents and Settings\G097447\Bureau\MFF 251963782A LU WorkCentre220_Australie\workcentre220TOC.fm
6-23
6-24
6-25
6-25
Contents
-4-
Date en cours : 23 March 2005
C:\Documents and Settings\G097447\Bureau\MFF 251963782A LU WorkCentre220_Australie\workcentre220TOC.fm
1 BEFORE USING THE
MACHINE
PREFACE
Thank you for choosing the WorkCentre 220.
This guide is written for users who are new to the machine and provides information on printing,
copying, and scanning operations, as well as troubleshooting, daily maintenance, machine settings,
and precautions users should take when operating the machine.
Please read this guide thoroughly to get the most out of the features available. After reading this
guide, keep it handy for future reference when you need explanations on particular features of the
machine or when you encounter difficulties with the machine during use.
In this manual, safety instructions are preceded by the symbol
.
Always read and follow the instructions before performing the required procedures.
As a member of the International Energy Star Program, Fuji Xerox confirms this
product satisfies the requirements for International Energy Star Program standards.
The equipment complies with IEC/EN 60950-1 (which relates to Safety), EN 55022 and EN 55024,
(which relate to radio frequency interference regulations).
It was tested by an accredited laboratory and certified by a national recognised certification body.
The equipment is also certified in compliance with applicable standards by various national bodies.
Any unauthorized alteration, which includes the addition of new functions or the connection of
external devices, may impact this certification.
Contact your local Xerox representative for a list of approved accessories.
The equipment is manufactured under a registered ISO 9001 Quality System.
1-1
Date en cours : 23 March 2005
C:\Documents and Settings\G097447\Bureau\MFF 251963782A LU WorkCentre220_Australie\01_front.fm
Before using the machine
RELATED INFORMATION SOURCES
The following additional sources of information are available for the machine.
• Installation Guide
• Companion Suite Pro User Guide
Note -
Please note that the screens shown in this guide apply to a fully configured machine and
therefore may not exactly represent the configuration being used.
USING THIS GUIDE
This section describes the organization of this guide.
This guide was produced for users who operate the WorkCentre 220 on a regular basis. When reading
this guide, refer to the chapter most relevant to the operation you are performing.
Prerequisite knowledge
This guide assumes that the user has basic knowledge of the operating system of the PC in use,
networking environments, and how to operate a PC itself.
For details on the operating system in use, basic knowledge of networking environments, and how to
operate a PC, refer to the documentation provided with the operating system, network system, and the
PC, respectively.
Organization
This guide consists of the following chapters.
Chapter 1 Before using the machine
Describes how to use this guide, safety information, and legal notices.
Chapter 2 Installation
Describes the machine components, and how to install removable parts and connect cables.
Chapter 3 Getting started
Describes the navigation methods and the function list.
Chapter 4 Setting your machine
Describes the machine settings.
Chapter 5 Operation
Describes copying a document and other functions.
1-2
Date en cours : 23 March 2005
C:\Documents and Settings\G097447\Bureau\MFF 251963782A LU WorkCentre220_Australie\01_front.fm
Before using the machine
Chapter 6 Maintenance
Describes how to replace consumables, troubleshooting, and unit characteristics.
CONVENTIONS
This section describes the conventions used throughout this User Guide. In this User Guide, you
will find that some terms are used interchangeably:
• Paper is synonymous with media.
• Document is synonymous with original.
• WorkCentre 220 is synonymous with the machine.
Cautions
Cautions are statements that suggest the possibility of mechanical damage as a result of an action.
For example:
Caution - Use of controls, adjustments or performance of procedures other than those specified
herein may result in hazardous light exposure.
Notes
Notes are statements that provide additional information.
For example:
Note - Do not add paper to the tray while the machine is printing.
1-3
Date en cours : 23 March 2005
C:\Documents and Settings\G097447\Bureau\MFF 251963782A LU WorkCentre220_Australie\01_front.fm
Before using the machine
SAFETY NOTES
Read these safety notes carefully before using this product to make sure you operate the equipment
safely.
Your Fuji Xerox product and recommended supplies have been designed and tested to meet strict safety
requirements. These include safety agency approval, and compliance to established environmental
standards. Please read the following instructions carefully before operating the product and refer to
them as needed to ensure the continued safe operation of your product.
The safety and environment testing and performance of this product have been verified using Fuji
Xerox materials only.
Warning: Any unauthorized alteration, which may include the addition of new functions or connection
of external devices, may impact the product certification. Please contact your authorized Service
Provider for more information.
Warning markings
All warning instructions marked on or supplied with the product should be followed.
Warning
This WARNING alerts users to areas of the product where
there is the possibility of personal injury.
Warning
This WARNING alerts users to areas of the product where
there are heated surfaces, which should not be touched.
Electrical supply
This product shall be operated from the type of electrical supply indicated on the product data plate
label. If you are not sure that your electrical supply meets the requirements, please consult your local
power company for advice.
This product must be connected to a protective earth circuit.
This product is supplied with a plug that has a protective earth pin. This plug will fit only
into an earthed electrical outlet. This is a safety feature. To avoid risk of electric shock, contact your
electrician to replace the electrical outlet if you are unable to insert the plug into it. Never use an earthed
adapter plug to connect the product to an electrical outlet that lacks an earth connection terminal.
Operator accessible areas
This equipment has been designed to restrict operator access to safe areas only. Operator access to
hazardous areas is restricted with covers or guards, which would require a tool to remove. Never
remove these covers or guards.
1-4
Date en cours : 23 March 2005
C:\Documents and Settings\G097447\Bureau\MFF 251963782A LU WorkCentre220_Australie\01_front.fm
Before using the machine
Maintenance
Any operator product maintenance procedures will be described in the customer documentation
supplied with the product. Do not carry out any maintenance procedures on this product which
are not described in the customer documentation.
Cleaning your product
Before cleaning this product, unplug the product from the electrical outlet. Always use materials
specified for this product. The use of other materials may result in poor performance and may
create a hazardous situation. Do not use aerosol cleaners, they may be explosive and flammable
under certain circumstances.
Warning - Electrical safety information
Z Only use the power cord supplied with the equipment.
Z Plug the power cord directly into a grounded electrical outlet easily accessible. Do not use an
extension cord. If you do not know whether an outlet is grounded, consult a qualified
electrician.
Z Improper connection of the equipment-grounding conductor can result in an electric shock.
X Do not place this equipment where people might step on or trip over the power cord.
X Do not place objects on the power cord.
X Do not override or disable electrical or mechanical interlocks.
X Do not obstruct the ventilation openings.
X Never push objects of any kind into slots or openings on the equipment.
Z If any of the following conditions occur, switch off the power to the machine immediately
and disconnect the power cord from the electrical outlet. Call an authorized local service
representative to correct the problem.
-
The equipment emits unusual noises or odors.
-
The power cord is damaged or frayed.
-
A wall panel circuit breaker, fuse, or other safety device has been tripped.
-
Liquid has spilled into the equipment.
-
The equipment is exposed to water.
-
Any part of the equipment is damaged.
Disconnect device
The power cable is the disconnect device for this equipment. It is attached to the back of the
machine as a plug-in device. To remove all electrical power from the equipment, disconnect the
power cable from the electrical outlet.
Laser safety information
Caution - Use of controls, adjustments or performance of procedures other than those specified
herein may result in hazardous light exposure.
1-5
Date en cours : 23 March 2005
C:\Documents and Settings\G097447\Bureau\MFF 251963782A LU WorkCentre220_Australie\01_front.fm
Before using the machine
With specific regard to laser safety, the equipment complies with performance standards for laser
products set by government, national and international agencies as a Class 1 laser product. It does not
emit hazardous light, as the beam is totally enclosed during all phases of customer operation and
maintenance.
Operational safety information
To ensure the continued safe operation of your Fuji Xerox equipment, follow these safety guidelines at
all times.
Do these:
• Always connect equipment to a correctly grounded power outlet. If in doubt, have the outlet
checked by a qualified electrician.
Z This equipment must be connected to a protective earth circuit.
This equipment is supplied with a plug that has a protective earth pin. This plug will fit only into
an earthed electrical outlet. This is a safety feature. To avoid risk of electric shock, contact your
electrician to replace the electrical outlet if you are unable to insert the plug into it. Never use a
plug that lacks an earth connection terminal to connect the product to an electrical outlet.
• Always follow all warnings and instructions that are marked on or supplied with the equipment.
• When moving the machine, be sure to unplug all cords including the power cord. If tilted, the
machine may fall over and cause injuries.
• Always locate the equipment in an area that has adequate ventilation, and space for servicing.
• Always use materials and supplies specifically designed for your Fuji Xerox equipment. Use of
unsuitable materials may result in poor performance.
• Always unplug this equipment from the electrical outlet before cleaning.
• Make sure that you do not block the aeration grill located on the left side of the terminal. When
installing the terminal close to a wall, make sure that the distance between the wall and the rear,
and the wall and the left hand side of the terminal is at least 25 centimeters, to make opening of
the cover easier and so as not to block the aeration grill of the terminal. A poorly ventilated
machine can cause excessive internal heat and fire. The accompanying diagram shows the minimum clearances required for normal operation, consumables replacement, and maintenance to
ensure your machine operates at peak performance. Your Xerox representative will provide necessary support for the proper installation of the machine.
1-6
Date en cours : 23 March 2005
C:\Documents and Settings\G097447\Bureau\MFF 251963782A LU WorkCentre220_Australie\01_front.fm
Before using the machine
• This machine is capable of operating normally within the following recommended environmental limits.
Temperature range:
10°C to 35°C with fluctuation of 10°C per hour
Humidity range:
20% to 80% (no condensation) with fluctuation of 20% per hour
Note: Sudden temperature fluctuations can affect copy quality. Rapid heating of a cold room
can cause condensation
inside the machine, directly interfering with image transfer.
Do not do these:
• Never use a plug that lacks an earth connection terminal to connect the product to an electrical outlet.
• Never attempt any maintenance procedures that are not specifically described in the customer documentation.
• This equipment should not be placed in a built-in unit unless proper ventilation is provided.
Please contact your authorized local dealer for further information.
• Never remove covers or guards that are fastened with screws. There are no operator serviceable areas within these covers.
• Never locate the equipment near a radiator or any other heat source.
• Never push objects of any kind into the ventilation openings.
• Never override or “cheat” any of the electrical or mechanical interlock devices.
• Never operate the equipment if you notice unusual noises or odors. Disconnect the power
cord from the electrical outlet and contact your local Fuji Xerox Service Representative or
Service Provider immediately.
Maintenance information
Do not attempt any maintenance procedures that are not specifically described in the customer
documentation supplied with the machine.
• Do not use aerosol cleaners. The use of cleaners that are not approved may cause poor performance of the equipment, and could create a dangerous condition.
• Use supplies and cleaning materials only as directed in the customer documentation. Keep
all these materials out of the reach of children.
• Do not remove covers or guards that are fastened with screws. There are no parts behind
these covers that you can maintain or service.
1-7
Date en cours : 23 March 2005
C:\Documents and Settings\G097447\Bureau\MFF 251963782A LU WorkCentre220_Australie\01_front.fm
Before using the machine
• Do not perform any maintenance procedures unless you have been trained to do them by an
authorized local dealer or unless a procedure is specifically described in the customer documentation.
• Never touch a labelled area found on or near the heat roller. You can get burnt. If a sheet of paper
is wrapped around the heat roller, do not try to remove it by yourself to avoid injuries or burns.
Switch off the machine immediately, and contact your Xerox Customer Support Centre.
Ozone safety information
This product will produce ozone during normal operation. The ozone produced is heavier than air and
is dependent on copy volume. Adhering to the correct environmental conditions as specified in the
installation instructions will ensure that the concentration levels meet safe limits.
If you need additional information about ozone, please request the Fuji Xerox publication Ozone from
your Service Provider.
For consumables
Store all consumables in accordance with the instructions given on the package or container.
Z Keep all consumables away from the reach of children.
X Never use a vacuum cleaner when you clean spilled toner. It can cause explosion as the toner fills
the vacuum cleaner and gets sparks. Use a broom or a wet cloth.
X Never throw toner or a toner container into an open flame. It can cause an explosion and you can
get burnt.
Product safety certification
This product is certified according to IECEE "The IEC System for Conformity Testing and
Certification of Electrical Equipment" CB scheme using the Safety standards IEC60950-1 Edition1
(2001).
This product was manufactured under a registered ISO 9001 Quality system.
1-8
Date en cours : 23 March 2005
C:\Documents and Settings\G097447\Bureau\MFF 251963782A LU WorkCentre220_Australie\01_front.fm
Before using the machine
THE OBJECTIVE OF THE INTERNATIONAL
ENERGY STAR PROGRAM
To protect the global environment and conserve energy sources, the International Energy Star
Program encourages the following product features. Fuji Xerox confirms that WorkCentre 220
satisfies the requirements for this program.
Sleep Mode feature (Eco Energy)
This product has a power-saving feature, which switches the machine to the Sleep Mode
automatically if the machine is on and not operated for a certain period of time. In this mode, the
machine consumes minimum power.
1-9
Date en cours : 23 March 2005
C:\Documents and Settings\G097447\Bureau\MFF 251963782A LU WorkCentre220_Australie\01_front.fm
Before using the machine
LEGAL NOTICE
Copying or printing certain documents may be illegal in your country. Penalties of fines or
imprisonment may be imposed on those found guilty. The following are examples of items that may be
illegal to copy or print in your country.
• Currency
• Banknotes and checks
• Bank and government bonds and securities
• Passports and identification cards
• Copyright material or trademarks without the consent of the owner
• Postage stamps and other negotiable instruments
This list is not inclusive and no liability is assumed for either its completeness or accuracy. In case of
doubt, contact your legal counsel.
1-10
Date en cours : 23 March 2005
C:\Documents and Settings\G097447\Bureau\MFF 251963782A LU WorkCentre220_Australie\01_front.fm
Before using the machine
CONSOLE
1. Key
: stops current printing.
2. Key
: help in terminal use.
3. Key
: local photocopy.
14. Indicator printer paper jam
15. Digital keyboard.
.
16. Key
: validation/ local copy.
17. Key OK : validates displayed selection.
4. Key
: reduce or enlarge.
5. Key PC : scan to PC / scan to FTP.
6. Key
: double sided printing
7. Key
: selection of color mode.
8. Key
: scan resolution.
9. Key : contrast setting.
10. Scan resolution (Fine (Fin), SFine (Super Fin),
Photo).
11. Icon
: color mode selected.
12. Recto/Verso print indicated
:
* On :
duplex mode activated.
* Out :
printing mode deactivated.
13. Indicator reserve "Toner"
:
On : end of toner.
Flashing : near the end of toner.
1--11
1
1
1
18. Key
: access to menu and browsing in menus
downwards.
19. Key C : return to previous menu and correction of
text.
20. Key
: browsing in menus upwards.
21. Key
22. Key
: stops current operation.
: stops current operation.
STOP
1--12
Date en cours : 23 March 2005
C:\Documents and Settings\G097447\Bureau\MFF 251963782A LU WorkCentre220_Australie\01_Legende GB.fm
2 INSTALLATION
INSTALLING YOUR TERMINAL
INSTALLATION REQUIREMENTS
A proper location helps to ensure that your printer provides you with the long service life for which
it is designed. Double-check to make sure that the location you select has the following
characteristics.
• Always locate the equipment in an area that has adequate ventilation, and space for servicing.
• Never operate the equipment if you notice unusual noises or odors. Disconnect the power cord
from the electrical outlet and contact your local Fuji Xerox Service Representative or Service
Provider immediately.
• Plug the power cord directly into a grounded electrical outlet easily accessible. Do not use an
extension cord. If you do not know whether an outlet is grounded, consult a qualified electrician.
• Never locate the equipment near a radiator or any other heat source.
• Do not obstruct the ventilation openings.
• Make sure that you do not block the aeration grill located on the left side of the terminal. When
installing the terminal close to a wall, make sure that the distance between the wall and the rear,
and the wall and the left hand side of the terminal is at least 25 centimeters, to make opening of
the cover easier and so as not to block the aeration grill of the terminal. A poorly ventilated
machine can cause excessive internal heat and fire. The accompanying diagram shows the minimum clearances required for normal operation, consumables replacement, and maintenance to
2-1
Date en cours : 23 March 2005
C:\Documents and Settings\G097447\Bureau\MFF 251963782A LU WorkCentre220_Australie\02_Installation GB.fm
Installation
ensure your machine operates at peak performance. Your Xerox representative will provide necessary support for the proper installation of the machine.
Operational precautions
Note the following important precautions whenever using the printer.
Operating Environment
This machine is capable of operating normally within the following recommended environmental
limits.
- Temperature range:
10°C to 35°C with fluctuation of 10°C per hour
- Humidity range:
20% to 80% (no condensation) with fluctuation of 20% per hour
Note -
Sudden temperature fluctuations can affect copy quality. Rapid heating of a cold room can
cause condensation inside the machine, directly interfering with image transfer.
Terminal
The following describes precautions for using the terminal.
• If any of the following conditions occur, switch off the power to the machine immediately and
disconnect the power cord from the electrical outlet. Call an authorized local service representative to correct the problem.
- The equipment emits unusual noises or odors.
- The power cord is damaged or frayed.
- A wall panel circuit breaker, fuse, or other safety device has been tripped.
- Liquid has spilled into the equipment.
- The equipment is exposed to water.
- Any part of the equipment is damaged.
• When moving the machine, be sure to unplug all cords including the power cord. If tilted, the
machine may fall over and cause injuries.
• Never remove covers or guards that are fastened with screws. There are no operator serviceable
areas within these covers.
• Do not place objects on the power cord.
2-2
Date en cours : 23 March 2005
C:\Documents and Settings\G097447\Bureau\MFF 251963782A LU WorkCentre220_Australie\02_Installation GB.fm
Installation
• Do not place this equipment where people might step on or trip over the power cord.
• Never push objects of any kind into slots or openings on the equipment.
Caution -
This product will produce ozone during normal operation. The ozone produced is
heavier than air and is dependent on copy volume. Adhering to the correct environmental
conditions as specified in the installation instructions will ensure that the concentration levels
meet safe limits. If you need additional information about ozone, please request the Fuji Xerox
publication Ozone from your Service Provider.
2-3
Date en cours : 23 March 2005
C:\Documents and Settings\G097447\Bureau\MFF 251963782A LU WorkCentre220_Australie\02_Installation GB.fm
Installation
UNPACKING THE BOX
)
Take the protection profiles, the packing material and the machine out of the shipping box.
)
Check that the following parts are in the box.
Terminal
Output tray
printer
Mains power cord
(model depending
on country)
Document feeder
CD-ROM
User guide
CD-ROM Kit PC
Installation
guide
Printer paper
tray
Cardboard box
2-4
Date en cours : 23 March 2005
C:\Documents and Settings\G097447\Bureau\MFF 251963782A LU WorkCentre220_Australie\02_Installation GB.fm
Installation
UNPACKING THE ADDITIONAL PAPER TRAY
(OPTIONAL)
)
Remove the plastic bags and check for the parts illustrated below.
Paper tray
Mechanical unit
paper tray
Cardboard box
Installing the additional paper tray (refer to paragraph Description, page 2-6)
2-5
Date en cours : 23 March 2005
C:\Documents and Settings\G097447\Bureau\MFF 251963782A LU WorkCentre220_Australie\02_Installation GB.fm
Installation
DESCRIPTION
Document feed
tray for scanning
Adjustable
paper guide
Original document
output stacker
Access handle
Flatbed scanner
Scroll scanner
(ADF)
Chip card reader
Console
Printer
output stacker
Printer
Manual paper
feed tray
Second paper
tray (optional)
(500 pages)
Printer paper feed tray
Parallel PC port
USB Port
On/Off
button
Power socket
Mains
lead (depending on country)
Toner drum/cartridge
(pre-installed in printer)
2-6
Date en cours : 23 March 2005
C:\Documents and Settings\G097447\Bureau\MFF 251963782A LU WorkCentre220_Australie\02_Installation GB.fm
Installation
INSTALLING THE REMOVABLE PARTS
This section details the installation of the terminal’s removable parts.
INSTALLING THE SCANNER PAPER TRAY
)
Secure the document feeder by fitting the two clips (B) in the notches (A) provided for this
purpose.
A
B
2-7
Date en cours : 23 March 2005
C:\Documents and Settings\G097447\Bureau\MFF 251963782A LU WorkCentre220_Australie\02_Installation GB.fm
Installation
INSTALLING THE PRINTER OUTPUT STACKER
)
Insert the two clips (B) of the stacker into the notches (A) provided for this purpose.
A
B
2-8
Date en cours : 23 March 2005
C:\Documents and Settings\G097447\Bureau\MFF 251963782A LU WorkCentre220_Australie\02_Installation GB.fm
Installation
INSTALLING THE PRINTER PAPER TRAY
)
Laying the tray with the left and right clips to the printer, slowly press the tray until it has
docked against the bottom of the notches (as shown in the drawing).
2-9
Date en cours : 23 March 2005
C:\Documents and Settings\G097447\Bureau\MFF 251963782A LU WorkCentre220_Australie\02_Installation GB.fm
Installation
LOADING PAPER
)
Remove the cover from the printer paper tray.
)
Press the paper size guide inside the tray on the right, in order to push both paper size guides to
the left or to the right.
)
Put a stack of paper into the tray (do not put in more than 250 pages). In case of letterhead paper,
be sure to place the paper printed side up.
)
Secure the stack of paper by pushing the paper size guides against the right and left edges of the
stack.
2-10
Date en cours : 23 March 2005
C:\Documents and Settings\G097447\Bureau\MFF 251963782A LU WorkCentre220_Australie\02_Installation GB.fm
Installation
Note - Do not add paper to the tray while the machine is printing.
Paper useable in the printer :
)
Printer paper tray
60 to 90 g/m2
Manual feed
60 to 160 g/m2
Replace the printer paper tray cover.
2-11
Date en cours : 23 March 2005
C:\Documents and Settings\G097447\Bureau\MFF 251963782A LU WorkCentre220_Australie\02_Installation GB.fm
Installation
ADJUSTING THE ORIGINAL DOCUMENT OUTPUT TRAY
)
Depending on the size of paper to scan, A4 or LGAL (LEGAL), adjust the supply stop.
LOADING PAPER IN MANUAL MODE
When printing on special paper, such as 60 to 160 g/m2 maximum color paper or transparent file
(laserprinter compatible), you should load the paper manually, up to 10 sheets maximum. Insert your
sheet of paper or film between the two feed pawls 1 and 2 located on the paper tray cover until it stops
in the printer.
2-12
Date en cours : 23 March 2005
C:\Documents and Settings\G097447\Bureau\MFF 251963782A LU WorkCentre220_Australie\02_Installation GB.fm
Installation
)
Adjust to the size of the paper or film using the paper size guide 1 or 2.
1
2
2-13
Date en cours : 23 March 2005
C:\Documents and Settings\G097447\Bureau\MFF 251963782A LU WorkCentre220_Australie\02_Installation GB.fm
Installation
INSTALLING THE SECOND PAPER TRAY
(OPTIONAL)
1. Remove the second paper cassette unit
and tray 2 from their packaging,
including the protective tape used to
hold the various components in place.
2. Position the printer above the additional paper tray unit. Align the coupling pins of the additional paper tray
unit with the corresponding notches in
the bottom of the printer.
3. Remove the paper tray cover.
4. Press the support plate located on the
paper tray until it locks into position.
5. Put a stack of 500 paper sheets,
maximum, into the paper tray, making
sure to always position the paper so
that the up-side, when the paper is
packed, is always facing up.
6. Put the cover back onto the tray, and
insert the paper tray into the additional
paper unit.
2-14
Date en cours : 23 March 2005
C:\Documents and Settings\G097447\Bureau\MFF 251963782A LU WorkCentre220_Australie\02_Installation GB.fm
Installation
Note - Always get hold of the paper tray with both hands when removing it or putting it back
into the additional paper unit.
2-15
Date en cours : 23 March 2005
C:\Documents and Settings\G097447\Bureau\MFF 251963782A LU WorkCentre220_Australie\02_Installation GB.fm
Installation
CONNECTIONS
A
B
D
C
)
Make
switch is in position o (Off).
y sure the On/Off
g
A : Parallel port
B : USB Port
C :Mains plug
D : Mains power cord (model
depending on country)
2-16
Date en cours : 23 March 2005
C:\Documents and Settings\G097447\Bureau\MFF 251963782A LU WorkCentre220_Australie\02_Installation GB.fm
Installation
POWER LINE CONNECTION AND SWITCH ON
Caution -
Refer to Safety notes in Before Using the Machine.
)
Plug the end of the mains power cord (E) into the socket (D) of the terminal and the other
end in the wall outlet.
)
Set the On/Off switch to position "I" (On).
After a few seconds, when the printer has warmed up, WORKCENTRE 220 will appear. To
adjust the language of your terminal, refer to paragraph Setting your machine, page 4-1.
2-17
Date en cours : 23 March 2005
C:\Documents and Settings\G097447\Bureau\MFF 251963782A LU WorkCentre220_Australie\02_Installation GB.fm
Installation
2-18
Date en cours : 23 March 2005
C:\Documents and Settings\G097447\Bureau\MFF 251963782A LU WorkCentre220_Australie\02_Installation GB.fm
3 GETTING STARTED
NAVIGATION METHODS
PRESENTATION
The navigator gives you access to the menus visible on screen.
The navigator
This navigator has 4 keys and allows you to move within the menus available on your machine.
3-1
Date en cours : 23 March 2005
C:\Documents and Settings\G097447\Bureau\MFF 251963782A LU WorkCentre220_Australie\03_PriseEnMains GB.fm
Getting started
Moving within the menus
To
Use key
Symbol used
Confirm entry and go to the following
menu.
OK
Select the next line in a menu.
Select the previous line in a menu.
Return to the previous menu.
C
Confirm and exit from the current menu.
Exit without confirming from the current
menu.
Moving within a data entry field
To
Use key
Symbol used
Move to the right.
Move to the left.
3-2
Date en cours : 23 March 2005
C:\Documents and Settings\G097447\Bureau\MFF 251963782A LU WorkCentre220_Australie\03_PriseEnMains GB.fm
Getting started
To
Use key
Symbol used
Confirm your entry.
OK
Delete a character by moving the cursor to
the left.
C
Confirm your entry and return to the initial
screen.
The display screen
The screen has two lines of 16 characters.
The cursor
shows the line you selected.
2
SETUP
5
PRINT
For menus with more than two choices, use the
(hidden) line of the menu.
arrow of the navigator to obtain the next
ACCESS TO FUNCTIONS
Access to functions may be achieved in two ways.
• Menu-driven access.
• Direct function access.
Menu-driven access
You can print the guide to find out the number of a function by pressing
scrolling through the menus, as indicated below.
)
Press the
)
Use the
)
the key or by
key, the functions menu appear.
or
2
SETUP
5
PRINT
navigator arrows to select the PRINT menu.
Validate your choice by pressing OK.
3-3
Date en cours : 23 March 2005
C:\Documents and Settings\G097447\Bureau\MFF 251963782A LU WorkCentre220_Australie\03_PriseEnMains GB.fm
Getting started
)
When in the selected menu, use the
or
navigator arrows to move the cursor
in front
of the required sub-function.
)
51
FUNCTIONS LIST
54
SETUP
Validate your choice by pressing OK.
Direct access by number
You may print the functions list to find out the number of a function.
From the stand-by mode:
)
Press successively the
by pressing OK.
key and dial the number of the required function. Validate your choice
GUIDE TO FUNCTION LIST
MAIN MENU 2: SETUP
Functions
29 OK
20 OK
203 OK
-
Function description
TECHNICALS
GEOGRAPHICAL
LANGUAGE
Technicals parameters
Geographical settings
Choice of language
Page
p. 4-2
p. 4-1
p. 4-1
MAIN MENU 5: PRINT
Functions
51 OK
54 OK
-
Function description
FUNCTIONS LIST
SETUP
Function list printing
User parameters printing
Page
p. 5-5
p. 5-5
MAIN MENU 8: ADVANCED FCT
Functions
80 OK
81 OK
811 OK
812 OK
82 OK
823 OK
824 OK
-
-
CALIBRATION
LOCK
LOCKING CODE
LOCK KEYBD.
COUNTERS
SCANNED PAGE
SCANNED SHT
Function description
Scanner calibration
Activate an access limitation lock
Locking code
Activate keyboard lock
See the activity counters
Scanned pages counter
Scanned sheets counter
3-4
Date en cours : 23 March 2005
C:\Documents and Settings\G097447\Bureau\MFF 251963782A LU WorkCentre220_Australie\03_PriseEnMains GB.fm
Page
p. 6-17
p. 5-6
p. 5-6
p. 5-6
p. 5-6
p. 5-6
p. 5-6
Getting started
MAIN MENU 8: ADVANCED FCT
Functions
825 OK
84 OK
841 OK
842 OK
843 OK
844 OK
845 OK
846 OK
85 OK
851 OK
852 OK
854 OK
855 OK
856 OK
857 OK
86 OK
A.
-
-
-
PRINTED PG
COPY
RESOLUTION
ZOOMING
ASSEMBLED
ORIGIN
CONTRAST
LUMINOSITY
SCAN. & PRINT
PAPER
PAPER TRAY
S.F MARGINS
FLATBED MARG
PRINTER MARG
PRINTER MARG
CONSUMABLES
Function description
Printed pages counter
CIS scanner settings
Resolution type choice
Zoom setting
Assembled or not copy choice
Origin setting
Contrast setting
Luminosity setting
Printer adjustments
Type of paper choice
Paper tray choiceA
Set margins
Sheet-feed scanner margins setting
Printer margins setting
Printer margins setting
Consumables status
Depending on option
3-5
Date en cours : 23 March 2005
C:\Documents and Settings\G097447\Bureau\MFF 251963782A LU WorkCentre220_Australie\03_PriseEnMains GB.fm
Page
p. 5-6
p. 5-2
p. 5-3
p. 5-3
p. 5-3
p. 5-3
p. 5-4
p. 5-4
p. 5-4
p. 5-4
p. 5-4
p. 5-4
p. 5-4
p. 5-5
p. 5-5
p. 6-2
Getting started
3-6
Date en cours : 23 March 2005
C:\Documents and Settings\G097447\Bureau\MFF 251963782A LU WorkCentre220_Australie\03_PriseEnMains GB.fm
4 SETTING YOUR
MACHINE
MAIN SETTINGS
At machine powerup, the screen displays:
WORKCENTRE 220
PLEASE WAIT
Fine Sfine Photo
You have to set the language parameters, and verify the other parameters listed below.
Geographical settings
Language
This setting enables you to choose a language other than that imposed by the COUNTRY setting.
To select the language:
203 OK - SETUP / GEOGRAPHICAL / LANGUAGE
)
Select the required option and press the OK key to confirm.
4-1
Date en cours : 23 March 2005
C:\Documents and Settings\G097447\Bureau\MFF 251963782A LU WorkCentre220_Australie\04_Configuration GB.fm
Setting your machine
TECHNICAL PARAMETERS
As delivered your machine is preset by default. However, you may adjust it to meet your requirements
by resetting the technical parameters.
To set the technical parameters:
29 OK - SETUP / TECHNICALS
)
Select the desired parameter and confirm with OK.
)
With the keys
press OK.
or
Parameter
Setting
, modify the parameter settings by following the table below and
Signification
8 - ECO
ENERGY
1 - WITHOUT
2 - DELAY
5 MIN
3 - DELAY
15 MIN
4 - DELAY
30 MIN
Choosing the printer standby delay: the printer
will switch to standby after a delay (in minutes)
of NON-operation.
80 - TONER
SAVE
1 - WITH
2 - WITHOUT
Makes printing lighter to save toner cartridge
ink.
Your terminal is now configured.
4-2
Date en cours : 23 March 2005
C:\Documents and Settings\G097447\Bureau\MFF 251963782A LU WorkCentre220_Australie\04_Configuration GB.fm
5 OPERATION
COPYING
Your machine offers to print out one more copies of one or more pages.
DOCUMENT DEPOSITING
Scanner
From the automatic feeder tray
)
Paper guides
Place your original documents in the
document feeder:
- face printed on the top,
- first page under the stack.
)
Set the paper guide to the document
width.
)
Once the operation is over, take your
original documents back from the
document exit tray.
5-1
Date en cours : 23 March 2005
C:\Documents and Settings\G097447\Bureau\MFF 251963782A LU WorkCentre220_Australie\05_Utilisation GB.fm
Operation
From the flat scanner.
Scanner origin
)
Using the handle, lift up the document
feeder tray.
)
Put your document, with the printed face
down on the scanner window. The
scanner origin is located at your end, to
the left, as shown opposite.
)
Once the operation is complete, lift the
document feeder tray and recover your
document.
LOCAL COPY
Standard copy
)
Position the document.
)
Press key
twice.
"Sophisticated" copy
)
Position the document.
)
Press key
)
Enter the required number of copies and confirm with the OK key.
)
Using the keys
or
select the scan modes DUPLEX->1-SIDE or 1-SIDE->1-SIDE and
confirm with the OK key.
)
Using the keys
or
select the resolution: ULTRA FAST, FAST, QUALITY or PHOTO and
confirm with the OK key.
)
Using the keys
or
select the degree of contrast and confirm with the OK key.
)
Using the keys
or
select the degree of brightness and confirm with the OK key.
)
Select the collation mode COPY ASSEMBLED or NOT ASSEMBLED and confirm with the OK
key.
)
Using the keys
or
or the numeric key pad or eventually the key dedicated for zoom set
up the degree of zoom between 25% TO 400% and confirm with the OK key.
.
5-2
Date en cours : 23 March 2005
C:\Documents and Settings\G097447\Bureau\MFF 251963782A LU WorkCentre220_Australie\05_Utilisation GB.fm
Operation
)
Using the keys
or
or the numerical key pad select the required base values and
confirm with the OK key.
)
Using the keys
or
with the OK key.
)
Using the keys
or
select the required paper tray, AUTOMATIC TRAY, UPPER TRAY
or LOWER TRAY and confirm with the OK key.
select the type of paper NORMAL PAPER or THICK and confirm
SPECIFIC COPY SETTINGS
When the copy quality is no longer satisfactory, you can perform a calibration. To do so, refer to
paragraph Scanner calibration, page 6-17.
Moreover, a high number of controls let you improve the copy quality.
Scanner settings
841 OK - ADVANCED FCT / COPY / RESOLUTION
)
The Resolution parameter adjusts the photocopying resolution. Select High Speed, Quality
or Photo resolution using keys
or
, then validate the choice with the OK key.
842 OK - ADVANCED FCT / COPY / ZOOMING
)
The zoom setting is used to reduce or enlarge part of the document by choosing the original
and the zoom value to apply to the document, 25 to 400 %. Enter the zoom value required
using the keys of the digital key pad. Validate the choice with the OK key.
843 OK - ADVANCED FCT / COPY / ASSEMBLED
)
The ASSEMBLED parameter is used to define the choice of your printer outputs; either
assembled or not assembled. Validate the choice with the OK key.
844 OK - ADVANCED FCT / COPY / ORIGIN
If you wish, you can change the origin of the scanner.
By entering new values of X and Y given in mm (X < 210 and Y < 286), you will move the
scanning zone as shown on the figure below.
)
END OF SHEET
TOP OF SHEET
scanned area
y
x
Top view: scanned side down
Select the X and Y coordinates with keys
or
.
5-3
Date en cours : 23 March 2005
C:\Documents and Settings\G097447\Bureau\MFF 251963782A LU WorkCentre220_Australie\05_Utilisation GB.fm
Operation
)
Set the required coordinates with the numeric keypad or
)
Confirm your setting by pressing key OK.
or
.
845 OK - ADVANCED FCT / COPY / CONTRAST
)
The CONTRAST parameter is used to select the photocopy contrast. Adjust the contrast using
keys
)
and
, then validate the choice with the OK key.
You can also directly adjust the desired contrast using the key, press this key several times until
845.
the required adjustment is obtained without using
846 OK - ADVANCED FCT / COPY / LUMINOSITY
)
The LUMINOSITY parameter is used to make your original document lighter or darker. Adjust
the brightness required using keys
and
, then validate the choice with the OK key.
Note - All settings made using this menu become default settings of the machine.
85 OK - ADVANCED FCT / SCAN. & PRINT
)
Use keys
or
of the browser to scroll the setting described below that you want to modify.
Validate your setting by pressing the OK key.
851 OK - ADVANCED FCT / SCAN. & PRINT / PAPER
)
Select NORMAL or THICK paper using keys
and
.
) Validate your setting by pressing the OK key.
Note - When THICK paper type is selected, the print speed is slowed down.
Note - Use the manual feeder for paper with a weight greater than 90 g/m2.
852 OK - ADVANCED FCT / SCAN. & PRINT / PAPER TRAY
)
Select the paper tray that you want to use; AUTOMATIC, LOWER or UPPER using keys
and
.
)
Validate by pressing the OK key.
854 OK - ADVANCED FCT / SCAN. & PRINT / S.F MARGINS
If you want to offset the side margins of your document to the left or to the right when scanning with
your scroll scanner.
)
Adjust the offset of the left/right margins (in 0.5mm steps) using keys
)
Validate by pressing the OK key.
and
.
855 OK - ADVANCED FCT / SCAN. & PRINT / FLATBED MARG
If you want to offset the side margins of your document to the left or to the right when scanning with
your flat scanner:
)
Adjust the offset of the left/right margins (in 0.5mm steps) using keys
5-4
Date en cours : 23 March 2005
C:\Documents and Settings\G097447\Bureau\MFF 251963782A LU WorkCentre220_Australie\05_Utilisation GB.fm
and
.
Operation
)
Validate by pressing the OK key.
856 OK - ADVANCED FCT / SCAN. & PRINT / PRINTER MARG
If you want to offset the side margins of your document to the left or to the right.
)
Adjust the offset of the left/right margins (in 0.5mm steps) using keys
)
Validate by pressing the OK key.
and
.
857 OK - ADVANCED FCT / SCAN. & PRINT / PRINTER MARG
If you want to offset the side margins of your document to the high or to the low.
)
Adjust the offset of the high/low margins (in 0.5mm steps) using keys
)
Validate by pressing the OK key.
and
.
OTHER FUNCTIONS
PRINTING THE FUNCTIONS LIST
You may print the functions list of your terminal machine at any time.
To print the functions list:
51 OK - PRINT / FUNCTIONS LIST
PRINTING THE MACHINE SETTINGS
At any moment, you may print the list of your terminal’s parameter settings to control any
changes possibly made to the default parameters.
Printing the machine settings:
54 OK - PRINT / SETUP
Your terminal prints the list of stored parameters.
5-5
Date en cours : 23 March 2005
C:\Documents and Settings\G097447\Bureau\MFF 251963782A LU WorkCentre220_Australie\05_Utilisation GB.fm
Operation
COUNTERS
At any time, you may consult the activity counters of your machine.
To get access to the counters of the machine:
82 OK - ADVANCED FCT / COUNTERS
These counters indicate the number of:
• scanned pages
823 OK - ADVANCED FCT / COUNTERS / SCANNED PAGE
• scanned sheets
824 OK - ADVANCED FCT / COUNTERS / SCANNED SHT
• printed pages
825 OK - ADVANCED FCT / COUNTERS / PRINTED PG
LOCK
There is a restriction to the use of your terminal:
• locking the keyboard
Entering the locking code
The operator access parameters are confidential; they are protected by a four-digit interlock code that
the authorized operators must know.
To access the locking code:
811 OK - ADVANCED FCT / LOCK / LOCKING CODE
)
Enter your four-digit interlock code on the keypad.
)
Confirm by pressing OK.
)
Confirm the interlock code by entering the code one more time.
) Press OK to confirm.
Note - When a code is already
registered, the machine asks you to give the former code before
allowing you to modify it.
Locking the keyboard
This function allows you to prevent access to non-authorized persons. An access code must be entered
each time a person wants to use the machine.
To access the keypad unlocking menu:
812 OK - ADVANCED FCT / LOCK / LOCK KEYBD.
)
Enter the four-digit interlock code.
5-6
Date en cours : 23 March 2005
C:\Documents and Settings\G097447\Bureau\MFF 251963782A LU WorkCentre220_Australie\05_Utilisation GB.fm
Operation
)
Press key OK to confirm.
)
With keys
or
of the navigator, select the option WITH.
) Press key OK to confirm.
Note - After each operation, the machine interlocks automatically.
SCAN TO PC
Note -
Your machine is provided with a Scan to PC key. This key activates, first of all, the
SCAN -TO - PC function, which associated with the Companion Suite Pro kit makes it possible
to send an opening notice of a scan function of a PC connected to your machine. For more
information, refer to the User Manual provided with your PC Kit (Companion Suite Pro).
5-7
Date en cours : 23 March 2005
C:\Documents and Settings\G097447\Bureau\MFF 251963782A LU WorkCentre220_Australie\05_Utilisation GB.fm
Operation
5-8
Date en cours : 23 March 2005
C:\Documents and Settings\G097447\Bureau\MFF 251963782A LU WorkCentre220_Australie\05_Utilisation GB.fm
6 MAINTENANCE
MAINTENANCE
GENERAL
To ensure the best operating conditions for your machine, it is recommended that you regularly clean
the inside.
For normal usage, please respect the following rules:
• Never use a plug that lacks an earth connection terminal to connect the product to an electrical
outlet.
• Never attempt any maintenance procedures that are not specifically described in the customer
documentation.
• Never touch a labelled area found on or near the heat roller. You can get burnt. If a sheet of
paper is wrapped around the heat roller, do not try to remove it by yourself to avoid injuries or
burns. Switch off the machine immediately, and contact your Xerox Customer Support Centre.
• Never throw toner or a toner container into an open flame. It can cause an explosion and you
can get burnt.
For more information, see Safety Notes in Before using the machine.
6-1
Date en cours : 23 March 2005
C:\Documents and Settings\G097447\Bureau\MFF 251963782A LU WorkCentre220_Australie\06_Maintenance GB.fm
Maintenance
REPLACING THE CONSUMABLES
(TONER AND DRUM )
To check the remaining capacities of the consumables:
86 OK - ADVANCED FCT / CONSUMABLES
The toner cartridge and the drum cartridge come with a chip card.
After replacing a consumable item in the printer, you need to inform the machine about its features.
For this purpose, the chip card supplied with each toner cartridge must be read by the machine each
time a new consumable item is installed.
Replacing cartridges
Replacing the toner cartridge
To replace the toner cartridge, proceed as shown below.
When the display shows:
CHANGE TONER
<OK> TO CONFIRM
)
1 - Open the printer cover.
6-2
Date en cours : 23 March 2005
C:\Documents and Settings\G097447\Bureau\MFF 251963782A LU WorkCentre220_Australie\06_Maintenance GB.fm
Maintenance
Caution - Never touch a labelled area found on or near the heat roller. You can get burnt. If a
sheet of paper is wrapped around the heat roller, do not try to remove it by yourself to avoid
injuries or burns. Switch off the machine immediately, and contact your Xerox Customer Support
Centre.
) 2 - Remove the drum/toner cartridge assembly.
Caution - Never throw toner or a toner container into an open flame.
It can cause an
explosion and you can get burntt.
)
3 - Unlock the toner cartridge by turning the blue locking clip as shown in the illustration
below.
6-3
Date en cours : 23 March 2005
C:\Documents and Settings\G097447\Bureau\MFF 251963782A LU WorkCentre220_Australie\06_Maintenance GB.fm
Maintenance
)
4 - Separate the drum cartridge from the toner cartridge.
Drum cartridge
Toner cartridge
)
5 - Remove the new toner cartridge from its box, holding it firmly in both hands.
6-4
Date en cours : 23 March 2005
C:\Documents and Settings\G097447\Bureau\MFF 251963782A LU WorkCentre220_Australie\06_Maintenance GB.fm
Maintenance
)
6 - Shake the toner cartridges alternately in the directions shown by the arrows in the
illustration below.
)
7 - Remove the protective plastic strip from the cartridge as shown below.
6-5
Date en cours : 23 March 2005
C:\Documents and Settings\G097447\Bureau\MFF 251963782A LU WorkCentre220_Australie\06_Maintenance GB.fm
Maintenance
)
8 - Insert the new toner cartridge in the drum cartridge until locked in place..
Note - Make sure not to touch the green colored drum roller located under the fold away flap of the
drum cartridge, which could cause deterioration to the print quality of your local photocopies.
Note - Do not touch the metal parts located on the side of the toner/drum cartridge set as shown below,
to prevent causing damage due to possible static electricity discharges.
Drum roller
Note -
Make sure not to touch the black colored development roller located in front of the toner
cartridge, which would cause downgrading to the print quality of your local photocopies.
Development roller
6-6
Date en cours : 23 March 2005
C:\Documents and Settings\G097447\Bureau\MFF 251963782A LU WorkCentre220_Australie\06_Maintenance GB.fm
Maintenance
)
9 - Insert the toner/drum cartridge in the printer as shown below.
)
10 - Close the printer cover pressing it carefully but firmly until it clicks into position.
)
Press OK on the scanner keypad. The display shows:
TUE 02 APR 13:39
INSERT GAUGE CARD
6-7
Date en cours : 23 March 2005
C:\Documents and Settings\G097447\Bureau\MFF 251963782A LU WorkCentre220_Australie\06_Maintenance GB.fm
Maintenance
)
Insert chip card (supplied with the toner cartridge) into the card reader ensuring that the chip is
entered as shown in the drawing below.
Green arrow
)
The following is displayed on the scanner control panel screen:
CHANGE TONER ?
YES= OK - NO= C
)
Press OK.
)
Once the chip card has been read, the display shows:
TONER OK
REMOVE CARD
) Remove the card.
Note - If the following is displayed, check that you have inserted the chip card the right way up:
CANNOT READ CARD
REMOVE CARD
Note - If the following is displayed, remove the chip card and insert it the right way up, on the green
arrow side:
ILLEGIBLE
CHANGE SIDE
6-8
Date en cours : 23 March 2005
C:\Documents and Settings\G097447\Bureau\MFF 251963782A LU WorkCentre220_Australie\06_Maintenance GB.fm
Maintenance
Replacing the drum cartridge
To replace the drum cartridge, proceed as shown below:
When the display shows:
CHANGE DRUM
<OK> TO CONFIRM
)
1 - Open the printer cover.
6-9
Date en cours : 23 March 2005
C:\Documents and Settings\G097447\Bureau\MFF 251963782A LU WorkCentre220_Australie\06_Maintenance GB.fm
Maintenance
)
2 - Remove the former toner/drum cartridge set. To preserve the environment, do not throw
the spent drum cartridge into the dustbin. Dispose of the drum cartridge according to the
local regulations in force.
Caution - Never touch a labelled area found on or near the heat roller.
You can get burnt. If a sheet
of paper is wrapped around the heat roller, do not try to remove it by yourself to avoid injuries or burns.
Switch off the machine immediately, and contact your Xerox Customer Support Centre.
)
3 - Unlock the toner cartridge by turning the blue locking clip in the direction shown in the
illustration below.
6-10
Date en cours : 23 March 2005
C:\Documents and Settings\G097447\Bureau\MFF 251963782A LU WorkCentre220_Australie\06_Maintenance GB.fm
Maintenance
)
4 - Separate the drum cartridge from the toner cartridge.
) 5 - Remove the new drum cartridge from its box, holding it firmly in both hands.
Note - Make sure not to touch the green colored drum roller located under the fold away flap
of the drum cartridge, which could cause deterioration to the print quality of your local
photocopies.
Note - Do not touch the metal parts located on the side of the toner/drum cartridge set as shown
below, to prevent causing damage due to possible static electricity discharges.
Drum roller
Note - Make sure not to touch the black colored development roller located in front of the toner
cartridge, which would cause downgrading to the print quality of your local photocopies.
Development roller
6-11
Date en cours : 23 March 2005
C:\Documents and Settings\G097447\Bureau\MFF 251963782A LU WorkCentre220_Australie\06_Maintenance GB.fm
Maintenance
)
6 - Insert the new toner cartridge in the drum cartridge until locked in place.
)
7 - Insert the toner/drum cartridge in the printer as shown below.
6-12
Date en cours : 23 March 2005
C:\Documents and Settings\G097447\Bureau\MFF 251963782A LU WorkCentre220_Australie\06_Maintenance GB.fm
Maintenance
)
8 - Close the printer cover pressing it carefully but firmly until it clicks into position.
)
9 - Press the OK key on the scanner control panel. The display shows:
TUE 02 APR 13:39
INSERT GAUGE CARD
)
10 - Insert the gauge card (supplied with the drum cartridge) into the card reader ensuring
that the chip is entered as shown in the drawing below.
Green arrow
6-13
Date en cours : 23 March 2005
C:\Documents and Settings\G097447\Bureau\MFF 251963782A LU WorkCentre220_Australie\06_Maintenance GB.fm
Maintenance
)
11 - The following is displayed on the scanner control panel screen:
CHANGE DRUM ?
YES= OK - NO= C
)
12 - Press OK.
)
13 - Once the chip card has been read, the display shows:
DRUM OK
REMOVE CARD
) 14 - Remove the card.
Note - If the following is displayed, check that you have inserted the chip card the right way up:
CANNOT READ CARD
REMOVE CARD
Note - If the following is displayed, remove your card and insert it the right way up:
ILLEGIBLE
CHANGE SIDE
CLEANING
Cleaning the scanner’s reading devices
When one or more vertical lines appear on transmitted copies, follow these steps :
)
Open the scanner cover by
pushing it backwards until held
vertically in position.
6-14
Date en cours : 23 March 2005
C:\Documents and Settings\G097447\Bureau\MFF 251963782A LU WorkCentre220_Australie\06_Maintenance GB.fm
Maintenance
)
Clean the two transparent
scanning windows with a soft,
lint-free cloth, dampened with
alcohol. Close the scanner cover.
)
Make a copy to check that the
symptoms have been cleared.
Cleaning the printer
Dust, dirt and paper debris on the outer surfaces and inside the printer can interfere with printer
performance. Clean the printer regularly.
Note - Use a soft cloth to clean the printer. Never use abrasive or corrosive detergents.
Caution - Never touch a labelled area found on or near the heat roller. You can get burnt. If a
sheet of paper is wrapped around the heat roller, do not try to remove it by yourself to avoid
injuries or burns. Switch off the machine immediately, and contact your Xerox Customer Support
Centre.
Cleaning the outside of the printer
Clean the outside of the printer with a smooth duster.
6-15
Date en cours : 23 March 2005
C:\Documents and Settings\G097447\Bureau\MFF 251963782A LU WorkCentre220_Australie\06_Maintenance GB.fm
Maintenance
Cleaning the paper feed roller
)
1 - Turn off the printer and unplug the power cord.
)
2 - Remove the drum/toner cartridge set from the machine.
)
3 - Use a soft cloth to clean the paper feed roller.
)
4 - Put the drum/tone cartridge set back in place and refer to the Replacing Cartridges paragraph,
page 6-2.
)
5 - Close the printer cover, connect the power lead and power the machine using the switch
located on the front left hand side.
Caution - Never touch a labelled area found on or near the heat roller.
You can get burnt. If a sheet
of paper is wrapped around the heat roller, do not try to remove it by yourself to avoid injuries or burns.
Switch off the machine immediately, and contact your Xerox Customer Support Centre.
6-16
Date en cours : 23 March 2005
C:\Documents and Settings\G097447\Bureau\MFF 251963782A LU WorkCentre220_Australie\06_Maintenance GB.fm
Maintenance
SERVICING
For guaranteed performance of your terminal, some maintenance work (replacing the fusing unit
and the transfer roll) has to be done on the printer approximately every 50,000 printed pages.
Please contact your supplier for this operation.
SCANNER CALIBRATION
You can perform this operation when the quality of photocopied documents is no longer
satisfactory.
80 OK - ADVANCED FCT / CALIBRATION
)
Confirm your choice by pressing the OK key.
INCIDENTS
Error messages
If the printer has one of the problems described below, the signal "On" flashes red, and you can’t
use your machine temporarily. The corresponding message is displayed on the screen.
Message
Action
CHANGE TONER
<OK> TO CONFIRM
Replace the toner cartridge.
CHANGE DRUM
<OK> TO CONFIRM
Replace the drum cartridge.
ILLEGIBLE
CHANGE SIDE
Insert your chip card the right way up.
CLOSE FRONT COVE
Close the front cover of the printer.
DRUM NEAR END
The drum is nearly worn out (10% use left).
TONER NEAR END
The toner cartridge is nearly worn out (10% capacity left).
Proceed as indicated Replacing the toner cartridge, page 6-2.
Proceed as indicated Replacing the drum cartridge, page 6-9.
6-17
Date en cours : 23 March 2005
C:\Documents and Settings\G097447\Bureau\MFF 251963782A LU WorkCentre220_Australie\06_Maintenance GB.fm
Maintenance
Message
PAPER EMPTY
Action
Install the paper tray.
Fill the tray with paper in the required size.
PAPER JAM INSIDE
Open the tray.
Remove the jammed sheet.
PAPER JAM
EXTERNAL TRAY
Open the cover.
PAPER JAM
INTERNAL TRAY
Open the cover.
PRINTER ERROR XX
Disconnect and reconnect the terminal.
Remove the jammed sheet from the print outlet.
Remove the jammed sheet from between the tray and the fusing unit.
If the problem persists, contact your supplier.
PAPER SIZE ERROR
Check paper size (A4 / LETTER / ...).
CHECK PAPER TYPE
Verify that the paper type used complies with manufacturer data
(refer to Characteristics paragraph, page 6-28).
Printer paper jam
Inside the printer
) Use the following procedure to remove any sheets of paper jammed inside the printer.
Caution - Never touch a labelled area found on or near the heat roller. You can get burnt. If a sheet
of paper is wrapped around the heat roller, do not try to remove it by yourself to avoid injuries or burns.
Switch off the machine immediately, and contact your Xerox Customer Support Centre.
)
Open the front cover of the printer.
)
Remove the toner/drum cartridge set from inside the printer.
6-18
Date en cours : 23 March 2005
C:\Documents and Settings\G097447\Bureau\MFF 251963782A LU WorkCentre220_Australie\06_Maintenance GB.fm
Maintenance
)
Remove any jammed sheets.
)
Open the rear cover of the printer until locked behind lug A.
)
Remove any jammed sheets.
A
)
Reinstall the drum/toner cartridge set (refer to Replacing Cartridges paragraph, page 6-2).
)
Correctly close the front and rear covers of the printer.
6-19
Date en cours : 23 March 2005
C:\Documents and Settings\G097447\Bureau\MFF 251963782A LU WorkCentre220_Australie\06_Maintenance GB.fm
Maintenance
Paper jam at the feeders and trays
The figures below show different type of paper jam you might experience when using your machine.
Remove any stuck sheets as shown by the arrow depending on where the paper jam occurs.
At the printer output stacker
At the paper tray
At the manual feed tray
6-20
Date en cours : 23 March 2005
C:\Documents and Settings\G097447\Bureau\MFF 251963782A LU WorkCentre220_Australie\06_Maintenance GB.fm
Maintenance
Second cassette
2
1
1
2
SCANNER INCIDENTS
Scanner paper jam
When a paper jam occurs, the following message appears on the control panel screen.
REMOVE DOCUMENT.
If jams often occur in a specific part of the unit, the latter needs to be checked, cleaned or repaired.
6-21
Date en cours : 23 March 2005
C:\Documents and Settings\G097447\Bureau\MFF 251963782A LU WorkCentre220_Australie\06_Maintenance GB.fm
Maintenance
)
Open the scanner cover.
)
Remove the jammed paper (A) without tearing it.
A
)
Then, close the scanner cover.
6-22
Date en cours : 23 March 2005
C:\Documents and Settings\G097447\Bureau\MFF 251963782A LU WorkCentre220_Australie\06_Maintenance GB.fm
Maintenance
MISCELLANEOUS INCIDENTS
At switch-on nothing appears on screen
Check that the mains cable is plugged in, and check the mains plug if necessary.
The machine does not detect the presence of your inserted document. The message READY
does not appear on the screen.
At the start and during scanning, REMOVE DOCUMENT appears on the screen.
Remove the document or press key
.
Check the thickness of the document (50 sheets of paper of 80 g/m2).
Iron out the sheets if needed.
Help the sheets along.
You receive a blank page
Make a photocopy of a document ; if it is correct then your machine is functioning normally. Call
back the subscriber and have him resend the document. It was probably sent with the sheet
inserted backwards.
6-23
Date en cours : 23 March 2005
C:\Documents and Settings\G097447\Bureau\MFF 251963782A LU WorkCentre220_Australie\06_Maintenance GB.fm
Maintenance
MACHINE PACKING AND TRANSPORTATION
Always use the original package when transporting the machine. Failure to do so could void the
warranty.
)
1 - Disconnect the machine from the mains plug.
)
2 - Remove the mains lead, the document feeder tray, the printer output tray and the paper tray;
pack in the original boxes.
)
3 - Put the machine in a plastic bag and put it in its original box with all the original wedges.
)
4 - Add all documentation (printer documents and miscellaneous CD Roms) in the box.
)
5 - Correctly close the box with tape.
6-24
Date en cours : 23 March 2005
C:\Documents and Settings\G097447\Bureau\MFF 251963782A LU WorkCentre220_Australie\06_Maintenance GB.fm
Maintenance
CHARACTERISTICS
Device type: Office color printing machine, fast operation with all Group 3 devices according to
ITU-T recommendations.
UNIT CHARACTERISTICS
Dimensions:
Width: 440 mm
Depth: 460 mm
Height: 460 mm (without stackers and 500 sheets
paper feed tray)
14 kg
220-240 V - 50-60 Hz - 4.5 A
- standby mode: less than 15 W
- wait mode: less than 75 W
- operation: 580 W (during copy) (850 W peak)
- operation: +10°C to 35°C with a maximum
difference of 10°C per hour.
Weight:
Electric power supply:
Power consumption (max. values):
Operating temperature:
- storage: +0°C to 40°C with a maximum difference
of 10°C per hour.
Operation or storage: 20% to 80% RH (without
condensation) with a maximum difference of 20%
per hour.
Width: 216 mm max.
Height: 297 mm
Thickness: 0.05 to 0.15 mm
Max capacity : sheet stack height 3 mm (ie a normal
capacity of 50 pages (80 g/m2))
A4 size
Plain paper (copier type (80 g/m2))
250 pages max. (80 g/m2)
Second paper tray : 500 pages (80 g/m2)
Scanner : 300 dpi
CIS optronics reading
Laser printing process
600 x 600 dpi
- Image : TIFF-F for black/white documents and
JPEG for color documents
*
Operating humidity :
Original document size:
Document feeder:
Reception size: (A4 size):
Reception paper:
Paper tray capacity:
Second paper tray (option):
Scanned image resolution:
Reading system:
Print type:
Printer resolution
File format:
- PDF : monochrome and color
Specifications may change for improvement without prior notice.
*
Operating humidity max: 65% RH for temperature higher than 30°C.
6-25
Date en cours : 23 March 2005
C:\Documents and Settings\G097447\Bureau\MFF 251963782A LU WorkCentre220_Australie\06_Maintenance GB.fm
CONSUMABLE
INFORMATION
For information about consumables, visit http://www.fxprinters.com
CONSUMABLE
CHARACTERISTICS
Toner cartridge:
The standard toner cartridge can produce up to
6,000 pages (when printing on A4 paper with a 5%
max. black and white ratio).
The initial toner cartridge can produce up to 2,000
pages (when printing on A4 paper with a 5% max.
black-and-white ratio).
The service life of the toner cartridge mainly
depends on the type of printed document and the
average number of pages per print operation).
Drum cartridge:
The standard drum cartridge can produce up to
20,000 pages.
The initial drum cartridge that comes with the
printer can produce up to 4,000 pages.
Various factors may influence the effective service
life of the drum cartridge, namely the environment
(temperature, humidity), the average number of
pages per print operation, the type of paper used,
etc.
LATEST
DRIVER INFORMATION
Visit our web site at http://www.fxprinters.com where you can get the latest drivers.
6-26
Date en cours : 23 March 2005
C:\Documents and Settings\G097447\Bureau\MFF 251963782A LU WorkCentre220_Australie\06_Maintenance GB.fm
Customer Response Sheet
WorkCentre 220 User Guide
(ME3411E2-1)
To improve our publications, we would appreciate your feedback regarding this guide.
Please take a few moments to complete and return this form to us.
About Yourself
1. How often do you use this guide?
[ ] Daily [ ] Weekly [ ] Monthly [
] Infrequently
2. When do you usually refer to the guide?
[ ] Doing a usual operation [ ] Using unfamiliar features
[ ] Solving a problem
3. Which part of the guide do you read frequently?
Chapter/Section/Page:
4. Where do you keep this guide?
(Optional)
Your Name:
Company or organization:
Address:
Occupation:
About the Guide
Strongly
Strongly
disagree
Neutral
agree
1. It is handy.
1
2
3
4
5
2. It is easy to read.
1
2
3
4
5
3. Titles of chapters and sections
make sense.
1
2
3
4
5
4. Information is logically placed. 1
2
3
4
5
5. Referencing is easy.
1
2
3
4
5
6. Content is easy to understand.
1
2
3
4
5
7. The step-by-step instructions
are easy to follow.
1
2
3
4
5
8. All necessary information is
included.
1
2
3
4
5
9. Illustrations aid in the
understanding of content.
1
2
3
4
5
10. The use of color is effective.
1
2
3
4
5
Other comments:
After completing this form, detach and send it to the address below.
(Please use your own envelope and postage stamp.)
Thank you for your cooperation.
Fuji Xerox Co., Ltd.
Ebina Prime Tower
2-9-50, Chuo, Ebina-shi, Kanagawa-ken
JAPAN 243-0432.
WorkCentre 220 User Guide
Fuji Xerox Co., Ltd.
Human Interface & Design Development
ME3411E2-1 (Edition
1)
May 2005
Copyright© 2005 by Fuji Xerox Co., Ltd.
Date en cours : 23 March 2005
C:\Documents and Settings\G097447\Bureau\MFF 251963782A LU WorkCentre220_Australie\99_cover03.fm
User Guide (WorkCentre 222/228)