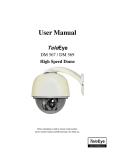
1
Manuals Page
Search Manuals
Feedback
Web
Finnigan
AQA™
[Including Navigator with =3=]
Hardware Manual
Revision C
FM101638
Manuals Page
Search Manuals
Feedback
Web
Xcalibur™ and AQA™ are trademarks of ThermoQuest Corporation. Eppendorf® is a registered trademark of EppendorfNetheler-Hinz GmbH. Microsoft® and Windows NT® are registered trademarks of Microsoft Corporation. PEEK™ is a
trademark of Victrex plc. Rheodyne® is a registered trademark of Rheodyne Inc. Swagelok® is a registered trademark of Swagelok
Corporation. Teflon® is a registered trademarks of E.I. DuPont DeNemours and Co. Tygon® is a registered trademark of Norton
Industrial Plastics. Valco® is a registered trademark of VICI Valco Instruments Co., Inc.
Technical information contained in this publication is for reference purposes only and is subject to change
without notice. Every effort has been made to supply complete and accurate information; however,
ThermoQuest Corporation assumes no responsibility and will not be liable for any errors, omissions,
damage, or loss that might result from any use of this manual or the information contained therein (even if
this information is properly followed and problems still arise).
This publication is not part of the Agreement of Sale between ThermoQuest Corporation and the purchaser
of ThermoQuest system. In the event of any conflict between the provisions of this document and those
contained in ThermoQuest Corporation’s Terms and Conditions, the provisions of the Terms and
Conditions shall govern.
Reference to System Configurations and Specifications supersede all previous information and are subject
to change without notice.
Printing History: Revision A printed in June 1999. Revision B printed in August 1999. Revision C printed in June 2000.
The products of ThermoQuest are produced under ISO 9001 accredited quality management systems.
Australia: ThermoQuest • P.O. Box 239 Rydalmere• Unit 20, Metro Centre • 38 – 46 South Street • Rydalmere, N.S.W. 2116 • [61] (02) 9898-9000
Austria: Spectronex GmbH • Bischoffgasse 26 • A-1120 Wein • [43] (01) 813 9993
Belgium: ThermoQuest BVBA • Groenenbrogerlaan 84 • B-2610 Wilrijk (Antwerpen) • [32] (03) 825 06 70
Canada: ThermoQuest Canada • 5716 Coopers Avenue, Unit 1 • Mississauga, Ontario • L4Z2E8 • [1] (905) 712-2258
France: ThermoQuest France SA • Parc Hightec Sud • 12 avenue des Tropiques • Z.A. de Courtaboeuf BP141 • F-91944 Les Ulis Cédex •
[33] (01) 69 18 88 10
Germany: ThermoQuest Analytische Systeme GmbH • Boschring 12 • D-63329 Egelsbach • [49] (06103) 408 0
Italy: ThermoQuest Italia S.p.A. • Strada Rivoltana • I-20090 Rodano (Milano) • [39] (02) 95 059 1
Japan: ThermoQuest K.K. • Nishi-Shinjuku Toyokuni Building, 3rd Floor • 2-5-8 Hatsudai, Shibuya-ku • Tokyo 151-0061 • [81] (03) 3372-3001
Japan: ThermoQuest K.K. • Esaka Grand Building • 2-3-1 Esaka-cho, Suita City • Osaka 564-0063 • [81] (06) 6387-6681
Netherlands: ThermoQuest BV • Druivenstraat 33 • NL – 4816 KB Breda • [31] (076) 587 8722
P.R. China: ThermoQuest China • Room 912-916, Ping-an Mansion. • No. 23, Jin Rong Street • Xi Cheng District • Beijing 100032 • [86] (010) 6621 0839
Spain: ThermoQuest SA • Acer 30 – 32 • Edificio Sertram – Planta 2, Modulo 3 • ES-08038 Barcelona • [34] (093) 223 0918
Spain: ThermoQuest SA • Avenida de Valdelaparra 27 • Edificio Alcor – Planta 2a • ES-28108 Alcobendas (Madrid) • [34] (091) 657 4930
Sweden: ThermoQuest AB • Pyramidbacken 3 • S-141 75 Kungens Kurva (Stockholm) • [46] (08) 680 01 01
Switzerland: Spectronex AG • Rotterdam-Str 21 • Basel • CH-4002 • Switzerland • [41] (061) 331 6020
United Kingdom: ThermoQuest Ltd. • Paradise • Hemel Hempstead • Herts HP2 4TG • [44] (01442) 233 555
U.S.A.: ThermoQuest LC and LC/MS Division • 355 River Oaks Parkway • San Jose, CA 95134-1991 • [1] (408) 965-6000
Notes: The country code is enclosed in square brackets [ ]. The city code or area code is enclosed in parenthesis ( ). For countries other than the U.S.A.,
when you are dialing from within the specified country, dial the 0 of the city code. For countries other than Italy, when you are dialing from outside the country,
do not dial the 0 of the city code.
Published by Technical Publications, ThermoQuest, Manchester, UK.
Copyright© 2000 ThermoQuest Corporation, a private subsidiary of Thermo Electron Corporation. All rights reserved. Printed in the UK.
READER SURVEY
Finnigan AQA Hardware Manual
Revision C
P/N FM101638
Please help us improve the quality of our documentation by completing and returning this survey.
Circle one number for each of the statements below.
The manual is well organized.
The manual is clearly written.
The manual contains all the information I need.
The instructions are easy to follow.
The instructions are complete.
The technical information is easy to understand.
The figures are helpful.
Strongly
Agree
Agree
Neutral
Disagree
Strongly
Disagree
1
1
1
1
1
1
1
2
2
2
2
2
2
2
3
3
3
3
3
3
3
4
4
4
4
4
4
4
5
5
5
5
5
5
5
If you would like to make additional comments, please do. (Attach additional sheets if necessary.)
fold
___________________________________________________________________________________________
___________________________________________________________________________________________
___________________________________________________________________________________________
Customer Registration Card
Register now…and receive all the privileges associated with being a ThermoQuest / Finnigan product user
including customer support, application reports, technical reports, and the ThermoQuest / Finnigan publication,
Analytical News.
MY ORGANIZATION IS: (Check one only)
❑ Commercial (for profit) lab
❑ Government lab
❑ Hospital / Clinic
❑ Industrial Lab
❑ Research Institute
❑ University / College
❑ Veterinary
❑ Other ___________________________________
fold
JOB FUNCTION: (Check one only)
❑ Administration
❑ Lab Management
❑ Operator
❑ Other ________________________________________
MY PRIMARY APPLICATION IS: (Check one only)
❑ Analytical
❑ Biomedical
❑ Clinical / Toxicology
❑ Energy
❑ Environmental
❑ Food / Agriculture
❑ Forensic / Toxicology
❑ Pharmaceutical
❑ Research / Education
❑ Other ____________________________________
Name ________________________________________________________
Title _________________________________________________________
Company ______________________________________________________
Address _______________________________________________________
City/State/Postal Code ____________________________________________
Country _______________________________________________________
Telephone ______________________________________ Ext. ___________
Finnigan AQA Serial # __________________ Date purchased ______________
Please fold this sheet closed, stamp it, and drop it in the mail.
Thank You!
Manuals Page
Search Manuals
Feedback
Web
Technical Publications Manager
ThermoQuest
Crewe Road
Wythenshawe
Manchester
M23 9BE
UK
Manuals Page
Search Manuals
Feedback
Web
MassLab Ltd
Crewe Road
Wythenshawe
Manchester M23 9BE
UK
Tel: + 44 (161) 946 1060
Fax: + 44 (161) 998 9882
Web: www.finnigan.co.uk
EU DECLARATION OF CONFORMITY
The EU Directives covered by this Declaration
89/336/EEC
73/23/EEC
93/68/EEC
Electromagnetic Compatibility Directive, amended by 92/31/EEC & 93/68/EEC
Low Voltage Equipment Directive, amended by 93/68/EEC
CE Marking Directive
The Products covered by this Declaration
The Finnigan AQA (formerly Navigator II) mass spectrometer for LC/MS.
The Basis on which Conformity is being Declared
The products identified above comply with the EU directive 89/336/EEC by meeting the following standards:
EN55022 Class A:1994
EN50082-1:1992
FCC Part 15
Limits and methods of measurement of radio interference
characteristics of information technology equipment.
Electromagnetic compatibility - Generic immunity standard.
Part 1. Residential, commercial and light industry.
SubPart B Class A (Digital Devices). FCC EMC emissions
standard for USA.
The products identified above comply with the EU directive 73/23/EEC by meeting the following standard:
EN61010-1:1993
Safety requirements for electrical equipment for measurement,
control and laboratory use.
The technical documentation is available for inspection by the relevant enforcement authorities.
The CE mark was first applied in 1998.
Signed:
Dr W.E. McKnight
Authority:
Managing Director
Date:
May 1999
ATTENTION!
The attention of the purchaser, installer and user is drawn to the special measures and limitations to use which must be observed when the
product is taken into service to maintain compliance with the above directives. Details of these measures are contained in the User Manual.
ISO 9001
Accredited 925584
Manuals Page
Search Manuals
Feedback
Web
Manuals Page
Search Manuals
Feedback
Web
______________________________________________________________________ Contents
Contents
1. Read This First .............................................................................................................................v
Changes to the Manual and Online Help ...............................................................................................vi
Abbreviations....................................................................................................................................... vii
Typographical Conventions ...................................................................................................................xi
Data Input.............................................................................................................................xi
Notes, Cautions, and Warnings.......................................................................................... xii
Topic Headings ................................................................................................................. xiii
Reply Card ...........................................................................................................................................xiv
1. Introducing the Finnigan AQA................................................................................................ 1-i
1.1
Introduction ............................................................................................................................. 1-1
1.2
System Overview..................................................................................................................... 1-2
What is Mass Detection? .................................................................................................. 1-4
Exterior Features of the Finnigan AQA............................................................................ 1-5
1.3
The Source – an Introduction to API Techniques ................................................................... 1-9
Electrospray .................................................................................................................... 1-10
Atmospheric Pressure Chemical Ionization.................................................................... 1-15
Source Fragmentation ..................................................................................................... 1-18
Source Voltage Ramping ................................................................................................ 1-20
Polarity Switching........................................................................................................... 1-21
Application of API Techniques....................................................................................... 1-22
1.4
The Self Cleaning Source: AQA Flow .................................................................................. 1-25
Introduction..................................................................................................................... 1-25
Functional Description.................................................................................................... 1-26
1.5
The Sample Infusion System................................................................................................. 1-27
Introduction..................................................................................................................... 1-27
Functional Description.................................................................................................... 1-27
1.6
The Mass Analyzer and Detector .......................................................................................... 1-29
1.7
The Vacuum System.............................................................................................................. 1-30
1.8
The Data System.................................................................................................................... 1-31
Software .......................................................................................................................... 1-31
_______________________ Finnigan AQA Hardware Manual ___________________________
i
Manuals Page
Search Manuals
Feedback
Web
Contents _____________________________________________________________________
Raw Data .........................................................................................................................1-33
Raw Data Types...............................................................................................................1-34
2. Changing Ionization Modes ..................................................................................................... 2-i
2.1
Introduction ..............................................................................................................................2-1
2.2
Removal of APCI.....................................................................................................................2-2
2.3
Setup for ESI ............................................................................................................................2-3
2.4
Removal of ESI ........................................................................................................................2-6
2.5
Setup for APCI.........................................................................................................................2-8
3. LC/MS and AQA Flow ............................................................................................................. 3-i
3.1
Introduction ..............................................................................................................................3-1
3.2
LC/MS Considerations.............................................................................................................3-2
Flow Rates .........................................................................................................................3-2
HPLC Solvents and Mobile Phase Additives ....................................................................3-3
3.3
Setting up AQA Flow...............................................................................................................3-7
3.4
Flow Splitting.........................................................................................................................3-12
4. AQA Sample Infusion System.................................................................................................. 4-i
4.1
Introduction ..............................................................................................................................4-1
4.2
Overview ..................................................................................................................................4-2
4.3
Setting up the AQA Sample Infusion System..........................................................................4-3
5. Routine and Preventive Maintenance ..................................................................................... 5-i
5.1
Introduction ..............................................................................................................................5-1
5.2
Maintenance Schedule .............................................................................................................5-2
5.3
The Electrospray and APCI Inserts..........................................................................................5-3
Flushing the Inserts............................................................................................................5-3
Cleaning the ESI Insert and Ceramic Gas Nozzle .............................................................5-3
Replacing the Inserts .........................................................................................................5-5
ii __________________________ Finnigan AQA Hardware Manual
______________________
Manuals Page
Search Manuals
Feedback
Web
______________________________________________________________________ Contents
5.4
The Source Block .................................................................................................................... 5-6
Cleaning the Entrance Cone.............................................................................................. 5-6
Cleaning the Source Block................................................................................................ 5-7
5.5
The Hexapole RF Lens.......................................................................................................... 5-14
Cleaning the Hexapole RF Lens ..................................................................................... 5-14
5.6
The Probe .............................................................................................................................. 5-20
5.7
The Rotary Pump................................................................................................................... 5-21
Checking the Rotary Pump Oil Level and Color ............................................................ 5-21
Changing the Rotary Pump Oil....................................................................................... 5-23
Replacing the Foreline Trap Pellets ................................................................................ 5-24
5.8
The Rear Panel Fan Filters .................................................................................................... 5-25
6. Troubleshooting......................................................................................................................... 6-i
6.1
Introduction ............................................................................................................................. 6-1
6.2
Troubleshooting Tables ........................................................................................................... 6-2
General Problems.............................................................................................................. 6-3
Low Sensitivity Problems ................................................................................................. 6-5
Inlet System / Chromatography Problems ...................................................................... 6-11
Spectral Problems ........................................................................................................... 6-13
Calibration Problems ...................................................................................................... 6-14
Tuning Problems............................................................................................................. 6-15
Communication Problems............................................................................................... 6-16
Vacuum Problems........................................................................................................... 6-17
MS Resolution Problems ................................................................................................ 6-18
6.3
Resolving Common Problems ............................................................................................... 6-19
Checking Finnigan AQA Power Supply Requirements.................................................. 6-19
Rebooting the PC ............................................................................................................ 6-19
Running Finnigan AQA Tuning Diagnostics.................................................................. 6-20
6.4
HPLC System Troubleshooting............................................................................................. 6-22
Buffers and Additives ..................................................................................................... 6-22
Mobile Phase Reservoir .................................................................................................. 6-22
Bubble Problems and Degassing..................................................................................... 6-22
Contamination in the LC System .................................................................................... 6-23
Tubing and Fittings ......................................................................................................... 6-23
Injection Valves .............................................................................................................. 6-25
UV Detectors .................................................................................................................. 6-25
Preventative Maintenance and Spares............................................................................. 6-27
_______________________ Finnigan AQA Hardware Manual __________________________ iii
Manuals Page
Search Manuals
Feedback
Web
Contents _____________________________________________________________________
7. Shutting Down and Restarting the System ............................................................................. 7-i
7.1
Introduction ..............................................................................................................................7-1
7.2
Instrument Standby and Shutdown ..........................................................................................7-2
In Between Analytical Runs ..............................................................................................7-2
Up to Two Weeks ..............................................................................................................7-2
Two Weeks or More ..........................................................................................................7-3
7.3
Restarting the System...............................................................................................................7-4
Pre-switch on Checklist .....................................................................................................7-4
System Start-up Procedure ................................................................................................7-5
Pumping Down the Finnigan AQA ...................................................................................7-5
8. Consumables and Spares.......................................................................................................... 8-i
8.1
Introduction ..............................................................................................................................8-1
8.2
Consumables ............................................................................................................................8-2
Consumables Kit - FM100970...........................................................................................8-2
8.3
Spares .......................................................................................................................................8-5
iv__________________________ Finnigan AQA Hardware Manual
______________________
Manuals Page
Search Manuals
Feedback
Web
1. Read This First
Welcome to the Finnigan AQA LC/MS system!
The Finnigan AQA Hardware Manual provides you with a complete
description of the Finnigan AQA MS detector and its operation. It includes
step-by-step instructions on changing ionization modes, setting up AQA
flow and the sample infusion system, and routine maintenance procedures.
Note. The information contained within this manual can also be applied to
the Navigator with =3= mass spectrometer. However, the reader should be
aware that all text, examples and Figures refer only to the Finnigan AQA
for the purpose of simplification.
The Finnigan AQA Hardware Manual includes the following chapters:
Chapter 1: Introducing the Finnigan AQA provides an overview of each
part of the Finnigan AQA MS detector. This includes the ionization modes,
the source, the mass analyzer and detector, the sample infusion system,
AQA flow, and the data system.
Chapter 2: Changing Ionization Modes describes how to change the
ionization mode; that is, removing the existing ionization mode and setting
up a new one.
Chapter 3: LC/MS and AQA Flow describes how to set up AQA flow. It
describes the LC/MS factors to be taken into account when using Finnigan
AQA.
Chapter 4: AQA Sample Infusion System describes how to set up the
AQA sample infusion system.
Chapter 5: Routine and Preventive Maintenance provides details of the
maintenance tasks which must be performed to keep the Finnigan AQA in
optimum condition.
Chapter 6: Troubleshooting helps you to diagnose and resolve problems
that may occur from time-to-time with the Finnigan AQA.
Chapter 7: Shutting down and Restarting the System describes how to
shut down the system for both short and long periods. It also describes how
to restart the system following a long-term shut down.
Chapter 8: Consumables and Spares lists the parts that may be necessary
in the course of working with and maintaining the Finnigan AQA MS
detector.
_______________________ Finnigan AQA Hardware Manual __________________________
v
Manuals Page
Search Manuals
Feedback
Web
Read This First
Changes to the Manual and Online Help ____________________________________________
Changes to the Manual and
Online Help
To suggest changes to this manual or the online Help, please send your
comments to:
Technical Publications Manager
ThermoQuest
Crewe Road
Wythenshawe
Manchester
M23 9BE
UK
You are encouraged to report errors or omissions in the text or index.
Thank you!
vi__________________________ Finnigan AQA Hardware Manual
______________________
Manuals Page
Search Manuals
Feedback
Web
Read This First
__________________________________________________________________ Abbreviations
Abbreviations
The following abbreviations are used in this and other Finnigan AQA
manuals and in the online Help.
A
ampere
ac
alternating current
ADC
analog-to-digital converter
amu
atomic mass unit
AP
acquisition processor
APCI
atmospheric pressure chemical ionization
API
atmospheric pressure ionization
ASCII
American Standard Code for Information Interchange
b
bit
B
byte (8 b)
baud rate
data transmission speed in events per second
°C
degrees Celsius
cfm
cubic feet per minute
CD
compact disc
CD-ROM
compact disc read-only memory
CI
chemical ionization
CIF
Carriage Insurance Freight
CIP
Carriage and Insurance Paid To
cm
centimeter
cm3
cubic centimeter
CPU
central processing unit (of a computer)
CRM
consecutive reaction monitoring
<Ctrl>
control key on the terminal keyboard
d
depth
Da
dalton
DAC
digital-to-analog converter
dc
direct current
DDS
direct digital synthesizer
DS
data system
DSP
digital signal processor
EI
electron ionization
_______________________ Finnigan AQA Hardware Manual _________________________
vii
Manuals Page
Search Manuals
Feedback
Web
Read This First
Abbreviations _________________________________________________________________
<Enter>
<Enter> key on the terminal keyboard
EMC
electromagnetic compatibility
ESD
electrostatic discharge
ESI
electrospray ionization
eV
electron volt
f
femto (10-15)
°F
degrees Fahrenheit
FID
Flame Ionization Detector
FOB
Free on Board
FPD
Flame Photometric Detector
ft
foot
FTP
file transfer protocol
g
gram
G
giga (109)
GC
gas chromatograph
GC/MS
gas chromatograph / mass spectrometer
GND
electrical ground
GPIB
general-purpose interface bus
GUI
graphical user interface
h
height
h
hour
HPLC
high-performance liquid chromatograph
HV
high voltage
Hz
hertz (cycles per second)
ICISä
Interactive Chemical Information System
ICLä
Instrument Control Languageä
IEC
International Electrotechnical Commission
IEEE
Institute of Electrical and Electronics Engineers
in.
inch
I/O
input/output
k
kilo (103, 1000)
K
kilo (210, 1024)
kg
kilogram
l
length
viii_________________________ Finnigan AQA Hardware Manual
______________________
Manuals Page
Search Manuals
Feedback
Web
Read This First
__________________________________________________________________ Abbreviations
L
liter
LAN
local area network
lb
pound
LC
liquid chromatograph
LC/MS
liquid chromatograph / mass spectrometer
LED
light-emitting diode
m
meter
m
milli (10-3)
M
mega (106)
M+
molecular ion
µ
micro (10-6)
min
minute
mL
milliliter
mm
millimeter
MS
scan power: MS1
MS/MS
scan power: MS2
MSn
scan power: MSn, n = 1 through 10
m/z
mass-to-charge ratio
n
nano (10-9)
NCBI
National Center for Biotechnology Information (USA)
NIST
National Institute of Standards and Technology
Ω
ohm
p
pico (10-12)
Pa
pascal
PC
personal computer
PCB
printed circuit board
PID
Photo Ionization Detector
PMD
Photo Multiplier Detector
PMT
Photo Multiplier Tube
P/N
part number
P/P
peak-to-peak voltage
ppm
parts per million
psig
pounds per square inch, gauge
RAM
random access memory
_______________________ Finnigan AQA Hardware Manual __________________________ ix
Manuals Page
Search Manuals
Feedback
Web
Read This First
Abbreviations _________________________________________________________________
<Return>
<Return> key on the terminal keyboard
RF
radio frequency
RMS
root mean square
ROM
read-only memory
RS232
industry standard for serial communications
s
second
SCSI
small computer system interface
SIM
selected ion monitoring
solids probe
direct insertion probe
TIC
total ion current
TCP/IP
transmission control protocol / Internet protocol
Torr
torr
u
atomic mass unit
URL
uniform resource locator
V
volt
V ac
volts alternating current
V dc
volts direct current
VGA
Video Graphics Array
w
width
W
Watt
WWW
World Wide Web
Note. Exponents are written as superscripts. In the corresponding online
Help, exponents are written with a caret (^) or with e notation because of
design constraints in the online Help. For example:
MSn (in this manual)
MS^n (in the online Help)
105 (in this manual)
10^5 (in the online Help)
x __________________________ Finnigan AQA Hardware Manual
______________________
Manuals Page
Search Manuals
Feedback
Web
Read This First
_______________________________________________________ Typographical Conventions
Typographical Conventions
Typographical conventions have been established for ThermoQuest manuals
for the following:
•
Data input
•
Notes, Cautions, and WARNINGS
•
Topic headings
Data Input
Throughout this manual, the following conventions indicate data input and
output via the computer:
•
Prompts and messages displayed on the screen are represented in this
manual by capitalizing the initial letter of each word and italicizing each
word.
•
Input that is to be entered by keyboard or buttons that are to be clicked
on by the mouse is represented in bold face letters. (Titles of topics,
chapters, and manuals also appear in bold face letters.)
•
For brevity, expressions such as “choose File | Directories” are used
rather than “pull down the File menu and choose Directories.”
•
Any command enclosed in angle brackets < > represents a single
keystroke. For example, “press <F1>” means press the key labeled F1.
•
Any command that requires pressing two or more keys simultaneously
is shown with a hyphen connecting the keys. For example, “press
<Shift>-<F1>” means depress and hold the <Shift> key and then press
the <F1> key.
_______________________ Finnigan AQA Hardware Manual __________________________ xi
Manuals Page
Search Manuals
Feedback
Web
Read This First
Typographical Conventions_______________________________________________________
Notes, Cautions, and Warnings
Notes, Cautions, and WARNINGS are displayed in boxes such as the one
below.
Note. Boxes such as this are used to display Notes, Cautions, and
WARNINGS.
A Note contains information that can affect the quality of your data. In
addition, notes often contain information that you may need if you are
having trouble.
A Caution contains information necessary to protect your instrument from
damage.
A WARNING describes hazards to human beings.
xii _________________________ Finnigan AQA Hardware Manual
______________________
Manuals Page
Search Manuals
Feedback
Web
Read This First
_______________________________________________________ Typographical Conventions
Topic Headings
The following headings are used to show the organization of topics within a
chapter:
Chapter 1
Chapter Name
1.1 Second Level Topics
Third Level Topics
Fourth Level Topics
Fifth Level Topics
_______________________ Finnigan AQA Hardware Manual _________________________ xiii
Manuals Page
Search Manuals
Feedback
Web
Read This First
Reply Card ___________________________________________________________________
Reply Card
Finnigan AQA manuals contain a Reader Survey card located at the front of
each manual.
A message on the Reader Survey card asks the user to fill out and return the
card after he or she has had an opportunity to use the manual. The Reader
Survey card has two functions. Firstly, it allows the user to tell
ThermoQuest what he or she does and doesn’t like about the manual.
Secondly, when the user returns the card, he or she is registered and placed
on the ThermoQuest mailing list. Once registered, the user will receive
ThermoQuest's newsletter Analytical News and will be notified of events of
interest, such as user meetings.
xiv
________________________ Finnigan AQA Hardware Manual ______________________
Manuals Page
Search Manuals
Feedback
Web
Chapter 1
1. Introducing the Finnigan AQA
1. Contents...................................................................................................................................... 1-i
1.1
Introduction ............................................................................................................................. 1-1
1.2
System Overview..................................................................................................................... 1-2
What is Mass Detection? .................................................................................................. 1-4
Exterior Features of the Finnigan AQA............................................................................ 1-5
1.3
The Source – an Introduction to API Techniques ................................................................... 1-9
Electrospray .................................................................................................................... 1-10
Atmospheric Pressure Chemical Ionization.................................................................... 1-15
Source Fragmentation ..................................................................................................... 1-18
Source Voltage Ramping ................................................................................................ 1-20
Polarity Switching........................................................................................................... 1-21
Application of API Techniques ...................................................................................... 1-22
1.4
The Self Cleaning Source: AQA Flow.................................................................................. 1-25
Introduction..................................................................................................................... 1-25
Functional Description.................................................................................................... 1-26
1.5
The Sample Infusion System................................................................................................. 1-27
Introduction..................................................................................................................... 1-27
Functional Description.................................................................................................... 1-27
1.6
The Mass Analyzer and Detector .......................................................................................... 1-29
1.7
The Vacuum System.............................................................................................................. 1-30
1.8
The Data System.................................................................................................................... 1-31
Software .......................................................................................................................... 1-31
Raw Data......................................................................................................................... 1-33
Raw Data Types.............................................................................................................. 1-34
_______________________ Finnigan AQA Hardware Manual _________________________ 1-i
Manuals Page
Search Manuals
Feedback
Web
Introducing the Finnigan AQA
Contents _____________________________________________________________________
1-ii ________________________ Finnigan AQA Hardware Manual
______________________
Manuals Page
Search Manuals
Feedback
Web
Introducing the Finnigan AQA
____________________________________________________________________ Introduction
1.1 Introduction
The Finnigan AQA™ MS detector has been specifically designed and
engineered for liquid chromatographic detection using Atmospheric
Pressure Ionization (API) and Mass Spectrometry (MS) technology. These
technologies can provide sensitive and selective detection of organic
molecules.
Interfacing High Performance Liquid Chromatography (HPLC or LC) and
MS provides the separation scientist with one of the most powerful
analytical tools available. Both LC and MS have developed to a point
whereby they represent two of the most important techniques in
characterizing and detecting organic compounds. Although the potential
benefits of interfacing LC to MS have been clearly recognized for many
years, producing a truly automated ‘connect and use’ interface has proven to
be a challenging task.
Atmospheric Pressure Ionization (API) techniques now provide highly
sensitive detection using conventional to capillary LC flow rates on benchtop MS detector systems. LC/MS works with typical solvent compositions,
whether the separation is achieved by isocratic or by gradient elution.
Historically, LC/MS has been compatible only with volatile buffer systems
using modifiers such as trifluoroacetic acid, formic acid and acetic acid.
Phosphate buffers, although extensively used in LC separations, were not
suited to LC/MS due to rapid blocking of the ion sampling region caused by
the deposition of involatile phosphate salts. The self-cleaning AQA API
source allows for extended periods of operation in LC/MS with
chromatographic buffers such as phosphates or ion pairing agents and
samples in dirty matrices.
API using Electrospray (ESI) or Atmospheric Pressure Chemical Ionization
(APCI) interfaces has proved to be invaluable in meeting sensitivity
requirements in quantitative methods. It can also provide structural
information, which is complementary to techniques such as NMR and infra
red spectroscopy.
This introduction focuses on the principal components of the system.
_______________________ Finnigan AQA Hardware Manual ________________________
1-1
Manuals Page
Search Manuals
Feedback
Web
Introducing the Finnigan AQA
System Overview ______________________________________________________________
1.2 System Overview
The Finnigan AQA MS detector is an integral part of the LC detection
system. Key points of the system are:
•
The sample is introduced into the ion source using an LC system,
possibly through a column.
•
In an API MS detector, the part of the source where ionization takes
place is held at atmospheric pressure, giving rise to the term
Atmospheric Pressure Ionization (API).
•
In ESI, the sample is ionized in the liquid phase, whilst in APCI,
ionization occurs in the gas phase. In both cases, efficient desolvation is
needed to remove the solvents from the sample.
•
Ions, now in the gas phase, are passed through the mass analyzer and are
collected at the detector.
•
The detected signal is sent to the data system and stored ready for
processing.
LC System
Sample
introduction
LC Column
Separation
Ion Source
Ionization &
transmission
Mass Analyzer
Sorting of ions
Detector
Detection
of ions
Turbomolecular
& rotary pumps
Data System
Windows NT
Molecular weight information
Structural information
Positive identification
Quantitative information
Figure 1-1. The key components of the Finnigan AQA API LC
detection system
1-2 ________________________ Finnigan AQA Hardware Manual
______________________
Manuals Page
Search Manuals
Feedback
Web
Introducing the Finnigan AQA
_______________________________________________________________ System Overview
The main features of the Finnigan AQA MS detector are:
•
Dual ESI/APCI orthogonal probe
•
Self-cleaning API-LC/MS interface
•
Flow-focused source, eliminating the need for electrostatic focusing
Detector
Quadrupole
mass analyzer
Turbomolecular
pump
Hexapole
RF lens
Turbomolecular
pump
Exit cone
Rotary
pump
Flow disrupter pin
Flowfocusing
region
Entrance cone
From HPLC
AQA flow
Orthogonal sample introduction probe
Figure 1-2. Schematic diagram of the Finnigan AQA API inlet, analyzer
and detector system
The LC eluent is ionized at the API probe with the resulting ions flowfocused into a hexapole RF lens. The quadrupole mass analyzer filters the
ions before detection.
_______________________ Finnigan AQA Hardware Manual ________________________
1-3
Manuals Page
Search Manuals
Feedback
Web
Introducing the Finnigan AQA
System Overview ______________________________________________________________
What is Mass Detection?
Mass detection is a very powerful analytical technique used in a number of
fields including:
•
Identification of unknown compounds
•
Quantitation of known compounds
•
Determination of chemical structure
The basic function of an MS detector is to measure the mass-to-charge ratio
of ions.
The unit of mass used is the Dalton (Da). One Dalton is equal to 1/12 of the
mass of a single atom of carbon-12. This follows the accepted convention
that an atom of carbon-12 has exactly 12 atomic mass units (amu). The MS
detector does not directly measure molecular mass but the mass-to-charge
ratio of the ions. Electrical charge is a quantized property and so can exist
only as an integer; that is, 1, 2, 3 and so on. The unit of charge used here (z)
is that which is on an electron (negative) or a proton (positive). Therefore,
the mass-to-charge ratio measured can be denoted by m/z. Most ions
encountered in mass detection have just one charge. In this case, the massto-charge ratio is often spoken of as the “mass” of the ion.
1-4 ________________________ Finnigan AQA Hardware Manual
______________________
Manuals Page
Search Manuals
Feedback
Web
Introducing the Finnigan AQA
_______________________________________________________________ System Overview
Exterior Features of the Finnigan AQA
This section highlights the exterior features of the Finnigan AQA. The parts
labeled here may be referred to in later chapters of this manual or other
manuals supplied with the Finnigan AQA.
status light
panel
Figure 1-3. Front view of the Finnigan AQA
Figure 1-3 shows the front view of the Finnigan AQA. The main feature is
the status light panel.
vent
source open
vacuum
operate
Figure 1-4. The Finnigan AQA status light panel
The status light panel, shown in Figure 1-4, gives an indication of the status
of the instrument. The panel consists of four lights: vent, source open,
vacuum, and operate.
_______________________ Finnigan AQA Hardware Manual ________________________
1-5
Manuals Page
Search Manuals
Feedback
Web
Introducing the Finnigan AQA
System Overview ______________________________________________________________
Table 1-1.
Instrument status lights
instrument status
Vent light
Source Open
light
Vacuum light
Operate light
vented
green
off
off
off
venting
flashing green
off
off
off
pumping down
off
off
flashing green
off
under vacuum (above
vacuum trip)
off
off
amber
off
under vacuum (ready for
use)
off
off
green
off
Operate On (Finnigan
AQA in use)
off
off
green
green
source enclosure open
(Operate On)
off
flashing amber
green
amber
source enclosure open
(Operate Off)
off
flashing amber
green
off
The vacuum trip is the pressure below which it is safe to switch on the
voltages in the source. When the instrument is functioning normally, the
vacuum light will go from flashing green to solid green and Operate can be
switched On. If the pressure in the instrument rises above the operating
pressure, the vacuum light turns amber to indicate that the pressure is above
a safe level. See the chapter Shutting Down and Restarting the System for
information on pumping down the Finnigan AQA.
1-6 ________________________ Finnigan AQA Hardware Manual
______________________
Manuals Page
Search Manuals
Feedback
Web
Introducing the Finnigan AQA
_______________________________________________________________ System Overview
Figure 1-5 shows the front view of the Finnigan AQA with the doors open.
The source enclosure and AQA reservoir are now visible.
source
enclosure
AQA
reservoir
Figure 1-5. Front view of the Finnigan AQA (doors open)
_______________________ Finnigan AQA Hardware Manual ________________________
1-7
Manuals Page
Search Manuals
Feedback
Web
Introducing the Finnigan AQA
System Overview ______________________________________________________________
Figure 1-6 is a schematic of the rear view of the Finnigan AQA.
LC/NMR/MS
ANALOGUE OUT
Fan
Contact closure
and
analog inputs
To PC
AQA
WATER
IN GAS INLET
BACKING
EXHAUST
WATER
OUT GAS INLET
COM 2
PC LINK
ROTARY PUMP
6A MAX
Finnigan AQA
SOURCE
COM 1
USER I/O
SUPPLY INLET
RATING:
To rotary
Gas inlet to
Power
pump
pressurize
To rotary
switch
inlet via
AQA reservoir
pump inlet
foreline
Gas inlet for
Rotary pump
trap
LC exhaust
nebulizer and
power
from API
sheath gas
source
To and from
water chiller
Figure 1-6. Rear view of the Finnigan AQA
1-8 ________________________ Finnigan AQA Hardware Manual
______________________
Navigator
power
Manuals Page
Search Manuals
Feedback
Web
Introducing the Finnigan AQA
_______________________________________ The Source – an Introduction to API Techniques
1.3 The Source – an Introduction to
API Techniques
The source, or interface, performs four main functions:
•
Separates the analytes from the solvent and buffer systems used in LC
•
Ionizes the analyte molecules
•
Allows efficient transfer of ions into the mass analyzer for detection
LC eluent enters the source through the orthogonal sample introduction
probe. The primary objective of an orthogonal probe is to direct any
involatile components present in the LC eluent, such as those from buffers,
ion pairing agents or matrices, away from the entrance orifice. Under
operating conditions, however, both the sample ions and the charged liquid
droplets (containing any involatile components if they are present) are
deflected by the electric field towards the entrance orifice. This leads to a
gradual build up of involatiles and a concomitant loss in sensitivity with
time. The self-cleaning AQA source delivers a constant, low flow of solvent
(the AQA flow) to the edge of the inlet orifice helping to prevent a build up
of involatiles during an LC/MS run.
The sample ions enter the flow-focusing region of the source through the
entrance cone. Flow-focusing has been designed to eliminate the need for
electrostatic lenses as a means of efficient extraction of ions into the mass
analyzer. The source chamber between the entrance and exit cones is
designed such that the gas flow is disrupted after passing through the
entrance orifice (see Figure 1-7). This has the effect of increasing the
number of ions in the region adjacent to the exit cone orifice, which in turn
increases the ion transmission efficiency through the exit cone and into the
mass analyzer. The entire flow-focusing region is held at the same electric
potential, forming a field-free region.
_______________________ Finnigan AQA Hardware Manual ________________________
1-9
Manuals Page
Search Manuals
Feedback
Web
Introducing the Finnigan AQA
The Source – an Introduction to API Techniques ______________________________________
To the mass
analyzer
Exit cone
Rotary pump
Flow disrupter pin
Entrance cone
AQA flow
From HPLC
Orthogonal sample introduction probe
Figure 1-7. Schematic of the Finnigan AQA source showing the selfcleaning AQA flow
Two types of API are commonly encountered. These are Electrospray
Ionization (ESI) and Atmospheric Pressure Chemical Ionization (APCI).
The following sections discuss the mechanism of ion generation in each.
Electrospray
Electrospray Ionization (ESI) is regarded as a soft ionization technique
providing a sensitive means of analyzing a wide range of polar molecules.
Since the first combined ESI LC/MS results were announced in 1984, and
its first application to protein analysis four years later, the technique has
become an established analytical tool in separation science.
Electrospray ionization applied to smaller molecules up to 1000 Daltons in
molecular mass, results in either a protonated, [M+H]+ (see Figure 1-8) or
deprotonated, [M-H]-, molecule. Choice of ionization mode is governed by
the functional chemistry of the molecule under investigation. In ESI,
fragmentation is generally not apparent, however increased source voltages
can induce fragmentation to provide structural information.
1-10
______________________ Finnigan AQA Hardware Manual ______________________
Manuals Page
Search Manuals
Feedback
Web
Introducing the Finnigan AQA
_______________________________________ The Source – an Introduction to API Techniques
240
100
OH
NH tBu
HO
%
HO
Chemical structure of salbutamol,
(molecular weight 239)
241
0
60
80
100
120
140
160
180
200
220
240
260
280
m/z
300
Figure 1-8. Electrospray mass spectrum of salbutamol in positive ion
mode
The base peak at m/z 240 (see Figure 1-8) corresponds to the protonated
salbutamol molecule. It is notable that ESI results in a prominent base peak
with minimal fragmentation, quite dissimilar from the results often achieved
with GC/MS.
Mechanism of Ion Generation
Electrospray ionization operates by the process of emission of ions from a
droplet into the gas phase, a process termed Ion Evaporation. A solvent is
pumped through a stainless steel insert capillary that carries a high potential,
typically 3 to 5 kV (see Figure 1-9). The strong electric field generated by
this potential causes the solvent to be sprayed from the end of the insert
capillary (hence electrospray), producing highly charged droplets. As the
solvent is removed by the desolvation process, the charge density on the
surface of the droplets increases until the Rayleigh limit is exceeded, after
which, a multitude of smaller droplets are formed by coulombic explosion.
This process is repeated until charged sample ions remain. These ions are
then available for sampling by the ion source.
+ +
+ +++ + +
+ + +
+ +
+ Insert capillary +3-5 kV
Droplet
containing
ions
+ + -+
++
+
+
+ + ++
++
+
-++-+
++-+++
+
As the droplet
evaporates, the
electric field
increases and ions
move towards
the surface
+
+
+
Ions evaporate
from the surface
Figure 1-9. Positive ion electrospray mechanism
_______________________ Finnigan AQA Hardware Manual _______________________ 1-11
Manuals Page
Search Manuals
Feedback
Web
Introducing the Finnigan AQA
The Source – an Introduction to API Techniques ______________________________________
Electrospray Ionization Using the AQA Source
The sample, in solution, enters the source via a 75 µm ID stainless steel
insert capillary held at a voltage of 3 to 5 kV. The insert capillary is
surrounded by a tube that directs a concentric flow of nitrogen nebulizing
gas past the droplets of liquid forming at the probe tip. The action of the
nebulizing gas, high voltage and heated probe produces an aerosol of liquid
droplets containing ions of the sample and solvent. The ion evaporation
process is assisted by a second concentric flow of nitrogen gas. This is the
sheath gas. This highly efficient evaporation process close to the entrance
cone enables the routine use of high LC flow rates (up to 2 mL/min) in ESI
mode.
The newly formed ions then enter the flow-focusing region through the
entrance cone. This is due to the following:
•
The high electric field - the insert capillary is at 3 to 5 kV with respect
to the rest of the source, which is typically at 20 to 30 V.
•
The gas flow into the flow-focusing region.
Ions then exit the flow-focusing region and pass into the RF lens. The RF
lens (hexapole) helps to focus the ions before they enter the mass analyzer
region.
Note. The source chamber, flow disrupter pin and cones are all at the same
electric potential, which forms a field-free region within the source.
1-12
______________________ Finnigan AQA Hardware Manual ______________________
Manuals Page
Search Manuals
Feedback
Web
Introducing the Finnigan AQA
_______________________________________ The Source – an Introduction to API Techniques
High Vacuum
Region
Exit
cone
Intermediate
Pressure
Region
Rotary
pump
Flow disrupter pin
Flow
focusing
region
Entrance cone
AQA flow
Probe
Atmospheric
Pressure
Region
Insert capillary
LC eluent
Nebulizing gas, N2
Sheath gas, N2
Insert
Figure 1-10. Schematic of the AQA ESI source on the Finnigan AQA,
showing the principal components and pressure regions
Spectral Characteristics
Polar compounds of low molecular weight (<1000 amu) typically form
singly charged ions by the loss or gain of a proton. Basic compounds (for
example amines) can form a protonated molecule [M+H]+, which can be
analyzed in positive ion mode to give a peak at m/z M+1. Acidic
compounds (for example sulphonic acids) can form a deprotonated molecule
[M-H]-, which can be analyzed in negative ion mode to give a peak at m/z
M-1. As electrospray is a very soft ionization technique, there is usually
little or no fragmentation and the spectrum contains only the protonated or
deprotonated molecule.
Some compounds are susceptible to adduct formation if ionization takes
place in the presence of contamination or additives such as ammonium or
sodium ions. The spectra will show other ions in addition to or instead of the
quasi-molecular ion. Common adducts are ammonium ions NH4+ [M+18]+,
sodium ions Na+ [M+23]+ and potassium ions K+ [M+39]+.
_______________________ Finnigan AQA Hardware Manual _______________________ 1-13
Manuals Page
Search Manuals
Feedback
Web
Introducing the Finnigan AQA
The Source – an Introduction to API Techniques ______________________________________
+
322 [M+H]
100
%
[M+Na]+
344 363
241
100
80 99
103
244
181
141 145
261
187
279
282
0
60
80
100
120
140
160
180
200
220
240
260
280
300
320
340
360
m/z
Figure 1-11. Electrospray spectrum showing a sodium adduct
The singly charged ions arising from samples of relatively low molecular
masses can be interpreted directly as they represent the protonated or
deprotonated molecule. Electrospray however, can produce multiply
charged ions for analytes that contain multiple basic or acidic sites, for
example, proteins and peptides. As an MS detector measures mass-to-charge
ratio (m/z), these ions appear at a m/z value given by the mass of their
protonated molecule divided by the number of charges:
é M + nH ù
êë n úû
n+
=m z
Where, M = actual mass, n = number of charges and H = mass of a proton.
Electrospray allows molecules with molecular weights greater than the mass
range of the MS detector to be analyzed. This is a unique feature of
electrospray.
Flow Rate
The electrospray source can be used with flow rates from 2.0 µL/min to
2.0 mL/min.
1-14
______________________ Finnigan AQA Hardware Manual ______________________
Manuals Page
Search Manuals
Feedback
Web
Introducing the Finnigan AQA
_______________________________________ The Source – an Introduction to API Techniques
Atmospheric Pressure Chemical Ionization
Atmospheric Pressure Chemical Ionization (APCI) is also a very soft
ionization technique and has many similarities to electrospray ionization.
Ionization takes place at atmospheric pressure and the ions are extracted into
the MS detector in the same way as in electrospray.
Similarly, as observed in ESI, [M+H]+ and [M-H]- ions are usually formed
providing molecular weight information. Fragmentation can be induced in
the source by increasing the source voltage to give structural information.
Mechanism of Ion Generation
In APCI the liquid elutes from an insert capillary, surrounded by a coaxial
flow of nitrogen nebulizing gas into a heated region. The combination of
nebulizing gas and heat form an aerosol that evaporates quickly to yield
desolvated neutral molecules (see Figure 1-12).
At the end of the probe is a corona pin held at a high potential, typically 2.0
to 3.5 kV. This produces a high-field corona discharge that causes solvent
molecules eluting into the source to be ionized. In the atmospheric pressure
region surrounding the corona pin, a series of reactions occur that give rise
to charged reagent ions. Any sample molecules, which elute and pass
through this region of reagent ions, can be ionized by the transfer of a proton
to form [M+H]+ or [M-H]-. This is a form of chemical ionization, hence the
name of the technique, Atmospheric Pressure Chemical Ionization.
Heated nebuliser
Solvent molecules
Sample molecules
N2
Liquid
N2
+
Corona pin
Collisions and
proton transfer
+
+
+
+
+
+
+
+
An aerosol
is formed
Solvent and
sample molecules
are desolvated
Solvent molecules
are ionized
Sample
[M+H]+
ions formed
Figure 1-12. Positive ion APCI mechanism
_______________________ Finnigan AQA Hardware Manual _______________________ 1-15
Manuals Page
Search Manuals
Feedback
Web
Introducing the Finnigan AQA
The Source – an Introduction to API Techniques ______________________________________
APCI Using the AQA Source
The sample is carried to a spray region via a 100 µm ID fused silica insert
capillary. The action of both the nebulizing gas and the heated probe lead to
the formation of an aerosol. The desolvation process is assisted by a second
concentric flow of nitrogen gas, the sheath gas.
In contrast to electrospray, APCI is a gas phase ionization technique.
Ionization occurs as the aerosol leaves the heated nebulizer region. A corona
pin, mounted between the heated region and the entrance cone, ionizes the
sample molecules with a discharge voltage of approximately 3.0 to 3.5 kV
in positive ion mode and 2.0 to 3.0 kV in negative ion mode.
High Vacuum
Region
Exit
cone
Intermediate
Pressure
Region
Flow disrupter pin
Flow
focusing
region
AQA flow
Entrance cone
Probe
Rotary
pump
Atmospheric
Pressure
Region
LC eluent
Nebulizing gas, N2
Corona pin
Sheath gas, N2
Figure 1-13. Schematic of the AQA APCI source on the Finnigan AQA,
showing the principal components and pressure regions
The newly formed ions then enter the flow-focusing region through the
entrance orifice and pass into the RF lens region. The RF lens (hexapole)
helps to focus the ions before they enter the mass analyzer region.
Note. The source chamber, flow disrupter pin and cones are all at the same
electric potential, which forms a field-free region within the source.
1-16
______________________ Finnigan AQA Hardware Manual ______________________
Manuals Page
Search Manuals
Feedback
Web
Introducing the Finnigan AQA
_______________________________________ The Source – an Introduction to API Techniques
Spectral Characteristics
Like electrospray, APCI is a soft ionization technique and forms singly
charged ions, either the protonated, [M+H]+, or deprotonated, [M-H]-,
molecule depending on the selected ionization mode. Unlike electrospray
however, APCI does not produce multiply charged ions and so is unsuitable
for the analysis of high molecular weight compounds such as proteins or
peptides.
Although a high temperature is applied to the probe, most of the heat is used
in evaporating the solvent so the thermal effect on the sample is minimal. In
certain circumstances; for example, with very thermally labile (unstable)
compounds, the heated probe may cause some thermal fragmentation.
Flow Rate
Flow rates of 0.2 to 2.0 mL/min can be used with APCI.
_______________________ Finnigan AQA Hardware Manual _______________________ 1-17
Manuals Page
Search Manuals
Feedback
Web
Introducing the Finnigan AQA
The Source – an Introduction to API Techniques ______________________________________
Source Fragmentation
Both electrospray and APCI are regarded as soft ionization techniques.
Ionization generally results in spectra dominated by either the protonated
molecule [M+H]+ (positive ion mode) or deprotonated molecule [M-H](negative ion mode) depending on whether positive or negative ionization
mode has been selected. Choice of ionization mode is governed by the
functional chemistry of the molecule under investigation.
Source fragmentation can be induced to give additional information on a
compound such as diagnostic fragment ions for structural determination or
an increased response on a particular confirmatory ion for peak targeting.
Formation of Diagnostic Fragment Ions
The Finnigan AQA allows the simultaneous acquisition of MS data at up to
four different source voltages. For example, the Finnigan AQA can be
programmed to acquire data at source voltages of 20, 40, and 60 V on an
alternating scan basis within a single acquisition. The benefits of setting up
acquisitions in this way are:
•
The optimum source voltage for a particular ion can be determined in
one acquisition for compounds where sample volume is at a premium.
•
The intensity of fragment ions can be maximized to gain structural
information.
Fragmentation at increased source voltages is useful for most compounds.
For example, using source fragmentation of salbutamol in electrospray
ionization, a number of confirmatory fragment ions can be generated and
their intensity maximized, see Figure 1-14.
The mechanism for the formation of the fragment ions is characteristic for
not only salbutamol but also for related β-agonists such as clenbuterol,
terbutaline and metaproterenol. It involves loss of water (-18 amu; resulting
in the fragment ion at m/z 222 (middle trace)) and an additional loss of the
tert-butyl group (-56 amu; resulting in the fragment at m/z 166 (lower
trace)).
Note. The Finnigan AQA uses the term AQAmax™ to represent source
voltage.
1-18
______________________ Finnigan AQA Hardware Manual ______________________
Manuals Page
Search Manuals
Feedback
Web
Introducing the Finnigan AQA
_______________________________________ The Source – an Introduction to API Techniques
Protonated molecule at m/z 240
240
100
Source voltage 10V
OH
HO
NH2
+
tBu
[M+H]
+
%
HO
241
0
50
75
100
125
150
175
200
225
250
275
m/z
300
Fragment ion at m/z 222
240
100
+
[M+H] -H2O
Source voltage 25V
HO
%
NH2
+
tBu
222
HO
241
0
50
75
100
125
150
175
200
225
250
275
m/z
300
240
100
Fragment ion at m/z 166
+
Source voltage 35V
[M+H] -H2O-tBu
HO
%
NH3
+
222
148 166
HO
241
0
50
75
100
125
150
175
200
225
250
275
m/z
300
Figure 1-14. Source fragmentation of salbutamol in electrospray
ionization
Optimum Response for Confirmatory Ions
When acquiring fragment ions for confirmation purposes, the applied source
voltage per compound would require some optimization to maximize the
intensity of these ions. It is generally observed that small changes to the
source voltage result in only small intensity changes and thus fine tuning of
this voltage is usually not critical (typically +/- 5 V is adequate).
_______________________ Finnigan AQA Hardware Manual _______________________ 1-19
Manuals Page
Search Manuals
Feedback
Web
Introducing the Finnigan AQA
The Source – an Introduction to API Techniques ______________________________________
Source Voltage Ramping
Source voltage ramping can be used in Full Scan operation (see page 1-35)
in electrospray when the compound of interest forms multiply charged ions.
A spectrum similar to that in Figure 1-15 will be produced showing the
multiply charged envelope.
848
100
893
808
942
771
998
%
1060
738
944
707
694
1131
999
1212
1305
0
m/z
700
800
900
1000
1100
1200
1300
Figure 1-15. Electrospray spectrum of horse heart myoglobin
This envelope is represented in diagrammatic form in Figure 1-16. The first
diagram shows the envelope at a source voltage of 30 V. Next, the envelope
is shown at 60 V. There is no ramping applied here. The envelope has the
same shape but has moved to a higher m/z value. This is due to the charge
stripping that occurs at high source voltages, which lowers the charge state
and produces an apparent higher mass distribution. If the source voltage is
ramped between 30 and 60 V, the charge distribution envelope is extended
and it resembles the lower diagram.
1-20
______________________ Finnigan AQA Hardware Manual ______________________
Manuals Page
Search Manuals
Feedback
Web
Introducing the Finnigan AQA
_______________________________________ The Source – an Introduction to API Techniques
Intensity
Intensity
Without source voltage ramping
Source voltage 30V
Increasing
number of
charges
Without source voltage ramping
Source voltage 60V
Decreasing
number of
charges
m/z
m/z
Intensity
With source voltage ramping 30-60V
m/z
Figure 1-16. Source voltage ramping
Source voltage ramping is often used for proteins and peptides during:
•
Calibration (to extend the calibration range)
•
Analysis (to increase the number of charge states leading to greater
accuracy of molecular weight determination)
Note. Source voltage ramping will not perform source fragmentation
because the same source voltage corresponds to the same m/z value each
time.
Polarity Switching
Switching between positive and negative ionization modes in a single
analytical run is supported by the Finnigan AQA. Rapid polarity switching
is a technique that is applied to several important areas of MS analysis, for
example:
•
Quantitation of different chemistries within the same run. In drug
metabolism studies, certain compounds preferentially ionize in positive
ion mode because they may contain a primary amino group. Other
metabolites are likely to lose a proton and respond in the negative ion
mode, for example glucuronide metabolites.
•
Rapid screening of unknown analytes, for example in combinatorial
chemistry. If the compound has a carboxylic acid group that is sterically
unhindered, it is likely that the compound will lose a proton in negative
ion mode and not respond in positive ion mode.
_______________________ Finnigan AQA Hardware Manual _______________________ 1-21
Manuals Page
Search Manuals
Feedback
Web
Introducing the Finnigan AQA
The Source – an Introduction to API Techniques ______________________________________
Application of API Techniques
Both electrospray and APCI are ideal for on-line liquid chromatography
detection, providing an additional dimension of information. With many
compounds, it is possible to analyze them by both APCI and electrospray. It
may be difficult to decide which is the more appropriate technique,
especially when the compounds of interest lack polar functionalities.
Points to note:
•
Electrospray is one of the softest ionization methods available, whereas
APCI, although also a soft ionization technique, may not be suitable for
some very thermally labile compounds as there may be thermal
fragmentation (see Figure 1-17).
214
100
APCI mass spectrum,
source voltage 25V.
231
156
%
173
0
m/z
130
140
150
160
170
180
190
200
210
220
230
240
231
100
Electrospray mass
spectrum, source
voltage 25V.
%
0
m/z
130
140
150
160
170
180
190
200
210
220
230
240
Figure 1-17. Thermal fragmentation of the herbicide asulam in APCI
1-22
•
APCI does not yield multiply charged ions like electrospray and so is
unsuitable for the analysis of high molecular weight compounds such as
proteins.
•
Both APCI and electrospray generally provide data from which it is
simple to infer molecular weight values.
In many cases, with the correct conditions, only one major peak is
observed in the spectrum: either the protonated molecule [M+H]+ (+ve
ion) or deprotonated molecule [M-H]- (-ve ion). However, some
compounds are more susceptible to fragmentation than others, so
different degrees of fragmentation may be seen from compound to
compound. When determining molecular weights, always take account
of possible adduct ions. Common adducts are [M+18]+ NH4+
(ammonium adducts seen in the presence of buffers such as ammonium
acetate), [M+23]+ Na+ (sodium adducts) and [M+39]+ K+ (potassium
adducts).
______________________ Finnigan AQA Hardware Manual ______________________
Manuals Page
Search Manuals
Feedback
Web
Introducing the Finnigan AQA
_______________________________________ The Source – an Introduction to API Techniques
•
Source fragmentation is used in both APCI and electrospray to give
structural information.
In general, increasing the voltage applied to the source block (the source
voltage) yields increasing amounts of fragmentation, depending on the
nature of the compound. The optimum source voltage required to give
the maximum intensity of the protonated or deprotonated molecule is
compound dependent, as is the source voltage required for
fragmentation. The energies involved in source fragmentation are low,
so usually only weaker bonds such as C-N and C-O are broken.
Since there are many similarities between electrospray and APCI, there are
many applications common to both.
Compounds suitable for analysis by electrospray are polar and of molecular
weight less than 100,000 amu. The higher molecular weight compounds
such as proteins can produce multiply charged ions. As it is the mass-tocharge ratio (m/z) that is measured by the MS detector, these can often be
seen at lower masses. For example, if the molecular weight is 10,000, a
doubly charged ion (2+ in +ve ion) would be seen at m/z 5001, 10+ at m/z
1001 etc.
Typical electrospray applications are: peptides, proteins, oligonucleotides,
sugars, drugs, steroids, and pesticides.
Compounds suitable for analysis by APCI are generally polar (although less
polar than electrospray) and of molecular weight <1000 amu.
Typical APCI applications are: pesticides, drugs, azo dyes, and steroids.
A summary comparing electrospray and APCI is shown in Table 1-2.
_______________________ Finnigan AQA Hardware Manual _______________________ 1-23
Manuals Page
Search Manuals
Feedback
Web
Introducing the Finnigan AQA
The Source – an Introduction to API Techniques ______________________________________
Table 1-2.
Comparison of ESI and APCI
LC/MS technique
Electrospray (ESI)
Atmospheric Pressure Chemical
Ionization (APCI)
Compound polarity
polar
polar, some non-polar
Examples
drugs, proteins, biopolymers,
oligonucleotides, steroids and
pesticides
pesticides, azo dyes, drugs,
metabolites, agrochemicals and
steroids
Sensitivity
fg to pg (compound dependent)
+
-
fg to pg (compound dependent)
+
-
Type of spectra
[M+H] for +ve ion mode, [M-H] for
-ve ion mode, fragmentation via
source voltage
[M+H] for +ve ion mode, [M-H] for
-ve ion mode, fragmentation via
source voltage
Flow rates
2.0 µL/min to 2.0 mL/min
0.2 to 2.0 mL/min
LC columns
capillary to 4.6 mm ID columns
2.1 to 4.6 mm ID columns
Mobile phases
H2O, CH3CN, CH3OH are most
frequently used.
H2O, CH3CN, CH3OH are most
frequently used. Non-polar
solvents can be used.
Typical mass range
<100,000
<1000
1-24
______________________ Finnigan AQA Hardware Manual ______________________
Manuals Page
Search Manuals
Feedback
Web
Introducing the Finnigan AQA
________________________________________________ The Self Cleaning Source: AQA Flow
1.4 The Self Cleaning Source: AQA
Flow
This section introduces AQA flow. Information on how and when to set up
AQA flow is given in the chapter LC/MS and AQA Flow.
Introduction
The API source on the Finnigan AQA includes a self-cleaning solvent
delivery system. This makes the source extremely robust and productive,
greatly increasing the number of samples that can be analyzed routinely,
before maintenance is required.
The orthogonal API probe serves to direct the LC eluent away from the inlet
orifice. However, under typical LC/MS conditions, both the ions and the
charged liquid droplets (containing involatile components) are deflected by
the electric field towards the inlet orifice. This effect leads to a gradual build
up of involatile components and a concomitant loss in sensitivity with time.
The self-cleaning AQA source delivers a constant, low flow of solvent to the
edge of the inlet orifice (see Figure 1-18). This prevents the build-up of
involatile components during LC/MS analysis with typical chromatographic
buffers (for example phosphates and ion pairing agents). Thus, AQA greatly
improves the quantitation precision of analysis without the need to
compromise the LC method, and more importantly, dramatically extends the
length of time possible for analysis.
Figure 1-18. Dispersion of involatile components from the inlet orifice
_______________________ Finnigan AQA Hardware Manual _______________________ 1-25
Manuals Page
Search Manuals
Feedback
Web
Introducing the Finnigan AQA
The Self Cleaning Source: AQA Flow _______________________________________________
Functional Description
As shown in Figure 1-19, AQA flow consists of a pressurized reservoir
filled with solvent (typically HPLC grade water or organic solvents such as
methanol), and a fused silica capillary. One end of the capillary is inserted
into the reservoir while the other end is fed to the edge of the inlet orifice of
the entrance cone. When the pressure in the AQA reservoir is increased, the
solvent is forced through the fused silica capillary and delivered to the edge
of the inlet orifice. The pressure in the reservoir can be controlled and hence
the flow rate of the solvent.
fused silica capillary
entrance cone
AQA reservoir
Figure 1-19. The components of the solvent delivery system
Note. It is necessary to use the AQA flow system only for compounds in
dirty matrices or when involatile buffers are used. Choose the AQA solvent
to give the most effective solubility for the expected contaminants.
1-26
______________________ Finnigan AQA Hardware Manual ______________________
Manuals Page
Search Manuals
Feedback
Web
Introducing the Finnigan AQA
______________________________________________________ The Sample Infusion System
1.5 The Sample Infusion System
This section introduces the AQA sample infusion system. Information on
how to set up the sample infusion system is given in the chapter AQA
Sample Infusion System.
Introduction
The recommended way to introduce a sample for tuning and mass
calibration in electrospray is to use the AQA sample infusion system.
Note. Due to the low flow rates involved, direct sample infusion is
normally used only with electrospray. In APCI, a sample can be infused
into the source using a splitter. Infuse the sample into a suitable LC flow
(for example 0.5 mL/min) via the splitter before the sample enters the
source.
Functional Description
As shown in Figure 1-20, the sample infusion system consists of a
pressurized reservoir containing an Eppendorf® sample vial supported by a
tripod vial holder, and a fused silica capillary. One end of the capillary is
inserted into the Eppendorf sample vial contained within the reservoir, while
the other end is attached to the sample introduction probe. When the
pressure in the AQA reservoir is increased, the sample is forced through the
fused silica capillary and infused directly into the source. The pressure in the
reservoir can be controlled and hence the sample infusion flow rate.
_______________________ Finnigan AQA Hardware Manual _______________________ 1-27
Manuals Page
Search Manuals
Feedback
Web
Introducing the Finnigan AQA
The Sample Infusion System _____________________________________________________
to sample
introduction probe
Eppendorf
sample vial
fused silica capillary
AQA reservoir
tripod
Figure 1-20. The components of the sample infusion system
1-28
______________________ Finnigan AQA Hardware Manual ______________________
Manuals Page
Search Manuals
Feedback
Web
Introducing the Finnigan AQA
___________________________________________________ The Mass Analyzer and Detector
1.6 The Mass Analyzer and Detector
The mass analysis and detection system comprises two main components:
•
A quadrupole mass analyzer
•
A detector whose main component is a photomultiplier tube
The hexapole RF lens helps to focus the ions before they are filtered,
according to their mass-to-charge ratio in the mass analyzer.
The analyzer in the Finnigan AQA is a quadrupole. This is one of the most
widely used types of analyzer and can be easily interfaced to various inlet
systems. By applying carefully controlled voltages to the four rods in the
quadrupole, only ions of a specific mass-to-charge ratio are allowed to pass
through at any one time.
The ions then reach the detector, whose main component is a
photomultiplier tube. The ions exit the analyzer and strike a conversion
dynode, which results in the emission of electrons. The electrons are
accelerated towards a phosphor screen, producing photons. The photons
then strike the photocathode in front of the photomultiplier, which then
creates an electron cascade. This cascade allows the tiny electron current to
be magnified to about 1,000,000 times the original signal. The current is
then converted and amplified into a voltage signal that is analyzed and
processed by the Finnigan AQA’s on-board data acquisition system. The
resultant peak information is sent to the data system.
Detector
Ion successfully transmitted
by the mass analyzer
Quadrupole
mass analyzer
Turbomolecular pump
Ion trajectory incorrect
for transmission through
the mass analyzer
Hexapole
RF lens
Turbomolecular pump
Source exit cone
Figure 1-21. Schematic of the Finnigan AQA analyzer and detector
_______________________ Finnigan AQA Hardware Manual _______________________ 1-29
Manuals Page
Search Manuals
Feedback
Web
Introducing the Finnigan AQA
The Vacuum System ____________________________________________________________
1.7 The Vacuum System
The main challenge in interfacing MS with LC is the introduction of a liquid
mobile phase at flow rates of up to 2 mL/min into a system that operates
under vacuum. The transition between atmospheric pressure and high
vacuum is achieved by using several different stages of pressure controlled
by the vacuum system. This arrangement effectively removes the mobile
phase, leaving the analytes to travel as ions through the mass analyzer.
It is important to remember that an MS detector must be under high vacuum
in order to operate. In the case of the Finnigan AQA system, not all of the
MS detector is under high vacuum. The ion source is held at atmospheric
pressure, while the flow focusing region between the entrance and exit
cones is held at an intermediate pressure to step down to the high vacuum
region in the mass analyzer and detector. The intermediate pressure region is
pumped by one rotary pump. The high vacuum in the mass analyzer and
detector region is achieved by using two turbomolecular pumps. All the
pumps are controlled by the data system.
1-30
______________________ Finnigan AQA Hardware Manual ______________________
Manuals Page
Search Manuals
Feedback
Web
Introducing the Finnigan AQA
_______________________________________________________________ The Data System
1.8 The Data System
The data system has complete control of the Finnigan AQA system and runs
on a Microsoft® Windows NT™ platform.
Software
Xcalibur™ software controls the Finnigan AQA MS detector. When
Xcalibur is run, the Home Page is displayed (see Figure 1-22). In addition,
Xcalibur also runs the Finnigan AQA Server (see Figure 1-23).
The Home Page
The Home Page opens to show a ‘road map’ view of the data system.
Figure 1-22. The Xcalibur Home Page Road Map view
_______________________ Finnigan AQA Hardware Manual _______________________ 1-31
Manuals Page
Search Manuals
Feedback
Web
Introducing the Finnigan AQA
The Data System ______________________________________________________________
The icons shown on the road map provide an easy way to access all the
major modules of the data system. These modules are:
•
Instrument Setup
Use Instrument Setup to configure the Finnigan AQA and all your LC
equipment for acquisition. This information is saved as an instrument
method.
•
Processing Setup
Use Processing Setup to specify all parameters for processing, reporting and
manipulation of acquired data. This information is saved as a processing
method.
•
Sequence Setup
Use Sequence Setup to enter the details of the samples to be examined,
including instrument and processing methods, and to control the acquisition
of data.
•
Qual Browser
Use Qual Browser to examine acquired data, both chromatograms and
spectra, in order to obtain more information about the compounds in the
sample.
•
Quan Browser
Use Quan Browser to examine acquired data in order to obtain an accurate
determination of the amounts of individual components present in a sample.
•
Library Browser
Use Library Browser to create your own libraries of spectra and to perform
searches of those libraries.
The Server
The Server is displayed as an icon in the Windows Taskbar. It is shown in
Figure 1-23 just to the left of the time display.
Figure 1-23. The taskbar showing the Xcalibur Home Page and Server
The Server is shown as three lights:
1-32
•
The green, top light represents the Vacuum status.
•
The red, middle light represents the Operate status.
•
The yellow, bottom light represents the API Gas status.
______________________ Finnigan AQA Hardware Manual ______________________
Manuals Page
Search Manuals
Feedback
Web
Introducing the Finnigan AQA
_______________________________________________________________ The Data System
When all the lights are on, the Finnigan AQA is in vacuum with Operate On
and the API gas flowing. In addition, when the Finnigan AQA is pumping
down, the vacuum light flashes.
Use the Server to view the Finnigan AQA Properties dialog box, pump or
vent the system, and reset the system.
Right-click on the Server to display a menu:
•
Choose Properties to view the Finnigan AQA Properties dialog box.
Figure 1-24. The Finnigan AQA Properties dialog box
•
Choose Vacuum | Pump to pump down the Finnigan AQA or
Vacuum | Vent to vent the Finnigan AQA.
•
Choose Reset to reset the Finnigan AQA’s communications.
•
Choose Exit to close the server. This will be possible only if Xcalibur is
no longer running.
Raw Data
Xcalibur acquires data in a “raw” file. Raw data can be viewed as
chromatograms and mass spectra (see Figure 1-25).
The term mass spectrum refers to a plot of mass-to-charge ratio (m/z)
versus relative abundance information. The mass spectrum at a particular
time in an analytical run will reveal a “snapshot” of the data at that time.
The chromatogram is a plot of relative abundance versus time. Xcalibur
produces the following types of chromatograms: total ion current (TIC)
chromatogram, base peak chromatogram, mass range chromatogram, and
analog UV chromatogram.
_______________________ Finnigan AQA Hardware Manual _______________________ 1-33
Manuals Page
Search Manuals
Feedback
Web
Introducing the Finnigan AQA
The Data System ______________________________________________________________
RT: 1.09- 6.11
Relative Abundance
NL:
2.49E5
TIC carb
mix pmix03
2.66
100
80
2.82
60
40
3.28 3.59
2.35
1.24 1.55
2.25
3.72 3.87
4.18 4.75
5.17 5.32 5.42
20
0
1.5
2.0
2.5
3.0
3.5
4.0
Time (min)
4.5
5.0
5.5
6.0
Relative Abundance
carb mix pmix03#102 RT: 2.66 AV: 1 SB: 38 1.42-2.07, 2.87-3.15 NL: 1.02E5
T: + c ESI Full ms [ 150.00-500.00]
281.2
100
80
60
40
459.1
240.3
20
229.4
181.5
0
150
200
256.2
250
282.5
346.8 387.0 403.2
300
350
400
454.1 461.0 482.1
450
500
m/z
Figure 1-25. A mass spectrum taken at retention time 2.66 minutes
(lower trace) from a TIC chromatogram (upper trace)
Raw Data Types
The data can be collected and stored by the data system in two different
ways: Full Scan and Selected Ion Monitoring (SIM). The main difference
between these two modes is:
1-34
•
In Full Scan mode, data is collected across the whole scan range.
•
In SIM mode, data is acquired only at specific mass-to-charge ratios.
______________________ Finnigan AQA Hardware Manual ______________________
Manuals Page
Search Manuals
Feedback
Web
Introducing the Finnigan AQA
_______________________________________________________________ The Data System
Full Scan Mode
There are three different types of Full Scan acquisition. These are:
•
Centroid
•
Profile
•
MCA (Multi Channel Analysis)
In all full scan acquisitions raw data is collected over the whole scan range
defined by the start and end mass.
Centroid
During centroid acquisitions, Xcalibur automatically determines and saves
the mass center of the acquired profile peak returned from the detector.
Hence, the previously large number of points that described the mass
spectral peak are reduced to a single centroid stick (see Figure 1-26) for
each ion mass recorded. This has the advantage of reducing the quantity of
data recorded to the hard disk and improving processing speeds.
265
100
267
263
%
0
m/z
120
140
160
180
200
220
240
260
280
Figure 1-26. Full scan centroid spectrum of pentachlorophenol
_______________________ Finnigan AQA Hardware Manual _______________________ 1-35
Manuals Page
Search Manuals
Feedback
Web
Introducing the Finnigan AQA
The Data System ______________________________________________________________
Profile
With profile acquisition, data is not “centroided” into sticks. Instead, the
signal received by the interface electronics is stored to give an analog
intensity profile of the data being acquired for every scan (see Figure 1-27).
Profile acquisition enables mass spectral peak width and resolution to be
examined and measured. For example, the resolution between an ion and its
isotope(s) or multiply charged ions can be seen and measured if necessary.
This is most useful in the case of protein and peptide analysis, where
multiply charged ions are formed.
Due to the fact that data is being written to disk at all times (even when
there are no peaks being acquired), profile data acquisition places an extra
burden on the acquisition system in comparison to centroided acquisition.
Profile data files tend to be significantly larger than centroided ones and the
scan speeds used tend to be slower than when acquiring centroided data.
503
100
%
281
283
325
504
0
m/z
275
300
325
350
375
400
425
450
475
Figure 1-27. Full scan profile spectrum of D-raffinose
1-36
______________________ Finnigan AQA Hardware Manual ______________________
500
525
Manuals Page
Search Manuals
Feedback
Web
Introducing the Finnigan AQA
_______________________________________________________________ The Data System
MCA
The third type of full scan acquisition is MCA. Such data can be thought of
as “summed profile”, with only one intensity-accumulated scan being
written to disk for a given experiment (see Figure 1-28). As each scan is
acquired, its intensity data is added to the accumulated summed data of
previous scans.
An advantage of MCA is that although noise will accumulate at the same
rate as sample-related data, noise is random, and therefore its effects will be
reduced over a number of scans. This will emphasize the sample-related
data and improve signal to noise. A further advantage of MCA is that data is
written to disk only at the end of an experiment; therefore, significantly less
storage space is required.
MCA cannot be used for time-resolved data because an MCA raw file
contains only one scan. Therefore, MCA is not used during a
chromatographic run. Generally, it is used to acquire infusion or loop
injected samples of fairly weak concentration (the signal can then be
enhanced). The real-time spectrum can be viewed and the acquisition
stopped when the required results are obtained. MCA is often used to
acquire raw data from the infusion of proteins and peptides.
848
100
893
808
942
771
998
%
1060
738
944
707
694
1131
999
1212
1305
0
m/z
700
800
900
1000
1100
1200
1300
Figure 1-28. Full scan MCA spectrum of horse heart myoglobin
_______________________ Finnigan AQA Hardware Manual _______________________ 1-37
Manuals Page
Search Manuals
Feedback
Web
Introducing the Finnigan AQA
The Data System ______________________________________________________________
SIM Mode
This acquisition mode is used when only one or a few specific masses are to
be monitored during the acquisition. Since most of the acquisition time is
spent on these masses, the SIM technique is far more sensitive (typically
greater than a factor of ten) than full scan techniques. However, this
sensitivity does depend on the number of masses being monitored
simultaneously.
SIM is also a highly selective technique. Impurities present in the sample
that co-elute with the compound of interest will not affect the analysis as
long as they do not produce ions at the same m/z value being monitored.
SIM does not produce spectra that can be used for library searching routines.
1-38
______________________ Finnigan AQA Hardware Manual ______________________
Manuals Page
Search Manuals
Feedback
Web
Chapter 2
2. Changing Ionization Modes
2. Contents...................................................................................................................................... 2-i
2.1
Introduction ............................................................................................................................. 2-1
2.2
Removal of APCI .................................................................................................................... 2-2
2.3
Setup for ESI ........................................................................................................................... 2-3
2.4
Removal of ESI ....................................................................................................................... 2-6
2.5
Setup for APCI ........................................................................................................................ 2-8
_______________________ Finnigan AQA Hardware Manual _________________________ 2-i
Manuals Page
Search Manuals
Feedback
Web
Changing Ionization Modes
Contents _____________________________________________________________________
2-ii ________________________ Finnigan AQA Hardware Manual
______________________
Manuals Page
Search Manuals
Feedback
Web
Changing Ionization Modes
____________________________________________________________________ Introduction
2.1 Introduction
Use the information in this chapter in conjunction with the ESI and APCI
setup animations on the Finnigan AQA CD shipped with your system. The
chapter is divided into the following sections:
•
Removal of APCI
•
Setup for ESI
•
Removal of ESI
•
Setup for APCI
To change from APCI to ESI, follow removal of APCI and then setup for
ESI. Similarly, to change from ESI to APCI, follow removal of ESI and then
setup for APCI.
_______________________ Finnigan AQA Hardware Manual ________________________
2-1
Manuals Page
Search Manuals
Feedback
Web
Changing Ionization Modes
Removal of APCI_______________________________________________________________
2.2 Removal of APCI
The starting point for this procedure is the source setup for APCI operation,
with the LC and gas flows off, and the probe cooled.
WARNING. Allow the source block and probe heater assembly to cool
before changing ionization modes.
1. Loosen the thumb nut, and drop the retaining latch to the open position
(see Figure 2-1).
2. Unscrew and remove the PEEK™ finger-tight fitting from the PEEK
union at the inside edge of the source enclosure.
3. Remove the APCI insert (P/N 9227-65) and its connecting orange stripe
PEEK tubing.
Caution. Exercise care when handling the APCI insert because it is fragile
and may be damaged easily.
APCI insert
thumb nut
insert retaining latch
Figure 2-1. Removing the APCI insert
2-2 ________________________ Finnigan AQA Hardware Manual
______________________
Manuals Page
Search Manuals
Feedback
Web
Changing Ionization Modes
___________________________________________________________________Setup for ESI
2.3 Setup for ESI
The starting point for this procedure is a probe with no insert installed.
WARNING. Allow the source block and probe heater assembly to cool
before changing ionization modes.
1. Fit the ESI insert (P/N 9227-66) into the probe.
Caution. Exercise care when handling the ESI insert because it is fragile
and may be damaged easily.
ceramic jet insulator
blue stripe PEEK tubing
Figure 2-2. ESI insert
2. Secure the blue stripe PEEK tubing of the ESI insert to the PEEK union
at the inside edge of the source housing using the PEEK finger-tight
fitting.
_______________________ Finnigan AQA Hardware Manual ________________________
2-3
Manuals Page
Search Manuals
Feedback
Web
Changing Ionization Modes
Setup for ESI__________________________________________________________________
ESI insert
insert retaining latch
insulated plug
Figure 2-3. Installing the ESI insert and securing with the retaining
latch
3. To hold the insert in place, secure the retaining latch using the thumb
nut (use finger-tight pressure).
4. Place the ceramic gas nozzle (P/N 9227-92) on the front end of the
probe, ensuring that the ESI insert is protruding through the center of
the nozzle (see Figure 2-4). The nozzle must be fitted in the orientation
shown.
2-4 ________________________ Finnigan AQA Hardware Manual
______________________
Manuals Page
Search Manuals
Feedback
Web
Changing Ionization Modes
___________________________________________________________________Setup for ESI
Corona pin raised into the ESI position
Secure corona pin in
position using the nut
ESI ceramic
nozzle
ESI insert
Figure 2-4. Fitting the ceramic gas nozzle on the end of the probe in
the orientation shown and retracting the corona pin
5. Raise the corona pin into the ESI position and secure with the thumb
nut.
6. Insert the insulated plug (P/N FM100507) into the ESI position; see
Figure 2-3 for identification of the insulated plug.
_______________________ Finnigan AQA Hardware Manual ________________________
2-5
Manuals Page
Search Manuals
Feedback
Web
Changing Ionization Modes
Removal of ESI ________________________________________________________________
2.4 Removal of ESI
The starting point for this procedure is the source setup for ESI operation,
with the LC and gas flows off, and the probe cooled.
WARNING. Allow the source block and probe heater assembly to cool
before changing ionization modes.
1. Remove the ceramic gas nozzle (P/N 9227-92) from the front end of the
probe (see Figure 2-5).
ESI ceramic nozzle
Figure 2-5. Removing the ESI ceramic gas nozzle
2. Loosen the thumb nut, and drop the retaining latch to the open position
(see Figure 2-6).
3. Unscrew and remove the PEEK finger-tight fitting from the PEEK
union at the inside edge of the source enclosure.
4. Remove the ESI insert (P/N 9227-66) and its connecting blue stripe
PEEK tubing.
2-6 ________________________ Finnigan AQA Hardware Manual
______________________
Manuals Page
Search Manuals
Feedback
Web
Changing Ionization Modes
_________________________________________________________________ Removal of ESI
Caution. Exercise care when handling the ESI insert because it is fragile
and may be damaged easily.
ESI insert
thumb nut
insert retaining latch
Figure 2-6. Removing the ESI insert
_______________________ Finnigan AQA Hardware Manual ________________________
2-7
Manuals Page
Search Manuals
Feedback
Web
Changing Ionization Modes
Setup for APCI ________________________________________________________________
2.5 Setup for APCI
The starting point for this procedure is a probe with no insert installed.
WARNING. Allow the source block and probe heater assembly to cool
before changing ionization modes.
1. Fit the APCI insert (P/N 9227-65) into the probe.
Caution. Exercise care when handling the APCI insert because it is fragile
and may be damaged easily.
orange stripe PEEK tubing
Figure 2-7. APCI insert
2. Secure the orange stripe PEEK tubing of the APCI insert to the PEEK
union at the inside edge of the source enclosure using the PEEK fingertight fitting.
2-8 ________________________ Finnigan AQA Hardware Manual
______________________
Manuals Page
Search Manuals
Feedback
Web
Changing Ionization Modes
_________________________________________________________________ Setup for APCI
LC tubing
APCI insert
insert
retaining latch
insulated plug
Figure 2-8. Installing the APCI insert and securing with the retaining
latch
3. To hold the insert in place, secure the retaining latch using the thumb
nut (use finger-tight pressure).
Secure corona pin in
position using the nut
Corona pin lowered
into the APCI position
Figure 2-9. Lowering the corona pin
_______________________ Finnigan AQA Hardware Manual ________________________
2-9
Manuals Page
Search Manuals
Feedback
Web
Changing Ionization Modes
Setup for APCI ________________________________________________________________
4. Lower the corona pin into the APCI position and secure with the thumb
nut (see Figure 2-9). When looking at the probe and corona pin end-on,
ensure that the pin is central and protrudes into the path of the probe by
1 mm.
equal distance
corona pin
x
x
1mm
probe
Figure 2-10. The position of the corona pin relative to the probe for
APCI
5. Insert the insulated plug (P/N FM100507) into the APCI position; see
Figure 2-8 for identification of the insulated plug.
2-10
______________________ Finnigan AQA Hardware Manual ______________________
Manuals Page
Search Manuals
Feedback
Web
Chapter 3
3. LC/MS and AQA Flow
3. Contents...................................................................................................................................... 3-i
3.1
Introduction ............................................................................................................................. 3-1
3.2
LC/MS Considerations ............................................................................................................ 3-2
Flow Rates ........................................................................................................................ 3-2
HPLC Solvents and Mobile Phase Additives ................................................................... 3-3
3.3
Setting up AQA Flow.............................................................................................................. 3-7
3.4
Flow Splitting ........................................................................................................................ 3-12
_______________________ Finnigan AQA Hardware Manual _________________________ 3-i
Manuals Page
Search Manuals
Feedback
Web
LC/MS and AQA Flow
Introduction ___________________________________________________________________
3-ii ________________________ Finnigan AQA Hardware Manual
______________________
Manuals Page
Search Manuals
Feedback
Web
LC/MS and AQA Flow
____________________________________________________________________ Introduction
3.1 Introduction
Historically, LC/MS has only been compatible with volatile buffer systems
using modifiers such as trifluoroacetic acid, formic acid and acetic acid.
Phosphate buffers, although extensively used in LC separations, were not
suited to LC/MS due to the rapid blocking of the ion sampling region caused
by the deposition of involatile phosphate salts. The self-cleaning AQA API
source allows routine LC/MS with chromatographic buffers such as
phosphates or ion pairing agents and samples in dirty matrices.
This chapter contains the following information:
•
Details of HPLC solvents and mobile phase additives that focus on
LC/MS applications using the Finnigan AQA.
•
Instructions on how to setup AQA flow and information on when to use
it.
•
Instructions on flow splitting for use with hyphenated detection
applications.
_______________________ Finnigan AQA Hardware Manual ________________________
3-1
Manuals Page
Search Manuals
Feedback
Web
LC/MS and AQA Flow
LC/MS Considerations __________________________________________________________
3.2 LC/MS Considerations
This section discusses the considerations to be taken into account when
choosing solvents and additives, and gives guidance on how to optimize
LC/MS analyses using the Finnigan AQA to produce high quality data.
Flow Rates
In general, the column employed determines the choice of flow rate. Each
column has an optimum flow rate. The guidelines in Table 3-1 apply.
Table 3-1.
LC columns and flow rates
Column ID
Flow rate
4.6 mm
1.0 mL/min
3.9 mm
0.5 mL/min
2.1 mm
0.2 mL/min
1.0 mm
40-50 µL/min
capillary
<10 µL/min
The ionization mode determines the flow rate, and hence column ID, that is
used. The following guidelines apply:
•
Electrospray on the Finnigan AQA can operate at all the flow rates
described in Table 3-1 and hence the full range of column IDs can be
used without splitting the flow.
•
APCI cannot operate at flow rates below 0.2 mL/min; therefore, suitable
column IDs are 2.1 mm, 3.9 mm and 4.6 mm.
3-2 ________________________ Finnigan AQA Hardware Manual
______________________
Manuals Page
Search Manuals
Feedback
Web
LC/MS and AQA Flow
___________________________________________________________ LC/MS Considerations
HPLC Solvents and Mobile Phase Additives
The following section is a guide for the choice of solvent and mobile phase
additives. The choice of solvents for LC will be dictated primarily by the
separation requirements, but there are some guidelines that need to be
followed. These take the form of selected examples, which have been
divided into three categories: most compatible, least suitable, and other less
common ones. In all cases, degassed solvents are necessary for LC/MS
operation. Sonication, helium sparging or vacuum membrane degassing
achieves this. Helium sparging and vacuum membrane degassing are the
more efficient techniques.
Most Compatible Solvents
Most compatible solvents are:
•
Water
•
Acetonitrile
•
Methanol
These common reverse phase LC solvents are ideal for LC/MS. When using
high percentages of water, the probe temperature usually needs to be raised
to aid desolvation in the source.
Most Compatible Additives
The most compatible additives are:
•
Acetic acid or formic acid
The LC separations can be enhanced by reducing the pH of the mobile
phase. Suitable additives for this are acetic acid or formic acid. (Formic acid
is stronger than acetic acid and therefore less needs to be added to reach a
required pH.) Addition of acids can suppress ionization in negative ion
analysis and weakly acidic compounds may not form [M-H]- ions in acidic
conditions.
•
Ammonium hydroxide
Ammonium hydroxide (ammonia solution) is suitable for increasing the pH
of the mobile phase, which can enhance LC separations. When analyzing
weakly acidic compounds in negative ion mode, it is unlikely that there will
be any suppression of ionization.
_______________________ Finnigan AQA Hardware Manual ________________________
3-3
Manuals Page
Search Manuals
Feedback
Web
LC/MS and AQA Flow
LC/MS Considerations __________________________________________________________
•
Ammonium acetate or ammonium formate
These volatile salts are often used to buffer mobile phases. Use as little
ammonium acetate or ammonium formate as possible, keeping the
concentration below 100 mM. Ensure that AQA flow is running when using
high concentrations.
•
Non-volatile salts
When using non-volatile salts, ensure that AQA flow is running as they can
crystallize in the source, block the entrance cone, and prevent the mass
spectrometer from functioning. The most common non-volatile salts used
are phosphates.
•
Ion pairing agents
Ensure that AQA flow is running when using ion pairing agents (for
example, sodium octanesulfonic acid). Many ion pairing agents suppress
electrospray ionization.
Least Suitable Additives
Least suitable additives are surface-active agents/detergents.
These can suppress the ionization of other compounds. Detergents, by their
very nature are concentrated at the surface of a liquid. This causes problems
with electrospray as the ionization relies on the evaporation of ions from the
surface of a droplet. The detergent therefore suppresses the evaporation of
other ions. Use surfactants only when they are being analyzed themselves,
not as additives to HPLC mobile phases.
Other Solvents
Other solvents are:
•
Normal phase solvents
Normal phase solvents such as dichloromethane, hexane and toluene are
most suitable for use in APCI.
•
Propan-2-ol (IPA), 2-methoxyethanol, ethanol and so on
These have all been used with LC/MS but their use tends to be
application-specific.
•
Dimethyl sulfoxide (DMSO)
This solvent is commonly used by synthetic chemists for primary dilution.
3-4 ________________________ Finnigan AQA Hardware Manual
______________________
Manuals Page
Search Manuals
Feedback
Web
LC/MS and AQA Flow
___________________________________________________________ LC/MS Considerations
Other Additives
•
Trifluoroacetic acid (TFA)
This is frequently used for peptide and protein analysis. High levels,
>0.1% v/v, can cause suppression of sensitivity in positive ion mode. TFA
may completely suppress ionization in negative ion mode.
•
Triethylamine (TEA)
This may suppress the ionization of less basic compounds in positive ion
mode (as it also is readily ionized to give a [M+H]+ ion at m/z 102). TEA
enhances ionization of other compounds in negative ion mode because it is
basic. This is a particularly useful additive for the analysis of nucleic acids.
•
Tetrahydrofuran (THF)
In ESI, use of THF can reduce sensitivity. This effect can be counteracted
by post-column addition of ammonium acetate. It has no effect in APCI.
Caution. Do not use a concentration of THF greater than 5% with PEEK
tubing. THF causes swelling in the PEEK tubing and consequently presents
a risk of the LC tubing bursting.
•
Inorganic acids
Inorganic acids (for example, sulfuric acid or phosphoric acid) can be used.
Check the suitability of the LC column to low pHs.
Caution. After using phosphoric acid, thoroughly clean the source, source
enclosure and hexapole RF lens to minimize the physical damage.
_______________________ Finnigan AQA Hardware Manual ________________________
3-5
Manuals Page
Search Manuals
Feedback
Web
LC/MS and AQA Flow
LC/MS Considerations __________________________________________________________
Summary of Additives
Table 3-2.
Avoid
Use
Summary of additive use
Positive ion
Trifluoroacetic acid (TFA) (>0.1% v/v),
surfactants.
Negative ion
Surfactants, organic acids; for example,
acetic acid, formic acid, trifluoroacetic
acid (TFA).
Positive ion
Acetic acid, formic acid, ammonium
acetate (<0.1M).
Negative ion
Triethylamine (TEA), ammonium
hydroxide (ammonia solution),
ammonium acetate (<0.1M).
3-6 ________________________ Finnigan AQA Hardware Manual
______________________
Manuals Page
Search Manuals
Feedback
Web
LC/MS and AQA Flow
_____________________________________________________________Setting up AQA Flow
3.3 Setting up AQA Flow
Use the following information in conjunction with the setup and
maintenance animations on the Finnigan AQA CD shipped with the
instrument.
Note. It is necessary to use the AQA flow system only for dirty matrices or
with involatile buffers. Choose the AQA flow solvent to give the most
effective solubility for the expected contaminants.
1. Unscrew the AQA reservoir from its support.
AQA reservoir
Figure 3-1. The AQA reservoir
_______________________ Finnigan AQA Hardware Manual ________________________
3-7
Manuals Page
Search Manuals
Feedback
Web
LC/MS and AQA Flow
Setting up AQA Flow____________________________________________________________
2. Fill the reservoir to 5 mm from the top with a suitable solvent; for
example, HPLC grade water or an organic solvent such as methanol.
suitable
solvent
Figure 3-2. Filling the reservoir
3. Check the integrity of the o-ring seal. Replace the o-ring (P/N
FM100200) if it is damaged.
4. Screw the reservoir back into its support.
3-8 ________________________ Finnigan AQA Hardware Manual
______________________
Manuals Page
Search Manuals
Feedback
Web
LC/MS and AQA Flow
_____________________________________________________________Setting up AQA Flow
5. Loosen the Swagelok® nut on the top of the reservoir support. Insert
AQA fused silica capillary (P/N FM100772) through the Swagelok nut
until it reaches the bottom of the reservoir. Mark this point with
correction fluid.
6. Raise the capillary 1-2 mm, measuring the distance using the correction
fluid mark. Tighten the Swagelok nut.
AQA fused silica capillary
Figure 3-3. Installing the AQA fused silica capillary in the reservoir
_______________________ Finnigan AQA Hardware Manual ________________________
3-9
Manuals Page
Search Manuals
Feedback
Web
LC/MS and AQA Flow
Setting up AQA Flow____________________________________________________________
7. Insert the other end of the capillary into the source through the
Swagelok nut on the top of the source enclosure.
8. Feed the capillary through this nut and down the AQA capillary support
until it touches the edge of the entrance cone orifice.
Insert the AQA capillary into the source
AQA fused silica capillary
Move the AQA capillary support into place
Figure 3-4. Installing the AQA capillary in the source
9. Tighten the Swagelok nut to hold the capillary in place.
3-10
______________________ Finnigan AQA Hardware Manual ______________________
Search Manuals
Feedback
Web
LC/MS and AQA Flow
_____________________________________________________________Setting up AQA Flow
10. Pull out the mini regulator adjuster in the nitrogen line, and turn
clockwise to pressurize the AQA reservoir. When the regulator reads
approximately 12 psig, stop turning and push the adjuster into its locked
position. A reservoir pressure of approximately 12 psig is needed to
produce the desired AQA flow rate of 40 µL/min.
Figure 3-5. Turning the mini regulator adjuster
The graph in Figure 3-6 shows the relationship between the pressure within
the AQA reservoir and the AQA flow rate onto the entrance cone.
80
70
AQA flow rate (µL/min)
Manuals Page
60
50
40
30
20
10
0
0
2
4
6
8
10
12
14
16
18
20
22
24
26
Reservoir pressure (psig)
Figure 3-6. Graph of AQA flow rate against reservoir pressure (fused
silica dimensions: length 450 mm, ID 0.1 mm, OD 0.36 mm)
_______________________ Finnigan AQA Hardware Manual _______________________ 3-11
Manuals Page
Search Manuals
Feedback
Web
LC/MS and AQA Flow
Flow Splitting__________________________________________________________________
3.4 Flow Splitting
Due to the Finnigan AQA’s source design, it is not a requirement to use
flow splitting of the LC eluent. However, if hyphenated detection is
required, flow splitting can be achieved in the following way.
Zero dead volume
T-piece
HPLC column
Fused silica
to insert
and source
PTFE sleeve
PEEK LC tubing
PTFE sleeve
Fused silica
to waste or UV
Figure 3-7. Schematic of a split
A simple and effective way to make a post-column split for use with the
Finnigan AQA is shown in Figure 3-7.
1. Connect a zero dead volume T-piece to the exit of the column using the
normal PEEK or stainless steel LC tubing (PEEK tubing is used in the
figure).
2. Connect one of the exits of the T-piece to the source enclosure using
narrow bore PEEK tubing or, as shown in the diagram, fused silica. Use
a PTFE, or orange stripe PEEK tubing, sleeve to secure the fused silica
into the T-piece.
3. Connect a length of the same tubing to the other exit (the split stream).
The amount of liquid directed through the split stream is determined by the
back-pressure exerted at this exit, and hence by the internal diameter and the
length of the tubing attached. As a general rule, the longer the piece of
tubing attached to the split, the greater the flow to the source and the smaller
the split. To reduce the flow to the source and increase the split, shorten the
length of tubing at the split stream exit.
There are a number of ways to measure the amount of liquid flowing into
the source and hence measure the split ratio. Two methods are provided
here, one giving a rough estimate and the other a more accurate figure.
3-12
______________________ Finnigan AQA Hardware Manual ______________________
Manuals Page
Search Manuals
Feedback
Web
LC/MS and AQA Flow
___________________________________________________________________Flow Splitting
To achieve a rough estimate of the flow rate into the source:
1. Remove the insert from the source enclosure.
2. Connect the insert directly to the column outlet and set the flow rate of
the LC pump to the desired flow rate into the source; for example,
0.2 mL/min.
3. Count the drops that fall off the end of the insert in one minute. Make a
note of this figure.
4. Connect the split as shown in Figure 3-7.
5. Now set the LC pump to the flow rate that is required through the
column, for example, 1.0 mL/min.
6. Count the drops that fall off the end of the insert in one minute.
If the split is set up correctly (in this case to give a split ratio of 4:1), then
the number of drops recorded will be the same as that in step 3. If the
number of drops is greater than before, shorten the length of the tubing
connected to the waste (or UV detector) stream. If there are too few drops
then a longer length of tubing is required. Continue this until the number of
drops is the same as that recorded in step 3.
Note. There is no need to measure the split ratio accurately. Even
significant changes in split ratio have only minimal effect on
chromatographic peak shape.
To accurately measure the split and therefore know the exact flow rate into
the source, use the following method:
1. Remove the insert from the source enclosure.
2. Connect the split to the insert and LC pump as shown in Figure 3-7.
3. Set the flow rate of the pump to the flow required through the column,
for example, 1.0 mL/min.
4. Collect and weigh the liquid that emerges from the insert in one minute.
5. Follow the same procedure with the liquid that emerges from the waste
(or UV detector) stream.
6. Calculate the ratio of the two masses of the liquid to give the split ratio,
and hence calculate the exact flow rate into the source.
For example, if 200 mg emerges from the insert and 800 mg from the waste
stream in one minute, then the split ratio is 4:1 and the flow rate into the
source can be calculated as 0.2 mL/min.
_______________________ Finnigan AQA Hardware Manual _______________________ 3-13
Manuals Page
Search Manuals
Feedback
Web
LC/MS and AQA Flow
Flow Splitting__________________________________________________________________
3-14
______________________ Finnigan AQA Hardware Manual ______________________
Manuals Page
Search Manuals
Feedback
Web
Chapter 4
4. AQA Sample Infusion System
4. Contents...................................................................................................................................... 4-i
4.1
Introduction ............................................................................................................................. 4-1
4.2
Overview ................................................................................................................................. 4-2
4.3
Setting up the AQA Sample Infusion System ......................................................................... 4-3
_______________________ Finnigan AQA Hardware Manual _________________________ 4-i
Manuals Page
Search Manuals
Feedback
Web
AQA Sample Infusion System
Introduction ___________________________________________________________________
4-ii ________________________ Finnigan AQA Hardware Manual
______________________
Manuals Page
Search Manuals
Feedback
Web
AQA Sample Infusion System
____________________________________________________________________ Introduction
4.1 Introduction
The Finnigan AQA’s built-in sample infusion system allows easy calibration
and tuning.
This chapter provides instructions on how to setup the AQA sample infusion
system.
_______________________ Finnigan AQA Hardware Manual ________________________
4-1
Manuals Page
Search Manuals
Feedback
Web
AQA Sample Infusion System
Overview _____________________________________________________________________
4.2 Overview
The recommended way to introduce a sample for tuning and mass
calibration is to use the AQA sample infusion system. This method provides
a steady flow of sample directly into the source (typically at flow rates of
<50 µL/min). Direct sample infusion is used to introduce the following:
•
Calibration sample
•
Sensitivity verification sample
•
Compound of interest for tuning
Note. Due to the low flow rates involved, direct sample infusion is
normally used only with electrospray. In APCI, a sample can be infused
into the source using a splitter (see Figure 4-1). Infuse the sample into a
suitable LC flow (for example 0.5 mL/min) via the splitter before the
sample enters the source.
AQA reservoir
LC pump
To the APCI insert
and source
zero dead volume
T-piece
Figure 4-1. Using a splitter to add a suitable LC flow to the sample
infusion flow for operation in APCI
4-2 ________________________ Finnigan AQA Hardware Manual
______________________
Manuals Page
Search Manuals
Feedback
Web
AQA Sample Infusion System
__________________________________________ Setting up the AQA Sample Infusion System
4.3 Setting up the AQA Sample
Infusion System
Use the following information in conjunction with the setup and
maintenance animations on the Finnigan AQA CD shipped with the
instrument.
These instructions show how to configure the AQA sample infusion system
to introduce tuning and mass calibration samples into the source. They
assume that the source is setup for electrospray ionization. If your source is
not setup for ESI, refer to the chapter Changing Ionization Modes.
1. Unscrew the AQA reservoir from its support and empty out any
remaining liquid.
2. Place an Eppendorf® sample vial (P/N FM100785) containing your
sample into the tripod sample vial holder (P/N FM100764) with the lid
open.
Empty AQA
reservoir
tripod
Eppendorf vial
containing the sample
Figure 4-2. Placing sample vial and tripod into the empty AQA
reservoir
3. Place the tripod sample vial holder into the empty AQA reservoir.
4. Check the integrity of the o-ring seal. Replace the o-ring (P/N FM
100200) if it is damaged.
5. Screw the reservoir back into its support.
_______________________ Finnigan AQA Hardware Manual ________________________
4-3
Manuals Page
Search Manuals
Feedback
Web
AQA Sample Infusion System
Setting up the AQA Sample Infusion System _________________________________________
6. Loosen the Swagelok nut on the top of the reservoir support. Insert the
long sample infusion fused silica capillary (P/N FM100786) through the
Swagelok nut until it reaches the bottom of the sample vial. Mark this
point on the fused silica with correction fluid
7. Raise the fused silica capillary 1-2 mm measuring the distance using the
correction fluid mark. Tighten the Swagelok nut.
sample infusion fused silica capillary
Figure 4-3. Installing sample infusion fused silica capillary
4-4 ________________________ Finnigan AQA Hardware Manual
______________________
Manuals Page
Search Manuals
Feedback
Web
AQA Sample Infusion System
__________________________________________ Setting up the AQA Sample Infusion System
8. If LC tubing is present, disconnect it from the PEEK union at the outer
edge of the source enclosure. Connect the other end of the fused silica
capillary to the PEEK union at the outer edge of the source enclosure.
fused silica sample infusion capillary
ESI insert
Figure 4-4. Connecting sample infusion capillary to the source
enclosure
9. Pull out the mini regulator adjuster in the nitrogen line, and turn
clockwise to pressurize the AQA reservoir. When the regulator reads
approximately 6 psig, stop turning and push the adjuster into its locked
position. A reservoir pressure of approximately 6 psig gives a sample
infusion flow rate of 10 µL/min.
Figure 4-5. Turning the mini regulator adjuster
_______________________ Finnigan AQA Hardware Manual ________________________
4-5
Manuals Page
Search Manuals
Feedback
Web
AQA Sample Infusion System
Setting up the AQA Sample Infusion System _________________________________________
The graph in Figure 4-6 shows the relationship between the pressure within
the AQA reservoir and the sample infusion rate.
45
Sample infusion rate (µL/min)
40
35
30
25
20
15
10
5
0
0
5
10
15
20
25
Resevoir pressure (psig)
Figure 4-6. Graph of sample infusion rate against reservoir pressure
(fused silica dimensions: length 650 mm, ID 0.1 mm, OD
0.36 mm)
4-6 ________________________ Finnigan AQA Hardware Manual
______________________
Manuals Page
Search Manuals
Feedback
Web
AQA Sample Infusion System
__________________________________________ Setting up the AQA Sample Infusion System
10. Check that liquid is emerging from the end of the ESI insert. The flow
rate should be approximately 10 µL/min.
liquid drop emerging from the ESI insert
Figure 4-7. Liquid emerging from the end of the ESI insert
11. Stop sample infusion by depressurizing the AQA reservoir. Pull out the
mini regulator adjuster and turn anti-clockwise. Stopping the flow
allows time for the probe heater to warm up and stabilize at the required
temperature for sample infusion.
12. Close the source.
Follow step 9 to pressurize the AQA reservoir. Introduce the sample into the
source when the gas flows have been activated and the probe has reached
the required temperature.
Note. Allow time for the probe heater to warm up and stabilize at the
required temperature before commencing sample infusion.
_______________________ Finnigan AQA Hardware Manual ________________________
4-7
Manuals Page
Search Manuals
Feedback
Web
AQA Sample Infusion System
Setting up the AQA Sample Infusion System _________________________________________
4-8 ________________________ Finnigan AQA Hardware Manual
______________________
Manuals Page
Search Manuals
Feedback
Web
Chapter 5
5. Routine and Preventive Maintenance
5. Contents...................................................................................................................................... 5-i
5.1
Introduction ............................................................................................................................. 5-1
5.2
Maintenance Schedule............................................................................................................. 5-2
5.3
The Electrospray and APCI Inserts ......................................................................................... 5-3
Flushing the Inserts ........................................................................................................... 5-3
Cleaning the ESI Insert and Ceramic Gas Nozzle ............................................................ 5-3
Replacing the Inserts......................................................................................................... 5-5
5.4
The Source Block .................................................................................................................... 5-6
Cleaning the Entrance Cone.............................................................................................. 5-6
Cleaning the Source Block................................................................................................ 5-7
5.5
The Hexapole RF Lens.......................................................................................................... 5-14
Cleaning the Hexapole RF Lens ..................................................................................... 5-14
5.6
The Probe .............................................................................................................................. 5-20
5.7
The Rotary Pump................................................................................................................... 5-21
Checking the Rotary Pump Oil Level and Color ............................................................ 5-21
Changing the Rotary Pump Oil....................................................................................... 5-23
Replacing the Foreline Trap Pellets ................................................................................ 5-24
5.8
The Rear Panel Fan Filters .................................................................................................... 5-25
_______________________ Finnigan AQA Hardware Manual _________________________ 5-i
Manuals Page
Search Manuals
Feedback
Web
Routine and Preventive Maintenance
Contents _____________________________________________________________________
5-ii ________________________ Finnigan AQA Hardware Manual
______________________
Manuals Page
Search Manuals
Feedback
Web
Routine and Preventive Maintenance
____________________________________________________________________ Introduction
5.1 Introduction
This chapter contains details of how to perform all the user maintenance
tasks on the Finnigan AQA, both routine and as required. Use this
information in conjunction with the setup and maintenance animations on
the Finnigan AQA CD shipped with the instrument.
The chapter begins with a maintenance schedule, indicating how often you
should perform each routine maintenance task.
The chapter then describes maintenance of the following parts of the
Finnigan AQA:
•
The electrospray and APCI inserts
•
The source block
•
The hexapole RF lens
•
The probe
•
The rotary pump
•
The rear panel fan filters
_______________________ Finnigan AQA Hardware Manual ________________________
5-1
Manuals Page
Search Manuals
Feedback
Web
Routine and Preventive Maintenance
Maintenance Schedule __________________________________________________________
5.2 Maintenance Schedule
Table 5-1 is a list of routine maintenance procedures that should be carried
out on the Finnigan AQA at the intervals specified.
The maintenance schedule provides only a rough guide to the frequency of
maintenance tasks. The appropriate frequency depends on instrument usage
and the level of system-induced contamination from samples and matrices.
Table 5-1.
Maintenance schedule
Frequency
Action
Weekly
Clean the source if a drop in sensitivity is seen during
analysis, or if there is a drop in sensitivity when
performing the sensitivity verification test (refer to the
chapter Preparing for Daily Operation in the
Finnigan AQA Getting Started manual), see page 57
Clean and flush the inserts, see page 5-3
Check the oil level and color in the rotary pump and
add oil if necessary, see page 5-21
Monthly
Check the rear panel fan filters for blockage and clean
if necessary, see page 5-25
3-6 Monthly
Clean the hexapole RF lens, see page 5-14
6 Monthly
Replace the rotary pump oil, see page 5-23
Replace the foreline trap pellets, see page 5-24
Clean the inside of the probe, see page 5-20
Refer to the PC user guide supplied for cleaning the PC fan filters.
5-2 ________________________ Finnigan AQA Hardware Manual
______________________
Manuals Page
Search Manuals
Feedback
Web
Routine and Preventive Maintenance
__________________________________________________The Electrospray and APCI Inserts
5.3 The Electrospray and APCI Inserts
To extend their lifetime, regularly flush both the inserts with solvent,
especially after prolonged use with buffers. The ESI insert can also be
stripped-down and cleaned. Replace the inserts if they become blocked.
Flushing the Inserts
To prevent blockage, flush the inserts with [50:50] acetonitrile:water or
methanol:water after use with phosphates, ion pairing agents, acids, or other
additives. Flush the inserts outside the source enclosure.
Note. To prevent blockage, flush each insert after using buffers.
Cleaning the ESI Insert and Ceramic Gas
Nozzle
The ESI insert can be stripped down for thorough cleaning after prolonged
use with additives. Also clean the ESI ceramic gas nozzle.
1. Remove the ceramic gas nozzle (P/N 9227-92) from the front end of the
probe.
ESI ceramic nozzle
Figure 5-1. Removing the ESI ceramic gas nozzle
_______________________ Finnigan AQA Hardware Manual ________________________
5-3
Manuals Page
Search Manuals
Feedback
Web
Routine and Preventive Maintenance
The Electrospray and APCI Inserts _________________________________________________
2. Loosen the thumb nut, and drop the retaining latch to the open position.
3. Unscrew and remove the PEEK finger-tight fitting from the PEEK
union at the inside edge of the source enclosure.
4. Remove the ESI insert (P/N 9227-66), and its connecting blue stripe
PEEK tubing.
ESI insert
thumb nut
insert retaining latch
Figure 5-2. Removing the insert from the probe
5. Carefully pull the outer ceramic jet insulator (P/N 9227-70) to remove it
from the insert.
ceramic jet insulator
blue stripe PEEK tubing
Figure 5-3. ESI insert
6. Wipe the now exposed surface of the stainless steel insert capillary with
[50:50] methanol:water.
7. Sonicate the ceramic jet insulator and ESI ceramic gas nozzle in
concentrated nitric acid. Then boil them in distilled water for 5 to 10
minutes.
5-4 ________________________ Finnigan AQA Hardware Manual
______________________
Manuals Page
Search Manuals
Feedback
Web
Routine and Preventive Maintenance
__________________________________________________The Electrospray and APCI Inserts
WARNING. Exercise extreme caution when using concentrated nitric
acid. Always wear protective clothing and use only in a fume hood.
Observe appropriate disposal requirements when discarding the used acid.
Replacing the Inserts
Replace the inserts if either of them has become blocked or partially blocked
during operation. A significant increase in LC pump backpressure (that is,
up to 300 psig at 1 mL/min added to the total LC system backpressure) or
instability in the signal, could be symptoms of a partially blocked insert.
Follow steps 1-4 of Cleaning the ESI Insert on page 5-3 to remove the ESI
insert or steps 2-4 to remove the APCI insert. Alternatively, refer to the
chapter Changing Ionization Modes.
Fit a new ESI insert (P/N 9227-66) or APCI insert (P/N 9227-65) into the
probe and complete steps 1-3 in reverse to secure in place. Alternatively,
refer to the chapter Changing Ionization Modes.
_______________________ Finnigan AQA Hardware Manual ________________________
5-5
Manuals Page
Search Manuals
Feedback
Web
Routine and Preventive Maintenance
The Source Block ______________________________________________________________
5.4 The Source Block
The source block can be removed from the instrument (see page 5-7) and
disassembled (see page 5-10) into its component parts for cleaning.
Typically, the entrance cone needs to be cleaned most frequently because it
becomes dirty with use over a long period. The cone can be reached without
the need to remove the source block from the instrument.
WARNING. Allow the source block and probe heater assembly to cool
before carrying out any maintenance.
Cleaning the Entrance Cone
1. Vent the instrument if it is currently under vacuum. Right-click on the
server and choose Vacuum | Vent.
2. Expose the entrance cone. Retract the corona pin (if in APCI mode), or
remove the ESI ceramic gas nozzle and insert (if in ESI mode), and
move the AQA capillary support away.
probe
corona pin
AQA capillary support
Figure 5-4. Exposing the source entrance cone
3. Remove the entrance cone after venting and sonicate first in a 10% v/v
solution of formic acid and then in methanol.
5-6 ________________________ Finnigan AQA Hardware Manual
______________________
Manuals Page
Search Manuals
Feedback
Web
Routine and Preventive Maintenance
_______________________________________________________________ The Source Block
Cleaning the Source Block
It is good practice to clean the entire source on a weekly basis, particularly if
complex sample matrices or chromatographic buffers are routinely used.
Carry out the procedure for removing the source and then the procedure for
disassembling and cleaning the source if the source has become completely
blocked.
Removing the Source
1. Vent the instrument if it is currently under vacuum. Right-click on the
server and choose Vacuum | Vent.
2. Remove either the ESI or the APCI insert from the probe. (If you have
been working in ESI mode remember to remove the ceramic gas nozzle
from the front end of the probe (see Figure 5-1).)
3. Loosen the Swagelok nut and remove the AQA capillary support (P/N
FM100770) from the source. If, after removing the source, you want to
remove the hexapole RF lens for cleaning, then completely remove this
Swagelok fitting (P/N FM100580). If not, the fitting can remain in
place.
Swagelok nut and fitting
ill
AQA capillary support
Figure 5-5. Loosening the Swagelok nut and removing the AQA
capillary support
_______________________ Finnigan AQA Hardware Manual ________________________
5-7
Manuals Page
Search Manuals
Feedback
Web
Routine and Preventive Maintenance
The Source Block ______________________________________________________________
4. Disconnect the source voltage connection from the bottom of the source
block.
source block
source voltage connection
Figure 5-6. Disconnecting the source voltage
5-8 ________________________ Finnigan AQA Hardware Manual
______________________
Manuals Page
Search Manuals
Feedback
Web
Routine and Preventive Maintenance
_______________________________________________________________ The Source Block
5. Loosen the thumb screws (P/N 9227-64) securing the vacuum line
clamp (P/N 9227-118) in position. Pull the clamp towards you as far as
it can go. Disengage the vacuum line elbow (P/N 9227-120) from the
clamp.
6. Remove the two screws holding the source block in place (P/N
FM100382). Remove the source block.
source screws
vacuum line clamp thumb screws
vacuum line elbow
Figure 5-7. Disengaging the vacuum line elbow from the clamp and
removing the source screws to allow the source block to
be removed
Caution. Support the source block from below to prevent it from falling.
_______________________ Finnigan AQA Hardware Manual ________________________
5-9
Manuals Page
Search Manuals
Feedback
Web
Routine and Preventive Maintenance
The Source Block ______________________________________________________________
Disassembling and Cleaning the Source Block
1. Remove the voltage connection screw (P/N 5312004), pin (P/N 9227113), and washer (P/N 1150705), from the bottom of the source.
vacuum clamp
washer
screw
thumb screws
voltage connection pin
Figure 5-8. Removing the voltage connection and vacuum line clamp
2. Remove the thumb screws (P/N 9227-64), and vacuum line clamp (P/N
9227-118), from the side of the source block.
5-10
______________________ Finnigan AQA Hardware Manual ______________________
Manuals Page
Search Manuals
Feedback
Web
Routine and Preventive Maintenance
_______________________________________________________________ The Source Block
3. Remove the disrupter pin (P/N 9227-119) and o-ring (P/N 5711003).
o-ring
disrupter pin
Figure 5-9. Removing the disrupter pin and o-ring
_______________________ Finnigan AQA Hardware Manual _______________________ 5-11
Manuals Page
Search Manuals
Feedback
Web
Routine and Preventive Maintenance
The Source Block ______________________________________________________________
4. Remove the two entrance cone screws (P/N 5311023), the entrance cone
(P/N 9227-5) and the entrance cone o-ring (P/N FM100231).
entrance cone
o-ring
Figure 5-10. Removing the source entrance cone
Caution. Exercise great care when handling the entrance cone. Always
store with the cone facing upwards.
5-12
______________________ Finnigan AQA Hardware Manual ______________________
Manuals Page
Search Manuals
Feedback
Web
Routine and Preventive Maintenance
_______________________________________________________________ The Source Block
5. Remove the two exit cone screws (P/N 5314015) and the exit cone (P/N
9227-3).
exit cone
Figure 5-11. Removing the source exit cone
6. Sonicate the disassembled component parts (except the o-rings) first in a
1% v/v solution of formic acid, then in water, and then in methanol.
Caution. Ensure that the parts do not become damaged in this process. If
necessary, sonicate each part separately. In particular, ensure that the cones
are face-up at all times.
Caution. Do not sonicate the o-rings, as the solvent and acid may damage
them.
_______________________ Finnigan AQA Hardware Manual _______________________ 5-13
Manuals Page
Search Manuals
Feedback
Web
Routine and Preventive Maintenance
The Hexapole RF Lens __________________________________________________________
5.5 The Hexapole RF Lens
The hexapole RF lens can be removed from the instrument (see page 5-14)
and disassembled (see page 5-17) into its component parts for cleaning.
WARNING. Allow the source block and probe heater assembly to cool
before carrying out any maintenance.
Cleaning the Hexapole RF Lens
This procedure only needs to be carried out approximately once every 3 to 6
months under normal working conditions. Refer to the Maintenance
Schedule topic on page 5-2.
Removing the RF Hexapole
Note. Follow the procedure for removing the source (see page 5-7), before
removing the hexapole to carry out maintenance.
1. Disconnect the voltage connection to the corona pin.
voltage connection
corona pin
Figure 5-12. Disconnecting the corona pin voltage connection
5-14
______________________ Finnigan AQA Hardware Manual ______________________
Manuals Page
Search Manuals
Feedback
Web
Routine and Preventive Maintenance
___________________________________________________________ The Hexapole RF Lens
2. Remove the three screws that secure the probe cover plate in position.
cover plate screws
Figure 5-13. Removing the probe cover screws
3. Remove the probe cover plate and corona pin as one item.
4. Remove the vacuum line elbow (P/N 9227-120), o-ring (P/N 5711013)
and the Tygon® tube (P/N 9227-123) from the source as a single item.
Tygon tube
o-ring
vacuum line elbow
Figure 5-14. Removing the vacuum line elbow and Tygon tube
_______________________ Finnigan AQA Hardware Manual _______________________ 5-15
Manuals Page
Search Manuals
Feedback
Web
Routine and Preventive Maintenance
The Hexapole RF Lens __________________________________________________________
5. Remove the two screws (P/N 5314016) and washers (P/N 1150605) that
secure the probe mounting block in position (see Figure 5-15). Note that
the top screw is under the hexagonal spacer in the figure. Swing the
probe forward and to the left out of the path of the source flange.
Caution. Do not bend the heater wires and thermocouple as the probe is
moved to one side because this will damage the wires and lead to heater
failure.
heater wires and thermocouple
screws securing the probe mounting block in positiion
Figure 5-15. Bringing the probe out of the path of the hexapole
6. Remove the two source flange screws (P/N 5313047).
7. Reinsert the source block screws (P/N FM100382) into the source
flange. Use these to remove the hexapole, which is attached to the
source flange.
5-16
______________________ Finnigan AQA Hardware Manual ______________________
Manuals Page
Search Manuals
Feedback
Web
Routine and Preventive Maintenance
___________________________________________________________ The Hexapole RF Lens
source screws
source flange screws
Figure 5-16. Removing the hexapole
8. Slide the hexapole forward to remove it from the instrument.
Disassembling and Cleaning the RF Hexapole
1. Unscrew the three nuts holding the hexapole in place on the source
flange studs.
Note. Behind the nuts and hexapole are springs. Exercise care when
unscrewing the nuts.
_______________________ Finnigan AQA Hardware Manual _______________________ 5-17
Manuals Page
Search Manuals
Feedback
Web
Routine and Preventive Maintenance
The Hexapole RF Lens __________________________________________________________
source flange
differential aperture plate
source flange stud nuts
Figure 5-17. Separating the hexapole from the source flange
2. Separate the hexapole from the source flange.
3. Remove the three screws (P/N 5311016) securing the differential
aperture plate in position, and separate the differential aperture plate
from the hexapole.
4. Totally immerse the hexapole and differential aperture plate in separate
measuring cylinders or beakers of [50:50] methanol:water and sonicate.
Figure 5-18. Cleaning the hexapole
Caution. To prevent the hexapole or the differential aperture plate from
touching the bottom of the vessel and hence becoming damaged, either
suspend each one on a wire or place a tissue at the bottom of the vessel.
5-18
______________________ Finnigan AQA Hardware Manual ______________________
Manuals Page
Search Manuals
Feedback
Web
Routine and Preventive Maintenance
___________________________________________________________ The Hexapole RF Lens
5. If necessary, clean the differential aperture plate with a cotton bud
(Q-tip) soaked in [50:50] methanol:water.
6. Rinse both the hexapole and differential aperture plate with methanol.
7. Dry the hexapole and differential aperture plate with nitrogen gas.
Assembling the RF Hexapole
1. Secure the differential aperture plate onto the hexapole using the three
screws (P/N 5311016).
2. Depress the hexapole onto the springs and secure the three nuts to hold
the hexapole in place on the source flange.
Note. Tighten the nuts until they are just flush with the ends of the studs.
Ensure that the hexapole is able to move 2-3 mm relative to the source
flange.
tighten the source flange stud nuts
so that they are flush with the top of the studs
Figure 5-19. Assembling the hexapole
3. Slide the hexapole back into the instrument along the guide rails.
Resistance will be felt along the last 2-3 mm. Push the hexapole into
place with the source flange and secure with two screws.
_______________________ Finnigan AQA Hardware Manual _______________________ 5-19
Manuals Page
Search Manuals
Feedback
Web
Routine and Preventive Maintenance
The Probe ____________________________________________________________________
5.6 The Probe
The inside of the probe can be cleaned. This procedure needs to be carried
out only once every 6 months. Refer to the Maintenance Schedule table on
page 5-2.
WARNING. Allow the probe heater assembly to cool before carrying out
any maintenance.
1. Remove the insert from the probe. Refer to the chapter Changing
Ionization Modes for information on removing the insert.
2. Clean the inside of the probe using a cotton bud (Q-tip) soaked in
[50:50] methanol:water.
5-20
______________________ Finnigan AQA Hardware Manual ______________________
Manuals Page
Search Manuals
Feedback
Web
Routine and Preventive Maintenance
_______________________________________________________________ The Rotary Pump
5.7 The Rotary Pump
The vacuum system consists of two types of vacuum pumps: two
turbomolecular pumps and one rotary pump. The turbomolecular pumps are
housed within the Finnigan AQA and must be serviced only by a trained
service engineer. The rotary pump is external to the Finnigan AQA and
requires routine maintenance to keep it running at its optimum performance
level.
The following maintenance procedures are covered here:
•
Checking the rotary pump oil level and color
•
Adding oil to top-up the oil level
•
Changing the rotary pump oil
•
Replacing the foreline trap pellets
Note. More information on operating and maintaining the rotary pump can
be found in the Rotary Pump User Manual, supplied with the Finnigan
AQA system.
Checking the Rotary Pump Oil Level and
Color
Check the rotary pump oil level and color at least once a week.
If the oil level in the rotary pump gets low before the scheduled oil change,
use the procedure in the next section to add oil. To check the oil:
1. Look through the viewing window at one end of the rotary pump. The
oil level should be between the upper and lower marks positioned next
to the window.
2. Add more oil if the oil level is near or below the lower mark. Refer to
the procedure for adding oil on page 5-22.
If a six-monthly service is due, it may be more convenient to drain and
replace the oil. In this case, refer to the procedure for changing the rotary
pump oil on page 5-23.
If the oil has turned red in color, it should also be replaced. (Clean rotary
pump oil is a clear straw color.)
_______________________ Finnigan AQA Hardware Manual _______________________ 5-21
Manuals Page
Search Manuals
Feedback
Web
Routine and Preventive Maintenance
The Rotary Pump ______________________________________________________________
Adding Oil
WARNING. Vent the instrument before adding oil. Attempting to add oil
while the pump is running could result in serious personal injury from hot
rotary pump oil.
The oil used in the Edwards E2M28 Rotary Pump is type Ultragrade 19
(P/N FM101067).
1. Turn Operate Off and vent the instrument. Refer to the chapter Shutting
Down and Restarting the System for information on turning Operate
Off and venting.
2. Remove the oil filler plug marked Oil from the top of the pump.
3. Pour the oil into the pump until the oil level in the viewing window is
close to, but not above, the upper mark.
5-22
______________________ Finnigan AQA Hardware Manual ______________________
Manuals Page
Search Manuals
Feedback
Web
Routine and Preventive Maintenance
_______________________________________________________________ The Rotary Pump
Changing the Rotary Pump Oil
The fluid in the rotary pump should be replaced at least once every six
months. When replacing the oil, also replace the foreline trap pellets.
The oil used in the Edwards E2M28 Rotary Pump is Ultragrade 19 (P/N
FM101067).
WARNING. Wear gloves when changing the oil. Avoid contact with the
pump oil; it may contain dissolved residues from analyzed samples.
Observe appropriate disposal requirements when discarding the used oil.
1. Turn Operate Off and vent the instrument.
2. Elevate the rotary pump to gain access to the drain plug.
WARNING. The rotary pump is a heavy item requiring at least two
people to lift and move it safely.
3. Place a container under the drain plug on the rotary pump (next to the
oil level viewing window).
4. Remove the oil filler plug marked Oil from the top of the pump.
5. Remove the drain plug from the pump and allow the old oil to drain out
until it reaches a trickle.
6. Replace the drain plug.
7. Fill the pump reservoir up to, but not above, the upper mark.
8. Replace the filler plug.
9. Pump down the instrument to prepare for operation.
Note. Leave the system pumping for at least half an hour before
commencing operation.
_______________________ Finnigan AQA Hardware Manual _______________________ 5-23
Manuals Page
Search Manuals
Feedback
Web
Routine and Preventive Maintenance
The Rotary Pump ______________________________________________________________
Replacing the Foreline Trap Pellets
The pellets in the foreline trap need to be replaced periodically to help keep
the Finnigan AQA in high vacuum. Perform this procedure at the same time
as an oil change.
WARNING. Wear gloves when handling the pellets. Avoid contact with
them as they are poisonous and may contain residues from previously
analyzed samples. Observe appropriate disposal requirements when
discarding the used pellets.
To the SOURCE pumping
connection on the rear of the AQA
To the BACKING pumping
connection on the rear of the AQA
Foreline trap
Pumping inlet
Rotary pump
Figure 5-20. The rotary pump, showing the foreline trap and the
pumping connections to the rear of the Finnigan AQA
Use Foreline Trap alumina pellets (P/N 6060116). For any additional
information, refer to the Foreline Trap manual provided.
1. Turn Operate Off and vent the instrument.
2. Remove the end cap from the foreline trap to gain access to the inner
basket of alumina pellets.
3. Remove the basket from the foreline trap and empty its contents. Refill
with a new tin of pellets.
4. Reassemble the foreline trap.
5. Pump down the instrument to prepare for operation.
5-24
______________________ Finnigan AQA Hardware Manual ______________________
Manuals Page
Search Manuals
Feedback
Web
Routine and Preventive Maintenance
________________________________________________________ The Rear Panel Fan Filters
5.8 The Rear Panel Fan Filters
The Finnigan AQA has two rear panel fans to cool the instrument internally.
Covering these fans are two fan filters that prevent dust and other particulate
matter from entering the instrument. It is necessary to periodically clean the
filters as they can become blocked, causing the Finnigan AQA to overheat.
position of fans on rear panel
ANALOGUE OUT
COM 1
COM 2
USER I/O
PC LINK
ROTARY PUMP
6A MAX
SUPPLY INLET
AQA
WATER
IN GAS INLET
BACKING
EXHAUST
WATER
OUT GAS INLET
Finnigan AQA
SOURCE
RATING:
Figure 5-21. Rear of the Finnigan AQA showing the position of the two
fans
_______________________ Finnigan AQA Hardware Manual _______________________ 5-25
Manuals Page
Search Manuals
Feedback
Web
Routine and Preventive Maintenance
The Rear Panel Fan Filters _______________________________________________________
The filter (a piece of metal gauze) is held in place by a plastic screen.
1. Remove the plastic screen by pulling it away from the Finnigan AQA. It
will snap out of place quite easily.
2. Remove the gauze from the fan or screen.
3. Clean the gauze using a vacuum cleaner or blowing with compressed
air. The gauze can also be washed using soap and water and then airdried.
4. Replace the gauze over the fan and snap the screen back into place.
Note. Clean the gauze away from the Finnigan AQA to ensure that the
dust removed from the gauze does not affect any part of the instrument.
5-26
______________________ Finnigan AQA Hardware Manual ______________________
Manuals Page
Search Manuals
Feedback
Web
Chapter 6
6. Troubleshooting
6. Contents...................................................................................................................................... 6-i
6.1
Introduction ............................................................................................................................. 6-1
6.2
Troubleshooting Tables ........................................................................................................... 6-2
General Problems.............................................................................................................. 6-3
Low Sensitivity Problems ................................................................................................. 6-5
Inlet System / Chromatography Problems ...................................................................... 6-11
Spectral Problems ........................................................................................................... 6-13
Calibration Problems ...................................................................................................... 6-14
Tuning Problems............................................................................................................. 6-15
Communication Problems............................................................................................... 6-16
Vacuum Problems........................................................................................................... 6-17
MS Resolution Problems ................................................................................................ 6-18
6.3
Resolving Common Problems............................................................................................... 6-19
Checking Finnigan AQA Power Supply Requirements.................................................. 6-19
Rebooting the PC ............................................................................................................ 6-19
Running Finnigan AQA Tuning Diagnostics.................................................................. 6-20
6.4
HPLC System Troubleshooting............................................................................................. 6-22
Buffers and Additives ..................................................................................................... 6-22
Mobile Phase Reservoir .................................................................................................. 6-22
Bubble Problems and Degassing..................................................................................... 6-22
Contamination in the LC System.................................................................................... 6-23
Tubing and Fittings ......................................................................................................... 6-23
Injection Valves .............................................................................................................. 6-25
UV Detectors .................................................................................................................. 6-25
Preventative Maintenance and Spares............................................................................. 6-27
_______________________ Finnigan AQA Hardware Manual _________________________ 6-i
Manuals Page
Search Manuals
Feedback
Web
Troubleshooting
Contents _____________________________________________________________________
6-ii ________________________ Finnigan AQA Hardware Manual
______________________
Manuals Page
Search Manuals
Feedback
Web
Troubleshooting
____________________________________________________________________ Introduction
6.1 Introduction
This chapter helps you to diagnose and resolve problems that may occur
from time-to-time with the Finnigan AQA LC/MS system.
If you encounter a problem that is not described here, or have a problem that
is not resolved by the remedy suggested, contact your local ThermoQuest
service representative who will be able to provide additional advice.
This chapter is divided into the following sections:
•
Troubleshooting Tables
The tables help to identify the precise nature of the problem and the
action to be taken.
•
Resolving Common Problems
This section provides procedures to help remedy some of the more
easily resolved problems you might encounter.
•
HPLC System Troubleshooting
This section provides a general guide to HPLC system troubleshooting.
_______________________ Finnigan AQA Hardware Manual ________________________
6-1
Manuals Page
Search Manuals
Feedback
Web
Troubleshooting
Troubleshooting Tables__________________________________________________________
6.2 Troubleshooting Tables
The tables that follow are designed to help you identify problems in the
following areas:
•
General system problems
Problems relating to the basic operation of the system; including, for
example, breaks in power supply.
•
Low sensitivity
Problems relating to low sensitivity. The symptoms are divided into
excessive noise, low signal and no signal.
•
Inlet system / chromatography
Problems relating to liquid chromatography and the HPLC system.
•
Spectral problems
Problems relating to mass spectral data.
•
Calibration
Problems relating to calibration.
•
Tuning
Problems relating to tuning.
•
Communication
Problems relating to communications between the various parts of the
system and with Xcalibur.
•
Vacuum
Problems relating to the vacuum system.
•
MS resolution
Problems relating to MS resolution.
The tables describe the visible symptoms, the probable cause of the
problem, and suggestions on how to remedy it.
6-2 ________________________ Finnigan AQA Hardware Manual
______________________
Manuals Page
Search Manuals
Feedback
Web
Troubleshooting
__________________________________________________________ Troubleshooting Tables
General Problems
Table 6-1 details for each general problem, the symptom, probable cause
and remedy.
Table 6-1.
Troubleshooting general problems
Symptom
Probable cause
Remedy
System fails to power-up.
System not plugged in or not
switched on at the mains.
Plug in and switch on.
Mains supply problems.
Check mains supply conforms
to the requirements of the
Finnigan AQA system; see
Checking Finnigan AQA
Power Supply Requirements
on page 6-19 for details.
Fan filter is blocked and needs
cleaning.
Clean the real panel fan filters,
Refer to the chapter Routine
and Preventative
Maintenance for details.
Fan is broken.
Contact your ThermoQuest
service representative.
Rotary pump fails to switch on.
Pump not plugged in or not
switched on.
Plug in. Switch on. Check circuit
breaker.
Turbomolecular pump fails to
switch on.
Communications failure.
See Communication
Problems on page 6-16.
Line extender cable
disconnected.
Reconnect.
Rear panel fan fails to operate.
_______________________ Finnigan AQA Hardware Manual ________________________
6-3
Manuals Page
Search Manuals
Feedback
Web
Troubleshooting
Troubleshooting Tables__________________________________________________________
Symptom
Probable cause
Remedy
Pumps switch on but fail to
generate vacuum.
Source block not inserted
correctly.
Remove source block and refit.
See the topic The Source
Block in the chapter Routine
and Preventative
Maintenance for details.
Air is leaking into the system.
Check all source o-rings and
seals.
Rotary pump foreline trap
pellets need replacing.
Refer to the chapter Routine
and Preventative
Maintenance for details.
Rotary pump oil needs toppingup or replacing.
Refer to the chapter Routine
and Preventative
Maintenance for details.
Rotary pump gas ballast open.
Close gas ballast.
6-4 ________________________ Finnigan AQA Hardware Manual
______________________
Manuals Page
Search Manuals
Feedback
Web
Troubleshooting
__________________________________________________________ Troubleshooting Tables
Low Sensitivity Problems
Sensitivity is determined by the ratio of signal-to-noise. Before attempting a
diagnosis, determine whether the problem is due to a weak signal or
excessive noise by reference to a previous known good spectrum. Table 6-2
details for each low sensitivity problem, the symptom, probable cause and
remedy.
Table 6-2.
Troubleshooting low sensitivity problems
Symptom
Probable cause
Remedy
Excessive noise.
LC pump fluctuations.
Thoroughly degas all the solvents.
Purge the pump at a high flow rate using
the current solvent. If this fails, change
the solvent to propan-2-ol and purge the
pump again. Once primed, replace with
the required solvent system.
Check and replace the inlet/outlet check
valves on the pump.
Solvent contamination.
Thoroughly clean all solvent bottles.
Replace old solvents with new, clean
solvents.
Injector contamination.
Flush the injector with clean solvents.
Check the injector rotor seal for
scratches and replace if it is scratched.
Clean the syringe port with clean
solvents.
Pump contamination.
Confirm that the solvents are free from
contamination (see above).
Flush all pump solvent lines with a series
of clean solvents (water followed by
methanol).
_______________________ Finnigan AQA Hardware Manual ________________________
6-5
Manuals Page
Search Manuals
Feedback
Web
Troubleshooting
Troubleshooting Tables__________________________________________________________
Symptom
Probable cause
Remedy
Excessive noise
(continued).
The probe temperature is too
low for the flow rate.
See the Finnigan AQA Getting Started
manual for information on the correct
probe temperature.
The LC flow rate is too high.
Reduce the flow rate or use a splitter.
Refer to the topic Flow Splitting in the
chapter LC/MS and AQA Flow for
information.
Vacuum leak.
Vent the instrument and check all source
o-rings for signs of damage. Replace as
necessary. Refer to the topic The
Source Block in the chapter Routine
and Preventative Maintenance.
Poor or incorrect sample
preparation.
Prepare fresh samples.
Excessive condensation in the
source enclosure.
Dry the inside of the source enclosure.
Ensure that the probe temperature is
high enough for the flow rate and that the
source enclosure is hot before starting
the liquid flow.
The ESI Probe (kV) readback
voltage is lower than the set
voltage.
Check for excessive condensation in the
source enclosure. Dry if appropriate.
Faulty electrical source
connection.
Check the source voltage connection and
reconnect if appropriate (see Figure 6-2).
Dirty hexapole RF lens
assembly.
Check for abnormal tuning conditions for
the RF Lens and/or ion energy. If
applicable thoroughly clean the hexapole
RF lens assembly (see the topic
Cleaning the Hexapole RF lens in the
chapter Routine and Preventative
Maintenance). Note that contamination
on the hexapole RF lens will only build up
over a period of time and cannot account
for a sudden loss in sensitivity.
Incorrect detector voltage.
Check that the voltage setting on the
detector is correct. Increase the value if
necessary (typical value is 650 V).
Weak signal.
6-6 ________________________ Finnigan AQA Hardware Manual
______________________
Manuals Page
Search Manuals
Feedback
Web
Troubleshooting
__________________________________________________________ Troubleshooting Tables
Symptom
Probable cause
Remedy
Weak signal
(continued).
Blocked ESI/APCI insert.
Replace the insert. Refer to the chapter
Changing Ionization Modes.
Damaged ESI/APCI insert.
Replace the insert. Refer to the chapter
Changing Ionization Modes.
Incorrect probe temperature.
Check instrument method and Tune
window values for the probe temperature.
Check probe temperature readback in
the Tune window. If incorrect, check the
integrity of the two thermocouple and two
heater connections to the probe. If any of
the connections are damaged, call your
local ThermoQuest service
representative.
Incorrect source voltage.
Infuse the sample into the source and
optimize the source voltage to give the
maximum signal.
No source voltage (the
readback in the Tune window
is zero).
Check all electrical connections in the
source region (see Figure 6-1 and Figure
6-2).
Call your local ThermoQuest Service
Representative if this does not remedy
the problem.
Damaged ESI ceramic jet
insulator.
Replace the part. Refer to the topic
Cleaning the ESI Insert and Ceramic
Gas Nozzle in the chapter Routine and
Preventative Maintenance.
Incorrect APCI corona
discharge pin position.
Check that the corona discharge pin is
positioned correctly. Refer to the chapter
Changing Ionization Modes.
Dirty APCI corona discharge
pin.
Clean the corona discharge pin using a
very fine abrasive paper taking care not
to blunt the end of the pin. Sonicate the
pin in methanol.
ESI/APCI selector jumper
(insulated plug) incorrectly
inserted.
Move the insulated plug to the correct
position. Refer to the chapter Changing
Ionization Modes.
Incorrect ESI ceramic gas
nozzle position.
Adjust to correct setting. Refer to the
topic Setup for ESI in the chapter
Changing Ionization Modes.
_______________________ Finnigan AQA Hardware Manual ________________________
6-7
Manuals Page
Search Manuals
Feedback
Web
Troubleshooting
Troubleshooting Tables__________________________________________________________
Symptom
Probable cause
Remedy
Weak signal
(continued).
Dirty ESI ceramic gas nozzle.
Clean or replace the ESI ceramic gas
nozzle. Refer to the topic Cleaning the
ESI Insert and Ceramic Gas Nozzle in
the chapter Routine and Preventative
Maintenance.
Dirty probe interior.
Clean the probe interior. Refer to the
topic The Probe in the chapter Routine
and Preventative Maintenance.
Dirty ESI insert.
Clean the ESI insert. Refer to the topic
Cleaning the ESI Insert and Ceramic
Gas Nozzle in the chapter Routine and
Preventative Maintenance.
Incorrect probe alignment.
Align the probe using the procedure on
page 6-10.
Loss of high voltage (the Probe
(kV) or Corona (kV) readback
is zero in the Tune window).
Check either the ESI or APCI high
voltage electrical connection as
appropriate (see Figure 6-1 and Figure
6-2).
No signal
In ESI mode check for excessive
condensation in the source enclosure.
Dry the inside of the source enclosure.
Ensure that the probe temperature is
high enough for the flow rate and that the
source enclosure is hot before starting
the flow.
In ESI mode check that the ESI insert is
fitted.
In APCI mode check that the corona
discharge pin is positioned correctly.
Liquid leaks.
Check all LC couplings. Tighten any
loose fittings and replace them if
defective.
Replace tubing if appropriate.
Nebulizer/sheath gas leaks.
Isolate the source of the leak. Tighten
any loose fittings and replace them if
defective.
No nitrogen gas flow.
Check the cylinder pressure.
Check gas supply tubing for leaks.
6-8 ________________________ Finnigan AQA Hardware Manual
______________________
Manuals Page
Search Manuals
Feedback
Web
Troubleshooting
__________________________________________________________ Troubleshooting Tables
ESI high voltage connection
Figure 6-1. The location of the ESI high voltage connection
APCI high voltage connection to corona
discharge pin
Source voltage connection
Figure 6-2. The location of the APCI high voltage connection and
source voltage connection
Probe thermocouple and heater wires
Figure 6-3. The location of the probe thermocouple and heater wires
_______________________ Finnigan AQA Hardware Manual ________________________
6-9
Manuals Page
Search Manuals
Feedback
Web
Troubleshooting
Troubleshooting Tables__________________________________________________________
Alignment of the Probe
1. Remove the probe cover plate. Refer to the topic Removing the RF
Hexapole in the chapter Routine and Preventative Maintenance for
details of this procedure.
2. Ensure that the ESI insert and ESI ceramic gas nozzle are fitted. These
parts are used in the alignment procedure. Refer to the topic Setup for
ESI in the chapter Changing Ionization Modes for details.
3. Loosen the two screws that secure the probe mounting block in position.
4. Align the probe on two axes (see Figure 6-4) so that:
•
The axis of the ESI insert is in line with the entrance cone orifice.
•
The end of the ESI ceramic gas nozzle is in line with the edge of the
entrance cone.
screws securing the probe
mounting block in positiion
entrance cone
probe
ESI ceramic gas nozzle
ESI insert
Figure 6-4. Aligning the probe
6-10
______________________ Finnigan AQA Hardware Manual ______________________
Manuals Page
Search Manuals
Feedback
Web
Troubleshooting
__________________________________________________________ Troubleshooting Tables
Inlet System / Chromatography Problems
Table 6-3 details for each inlet system / chromatography problem, the
symptom, probable cause and remedy. See HPLC System Troubleshooting
on page 6-22 for further information.
Table 6-3.
Troubleshooting inlet system / chromatography problems
Symptom
Probable cause
Remedy
Low sensitivity.
Unstable solvent flow.
Refer to the topic Low Sensitivity
Problems on page 6-5.
Incorrect solvents.
Poor sample preparation.
Variable retention
times.
Pumping fluctuations.
Check the pump for problems (refer to
the manual supplied with your pumping
instrumentation).
Column temperature
fluctuations.
Place the column in a constant
temperature oven.
Rising/falling
baselines.
Possible contamination
especially when running
gradient analyses.
Replace the solvents with fresh solvents.
If necessary, clean the pumping lines to
remove the contamination.
Overly wide peaks.
Column degradation or
pumping problems.
Replace the chromatographic column or
wash with a high percentage of a strong
eluting solvent. Check the performance
of the pumping system (refer to the
manual supplied with your pumping
instrumentation).
The column is overloaded.
Reduce the injection volume and/or the
sample concentration.
The signal exceeds the
dynamic range of the detector.
Reduce the detector voltage.
The sample is too
concentrated.
Dilute the sample.
Column degradation or
incorrect column type for the
intended analysis.
Replace the column or use an alternative
column type (stationary phase).
The peaks have flat
tops.
Peaks tailing or
fronting.
Column overloading.
Reduce the concentration of the sample
or inject less onto the column.
_______________________ Finnigan AQA Hardware Manual _______________________ 6-11
Manuals Page
Search Manuals
Feedback
Web
Troubleshooting
Troubleshooting Tables__________________________________________________________
Symptom
Probable cause
Remedy
Post column band
broadening.
Poor LC connections.
Check all couplings between the injector
and the detector for bad connections, or
for tubing that has been incorrectly cut.
Damaged ESI/APCI insert.
Check the condition of the ESI/APCI
insert and replace if necessary.
Peak tailing in APCI.
Incorrect probe heater
temperature.
Optimize the temperature of the probe
heater by a series of loop injections at
different temperatures.
Fluctuating baselines.
Bubbles in LC system,
especially in the solvents or
pump heads.
Thoroughly degas all solvents prior to
use. Purge the pump to remove trapped
bubbles from the pump heads.
Column failure.
Replace column.
High TIC.
Contamination.
Refer to the topic Low Sensitivity
Problems on page 6-5.
Excessive baseline
noise.
High aqueous mobile phase at
a high flow.
If the analyte elutes in the region of high
aqueous mobile phase, increase the
probe temperature to maximize the
desolvation properties of the source.
Leaking injector rotor seal.
Replace the injector rotor seal.
Poor solvent preparation.
Check the solvent compatibility.
Negative peaks in
flow injection analysis.
Check that the samples have been
prepared using clean solvents free from
contamination.
Check the solvents used for the mobile
phase are clean and free from
contamination.
Leaking injector rotor seal.
Replace the injector rotor seal.
Higher than normal
backpressure on the
LC pump.
Blocked or partially blocked
insert.
Replace the insert. Refer to the chapter
Changing Ionization Modes.
Lower than normal
backpressure on the
LC pump.
Solvent leakage.
Check for any solvent leaks especially
inside the source enclosure. Repair or
replace any faulty LC couplings.
6-12
______________________ Finnigan AQA Hardware Manual ______________________
Manuals Page
Search Manuals
Feedback
Web
Troubleshooting
__________________________________________________________ Troubleshooting Tables
Spectral Problems
Table 6-4 details for each spectral problem, the symptom, probable cause
and remedy.
Table 6-4.
Troubleshooting spectral problems
Symptom
Probable cause
Remedy
Missing high mass
peaks.
The scan speed is too fast.
This will only happen if
Advanced mode is selected.
Reduce the scan speed. Clear the
Advanced check box on the Acquisition
page of the method editor to allow Xcalibur
to limit the scan speed.
The spectra are
skewed or distorted.
The scan speed is too slow.
Increase the scan speed to give greater
than 6 scans across the peak.
Incorrect isotope
peaks/ratios.
LM/HM Res settings are
incorrect or the ion energy
setting is too high (see the
Tune window).
Infuse the sample and set the LM/HM Res
settings and/or ion energy for good
resolution.
Inaccurate calibration.
Re-calibrate. Refer to the Finnigan AQA
Getting Started manual for details.
The detector is being
overloaded.
If any of the peaks have an ion count of
greater than 2×10⁶, reduce the
concentration of the sample or reduce the
detector voltage.
The source gases flow rate
is too low.
Check that the cylinder pressure is set
correctly. Check for leaks in the supply
lines. Check that the insert is correctly
fitted.
Vacuum leak.
Vent the instrument and check all source
and hexapole o-rings for signs of damage.
Replace as necessary. Refer to the topics
The Source Block and The Hexapole RF
Lens in the chapter Routine and
Preventative Maintenance.
Dirty hexapole RF lens.
Clean the hexapole RF lens. Refer to the
topic The Hexapole RF Lens in the chapter
Routine and Preventative Maintenance. If
problems are still encountered, contact your
local ThermoQuest Service Representative.
Some samples have a high
tendency to from acetonitrile
adducts.
Use methanol rather than acetonitrile if
possible.
Spectra show high
acetonitrile adduct
formation.
_______________________ Finnigan AQA Hardware Manual _______________________ 6-13
Manuals Page
Search Manuals
Feedback
Web
Troubleshooting
Troubleshooting Tables__________________________________________________________
Calibration Problems
Table 6-5 details for each calibration problem, the symptom, probable cause
and remedy.
Table 6-5.
Troubleshooting calibration problems
Symptom
Probable cause
Remedy
The Instrument does
not calibrate.
Refer to Low Sensitivity
Problems on page 6-5.
Refer to Low Sensitivity Problems on
page 6-5.
Contamination of calibration
compound.
Check that the calibrant is free from
contamination and within the acceptable
storage lifetime.
Prepare a fresh calibration standard.
Masses are drifting.
6-14
Liquid leakage.
Check for leaks and repair or replace
tubing and fittings as necessary.
The first peak (lowest mass) in
the acquired spectrum is too
weak.
Alter the calibration range to start with a
strong first peak.
Concentration of the calibration
sample is too low.
Increase the concentration of the
calibration sample.
Using the incorrect reference
file.
Check that the selected reference file
relates the calibrant being used. Check
that the calibration reference file contains
the correct masses, and reload if
necessary.
Poor sample preparation.
Refer to Low Sensitivity Problems on
page 6-5.
Instability of the liquid spray.
Refer to Low Sensitivity Problems on
page 6-5.
Incorrect default tune values.
Check the tune page settings for the
system voltage settings.
Poor resolution.
Check LM/HM Res and ion energy
settings.
Excessive temperature
fluctuations.
Check room temperature. Check the
operation of the water chiller (if this
option is fitted) and rear panel fans.
High fields.
Check for other instruments emitting high
fields in close proximity. Change
instrument location if necessary.
______________________ Finnigan AQA Hardware Manual ______________________
Manuals Page
Search Manuals
Feedback
Web
Troubleshooting
__________________________________________________________ Troubleshooting Tables
Note. In the event of any problems during calibration, use the Finnigan
AQA tuning diagnostics facilities to obtain further information. See page 620 for details.
Tuning Problems
Table 6-6 details for each tuning problem, the symptom, probable cause and
remedy.
Table 6-6.
Troubleshooting tuning problems
Symptom
Probable cause
Remedy
Delayed response to
changes in tuning
parameters.
Dirty/charging source
block/hexapole RF lens.
Clean the source block/hexapole RF
lens. Refer to the topics The Source
Block and The Hexapole RF Lens in the
chapter Routine and Preventative
Maintenance.
No response to
changes in tuning
parameters.
Faulty source electrical
connections.
Check the connections and reconnect if
necessary.
Faulty electronics - check the
Tune window readbacks and
run the diagnostic tests.
Please call your local ThermoQuest
Service Representative with any
diagnostic test results.
Refer to Low Sensitivity
Problems on page 6-5.
Refer to Low Sensitivity Problems on
page 6-5.
Faulty source electrical
connections.
Check connections and reconnect if
necessary. (See Figure 6-1, Figure 6-2
and Figure 6-3.)
Faulty electronics.
Check the Tune window readbacks. Run
the instrument diagnostic tests. Call your
local ThermoQuest Service
Representative.
Poor calibration.
Re-calibrate. Refer to the Finnigan AQA
Getting Started manual for details.
Low or no signal.
Peaks shifted from
their nominal mass
position.
Note. In the event of any problems during tuning, use the Finnigan AQA
tuning diagnostics facilities to obtain further information. See page 6-20 for
details.
_______________________ Finnigan AQA Hardware Manual _______________________ 6-15
Manuals Page
Search Manuals
Feedback
Web
Troubleshooting
Troubleshooting Tables__________________________________________________________
Communication Problems
Table 6-7 details for each communication problem, the symptom, probable
cause and remedy.
Table 6-7.
Troubleshooting communication problems
Symptom
Probable cause
Remedy
No communication
with the other
equipment.
Loose or incorrectly inserted
cables.
Check all the cables from the Finnigan
AQA, the PC and the LC system. Refer
to the Finnigan AQA Getting
Connected manual. Reboot the PC if
necessary. Refer to the topic Rebooting
the PC on page 6-19 for details.
PC system crash.
Reboot the PC.
Unsupported communications.
Use contact closure to start the MS
detector.
Incorrect firmware version
(Waters Alliance only).
Obtain a firmware upgrade or use contact
closure to start the MS detector.
A transient break or fluctuation
in mains power supply has
halted Xcalibur.
Reboot the PC.
A malfunction has occurred in
the MS or LC system
electronics.
Contact your local ThermoQuest service
representative or LC system
manufacturer.
The instrument stops
and displays the
message waiting for
contact closure.
The contact closure cable is
incorrectly fitted.
Check that the cable is attached
correctly. Replace it if appropriate.
Xcalibur crashes at
the start of data
acquisition.
The Xcalibur software or raw
file has become corrupted.
Delete the raw file. Reboot the PC and
reload the software if necessary.
6-16
______________________ Finnigan AQA Hardware Manual ______________________
Manuals Page
Search Manuals
Feedback
Web
Troubleshooting
__________________________________________________________ Troubleshooting Tables
Symptom
Probable cause
Remedy
The system crashes
at times other than
the start of data
acquisition.
High voltage breakdown from
the ESI ceramic jet insulator.
Clean the ESI ceramic jet insulator. Refer
to the topic Cleaning the ESI Insert and
Ceramic Gas Nozzle in the chapter
Routine and Preventative
Maintenance. Replace the ESI ceramic
jet insulator if it is damaged.
High voltage breakdown from
excessive condensation in the
source enclosure.
Increase the probe temperature and/or
reduce the flow rate into the source
enclosure.
High voltage tracking due to a
dirty source.
Clean the source. Refer to the topic The
Source Block in the chapter Routine
and Preventative Maintenance.
Vacuum Problems
Table 6-8 details for each vacuum problem, the symptom, probable cause
and remedy.
Table 6-8.
Troubleshooting vacuum problems
Symptom
Probable cause
Remedy
The instrument is either
pumping slowly or not
pumping at all.
The rotary pump oil level is low.
Fill the rotary pump with oil. Refer to
the topic Rotary Pump
Maintenance in the chapter Routine
and Preventative Maintenance.
The foreline trap pellets are
saturated.
Replace the pellets. Refer to the
topic Rotary Pump Maintenance in
the chapter Routine and
Preventative Maintenance.
The rotary pump requires gas
ballasting.
Refer to the manual supplied with
the rotary pump. Note that under
normal operation, gas ballasting of
the rotary pump is not necessary.
There is a leak at the vacuum line
elbow (source block or Tygon
tube connection).
Vent the instrument. Check that the
elbow is seated correctly on the side
of the source block. Check the
positioning of the Tygon tubing and
replace it if necessary. Refer to the
topic The Source Block in the
chapter Routine and Preventative
Maintenance.
_______________________ Finnigan AQA Hardware Manual _______________________ 6-17
Manuals Page
Search Manuals
Feedback
Web
Troubleshooting
Troubleshooting Tables__________________________________________________________
Symptom
Probable cause
Remedy
The instrument is either
pumping slowly or not
pumping at all
(continued).
The flow disrupter pin is missing.
Replace the flow disrupter pin.
The flow disrupter pin o-ring is
missing or damaged.
Replace the o-ring.
A source block o-ring(s) is
missing or damaged.
Replace the o-ring(s).
A source flange o-ring(s) is
missing or damaged.
Replace the o-ring(s).
The entrance cone is damaged.
Replace the entrance cone.
The exit cone is damaged or
missing.
Replace the exit cone.
There is excessive
noise from the
turbomolecular pumps.
Potentially faulty turbomolecular
pump.
Call your local ThermoQuest Service
Representative.
The turbomolecular
pumps are tripping
Potentially faulty turbomolecular
pump.
Call your local ThermoQuest Service
Representative.
MS Resolution Problems
Table 6-9 details for each MS resolution problem, the symptom, probable
cause and remedy.
Table 6-9.
Troubleshooting MS resolution problems
Symptom
Probable cause
Remedy
Unresolved peaks with
LM/HM Res 12.5 and ion
energy 1.0.
Faulty electronics.
Please call your local ThermoQuest
Service Representative.
Poor resolution and low
sensitivity. (To get ions,
you must increase the
ion energy to ≥ 1.5.)
Dirty prefilters or quadrupole.
Please call your local ThermoQuest
Service Representative.
The sensitivity fine but
there is no resolution.
Failed DC voltage.
Run the instrument diagnostics. If the
diagnostic test fails, call your local
ThermoQuest Service
Representative.
6-18
______________________ Finnigan AQA Hardware Manual ______________________
Manuals Page
Search Manuals
Feedback
Web
Troubleshooting
______________________________________________________Resolving Common Problems
6.3 Resolving Common Problems
The following pages describe how to resolve some of the more easily
handled problems.
Checking Finnigan AQA Power Supply
Requirements
The Finnigan AQA should be connected to a suitable power supply. Full
details of the power requirements for your Finnigan AQA MS detector
can be found in the Finnigan AQA Preinstallation Requirements Guide.
Note. For details of the power requirements of other system peripherals,
refer to the appropriate manufacturer’s specifications.
Rebooting the PC
Most communication problems that occur with Xcalibur are transient and
can be resolved by rebooting the PC.
To reboot the PC, do the following:
1. Try to save any open data files.
Depending upon the nature of the problem, this may not be possible.
Note that any data that is not saved will be lost.
2. Close Xcalibur.
3. Exit from the Windows operating system in the usual way, and switch
off the PC.
Consult your PC user documentation for details.
4. Restart the PC, the operating system, and then Xcalibur.
_______________________ Finnigan AQA Hardware Manual _______________________ 6-19
Manuals Page
Search Manuals
Feedback
Web
Troubleshooting
Resolving Common Problems_____________________________________________________
Running Finnigan AQA Tuning Diagnostics
In the event of any tuning or calibration problems, use the Finnigan AQA
tuning diagnostics facility to help identify the nature of the problem.
To run the tuning diagnostics:
1. Click on the Start button of the Taskbar and choose
Programs | Xcalibur | Tune to open the Tune window.
2. Choose View | Diagnostics from the Tune window menu.
Figure 6-6. Instrument Diagnostics and Optimizations dialog box
3. Select the boxes alongside the diagnostic tests you want to carry out.
Usually, you will need to perform all the diagnostic tests available.
4. Click on Start.
Xcalibur reports the success
6-20
or failure
of the tests (see Figure 6-7).
______________________ Finnigan AQA Hardware Manual ______________________
Manuals Page
Search Manuals
Feedback
Web
Troubleshooting
______________________________________________________Resolving Common Problems
Figure 6-7. Diagnostics results
Note. You may be asked to run the diagnostics facility should you contact
ThermoQuest regarding a tuning or calibration problem.
_______________________ Finnigan AQA Hardware Manual _______________________ 6-21
Manuals Page
Search Manuals
Feedback
Web
Troubleshooting
HPLC System Troubleshooting ____________________________________________________
6.4 HPLC System Troubleshooting
This is a general guide to HPLC system troubleshooting. For systemspecific problems, consult the manufacturer’s manual. This section gives
advice on appropriate LC conditions and rectifying LC system problems.
Buffers and Additives
In many cases, buffers and/or other additives are necessary in the mobile
phase to modify chromatography. The concentration of buffer/additive
added is critical, as the MS performance can be affected. An example of this
is the addition of acid in negative ion mode. This will suppress ionization of
weakly acidic compounds. Refer to the chapter LC/MS and AQA Flow for
information on specific solvents and additives.
Mobile Phase Reservoir
The mobile phase reservoir should be an inert container, usually glass, fitted
with a vented cap to keep particulate matter from entering. The white frit
serves as a gross filter only; always use a 0.45 µm filter in-line to prevent
solid particles from entering the MS detector.
Bubble Problems and Degassing
Bubble problems in LC systems result from mixing air-saturated solvents.
Air is generally less soluble in solvent mixtures than in pure solvents, and
the excess gas leaves the solution as bubbles. Bubbles in the LC system can
cause instability in UV and other detectors, and in API sources.
Thorough degassing can minimize bubble problems in the mobile phase.
Heating is the most efficient way of removing gas from reversed phase
solvents, but this is inconvenient. The most common way of degassing
solvents is using a vacuum membrane degasser. Many LC systems have this
feature. Another efficient way to degas solvents is by helium sparging. Use
a flow of ~ 300 mL/min for 3 to 4 minutes and then reduce the flow to a
trickle (most LC systems allow constant helium sparging). One liter of
helium can degas one liter of solvent with ~99% efficiency. Only sparge for
a few minutes at high flow to minimize evaporation of mobile phase and
potential change in composition. Degassing in an ultrasonic bath is a poor
technique for removal of gas from solvents. Normal phase solvents do not
need to be degassed.
6-22
______________________ Finnigan AQA Hardware Manual ______________________
Manuals Page
Search Manuals
Feedback
Web
Troubleshooting
_____________________________________________________HPLC System Troubleshooting
Bubbles trapped in the pump head are also a problem and can be removed
by:
•
Flushing the pump with degassed mobile phase (try increasing the flow
rate to 5 mL/min).
•
Opening the purge valve and increasing the flow.
•
Gently tapping the pump head.
•
Washing the system through with methanol or IPA (isopropyl alcohol).
Contamination in the LC System
Buffer residues and solid particles from mobile phases are the primary
reasons for pump seal wear and check valve problems. If a buffer has been
used, flush the pump with clean degassed solvents; for example
[50:50] methanol:water, to remove any traces of buffer.
Ensure the mobile phase reservoir is clean and capped (and mobile phase
filtered if necessary) to minimize the solid particles which may be
transferred to the pumping system.
Change pump seals at least once a year. When seals are replaced, rinse the
piston(s) to remove any foreign matter, inspect it for scratches (which will
cause future wear) and lubricate it by wetting with water or methanol before
sliding the pump head and seal back in place.
To avoid bacterial growth, never leave mobile phases containing greater
than 70% water in the LC system when it is not in use. Acetonitrile is an
effective antibacterial agent.
Tubing and Fittings
Three types of tubing are commonly used in LC systems: Teflon®, stainless
steel and PEEK.
Teflon Tubing
This is sometimes used in low-pressure parts of the LC system. The sample
does not come in contact with these parts.
Due to oxygen diffusion through the tubing walls, it is susceptible to crimps,
fitting problems and bubbles.
_______________________ Finnigan AQA Hardware Manual _______________________ 6-23
Manuals Page
Search Manuals
Feedback
Web
Troubleshooting
HPLC System Troubleshooting ____________________________________________________
Stainless Steel Tubing
This is suitable for any part of the system that is subject to high pressure.
Problems with stainless steel tubing arise from incorrect selection of internal
diameter, poor cutting and fittings.
Typical internal diameters are 0.020" between the pump and autosampler
and 0.010" or less between the autosampler and (UV) detector and/or
column.
Cut stainless steel tubing with an abrasive-wheel cut-off machine, a rotary
cutter (for example Terry tool) or a triangle needle file. Flush the tubing
with solvent to remove any filings before connecting to the LC system.
When using stainless steel fittings, take care not to over-tighten, as the
tubing can become crushed and the flow restricted. The ferrules can also be
distorted, leading to leaks. Different brands of ferrules look different but for
the most part, they are interchangeable when they are new. The primary
difference between different brands is the distance of the extension of the
tube past the ferrule.
WARNING. Do not use stainless steel tubing to connect directly to the
source in electrospray mode. This could result in an electric shock due to
the high voltage present on the insert capillary.
PEEK (Poly-Ether-Ether-Ketone) Tubing
This is now a widely used alternative to stainless steel tubing in highpressure parts of the system. It is compatible with most LC solvents except
THF (tetrahydrofuran) and methylene chloride. It works well to a reasonably
high pressure, is easy to cut and route, and is less expensive than stainless
steel.
PEEK comes in eight different internal diameters that are color-coded. The
four most commonly used in LC/MS applications are shown in Table 6-10.
Table 6-10. PEEK tubing color coding
6-24
Color
OD × ID
Max. pressure
Orange
1/16" × 0.020"
6000 psig
Blue
1/16" × 0.010"
6000 psig
Yellow
1/16" × 0.007"
8000 psig
Red
1/16" × 0.005"
8000 psig
______________________ Finnigan AQA Hardware Manual ______________________
Manuals Page
Search Manuals
Feedback
Web
Troubleshooting
_____________________________________________________HPLC System Troubleshooting
The choice of ID depends mainly on the LC flow. In general, avoid the red
0.005" ID tubing, as it is prone to blockage. It is mostly used only for low
flow, that is <100 µL/min applications.
Yellow 0.007" and blue 0.010" are most commonly used for flow rates
within the range of typical LC/MS applications, that is 100 µL/min to
1.5 mL/min.
Cut PEEK tubing with a PEEK tubing cutter or scalpel to ensure a square
cut and no blockage. Flush Peek tubing with solvent before use.
PEEK fittings used with PEEK tubing are one or two-piece (with ferrule)
finger-tight compression fittings. Never over-tighten PEEK fittings as this
can cause leaks.
Stainless steel fittings can also be used, but exercise care not to over tighten,
as the tubing can become crushed and the flow restricted.
Injection Valves
Rheodyne® and Valco® manufacture the most commonly used injection
valves. They can be used manually or as part of an autosampler system. The
injectors can be fitted with various injection loop volumes although they are
most suitable for volumes up to 100 µL.
The injection valve rotor face is easily damaged by solid particles entering
the injector and subsequent loading and injecting. The most common source
of damage is from stainless steel tube filings. The rotor is easily replaced
(refer to the manufacturer’s manual).
Injectors are prone to blockage if dirty samples are injected or particles from
the mobile phase or a worn pump seal block the passages. Strip and clean
the injector regularly.
Most manual injection valves require a square-tipped needle. Avoid pointed
or tapered needles because they can become stuck in the injector or scratch
the rotor seal.
Some autosamplers use a side port needle to prevent septum coring.
UV Detectors
UV detectors are the most widely used LC detectors and are often used
in-line with LC/MS instruments.
The three common types of UV detector are single wavelength (one
channel), multi-wavelength (four channels with two outputs, combinations
are possible) and diode-array (a scanning UV detector).
_______________________ Finnigan AQA Hardware Manual _______________________ 6-25
Manuals Page
Search Manuals
Feedback
Web
Troubleshooting
HPLC System Troubleshooting ____________________________________________________
UV Detector Problems
Temperature, wavelength selection and the detector time constant affect
noise and drift. If the environmental temperature varies greatly, baseline
drift can occur.
Wavelength selection can influence background noise and signal-to-noise
ratios. In general, lower wavelengths result in increased signal for the
sample as well as the background noise. Balance the gain in signal against
the increase in noise when selecting lower wavelengths.
The detector time constant acts as an electronic filter to reduce baseline
noise. Set the time constant to 1/10th of the peak width (10 points per peak).
Solvent selection is influenced by the wavelength to be monitored; for
example, methanol is good for gradient work at 254 nm but at 215 nm it
creates unacceptable baseline drift. Acetonitrile has much lower absorbance
at low wavelengths, and is suitable down to 200 nm. Contaminated solvents
can cause high background.
Deuterium lamps should last for ~ 1000 hours. Noise spikes in the detector
can arise from lamp filament flicker.
Detector cells are prone to trapping air bubbles from the mobile phase or
micro-particulate matter from the column. The windows can also become
clouded by polymerized organic material with long term use. Solve bubble
problems in the cell by using a thoroughly degassed mobile phase, assuring
that the fittings are leak-free, and applying a slight backpressure with a
detector back pressure device. The cell should be flushed daily with the rest
of the system.
Noise spikes can arise from lamp problems, air bubbles or external electrical
interference. This can be determined by setting the flow at zero and
observing the baseline. If the baseline is constant, a bubble is likely, but if
the noise persists, a failed lamp or external electrical problem is more likely.
Testing UV Detectors
Test a UV detector by monitoring the output either via the analog inputs
(check output voltage) or by viewing the UV detector display.
Injecting a solution of erythromycin, for example, should give a good
response at a wavelength setting of 280 nm.
6-26
______________________ Finnigan AQA Hardware Manual ______________________
Manuals Page
Search Manuals
Feedback
Web
Troubleshooting
_____________________________________________________HPLC System Troubleshooting
Preventative Maintenance and Spares
Important practices to prevent LC system problems are:
•
Filtering
If possible filter solvents (especially if buffers are being used) and
samples to prevent unwanted particulate matter from entering the pump
and subsequently the Finnigan AQA.
•
Degassing
Thoroughly degas all solvents to prevent air from entering the pump, to
minimize problems associated with bubbles, and to improve check valve
operation.
•
Flushing
Regular flushing of the system to remove unwanted contaminants and to
prevent build-up of buffer residues will extend pump component
lifetimes.
•
Replacing pump seals
The pump seals should be replaced regularly (every 3 months with
constant use).
Keep a stock of PEEK tubing and fittings, frits/filters and syringes. It is
helpful to have use of a manual injector valve with 10 µL loop and spares
(nuts, ferrules, rotor seal, and so on).
_______________________ Finnigan AQA Hardware Manual _______________________ 6-27
Manuals Page
Search Manuals
Feedback
Web
Troubleshooting
HPLC System Troubleshooting ____________________________________________________
6-28
______________________ Finnigan AQA Hardware Manual ______________________
Manuals Page
Search Manuals
Feedback
Web
Chapter 7
7. Shutting Down and Restarting the
System
7. Contents...................................................................................................................................... 7-i
7.1
Introduction ............................................................................................................................. 7-1
7.2
Instrument Standby and Shutdown.......................................................................................... 7-2
In Between Analytical Runs ............................................................................................. 7-2
Up to Two Weeks ............................................................................................................. 7-2
Two Weeks or More ......................................................................................................... 7-3
7.3
Restarting the System .............................................................................................................. 7-4
Pre-switch on Checklist .................................................................................................... 7-4
System Start-up Procedure................................................................................................ 7-5
Pumping Down the Finnigan AQA................................................................................... 7-5
_______________________ Finnigan AQA Hardware Manual _________________________ 7-i
Manuals Page
Search Manuals
Feedback
Web
Shutting Down and Restarting the System
Contents _____________________________________________________________________
7-ii ________________________ Finnigan AQA Hardware Manual
______________________
Manuals Page
Search Manuals
Feedback
Web
Shutting Down and Restarting the System
____________________________________________________________________ Introduction
7.1 Introduction
This chapter provides details of how to shut down the Finnigan AQA system
for a short period (up to 2 weeks) or for a longer period.
It also describes how to restart your system following a long-term shutdown.
_______________________ Finnigan AQA Hardware Manual ________________________
7-1
Manuals Page
Search Manuals
Feedback
Web
Shutting Down and Restarting the System
Instrument Standby and Shutdown _________________________________________________
7.2 Instrument Standby and Shutdown
There are two occasions when the instrument should not be totally shut
down, but left in a stand-by mode. These are as follows:
•
Between analytical runs.
•
For any other period up to two weeks.
For periods of longer than two weeks, the instrument should be fully shut
down.
In Between Analytical Runs
Between analytical runs, turn the API gas flow off to conserve the supply.
Follow the steps described below:
1. Open the Finnigan AQA Tune window.
a. Click on Instrument Setup on the Home Page Road Map view.
b. Click on the Finnigan AQA button.
c. Click on the Analysis tab to display the Analysis page.
d. Click on the Tune button.
2. Choose Instrument | Gas, or click on the Toggle Gas toolbar button,
to switch the nitrogen gas flow Off.
Up to Two Weeks
For periods of up to two weeks, first follow the steps described above and
then do the following:
1. In the Finnigan AQA Tune window, choose Instrument | Operate, or
click on the Toggle Operate toolbar button, to switch Operate Off.
2. Switch off the PC monitor.
Leave the remainder of the system running with the Finnigan AQA under
vacuum.
Note. Leave the Finnigan AQA under vacuum during the switching of
ionization modes and basic maintenance procedures. It is good working
practice not to vent the instrument unless non-routine maintenance is being
carried out.
7-2 ________________________ Finnigan AQA Hardware Manual
______________________
Manuals Page
Search Manuals
Feedback
Web
Shutting Down and Restarting the System
__________________________________________________ Instrument Standby and Shutdown
Two Weeks or More
If the Finnigan AQA system is unlikely to be used for an extended period
(longer than 2 weeks), perform a full shutdown:
1. Open the Finnigan AQA Tune window (see page 7-2).
2. Choose Instrument | Gas, or click on the Toggle Gas toolbar button,
to switch the nitrogen gas flow Off.
3. Choose Instrument | Operate, or click on the Toggle Operate toolbar
button, to switch Operate Off.
4. Right-click on the Finnigan AQA Server in the Windows Taskbar and
choose Vacuum | Vent to vent the system.
The Server is displayed as an icon in the Windows Taskbar just to the left of
the time display (see Figure 7-1).
Figure 7-1. The taskbar showing the Server icon
The Server is shown as three lights:
•
The green, top light represents the Vacuum status
•
The red, middle light represents the Operate status
•
The yellow, bottom light represents the API Gas status
All the lights are automatically switched off as the instrument is shut down.
Refer to the topic The Server, in the chapter Introducing the Finnigan
AQA for more information on the Server.
5. Exit from Xcalibur and shut down the PC in the usual way. Ensure that
you have switched off the PC monitor, printer and any other associated
hardware.
6. Switch off the instrument and unplug it from the mains.
7. Carry out any column conditioning that may be required and shut down
the LC and associated hardware. Follow the instructions in the
documentation supplied by the manufacturer.
8. Close the nitrogen gas cylinder at the main regulator.
9. Switch off the water chiller once the system has cooled (only applies if
this option is fitted to your system).
_______________________ Finnigan AQA Hardware Manual ________________________
7-3
Manuals Page
Search Manuals
Feedback
Web
Shutting Down and Restarting the System
Restarting the System ___________________________________________________________
7.3 Restarting the System
This section describes how to restart the system.
Following a long-term shutdown:
•
Carry out the visual checks which form the pre-switch on checklist
•
Follow the system start-up procedure
•
Pump down the Finnigan AQA
Once you have completed these procedures, the system is ready for tuning
and calibration; see the Finnigan AQA Getting Started manual for details.
Pre-switch on Checklist
Before you switch on the system after an extended shutdown period, a major
overhaul, or instrument relocation, perform a number of visual checks on the
system.
These include:
•
•
•
Connections check
•
Data system connections
•
LC and MS power cables
•
LC and MS communication cables
LC check
•
Any gas supplies to the LC and associated hardware
•
Quantity of HPLC mobile phase
MS check
•
Water cooling connections (only applies if this option is fitted to
your system)
•
API gas supply
7-4 ________________________ Finnigan AQA Hardware Manual
______________________
Manuals Page
Search Manuals
Feedback
Web
Shutting Down and Restarting the System
____________________________________________________________Restarting the System
System Start-up Procedure
To start up the system, do the following:
1. Activate the LC and its associated hardware, following the instructions
provided by the manufacturer. Wait for the LC to complete its
initialization before continuing.
2. Plug in the Finnigan AQA and switch it on at the mains.
3. Toggle the ON switch located at the rear of the instrument.
Note. The Finnigan AQA vacuum pumps will not start straight away.
Refer to the topic Pumping down the Finnigan AQA for information on
starting the vacuum pumps.
4. Switch on the PC.
5. Wait until Windows is running and then start Xcalibur.
6. Start the water chiller (only applies if this option is fitted to your
system).
Pumping Down the Finnigan AQA
Pumping down is necessary in order to create a high vacuum within the
system.
To pump down the Finnigan AQA, right-click on the Finnigan AQA server
in the Windows Taskbar and choose Vacuum | Pump.
Reaching high vacuum takes approximately 5 minutes. If the Finnigan AQA
has not reached vacuum after 10 minutes, check for leaks in the system. See
the Troubleshooting chapter for advice.
When the Finnigan AQA has reached vacuum, Xcalibur switches the
server’s green vacuum light on.
You can also monitor the vacuum status of the instrument by observing the
vent and vacuum lights on the status light panel on the front of the
instrument. For further information on the status light panel, refer to the
topic Exterior Features of the Finnigan AQA in the chapter Introducing
the Finnigan AQA.
_______________________ Finnigan AQA Hardware Manual ________________________
7-5
Manuals Page
Search Manuals
Feedback
Web
Shutting Down and Restarting the System
Restarting the System ___________________________________________________________
7-6 ________________________ Finnigan AQA Hardware Manual
______________________
Manuals Page
Search Manuals
Feedback
Web
Chapter 8
8. Consumables and Spares
8. Contents...................................................................................................................................... 8-i
8.1
Introduction ............................................................................................................................. 8-1
8.2
Consumables ........................................................................................................................... 8-2
Consumables Kit - FM100970.......................................................................................... 8-2
8.3
Spares ...................................................................................................................................... 8-5
_______________________ Finnigan AQA Hardware Manual _________________________ 8-i
Manuals Page
Search Manuals
Feedback
Web
Consumables and Spares
Contents _____________________________________________________________________
8-ii ________________________ Finnigan AQA Hardware Manual
______________________
Manuals Page
Search Manuals
Feedback
Web
Consumables and Spares
____________________________________________________________________ Introduction
8.1 Introduction
This chapter lists the parts most commonly used in the course of working
with and maintaining your Finnigan AQA.
The parts are categorized as follows:
•
Consumable Parts. Keep a stock of each of these parts, as they may need
to be replaced frequently.
•
Spare Parts. These parts can be ordered as required.
_______________________ Finnigan AQA Hardware Manual ________________________
8-1
Manuals Page
Search Manuals
Feedback
Web
Consumables and Spares
Consumables _________________________________________________________________
8.2 Consumables
All the consumables required for the upkeep of your Finnigan AQA are
contained in a Consumables Kit. The part number for this kit is FM100970.
Each individual part contained in the kit is listed below. In addition to the
individual parts, this kit contains two additional kits. These are:
•
O-ring kit, part number FM101065.
•
Screw and fixing kit, part number FM101066.
Consumables Kit - FM100970
Part number
Number of each
part contained
in the kit
Part category
hexapole stud springs
FM100216
6
consumable
thumb nut (for corona discharge pin
assembly)
FM100491
1
consumable
insulated plug
FM100507
2
consumable
PEEK zero dead volume (ZDV) union
(connects the LC tubing or sample
infusion capillary to ESI/APCI insert)
FM100510
2
consumable
source o-ring kit
FM101065
1
consumable
source screw and fixing kit
FM101066
1
consumable
exit skimmer cone
9227-3
1
consumable
entrance skimmer cone
9227-5
1
consumable
APCI insert
9227-65
1
consumable
ESI insert
9227-66
1
consumable
ceramic jet insulator (ESI insert)
9227-70
4
consumable
corona discharge pin assembly (corona
pin and connector)
9227-90
1
consumable
ceramic jet location nozzle (ESI)
9227-92
3
consumable
Tygon adapter tube (from vacuum line
elbow)
9227-123
1
consumable
source enclosure seal
9227-125
1
consumable
6 mm blanking plug (underside of
source enclosure)
6171001
2
consumable
Part description
Source and Hexapole parts
8-2 ________________________ Finnigan AQA Hardware Manual
______________________
Manuals Page
Search Manuals
Feedback
Web
Consumables and Spares
__________________________________________________________________ Consumables
Part description
Part number
Number of each
part contained
in the kit
Part category
AQA fused silica capillary
FM100772
2
consumable
Eppendorf vial 1.5 mL
FM100785
10
consumable
sample infusion fused silica capillary
FM100786
2
consumable
graphatized vespel ferrule (for Swagelok
fittings)
6070116
6
consumable
Ultragrade 19 pump oil (4 liters)
FM101067
2
consumable
foreline trap activated alumina pellets
6060116
1
consumable
AQA pneumatic parts
Rotary pump parts
Source O-Ring Kit - FM101065
Part description
Part number
Number of each
part contained
in the kit
Part category
entrance cone o-ring (BS012 viton)
FM100231
5
consumable
disrupter pin o-ring (BS003 viton)
5711003
3
consumable
vacuum line elbow o-ring (BS013 viton)
5711013
2
consumable
source flange (hexapole side) o-ring
(BS235 viton)
5711029
1
consumable
source flange (source block side) o-ring
(BS121 viton)
5711121
2
consumable
AQA reservoir o-ring (BS131 viton)
FM100200
1
consumable
_______________________ Finnigan AQA Hardware Manual ________________________
8-3
Manuals Page
Search Manuals
Feedback
Web
Consumables and Spares
Consumables _________________________________________________________________
Source Screws and Fixings Kit - FM101066
Part description
Part number
Number of each
part contained
in the kit
Part category
source block screw
(M4 × 37LG c/sunk head st stl)
FM100382
4
consumable
probe cover plate screw
(M3 × 30LG c/sunk head st stl)
FM100493
4
consumable
probe washer
(M3 flat washer)
1150605
4
consumable
probe cover plate/differential aperture
plate screw
(M3 × 6LG c/sunk head st stl)
5311016
4
consumable
entrance cone screw
(M3 × 8LG c/sunk head, st stl)
5311023
10
consumable
PEEK ZDV union securing screw
(M3 × 6LG cap head st stl)
5313041
2
consumable
source flange screw
(M5 × 12 cap head zinc plated)
5313047
4
consumable
exit cone screw
(M3 × 4LG ch head st stl)
5314015
10
consumable
probe screw
(M3 × 6LG ch head st stl)
5314016
4
consumable
hexapole stud nut
(M3 st stl nut)
5321004
6
consumable
8-4 ________________________ Finnigan AQA Hardware Manual
______________________
Manuals Page
Search Manuals
Feedback
Web
Consumables and Spares
_______________________________________________________________________ Spares
8.3 Spares
Part description
Part number
Number or
amount of each
part contained
in the pack
Part category
3 m line extender cable
C773A
1
spare
insert retaining latch
FM100485
1
spare
adjuster thumb nut
FM100487
1
spare
¾ OD x ½ ID clear hose
FM100595
3 meters
spare
6 mm PTFE tube
PDM00129
3 meters
spare
3/8 ID PVC hose
PDM00130
3 meters
spare
1/16 × 0.13 mm ID red PEEK tubing
PDM00134
1 meter
spare
loop back connector
TDAT106
1
spare
thumb screw (vacuum line clamp)
9227-64
1
spare
LC fitting clamp
9227-100
1
spare
source block voltage contact pin
9227-113
1
spare
flow disrupter pin
9227-119
1
spare
M4 shakeproof washer
1150406
10
spare
source voltage contact washer
M2 plain
1150705
10
spare
M3 × 10 countersunk st stl screw
5311017
10
spare
source voltage contact screw
M2 × 4LG ch head st stl
5312004
10
spare
M4 × 10 cap head st stl screw
5313015
10
spare
M4 × 10 cap head st stl screw
5313019
10
spare
M3 st stl nut
5321004
10
spare
M3 plain washer
5331005
10
spare
M4 plain washer
5331006
10
spare
6 mm OD × 4 mm ID Teflon tube
6060719
3 meters
spare
9.5 mm hosetail
6070120
1
spare
Unex D17 hoseclip
6366317
1
spare
fan filter kit
7990720
1
spare
_______________________ Finnigan AQA Hardware Manual ________________________
8-5
Manuals Page
Search Manuals
Feedback
Web
Consumables and Spares
Spares_______________________________________________________________________
8-6 ________________________ Finnigan AQA Hardware Manual
______________________
Manuals Page
Search Manuals
Feedback
Web
_________________________________________________________________________ Index
Index
A
C
acetic acid, 1-1, 3-3
acetonitrile, 3-3
acidic compounds, 1-13
acquisition modes
Full Scan, 1-35
raw data types, 1-34
SIM, 1-38
additives
summary of use (table), 3-6
adducts, 1-13
ammonium acetate, 3-4
ammonium formate, 3-4
ammonium hydroxide, 3-3
analog UV chromatogram, 1-33
analyzer and detector
schematic (figure), 1-29
animations, 2-1, 3-7, 4-3, 5-1
APCI
applications, 1-23
comparison with ESI (table), 1-24
flow rate, 1-17
introduction, 1-15
ion generation, 1-15
removal, 2-2
setup, 2-8
source (figure), 1-16
source description, 1-16
APCI insert
figure, 2-8
installing, 2-8
API, 1-1
applications
APCI, 1-23
API, 1-22
ESI, 1-23
AQA flow
components (figure), 1-26
dispersion of involatiles (figure), 1-25
functional description, 1-26
introduction, 1-25, 3-i
setup, 3-7
solvent (Note), 1-26, 3-7
atmospheric pressure chemical ionization. See APCI
atmospheric pressure ionization. See API
calibration
calibration problems, 6-14
calibration problems (table), 6-14
capillary
AQA flow, 3-9
ESI insert capillary, 1-12
sample infusion, 4-4
carboxylic acid, 1-21
Cautions
cleaning hexapole RF lens, 5-18
cleaning the source block, 5-13
cleaning the source block o-rings, 5-13
entrance cone, 5-12
handling insert, 2-2, 2-7, 2-8
heater wires and thermocouple, 5-16
phosphoric acid, 3-5
removing the source block, 5-9
tetrahydrofuran, THF, 3-5
centroid, 1-35
changing ionization modes
description, 2-i
hot parts (Warning), 2-2, 2-3, 2-6, 2-8
checklist, pre-switch on, 7-4
chemical ionization, 1-15
chromatogram, types of, 1-33
chromatography
chromatographic considerations, 3-2
problems, 6-11
cleaning
entrance cone, 5-6
ESI ceramic gas nozzle, 5-3
ESI insert, 5-3
flushing inserts, 5-3
hexapole RF lens, 5-14
rear panel fan filters, 5-25
source block, 5-7
communication
problems, 6-16
problems (table), 6-16
comparison of ESI and APCI
table, 1-24
consumables, 8-2
contamination in HPLC systems, 6-23
corona pin
ionization mechanism, 1-15
position (figure), 2-10
B
base peak chromatogram, 1-33
basic compounds, 1-13
bubbles in HPLC systems, troubleshooting, 6-22
D
Dalton, Da, 1-4
data. See raw data
data system, 1-31
detector, 1-29
detergents, 3-4
_______________________ Finnigan AQA Hardware Manual __________________________
1
Manuals Page
Search Manuals
Feedback
Web
Index ________________________________________________________________________
diagnostics
running, 6-20
dialog box
Finnigan AQA Properties (figure), 1-33
Instrument Diagnostics and Optimizations (figure),
6-20
dimethyl sulphoxide, 3-4
E
electrospray. See ESI
entrance cone
cleaning, 5-6
storage and handling (Caution), 5-12
ESI
applications, 1-23
comparison with APCI (table), 1-24
introduction, 1-10
ion generation, 1-11
removal, 2-6
setup, 2-3
source (figure), 1-13
source description, 1-12
ESI ceramic gas nozzle
cleaning, 5-3
orientation (figure), 2-5
ESI insert
figure, 2-3, 5-4
installing, 2-3
F
fan filters. See rear panel fan filters
Finnigan AQA
analyzer and detector schematic (figure), 1-29
APCI source (figure), 1-16
components (figure), 1-2
ESI source (figure), 1-13
exterior features, 1-5
front view (figure), 1-5
front view doors open (figure), 1-7
introduction, 1-1
power supply requirements, 6-19
rear view (figure), 1-8
schematic (figure), 1-3
source schematic (figure), 1-10
status light panel (figure), 1-5
system overwiew, 1-2
Finnigan AQA Properties dialog box
figure, 1-33
flow rate
APCI, 1-17
columns, 3-2
columns (table), 3-2
ESI, 1-14
flow splitting
accuracy (Note), 3-13
procedure, 3-12
schematic (figure), 3-12
flow-focused source, 1-3
foreline trap
pumping connections (figure), 5-24
foreline trap pellets
replacing, 5-24
replacing (Warning), 5-24
troubleshooting, 6-4
formic acid, 1-1, 3-3
fragment ions, 1-18
Full Scan mode
centroid, 1-35
centrold (figure), 1-35
introduction, 1-35
MCA, 1-37
MCA (figure), 1-37
profile, 1-36
profile (figure), 1-36
G
gas nozzle
orientation (figure), 2-5
glucuronide metabolites, 1-21
graph
AQA flow rate against reservoir pressure, 3-11
sample infusion rate against reservoir pressure, 46
H
heater wires and thermocouple
moving the probe (Caution), 5-16
hexapole RF lens
assembling, 5-19
assembly (Note), 5-19
cleaning (Caution), 5-18
cleaning (Warning), 5-14
cleaning procedure, 5-14
disassembling and cleaning, 5-17
disassembly (Note), 5-17
overview, 1-29
removing, 5-14
removing (Note), 5-14
Home Page, 1-31
horse heart myoglobin
mass spectrum (figure), 1-20
HPLC
bubble problems and degassing, 6-22
buffers and additives, 6-22
contamination, 6-23
injection valves, 6-25
mobile phase reservoir, 6-22
preventative maintenance and spares, 6-27
troubleshooting, 6-22
tubing and fittings, 6-23
use of solvents and additives with Finnigan AQA,
3-3
UV detectors, 6-25
2 __________________________ Finnigan AQA Hardware Manual
______________________
Manuals Page
Search Manuals
Feedback
Web
_________________________________________________________________________ Index
I
infusion system. See sample infusion system
injectors, LC, 6-25
inlet system / chromatography
problems, 6-11
problems (table), 6-11
inorganic acids, 3-5
insert
APCI, 2-8
APCI (figure), 2-8
cleaning ESI insert, 5-3
ESI, 2-3
ESI (figure), 2-3, 5-4
flushing, 5-3
flushing (Note), 5-3
handling (Caution), 2-2, 2-7, 2-8
replacing, 5-5
Instrument Setup, 1-32
ion evaporation, 1-11
ion generation
APCI, 1-15
APCI (figure), 1-15
ESI, 1-11
ESI (figure), 1-11
ion pairing agents, 1-1, 3-4
ionization modes
APCI, 1-15
changing, 2-i
ESI, 1-10
K
kit
consumables, 8-2
source o-rings, 8-3
source screws and fixings, 8-4
L
LC/MS
considerations, 3-2
flow rate, 3-2
flow rate (table), 3-2
introduction to AQA, 1-1
Library Browser, 1-32
low sensitivity
problems, 6-5
problems (table), 6-5
M
mass spectrum
introduction, 1-33
spectral problems, 6-13
spectral problems (table), 6-13
mass-to-charge ratio, 1-4
MCA, 1-37
methanol, 3-3
mobile phase additives, 3-3
modes of acquisition, 1-34
molecule
deprotonated, 1-13
protonated, 1-13
multi channel analysis, 1-37
multiply charged ions, 1-14
N
nebulizing gas, 1-12, 1-15
non-volatile salts, 3-4
normal phase solvents, 3-4
Notes
AQA flow, 1-26
AQA flow solvent, 3-7
assembling hexapole RF lens, 5-19
changing the rotary pump oil, 5-23
cleaning rear panel fan filters, 5-26
disassembling hexapole RF lens, 5-17
field-free source region, 1-12, 1-16
Finnigan AQA under vacuum, 7-2
flow splitting, 3-13
flushing the inserts, 5-3
removing hexapole RF lens, 5-14
rotary pump maintenance, 5-21
running tune diagnostics, 6-21
sample infusion, 1-27
sample infusion flow rate, 4-2
sample infusion probe temperature, 4-7
source voltage ramping, 1-21
starting vacuum pumps, 7-5
troubleshooting calibration problems, 6-15
troubleshooting tuning problems, 6-15
O
oil
adding oil, 5-22
changing rotary pump oil, 5-23
checking oil level, 5-21
checking the color, 5-21
orthogonal probe, 1-3
P
m/z, 1-4
maintenance schedule
description, 5-2
table, 5-2
mass analyzer, 1-29
mass detection, 1-4
mass range chromatogram, 1-33
part categories, 8-1
parts kit
consumables, 8-2
source o-rings, 8-3
source screws and fixings, 8-4
parts lists, 8-i
_______________________ Finnigan AQA Hardware Manual __________________________
3
Manuals Page
Search Manuals
Feedback
Web
Index ________________________________________________________________________
phosphates, 1-1, 3-4
phosphoric acid
use, 3-5
use (Caution), 3-5
photomultiplier tube, 1-29
polarity switching, 1-21
power failure, 6-3
power supply
requirements, 6-19
probe
alignment procedure, 6-10
alignment procedure (figure), 6-10
cleaning, 5-20
cleaning (Warning), 5-20
orthogonal, 1-3
Processing Setup, 1-32
profile
description, 1-36
proteins, 1-21
pumping down, 1-33, 7-5
Q
quadrupole mass analyzer, 1-29
Qual Browser, 1-32
Quan Browser, 1-32
R
raw data
figure, 1-34
introduction, 1-33
types of, 1-33
types of raw data, 1-34
viewing raw data, 1-33
Rayleigh limit, 1-11
rear panel fan filters
cleaning, 5-25
cleaning (Note), 5-26
position (figure), 5-25
troubleshooting, 6-3
rebooting the PC, 6-19
removal
APCI, 2-2
ESI, 2-6
resolution
troubleshooting MS problems, 6-18
troubleshooting MS problems (table), 6-18
restarting the system, 7-4
reverse phase solvents, 3-3
RF lens. See hexapole RF lens
rotary pump
adding oil, 5-22
adding oil (Warning), 5-22
changing the oil, 5-23
changing the oil (Note), 5-23
changing the oil (Warning), 5-5, 5-23
checking the oil color, 5-21
checking the oil level, 5-21
figure, 5-24
lifting (Warning), 5-23
maintenance, 5-21
maintenance (Note), 5-21
replacing the foreline trap pellets, 5-24
troubleshooting, 6-3, 6-4
S
salbutamol
ESI mass spectrum (figure), 1-11
source fragmentation (figure), 1-19
sample infusion system
components (figure), 1-28
flow rate (Note), 1-27, 4-2
functional description, 1-27
introduction, 1-27, 4-i
probe temperature (Note), 4-7
setup, 4-3
using with APCI (figure), 4-2
schedule, maintenance, 5-2
self cleaning source, 1-3, 1-25
sensitivity problems, 6-5
Sequence Setup, 1-32
server, 1-32
setup
APCI, 2-8
AQA flow, 3-7
ESI, 2-3
sample infusion system, 4-3
sheath gas, 1-12, 1-16
shutting down the system
in between analytical runs, 7-2
two weeks or more, 7-3
up to two weeks, 7-2
SIM, 1-38
singly charged ions, 1-13, 1-17
sodium adduct
mass spectrum (figure), 1-14
software, Xcalibur, 1-31
solvents, 3-3
source
APCI (figure), 1-16
ESI (figure), 1-13
field-free region (Note), 1-12, 1-16
flow-focused, 1-3
introduction, 1-9
schematic (figure), 1-10
self-cleaning, 1-3
source block
cleaning (Caution), 5-13
cleaning (Warning), 5-6
cleaning procedure, 5-7
cleaning the entrance cone, 5-6
disassembling and cleaning, 5-10
removing, 5-7
removing (Caution), 5-9
source block o-rings
cleaning (Caution), 5-13
source enclosure
4 __________________________ Finnigan AQA Hardware Manual
______________________
Manuals Page
Search Manuals
Feedback
Web
_________________________________________________________________________ Index
APCI high voltage connection, location (figure), 6-9
ESI high voltage connection, location (figure), 6-9
heater and thermocouple wires, location (figure),
6-9
source voltage connection, location (figure), 6-9
source fragmentation, 1-18
source voltage ramping
figure, 1-21
introduction, 1-20
source fragmentation (Note), 1-21
spares, 8-5
spectrum, 1-33
status light panel, 1-5
figure, 1-5
indications (table), 1-6
stick spectrum, 1-35
sulfuric acid, 3-5
surface active agents, 3-4
T
tubing
PEEK, 6-24
PEEK color coding (table), 6-24
stainless steel, 6-24
Teflon, 6-23
use of stainless steel tubing (Warning), 6-24
tune diagnostics
dialog box (figure), 6-20
running, 6-20
running (Note), 6-21
tune diagnostics completed (figure), 6-21
tuning
tuning problems, 6-15
tuning problems (table), 6-15
U
UV detectors, 6-25
V
tetrahydrofuran, THF
use, 3-5
use (Caution), 3-5
thermal fragmentation
figure, 1-22
TIC chromatogram, 1-33
total ion current chromatogram. See TIC
chromatogram
triethylamine, TEA, 3-5
trifluoroacetic acid, TFA, 1-1, 3-5
troubleshooting
APCI high voltage connection, location (figure), 6-9
calibration problems, 6-14
calibration problems (Note), 6-15
calibration problems (table), 6-14
communication problems, 6-16
communication problems (table), 6-16
ESI high voltage connection, location (figure), 6-9
general problems, 6-3
general problems (table), 6-3
heater and thermocouple wires, location (figure),
6-9
inlet system / chromatography problems, 6-11
inlet system / chromatography problems (table), 611
low sensitivity problems, 6-5
low sensitivity problems (table), 6-5
MS resolution problems, 6-18
MS resolution problems (table), 6-18
probe alignment procedure, 6-10
source voltage connection, location (figure), 6-9
spectral problems, 6-13
spectral problems (table), 6-13
tuing problems (Note), 6-15
tuning problems, 6-15
tuning problems (table), 6-15
vacuum problems, 6-17
vacuum problems (table), 6-17
vacuum
Finnigan AQA under vacuum (Note), 7-2
pumping down, 7-5
starting vacuum pumps (Note), 7-5
troubleshooting vacuum problems, 6-17
troubleshooting vacuum problems (table), 6-17
vacuum system
introduction, 1-30
troubleshooting, 6-3, 6-4
vent, 1-33
volatile buffer systems, 1-1
W
Warnings
adding rotary pump oil, 5-22
changing ionization modes, 2-2, 2-3, 2-6, 2-8
changing the rotary pump oil, 5-23
hexapole RF lens cleaning, 5-14
lifting rotary pump, 5-23
probe cleaning, 5-20
replacing foreline trap pellets, 5-24
source block cleaning, 5-6
use of stainless steel tubing, 6-24
using concentrated nitric acid, 5-5
water, 3-3
X
Xcalibur
Home Page, 1-31
Home Page (figure), 1-31
introduction, 1-31
rebooting the PC, 6-19
server, 1-32
server (figure), 1-32
_______________________ Finnigan AQA Hardware Manual __________________________
5