1
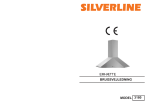
COOKER HOOD
USER MANUAL
READ AND SAVE THESE INSTRUCTIONS MANUAL
CONTENTS
TECHNICAL
CHARACTERISTICS .................................... 2
BODY SIZE ............................................................................2
MAIN PARTS NAME ................................................................3
INSTALLATION REQUIREMENT......................................4
INSTALLATION PROCEDURES.......................................5-7
OPERATING INSTRUCTION..............................................8
MAINTENANCE...............................................................8-9
C L E A N T H E B L O W E R. . . . . . . . . . . . . . . . . . . . . . . . . . . . . . . . . . . . . . . . . . . . . . . 9
REPLACE LIGHT BULB...............................................10
IMPORTANT SAFETY INSTRUCTIONS...........................11-12
TROUBLE SHOOTINGS.....................................................13
Please note that this product is marked with this symbol:
According to Waste of Electrical and Electronic Equipment
(WEEE) directive, WEEE should be separately collected and
treated. If at any time in future you need to dispose of this
product, Please do NOT dispose of this product with house hold
waste. Please send this product to WEEE collecting points where
available.
1
TROUBLE SHOOTINGS
CAUTION: Disconnect the power supply before servicing.
STATUS
CAUSE AND METHOD OF REPAIRING
TOOL
The power
supply is
damaged
If the power supply is damaged,please call the
technicians to repair.
"+" type
Screwdriver
Sharp Pincers
The motor does
not run
A)The fan was blocked,check the fan make sure
it is in the correct place.
B)The motor was blocked,check the motor make
sure it is in the correct place.
"+" type
C)The motor was broken,replace a new one.
Screwdriver
D)The switch control was broken,replace a new
one.
E)The capacitance was broken,replace a new one.
The unit
body shake
A) The installation is not firm enough.Check it
and make sure the hood is firm enough.
B)The fan is broken,so it is not balance.Repalce a
a new one.
"+" type
C)The blower install is not correct.Check it and Screwdriver
install it correctly.
D)The motor does not firm enough.Check it and
install it firmly enough.
Big noise
a) The blower is not in balance.Adjust the fan fix
screws to balance or replace a new one.
B)Some other things drop to the blower.Check
and clean it.
Suction not
so powerful
A) The distance from the range hood to the gas
cooker is too big.Make sure the distance is
about 650-700mm.
B) There are many windows or doors in the
kitchen, the air convection is too big.Close
some doors or windows,smaller the air
convection.
C) There have some other pour wind to the
"+" type
exhaust pipe.Make the exhaust pipe s exit
Screwdriver
to downwards.
D)The run rate of motor decrease obviously.
Replace a new motor or capacitance.
Because of the Range Hood is set upon the
window, the best solution is that put one
threeply board on the back of the Range Hood
for covering the hollow of window.
MODEL NO.:
RS-668A(60)
RS-668A
RS-668
TOTAL POWER: 190W
THREE SPEED MOTOR: 170W
Lights:
2 x 10 W
4 x 5W
VOLTAGE: 220 V 230V
240V
110V
120V
FREQUENCY: 50Hz
60 Hz
FILTER:
6-layer filter
2-layer filter
CONTROL:
Touch control
Push button
BODY SIZE
29 5
"+" type
Screwdriver
29 5
285
5
115
53
47
475
60 0
668A(60)
28
48
0
5
900
668A
5
580-960
295
900
668
13
28
570-950
515-905
"+" type
Screwdriver
125
Replace with a new
bulb or replace a new lamp assembly.
TECHNICAL CHARACTERISTICS
60
Bulb does not
work
Dear consumer,
Thanks for your purchase of our cooker hood and we hope we can fully
satisfy all of your needs. Please read entire instructions carefully before
proceeding to obtain the best results of using the cooker hood.
2
MAIN PARTS NAME
Wear protective
glove before you start
to clean the hood. Remove
the components gently
when you clean!
Glove
1. Hook
2. Inner Chimney
Don t wash the
key parts with water or
other kind of liquid .For
the liquid may inpour the hood
body cause electrical
problem .
3. Outer Chimney
Be more carefully
when clean the blower .
Don t impact the blower and
don t move the blower knob
otherwise it will cause the
body shake and big
noise.
4. Exhaust pipe
Never pull out
the plug by wet hand to
avoid the possibility of
electric shock.
5. Mounting hook
8.Blower Assembly
6. Tempered
glass
If along time
you don t use the
appliance,please pull
out the plug!
7.Aluminium Filter
3
12
IMPORTANT SAFETY INSTRUCTIONS:
INSTALLATION REQUIREMENT
1. Do not install the cooker hood where there have many doors or windows.
For the air convection will effect the exhaust efficiency of the hood.(Fig.1 )
Do not connect
the air outlet to other
fuel s chimney or
conbustion gas ducts.
2. Install the cooker hood right above the hob.The recommended distance
between the hob and the lower edge of the cooker hood is minimum
650mm and maximum 700mm. (Fig. 2)
3. In order to get the optimum performance, do not elongate the exhaust
pipe too long, and try to make the bend of exhaust pipe less and biggest,
ensure the connection is airproof.(Fig. 3)
Do not leave naked
flames under this hood
5. The air outlet must not be connected to chimney flues or combustion gas
ducts. The air outlet must under no circumstances be connected to ventilation ducts for room in which fuel-burning appliances are installed.
Fig.1
Fig.2
Fig.3
650~700mm
In case of any
damage of the power
cable, replace the broken
cable with a new one by an
experienced person.
4. After hanging the unit on the wall, ensure the hood is level and vertical.
(Fig. 4)
Manual
10
Do clean the hood
in according to the instruction
stated or it might cause
the possibility of fire
accident
The bulb should be
replaced by an experienced
person, Halogen bulb no more
then 10W,LED bulb no
more then 2W.
Fig.4
LEVEL
Acclivitous
Upright
11
Acclivitous
4
INSTALLATION PROCEDURES
SAFETY WARNING
HOOD MAY HAVE VERY SHARP EDGES;PLEASE WEAR
PROTECTIVE GLOVES IF IT IS NECESSARY TO REMOVE ANY
PARTS FOR INSTALLING, CLEANING OR SERVICING.
650-700mm
10mm
Step 1:
Please put the cooker hood on
the wall and mark the position where
you want to install.We recommend
the height from the hob to the lower
edge of the hood should be from
650mm to 700mm.
TO REPLACE LIGHT BULB
CAUTION: LAMP UNIT MAY BE HOT!WAIT UNTIL THE UNIT IS
COOL. ANDUSE THE SAME TYPE LIGHT BULB!
Make sure all switches control are off,and range hood is unplugged.
Pls follow below instructions:
Warning!
Make sure the bulb is cool before you touch it !
1. Use a flat head screwdriver to take out the lamp assembly, then
disconnect lamp from the internal wires.
2. Unloose the screw using cross head screwdriver.
3. Remove the lamp cover and take out of lamp bulb.
4. Replace a new 10W halogen lamp bulb or 5 W bulb , put bulb securely into
lamp socket.
5. Lay back lamp bulb to lamp cover, fix it with screws.
Expanding Tube
Step 2:
Drill 3 holes in level in the
wall ,the diameter is 8mm and
60~70mm in depth where you marked,
Press the 3 expanding tube provided
into the holes.Using the 5x60 wood
screws to fix the hook on the wall.
182mm
338mm
5x60
Wood Screw
40mm
Hook
182mm
260mm
282mm
6. Connect the lamp assembly with internal electrical wire and push the
light into the hood lamp hole.
Step 3:
Fix the exhaust pipe(153 diameter
side) to the shutter.
Exhaust pipe
Shutter
5
10
4. Clean the blower assembly once half an year and use it according
Step 4:
Hook
to this manual for better effect!.
Fix the hook to the inner chimney
5. DO NOT clean the motor with water or other liquid.
with M4 screws .
Inner Chimney
M4 Screw
Clean the blower assembly
Motor wire
C h a r c o a l
filter if you need
Step 5:
Inner Chimney
Put the inner chimney to the
outer Chimney.
M5 nut
Fan
Blower box
Motor
Outer Chimney
Motor fix cover
1) Take off the Aluminium Filter.
2) Disconnect the earthing wire connection of the motor.
3) Use a cross screwdriver to loose the fixing bolts of the blower
Step 6:
Inner Chimney
Put the inner chimney and outer chimney
box (4 bolts for the air outlet, 2 bolts for the rear plate) to take off
the blower box ..
to the blower assembly.Using 8 pcs
Outer Chimneyr
M4X10 screws to fix the outer chimney
4) If istall thecharcoal filter ,then remove charcoal filter first.
5) Use a cross screwdriver to loose the six bolts of the fixed cover
to the blower assembly like the arrow s
M4 Screw
direction.
of the motor and take off the motor from the blower box.
6) Rotate about 10o like the arrow direction to remove the fixed cover
of the motor.
Step 7:
Hang the entire hood unit onto the
hook, ensure the hood is level and
upright. Put 2 pcsM4X10 screws s
holes in hole1 and 2 and tighten to
the wall to avoid the hood
unit can be removed.
7) Use a M5 hexagonal screwdriver to loose the anchoring nut of the
motor and take out the motor from the fan.
8) Reassemble it at the reverse order (note that the wire-out position of the
1
2
motor wire must be installed in the original position) and ensure the
earthing wire has been connected.)
9
6
Step 8:
1.Extend the inner chimney to the
height which you want . And mark
the two holes of the inner chimney s hook on the wall.
2. Put down the inner duct cover
gently, using 8mm drill to drill
two holes in 60-70 mm depth
on the wall which you marked
just now.
3. Press the expanding tube into the holes.
4.Extend the inner chimney and
tighen it to the expanding tubes
with two 5x60 wood screw .
Expanding Tube
5x60
Wood Screw
Expanding Tube
5x60
Wood Screw
Step 9:
Extend the exhaust pipe to the
vent-pipe of your building or to
outside. Try to make the bend of
the exhaust pipe is more than 120
Step 10:
Install filter.Put the fix
pin to the fix hole and press down
the filter s clip gently as the
direction of arrow A.
Clip
A
OPERATING INSTRUCTION
How to use the touch control
This panel is located on the front of the hood and
includes:
1 position light switch ( Ref.A).
3 position switch controls the motor (High speed,
Mid speed,Low speed) (Ref.B,C,D).
1 position motor-off ( Ref.E).
B
C
D
MAINTENANCE
CAUTION: NEVER PUT YOUR HAND INTO THE AREA HOUSING
THE FAN WHILE THE FAN IS OPERATING.
FOR THE OPTIMAL LEVEL OF OPERATION, CLEAN THE COOKER
HOOD SURFACE, FAN, AND ALUMINIUMFILTER REGULARLY.
1. Use only mild soap or detergent solutions to clean the cooker hood
surface. Dry surfaces using soft cloth.
2. Using a stainless steel cleaner to bring the glow back into a stainless
steel finish.
3. Clean the aluminium filter once a week or according to use status. Press
the clamp of the aluminium filter slightly, take off the aluminium filter
and put it into warm soapy water using mild detergent, wipe the alumin
-ium filter with soft brush. Replace the filter after it is dry. Or it can wash
in dishwasher.
Fix hole
Fix pin
7
A
8