1
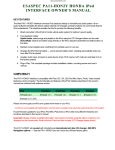
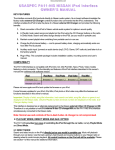
Discountcarstereo.com
BBLLIITTZZSSA
AFFEE H
HO
ON
N//M
M--LLIIN
NK
K11V
V..22xx IInntteerrffaaccee ffoorr iiPPoodd
KEY FEATURES
The HON/M-LINK1V.2x Honda/ Acura interface for iPod allows crystal clear audio playback from your iPod
on the factory stereo in select 2003-06 Honda factory systems. The interface fits all iPod with dock
connectors including iPod Video, Photo, Mini and Nano (not compatible with 10G/15G or iPod shuffle).
This interface enables the iPod to take the place of a Honda external CD Changer and provides the following
benefits:
1.
Direct connection of the iPod to Honda vehicle audio system for optimum sound quality
2.
Control your iPod using the iPod clickwheel (no controls available from the radio buttons)
3.
Charge the iPod internal battery --- and to prevent battery-drain, charging automatically ends 20
minutes after ignition is turned “off”
4.
Retain factory XM (if so equipped)
5.
Plug-n-Play: This complete package includes installation cables and user’s manual.
Important: When using the HON/M-LINK1V.2x interface: display of artist name, song title information, track
search and artist, song title, album or genre, or iPod controls are not available on the Honda radio but are
accessible using the iPod clickwheel and display.
VEHICLE COMPATIBLITY
The HON/M-LINK1V.2x is applicable to the following Honda/Acura Vehicles
HONDA
2003-06 Accord
2006 Civic
2005-06 CRV
2003-06 Element
2006 Insight
2005-06 Odyssey
2006 Pilot
2006 Ridgeline
2004-06 S2000
ACURA
2004-06 NSX
2004-06 TL
2005-06 MDX
2004-06 TSX
Notes and Misconceptions:
1. The HON/M-LINK1 V.2x works directly with or without factory Navigation and/or XM in all vehicles listed
above.
2. Installing the HON/M-LINK1V.2x does not interfere with the in-dash 6-CD Changer radio3. The only CD Changer that you must disconnect to use this interface is the external changer (mounted under
seat, in the trunk, hatch, center armrest, glove box etc). This requirement does not apply to the in-dash 6 CD
changer Radio – that is because is part of the radio and can’t be disconnected.
4. The HON/M-LINK1 V.2x will let you connect and play and charge your iPod on the stereo—they are no
additional features to this part. See our PA11-HON2 and PA11-HON2y if you want to control your iPod using
the radio buttons.
Discountcarstereo.com
EXCLUSIVE DASH REMOVAL AND INSTALLATION
INSTRUCTIONS
2004-05 S2000
1. Remove the radio surrounding by just popping out
2. Extract 4 phillips head screws securing the radio in the dash
3. Remove white 14-pin plug from the back of the radio and plug into the interface. Plug removed
white 14-pin connector into the female connector on Blizsafe interface.
2006 Ridgeline
1. Apply parking brake, and lower shifter all the way down to 1st gear
2. Using a panel removing tool, unsnap dash bezel surrounding radio. Lift away, disconnect and
remove
3. Extract (5) Philips head screws, lift away, disconnect and remove.
4. Remove white 14-pin plug from the back of the radio and plug into the interface. Plug removed
white 14-pin connector into the female connector on Blitzsafe interface
2002 –Up CRV
1.
2.
3.
4.
Extract 2 Philips screws form the bottom of the radio bezel.
Pry out radio bezel carefully using a panel removal tool and fingers, disconnect and remove
Extract 4 Philips screws securing radio
Remove white 14-pin plug from the back of the radio and plug into the interface. Plug removed
white 14-pin connector into the female connector on Blitzsafe interface.
2006 Civic
1. Remove access panel below the radio
2. Remove white 14-pin plug from the back of the radio and plug into the interface. Plug removed
white 14-pin connector into the female connector on Blitzsafe interface.
2006 Insight
1. Remove glove box
a. Open and unclip stopper
b. Remove 2 Philips head screws
2. Extract (2) Philips head screws securing panel around stereo
3. Pull forward and unclip panel. Note: Start from passenger side and work across and then down
4. Extract (4) Philips head screws securing radio brackets, unplug and remove.
5. Remove white 14-pin plug from the back of the radio and plug into the interface. Plug removed
white 14-pin connector into the female connector on Blitzsafe interface.
2005-06 Odyssey
1.
2.
3.
4.
5.
Using a panel removal tool carefully remove the panel surrounding the AC control and vents.
Remove two Philips head screws located below radio
Remove Philips head screw under the rear center portion of the radio
Remove radio from dash disconnect wire harness and antenna connection
Remove white 14-pin plug from the back of the radio and plug into the interface. Plug removed
white 14-pin connector into the female connector on Blitzsafe interface
Discountcarstereo.com
2003-Up Accord/ 04-Up TSX
1. Remove trim around shifter
2. Remove rubber and plastic insert in ash tray by prying them upwards. Remove two screws and
unplug lighter adapter
3. Remove two screws from base of pocket under radio. Remove the lower pocket under the
radio by pulling it outward.
4. Remove two screws at the back of the radio, on the bottom
5. Remove air vent cover above the radio by prying on the lower, outer corners of the air vent
covers
6. Remove the three screws above the radio and pull the radio out. (the bottom of the radio has
three pull tabs)
7. Remove white 14-pin plug from the back of the radio and plug into the interface. Plug removed
white 14-pin connector into the female connector on Blitzsafe interface
2005 CR-V
1. Extract 2 Philips screws from bottom of radio bezel. Pry out radio bezel carefully using a panel
removal tool and fingers, disconnect and remove
2. Extract 4 philips screws securing radio
3. Remove white 14-pin plug from the back of the radio and plug into the interface. Plug removed
white 14-pin connector into the female connector on Blitzsafe interface
2005 MDX
1. Remove trim panel around the radio by removing screws in vents and pulling outwards starting
at the air vents and working down.
2. Remove screws that hold in radio and pull radio outward
3. Remove white 14 pin plug from the back of the radio and plug into the interface. Plug removed
white 14 pin connector into the female connector on Blitzsafe interface
2004-05 NSX
1. Remove center module by removing screw in vent area and prying off the entire panel
2. Remove screws on the sides of the radio and pull radio outward
3. Remove white 14 pin plug from the back of the radio and plug into the interface. Plug removed
white 14 pin connector into the female connector on Blitzsafe interface.
Disclaimer: All products sold by Discount Car Stereo.com are tested and optimized for vehicles in the United States. You
may, at your own risk, purchase and install this part in vehicles outside the USA however; Discount Car Stereo.com will not
be liable for damage or compatibility issues that may arise. Products purchased for vehicles outside the US are not
returnable. It is the customer's responsibility to retain an installation technician with adequate knowledge and experience of
the vehicle into which the equipment will be installed.
Revised September 15, 2006
iPod™ iPod™ Mini and iTune™ are trademarks of Apple Computers Inc. registered in the USA and other countries.
HONDA is a registered trade mark of HONDA Co. Ltd
Design and specifications are subject to change without notice.
© 1995-06 Discount Car Stereo, Inc. All rights reserved. Information in this document is subject to change without notice.
Other products and companies referred to herein are trademarks or registered trademarks of their respective companies or mark
holders.