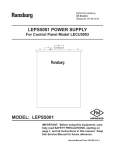
1
SERVICE MANUAL LN-9256-07.4 (Replaces LN-9256-07.3) July-2012 SERIAL A TOMIZER MODULE AT MODEL: A1 1925-00 A11925-00 IMPOR TANT IMPORT ANT:: Before using this equipment, carefully read SAFETY PRECAUTIONS, starting on page 1, and all instructions in this manual. Keep this Service Manual for future reference. Service Manual Price: €15.00 15.00 (Euro) $20.00 (U.S.) NOTE: This service manual has been superceded from service manual number LN-9256-07.3 to service manual number LN-9256-07.4 LN-9256-07.4. Reasons for this change are noted under “Manual Change Summary” inside the back cover of this manual. LN-9256-07.4 Serial Atomizer Module - Contents CONTENTS SAFETY: PAGE 1-6 SAFETY PRECAUTIONS.......................................................................................................... 1 HAZARDS / SAFEGUARDS...................................................................................................... 2-5 INTRODUCTION: 7 GENERAL DESCRIPTION........................................................................................................ 7 SPECIFICATIONS...................................................................................................................... 7 INSTALLATION: 8 LOCATION.................................................................................................................................. 8 CONNECTIONS......................................................................................................................... 8 OPERATION: 9-15 SPEED CONTROL..................................................................................................................... 9 79128-00 SERIAL ATOMIZER SPEED SELECT ..................................................................... 10 AUTOMATIC SHUTDOWN........................................................................................................ 11 OTHER MODES......................................................................................................................... 11 SIGNAL I/O................................................................................................................................. 11-12 MOTHERBOARDS..................................................................................................................... 13 SPEED CONTROL SYSTEM..................................................................................................... 14 SIDE VIEW.................................................................................................................................. 14 DIP SWITCH SETTINGS........................................................................................................... 15 MAINTENANCE: 16-18 SERIAL ATOMIZER MODULE...................................................................................................16 STATUS CODE DISPLAY..........................................................................................................16 TROUBLESHOOTING / TROUBLESHOOTING GUIDE CHART........................................... 17-18 PARTS IDENTIFICATION: 19-20 PARTS LIST................................................................................................................................ 19 POWER CONNECTIONS TO MOTHERBOARD TB1............................................................. 19 TRANSCEIVER CONNECTIONS TO MOTHERBOARD TB(X).............................................. 19-20 WARRANTY POLICIES: 21 LIMITED WARRANTY................................................................................................................ 21 LN-9256-07.4 Serial Atomizer Module - Safety SAFETY SAFETY PRECAUTIONS Before operating, maintaining or servicing any Ransburg electrostatic coating system, read and understand all of the technical and safety literature for your Ransburg products. This manual contains information that is important for you to know and understand. This information relates to USER SAFETY and PREVENTING EQUIPMENT PROBLEMS. To help you recognize this information, we use the following symbols. Please pay particular attention to these sections. A WARNING! states information to alert you to a situation that might cause serious injury if instructions are not followed. A CAUTION! states information that tells how to prevent damage to equipment or how to avoid a situation that might cause minor injury. A NOTE is information relevant to the procedure in progress. While this manual lists standard specifications and service procedures, some minor deviations may be found between this literature and your equipment. Differences in local codes and plant requirements, material delivery requirements, etc., make such variations inevitable. Compare this manual with your system installation drawings and appropriate Ransburg equipment manuals to reconcile such differences. ! WARNING The user MUST read and be familiar with the Safety Section in this manual and the Ransburg safety literature therein identified. > > This manual MUST be read and thoroughly understood by ALL personnel who operate, clean or maintain this equipment! Special care should be taken to ensure that the WARNINGS and safety requirements for operating and servicing the equipment are followed. The user should be aware of and adhere to ALL local building and fire codes and ordinances as well as NFPA33 SAFETY STANDARD, prior to installing, operating, and/or servicing this equipment. ! WARNING > The hazards shown on the following page may occur during the normal use of this equipment. Please read the hazard chart beginning on page 2. Careful study and continued use of this manual will provide a better understanding of the equipment and process, resulting in more efficient operation, longer trouble-free service and faster, easier troubleshooting. If you do not have the manuals and safety literature for your Ransburg system, contact your local Ransburg representative or Ransburg. 1 LN-9256-07.4 Serial Atomizer Module - Safety AREA HAZARD SAFEGUARDS Tells where hazards Tells what the hazard is. Tells how to avoid the hazard. Fire Hazard Fire extinguishing equipment must be present in the spray area and tested periodically. may occur. Spray Area Improper or inadequate operation and maintenance procedures will Spray areas must be kept clean to prevent the cause a fire hazard. accumulation of combustible residues. Protection against inadvertent arcing that is capable of causing fire or explosion is lost if any safety interlocks are disabled during operation. Frequent power supply shutdown indicates a problem in the system requiring correction. Smoking must never be allowed in the spray area. The high voltage supplied to the atomizer must be turned off prior to cleaning, flushing or maintenance. When using solvents for cleaning: Those used for equipment flushing should have flash points equal to or higher than those of the coating material. Those used for general cleaning must have flash points above 100oF (37.8oC). Spray booth ventilation must be kept at the rates required by NFPA-33, OSHA, and local codes. In addition, ventilation must be maintained during cleaning operations using flammable or combustible solvents. Electrostatic arcing must be prevented. Test only in areas free of combustible material. Testing may require high voltage to be on, but only as instructed. Non-factory replacement parts or unauthorized equipment modifications may cause fire or injury. If used, the key switch bypass is intended for use only during setup operations. Production should never be done with safety interlocks disabled. Never use equipment intended for use in waterborne installations to spray solvent based materials. The paint process and equipment should be set up and operated in accordance with NFPA-33, NEC, and OSHA requirements. LN-9256-07.4 2 Serial Atomizer Module - Safety AREA HAZARD SAFEGUARDS Tells where hazards Tells what the hazard is. Tells how to avoid the hazard. may occur. General Use and Maintenance Improper operation or maintenance Personnel must be given training in accordance with may create a hazard. the requirements of NFPA-33. Personnel must be properly trained Instructions and safety precautions must be read in the use of this equipment. and understood prior to using this equipment. Comply with appropriate local, state, and national codes governing ventilation, fire protection, operation maintenance, and housekeeping. Reference OSHA, NFPA-33, and your insurance company requirements. Electrical Equipment High voltage equipment is utilized. Arcing in areas of flammable or combustible materials may occur. Personnel are exposed to high voltage during operation and maintenance. The power supply, optional remote control cabinet, and all other electrical equipment must be located outside Class I or II, Division 1 and 2 hazardous areas. Refer to NFPA-33. Turn the power supply OFF before working on the equipment. Protection against inadvertent Test only in areas free of flammable or combusarcing that may cause a fire or explosion is lost if safety circuits tible material. are disabled during operation. Testing may require high voltage to be on, but only as instructed. Frequent power supply shutdown indicates a problem in the Production should never be done with the safety system which requires correccircuits disabled. tion. Explosion Hazard / Incompatible Materials 3 An electrical arc can ignite coating materials and cause a fire or explosion. Before turning the high voltage on, make sure no objects are within the sparking distance. Halogenated hydrocarbon solvents for example: methylene chloride and 1,1,1,-Trichloroethane are not chemically compatible with the aluminum that might be used in many system components. The chemical reaction caused by these solvents reacting with aluminum can become violent and lead to an equipment explosion. Aluminum is widely used in other spray application equipment - such as material pumps, regulators, triggering valves, etc. Halogenated hydrocarbon solvents must never be used with aluminum equipment during spraying, flushing, or cleaning. Read the label or data sheet for the material you intend to spray. If in doubt as to whether or not a coating or cleaning material is compatible, contact your material supplier. Any other type of solvent may be used with aluminum equipment. LN-9256-07.4 Serial Atomizer Module - Safety AREA HAZARD SAFEGUARDS Tells where hazards Tells what the hazard is. Tells how to avoid the hazard. may occur. Toxic Substances Certain material may be harmful if Follow the requirements of the Material Safety Data inhaled, or if there is contact with Sheet supplied by coating material manufacturer. the skin. Adequate exhaust must be provided to keep the air free of accumulations of toxic materials. Use a mask or respirator whenever there is a chance of inhaling sprayed materials. The mask must be compatible with the material being spray-ed and its concentration. Equipment must be as prescribed by an industrial hygienist or safety expert, and be NIOSH approved. Spray Area / High Voltage Equipment This is a high voltage device that Parts being sprayed must be supported on conveyors can produce electrical arcs capable or hangers and be grounded. The resistance between of igniting coating materials. the part and ground must not exceed 1 megohm. (Reference NFPA-33) A safe distance must be maintained between the parts being coated and the atomizer bell. A distance of at least 1-inch for each 10kV of power supply output voltage is required at all times. Parts must be supported so that they will not swing and reduce the clearance specified above. All electrically conductive objects in the spray area, with the exception of those objects required by the process to be at high voltage, must be grounded. Unless specifically approved for use in hazardous locations, the power supply and other electrical equipment must not be used in Class I, Division 1 or 2 locations. Personnel Safety/ The disk atomizer can rotate at Personnel must stay clear of the bell whenever it is speeds up to 40,000 rpm. At these rotating. Mechanical speeds, the edge of the applicator Hazards can easily cut into skin. Loose Before touching the bell, the turbine air must be shut articles of clothing can also be off. caught by the rotating bell. If the disk has been rotating, allow at least three minutes for it to come to a complete stop before touching it. LN-9256-07.4 4 Serial Atomizer Module - Safety AREA HAZARD SAFEGUARDS Tells where hazards Tells what the hazard is. Tells how to avoid the hazard. may occur. 5 Personnel Safety Skin puncturing by sharp electrode. Take precautions to see that flesh is not punctured by sharp electrode. Intended Use Using coating materials and/or This system is intended for use with waterborne cleaning and flushing solvents coating formulations only. As stated in this manual, which have flash points below 100oF this system can also be used for solventborne coatings. (37.8oC) may cause a fire hazard. LN-9256-07.4 Serial Atomizer Module - Safety NOTES LN-9256-07.4 6 Serial Atomizer Module - Introduction INTRODUCTION GENERAL DESCRIPTION Electrical Input Power: The Serial Atomizer Module is designed to continuously monitor and maintain the programmable speed of a rotary atomizer. This module utilizes closed-loop control via a fiber optic cable to maintain the rotator speed. A wide number of configuration options are available to the end user. The design is based on the Eurocard 19" rack standard which allows for easy installation. Various configuration options enable simple electrical integration. SPECIFICA TIONS SPECIFICATIONS (At Sea Level) Environmental / Physical Atomizer Speed Feedback: Fiber optic cable from atomizer to transceiver, differential electrical signal from transceiver to Serial Atomizer Module. Communication Modes: Serial bus communication from Node Adapter + or Discrete I/O Module. Control Range Specs: Bell Type Disk Max. Speed Command (krpm) 30 SW1 SW2 SW3 Off Off Off Temp. Operating: Storage: 0° to 55° C -40° C to 85° C Spare XXX Off Off On Humidity: 95% Non-Condensing Spare XXX Off On Off Size: 100 x 160mm Eurocard module, 35mm wide Aerobell 33 (30, 57mm) 50 Off On On RMA-202 (30, 57mm) 50 Off On On Spare XXX On Off Off Aerobell 33 (70mm) 40 On Off On Aerobell Classic 60 On On Off Aerobell II Direct Charge 60 On On Off Aerobell II Indirect Charge 60 On On Off 70 On On On Pneumatic Pneumatic Inputs Supply Air: Bearing Air: 0-100 psi (0-6.9 bar) filtered to 40 microns, 80 psi (5.5 bar) minimum required for specified performance Feedback of actual rotator bearing air pressure Pneumatic Outputs Drive Air: Zero to input pressure (variable) Brake Air: Zero to input pressure (On or Off) RMA-303, MMA-303 Accuracy: 7 24 VDC ± 10% @ 270 mA max. ± 500 rpm LN-9256-07.4 Serial Atomizer Module - Installation INSTALLATION LOCA TION LOCATION Install the rack assembly in a control cabinet that is protected from the possibility of any contact with water, vapor or high humidity. Ambient temperature should not exceed 131°F (55°C). DO NOT locate control cabinet near or adjacent to heat producing equipment such as ovens, high wattage lamps, etc. The area should be clean, dry and well ventilated. If the transceiver is located remotely from the rack assembly, the control cabinet should be located such that the total length of the cable between transceiver and rack assembly is no longer than 40-feet. ! WARNING > The Serial Atomizer Module(s) MUST be located outside the HAZARDOUS area (See NFPA-33). > The user should be aware of, and adhere to, all local fire codes and ordinances. > Conduit MUST be used for the input AC electrical connections. > The user MUST provide a properly fused disconnect between the power source and the power supply which complies with appropriate codes. LN-9256-07.4 CONNECTIONS (Refer to Figure 1) Input power connections depend on the motherboard used: Motherboard Part # Connection Points 76913 78145 78147 J16 J8 J7 Serial bus cable and transceiver assembly connections (see Figure 2). Pneumatic connection is made through the fittings of the motherboard. Make connections with 4mm or 5/32" OD tubing (see Figure 2). • Drive Air Pilot to Port 1 • Supply Air to Port 2 • Brake Air Pilot to Port 3 • Bearing Air Feedback to Port 4 The tubing for the drive air pilot from the motherboard to the volume booster must be a minimum of 10-feet long. The tubing from volume booster to bell (drive line) should be 1/2" OD (3/8" ID) and from 3-way valve to bell (brake line) should be 3/8" OD (1/4" ID). The use of tubing sizes other than these may compromise the Serial Atomizer Module's performance. Although the atomizer inlet tubing sizes may be smaller for the drive and brake air lines, it is recommended to run the larger size tubing as close to the applicator as possible before converting the tubing size to fit the applicator. 8 Serial Atomizer Module - Operation OPERATION SPEED CONTROL The Serial Atomizer Module is used in a closed-loop rotational speed control system for rotary atomizers. It accepts a requested speed command and, after comparing this with the actual speed feedback from the atomizer, provides an output to maintain the requested speed. When a speed request is received, the DRIVE solenoid on the module is activated and the module provides an air pilot signal to a 1:1 volume booster, such as Ransburg part number 11213-06. The front panel DRIVE LED is also activated. The volume booster supplies high volume drive air to the rotary atomizer. The atomizer speed is monitored by a fiber optic cable to a fiber optic transceiver, such as the Ransburg part number 10979-04. The transceiver then provides a differential speed feedback signal to the serial atomizer module. The speed, in increments of 1000's rpm, is displayed on the module front panel. An optional braking system can be incorporated to allow rapid speed changes. When changing speeds from high to low (change greater than 3,000 rpm), the module provides a brake pilot pneumatic output to a 3-way valve such as the Ransburg part number 11678-01. The 3-way valve supplies high volume air to the Rotary Atomizer brake input. The BRAKE LED on the front panel is also activated. A pneumatic input is provided and required for atomizer bearing air sensing and interlock. Bearing air pressure thresholds of 60, 70, and 80 psi are set by configuration of module switch SW2-7 and 8. These settings are detailed in Figure 3b. (See Caution below.) The maximum allowed speeds for various rotator types is shown in the "Specifications" in the "Introduction" section. There are no minimum speed limits set by the serial module itself, however, the low speed operation is limited by the drop out of speed feedback at about 2 krpm.A speed control system example is shown in Figure 3. ! CAUTION >Since the Serial Atomizer Module may be used as a replacement part in systems where bearing air sensing is done outside the module or is not required, a zero threshold setting is available as indicated in Figure 5. This setting may also be used in troubleshooting system pneumatic problems. It must never be used in systems which depend on the Serial Atomizer Module for bearing air interlock. If the threshold is set for zero and the atomizer loses bearing air pressure, the turbine could suffer severe damage. Note that when the speed is commanded to zero, the brake is not activated and the rotator simply coasts to a stop. For faster stoppage of rotation using the brake function, one should provide a 1 krpm setpoint. The Serial Atomizer Module recognizes this as an emergency stop condition and will cause the brake to operate until the speed reach 2 krpm from where the rotator will coast to a stop. The speed feedback will drop out at about 2 krpm and the module will set a Loss of Feedback Fault. Any new speed command will reset this fault. 9 LN-9256-07.4 Serial Atomizer Module - Operation 79128-00 SERIAL ATOMIZER SPEED SELECT OPERA TIONAL OPERATIONAL PROCEDURE 1. Must be used with Serial Atomizer Module only. 2. Must be used in Quarter Rack Motherboards (78145 or 78147). 7. Can be used in conjunction with a Serial Node Adapter communicating on same bus: Serial Atomizer takes its speed command from the Serial Speed Select Module only when its "Bell Enable" switch (that bell only) is in the "Enabled" position. Otherwise, Serial Atomizer receives command from the Serial Node Adapter. This feature requires Serial Node Adapter software Version 2.21 (EPROM 77128-07) and Serial Speed Select software Version 0.3 (EPROM 79130). When using multiple Serial Atomizer Modules, the Node Adapter must be set to Flex Mode communication (see Figure 5 for switch settings). 3. No motherboard wiring is required. 4. Can run 1-4 Serial Atomizer Modules as standalone system. 5. The bell number 1 refers to the Serial Atomizer with the lowest serial rack address, bell number 2 to the next highest, etc. 6. To command a speed, set the "Enable" switch for the desired bell to ON, set the "Atomizer Select" knob to that number, enter a number in krpm using the thumbwheels, and then press the "Speed Enter" button. 8. With the "Atomizer Select" knob in the "0" (fully counter-clockwise) position, all Serial Atomizer Modules will display their status number. 9. Once a speed has been entered, a Serial Atomizer will run at that speed until the "Enable" switch is set to OFF. If the Enable is set back to ON, the bell will run at the previously entered speed, without an entry by the Speed Enter" button. If a Serial Node Adapter is used, remember that it will supply the speed command when the "Enable" switch is in the OFF position. 10.The "zero" position of the rotary switch will instruct the Serial Atomizer to display fault status. (See Figure 5 for the error codes.) Figure 1: LN-9256-07.4 79128-00 Serial Atomizer Speed Select 10 Serial Atomizer Module - Operation AUT OMA TIC SHUTDOWN AUTOMA OMATIC The Serial Atomizer Module provides a number of modes of automatic shutdown in case of possible unsafe or abnormal conditions. These are: 1. Overspeed: If the speed feedback exceeds the speed setpoint: Liquid Bell - 10,000 rpm above setpoint Disk - any speed over 30 krpm Time delay is 0.5 seconds 2. Underspeed: If the speed feedback is less than the speed setpoint: Liquid Bell - 10,000 rpm under setpoint Disk - No underspeed checks made Time delay is 0.5 seconds. 3. Loss of Feedback: Senses when feedback should be present but is not: Pulses received from the fiber optics must be no greater than 800 msec apart during normal operation. Start-up delay: Liquid Bell - 1 second for the first pulse Disk - 7 seconds Once the first pulse has been received, the 800 msec interval applies. 4. Invalid Speed Command: Will not process speed requests higher than rated maximum. Internally set speed command to zero. 5. Low Bearing Air Pressure: If the bearing air pressure feedback drops below the threshold set by dipswitch SW2, positions 7 and 8. There is a 4 second time delay for all settings. Restart After Automatic Shutdown Restart is accomplished by requesting a different speed. If the same speed is desired, set the speed to zero and then back to the same speed. If the Discrete I/O Module is used for communication, restart can also be accomplished by setting the Bell Spin Enable signal to "Off" and back to "On". OTHER MODES Bell Run Normal operational mode, drive air is being supplied to the atomizer. Active when DRIVE LED is On. Out of T olerance Tolerance Speed is not within +/- 5% of setpoint, no action take, 1 second delay. SIGNAL I/O The input signal is Speed Request. Outputs are Speed Feedback, Drive Air Pressure Feedback, and Drive Status. The Serial Atomizer Module communicates via serial bus. The module has software built in to recognize the unlikely loss of communication from the adapter and shut down the modules outputs. An internal timer viewing the serial bus traffic accomplishes this. All communication to the Serial Atomizer Module is by serial bus from the Discrete I/O Module or Serial Node Adapter. (See the most current MicroPak User Manual for discrete wiring connections for Discrete I/O or PLC addressing for Node Adapter.) The status of these conditions are available via the Node Adapter or may be displayed locally on the Serial Atomizer Module display as described in "Troubleshooting" in the "Maintenance" section. 11 LN-9256-07.4 Serial Atomizer Module - Operation Two LED's, LED 1 and LED 2, are provided to indicate the status of communications on the serial bus. The serial bus is the only means of communication with the module. These are located at the top of the PCB, near the front panel, and do not protrude through the front panel. A solid or flashing Green LED 1 indicates normal communication on the bus. A solid or flashing Red LED 2 indicates communication faults are present. If neither LED is on, there is no communication on the serial bus, which is an abnormal condition, even if the setpoints are zero. LN-9256-07.4 NOTES 12 Serial Atomizer Module - Operation 76913 Assembly 78145 Assembly (Communication I/O Slot On Motherboard) 78147 Assembly (Communication I/O Slot Located In A Different Motherboard) + G _ + G _ Figure 2: 13 Motherboards LN-9256-07.4 Serial Atomizer Module - Operation Figure 3: Speed Control System Example 7554-03 yp.) (Typ.) O-Ring (T Figure 4: LN-9256-07.4 Side View 14 Serial Atomizer Module - Operation Figure 5: 15 Dip Switch Settings LN-9256-07.4 Serial Atomizer Module - Maintenance MAINTENANCE SERIAL A TOMIZER AT MODULE NOTES The Serial Atomizer Module maintains complete control of the rotator speed. Normal operating conditions are indicated by reading "00" or the requested speed on the front panel display readout. The DRIVE LED will be lit during all speed requests except "00". The BRAKE LED will be lit only during the transition from a higher speed to a lower speed. It is normal for BRAKE and DRIVE LED's to be on at the same time during speed changes. If during normal operation speed feedback is lost or speed control is not maintained within 10 krpm, the Serial Atomizer Module will enter the automatic shutdown mode. ST ATUS CODE DISPLA Y STA DISPLAY When the Serial Atomizer Module automatically shuts down because of the abnormal conditions (See "Automatic Shutdown" in the "Operation" section) it is extremely helpful to know what the status is when troubleshooting. This status can be displayed directly on the Atomizer Module display which is normally used for displaying turbine speed by setting SW2-6 to ON and SW25 to OFF. These status codes are explained in Figure 5. Note that the module can display a status code, such as loss of feedback, Code 04, but not be in an automatic shutdown condition, say if the speed was set to zero. If the F.O. feedback was interrupted while the bell was running, this would cause an automatic shutdown and display Code 44. Anytime the module shuts down automatically, and the display is in this mode, it will add 40 to whatever is being displayed. LN-9256-07.4 16 Serial Atomizer Module - Maintenance TROUBLESHOOTING The Serial Atomizer Module has no adjustable components on the module. With the possible exception of air leaks, there are no field repairable items on the module. Troubleshooting a rotator speed control problem generally consists of isolating the problem system component and replacing that component. During troubleshooting, it is important to recognize the automatic shutdown modes and consider the circumstances which might cause them. Some common system problems which cause the Serial Atomizer Module to go to automatic shutdown are: 1. Bearing air supply pressure momentarily drops below the required threshold when the system air supply cannot maintain pressure during periods of high air consumption. Figure 6: Input from Transceiver Card 2. Paint or solvent contamination in the rotator causing blockage of the fiber optic speed feedback signal. 3. Electrical noise on the transceiver output causing over or under speed indications. 4. Overheating of the transceiver board due to inadequate air flow of it's environment. Figure 7 will assist in troubleshooting a majority of these problems. Test points 1 and 2 are speed feedback pulses (1) and ground (2). The pulses should appear as an evenly spaced square wave whose frequency is proportional to the rotator speed. At a speed of 39 krpm the waveform frequency is 500 Hz (period of 2 msec.). The amplitude can vary since this test point signal is 1/2 of a differential pair. It may vary between 2 to 4 V. 17 LN-9256-07.4 Serial Atomizer Module - Maintenance Figure 7: LN-9256-07.4 Serial Atomizer Module Troubleshooting Chart 18 Serial Atomizer Module - Parts Identification PARTS IDENTIFICATION SERIAL A TOMIZER MODULE PAR TS LIST AT PARTS Part # A11925-00 76913-00 78145-00 78147-00 SMC-424 7554-03 10979-02 10979-04 11213-06 11678-01 Description Serial Atomizer Module Serial Motherboard (1/2 Rack) 1/4 Rack Motherboard (With Communication I/O Slot) 1/4 Rack Motherboard (Without Communication I/O Slot) Fiber Optic Cable for Assembly O-Ring Connector Transceiver 2 Channels Transceiver 4 Channels Volume Booster (1:1) 3-Way Valve Figure 8: Power Connections T o Motherboard TB1 To Figure 9: T ransceiver Connections T o Motherboard TB(x) Transceiver To 19 LN-9256-07.4 Serial Atomizer Module - Parts Identification Transceiver Board Specifications NOTE > If 24 VDC is used, do not connect 5 VDC terminal. Operating Temperature: 0°° TO 70°° C Power Required: 24 VDC at 0.15 A or 5 VDC at 0.35A Connections: Input power - Required input power is +24 VDC or 5 VDC. Connect 24 VDC to terminal “10” and 24 VRET to terminal “8”. For 5 VDC connect 5 VDC to terminal “9” and 5 VRET to terminal “8”. NOTE > Connect terminal #8 to earth ground and to pneumatic motherboard TB1 terminal 2. Figure 10: LN-9256-07.4 For the number 1 atomizer: connect a twisted pair wire with shield to terminal 3 and 2 for “+” and “-” respectively and to terminal 1 for shield. This wire is connected at the other end to the first Atomizer Module on TB2 V1 and V2 motherboard. Connect the fiber optic cable from the first bell to the fiber optic input labeled TP1 on the transceiver board. Follow the same procedure for multiple atomizers. The transceiver board is capable of receiving signals from four bells (-02 = 2 bells, -04 = 4 bells). The transceiver board mounts on a DIN rail. Transceiver Board 20 Serial Atomizer Module - Warranty Policies WARRANTY POLICIES LIMITED W ARRANTY WARRANTY Ransburg will replace or repair without charge any part and/or equipment that falls within the specified time (see below) because of faulty workmanship or material, provided that the equipment has been used and maintained in accordance with Ransburg's written safety and operating instructions, and has been used under normal operating conditions. Normal wear items are excluded. THE USE OF OTHER THAN RANSBURG APPROVED PARTS, VOIDS ALL WARRANTIES. SPARE PARTS: One hundred and eighty (180) days from date of purchase, except for rebuilt parts (any part number ending in "R") for which the warranty period is ninety (90) days. EQUIPMENT: When purchased as a complete unit, (i.e., guns, power supplies, control units, etc.), is one (1) year from date of purchase. WRAPPING THE APPLICATOR IN PLASTIC, SHRINK-WRAP, ETC., WILL VOID THIS WARRANTY. 21 RANSBURG'S ONLY OBLIGATION UNDER THIS WARRANTY IS TO REPLACE PARTS THAT HAVE FAILED BECAUSE OF FAULTY WORKMANSHIP OR MATERIALS. THERE ARE NO IMPLIED WARRANTIES NOR WARRANTIES OF EITHER MERCHANTABILITY OR FITNESS FOR A PARTICULAR PURPOSE. RANSBURG ASSUMES NO LIABILITY FOR INJURY, DAMAGE TO PROPERTY OR FOR CONSEQUENTIAL DAMAGES FOR LOSS OF GOODWILL OR PRODUCTION OR INCOME, WHICH RESULT FROM USE OR MISUSE OF THE EQUIPMENT BY PURCHASER OR OTHERS. EXCLUSIONS: If, in Ransburg's opinion the warranty item in question, or other items damaged by this part was improperly installed, operated or maintained, Ransburg will assume no responsibility for repair or replacement of the item or items. The purchaser, therefore will assume all responsibility for any cost of repair or replacement and service related costs if applicable. LN-9256-07.4 MANUAL CHANGE SUMMAR Y SUMMARY This manual was published to supercede Service Manuals LN-9256-07.3 Serial Atomizer Module to make the following changes: 1. In the "Operation" section, revised Figure 5: Dip Switch Settings. 2. In the "Operation" section, page 10, revised note to add "When using multiple Serial Atomizer Modules, the Node Adapter must be set to Flex Mode communication (see Figure 5 for switch settings)." 3. In the "Parts Identification" section, page 20, revised left column note to "Connect terminal #8 to earth ground and to pneumatic motherboard TB1 terminal 2." and revised right column note to "If 24 VDC is used, do not connect 5 VDC terminal." LN-9256-07.4 Service Manual Price: €15.00 15.00 (Euro) $20.00 (U.S.) Manufacturing 1910 North Wayne Street Angola, Indiana 46703-9100 Telephone: 260/665-8800 Fax: 260/665-8516 Technical Service - Assistance 320 Phillips Ave. Toledo, Ohio 43612-1493 Telephone (toll free): 800-233-3366 Telephone: 419-470-2021 Fax: 419-470-2233 Technical Support Representatives can direct you to the appropriate telephone number for ordering spare parts. © 2012 Ransburg. All rights reserved. Models and specifications subject to change without notice. Form No. LN-9256-07.4 Litho in U.S.A. 07/12