1
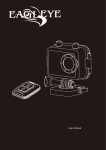
Super Car-Cam Patent . LDWS . Distance Alarm . 720P Content Foreword Certificate Product Accessories Product Feature Product Size Structure Key Functions Quick Start Guide Detailed user manual Main interface introduction Taking picture System Setup Time Setup Video Setup Picture Setup Play Back Connecting With Computer Charging Product Specification Certificate 1 2 2 3 3 4 5 5 9 12 12 13 16 17 19 20 21 21 22 23 Foreword Thanks for choosing our product. When driving in highway, sometimes you will need a friendly reminding. However, among all fetal accidents, 44% is related with changing lane. At the same time, changing lane is thought as the main reason why a car overturns. Besides, according to the analysis, 66% drivers ever sleep during driving. The above percentages are so surprising to prove the necessity of LDWS. Now with our accurate pixel analysis technology, it is not only a car recorder, but also an affordable valuable safety device. When you are changing lane or getting too close to the front car, it will remind you of that, just like a friend on the car does the same thing. But please also be well noted, it could be Max 98% accurate, due to all kinds of road situations and weather conditions. Even for human we will sometimes make wrong judgement, right? Please use the product as a tool only and use driver's safety while driving. Enjoy the kind reminding, enjoy recording on the road. Thank you! 1 Certificate The product is in conformity with CE/FCC and ROHS.It is authorized to bear FCC/CE and ROHS mark EU Environment Protection: Waste electrical products should not be disposed of with household waste. Please recycle where facilities exist. Check with your local Authority or retailer for recycling advice Product Accessories Camera Car bracket GPS bracket (not included) Super Car-Cam Patent . LDWS . Distance Alarm . 720P 9 User manual Power adaptor 2 USB cable Product Feature With Lane departure warning system With Distance alarm 720P 30FPS Software speed calculation Sharp Low-Light performance With reset pen Product Size 137.0MM 57.0MM 18.0MM 49.0MM 3 Structure Install on windows Fasten 360°Adjustable Loosen Car bracket socket LCD Screen Reset hole GPS Port Mic Reset pen Micro-SD Port Mode Previous OK Next Exit Lens USB Port Power Speaker 4 Key Functions Totally it has 6 keys: : Hold on power for 3 seconds, it will power on. Hold on power 3 seconds again, it will automatically power off. : To move back or forth to choose. : Confirmation key, to start/stop recording; in picture mode, take a picture. Hold on OK for 3 seconds, you will get into the manual settings. : One press to witch among video/photo display/ video display; hold on for 3 seconds to switch LDWS ON/OFF : To return to the previous. Quick Start Guide steps: 1).Put in Micro-SD and power on 2).Install the bracket on windows, the higher the better Best position Best position 5 3).Install LDWS (Lane departure warning system) 3.1)Please drive to a road side which do not block other cars but with clear lane lines. Adjust bracket angle to let the camera have a certain angle as below picture . And now you will have a clearview from LCD. Car windows Certain angle 3.2).Hold on in the LCD. for 3 seconds, and ״ HD 01:24 ״will appear HD Hold on 06/04/2013 13:25:30 01:25 06/04/2013 13:25:30 3.3). Loosen the bracket, slightly adjust the camera. 6 3.4) Please carefully check it, make sure ״ same as shown in the picture . ״is 1 2 3 In middle of the lane for distance alarm Parallel with the two lane lines To the border of car and on the road Then hold on again to let the interface disappear. After finish adjusting the above, remember to fasten the bracket as well as you could. So there is no necessary to adjust it any more. And you could easily take the camera up to the bracket before driving, or down from it after car stopped. If there is many false warning , it means you ״installation. should possibly double check ״ 7 1 2 3 4).Important Notice It is a must that the lane lines be clearly visible; or the lane departure warning and distance alarm will not be accurate. LDW shortcut key: You may easily turn on or turn off for 3 seconds . For example, LDW by holding on you may turn on it before go into highway; turn it off when you go out of highway. HD 09/04/2013 13:21:48 HD 09/04/2013 13:21:50 HD 09/04/2013 13:21:51 5).Connect with car power, it will record automatically. Once you are about 50km or above, it will make warnings upon changing lane or getting close to the front car. 6).Check the video records. With recording stopped, press OK and enter “play back”, you will see many videos. Then hold on to play, to quit. Play Back 11 1 2 3 4 5 6 MOV-20130904-6 Full screen MOV-20130904-6 You may also connect it with PC by the USB cable, just like a U-disk. Congratulations! Now you already manage it successfully! 8 Detailed user manual 1).Important This guide provides important information on the user and operation of the product. All information could be changed without notice due to system and firmware upgrades. please read all the information carefully prior to using the product for the best performance and to prevent any damage/injuries or misuse of the device. Customers are entitled to have read through this complete user's manual before using the product. any unapproved changes or modifications will void your warranty. please ensure to have a complete understanding of the following restrictions. Note: Please check your local laws and regulations to determine if windshield mounting is legal in your state 2).Restrictions When using the product, the safety precautions below must be taken to avoid possible legal liabilities and damages. Retain and follow all product safety and operation instructions. Observe all warnings in the product operating instructions. To reduce the risk of bodily injury, electric shock, fire and damage to the equipment, observe the following precautions. please note that under certain circumstances, audio or video recording may be prohibited by law. this device should be used only in compliance with all applicable federal, state and local statutes. 9 2.1). DO NOT use this product near water, for example, near a bathtub, washbowl, kitchen sink, or laundry tub, in a wet basement, or near swimming pool 2.2). DO NOT use this product to infringe on one's privacy, spying intercepting and related activities are illegal and punishable by law. Monitoring one's privacy activities without consent is illegal and this product is not designed or manufactured for these purposes 2.3). DO NOT place this product on an unstable cart, stand, or table. The product may fall, causing serious damage to the product. 2.4). DO NOT disassemble this product, Opening or removing covers may expose you to dangerous voltages or other risks. Incorrect reassembly can cause electric shock during subsequent use. 2.5). DO NOT use this product to carry out any illegal activities such as sneak preview, etc. We shall not be responsible for any consequences of illegal conducts made by users. 2.6). DO NOT cover the car cigarette lighter adapter when it is connected to any outlet, place the adapter near heaters, or put it on the floor which is equipped with a heater. the above mentioned operation might cause fire or incidents. 2.7). DO NOT plug in the car cigarette lighter adapter with wet hands might cause electric shock. 2.8). DO NOT put the plastic packaging bags in reach of children or babies. Plastic bags can create a suffocation hazard when place over the nose and mouth 10 3).Disclaimers 3.1). Please make sure that you are following the regulations and laws set by your country/city prior to mounting your camera. This manual does not intent to provide any specific legal advice. 3.2). Please check the features periodically to ensure that it is operating as required. 3.3). During a car accident, the impact of the collision must be hard enough to trigger the impact sensor in order for the product to lock the recorded files. 3.4). Please use the product as a tool only while driving and use driver's safety while driving. 3.5). we shall not be responsible for any traffic violations related to the improper use of our product. 11 Main interface introduction Video mode Or HD Camera mode Battery capacity Video resolution 1280x720 Or Lane departure Recording Micro-SD 03:23 05/04/2013 13:25:30 848x480 Or No SD Current record seconds Current time and date NOTE: 1.It will show “SD Card Full” if micro-sd card is full 2. It will auto power off if there's no operation for 1 minute Taking picture Picture resolution 00:14 2013/09/04 13:21:48 2013/09/04 13:24:48 2013/09/04 13:30:48 During recording, press to stop it. You may press to have picture mode. Now every press on it will take one picture. 12 System Setup When recording stopped, Holding on and you will get into manual settings. options for 3 seconds, return to higher System Setup Now use options to choose, to confirm, return to higher Lane Departure 繁体中文 Distance Alert G-Sensor System Setup 简体中文 日本語 Auto LCD Off 2).Lane Departure Warning Language 9 Distance Alert Off High Speed G-Sensor System Setup Auto LCD Off Off: LDW is off. On: LDW is always on, whatever on highways or low speed road. It is suggested to use to turn on it before going into highway; turn it off when you go out of highway 13 High speed: This mode is mainly designed with GPS bracket. If you have GPS bracket, it will do lane departure warning no less than 60KM/hour. Of course GPS is more accurate in calculating speed. But if without GPS, you could use LDWS "on" mode, which is very accurate and suggested. When it makes warning, the sound is like a doorbell ring “DingDong”. It is defaulted to be “on”. Each warning will has an MIN interval of 3 seconds, after which another warning should be made. 3).Distance Alert Language 9 Off Lane Departure G-Sensor System Setup Auto LCD Off In high speed, if you are getting too close to the front car, it will remind you of that by "DD". It is defaulted to be with high speed only. And due to false alarms, it will not work in evening. 4).G-Sensor Language 9 Off Lane Departure Distance Alert System Setup Auto LCD Off If the car hit anything, it will lock the previous video, present video and the next video not to be recycled and there will be a lock on the screen to remind there is locked video. Once press OK the lock will disappear. It is defaulted to be G-Sensor on. 14 5). Auto LCD Off Language 9 Lane Departure Distance Alert G-Sensor 30S 1Min 3Min System Setup Without operation for 30 seconds, it will automatically shut down the screen. Important notice: If it is battery powered and no operation for 1 minutes, it will automatically power off. 6). GPS Signal Format Beep No GPS Restore Default System Setup Version If no GPS available, it shows NO GPS; if there is GPS, it will show the signal strength, present longitude and Latitude. 7). Format Choose format to format the Micro-SD card Format YES Beep Restore Default System Setup Version 15 8). Beep It is defaulted to be beep on. Format On Restore Default System Setup Version 9). Restore Default Restore default to set everything as the factory settings. Format OK Beep System Setup Version 10). Version It shows the software version for future upgrade. Format 2013/10/01 Beep Restore Default 1 . 0 System Setup Time Setup 1 ). Time Format Choose the right date format, YYYY/MM/DD, DD/MM/YYYY, or MM/DD/YYYY Time and date DD/MM/YYYY MM/DD/YYYY Time Setup 16 2).Tme and date Use to change year/month/date/hour/ minute, use to confirm each and quit Time Format 11 / 1 0 / 2 0 1 3 13:34 Time Setup Video Setup 1).Video resolution You may choose 1280*720 or 848*480 as video resolution. However, the Max recording time is by 848*480 for more than 6 hours Video Length Recycle Record 848x480 Record Audio Video Setup Date Stamp 2). Video length Video Resolution Recycle Record Record Audio Video Setup Date Stamp 1 Min 3 Min 5 Min It means how long you want each video file will be. 3 Min is suggested. 17 3). Recycle Record Video Resolution Video Length On Record Audio Video Setup Date Stamp It means when the Micro-SD is full, you want it recycled or not. If G-sensor is on, it will not recycle the G-sensor triggered files. 4). Record Audio Video Resolution Video Length Recycle Record Video Setup On Date Stamp It means if you want the video record with audio or not. 5).Date Stamp Video Resolution Video Length Recycle Record On Record Audio Video Setup If you want time and date watermark on videos, just set it on. If not, set it off please. 18 Picture Setup 1).Picture Resolution You may choose 5M/3M/1M Quality Capture Mode Date Stamp 3M 1M Picture Setup 2).Picture Quality You may choose from fine and normal. Picture Resolution Capture Mode Normal Date Stamp Picture Setup 3). Capture Mode By manual, you need to make a photo by hand; by auto, it will automatically take pictures and save all. Picture Resolution Quality Auto Date Stamp 11 4).Date Stamp If you want time and date watermark on photos, just set it on. If not, set it off please. Picture Setup Picture Resolution Quality Capture Mode 11 Picture Setup 19 Off Play Back 1 ).Video Play Back 11 Use press 1 2 3 4 5 6 Delete All Full screen MOV-20130904-6 MOV-20130904-6 Hold on to choose the video you want and to playback. 2). Photo Play Back 11 Use 1 2 3 4 5 6 Delete All Full screen PIC-20130904-6 PIC-20130904-6 Hold on to choose the photo you want and press 20 to show it. Connecting With Computer Use the USB cable in the package to connect with computer. Now it is a normal USB disk. Connecting with computer, it will charge automatically. Charging During Charging, it will show a charging sign. 2013/09/04 13:27:58 When it is full charged, the battery sign will not change. 2013/10/04 09:43:09 It support recording during charging, please be noted. 21 Product Specification Video Format AVI 1280*720(848*480) max/30FPS with audio Camera Lens 5M CMOS Video Record Format Motion-JPEG Compression Audio Record Format PCM Memory extension supported Up to 32 GB Auto file-overwriting Available LCD 1.44 inch Resolution 1280*720(848*480) Power consumption Max 230mA 3.7V Battery 400MAH Lithium-ion battery Operation temperature -20-50℃ Operating humidity -20%-80% Weight About 40g Micro-SD required At least Class 4 or above 22 Certificate The product conforms to CF/FCC/RoHS.Please refer to the following certificates: 23