1
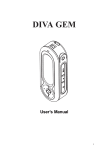
DIVA GEM
User’s Manual
1
CONTENTS
Contents
Before You Begin
Safty
Battery operation
Charge battery
Insterting memory card
Switching on and off
Getting Started
The operating elements
The operating buttons
The basic operating modes
Mp3 Mode
Haneling files
Playback
Foreward
Volume control
Hold
Equalizers
Repeat
Favorits
Playlists
Line-in recording
Voice Recorder
Recording
Playing records
Bitrates
Deleting records
Fm Radio
Auto search
Recording
Playing Fm records
Settings
Media
Backlight
Sleep
Info
Format
Defaults
Contrast
Time and date
Language change
Bluetooth setup
Troubleshooting
Technical Specification
2
2
4
4
4
4
4
4
5
5
5
5
6
6
6
6
7
7
7
7
7
8
8
9
9
9
9
9
10
10
10
10
11
11
11
11
11
11
11
12
12
12
13
15
16
BEFORE YOU BEGIN
Dear customer,
The manufacturer reserves the right to change the information in this
manual without notice. For further information on the latest software version of the product see our web site: http://www.daisymm.com
3
BEFORE YOU BEGIN
Safety
To ensure that this player provides you with long-term satisfaction and enjoyment,
please observe the following instructions !
This device is designed to record and playback audio signals.
If the player is subjected to sudden changes in temperature, for example when taken
from the cold into a warm room, condensation may appear.
Switch off the device for one hour before using it. You must make sure that the device is
protected from moisture such as rain or water splash. Never open the player casing. The
manufacturer will not accept any liability for damage resulting from improper handing.
BATTERY OPERATION
Do not expose the battery to direct flame or heat.
Do not allow the battery t o come in contact with water.
Do not store battery pack together with keys, coins or other metal objects.
When not using the battery, store it in a dry location.
Charge battery
Connect the AC adapter to the player and plug it into a household outlet to begin recharging.
Full recharging requires approximately 2 hours.
Note:
You can charge the player using the USB cable. Connect the player to the USB port of your
PC. When the device is connected to the USB you can charge and operate with it at the
same time. You can use the Battery charrger included in package. When battery is full , Diva
Gem will display “Battery Full”.
Inserting the battery and media card
1. Make sure the power is off.
2. Open the Battery Compartment Cover.
3. Insert the supplied battery and push the
multimedia card.
4. Close the cover.
Note: The player will not operate if the battery is inserted incorrectly.
Switching on/off
1. Press and hold the
2. Press and hold the
4
/ II
button to switch on the player.
button to switch off the player.
GETTING STARTED
The operating elements
DC Input
Headphones
outlet
LCD
Function
buttons
Joystick
The operating buttons
/ II
vol-
/
vol+
- start / pause playback; switch on the device
- lock buttons
- stop playback; switch off the device
- start / stop recording
- volume control
Joystick
Up
Central
Right
Left
Down
The basic operating modes
There are 4 operating modes:
- Mp3 mode.
- Radio mode.
- Settings mode.
- Voice Recording mode.
5
MP3 MODE
MP3 MODE
Press and hold the joystick to enter the main menu. Push the joystick left until “Audio
Player” is highlighted to enter Mp3 mode.
MP3 mode.
MP3 is standart audio file format, which compresses a sound sequence. This MP3 files
become relatively small, yet there is no apparent loss of sound quality.
Copying music files in the memory (internal/external)
1. Plug the enclosed USB cable into the socket of the player and the USB socket of the
computer and press and hold for a second / II button to switch on the device.
CHARGING. USB CONNECTED appears on the display.
2. The player will appear as a removable disk on your PC.
3. Call up the player in “My computer” on the PC and copy the MP3 files in the internal
memory or on the card if inserted. You can arrange your music in folders.The battery is
charging untill the player is connected to the PC. ( For recommend cards see page 13 )
Playback functions
During the playback press the joystick to enter the playback menu.
Playback
1. Use the joystick
/
to select a track.
2. To start playback press / II button.
3. Press the / II button to pause playback. II appears on the
display. 4 . Resume playback with the / II button. 5 .Push and
hold
/
for a secound to foreward or backward through the track. After some seconds the speed of forwarding is increased.
6 . Press and hold down
button to stop playback.
Index Forward
1. Briefly push
/
during playing. The previous/next track is selected. The desired
track can be selected through repeating brief pressing of
6
MP3 MODE
Volume control
1. Press
2. Press
vol+
vol-
to increase volume.
to decrease volume.
Hold
Locks the buttons against accidental pressing. To use press
button.
Equalizer
1. During playback press the joystick to enter the menu.
2. Press joystick again to enter “EQ” submenu and
choose equalizer. Choose: “ Flat”, “Pop”, “ Rock”,
“User”, “Latin” or ”Dance”.
User Eq
1. During playback press the joystick to enter the menu.
2. Press the joystick right to choose “ Eq Menu”.
3. Scroll down untill USER EQ is selected and press right.
4. To change frequencies push the joystick .
Available values: 60 Hz-12 kHz.
5. To change the level push the joystick up or down. Available values: 14 dB - (-14) dB.
6. To confirm and exit press center position of the joystick.
Repeat
1. During playback press the joystick to enter the menu.
2. Choose “Playmode menu” then “Repeat” menu and
choose from “No”, “One”, “All” and “Dir”. Press joystick to
confirm.
“ One ” -repeat current track;
“ All ” -repeat all tracks;
“ Dir ” -repeat tracks from the current folder;
Add to Favorites
1. During playback press the joystick to enter the menu.
2. Select “Playlists” to add the current track to the Favorites
dafault playlist.
7
MP3 MODE
Functions in stop mode
1. Press
button to stop playback.
2. In stop mode press the joystick to enter the menu.
Browse
This function allows browsing all directories and music files
available.
1.Enter the menu. Choose “Browse”.
Delete
1. Press the joystick to enter the MP3 menu.
2. Select “Delete” and choose from Currnet , Dir, All.
3. Use the joystick with left or right to select:
No - to cancel deleting;
Yes - to confirm deleting;
4. Press the joystick to confirm.
Playing tracks from folders
1. Press
2.
3.
4.
5.
6.
button to stop playback.
Beatles ).
Use the joystick to select folder ( for example:
Push the joystick dawn to enter the folder.
Use the joystick left or ritght to select track from the folder.
To start playback press / II button.
To exit the folder and return to the Root push the joystick up.
Playing playlists
You can create a playlist while the player is connected to your
PC using Music Loader(*.pl files) or WinAmp (*.m3u files) or
play the dafault favorites playlist.
1. Press
button to stop playback.
2. Use the joystick to select playlist (for example: favorite.pl).
3. Press / II to play the list.
5. To exit the playlist stop playback, press the joystick to enter the menu and select Exit PL
Line-in Recording
To record via the Line-in function, please make sure that you have plugged the the relevant
cable from the Diva Gem set to the Diva Gem USB slot and the line-out outlet of the
source device. Then, choose “MP3 mode” on your Diva Gem player and stop all actions.
8
VOICE RECORDER
To start recording press and hold
again.To stop recording press
for 2 seconds. To pause recording press
shortly.
Voice Recorder
Press and hold the joystick to enter the main menu. Push the joystick
and select “Voice Recorder” mode.
Recording
1. Press
2. Press
button to start recording.
to stop record.
Play records
1. Use the joystick to select the record.
2. Press
/ II to play the record.
3. To stop the playback press
button.
Microphone Sensitivity ( Mic Sens )
1. Press the joystick to enter the voice recorder menu.
2. Select “Rec Settings” then “Mic Sens”, and choose from “Low”, “Mid(middle)” or “
Hi(high)”.
Recording with Voice Activation ( VAct )
1. Press the joystick to enter the voice recorder menu.
2. Select “Rec Settings” then “Voice Act” To turn on select “On”.
When the recorder detects a voice input, it automatically starts recording. When voice input
stops, the recorder automatically pauses recording and
icon appears on the display.
To switch off the function select “Off”.
Recording in NEW FOLDER
1. Enter “Voice Recording menu” scroll down and choose “New Folder”.
2. Use “Down/UP” do choose letters, “Left/Right” to move to next letter.
Bitrate
1. To choose bitrate option, enter “Voice Recording menu”, then “Rec Settings”, then
“Bitrate” . You can choose from “Low”, “Medium” and “High”
9
FM RADIO
Delete records
1.
2.
3.
4.
Press the joystick to enter the “Voice Recorder menu”.
Push the joystick down to select “ Delete” .
Use left or right to select “Yes/ No”.
Press center position of the joystick to confirm.
FM tuner
Note: Before starting to use FM radio connect the headphones to the headphones
outlet. The lead of the headphones functions as the antenna of the radio, so let it hang
freely.
1. Use
/
to select the station you want to listen to.
Auto Search
1. Enter “Radio Menu” and select “Auto Preset”.
Scan
1. Press the joystick to enter the menu. Select “ Scan” .When the
station is found use the joystick to select: “ No” - to cancel,
“Yes” -to save the station. The search stops when all stations are
found or after pressing the joystick.
Recording
1. To start FM recording press
button to start recording. The
file number for each record is expressed as shown:
FMRECXX.mp3.
2. Press
to stop record.
Play FM records
1. Press and hold the joystick to enter the “main menu”. Enter “Mp3 mode”
2. Use the joystick to select the record and press / II to start playback.
10
SETTINGS
Settings
This mode allows you to customise your player settings. Press and hold the joystick to
enter the basic menu. Select “Settings icon” to go in settings menu.
Current Media
1. Use the joystick to select Media.
2.Push the joystick right and to slect Internal/ Card.
Backlight
1. Enter “Setting menu” and select “ Backlight “.
2. Choose from “ Auto”, ” On”, “Off”.
Sleep
Sleep sets the desired time for switch off the player.
1. Enter “Setting menu” and select “ Sleep “.
2. Choose from “ Off”, “1min”, “ 3min “ , “5min”, “8min” .
Info
1. Enter “Setting menu” and select “ Info”.
2. “Info” shows currnet hardware and software version.
Format
1.
2.
3.
4.
Enter “Setting menu” and select “ Format”.
Choose from “ Card” or ”Internal”. Press the joystick to confrm.
Select: “Yes” - to confirm formating, “No” - to cancel.
Press the joystick to confirm.
Defaults
This function allows to restore the factory defaults.
1. Enter “Setting menu” and select “ Defaults”.
2. Select: “Yes” - to confirm, “ No” - to cancel.
3. Press the joystick to confirm.
11
SETTINGS
Contrast
This funcion allows you to modify your LCD contrast.
1. Enter “Setting menu” and select “Contrast” and hold up/down keys to
modify it.
Setting Time
1.
2.
3.
4.
Enter “Setting menu” and select “Time”.
Push the joystick to slect the hour, minutes, seconds.
Use the joystick to set the time.
Press the joystick to confirm and exit.
Setting Date
1.
2.
3.
4.
Enter “Setting menu” and select “ Date”.
Push the joystick to select the day, month, year.
Use the joystick to set the time.
Press the joystick to confirm and exit.
Language change
To change language, go to “Settings”. Scroll down and choose
“Language”, confirm by pressing the joystick. Select the language file and
confirm by pressing the joystick.
Note:
1. You may need to restart your DivaGem to make changes.
2. Make sure, that you have been copied the language file to DivaGem
memory.
3. You can download aditional language files from our web site:
Http://www.daisymm.com
12
SETTINGS
What is Bluetooth® ?
Bluetooth® is a new revolutionary wireless communication technology that
makes possible wireless connection between your mobile phone, PDA,
PC, etc. It is based on Wi-Fi 802.11 wireless technology and the pairing
devices should be within 10 meters of one another.
What is the advantage of Diva Gem with Bluetooth® ?
You can now use your Diva Gem as Headset or Handsfree, and you will
never miss a call, even when you listen your favorite music.
How to setup my Diva Gem and my mobile phone?
1. Make sure that your mobile phone is Bluetooth® enabled and supports
Headset or Handsfree profiles.
2. See the User’s Manual of your mobile phone for detailed information on
how to operate and setup your phone using Bluetooth® technology.
3. Start your Diva Gem and enter “Settings”.
4. Using the joystick, scroll down, select “Bluetooth®” and confirm by
pressing the joystick.
5. Choose “Operation” and confirm by pushing the joystick to the right.
Select “On” to turn the Bluetooth® function on and then push the joystick to
the left to return to the Bluetooth® submenu.
6. Having turned Bluetooth® on, you need to choose an operating profile “Headset” or “Hands-free” (some mobile phones support only “Headset”
profile. Please, check your mobile phone manual to choose the right
profile). Choose “Hs/Hf mode” in the Bluetooth® submenu using the
joystick. Push the joystick to the right and then choose the relevant profile
and press the joystick to confirm. Return to Bluetooth® submenu by
pushing the joystick to the left.
Pairing
Pairing is a required process by which the Diva Gem and your Bluetooth®
enabled mobile phone become acquainted with each other for the first
time. At the end of this process both devices retain information about one
another, and every time one of them is turned on, it will search for the other
device and will connect to it automatically.
13
SETTINGS
For a specific pair of a Diva Gem and a mobile phone, pairing is only
required once.
1. In the “Bluetooth®” submenu choose “Discoverable” by pushing the
joystick to the right and the Diva Gem will go into discoverable mode.
2. Next, run the “Discover” function on your mobile phone.
3. When the “Discover” process is finished you will see “Diva Gem” on
the screen of your mobile phone. Connect to Diva Gem and type the pin
code 0000.
Accepting and ending calls
When an incoming call occurs, Diva Gem will automatically detect it. You
can accept the call by pressing the / II button on your Diva Gem or use
the buttons on your mobile phone. The call will automatically be transferred
to your Diva Gem. To end the current call press
button.
Voice dialing
This feature is only available for mobile phones equippted with voice
activation function. To use voice activation, you must first assign voice tags
to the desired parties listed as your contacts in your mobile phone ( if you
are not familiar with this procedure, please refer to the manual of your
mobile phone). While your phone is “On” and your Diva Gem is in
“Mp3”,“Radio” or “Recording” mode, press the / II button and say
your voice command loud and clear. dialing will begin.
Recording calls
You can easly record calls you made. To start recording press the
button. To stop the record, press the
button. The recorded files are
authomatically saved in default record directory. (see Recording section
for more information on page 9 )
14
TROUBLESHOOTING
Frequently Asked Questions
Q. The player doesen’t work.
A. Check wether the battery has been inserted in properly.
Q. The buttons of the player don’t work.
A. Check if the Hold function is activated.
Q. No sound after the / II button is pressed.
A. Make shure that you don’t press the button once again to pause.
Q. Can’t download the MP3 files.
A. Make sure the player is connected to your PC.
A. Check whether the memory is full.
Q. Can’t enter the USB mode.
A. Remove the USB cable from the player and reconnect it.
Q. How to update the firmware software.
A. To download the latest fitmware, visite: http:www.daisymm.com.
Copy the file Update.bin on the memory of your player.
1. Press and hold the joystick to enter the main menu.
2. Press and hold the joystick again.
3. Use the joystick to select:
“ No “ - to cancel programming.
“ Yes” - to confirm programming
4. Press the joystick to confirm.
Q. The folowing massage appears on the display : BAD MEDIA.
A. Enter the Settings menu and format the current media.
( All information on media will be lost! )
Q. My Sd/Mmc card dosn’t work with my Diva Gem.
A. Daisy MM recommends cards from the following brands:
Dane-Elec , Toshiba, Infiniane, Twinmos
15
TECHNICAL SPECS
MP3 Player
Decoder engine:
Music decoders:
Bitrates supported:
Sample rates supported:
Display type:
Audio DSP
MPEG1/2/2.5 Layer 3, Mp3
8-320kbps,VBR
8-48kHz
Sidelit Dot Matrix LCD
FM radio
Frequence range:
Presets:
Tuning:
Encoding:
87.5-108 MHz
20
auto/ manual
Mp3 44.1kHz/ 128kbps or 22.05kHz/
64kbps
Voice Recorder
Input:
Output format:
Modes:
Microphone Sensitivity:
Bitrate:
FM radio/ microphone
AMR
VOR(Voice Operation Recording)/ Manual
High/ Middle/ Low/ Automatic
Low / Middle / High
General
Storage: Internal memory:
External Media:
Connectivity:
up to 256 MB flash memory
SD/MMC
USB1.1; (USB2.0 compatible)
USB Drivers
Win98;
Driver free for:
Power:
Dimensions:
Weight:
16
Win Me/ 2000/ XP/ Linux 2.4.19/ Mac OS9.1
and above
450 mAh Li-Ion battery, embedded charger
86 x 32 x 20mm
25 g without battery