1
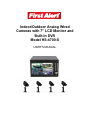
Indoor/Outdoor Analog Wired Cameras with 7” LCD Monitor and Built-In DVR Model HS-4700-S USER'S MANUAL ©2010 Lehigh Consumer Products, LLC All rights reserved. Distributed by Lehigh Consumer Products, LLC, Macungie, PA 18062. Due to continuing product development, the product inside the packaging may look slightly different than the one on the package. Lehigh Consumer Products, LLC is a subsidiary of Jarden Corporation (NYSE: JAH). To obtain warranty service, contact the Consumer Affairs Division at 1-800-323-9005, Monday through Friday, 7:30 a.m. - 5:00 p.m., Central Standard Time. Made in China M08-0244-000 Table of Contents Safety ............................................................................................................................... 1 Safety Precautions ........................................................................................................................... 1 FCC Compliance ............................................................................................................................. 1 Disposal ........................................................................................................................................... 2 Getting to Know Your HS-4700-S System ..................................................................... 3 Check Package Contents.................................................................................................................. 3 About the DVR ................................................................................................................................ 4 Front Panel Controls ................................................................................................................ 4 Rear Panel Interface................................................................................................................. 5 About the Remote Control............................................................................................................... 5 About the Cameras .......................................................................................................................... 6 Setting Up Your HS-4700-S System ............................................................................... 7 Installing and Connecting the Cameras ........................................................................................... 7 Connecting the DVR........................................................................................................................ 9 Operating Menus ........................................................................................................... 10 Start Up.......................................................................................................................................... 10 Main Menu .................................................................................................................................... 10 HDD – Hard Disk Management .................................................................................................... 11 Record Menu ................................................................................................................................. 12 Record Parameters (RecPara) ................................................................................................ 13 Schedule Record .................................................................................................................... 14 Manual Record....................................................................................................................... 15 Playback and Search ...................................................................................................................... 16 Search Results........................................................................................................................ 17 Playback................................................................................................................................. 18 Motion Menu ................................................................................................................................. 19 Motion Related ...................................................................................................................... 19 Motion Schedule .................................................................................................................... 20 PTZ (option) .................................................................................................................................. 21 PTZ Control (option) ..................................................................................................................... 22 Search Logs ................................................................................................................................... 23 System Menu ................................................................................................................................. 24 Configure ............................................................................................................................... 24 Modify Password ................................................................................................................... 25 Date & Time........................................................................................................................... 26 Default ................................................................................................................................... 27 Reset....................................................................................................................................... 27 System Variation .................................................................................................................... 28 Table of Contents Model HS-4700-S User's Manual DVR Client...................................................................................................................... 29 Installation ..................................................................................................................................... 29 Record Searching........................................................................................................................... 29 Playback Control.................................................................................................................... 30 Update............................................................................................................................................ 31 Input the Upgrade File ........................................................................................................... 31 System Upgrades ................................................................................................................... 32 Delete System Files from HDD ..................................................................................................... 32 Select Backup File ......................................................................................................................... 33 Troubleshooting ............................................................................................................ 34 Technical Information ................................................................................................... 36 General........................................................................................................................................... 36 Camera........................................................................................................................................... 36 DVR and Video.............................................................................................................................. 37 Warranty......................................................................................................................... 38 Product Limited Warranty.............................................................................................................. 38 Warranty Exclusions ...................................................................................................................... 38 Obtaining Service .......................................................................................................................... 39 Safety SAFETY PRECAUTIONS Do not drop, puncture, or disassemble the camera or monitor. Never tug on the power adapter. Use the plug to remove it from the wall. Do not expose the camera or monitor to high temperatures. Use the device with care. Avoid pressing hard on the camera body. Do not crush or damage the power cable. FCC COMPLIANCE This device complies with Part 15 of the FCC Rules. Operation is subjected to the following two conditions: (1) this device may cause harmful interference, and (2) this device must accept any interference received, including interference that may cause undesired operation. This equipment has been tested and found to comply with limits for a Class B digital device, pursuant to Part 15 of the FCC Rules. These limits are designed to provide reasonable protection against harmful interference in residential installations. This equipment generates, uses, and can radiate radio frequency energy and, if not installed and used in accordance with the instructions, may cause harmful interference to radio communications. However, there is no guarantee that interference will not occur with a particular installation. If this equipment does cause interference to radio or television equipment reception, which can be determined by turning the equipment off and on, the user is encouraged to try to correct the interference by the following measures: Reorient or relocate the receiving antenna. Increase the separation between the equipment and the receiver. Connect the equipment into an outlet on a circuit different from that to which the received is connected. Consult the dealer or an experience radio/TV technician for help. Notice: Changes or modifications to the product could void the user's authority to operate the product. 1 Safety Model HS-4700-S User's Manual DISPOSAL These symbols indicate that it is prohibited to dispose of these batteries in the household waste. You can take spent batteries that can no longer be charged to the designated collection points in your community. 2 Getting to Know Your HS-4700-S System Congratulations on purchasing your First Alert Security Camera product. First Alert has been helping families and businesses stay safe for over 50 years. By having a First Alert Security Camera, you’re taking the first step in protecting your home or business from damage or theft. We’re watching, even when you’re not. CHECK PACKAGE CONTENTS After unpacking the carton, check the contents for damage. Contact your supplier or dealer immediately if any part is missing or damaged. Your Model HS-4700-S security system consists of: 7” LCD monitor with 320GB MJPEG DVR system (1) Wired indoor/outdoor cameras (4) Camera stands (4) Mounting kits (4) 60 ft BNC cable (4) Remote control (1) Mouse (1) USB cable (1) Power supply (1) Installation CD (1) User's manual (1) 3 Getting to Know Your System Model HS-4700-S User's Manual ABOUT THE DVR The Model HS-4700-S security system has a 7” LCD monitor with built-in 320GB MJPEG DVR. The features of the front and rear panels follow. FRONT PANEL CONTROLS 1 2 4 3 6 7 5 8 9 14 10 11 12 13 1 Channel switch buttons (4) 8 Arrow buttons (4) 2 Four-screen display button 9 ENTER button 3 Manual record button 10 Power indicator 4 Menu button 11 Run indicator 5 PTZ control button* 12 Record status indicator 6 Play button 13 USB status indicator 7 ESC button 14 LCD power switch * Cameras supplied with HS-4700-S system are not equipped with PTZ feature. 4 Getting to Know Your System Model HS-4700-S User's Manual REAR PANEL INTERFACE VOUT-1 VIN-2 VIN-4 U S B DC1 DC2 DC3 DC4 DC OUT P C GND VOUT-2 VIN-1 VIN-3 PS2 485R485R+ 485T485T+ DC12V USB PC USB connection to PC PS2 Serial port to PC for mouse 485T / 485R PTZ connector* VOUT1, 2 Video output connector VIN-1, 2, 3, 4 Camera video input DC1, 2, 3, 4 DC 12V output power for cameras DC 12V DC input power to DVR system ABOUT THE REMOTE CONTROL quad-screen select camera select (1–4) PTZ menu select* menu select clear enter (select) arrow select buttons (4) escape record video play controls picture-in-picture (separate from video play) * Cameras supplied with HS-4700-S system are not equipped with PTZ feature. 5 Getting to Know Your System Model HS-4700-S User's Manual ABOUT THE CAMERAS The Model HS-4700-S security system includes four wired indoor/outdoor color CMOS security cameras, camera stands, mounting kits, and 60 feet of BNC cables. IR LEDs camera lens camera stand mounting bracket 6 Setting Up Your HS-4700-S System This chapter provides instructions on installing and connecting the cameras supplied with the system and connecting the DVR. INSTALLING AND CONNECTING THE CAMERAS Here are some general safety and installation tips when installing the cameras: 1 Do not attempt to open a camera. There are no user-serviceable parts inside. Refer servicing to qualified service personnel. When using power tools wear safety goggles. Before drilling holes through a wall or ceiling, check for hidden electricity cables and water pipes. When installing a camera on an external wall, pass the power cable through the wall as close as possible to the camera to reduce the chance of tampering. After drilling any hole though an external wall for cable, make sure the hole is sealed around the cable. Select the position for the camera and install a mounting bracket (supplied). Screws and anchors are supplied. Use an appropriate screw type for the mounting surface. 2 Screw the camera onto the bracket. Tighten the lock nut to secure the camera on the bracket. lock nut thumb bolt camera mounting bracket 3 Adjust camera to the proper view angle. Make sure the lens is upright relative to your subject. Tighten the thumb bolt. 7 Setting Up Your System Model HS-4700-S User's Manual 4 Connect the camera power and video connectors to the corresponding connectors on the BNC cable (supplied). The connectors on the cables are not weather resistant and should be sheltered from moisture, rain and sunlight. power supply BNC cable video cable 5 Connect the power cable from the camera to the DC1 connector on the rear of the DVR. Connect the video cable to the VIN1 connector. Repeat connection for all four cameras. to camera power to camera video 8 Setting Up Your System Model HS-4700-S User's Manual CONNECTING THE DVR 1 Connect the mouse to the PS2 port on the DVR prior to plugging in DVR power supply. 2 Connect the cable of the power supply adapter to the DC 12V connector on the DVR. 3 Plug the power supply into an electrical outlet. The DVR automatically powers on when plugged in. to computer USB port to electrical power receptacle to mouse 4 (optional) Attach a ground wire from the GND connector on the DVR to an appropriate ground (e.g., mounting screw on the receptacle cover plate). 5 Press the LCD Power button on the front of the DVR to turn on display. This button only controls the display, not the DVR unit. The POWER indicator light on the front panel will light. When system initialization (boot up) is complete, the image from each active camera will display on the quad-screen monitor. The RUN indicator will flash when the system is operating in normal mode. Note: Be sure to connect all components to the monitor prior to plugging in unit. 6 (optional) The DVR can be connected to an external display (i.e. television or computer monitor) to view live video feed via the Video Out connection. Though the DVR screen is programmed to shut off after 30 minutes to protect the display from overheating, the video feed will continue without interruption if connected to an external display. 9 Operating Menus This chapter provides information about the menu screens on the LCD monitor. The screens are used to control the various functions of the DVR system. The user selects options from a series of menus and executes the actions by using the keypad on the DVR, the mouse, or the remote control. START UP Before turning the system on, make sure all components (camera, mouse, and DVR) are connected properly. When the DVR is powered on, the power indicator light on the front panel will light. After the system boots-up, the camera image for each active camera will display on the quadscreen monitor. The screen displays the date, time, and channel number. Click the left mouse button or use the panel buttons to display a single-channel preview screen. Press the ESC button or re-click the left mouse button to return to the four-screen preview. MAIN MENU Use the Main Menu to access the operating and programming menus. The options are: HDD Record Playback Motion PTZ and PTZ Ctrl* Log System The screen display options are: picture-in-picture, four-picture, and language. The selected option displays in the shortcut menu at the bottom of the screen. Use the right/left arrow buttons to toggle between icons. Press the ENTER button on the DVR or click the left mouse button to select an option. * Cameras supplied with HS-4700-S system are not equipped with PTZ feature. 10 Operating Menus Model HS-4700-S User's Manual date/time menu options PIP screen display quad screen display language HDD – HARD DISK MANAGEMENT Access the HDD menu from the Main Menu. Use this menu to check hard drive status, capacity, available free space, and usage. The system supports hard drives up to a maximum of 1000 GB. Note: Stop all recording before formatting a hard drive. Formatting erases all of the information on the hard drive. Overwrite Status Active Capacity 305245.34M Free 305109.34M Used 0% FORMAT OK CANCEL Overwrite Select "X" in box to overwrite existing files when storage area is full. Overwrites oldest data first. Status Hard disk status: Active or Inactive. Capacity Total capacity of hard disk. Free Amount of hard disk space available. Used Amount of hard disk space already used. 11 Operating Menus Model HS-4700-S User's Manual FORMAT Click to begin formatting. A pop up message “formatted the hard disk” will confirm whether or not the new hard disk is formatted. It will remove all video files but will not destroy program files. OK Click to save the System setup options and return to the Main Menu CANCEL Click to keep the existing System setup options and return to the Main Menu RECORD MENU Access the Record Menu from the Main Menu. Use this menu to set up the record parameters (RecPara), record schedule, and to manually record (ManualRec) from any of the cameras. RecPara Schedule ManualRec Exit 12 Operating Menus Model HS-4700-S User's Manual RECORD PARAMETERS (RECPARA) Channel CH1 Name CH1 Brightness 50 Quality LOW Contrast 50 Saturation 50 FrameNum APPLY TO 15 CH1 OK CANCEL Channel Select channel 1, 2, 3, or 4. Name User-defined channel name. Quality Select one of five video quality options: minimum, low, medium, high, and highest. Frame Num Select one of six frame options: 01, 03, 05, 10, 15, and 30 fps (frames per second). Brightness Set range from 00-99; default setting is 50. Contrast Set range from 00-99; default setting is 50. Saturation Set range from 00-99; default setting is 50. APPLY TO Set current channel options and apply to other channels; select a channel number, then click the APPLY TO button. OK Click to save system setup options and return to the Main Menu. CANCEL Click to keep existing system setup options and return to Main Menu. 13 Operating Menus Model HS-4700-S User's Manual SCHEDULE RECORD Channel CH1 Red : On Mon Green :Off Wed Fri Sun 0 6 12 18 CH1 APPLY TO OK CANCEL Channel Select channel 1, 2, 3, or 4. Setting Method The interface box shows 7-lines (for 7 days from Monday to Sunday), 24 (for 24 hours, from left to right, 00 am to 23 points) for 24 hour time. To choose an option, Press the Menu button or click the mouse button and drag the mouse to select a time period: green indicates “not selected” and red indicates the “selected” time. APPLY TO Set the current channel options in the goal box and apply them to another channel. Select the channel number, and click the APPLY TO button. OK Click to save system options and return to Main Menu. CANCEL Click keep existing system options and return to Main Menu. 14 Operating Menus Model HS-4700-S User's Manual MANUAL RECORD To view the setup options, press the Manual Record button or the Record button on the front panel or remote control. Channel Status 1 REC 2 IDLE 3 IDLE 4 IDLE Rec X OK CANCEL Channel Select channel 1, 2, 3, or 4. Status Display the status of the selected channel. If the system is recording, the status is “REC; if not recording, the status is IDLE. Rec Select "X" in box to record channel video OK Click to save system setup options and return to Main Menu. CANCEL Click to keep existing system setup options and return to Main Menu. When the system is recording, the front panel REC indicator will be lit and a green dot will display in the right corner of the preview picture for this channel. If the DVR turns off due to loss of power while the system is recording, the system will start recording automatically when the power is restored. The system cannot record if the DVR does not have a hard disk, the hard disk is being formatted, or the hard disk is full. 15 Operating Menus Model HS-4700-S User's Manual PLAYBACK AND SEARCH Access Play (Search Files) from the Main Menu. Use this menu to search and playback video recorded from any of the cameras. Channel 1: X 2: X 3: X 4: X Start 01-01-2010 00 : 00 : 00 End 12-31-2010 23 : 59 : 59 Event MAN : X SCH : MTD : SEARCH PLAY CANCEL Channel Select a channel 1, 2, 3, or 4. “X” indicates selected. Start Time Select the start time to begin the search function. End Time Select the end time to quit the search function. Event Select the search mode: manual, schedule, and motion. "X” indicates selected. SEARCH Search a recording based on selected options (above) including: serial number, channel, video recording start time, etc. In the search list, click PAGE to select the input page number or click PREV and NEXT to change the page. Move the active frame using the left and right buttons on the panel or mouse. To locate listed frame files, press the Up and Down arrow buttons or click the left and right mouse buttons to select; click PLAY to play the selected recording. PLAY In the search list, click PLAY to play the entire recording (based on the setup options selected). CANCEL Click to keep existing system setup options and return to the Main Menu. 16 Operating Menus Model HS-4700-S User's Manual SEARCH RESULTS NO. CH 001 01 Start Time 05-26-10 19 : 51: 09 Total 001 files 01 pages PLAY goto PREV MB-Sec 004-061 001 page NEXT EXIT PLAY Play the selected video segment(s). PREV Play previous video segment(s). NEXT Play next video segment(s). CANCEL Click to keep the existing system setup options and return to the Main Menu. Note: The Search List can display up to 100 records starting with the earliest 100 records based on the search inquiry. If needed, select additional records by changing the search setup options. 17 Operating Menus Model HS-4700-S User's Manual PLAYBACK Access the Playback (search files options) from the Main Menu. Use this menu to play back video recordings from any of the cameras. Press the Menu button on the front panel or the right mouse button to open/close the control tool bar during playback. Select OK or click the left mouse button to reduce the size of the playback window. The display size will return to the default display after playback. Close the control tool bar and press the channel button or click the left mouse button to change the size of the playback window. video playback control tool bar Control Pause/Play functions. Control the FF (fast forward) speed of playback. Options are: 1×2 (time fast) ×4 (time fast) × 8 (time fast) ×1/2 (time fast) ×1/4 (time fast) × 1/8 (time fast) > normal. Normal <2 (time fast) <4 (time fast) <8 (time fast) <1/2 (time fast) <1/4 (time fast) <1/8 (time fast) <Normal. [ ] Stop playback and return. 18 Operating Menus Model HS-4700-S User's Manual MOTION MENU Access the Motion Menu from the Main Menu. Use this menu to record video from any camera detecting motion or to schedule specific recording times. Schedule the time and day in Motion Menu to set when Motion Detection will be enabled. MotionPara Schedule Exit MOTION RELATED Choose the second-level menu Motion Para to access its setup menu. SET Channel CH1 Record 1 : X 2 : X 3: X 4 : X Duration 05 sec Buzzer Level Middle Timer 00 Sec APPLY TO OK CANCEL Channel Choose a channel 1, 2, 3, or 4. Record Click "X" in the box to record the channel. Video Recording “X” indicates video recording setup is active. 19 Operating Menus Model HS-4700-S User's Manual Set To select the area of display that will trigger Motion Detection. Duration Indicates the length of record time. Set from 05 to 99 seconds. Level Select the record video quality: Lowest, Low, Middle, High, Highest. Buzzer Triggers buzzer to alarm. "X" indicates function is active. Timer Indicates the length of time the buzzer will continue output. Set from 00 to 99 seconds time. APPLY TO Apply the current channel parameter settings to another channel. Select the choice box of the channel number that you want to set, and click the APPLY TO button. OK Click to save system setup parameters and return to the Main Menu. CANCEL Click keep existing system setup parameters and return to the Main Menu. MOTION SCHEDULE Select Motion Schedule on the secondary menu, and enter the settings options. Channel CH1 Red : On Mon Green :Off Wed Fri Sun 0 6 12 18 CH1 APPLY TO OK CANCEL Channel Select the channel: 1, 2, 3, or 4. Method There are 7 rows (for 7 days) and 24 columns (for 24 hours) in the interface box. Rows indicate Monday to Sunday and columns indicate 00:00 o'clock to 23:00 o'clock. Press the Menu button on front panel or click left mouse buttons to select a day-hour box. Green indicates not selected; red indicates selected. Note: HS-4700-S system uses military time (24-hour clock). 20 Operating Menus Model HS-4700-S User's Manual APPLY TO Apply the current channel option settings to another channel. Select the choice box to apply the channel number and click the APPLY TO button. OK Click to save system setup parameters and return to the Main Menu. CANCEL Click to keep existing system setup options and return to the Main Menu PTZ (OPTION) The PTZ is an optional feature available on some cameras. This feature is not available on the cameras supplied with the HS-4700-S system, but the system software is PTZ-ready. Access PTZ (Pan Configure) from the Main Menu. Use this menu to select the address, protocol, and baud rate for each camera. Channel CH1 Address 01 Protocol Pelco-D Baudrate APPLY TO 4800 CH1 OK CANCEL Channel Select a channel, 1, 2, 3, or 4. Method PTZ communication address settings: range is 0099. To use this address, it must be the same as the PTZ address setting. Protocols PTZ communication protocols are: Pelco-D, Pelco-P, B01, and Samsung. Baud Rate PTZ baud rate settings are: 1200 /2 400 / 4800 / 9600 / 19200 / 38400 / 57600 / 115200. APPLY TO Apply the current channel options settings to another channel. Select the choice box of the channel number to the applied, and click the APPLY TO button. OK Click to save system setup options and return to Main Menu. CANCEL Click to keep existing system setup options and return to Main Menu. 21 Operating Menus Model HS-4700-S User's Manual PTZ CONTROL (OPTION) The PTZ is an optional feature available on some cameras. This feature is not available on the cameras supplied with the HS-4700-S system, but the system software is PTZ-ready. Access the PTZ Control from the Main Menu. Use this menu to adjust the focus, zoom, and iris setting for a selected camera. In the PTZ control screen, the optional control mode options are: Direct, Focus, Zoom, Iris, and Auto. To move the activity box, press the right/left buttons on the front panel or click the right/left mouse buttons; press the up/down arrow buttons or click the right/left mouse buttons to set up the contents. L CH1 DIRECT U R PAST EXIT D Channel Select a channel: 1, 2, 3, 4. Direct Move field of view left (L), right (R), up (U), or down (D). Focus Use "+" and "–" to adjust the focus. Zoom Use "+" and "–" to move the field of view in or out. Iris Use "+" and "–" to increase/decrease iris (aperture opening) to let in more/less light. Response Select control response speed: Slow, Normal, or Fast. 22 Operating Menus Model HS-4700-S User's Manual SEARCH LOGS Access the Search Logs menu from the Main Menu. Use this menu to search logs for the type of log and the start/end times. Type 1 : Operation Start 01-01-2010 00 : 00 : 00 End 12-31-2010 23 : 59 : 59 SEARCH CANCEL Channel Select a channel, 1, 2, 3, or 4. Type Select the type of log: alarm logs or operation logs. Start Set the start time of the log to be searched. End Set the end time of the log to be searched. SEARCH Select the SEARCH button, the system will display the search results and log information. Input the page number, then click the GO TO button or the PREVIOUS and NEXT buttons. OK Click to save system setup options and return to Main Menu. CANCEL Click to keep existing system setup options and return to Main Menu. 23 Operating Menus Model HS-4700-S User's Manual SYSTEM MENU Access the System Menu from the Main Menu. Use this menu to set system options, change the user password, change date and time information, and view software and system information. Configure Password Date & Time Default Reset About Exit CONFIGURE Access the Configure menu from the System Menu. Use this menu to set basic system parameters. Standard Present display standard for the system. Must be NTSC. Video Loss If there is video loss on any channel, the system will trigger the alarm buzzer. “X” indicates alarm is on. Auto Switch Display the interval time settings for the 4-channel preview auto circularity, 01-99 seconds. 24 Operating Menus Model HS-4700-S User's Manual PIPConfig Picture-in-Picture Configuration. Select two picture channels; the first is the front picture, the second is the back picture. VGA Type VGA resolution settings modes are: 1024 * 768/75HZ, 1280 * 1024/60HZ, 800 * 600/75HZ. Password When the system boots up, a password prompt displays. Select Disable to avoid displaying the password login prompt. Select Enable to verify the correct password. Lock Time The system automatically locks the menu when there are no operations after the set period: 1, 2, 5, 10, 15, and 30 minutes, and 1 hour. Password is required at login. OK Click to save system setup options and return to Main Menu. CANCEL Click to keep existing system setup options and return to Main Menu. MODIFY PASSWORD Access the Modify Password menu from the System Menu. Use this menu for password management. Old Password ------ New Password ------ Confirm -----OK CANCEL 0 1 2 3 4 5 6 7 8 9 Old Password Input the old password; Default is 888888. New Password Input the new password. Confirm Repeat the new password. The password can be set to any number from 0 to 9 digits. OK Click to save system setup options and return to the Main Menu. CANCEL Click to keep existing system setup options and return to the Main Menu. 25 Operating Menus Model HS-4700-S User's Manual DATE & TIME Access the Date & Time menu from the System Menu. Use this menu to change system date and time settings. Date 01-01-2010 Time 01 : 01 : 01 OK CANCEL Date System date format: year-month-date. Time System time format: hour-minute-second. OK Click to save system setup options and return to Main Menu. CANCEL Click to keep existing system setup options and return to Main Menu. Note: Time can not be changed when the DVR is recording. Quit the recording before changing the time. 26 Operating Menus Model HS-4700-S User's Manual DEFAULT Access the Default Configure menu from the System Menu. Use this menu to return the system to the factory-set default configuration. Default Configuration? OK CANCEL OK Click to save system setup options and return to Main Menu. CANCEL Click keep existing system setup options and return to Main Menu. RESET Access the Reset menu from the System Menu. Use this menu to restore previously set system options. OK Click to save system setup options and return to Main Menu. CANCEL Click keep existing system setup options and return to Main Menu. 27 Operating Menus Model HS-4700-S User's Manual SYSTEM VARIATION Access the System Variation (About) menu from the System Menu. Use this menu to view product information, hard drive version, and software version. Product Alma-asia DVR HD Ver. HD-Ver. 02.00 SW Ver. SW-Ver. 01.23 OK 28 DVR Client This chapter describes the DVR Client software that can be installed on a PC and used to record, playback, and search for video segments. INSTALLATION Connect the DVR unit to the PC using the USB cable (provided). Insert the DVR-Client CD and double click “DVR_Client Setup CHS” program. Follow the instructions on the installation menu. When the installation is complete, a shortcut icon will display on the PC desktop. Double click the client software icon, to start the DVR-Client program. RECORD SEARCHING Channel Select the channel number: 1, 2, 3, or 4. Mark indicates selected; mark indicates not selected. Start Time Set the start time for the search. End Time Set the end time for the search. Event Select the recording type. There are 3 options: manual, timing, and motion. Mark indicates selected; mark indicates not selected. PlaybackByFile Select one channel. Set the schedule and event, and click the Playback by File button to view the playback menu. The file will playback from the start time to the end time. 29 DVR Client Model HS-4700-S User's Manual Backup Select the file to be backed-up from the File Search List. Click the File Backup button. Select the directory and file type. Click the OK button to save. PlaybackByTime Select the file. Click the Playback by Time button to display the Playback menu. Note: There are two type of file MJPEG and AVI. MJPEG files can only be played via the client software. AVI files can be played using a regular player, such as Media Player. The AVI format will take a longer time and the video file will not be as clear. PLAYBACK CONTROL In file playback, the playing states for controls are: schedule state, pause/play, frame play, fast forward / slow progressive, screenshot, and return. Schedule state Move anywhere in the schedule state to control the playback schedule. Pause / play Click to playback the record file. Frame play Set up the end time for the search. Fast forward / Slow progressive Playback at different speeds. Mouse Click the right mouse button to display the control bar. Click the corresponding icon: 2 times faster, 4 times faster, 8 times faster, 2 times slower, 4 times slower, 8 times slower ScreenShot Click to pause playback and view a saved prompt. Select the directory and file type, then click OK to save. 30 DVR Client Model HS-4700-S User's Manual UPDATE Start the client software, and select the Upgrade menu. INPUT THE UPGRADE FILE To upgrade the software: 1. Browse to and select the hard disk area. Press the OK button to view the hard disk information, including hard disk model number, capacity, and connection type. Make sure the correct hard disk is in the DVR. Note: Make sure that the hard disk is the right one, or the dates in the hard disk will be destroyed. 2. Click the checkbox next to "Delete the source file after upgrade?" to delete the source file after upgrading. 3. Click the checkbox next to "Only ppgrade to USB Device" to input only the upgrade file to the USB hard disk. 4. Select the upgrade file. Click the Browse button and the selected system file will be input (R5104-SYS-*-*). 5. Input file: click the Input File button, and the system will input the file into the hard disk. 6. Shut off the client software and quit the USB device. This way of quitting is the same for the U disk or a portable hard disk. 7. Disconnect the USB cable. 31 DVR Client Model HS-4700-S User's Manual SYSTEM UPGRADES To upgrade the system: 1. Disconnect the USB cable and restart the DVR. The system will examine the upgrade file automatically, and start the upgrade process. 2. During the upgrade, the siren will sound and the display screen will flash. 3. When the upgrade is finished, the system will restart and display the Operation menu. 4. If there is an error, turn off the power and repeat the above steps. DELETE SYSTEM FILES FROM HDD To delete an upgraded hard disk file, available through the USB cable from the DVR equipment PC, open the client software, go to the Upgrade option, select the hard drive disk you want to remove, and click the Confirm button to view hard disk information, including: type, disk size, and connections. Click the Delete/Update File button to view the updated or deleted file. Open Client software, and press the Enter Playback menu. 32 DVR Client Model HS-4700-S User's Manual SELECT BACKUP FILE Select the backup file: 1. Click the Open button. Select the backup file to playback. 2. Open the Backup file directory. Drag the file to the client playback procedures. The backup interface has the following options: Open Select the backup file playback. When playing a file, the open button will change to a pause/play button, click the button to pause or play the backup file. Progress bar Position the location of the progress bar used to control the progress of the video file playback. Frame backup Click to backup a single video frame. Fast forward/ Slow progressive Select the playback speed: 1 × 2 (speed) × 4 (speed) × 8 (speed) × 1 / 2 (speed) × 1 / 4 (speed) × 1 / 8 (speed). Capture Click to suspend video playback. The options will be saved as part of the user interface. Select the storage directory and click Save. Stop Exit the playback interface. 33 Troubleshooting Problem Solution Make sure the cameras and receiver are plugged in. No picture. Make sure the TV/ VCR/ DVR is tuned to the correct input channel. The camera's infrared LEDs shine invisible light that reflects off surfaces such as glass causing white light. A white image appears at night. Place the camera on the other side of windows or place the lens flush against the surface to improve night vision. Relocate the camera to a well-lit area. The display turns off after 30 minutes. Why does the DVR run slow when it starts? This is a feature of the product designed to protect the LCD screen from overheating and burning out. There may be too much data on the HDD. The DVR checks data when it starts and this may cause the system to start slowly. HDD error – The system tests the HDD repeatedly during startup and this may cause the system to start slowly. Why does the system keep rebooting after the host self-test? Check the HDD. Make sure the HDD partition is not in the FAT32 format, and that the HDD does not have a problem. Either of these situations could cause the host to reboot. Check Video Parameter setting, if the host is in the PAL state but the video input is NTSC, the host will keep rebooting. Why does the system turn off when a video is playing or when checking video information during the normal routine? Check the HDD connection and make sure it is secure. Why does the video display only in black and white? Check to make sure the video input, DVR host, monitor, and TV format match. If they do not match, set the monitor or TV format to the auto detect state. Why does real-time video and record data have color and light distortion problems? Reboot DVR, in order to recover previous settings. Change the HDD if there is a problem. Adjust Video setting in the DVR setting menu. 34 Troubleshooting Model HS-4700-S User's Manual Problem Solution Check to make sure the power adaptor is working and the output is connected properly. Why is there no display on the monitor or computer VGA? Make sure the monitor is turned on and the video cable is connected properly. Connect the power and turn on the DVR, if there is a blue screen, but no video on the monitor, change to a corresponding channel to attempt to display the video. There might be a broken video cable, short circuit, or bad solder connection. Why does the video have "water waves"? The video cable can be disturbed by strong power so make sure it is not next to a strong power cable. Use a good quality cable. In this system, only a single line connected to the ground is permitted. Please connect the host to the ground through the ground screw located on the back panel. Make sure the camera, monitor or cables do not have aging problems. 35 Technical Information GENERAL Operating Power DC 12V Remote Control Yes Mouse Yes USB Connection Yes PC Backup USB connection 4-Camera Multi-View Yes CAMERA Image Device CMOS Video System NTSC Resolution 400 TV lines White Balance Automatic Lens 6 mm Infrared LEDs 30 Effective Pixels NTSC: 656 (H) x 492 (V) Signal/Noise Ratio > 48 dB Gain Control Automatic Backlight Compensation Automatic Night Vision Distance up to 50 ft Operating Temperature 14°F – 122°F Dimensions 5.5” x 2.8” x 7.0” (camera & stand) Indoor/Outdoor Both 36 Technical Information Model HS-4700-S User's Manual DVR AND VIDEO Video System NTSC Video In BNC 4-channel inputs Video Out Monitor and BNC Display Resolution NTSC: 680 (H) x 480 (V) Compression Format MJPEG Recording Resolution NTSC: 352 x 240, 120 fps Recording Frame Rate 1 fps – 30 fps max. Recording Modes Manual / Schedule / Motion HDD Interface / Memory Type SATA, up to 500 GB 37 Warranty PRODUCT LIMITED WARRANTY BRK Brands, Inc., (“BRK”) the maker of First Alert® brand products warrants that for a period of one year from the date of purchase (the “Warranty Period”), this product will be free from defects in material and workmanship. BRK, at its sole option, will repair or replace this product or any component of the product found to be defective during the Warranty Period. Replacement or repair will be made with a new or remanufactured product or component. If the product is no longer available, replacement may be made with a similar product of equal or greater value. This is your exclusive warranty. This warranty is valid for the original retail purchaser only from the date of initial retail purchase and is not transferable. In order to obtain warranty service, you must keep the original sales receipt and proof of purchase in the form of the UP code from the package. BRK dealers, service centers, or retail stores selling BRK products do not have the right to alter, modify or any way change the terms and conditions of this warranty. WARRANTY EXCLUSIONS Parts and Labor: 1 year limited (warranted parts do not include bulbs, LEDs, and batteries) This warranty does not apply to bulbs, LEDs, and batteries supplied with or forming part of the product. This warranty is invalidated if non- BRK accessories are or have been used in or in connection with the product or in any modification or repair is made to the product. This warranty does not apply to defects or damages arising by use of the product in other than normal (including normal atmospheric, moisture and humidity) conditions or by installation or use of the product other than in strict accordance with the instructions contained in the product owner’s manual. This warranty does not apply to defects in or damages to the product caused by (i) negligent use of the product, (ii) misuse, abuse, neglect, alteration, repair or improper installation of the product, (iii) electrical short circuits or transients, (iv) usage not in accordance with product installation, (v) use of replacement parts not supplied by BRK, (vi) improper product maintenance, or (vii) accident, fire, flood or other Acts of God. This warranty does not cover the performance or functionality of any computer software included in the package with the product. BRK makes no warranty that the software provided with the product will function without interruption or otherwise be free of anomalies, errors, or “Bugs.” This warranty does not cover any costs relating to removal or replacement of any product or software installed on your computer. BRK reserves the right to make changes in design or to make additions to or improvements in its products without incurring any obligations to modify any product which has already been manufactured. BRK will make every effort to provide updates and fixes to its software via its website. This warranty does not cover any alteration or damage to any 38 Warranty Model HS-4700-S User's Manual other software that may be or may become resident on the users system as a result of installing the software provided. This warranty is in lieu of other warranties, expressed or implied, and BRK neither assumes nor authorizes any person to assume for it any other obligation or liability in connection with the sale or service of the product. In no event shall BRK be liable for any special or consequential damages arising from the use of the product or arising from the malfunctioning or non-functioning of the product, or for any delay in the performance of this warranty due to any cause beyond its control. BRK does not make any claims or warranties of any kind whatsoever regarding the product’s potential, ability, or effectiveness to prevent, minimize, or in any way affect personal or property damage or injury. BRK is not responsible for any personal damage, loss, or theft related to the product or to its use for any harm, whether physical or mental related thereto. Any and all claims or statements, whether written or verbal, by salespeople, retailers, dealers, or distributors to the contrary are not authorized by BRK, and do not affect this provision of this warranty. BRK’s responsibility under this, or any other warranty, implied or expressed, is limited to repair, replacement or refund, as set forth above. These remedies are the sole and exclusive remedies for any breach of warranty. BRK is not responsible for direct, special, incidental, or consequential damages resulting from any breach of warranty or under any other legal theory including but not limited to, loss profits, downtime, goodwill, damage to or replacement of equipment and property and any costs of recovering, reprogramming or reproducing any program or data stored in or used with a system containing the product accompanying software. BRK does not warrant the software will operate with any other software except that which is indicated. BRK cannot be responsible for characteristics of their party hardware or software which may effect the operation of the software included. Except to the extent prohibited by applicable law, any implied warranty of merchantability or fitness for a particular purpose is limited in duration to the duration of the above Warranty Period. Some states, provinces, or jurisdictions do not allow the exclusion or limitation of incidental or consequential damages or limitations on how long an implied warranty lasts, so the above limitations or exclusion may not apply to you. This warranty gives you specific legal rights, and you may also have other rights that vary from state to state, or province to province, or jurisdiction to jurisdiction. OBTAINING SERVICE If service is required, do not return the product to your retailer. In order to obtain warranty service, contact the Consumer Affairs Division at 1-800-323-9005, 7:30 a.m. – 5:00 p.m. Central Standard Time, Monday through Friday. To assist us in serving you, please have the model number and date of purchase available when calling. After contacting the Consumer Affairs Division and it is determined that the product should be returned for Warranty Service, please mail the product to: Lehigh, 2834 Schoeneck Rd, Macungie, PA 18062-9679. 39