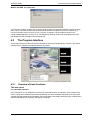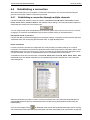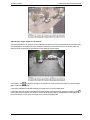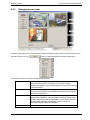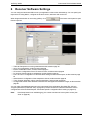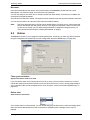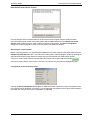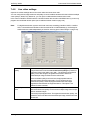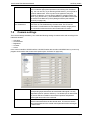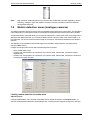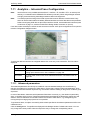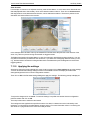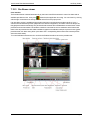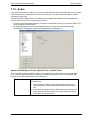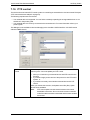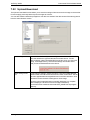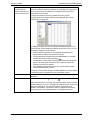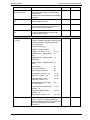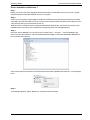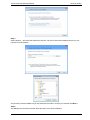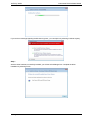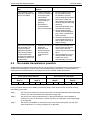
1
CamControl PRO
Software Guide
July 2015
Document: 27769_02
Software Version: 4.41
HeiTel by Xtralis
CamControl PRO Software Manual
Intellectual Property and Copyright
This document includes registered and unregistered trademarks. All trademarks displayed are the trademarks of
their respective owners. Your use of this document does not constitute or create a licence or any other right to use
the name and/or trademark and/or label.
This document is subject to copyright owned by Xtralis. You agree not to copy, communicate to the public, adapt,
distribute, transfer, sell, modify or publish any contents of this document without the express prior written consent of
Xtralis.
Disclaimer
The contents of this document is provided on an “as is” basis. No representation or warranty (either express or
implied) is made as to the completeness, accuracy or reliability of the contents of this document. The manufacturer
reserves the right to change designs or specifications without obligation and without further notice. Except as
otherwise provided, all warranties, express or implied, including without limitation any implied warranties of
merchantability and fitness for a particular purpose are expressly excluded.
General Warning
This product must only be installed, configured and used strictly in accordance with the General Terms and
Conditions, User Manual and product documents available from Xtralis. All proper health and safety precautions
must be taken during the installation, commissioning and maintenance of the product. The system should not be
connected to a power source until all the components have been installed. Proper safety precautions must be taken
during tests and maintenance of the products when these are still connected to the power source. Failure to do so
or tampering with the electronics inside the products can result in an electric shock causing injury or death and may
cause equipment damage. Xtralis is not responsible and cannot be held accountable for any liability that may arise
due to improper use of the equipment and/or failure to take proper precautions. Only persons trained through an
Xtralis accredited training course can install, test and maintain the system.
Liability
You agree to install, configure and use the products strictly in accordance with the User Manual and product
documents available from Xtralis.
Xtralis is not liable to you or any other person for incidental, indirect, or consequential loss, expense or damages of
any kind including without limitation, loss of business, loss of profits or loss of data arising out of your use of the
products. Without limiting this general disclaimer the following specific warnings and disclaimers also apply:
Fitness for Purpose
You agree that you have been provided with a reasonable opportunity to appraise the products and have made
your own independent assessment of the fitness or suitability of the products for your purpose. You acknowledge
that you have not relied on any oral or written information, representation or advice given by or on behalf of Xtralis
or its representatives.
Total Liability
To the fullest extent permitted by law that any limitation or exclusion cannot apply, the total liability of Xtralis in
relation to the products is limited to:
i. in the case of services, the cost of having the services supplied again; or
ii. in the case of goods, the lowest cost of replacing the goods, acquiring equivalent goods or having the goods
repaired.
Indemnification
You agree to fully indemnify and hold Xtralis harmless for any claim, cost, demand or damage (including legal costs
on a full indemnity basis) incurred or which may be incurred arising from your use of the products.
Miscellaneous
If any provision outlined above is found to be invalid or unenforceable by a court of law, such invalidity or
unenforceability will not affect the remainder which will continue in full force and effect. All rights not expressly
granted are reserved.
27769_02
i
CamControl PRO Software Manual
HeiTel by Xtralis
Document Conventions
The following typographic conventions are used in this document:
Convention Description
Italics
Used to denote: references to other parts of this document or other
documents. Used for the result of an action.
The following icons are used in this document:
Convention Description
Caution: This icon is used to indicate that there is a danger to
equipment. The danger could be loss of data, physical damage, or
permanent corruption of configuration details.
Warning: This icon is used to indicate that there is a danger of electric
shock. This may lead to death or permanent injury.
Warning: This icon is used to indicate that there is a danger of inhaling
dangerous substances. This may lead to death or permanent injury.
Contact Us
UK and Europe
+44 1442 242 330
The Americas
+1 781 740 2223
D-A-CH
+49 431 23284 1
Middle East
+962 6 588 5622
Asia
+86 21 5240 0077
Australia and New Zealand
+61 3 9936 7000
www.xtralis.com
www.heitel.com
ii
27769_02
HeiTel by Xtralis
CamControl PRO Software Manual
Table of Contents
1
How to Use this Guide
3
1.1
3
Guide on how to read this guide
2
Introduction
5
3
Installing the software
7
3.1
3.2
3.3
3.4
7
8
8
8
4
5
6
7
Working with CamControl PRO
11
4.1
4.2
4.3
4.4
4.5
4.6
4.7
4.8
4.9
12
16
17
20
23
35
52
54
60
Quick Start
Starting the program
The Program Interface
Establishing a connection
Software screen displays
Accessing CamDisc HNVR, CamDisc SVR, Cam4mobile and CamServer
Accessing CamTel SVR and CamTel VG
PTZ control and remote adapter
Audio transmission
Offline Access
63
5.1
5.2
5.3
63
74
75
Receiver archive (PC archive)
Deleting archive files
Accessing other archives
Receiver Software Settings
77
6.1
6.2
6.3
6.4
6.5
6.6
6.7
6.8
6.9
78
80
81
83
84
87
92
93
96
Take a call
User
Extras
HTconnect
PC Archive
Port A to Port D or Port 1 to Port 9
Serial Channel
Tours
Configuring the transmitter index
Configuring SVR devices (as well as CamDisc HNVR, Cam4mobile and
CamServer) and VG devices
117
7.1
7.2
7.3
7.4
7.5
7.6
7.7
7.8
7.9
7.10
7.11
7.12
7.13
7.14
27769_02
Hardware and Software Requirements
Licensing regulations
Installing the Software
Updating the Software
Device
122
User
123
Date and time
126
Connections
129
Camera settings
146
Camera groups
147
Motion (analogue cameras)
148
Motion detection zones (analogue cameras)
150
Privacy zones (analogue cameras)
151
Analytics – Allocating IntrusionTrace Licenses
154
Analytics – IntrusionTrace Configuration
155
Alarms
161
Site archive (only CamDisc VG HNVR, CamDisc VG, Cam4mobile VG,
CamServer VG, and CamDisc HNVR, CamDisc SVR, Cam4mobile and
CamServer)
175
Audio
206
1
CamControl PRO Software Manual
7.15
7.16
7.17
7.18
7.19
7.20
7.21
7.22
7.23
7.24
7.25
7.26
7.27
8
Configuration, configuration files and configuration examples
8.1
8.2
8.3
8.4
8.5
8.6
8.7
8.8
8.9
8.10
8.11
9
2
Relays
PTZ control
Serial channel
Video out
Alarm Panel
Logfile
Extras
Upload/download
Firmware update
CI Adapter (and CIO Adapter)
IP Camera
HYBRID Card 4 (only CamDisc HNVR/CamDisc VG HNVR)
PIR Integration
HeiTel by Xtralis
208
210
212
216
218
223
224
229
230
232
237
246
248
253
Overview of the used IP Ports
253
253
Program parameters (CAMCTRL.INI)
Saving window positions
269
271
Changing the informational text (FIRMA.TXT)
Transmitter-specific configuration files
271
283
Program parameters (SERVICE.INF)
Logfile entries (only CamDisc HNVR, CamDisc SVR, Cam4mobile, and
CamServer as well as VG Series)
285
Configuring data transmission devices
290
Installation of device drivers
294
Additional software GPS Data Viewer
308
Specification of the control inputs
312
Troubleshooting
315
9.1
9.2
9.3
9.4
9.5
315
315
317
317
318
Installation problems
Operating CamControl PRO
Evaluating Contents of CamDisc SVR, Cam4mobile and CamServer
No null modem connection possible
No remote transmission possible
10 Software Licence Contract
329
11 Addendum
333
27769_02
HeiTel by Xtralis
1
CamControl PRO Software Manual
How to Use this Guide
This guide provides you with information on all the functions and options of the HeiTel software program
CamControl PRO. You can use this software for operation, alarm verification and configuration of up to 6000
image transmitters. This guide relates to the functionality of the current CamTel SVR and CamDisc SVR
devices, and to the further devices which, in terms of their function, are largely identical Cam4mobile,CamServer and CamDisc HNVR.
In addition, this guide refers to the functionality of the end of 2012 introduced VG VideoGateway systems (see
"VG Device series" on page 109).
Guide creation date
This guide for the CamControl PRO software program was revised in July 2015. In the course of the constant
further development of our products, the functionality of CamControl PRO will also be continuously updated.
Information that could not be included in the guide at the time of printing can be found at the end of the guide in
the section containing late breaking information (see “Addendum” on page 333).
Version information
The current version of CamControl PRO replaces all previous versions. The software has been approved for
the following Microsoft operating systems: Windows 8, Windows 7, Windows Vista and Windows XP
1.1
Guide on how to read this guide
This guide for the CamControl PRO software addresses various target groups.
Operators
Operators are generally normal software users. They will receive all necessary information in the following
sections of this guide:
l
l
Working with CamControl PRO: page 11
l
The Program Interface: page 17
l
Establishing a connection: page 20
l
Software screen displays: page 23
l
Accessing CamDisc HNVR, CamDisc SVR, Cam4mobile and CamServer: page 35
l
Accessing CamTel SVR and CamTel VG: page 52
Offline Access: page 63
Installers
Installers require general instructions on handling this application as well as information about the software
installation including update and configuration. They will receive all necessary information in the following
sections of this guide:
l
l
l
Installing the Software: page 8
Receiver Software Settings: page 77
Working with CamControl PRO: page11
If additional adjustments are necessary, information on INI files, additional drivers and supplementary
software in section Configuration, configuration files and configuration examples on page 253
For more information regarding the programming of the HeiTel devices, refer to section Configuring SVR
devices (as well as CamDisc HNVR, Cam4mobile and CamServer) and VG devicespage 117
27769_02
3
CamControl PRO Software Manual
HeiTel by Xtralis
This page is intentionally left blank.
4
27769_02
HeiTel by Xtralis
2
CamControl PRO Software Manual
Introduction
Thank you for choosing a HeiTel product. Years of experience in developing and manufacturing CCTV
software and hardware have resulted in this well thought-out and reliable product designed for a wide range of
applications.
Competent digital video partner
HeiTel has been a pioneer in digital image archiving technology and remote digital video surveillance since
1990 and has now become an internationally recognised manufacturer in the field. Rapid developments in all
areas of hardware and software have made possible the development of increasingly complex and functional
systems.
Digital image archiving
Our range of digital image archiving equipment includes CamDisc SVR or CamDisc VG. The flexibility offered
by the removable hard disk for decentralised access using a typical PC makes it a cost-effective product for
recording digital video with all the features expected on the market.
Remote digital video transmission
All our products can be connected to the public telecommunications network (ISDN, PSTN) or a computer
network (TCP/IP) and can therefore be operated remotely. The saved video images can be quickly and
comfortably accessed in spite of the still relatively low bandwidth of the telephone network. The transmission
of live images makes it possible to view the area monitored immediately. Our systems open up completely
new areas of application and additional markets.
Break-in or false alarm?
Our range of devices also includes our CamTel SVR or CamTel VG products. With an external modem or an
optionally integrated ISDN card, we provide you with easy-to install, high-quality products for remote video
surveillance. The recording of images from before the actual alarm was triggered means you have a concrete
basis on which to make alarm verification decisions in a matter of seconds.
Powerful receiver software
At the heart of our products is the CamControl PRO software, which allows you to configure and access all
HeiTel products. This software product is included with our hardware and is available in various languages. It
allows you to install and control our products with ease using typical personal computers.
Integrated evaluation software
With our CamControl PLAYER you can evaluate and process archived images quickly and conveniently. The
CamControl PLAYER software allows you to evaluate both PC receiver archives and video recordings on
CamDisc SVR or CamDisc VG removable hard drives. The software is a stand-alone product and is available
free of charge. It allows third parties (police, public prosecution service, etc.) to review original files in order to
preserve evidence or suchlike.
Professional video management
CamControl PRO is the latest development of our proven receiver software. With this Windows software, up
to nine transmissions can be received simultaneously and the images displayed together on a monitor for
alarm verification or routine checks - ideal for security centres or applications with complex requirements.
27769_02
5
CamControl PRO Software Manual
HeiTel by Xtralis
Professional video wall application
CamControl MV allows the display of up to 64 live camera images of corresponding number of HeiTel devices
including the evaluation of archived images.
Control station integration
We are consistently developing our product philosophy even further and now also offer the option of
integrating our systems into existing control centres in order implement optimal alarm and video management
with regard to alarm verification.
Video control station
In the Event Management System (EMS), HeiTel offers its own autonomous control station solution. This
client-server system with up to 21 operator stations provides you with a high-performing alarm management
tool featuring dynamic alarm processing and an alarm database.
This control station solution can be expanded using the products EMS Site Map (interactive site map
management) and EMS TAPI (program interface for telephony applications).
We are pleased that you are interested in our products and hope that we continue to be a valuable partner for
you in the future.
Mobile Application
CamControl iPhone and CamControl Android allow transmission of live images as well as archive access to
HeiTel VideoGateways.
You can use the following HeiTel devices with CamControl PRO:
HeiTel Video Gateways
Note:
IntrusionTrace is only available with CamDisc E, CamDisc+ E, CamDisc+ ETx, as well as ipVG
and only in combination with JPEG/MJPEG cameras (not H.264). When using analogue cameras
we highly recommend using the analogue realtime cards in the equipment.
Digital video transmission systems
CamTel VG
CamTel SVR
Digital image transmitter with up to ten video inputs, Multi-Unicast server for
network and dial-up connections and access via the communication
connections.
CamTel V.24
Digital image transmitter with ten video inputs, integrated alarm image
storage and transparent serial interface - for operation with external modem
(null modem, analogue, ISDN, TCP/IP).
CamTel ISDN
As for CamTel V.24, but with integrated ISDN-TA instead of a serial
interface for external modem operation.
CamTel PSTN
As for CamTel V.24, but with integrated analogue modem instead of a serial
interface for external modem operation.
CamLine V.24
Digital image transmitter with two video inputs for operation with external
modem (null modem, analogue, ISDN, TCP/IP).
CamLine ISDN
As for CamLine V.24, but with integrated ISDN-TA instead of a serial
interface for external modem operation.
6
27769_02
HeiTel by Xtralis
3
CamControl PRO Software Manual
Installing the software
CamControl PRO is an operation, alarm verification and configuration program for all HeiTel devices.
CamControl PRO is an operation, alarm verification and configuration program with multi-site functionality for
all HeiTel devices.
3.1
Hardware and Software Requirements
In order to be able to install and operate the CamControl PRO software, the receiver PC must fulfill the
following minimum requirements.
Minimum requirements for up to two or three connection channels:
l
l
l
l
l
l
l
l
l
Intel Pentium processor 1 GHz or comparable AMD processor
512 MB memory
Operating system Microsoft Windows 8, 7, Vista, XP
60 MB free hard disk space
Graphics card with 32768 or 65536 colours and a resolution of 1024x768 pixels (small fonts) for optimal
image display. If only 256 colours are used, images will be displayed in grey scale.
COM port with UART (16550) or a multiple interface card
External ISDN terminal adapter (TA) and/or internal ISDN card with fossil driver (virtual COM port driver)
and/or modem and/or network card.
Sound card (Soundblaster® compatible for audio transmission with the Audio Card) and speakers if
acoustic signals are desired
CD-ROM drive
Minimum requirements for up to four connection channels
CamControl PRO with up to four connection channels:
l
l
Intel Pentium Processor from 1.7 GHz
1 GB RAM
Recommended hardware:
CamControl PRO with more than four connection channels:
l
l
Intel Pentium Processor from 3 GHz
2 GB RAM
Use of ISDN cards
CamControl PRO does not support the direct use of ISDN cards via the CAPI interface. With a driver that
allows the ISDN card to be accessed via virtual COM ports however, you can use your ISDN card to transmit
images with CamControl PRO (see “Communicating with CAPI devices via Fossil drivers” on page 293).
Note:
When using the Windows Vista operating system, please note the following points:
l
l
l
If you are using a first-generation (Audio V2.x) Audio Card in a SVR device, a TrueSpeech Audio
Codec must be installed.
When using cFos, a software/driver version approved for Windows Vista must be used where
applicable.
If using a Moxa serial interface, where applicable, a driver version approved for Windows Vista
must be used.
Recommended software:
l
Adobe Reader or Adobe Acrobat to display the online help in PDF format (see “PDF manuals for online
help” on page 9)
27769_02
7
CamControl PRO Software Manual
3.2
HeiTel by Xtralis
Licensing regulations
The purchase of one CamControl PRO entitles installation and operation on one PC workstation (see
“Software Licence Contract” on page 329).
3.3
Installing the Software
Proceed as follows:
1. Start Windows,
2. Insert the CamControl PRO installation CD into your CD-ROM drive. The CD starts automatically
(depending on how Windows is configured),
3. Follow the menu structure and from the Installation menu select the CamControl PRO software,
4. From the subsequent menu, select CamControl PRO and then decide the language you want to install the
software in,
5. Activate installation by clicking OK,
6. Click Next to start installation,
7. Accept the suggested target folder for installation or specify a different folder of your choice by clicking
Next,
8. Specify the Start menu folder by clicking Next,
9. Confirm selection of other details by clicking Next,
10. The installation program provides you with an overview of all selected options. Click Install to start the
installation process. The individual components will be installed on the computer,
11. Click Finish to conclude installation.
Uninstalling the software:
There are two ways to remove the program from the computer.
l
l
Click Start and select Programs/CamControl PRO/Uninstall CamControl PRO
(or select the path you chose during installation Programs/Yourname/Uninstall CamControl PRO)
Remove the program installation in the Add or Remove Programs item of the Control Panel
Starting the software
You can start the program from the Start menu by selecting Programs/CamControl PRO/ CamControl PRO
(or by selecting the path you chose during installation Programs/Yourname/CamControl PRO). Alternatively,
you can start the program by double-clicking the icon on your desktop, if you chose to add an icon to your
desktop during installation.
3.4
Updating the Software
Before installing an update, it is recommended that you back up the receiver archive and the configuration files
of the CamControl PRO version in use to date or the previous version of CamControl 4 to a directory of your
choice. Once you have installed the latest version of CamControl PRO, copy the backed-up configuration
files to the program directory of the newly-installed receiver software.
Note:
Do not install CamControl PRO over an existing installation. You must first uninstall the software
and delete the program group via Windows Explorer. Alternatively, specify a new directory and a
new program group during installation.
Make sure to back up all files that you still need. This applies in particular to the receiver archive.
You should back up the following files before an update:
Configuration file
C:\CamControl PRO\CAMCTRL.INI
Telephone directory
C:\CamControl PRO\TELEDATA.DAT or
C:\CamControl PRO\TELEFON.INI
Company text
C:\CamControl PRO\FIRMA.TXT
8
27769_02
HeiTel by Xtralis
CamControl PRO Software Manual
Tours
C:\CamControl PRO\ROUNDS32.RDS
Archive configuration
C:\CamControl PRO\SERVICE.INF
C:\CamControl PRO\ONSCREENINFO.CFG (masking position and font
type of camera and transmitter name while printing or saving picture)
Positions of additional windows
C:\CamControl PRO\CTPOSWIN.INI
Favourite transmitters
C:\CamControl PRO\FAVOURITES.INF
AVI export
C:\CamControl PRO\COMPRESSOR.CFG
Remote module
C:\CamControl PRO\RMCTRL\YZxxxxxx.R01 (various files for
controlling P/T heads, PTZ systems, relay modules, or similar)
Transmitter-specific alarm
processing
C:\CamControl PRO\R02\YZxxxxxx.R02 (various files for transmitterspecific processing of alarm and service calls)
Additional transmitter-specific
information
C:\CamControl PRO\TRINFOS\YZxxxxxxx.INF
Firmware files
C:\CamControl PRO\DEVICEUPDATES\*.BIN
PDF manuals for online help
C:\CamControl PRO\HELPFILES\*.* (contains software guides where
applicable and the file HLPINDEX.INI)
Device drivers
C:\CamControl PRO\Drivers\*.* (contains device drivers where
applicable)
Receiver archive
C:\CamControl PRO\ARCHIVE\…
(ARCHIVE contains further sub-folders and files.)
The program path (C:\CamControl PRO) is the default setting. You can
change it as you wish during software installation, so it could be different
for your application.
Backing up the receiver archive
The receiver archive contains additional sub-directories and files. Before
installing an update, always back up the entire directory including
subdirectories and files. If your hard drive does not have sufficient space
for a copy of the receiver archive, you can also move the archive if
necessary. If the receiver archive is not a sub-directory of the CamControl
PRO program directory, you do not have to back it up when updating (see
“Archive directory” on page 65). Once the configuration files of the
previous installation have been applied, the archive path used to date will
be used for CamControl PRO.
Transfer of the transmitter list TELEFON.INI
The additional storage of Username and Password as part of the transmitter data (see “Username &
Password” on page 101) requires a different saving of these data. If these data were formerly saved in
TELEFON.INI, they are saved now in TELEDATA.DAT.
Note:
The TELEDATA.DAT may under no circumstances be manipulated!
Transfer of the TELEFON.INI
If in the CamControl PRO program directory, no TELEDATA.DAT file is found, then the receiving software
will provide the option to import the data from of the TELEFON.INI file available in this program directory.
Click the button PORT 1 in order to open the transmitter directory. A dialogue window will offer you the
opportunity to import the data from an existing TELEFON.INI, using OK. With Cancel the import is stopped
and an empty transmitter directory is displayed.
27769_02
9
CamControl PRO Software Manual
10
HeiTel by Xtralis
27769_02
HeiTel by Xtralis
4
CamControl PRO Software Manual
Working with CamControl PRO
CamControl PRO is a further development of CamControl LITE with additional functions. The software
therefore meets more demanding requirements, particularly in the professional operation of security or control
centres.
Intuitive operation
All major functions are clearly organised and easy to use. If you have already
worked with CamControl LITE, then you'll recognise a familiar user
interface.
Multiple simultaneous
connections
In standard configuration, CamControl PRO allows you to simultaneously
process up to four different connections to different transmitters in four
connection windows, and to receive live images, pre-alarm images, an
archive image and status information from the CamDisc SVR or CamTel
SVR devices for example. No alarm is lost even during routine inspections,
such as carrying out tours.
By using an appropriate configuration by means of the CAMCTRL.INI, you
can increase the number of simultaneous connection channels to nine. The
individual connections are displayed in a main window and in additional side
windows.
Central management
Although CamControl PRO provides you with a separate control window for
each of the four connection channels (Port A - D), shared data and settings
are centrally managed. In such a way, you can clearly save all received
images in one receiver archive. All the connection channels also share a
central transmitter directory, which stores telephone numbers or IP
addresses, reference images and other parameters.
Main panel
In the main panel you can fully control the active transmitter, switch
cameras, select multi-image displays, control PTZ devices, change
transmitter configuration, and much more.
Side panels
In the side panels, you can establish connections to other transmitters,
accept alarms and receive image data, all at the same time. Just one mouse
click is all it takes to switch from a side panel to the main panel, where you
can fully control the active transmitter in question.
27769_02
11
CamControl PRO Software Manual
HeiTel by Xtralis
Variable configuration
The equivalent connection channels (Port A - D as well as Port 5 - 9) can be
variably configured for various communication paths. The following
communication paths are available: the physical COM port of the PC (null
modem, modem, ISDN-TA), network cards (TCP/IP) or an ISDN card (via
virtual COM ports). You assign one of the above options to the individual
connection paths. You can name ports A, B, C and D as well as 5 to 9 as
you wish, thus guaranteeing simple, secure operation.
Automatic camera switching
If using CamDisc SVR and CamTel SVR devices and a transmitter is
switched on, CamControl PRO can automatically switch to the cameras
whose camera inputs are reporting activity. This function perfectly
demonstrates the flexibility of the HeiTel system made up of intercoordinated hardware and software components.
Receiver archive
A sophisticated storage concept sorts every call according to transmitter
name / serial number, date and time. This makes the task of backing up and
accessing archived image recordings clear, convenient and transparent.
Every individual call may contain up to 2 GB of image data. The only thing
restricting the total size of the archive is the storage capacity of the hard
drive. Archived connections can be accessed at any time, even during
active connections.
Tours
Automatically executed tours make it possible to carry out predefined routine
monitoring while simultaneously being able to accept alarms from other
transmitters and connect to another transmitter manually.
Event window
The list in the event window provides you with information on all existing
connections, alarms and tours. Status and configuration changes to the
active transmitters are also stored in this list.
4.1
Quick Start
Getting started
Once you have installed CamControl PRO, it's easy to make the settings necessary to establish a data
connection to your transmitter and start receiving live images.
In addition to an operational image transmission system such as CamDisc SVR or CamTel SVR, you also
need a fully installed version of CamControl PRO and an appropriate communication device. Basic
configuration varies slightly for the different connection types (null modem, modem, external ISDN-TA,
internal ISDN card, network card or USB direct connection). Continue reading from the section that refers to
your method of establishing a connection to the transmitter.
4.1.1
Null modem connection, transmitter with external V.24 interface
(quick start) (only for SVR series)
Connection
l
Using the special HeiTel null modem cable, connect your digital image transmission system to an
available COM port on your PC, and switch on your transmitter.
Configuration
l
l
12
Start CamControl PRO. Click Setup. The Receiver options dialogue box opens. In the Options list click
one of the connection channels, for example Port A. Deactivate the TCP/IP option if necessary. From the
drop-down list in the Modem group, select Mode = Normal. From the Port drop-down list, select the COM
port to which you connected the transmitter. From the Baud drop-down list, select the same serial
transmission speed set on your transmission device (default on reset / factory setting usually 115200
Baud).
Then click OK.
27769_02
HeiTel by Xtralis
CamControl PRO Software Manual
Establishing a connection
l
Click the Port A button to use the main panel. A direct connection is now established to the transmitter
via the null modem cable.
Online
l
Once the transmitter settings have been loaded, image transmission starts. The status bar contains
information on current data reception.
4.1.2
Dial-up connection with modem or external ISDN TA (quick start)
Connection/ Preparation
l
Connect the modem or the ISDN TA to an available COM port on your PC, and turn on the device. Exit all
programs that may be using your modem or the IDSN TA (also fax programs).
Configuration
l
l
Start CamControl PRO and click Setup. The Receiver options dialog box opens. In the Options list click
one of the connection channels, for example Port A. Deactivate the TCP/IP option if necessary. From the
drop-down list in the Modem group, select Mode = Normal. From the Port drop-down list, select the COM
port to which you connected the modem or the ISDN TA. From the Baud drop-down list, select a suitable
serial transmission speed (ISDN connections: 115200 Baud, analogue connections: 38400-115200
Baud). In the Init.prefix field you can enter an AT command to initialise your modem (see “Port A to Port D
or Port 1 to Port 9” on page 87). In the Prefix 1 field enter "ATD".
Click OK. The dialog box closes, and the software initialises the connected modem.
Transmitter data
l
Click Dial. The Transmitter index now opens. Click Add. In the Transmitter data dialog box that now
opens, enter the name and the telephone number of a HeiTel-compatible transmitter in the corresponding
fields. You can find a suitable transmitter in the demo transmitter list (on the information CD) for example.
Ensure that Prefix 1 is selected. Now confirm your details with OK. The Transmitter data dialogue box
closes, and you find yourself back in the Transmitter index.
Establishing a connection
l
The Transmitter index is still open. The desired transmitter is highlighted in the transmitter list. Now click
Dial. The software starts dialing and establishing a connection.
Online
l
Once a remote connection has been established and the transmitter settings have been loaded, image
transmission starts. The status bar contains information on current data reception.
4.1.3
Dial-up connection with internal ISDN card or LAN CAPI (quick
start)
Connection
l
Install your internal ISDN card in your computer in line with the manufacturer's instructions, and then
install the drivers with CAPI support. If using LAN-CAPI, install the driver for this type of CAPI support on
your computer.
Requirements
Due to the fact that CamControl PRO cannot use internal ISDN cards and LAN-CAPI applications directly via
CAPI, you must use a special driver for virtual COM ports (see “Communicating with CAPI devices via Fossil
drivers” on page 293). Assign your communication device a virtual COM port.
27769_02
13
CamControl PRO Software Manual
HeiTel by Xtralis
Configuration
Start CamControl PRO and click Setup. The Receiver options dialogue box opens. In the Options list click
one of the connection channels, for example Port A. Deactivate the TCP/IP option if necessary. From the
dropdown list in the Modem group, select Mode = Normal. From the Port drop-down list, select the COM port
to which you connected CAPI as a virtual COM port. From the Baud drop-down list, select a suitable serial
transmission speed (115200 Baud). In the Init.prefix field you can enter an AT command to initialise your
virtual modem (see “Port A to Port D or Port 1 to Port 9” on page 87). In the Prefix 1 field enter "ATD". Then
click OK. The dialogue box closes, and the software initialises the virtual COM port through which CAPI
support is implemented.
Transmitter data
l
Click Dial. The Transmitter index now opens. Click Add. In the Transmitter data dialog box that now
opens, enter the name and the telephone number of a HeiTel-compatible transmitter in the corresponding
fields. You can find a suitable transmitter in the demo transmitter list (on the information CD) for example.
Ensure that Prefix 1 is selected. Now confirm your details with OK. The Transmitter data dialog box
closes, and you find yourself back in the Transmitter index.
Establishing a connection
The Transmitter index is still open. The desired transmitter is highlighted in the transmitter list. Now click Dial.
The software starts dialing and establishing a connection.
Online
l
Once a remote connection has been established and the transmitter settings have been loaded, image
transmission starts. The status bar contains information on current data reception.
4.1.4
Connecting via network, TCP/IP connection (quick start)
Requirements
l
In order to be able to operate a HeiTel transmitter in a network, you need a PC with a network connection
and configured TCP/IP protocol or an active Internet connection.
Configuration
l
Start CamControl PRO. Click Setup. The Receiver options dialogue box opens. In the Options list click
one of the connection channels, for example Port A. From the drop-down list in the Modem group, select
Mode = Off. Select the TCP/IP option. Then click OK.
Enter telephone number
l
Click Dial. The Transmitter index opens. Click Add. The Transmitter data dialogue box now opens. Give
your transmitter a name in the Transmitter name field. In the IP address/Telephone number + dial prefix
field enter the IP address of a HeiTel-compatible transmitter (e.g., IP address: 62.214.6.11 or symbolic IP
address: camdisc1.svr10.demo.heitel.com). Make sure to separate the individual fields of the IP address
with dots. If you are using a symbolic IP address, there must be three dots before the address. Now
confirm your details with OK. The Transmitter data dialogue box closes, and you find yourself back in the
Transmitter index.
Connection
l
14
The Transmitter index is still open. The desired transmitter is highlighted in the Transmitter list. Now click
Dial. The software starts to establish a connection.
27769_02
HeiTel by Xtralis
CamControl PRO Software Manual
Online
l
Once a remote connection has been established and the transmitter settings have been loaded, image
transmission starts. The status bar contains information on current data reception.
4.1.5
Connecting via the USB connection (quick start)
Requirements
l
In order to be able to operate a HeiTel transmitter (only CamDisc VG 4 and 10, CamTel VG 4 and 10 or
Cam4mobile VG 4 and 10) using a USB link, you need a PC with a USB connection and the driver which
has been supplied needs to be installed (see Installation of the USB driver for HeiTel Video Gateways on
page 294.
Requirements CamServer 2, CamServer 2c, CamDisc SVR 4s, CamDisc SVR 10s, CamDisc HNVR
l
In order to be able to operate a HeiTel transmitter (only CamDisc SVR 4s and 10s, CamDisc HNVR,
CamServer 2c and CamServer 2, produced from 2009 onwards) using a USB link, you need a PC with a
USB connection and the driver which has been supplied needs to be installed (see “Installation of the
USB driver for CamDisc HNVR, CamServer 1, CamServer 2, CamServer 2c, CamDisc SVR 4s and
CamDisc SVR 10s” on page 300).
Requirements VG devices
A requirement for USB operation with HeiTel Videogateways CamDisc SVR 4s and 10s (serial no
WS206xxx/WV206xxx and higher), CamDisc HNVR (serial no NV206xxx and higher) and CamServer 2c
(serial no WC211xxx and higher) and CamServer 2 (serial no WD206xxx and higher) is a PC with a USB port
and correctly installed USB driver (see "Installing the USB driver for the VG-series " on page 301).
Configuration
l
Start CamControl PRO. Click Setup. The Receiver options dialogue box opens. Now in the Options list
click Extras. Check in the USB section whether the option Transmitter index with USB node is activated
or switch it where necessary to be active. Then click on the OK button.
Connect
l
Click on the Port A or Port 1 button. The Transmitter index opens. In the top position on the Transmitter
list, you will find USB direct connection. Select this and then click on the Select button. The software
starts to establish a connection.
Online
l
Once the connection has been established and the transmitter settings have been loaded, image
transmission starts. The status bar contains information on current data reception.
Note:
27769_02
Like the null modem connection, connecting via USB serves primarily to put the device into
operation or to modify the parameters. In addition, the USB direct connection can also be used to
export image archives directly on the device.
15
CamControl PRO Software Manual
4.2
HeiTel by Xtralis
Starting the program
Once you have successfully installed CamControl PRO on your PC, you can start the program either by
clicking the program icon on the desktop or by selecting Start/Programs/CamControl PRO/CamControl PRO
(or by selecting the path you chose during installation Start/Programs/Your_name/CamControl PRO).
4.2.1
Logging on and off
User logon
If you configured one or more users in User Management (see “User” on page 80), then the User-identification
dialogue box opens on program start. You are requested to enter a user name and password. Pay attention to
spelling because user name is case sensitive.
If after clicking OK one of the entries is incorrect, a warning signal is emitted and the cursor moves to field
containing the incorrect entry. CamControl PRO will not start until the user has logged on correctly. This
process is logged in the event tree (see “Event tree” on page 22) together with the user name.
User logoff or change
. If User Management is active, the User identification dialogue
To exit the software, click
box prompts you to re-enter your password before the program closes. It is also possible to switch users by
entering another valid user name and password. Both program end and user change are logged in the event
tree.
Note:
4.2.2
If there is one or more active connections to transmitters, the first time you click Close all
connections are closed.
Initialisation
All important system components are configured and initialised as far as possible on program start. If an error
occurs, the corresponding message will appear. Do not ignore these messages. Deal with the underlying
cause. Possible causes include:
l
l
l
l
l
l
16
Selected COM interface does not exist
COM ports have be multiply assigned by other programs, ports or the serial channel
CAPI driver not installed
Fossil driver not installed or incorrectly installed for an internal ISDN card or LAN-CAPI
Incorrect AT command during initialisation of modem or ISDN TA
Modem or ISDN TA not switched on during initialisation or connected to a different COM port
27769_02
HeiTel by Xtralis
CamControl PRO Software Manual
Modem and ISDN TA initialisation
If you are using modems or ISDN TAs to transmit images, these are initialised one after the other on program
start. The AT command entered in the Init.prefix field in the Receiver options for the port in question (e. g.,
Port A) is used (see “Port A to Port D or Port 1 to Port 9” on page 87). This procedure is shown in the
corresponding dialogue box. If errors occur, the dialogue box remains visible for an extended period of time
and displays the error message of the terminal device.
4.3
The Program Interface
The program interface of CamControl PRO is divided into several functionally-distinct sections. This makes
working with the software as simple and intuitive as possible.
4.3.1
Overview of basic functions
The main panel
Full transmitter operation
In the main panel, you can establish a connection to HeiTel transmitters, accept alarm calls or perform tours.
Once a connection to a transmitter has been established, all control and display elements for accessing and
controlling the transmitter become available. CamControl PRO automatically detects the type of transmitter in
question and adjusts its functionality and display accordingly.
27769_02
17
CamControl PRO Software Manual
HeiTel by Xtralis
The side panels
You can establish connections, accept alarm calls and perform tours in the side panels, just like in the main
panel. Generally speaking, each side panel has the same functions as the main panel, but not all of the
controls for complete transmitter control are visible.
Switching between main and side panels
Left-clicking in one of the side panels automatically switches it to the main panel so that all operating features
are available. You can switch panels like this any time regardless of the connection status of the panel (online
or offline). When you switch the view in the main panel, the configured operating mode stays the same. Live
images from the selected transmitter also continue to be received in the side panel in the same size and
quality.
Some operating modes are, however, adapted to the side panel. For example, the video images from multiimage viewing modes such as Quadscreen, Ten screen viewing mode or the display of camera groups are not
shown in the side panel next to one another but one after the other.
Lower control panel:
Event tree and transmitter-specific information
Lower control panel
Underneath the main panel and the side panels on the left, you will find the three additional buttons PC
Archive, Setup and Close.
l
l
l
Clicking
63)
opens the PC receiver archive (see “Receiver archive (PC archive)” on page
Clicking
opens the Receiver options dialogue box of CamControl PRO (see
“Receiver Software Settings” on page 77). Due to the fact that this is where you make important basic
software settings, it cannot be opened if there is an active connection to a transmitter in one of the four
windows.
Clicking
closes CamControl PRO. If there is at least one active connection to a
transmitter however, clicking this button only closes active connections first.
Event tree
The event tree provides you with an overview of CamControl PRO events. The event tree logs events uses
both symbols and plain text together with the time and date to log events such program start with user name,
user change, program over, connection start, connection closed, configuration changes to transmitters and
the receiver software. You will find a detailed description of the event tree in the next section (see “Event tree”
on page 22).
Transmitter-related information
In this window you can provide operating personnel with additional information on the transmitter whose
images are shown in the main panel (see “Transmitter-specific information” on page 23).
Window title bar
The window title bar contains the program name, CamControl PRO, and the version number. The name of the
transmitter currently connected and displayed in the main panel is indicated in square brackets. If the
transmitter has not been given a name, its serial number appears here (see “Device” on page 122).
18
27769_02
HeiTel by Xtralis
CamControl PRO Software Manual
Status bar
The status bar provides some information on current image transmission. The fields have the following
meanings (from left to right):
l
l
F1 help
Reason for connection
Message
Event
Online
Normal receiver call
Online/Timer
Tour
Online/Alarm
Alarm call triggered by the alarm input
Online/Alarm camera name
Alarm call triggered by camera control
input
Online/Alarm alarm panel’ camera Alarm call triggered by alarm panel via
name
VdS 2465 protocol
l
l
l
l
Online/Alarm camera name
(triggered control input)
Alarm call triggered by control input on
the CI Adapter or CIO Adapter
Online/Motion camera name
Alarm call triggered by motion (internal
motion sensor)
Online/Alarm Reboot
Alarm call triggered by a device restart
Online/Video loss camera name
Alarm call triggered by the loss of video
signal
Online/Camera pos
authentication camera name
Alarm call triggered by camera position
authentication
Online/Alarm enable input
Status change of the alarm enable input
Online/Callback
Callback by transmitter
Online/HDD Error
Alarm call triggered by hard disk error of
the image storage device
online/sabotage triggered control
input
Alarm call triggered by sabotage of a
control input (connection type BS8418)
online/sabotage camera name
Alarm call triggered by sabotage of a
camera control input (connection type
BS8418)
online/sabotage camera name
(triggered control input)
Alarm call triggered by sabotage of a
camera control input (connection type
BS8418 on a CIO interface)
Size of the last picture received in kilobytes
Percentage indication of the progress of current image transmission for Port A to D (from left to right).
Number of users currently dialed in (only for HeiTel VG device series and for CamDisc HNVR,
Cam4mobile, CamServer, CamDisc SVR and CamTel SVR)
Camera number / image format / image quality
27769_02
19
CamControl PRO Software Manual
4.4
HeiTel by Xtralis
Establishing a connection
With CamControl PRO you can establish a connection to transmitters, carry out tours automatically and
process incoming calls / alarms or have them processed.
4.4.1
Establishing a connection through multiple channels
CamControl PRO has multiple connection channels, called Port A, Port B, Port C and Port D as well as
Port 5, Port 6, Port 7, Port 8 and Port 9 in the software's basic settings. The main panel and the respective
side panels have a button for each of these ports.
You can configure and name the individual ports in Receiver options (see “Port A to Port D or Port 1 to Port 9”
on page 87). A connection is established in the connection window where you clicked the button.
Dial-up and TCP/IP connections
For ports with dial-up (ISDN and analogue) communication settings, clicking the connection button opens the
Transmitter index (see “Configuring the transmitter index” on page 96) dialogue box.
Direct connections
If certain connection channels are configured in such a way that they use neither a dial-up nor a TCP/IP
connection, but instead are connected to a transmitter either via the HeiTel-specific null modem cable or via a
dedicated line (see “Port A to Port D or Port 1 to Port 9” on page 87), the Transmitter index dialogue box does
not open before the connection is established because it is not needed for direct connections.
To establish a connection to a transmitter, click Port A, Port B, Port C, Port D, Port 5, Port 6, Port 7, Port
8 or Port 9. Select the desired transmitter from the alphabetically-sorted Transmitter list in the Transmitter
index dialogue box.
Select the transmitter you want to connect to from the transmitter list in the Transmitter index dialogue box.
Clicking Dial initiates a call to the selected transmitter. Double-clicking the desired transmitter entry also
initiates dialing.
If you click the triangle next to
, an additional menu with the ten last dialled transmitters opens. Clicking
one of these entries also starts dialling the transmitter in question (see “Dialling into a transmitter” on page 97).
20
27769_02
HeiTel by Xtralis
CamControl PRO Software Manual
Direct connection
If your transmitter is connected directly to the receiver PC by means of the special null modem cable or a
dedicated line, the Transmitter index does not appear. Once you click the relevant Port button, the process of
establishing a connection starts immediately.
Dedicated line
If the transmitter is connected via a dedicated line and the receiver software is correspondingly configured, an
attempt is made to establish a connection every 20 seconds, even if the relevant Port button has not been
clicked (see “Port A to Port D or Port 1 to Port 9” on page 87).
4.4.2
Automatic tours
CamControl PRO allows you to access certain transmitters automatically at preset times in one of the
connection windows and to receive a configurable number of video images from selected cameras. You also
have the option of receiving acoustic and visual notification when a tour is carried out.
Tours are controlled automatically. If you move the tour from a side panel to the main panel, the
button in the main control panel gives you back full control of the procedure.
Note:
Once you switch to manual operation, you have to carry out all aspects of operation, including
establishing a connection. You cannot switch back to automatic operation.
Tours are described in more detail in the chapter on Receiver options (see “Tours” on page 93).
4.4.3
Accepting calls / processing alarms
You have four ways of accepting calls, which you can configure in Receiver options.
l
l
Do not accept call: The receiver PC does not accept any calls.
Accept call manually: When a call is incoming (null modem cable, modem or ISDN TA), a dialogue box
reports which port is receiving the call, e.g.: Port A: Call. If a sound card has been installed, an alarm
signal is also given via the connected speaker. If there is no sound card, incoming calls are notified by
means of short warning signals through the PC speaker. You can Accept or Ignore the call.
Notes:
l
l
Manual call acceptance is not available for network connections (TCP/IP).
l
Accept call automatically: Incoming calls/alarms are accepted automatically. You have the option
of receiving visual and acoustic notification.
In the case of transmitters with camera inputs (configured accordingly), the camera allocated to the
alarm-triggering input is switched on.
l
Accept call and auto. operation: In this operating mode, alarm processing takes place fully
automatically. You have the option of receiving visual and acoustic notification.
If you click Manual in the main control panel, after having switched the call/alarm from a side panel to
the main panel if necessary, you receive fully control of the procedure once again.
Once you switch to manual operation, you have to carry out all aspects of operation, including
establishing a connection. You cannot switch back to automatic operation.
27769_02
21
CamControl PRO Software Manual
HeiTel by Xtralis
The different ways of accepting calls are described in more detail in the chapter on Receiver options (see
“Take a call” on page 78).
4.4.4
Starting connection in different views
In manual mode, you can also start CamControl PRO in a view other than full screen mode. You can choose
between zoom, quadscreen or 10-screen viewing mode. The initial view is configured with Receiver
options/Extras (see View at start of connection” on page 81) or via CAMCTRL.INI (see "Specifying the initial
view” on page 265)
4.4.5
Event tree
The event tree contains an overview of the last max. 4000 events. The entries consist of event nodes that
may contain lower levels of additional information. Each entry consists of a symbol, the time and date of the
event, a code number (which may also include the serial number of the connected transmitter) and the actual
message in plain text.
The following events are saved:
l
Program start with user name
l
User change
l
Program end
l
Connection start
l
Alarm
l
Tours
l
Manually-established connection
l
Callback
l
Status of the alarm enable input
l
Change to recorder settings
l
Connection closed
l
Configuration of receiver options
Event list
In addition to the event tree, there is also a list of events in file format. Important events are permanently
saved in this file, thus making them available for subsequent analysis. The event list with the file name
CC4LOG.TXT is located in the CamControl PRO program directory.
Note:
If you want to access the event list while CamControl PRO is running, create a copy of
CC4LOG.TXT for further processing. In such a way you prevent loss of data, because as long as
this file is being used exclusively by another program, CamControl PRO cannot continue to add
entries to the list.
The following events are logged together with time and date:
l
l
l
l
22
Program start, with user name if available
Program over, with user name if available
User change
Connection start with transmitter name, transmitter serial number and reason for connection if available:
l
Online = normal receiver call
l
Online/Timer = Tour
l
Online/Alarm = Alarm call triggered by alarm input
l
Online/Alarm camera name = Alarm call trigger by camera input or motion detection
27769_02
HeiTel by Xtralis
CamControl PRO Software Manual
Online/Recall = Transmitter callback
Online alarm enable input = Change to the status of the alarm enable input
Connection closed
l
Offline
l
l
l
All the entries in this list are saved in a unified Excel-compatible format so that you can edit it using a text
editor or import it into a spreadsheet.
4.4.6
Transmitter-specific information
Transmitter-specific information refers to additional texts that may contain important information on the object
under surveillance. You can provide operating personnel for example with the address of the property, alarm
lists or action plans.
Adding transmitter-specific information
To save new transmitter-specific information or expand existing information, activate text input for the active
transmitter by double-clicking this text field. The information will be saved in the TRINFOS sub-directory of
the program directory. The file format is YZxxxxxx.INF and contains the serial number of the transmitter as
the file name.
Offline amendment
If you want to save additional information on a transmitter and you know its serial number but there is no
active connection to it, then using a text editor create a file in the TRINFOS sub-directory of CamControl PRO
in line with the following example:
YZxxxxxx.INF with YZxxxxxx = transmitter serial number
In this file record the information that you want CamControl PRO to show you when displaying the transmitter
in question in the main panel. This text can be up to 8000 characters (8 KB) with a maximum viewable line
length of 58 characters.
4.4.7
Closing the connection
If you want to end the connection in the main panel, click Hang up. If at least one transmitter is active, then
clicking Close once ends all connections, both in the main panel and in the side panels.
4.5
Software screen displays
The following section describes major functions, views and display variations available during an active
connection.
4.5.1
The main panel
The details of this view on your screen may vary from the one illustrated depending on the transmitter model in
use.
27769_02
23
CamControl PRO Software Manual
HeiTel by Xtralis
Image quality
You can adjust the quality of transmitted images in line with your requirements using the slider. Select a lower
image quality for a higher refresh rate. If you need high detail definition, then select a correspondingly higher
image quality. Image quality is configured separately for each camera. Once a connection has been
established, the image qualities configured in the transmitter are used (see “Video settings” on page 176).
Adjusting the image display
Depending on the display size selected for the CamControl PRO program window and the image quality
selected, the slider is supplemented on the left-hand side by an up/down control. This up/down control for
adjusting the image size is only provided for the normal view in connection with images displayed in an
enlarged size. You can use this control to vary the display size of the live images. The images can be reduced
in size down to the original size such as 128 x 80 pixels at lowest image quality. These settings are stored
separately for the respective image quality and are retained even after ending the program.
24
27769_02
HeiTel by Xtralis
CamControl PRO Software Manual
Adjusting the image display for IP cameras
Since the images from IP cameras can be of different resolutions, the live images transferred are inserted into
the intended place according to the view selected. Depending on the resolution of the IP camera used, the
image is either compressed or stretched out whilst retaining the proportions.
If necessary, use
to display the image in its original size. Click on this button again to insert the image
again in the intended location.
If the space available is sufficient to display the image in full, no switch takes place.
If the image of the IP camera is displayed in its original size, the mouse pointer changes to a hand symbol
when held over the image section of the IP camera. With this hand and by simultaneously holding down the
left mouse button you can move the image section within the display field.
27769_02
25
CamControl PRO Software Manual
HeiTel by Xtralis
Camera selection
Underneath the displayed image, you can switch between the cameras of the active transmitter by clicking
the various camera buttons. In Recorder settings you can enter transmitter-specific camera names to be used
as labels for the Camera buttons (see “Camera settings” on page 146).
Live camera with no video signal
If a camera is selected when no video signal input is connected, the missing video picture is indicated by the
HeiTel device with the symbol shown here.
Covered live camera
If a camera is selected where its lens is covered, the missing video picture is indicated by the HeiTel device
with the symbol shown here.
No live image of an IP camera
If a camera channel is selected whose live image is to be supplied by an IP camera and its HeiTel device does
not receive any such images, the message No video available will be displayed.
26
27769_02
HeiTel by Xtralis
CamControl PRO Software Manual
Possible causes are indicated in the section on how to configure the IP camera (see “No image from IP
camera” on page 245).
Note:
The number of camera buttons varies according to the number of video inputs that the various
transmitter types have.
Activity messages from cameras
If you have connected the corresponding transmitter inputs with camera control inputs and programmed the
transmitter accordingly, the button labels change colour (red and black) according to the status of the
connected inputs. In such a way it is easy to localise activities to the relevant inputs (see “Camera control
inputs” on page 167).
Activity messages from cameras in the multi-image display
In all multi-image displays (Quadscreen, Ten, Camera Group), the video image from a camera for which the
associated incoming camera message has been triggered is enclosed in a red frame. In Mainscreen or Zoom
mode, the message is signalled as previously using a change in the font colour on the corresponding camera
button.
Note:
No signalling is given if the corresponding camera is not switched on in the Quadscreen or Camera
Group mode.
Acoustic message and automatic camera switching
It is possible both to signal this change acoustically and to automatically switch to the relevant camera.
Configuration takes place in a transmitter specific R01 file (see “Extended software settings” on page 276).
27769_02
27
CamControl PRO Software Manual
HeiTel by Xtralis
Error relay
SVR devices as well as CamDisc HNVR, Cam4mobile and CamServer have an error relay that signals a
notifiable operating mode. CamControl PRO signals this status by means of a red error relay LED. An
operating fault (e.g. no video signal) or notification of a certain operating mode (e.g. storage warning threshold
reached) may be involved. Evaluating the transmitter logfile will provide more precise information on the actual
cause (see "Accessing the transmitter logfile" on page 47).
Alarm enable input
The red LED display in front of the text "Device armed" indicates that the alarm enable input is switched to
ground.
Relays
The current VG and SVR devices, CamDisc HNVR, Cam4mobile, CamServer and some older HeiTel
transmitters have two relays. The buttons for controlling these relays are located underneath the camera
buttons. You can configure these two relays in line with your requirements in Recorder settings (see “Relays”
on page 208):
l
l
l
l
l
l
l
Relay as latch or as an with automatic reset on connection being closed
Relay as momentary with adjustable switching time
Closed while connected
Closed on error
Closed while recording
Closed while alarm
Closed while alarm enabled
Note:
If the relays have not be configured as momentaries or switches, the corresponding buttons do not
appear on the program interface.
Keeping program window on top
You can configure CamControl PRO in such a way that the program window is always on top and cannot be
covered by other programs. Only windows with the same attribute are not covered. The necessary entry can
be configured in the CAMCTRL.INI configuration file. Further information on changing this entry can be found
in the relevant section (see “Program window [SCREEN]” on page 267).
Alternatively, this option can be defined using Receiver options/Extras (see “Extras” on page 81).
28
27769_02
HeiTel by Xtralis
4.5.2
CamControl PRO Software Manual
Changing screen view
CamControl PRO allows you to choose between different viewing modes when accessing live images in the
main panel. When you click
a menu containing the different viewing modes opens:
The software provides you with the following viewing modes:
Quadscreen
This multi-image viewing mode shows you four live images in the main
panel at the same time. By clicking the + and - buttons located
underneath the images, you can select different cameras for this viewing
mode as necessary.
Ten
This overview display shows live images from ten cameras at the same
time. This viewing mode is only available for transmitters with more than
four camera control inputs.
Fullscreen
The live image from the camera in the Mainscreen viewing mode is
enlarged in the main panel. The control panel to the left of the full image,
the LEDs and the Relay buttons are all hidden. The Camera buttons and
the image quality slider are still available. A button to switch to
Mainscreen viewing mode is also available.
Mainscreen
This is the default viewing mode of CamControl PRO.
27769_02
29
CamControl PRO Software Manual
HeiTel by Xtralis
Camera groups
For the SVR devices, CamDisc HNVR and Cam4mobile, you can define
up to five camera groups, each with between a minimum of two and a
maximum of nine cameras, for transmitters with ten camera control
inputs. For transmitters with four camera control inputs, you can define
up to two groups that group two or three cameras for one view. Camera
groups are defined in Recorder settings (see “Camera groups” on page
147).
Left mouse button
You can also change the viewing mode by clicking one of the image
windows in the main panel. This allows you to toggle quickly and easily
between Fullscreen and Mainscreen viewing mode. Left-click in one of
the images of the Quadscreen, Camera groups or Ten screen displays to
switch back to Mainscreen viewing mode and switch to the selected
camera.
Note:
Transparent data
transmission
4.5.3
Please note that the images are always saved in the receiver
archive in the configured quality and size. Image quality in
Quadscreen, Camera groups and Ten screen viewing mode is
less compared to the other viewing modes in order to facilitate
a quick overview of the connected cameras. You can adjust
the live image quality for SVR devices in Recorder settings
(see “Live video settings” on page 141).
The CamDisc HNVR, CamDisc SVR, CamTel SVR, Cam4mobile and
CamServer models also have a serial interface that you can use to
transparently transfer data between the transmitter in the main panel and
the receiver PC. During image transmission you can transparently
transfer any data between a device connected to the external serial
interface of the transmitter (see “Serial channel” on page 212) (e.g., a P/T
head) and a device connected to the receiver PC (see “Serial Channel”
on page 92) (e.g., operating panel for the P/T head).
To synchronise the date and time, you can configure Cam4mobile so
that it is possible to receive IBIS data via this interface (see “IBIS
function with Cam4mobile” on page 214).
Displaying GPS data
If, once a connection has been established, a HeiTel video system supplies valid GPS data and if the
connection is displayed in the main window, the position data and the current speed including further
additional functions are displayed on the following dialogue box:
Display of the dialogue box is compulsory when valid GPS data is received.
Note:
4.5.3.1
Ensure that the serial interface of the HeiTel video system is programmed correctly (see “GPS
function for Cam4mobile/Cam4mobile VG” on page 214).
GPS Live window
In addition to position data and the current speed, the GPS Live window offers additional functions relating to
the display of the position or the route in Google Earth or OpenStreetMap.
Note:
30
Please note the licence terms and conditions of use for Google Earth or OpenStreetMap.
27769_02
HeiTel by Xtralis
CamControl PRO Software Manual
Window title bar
Alongside GPS the window title bar includes the word Live when displaying live images. The following date
and time display shows when this data was received or recorded. Whilst valid data records are being
received, GPS data is updated by the HeiTel video system approximately every three seconds and is also
recorded with the image data where necessary. In the case of a live image connection, the video system
transfers the GPS data to the CamControl PRO software at the same rate.
When the Site Archive or the PC Archives are accessed, alternate window titles arise:
l
l
l
Site Archive: GPS Site Archive (see “Accessing GPS data” on page 46)
PC Archives: GPS Archive (see “Accessing GPS data” on page 74)
GPS data and speed
The GPS position data is specified in the form geographical latitude geographical longitude. For the current
speed you can choose between three units of measure via
l
l
l
toggle switch:
km/h: Kilometres per hour
mph: Miles per hour
kn: Knots (sea miles or nautical miles per hour)
Note:
The accuracy of GPS data is always limited. Even with a static location, the position data can still
therefore vary and a speed in excess of zero be displayed.
A revolving globe signals that valid GPS data records are being received. If GPS reception is disturbed, the
GPS signal is not sufficiently strong or the connection to the GPS receiver is interrupted, the globe will stop
revolving after approximately 30 seconds without valid GPS data. The font colour for position and speed
changes from green to red and instead of valid position data the following warning is displayed:
For temporary disturbances, the last determined positioned data and the speed is shown in red.
toggle switch to the right below the globe to switch from the standard display of GPS information
Use the
to an enhanced GPS window (see “Extended GPS (Live) window” on page 31). You can only switch between
both display modes if valid GPS data has been received or saved. Otherwise the button will be deactivated.
4.5.3.2
Extended GPS (Live) window
The extended GPS Live window contains the controls for use of Google Earth or OpenStreetMap.
Notes:
l
l
Concerning the Google Earth application:
l
Please note the licence terms and conditions of use for Google Earth.
l
For commercial use Google Earth Pro software is available, for which a charge is payable. There is
also Google Earth Enterprise which is offered as a company solution.
l
Please consult the Google Earth user manual for further information on usage.
l
Please note that HeiTel Digital Video GmbH has no influence over and assumes no liability for the
function and availability of services obtained from other parties.
Concerning the OpenStreetMap application:
l
Please note the licence terms and conditions of use for OpenStreetMap.
l
Please consult the OpenStreetMap user manual for further information on usage.
l
Please note that HeiTel Digital Video GmbH has no influence over and assumes no liability for the
function and availability of services obtained from other parties.
27769_02
31
CamControl PRO Software Manual
HeiTel by Xtralis
Choosing between Google Earth and OpenStreetMap map display
Starting with CamControl PRO software V3.85, the control elements described below for the extended GPS
window are deactivated for a new installation of the CamControl software and are greyed out. If, with the
installed CamControl PRO software, you want to use the additional control elements from the GPS window,
please install the GPS Data Viewer (see “Installation of the GPS Data Viewer” on page 308). During the
installation, you can choose whether to use Google Earth or OpenStreetMap to represent the position data on
the map. If necessary, prior to usage install the following Google Earth controls.
32
27769_02
HeiTel by Xtralis
Show
position
CamControl PRO Software Manual
Click Show Position to open Google Earth or OpenStreetMap and
display the current position of the video system. You may need to press
this button twice. A yellow arrow indicates the current location of the
sender according to the GPS data transferred. The serial number of the
video system is displayed, prefixed with the device name if necessary.
For OpenStreetMap, a green arrow indicates the current location of the
sender according to the GPS data transferred. In addition, the serial
number of the video system can be displayed, prefixed with the device
name if necessary, including date and time, by clicking with the mouse
on the position indicator.
Auto
If you enable the Auto option, every new position is automatically
displayed in Google Earth.
Note:
Track
27769_02
Please activate this option only after opening Google Earth or
OpenStreetMap.
If you enable both the Track option and the Auto option, the individual
positions are automatically displayed in Google Earth joined together by
lines. Depending on the update interval, you can follow the track on the
map.
33
CamControl PRO Software Manual
Update
interval
HeiTel by Xtralis
You specify the update interval for automatic display (Auto) from the
dropdown menu. You can choose from the following values 1 s, 2 s, 4 s,
10 s, 20 s, 30 s, 45 s, 60 s, 120 s, 180 s, 300 s and Off.
On the GPS Live window the interval relates to the date on which GPS
data is received. On the GPS Archive and GPS Site Archive windows, it
relates to the time interval between the recorded images.
If necessary you can enter a suitable time to reduce the update
frequency and give the Google Earth or OpenStreetMap software more
time to locate and update the position. You can also adjust the density of
positions when the Track option is enabled.
Delete
Use the Clear button to delete all entered positions on the map.
Close map
Google Earth is closed.
Google Earth or OpenStreetMap update interval
The default setting for the Google Earth or OpenStreetMap update interval can be adjusted:
l
l
l
l
l
34
Locate the GPSTr0100.ini file in the program directory of your CamControl software.
Open the file with an editor.
In the Options section, locate the entry msGoogleInterval:
[Options]
msGoogleInterval=1000
If necessary, change the default setting of 1000 milliseconds.
Save the file.
27769_02
HeiTel by Xtralis
4.6
CamControl PRO Software Manual
Accessing CamDisc HNVR, CamDisc SVR, Cam4mobile
and CamServer
HeiTel uses removable hard drives in its CamDisc HNVR, CamDisc SVR, and Cam4mobile devices to save
image sequences. These can be continuous recordings or event recordings. In the case of event recording,
not only are the alarm-triggering images saved. In transmitter configuration you can define a pre-alarm
sequence and a post-alarm sequence to be saved with the alarm images as a complete event.
With the exception of removable hard drives, the statements in the above paragraph also apply to CamServer.
This device is only equipped with a fixed installation hard drive. In order to keep the instructions concise, the
section below refers only to CamDisc SVR devices, although the statements are also applicable to CamDisc
HNVR, Cam4mobile and CamServer. In cases where there are more significant differences, this is indicated
accordingly.
Optimised image recording
Conditional refresh is set by default for CamDisc SVR devices. This means that only those parts of the video
images that have changed are recorded. Recording conditional refresh images considerably reduces the
required storage capacity. Conditional refresh is also advantageous because it allows more images to be
saved on the data carrier compared to full images, and it facilitates more effective data transmission to the
receiver PC at narrow bandwidths.
Note:
4.6.1
Images are formed gradually in conditional refresh mode. Under certain conditions this could result
in black blocks appearing in the image. These blocks are successively completed as the image
continues to be expanded.
Accessing the Site Archive
The devices in the CamDisc SVR series have a removable hard disk for multi-track recording. The images for
the individual camera tracks are saved as continuous recordings and/or event recordings in the Transmitter
archive. Transaction data can also be recorded.
If the receiver software is connected to the CamDisc SVR, CamDisc HNVR, CamServer or Cam4mobile via
button opens a pop-up menu in which you can select
a TCP/IP connection, clicking the
between Evaluation with optimal functionality and Evaluation with optimal speed.
Note:
4.6.1.1
Using Recorder settings/User, you can define the authorisations for the different evaluation formats
given to each respective user (see “User” on page 80). The selection referred to above is only
displayed where there is an authorisation for both types of evaluation.
Evaluation with optimal functionality
This extended access to the archive provides all CamControl PLAYER functions. You can access the archive
over a TCP/IP connection using virtually all functions that are available when locally accessing a removable
hard drive. The access speed is limited by the bandwidth of the TCP/IP connection.
The menu bar has an additional symbol
in the top right-hand corner, indicating a network data transfer. A
rotating two-colour ring in the online version of the CamControl PLAYER indicates the data transfer.
Evaluation with optimal functionality uses a discrete TCP/IP port. This port can be changed if necessary in
the file CAMCTRL.INI (see “TCP/IP port for Evaluation with optimal functionality” on page 257).
27769_02
35
CamControl PRO Software Manual
Note:
4.6.1.2
HeiTel by Xtralis
If you select Evaluation with optimal functionality, archive evaluation always takes place using the
maximum available bandwidth of the connection. The bandwidth limit programmed in the device
(see “Maximum transmission speed” on page 131) is ignored when this function is selected. If
necessary, select Evaluation with optimal speed (see “Evaluation with optimal speed” on page 36)
since this function takes the bandwidth limit into account.
Evaluation with optimal speed
When you select this option, the following classic evaluation dialogue opens:
Classic evaluation dialogue
Once you have established a connection to your transmitter in the main panel, you can open the Transmitter
archive dialogue box by clicking
. CamControl PRO first loads the event list.
The Transmitter archive is divided into two areas. The top section contains functions for navigating the
extensive archive. The middle section contains the archive tree with camera track nodes and a breakdown
according to recording type for each camera track. Nodes for recorded transaction data of POS systems can
also be shown.
Notes on archive access
In conditional refresh mode, paging backwards is significantly slower than paging forwards for technical
reasons.
If images with more than one image per second have been saved, then either the first or the last image in this
sequence (with the same timestamp) will be shown as a search result. This depends on whether you are
searching forwards or backwards from the current image.
36
27769_02
HeiTel by Xtralis
CamControl PRO Software Manual
Saving image sequences in the receiver archive
When playing back image sequences from the CamDisc SVR archive, these images will only be saved in the
receiver archive if you did not select the Preview option. Furthermore, the Archive active option must be
selected in Receiver options/Archive options (see “PC Archive” on page 84). If images are being saved, this is
indicated by the word Recording in red.
Transmitter archive controls
Archive access is controlled with the buttons at the top of the Transmitter archive dialogue box:
Show previous day
Show next day
First (oldest) image of the event or continuous recording
One image back
Stop play (Stop)
Play
One image forward
Last (most recent) image
Event back (only for event recordings)
Event forward (only for event recordings)
Save image
This function saves the current images with a checksum in JPEG
format. The checksum allows you to check, using the image authenticity
check of the CamControl PLAYER or the software integrated into
CamControl PRO for accessing the PC archive, whether an image has
been manipulated. The image file is saved by default in the SNAPSHOT
sub-directory of the CamControl PRO program directory. The image
name contains the name of the transmitter, the serial number, the
camera name and number, and the time and date. For example:
CamDisc SVR 10 #1 CV500006 2_camera 2 29_08_05 09_15_47_
01.JPG
Print picture
This function allows you to print the current image to your computer's
default printer with the following information:
Software name and version number
Transmitter name [serial number]
Camera number: Camera name, date and time of image recording
Printing date
27769_02
37
CamControl PRO Software Manual
HeiTel by Xtralis
Configuration parameters and image information
Image search according to time and date
If you know the time and date of the recording you are looking for, then you can access the relevant image in a
sequence directly by entering this information.
Preview
The sequence is not saved in Playback mode if the Preview option is selected. If the Record preview images
option in Recorder options/Video X in (see “Recording (Video 1-2/4/10 in)” on page 192) is selected, the
sequence is shown at the lower resolution of 256 x 128 pixels for a faster overview. If the Record preview
images option is not selected in Recorder options, the sequence is played back at normal resolution (but is not
saved).
Playback speed
Clicking the arrow between the Playback and Last image buttons opens a list in which you can set the
playback speed. The ability to adjust the playback speed is particularly useful for fast TCP/IP connections. In
such a way you can adjust the playback speed, and also archiving if necessary, in line with your needs.
The system and the bandwidth of the connection to the transmitter are the decisive factors influencing
playback speed. The settings in this menu do not generally affect the actual playback speed when working
with low bandwidth connections.
Status bar with operating status and number of images
The operating status of the transmitter archive is shown on the left of the status bar. The number of images in
the currently active sequence is shown on the right:
l
l
#images from continuous recording (multi-track recording)
#images from event recording (multi-track recording)
Image number Date & Time
When playing back image archives, the camera name is shown on the left underneath the image in the main
panel, while the current image number with respect to the total number is shown on the right underneath the
image in the main panel, together with the time and date of the current image. An asterisk * in front of the
image number indicates that an archive image is in the process of being transmitted.
Event list of the transmitter archive
In the case of multi-track recording, the camera tracks are initially arranged hierarchically in the event list in
the lower section of the Transmitter archive.
38
27769_02
HeiTel by Xtralis
CamControl PRO Software Manual
The camera track node, with camera number and name, branches into
the various levels of the data and image recording.
The transaction data nodes indicate that POS data have been recorded
for the camera track in question via a POS adapter. A separate dialogue
box opens to access this information (see “Accessing POS data” on
page 40).
This node indicates image continuous recording for the camera track in
question (see “Accessing continuous recordings” on page 39).
This node identifies event-based image recording. The events in
recordings of this kind are broken down further according to year, month,
date, time and event type (see “Accessing event recordings” on page
40).
Please note that devices in the CamDisc SVR series can save both
continuous and event recordings within one camera track depending on
the how the device (see “Recording (Video 1-2/4/10 in)” on page 192) is
configured. Double-click the relevant node to switch between the
different recordings.
Accessing continuous recordings
Double-click a continuous recording to open the last image in the recording. The recorded images for a single
day can be accessed using the slider. The values on the top left and bottom right indicate the start and end
times of the recording period. You can select an image within this view using the slider. The control elements
listed above are also available (see “Transmitter archive controls” on page 37).
27769_02
39
CamControl PRO Software Manual
HeiTel by Xtralis
Accessing event recordings
The current event in event recordings is identified by this symbol.
You can select an event in an event controlled recording by its date and trigger type (I/S/M). In the slider the
pre-alarm images are shown in green, the alarm image in red and the post-alarm images in yellow. Once you
have selected an event, the software shows the image that triggered the alarm with a red frame. If you play
back the entire alarm sequence using the control elements (see “Transmitter archive controls” on page 37), the
pre-alarm images are framed in green and the post-alarm images are framed in yellow.
Time nodes:
Calendar node: Branches into the underlying time levels (year, month,
day)
Hour node: Branches to the events
Event types:
Input event: Triggered by a control input (e.g. camera control input)
Motion event: Triggered by device-based motion detection
Serial event: Triggered by serial command
Accessing POS data
Another node in the tree structure of the event list indicates the
availability of transaction data. Click the button in front of the transaction
data node to open a dialogue box in which you can access these data.
Every camera track with transaction data has its own node and therefore
its own access dialogue box.
Control Elements
The transaction data dialogue box has the following control elements:
First (oldest) receipt
Previous receipt
Next receipt
Last (most recent) receipt
CamControl PRO provides you with two ways of accessing recorded transaction data.
The Transaction data of camera X dialogue box (where X stands for the camera track in
question and varies between 1 and 2, 1 and 4 or 1 and 10 depending on the video system
being used) has two search modes: Date & time search and the Text & price search.
40
27769_02
HeiTel by Xtralis
CamControl PRO Software Manual
Simple Date &
time search
Enter the Date of the search start or select it using the calendar function.
You can enter the Time of the search start in hours, minutes and
seconds using the buttons next to the time input box or using the
keyboard.
Click Search to start the search. The first sales receipt recorded after
the specified search start is returned. If there are no sales receipts after
this specified time, the last (most recent) sales receipt recorded is
returned.
You can navigate the search result using the toolbar buttons First
receipt, Previous receipt, Next receipt and Last receipt.
27769_02
41
CamControl PRO Software Manual
HeiTel by Xtralis
Text & price
search (POS
data)
In the Time window area you can define both the Start and End of the
search period by entering the Date and Time. Alternatively, you can
select all transaction data allocated to the camera track in question by
clicking Select all.
You can specify up to four text under Search parameter. You can also
specify a price if you wish. When checking the price you can choose
between <= (less than or equal to), = (equal to) or >= (greater than or
equal to). You can link all the selected parameters for the transaction
data search using the logical operators AND or OR by making the
relevant selection from the Search items combined drop-down list. In
addition to this combined search, you can also search according to
individual criteria, price only for example.
Now use the First sales receipt or Last sales receipt toolbar buttons to
jump to the first / last transaction that fulfils these search criteria. Sales
receipt back or Sales receipt forward shows the previous / next sales
receipt that fulfils the search parameter. Matches with the search criteria
within the sales receipt are marked in red line by line.
If there are no more results that meet your criteria, the following message
appears: "Search text could not be found."
42
27769_02
HeiTel by Xtralis
CamControl PRO Software Manual
Text & price
search
(ATM data)
If you are using a HeiTel POS/ATM Adapter as the source for transaction
data, you can specify the type of data recording. A distinction is made
between POS and ATM data. Depending on the data type, the search
options are different:
l
l
POS data (see “Text & price search (POS data)” on page42)
ATM data (see “Text & price search (ATM data)” on page43)
Using ATM search you can define the criteria you would like to use for
the search:
Transaction number, Account number, Bank code number, Amount
and/or General. When checking the amount you can choose between the
operators <= (less than or equal to), = (equal to) or >= (greater than or
equal to). You can link all the selected parameters for the ATM search in
the transaction data either using the logical operators AND or OR by
making the relevant selection from the Items combined by drop-down
list. In addition to this combined search, you can also search using
individual criteria such as price.
Saving
Clicking the Export transaction data to file button saves all the
transaction data transactions recorded for this camera track in a text file. The data in text
file are saved in an Excel-compatible format so that they can be imported
into a spreadsheet.
Note:
Printing a data
record
27769_02
The Export transaction data to file option is available only
for the Evaluation with optimal functionality or during an offline
evaluation of the removable hard disk via the CamControl
PLAYER.
Clicking the Print current data record button prints the data of the
current sales receipt with the associated image. The following
information is also printed out: file name with path name, serial number of
the transmitter, camera name with time and date.
43
CamControl PRO Software Manual
HeiTel by Xtralis
Synchronisation When accessing camera tracks with transaction data, the
of image and
Synchronisation function provides the following two options:
sales receipt
l
Update image from receipt: When selecting transaction data, the
first time-relevant image in a sequence is shown.
l
Update receipt from image: When playing back image data, the
associated receipt is shown.
Accessing IBIS data
In contrast to the POS and ATM transaction data, IBIS data is not transmitted to your HeiTel video system via
an intermediate POS/ATM Adapter, but rather only via a connected IBIS Adapter with appropriate
configuration of the serial interface.
Another node in the tree structure of the event list indicates the
availability of IBIS data. Click the button in front of the IBIS data node to
open a dialogue box in which you can access these data. Only Camera
track 1 with IBIS data has its own node and therefore its own access
dialogue.
The IBIS data dialogue box offers the same buttons as operating
elements as are found in the Transaction data (see “Control Elements”
on page 40) dialogue box.
CamControl PRO provides you with two ways of accessing recorded
IBIS data. On the IBIS data dialogue box: 1 the search options Date &
time search and Text & price search are offered:
Simple Date &
time search
Enter the Date of the search or select it using the calendar function. You
can enter the Time of the search start in hours, minutes and seconds
using the buttons next to the time input box or using the keyboard.
Click Search to start the search. The first sales receipt recorded after
the specified search start is returned. If there are no sales receipts after
this specified time, the last (most recent) sales receipt recorded is
returned. You can navigate the search result using the toolbar buttons
First receipt, Previous receipt, Next receipt and Last receipt.
44
27769_02
HeiTel by Xtralis
CamControl PRO Software Manual
Text & price
search (IBIS
data)
In the Time window area you can define both the Start and End of the
search period by entering the Date and Time. Alternatively, you can
select all IBIS data allocated to the relevant camera track by clicking
Select all.
Using IBIS search you can define the criteria (Wagon number, Line,
Course, Station) you would like to use for the search. For the selected
search options you can also define text strings as filters. You can link all
the selected parameters for the IBIS data search using the logical
operators AND or OR from the Items combined by dropdown list. In
addition to this combined search, you can also search using individual
criteria, station only for example.
Now use the First receipt or Last receipt toolbar buttons to jump to the
first or last IBIS data record that fulfils these search criteria. Previous
receipt or Next receipt shows the previous / next data record that fulfils
the search parameter. Matches with the search criteria within the data
record are marked in red by line. If there are no more results that meet
your criteria, the following message appears: "Search text could not be
found."
Saving IBIS data Click the Export transaction data to file button to save all of the IBIS
data recorded for this camera track to a text file. The data belonging to
this text file is saved in an Excel-compatible format to enable it to be
imported into a spreadsheet.
Note:
Printing a data
record
27769_02
The Export transaction data to file option is available only
for the Evaluation with optimal functionality or during an offline
evaluation of the removable hard disk via the CamControl
PLAYER.
Clicking the Print current data record button prints the data of the
current data record with the associated image. The following information
is also printed out: file name, serial number of the transmitter, camera
name.
45
CamControl PRO Software Manual
HeiTel by Xtralis
Synchronisation When accessing camera tracks with transaction data, the
of image and
Synchronization function provides the following two options:
sales receipt
l
Update picture from data: When selecting transaction data, the first
time-relevant image in a sequence is shown.
l
Update data from picture: When playing back image data, the
associated sales receipt is shown.
Evaluating Soyal data
In contrast to the POS and ATM transaction data, Soyal data is not transmitted to your HeiTel video system
via an intermediate POS/ATM Adapter, but instead only via a connected Soyal Card Reader with appropriate
configuration of the serial interface.
The evaluation is conducted in the same way as the evaluation of ATM data described above (see “Text &
price search (ATM data)” on page 43). The following options are available as possible search filters:
l
l
l
l
l
Armed status
Change in armed status
Card ID
Card reader ID
Card valid/invalid
Accessing GPS data
If valid GPS data exists for the current image data of the Site Archive, the following dialogue box may open
automatically:
Explanation of buttons
A detailed explanation of the buttons can be found in the section on the GPS Live dialogue (see “GPS Live
window” on page 30) and on the extended GPS Live dialogue (see “Extended GPS (Live) window” on page 30).
Differences in the evaluation of the Site Archive
When you access the Site Archive you can if necessary choose between two different procedures for archive
image evaluation:
l
l
Evaluation with optimal functionality: The display of the dialogue box is not compulsory when evaluating
archive images with valid GPS data:
l
Use the GPS-Viewer button or the View/GPS-Viewer function to show or hide the GPS dialogue box.
Evaluation with optimal speed: The display of the dialogue box is compulsory when evaluating archive
images with valid GPS data.
Exiting the Site Archive
To exit the Site Archive, click
for the active transmitter in the main panel or close the
Transmitter archive dialogue box in question. If the associated dialogue boxes for accessing transaction data
are also open, then these are closed as well.
46
27769_02
HeiTel by Xtralis
4.6.2
CamControl PRO Software Manual
Accessing the transmitter logfile
Transmitters with an integrated removable hard disk, such as the CamDisc SVR devices, log all important
events in the transmitter logfile. Any errors that occur (e.g., "No video signal on input 01"), as well as the
reaching of critical operating statuses (e.g., the complete utilisation of the hard drive with active overwrite
protection) are recorded in this file. You will find an overview of the logfile entries in a separate section of this
guide (see “Logfile entries (only CamDisc HNVR, CamDisc SVR, Cam4mobile, and CamServer as well as
VG Series))” on page 285).
Error relay
CamDisc SVR transmitters report critical operating statuses via the integrated error relay. CamControl PRO
signals this status by means of a red error relay LED (see “Error relay” on page 28). In this case be sure to
check the transmitter logfile in order make certain that the transmitter is operational.
Logfile
To open the logfile of the active CamDisc SVR transmitter, click
. The logfile starts
transmitting and can take some time depending on the size of the file and the connection. All the entries with
date, time and a brief description in English are then shown in the Transmitter logfile dialogue box. Use the
tabular overview (see “Logfile entries (only CamDisc HNVR, CamDisc SVR, Cam4mobile, and CamServer
as well as VG Series))” on page 285) to evaluate the logfile entries.
Resetting the error relay
Once the transmitter logfile has been fully transmitted, the error relay is reset.
Saving logfile to receiver PC
CamControl PRO allows you to automatically save the transmitter logfile to the receiver PC after it has been
successfully transmitted. You can activate this function by making the relevant entry in the CAMCTRL.INI
configuration file (see “Saving the transmitter logfile” on page 264). The saved logfiles are stored in the
CBLOG sub-directory of your CamControl PRO program directory in the format YZxxxxxx.LOG (YZxxxxxx =
transmitter serial number). The logfiles from video systems with battery-buffering (currently only CamServer
2c with serial number WCxxxxxx) may also be saved in the CBLOG subdirectory. The file format for these
logfiles is YZxxxxxx.TXT (YZxxxxxx = transmitter serial number).
4.6.2.1
Extended evaluation dialogue for battery-buffered logfile
The extended evaluation dialogue is only available for HeiTel video systems with a battery-buffered logfile ( CamServer 2c: WCxxxxxx). The minimum requirement for the evaluation of this logfile is the CamControl
PRO software version 4.02
27769_02
47
CamControl PRO Software Manual
HeiTel by Xtralis
Storage capacity
The battery-buffered logfile permits 16,383 lines of up to 64 characters each to be stored (approx. 1 MB). In
parallel to this, the transmitter logfile may also be written to a removable storage medium (removable hard disk
or CF). This logfile has 1024 lines with up to 64 characters each (approx. 64 KB). If the maximum number of
lines is exceeded, the oldest entry is always overwritten when a new line is created (FIFO).
In the extended evaluation dialogue, you can generally change the sorting of the entries by clicking on the
column headings (Type, # (sequential number), Date, Event).
Type column The Type column shows the category of each logfile entry: Error, Action
or Information. These categories are available as a filter for the logfile
(see “Filtering the logfile” on page 48)
# column
(sequential
number)
The # column (sequential number) contains the current number of an
event. The numbering is essentially assigned such that the latest event
when the logfile is called up is given the number 1.
Date column In the Date column, the date and time are shown in the ISO 8601 format.
Event
column
Event
number
The Event column shows the individual events in a short text format. For
more information on this topic, please refer to the section "Logfile entries
(only CamDisc HNVR, CamDisc SVR, Cam4mobile, and CamServer
as well as VG Series)on page 285). In addition, you can use the Filter,
Time window, Search, Print and Clipboard menus under logfile to
influence various functions and views.
On the right underneath the events, there are two numbers
that provide information about the number of events in the format
[currently displayed events/total number of events stored in the logfile]. If
the number of events is reduced by the Filter and/or Time window, the
left-hand value always shows the number of events that are currently
displayed.
Filtering the logfile
When the logfile information is written, the individual events are always divided into categories: Error, Action
or Information.
48
27769_02
HeiTel by Xtralis
CamControl PRO Software Manual
If the three options Error, Action and Information are enabled, the logfile is displayed without any restrictions.
You can reduce the scope of the displayed results by disabling individual categories. Another option for
restricting the scope of the logfile is the time window.
Logfile time window
While filtering (see “Filtering the logfile” on page 48) restricts the number of displayed results by category, you
can also limit the timeframe using the Time window options. By default, the Select all option is enabled.
Restricting the time window
Once you have disabled the Select all option, you can limit the Time window using the date and time settings
for Start and End. Changes to the date and time have a direct effect on the number of events displayed.
Note:
To limit the number of events, the Filter and Time window functions can be combined.
Searching in the logfile
Using the Search function, you can search for event texts in large logfiles. To do this, enter the search term
into the input window.
27769_02
Search next
With the Search next button, you start a search from the current cursor
position within the logfile or continue a search. The search stops at every
search term found. A counter underneath the button shows how many
hits there are. Event texts that contain a hit are highlighted in dark blue. A
change to the search criteria clears the display of the hits.
Clear
Clicking the Clear button removes the current search term from the input
window. The display of the number of hits is cleared at the same time.
Whole word
If the Whole word option is enabled, you restrict the search to a term that
must match the search term as a whole word.
49
CamControl PRO Software Manual
Search from
start
HeiTel by Xtralis
If the Search from start option is enabled, you make sure that the
search starts from the first item in the selected list. If this option is
disabled, the search starts from the current position within the list.
Printing out logfile data
You can print out the logfile using the Start printing ... button.
Note:
Only
selected
lines
If you enable the Only selected lines option, you only print out the lines in
the logfile that have been previously selected. The lines are selected
using the usual Windows method.
All without
filter
With the All without filter option, the list of logfile entries is printed out
without taking the filter function into consideration (see “Filtering the
logfile” on page 48).
Please note that the symbols indicating the event type are converted into corresponding letters
when printed out (see “Filtering the logfile” on page 48).
Logfile data on the clipboard
Using the Copy to clipboard button, you can use logfile data in other applications or documents.
Note:
50
Only
selected
lines
If you enable the Only selected lines option, you only copy to the
clipboard the lines in the logfile that have been previously selected. The
lines are selected using the usual Windows method.
All without
filter
With the All without filter option, the list of logfile entries is copied to the
clipboard without taking the filter function into consideration (see
“Filtering the logfile” on page 48).
Please note that the symbols indicating the event type are converted into corresponding letters
when copied to the clipboard (see “Filtering the logfile” on page 48).
27769_02
HeiTel by Xtralis
4.6.3
CamControl PRO Software Manual
Pre-recorded Audio Tracks
CamControl PRO allows to transmit pre-recorded audio tracks to a connected transmitter. The transmitter will
play these tracks on site.
Notes:
l
l
l
l
l
l
l
l
Up to 16 audio tracks are possible.
The audio tracks must be stored in the subdirectory “AudioTracks” that is generated automatically during
the installation of CC LITE.
In case CC LITE is used as CC Client within EMS (v 1.70 or higher) Audiotracks are provided via EMS
DB and stored on the Server PC not in the sub directory “AudioTracks”. The configuration must be done
using the data management module.
Audio tracks can be selected in the normal view <main screen> via a button located on the left panel.
Audio button or menu are blocked during playback on site.
Audio button or menu are blocked in case of a lack of user rights.
This function need firmware releases: VG 4.18 or higher, other 2.30 or higher
Supported are only wav files with PCM 8 kHz sampling rate, 16 bit, 1 channel up to 10MB file size.
Configuration file (CamControl 4.ini)
27769_02
51
CamControl PRO Software Manual
HeiTel by Xtralis
All keys to configure HTconnect have been transferred from section [EXTRA] to section
[HTCONNECTCTRL].
In case the configuration file already exists the following key are copied automatically an marked as obsolete:
[EXTRA]
HTCONNECTSVR=OBSOLETE
HTCONNECTSVRPORT=OBSOLETE
In any case it is recommended to check the settings in dialog windows <receiver settings/ htconnect>.
4.6.4
Accessing CamDisc archive offline
If you have removed the removable hard disk of your CamDisc HNVR, CamDisc SVR or Cam4mobile
transmitter or if you have replaced it, you can access the saved image data and logfile offline.
The functions available here are generally the same as for accessing the receiver archive (see “Offline
Access” on page 63). The CamControl PLAYER guide describes how to access all HeiTel archives in detail.
Note:
An offline evaluation is only possible on devices with removable hard drives such as CamDisc
HNVR, CamDisc SVR and Cam4mobile. On CamServer this evaluation option is not available
because the hard drive is permanently installed in the device.
4.7
Accessing CamTel SVR and CamTel VG
Pre-alarm image storage
The CamTel SVR and CamTel VG devices have a pre-alarm image storage device. Images are saved on a
FIFO basis (first in first out). The oldest images are replaced by new recordings after a certain period of time.
The four or ten storage areas (depending on the model) prevent other cameras from overwriting the recorded
images however.
Note:
52
For IP cameras there is no storage of pre-alarm images.
27769_02
HeiTel by Xtralis
4.7.1
CamControl PRO Software Manual
Accessing pre-alarm images
to
Once you are connected to an active CamTel SVR transmitter in the main panel, click
open the Transmitter archive dialogue box. The most recent image of the first camera with pre-alarm images
automatically opens. If the Pre-alarm button is disabled, there are no images in the transmitter archive. In this
case, check whether the pre-alarm function has been activated for at least one camera under Recorder
settings/Alarm/Pre-alarm (see “Pre-alarm (CamTel VG and CamTel SVR only)” on page 164).
Transmitter archive controls
Archive access is controlled with the buttons at the top of the Transmitter archive dialogue box:
Show first (oldest) image
One image back
One image forward
Play the pre-alarm sequence from current image position
Last (most recent) image
Changing
camera
Using the Camera buttons, you can switch between the individual
cameras in the same way as during live operation.
Image
When playing back transmitters archives, the camera name is shown on
number Date the left underneath the image in the main panel, while the current image
& Time
number with respect to the total number is shown on the right underneath
the image in the main panel, together with the time and date of the
current image. An asterisk * in front of the image number indicates that
an archive image is in the process of being transmitted.
Archiving in
the PC
archive
If you have activated the receiver archive in the Receiver options/PC
Archive options of CamControl PRO, the received transmitter archive
images are also saved (see “PC Archive” on page 84). When you are
accessing the PC archive these images are identified in the status bar
with the entry * Archive *.
Exiting pre-alarm images
Clicking
27769_02
exits the transmitter archive, and live image transmission resumes.
53
CamControl PRO Software Manual
4.8
HeiTel by Xtralis
PTZ control and remote adapter
CamDisc HNVR, CamDisc SVR, CamTel SVR, Cam4mobile and CamServer transmitters come equipped
as standard with a directly connect remote control interface for PTZ cameras. You can remotely control all the
important functions of up to two, four or ten cameras with customised menus and buttons via an existing
remote data transmission or network connection between the relevant transmitters and CamControl PRO. As
remote camera control is one of the main applications, the remainder of this section deals with this function.
This section also contains information on the R16 Adapter, which can be used to extend the devices with 16
relays.
4.8.1
Operating PTZ control
Installing control protocols
Before you can use the integrated PTZ control, you must install the relevant data protocols for your camera
system so that incoming remote control commands from CamControl PRO can be converted into control
commands that are compatible with the camera system in question, for example, a dome. The installation
procedure is described in Recorder settings (see “PTZ control” on page 210).
PTZ control operation
CamControl PRO automatically provides you with easy-to-use control elements for various remote options.
4.8.1.1
PTZ control in full-format and zoom view
CamControl PRO now also offers direct PTZ control by means of the Windows mouse pointer in the fullformat and zoom views in addition to the controls in the PTZ window (see “Classic PTZ control” on page 56).
Mouse pointer appearance
When you move the mouse pointer over the live image in full-format (Fullscreen) or zoom view, the
appearance of the mouse pointer changes depending on where it is located:
l
l
54
Direction arrows: When the mouse pointer is displayed as one of the eight possible direction arrows, the
connected PTZ camera will be tilted or panned in the indicated direction when the left mouse button is
pressed.
Z+ and Z–: The camera zoom functions are controlled by pressing the left mouse button when these
pointers are shown.
27769_02
HeiTel by Xtralis
l
l
l
CamControl PRO Software Manual
F+ and F–: The camera focus functions are controlled by pressing the left mouse button when these
pointers are shown.
Default mouse pointer: The default mouse pointer is shown when the pointer is located in the middle of
the image. When you press the left mouse button, the view changes from full-format to zoom or viceversa.
Right clicking: When you right click within the live or zoom view, this opens the PTZ window, which
contains corresponding PTZ controls and a miniature view of the live image (see “Classic PTZ control” on
page 56).
Alternative zoom control using the mouse wheel
From version 4.41, CamControl PRO supports zoom control using the mouse wheel. Zooming (zoom in or
zoom out) occurs for 0.5 seconds after the mouse wheel is operated once. Operating it again within this
timeframe extends the zooming by a further 0.5 seconds. The window with the video image to be zoomed
in/out must be active in order for the mouse wheel to be used in this way. If necessary, the window may have
to be selected with a mouse click.
Note:
4.8.1.2
The PTZ functions on an IP camera do not occur continuously, but must be repeatedly called up
with a mouse click. This behaviour may also be reflected in the use of the mouse wheel for the
zoom function.
PTZ control via USB joystick CamControl RU
In order to use the PTZ control via the USB joystick CamControl RU, it is necessary for this functionality to be
enabled via the CAMCTRL.INI (see “PTZ control via USB joystick” on page 262).
USB joystick CamControl RU
The USB joystick CamControl RU has three axes (X, Y and Z) and twelve buttons. The X- and Y-axes of the
joystick control the pan and tilt functions, while the zoom functions are controlled with the Z-axis by twisting
the upper part of the joystick. Using the twelve buttons, you can also call up presets for the camera, as
defined in an R01 file. The presets that can be called up correspond to the preset functions 1 to 12 stored on a
button panel (see “List box and button panel for PTZ control” on page 57).
27769_02
55
CamControl PRO Software Manual
HeiTel by Xtralis
16 presets
Up to 16 presets are supported in total, if the joystick used also provides this number of different buttons.
4.8.1.3
Classic PTZ control
The classic PTZ control is activated by right clicking once in the full-format (Mainscreen) or Zoom display.
This option is recommended particularly for low bandwidth connections. Due to the transmission of the live
images in low resolution, this allows for a higher refresh rate.
The lower latency interval between the control action and the transmission of the live image as response
means that reproduction of the PTZ control is facilitated even at low bandwidth fluid.
PTZ control
If the active transmitter in the main panel has a PTZ camera, select the camera in question by clicking the
relevant Camera button. Right-click the video image in mainscreen or fullscreen viewing mode to open a
dialogue box to control the camera's PTZ functions. The changes are shown in the preview screen of this
window. Click the arrow buttons to control the panning and tilting functions. The Z+ and Z- buttons allow you
to control the zoom function, while the F+ and F- buttons are for controlling the focus. Click OK to close this
dialogue box. A live image in line with the preview is then shown in mainscreen or fullscreen viewing mode.
PTZ control via keyboard
You can control the direction using the following keys:
PTZ control
56
key
PTZ control
key
27769_02
HeiTel by Xtralis
CamControl PRO Software Manual
Cursor up
Page up
Cursor right
Page down
Cursor down
Home
Cursor left
End
Use the following key for zoom and focus:
PTZ control
4.8.1.4
key
PTZ control
key
Insert
+ (Numerical pad)
Delete
- (Numerical pad)
List box and button panel for PTZ control
In both PTZ control options, a list box and a button panel are available if these have been defined with a
corresponding R01 file for the respective transmitter.
List Box
If your PTZ camera has additional functions such as fixed positions, automatic camera tours, configuration
commands or such like, you can select these from a list box. CamControl PRO automatically opens an
operating panel when you select a relevant camera.
Button panel
A button panel with up to 16 buttons can also be configured for special functions; this panel is displayed when
you select the associated camera. You can trigger a variety of remote control commands with these buttons,
which you can label as you wish.
Configuring list box and button panel
You can configure and customise the list box and button panel using socalled R01 files (see “Function and
structure of R01 files” on page 272).
27769_02
57
CamControl PRO Software Manual
4.8.2
HeiTel by Xtralis
Using the R16 Adapter
You have the option of connecting a R16 Adapter to devices in the CamDisc HNVR, CamServer, CamDisc
SVR and CamTel SVR series. The remote adapter has 16 relays for remotely controlling additional switching
functions.
Button panel
A button panel with up to 16 buttons can also be configured for special functions; this panel is displayed when
you select the associated camera. You can trigger a variety of remote control commands with these buttons,
which you can label as you wish. A number of additional functions are also available:
l
l
l
You can configure different commands for clicking and releasing the buttons.
You can configure commands that are sent when a button is clicked and repeated at variable intervals
until this button is released.
Instead of the buttons having a toggle function, you can also define them as switches.
Configuring the button panel
You can configure and customise the button panel using so-called R01 files (see “Function and structure of
R01 files” on page 272).
4.8.3
Global switching procedures
In addition to PTZ control and the R16 adapter, which are generally camera specific, you can also define
global switching procedures.
Position of control elements
If you define global switching procedures (i. e. switching procedures that are to be available irrespective of the
selected camera) in the transmitter-specific R01 file, the corresponding control elements are shown to the
right of the relay button of devices. These control elements involve a drop-down list for selecting the function
and a button for activating/deactivating the previously selected function.
First select the required function for the button from the dropdown list. You can then switch this function on
and off by clicking the button.
With the exception of zoom viewing mode, the control elements for global switching procedures are available
for the entire duration of the connection. Once you switch to a side panel, no other control elements are
shown.
58
27769_02
HeiTel by Xtralis
CamControl PRO Software Manual
Configuration of control elements
Global switching procedures are configured in a transmitter-specific R01 file (see “Function and structure of
R01 files” on page 272).
4.8.3.1
CIO Adapter relays as global switching elements
If a CIO Adapter is connected to the video system, the eight CIO Adapter relays are displayed as global
switching elements.
Relay selection
Using the dropdown menu, you select the relay concerned and switch it using the button below, as described
above.
Designation of the relay buttons
The standard naming the relay buttons for the CIO Adapter is relay 1 to relay 8 However, you can change the
naming of the buttons in the R01 file (see "Variables to rename the relay of the CIO Adapter" on page 276).
27769_02
59
CamControl PRO Software Manual
4.9
HeiTel by Xtralis
Audio transmission
The SVR devices, CamServer and Cam4mobile can be equipped with the optional Audio Card. In such a way
you can use a "push-to-talk" function to converse (talk and listen) with the object under surveillance simply
through a sound card installed in the receiver PC, because the bidirectional digital audio signal is transmitted
in voice quality.
For CamDisc HNVR and CamDisc VG HNVR devices, audio functionality is implemented in the basic
version. Duplex audio (live audio transmission and audio recording) is possible with the use of firmware V1.92
or higher and CamControl PRO V3.92 or higher.
Audio control
Once you have activated a transmitter equipped with an audio card in the main panel, the push-to-talk button
for audio control appears on the bottom right of the screen. This button is divided into two and facilitates three
types of operation:
The microphone button is not activated by default, in other words, the
audio data transmitted from the transmitter are output via the sound card
of the receiver PC (listening).
If you click the microphone button, audio signal is received through the
sound card in the receiver PC and sent to the transmitter (speaking).
When you release the mouse button, the microphone button reverts to
the default setting and the software works in listening mode.
If you click the lock button once, the microphone button stays pushed in
so that you don't have to keep the mouse button pressed while talking.
To release this function, click the button again.
Classic audio mode
If you want to continue using the normal audio function with separate buttons for listening and speaking, then
set the MODE=0 parameter in CAMCTRL.INI in the [AUDIO] section (see “Audio mode [AUDIO]” on page
268).
60
27769_02
HeiTel by Xtralis
CamControl PRO Software Manual
When the speaker button is activated, the audio data being transmitted
from the transmitter are output through the sound card of the receiver PC
(listening).
When the microphone button is activated, audio signal is received
through the sound card in the receiver PC and sent to the transmitter
(speaking).
Depending on the application, you can activate or deactivate the listening and speaking functions under
Recording settings/Audio (see “Audio” on page 206).
Quality of audio transmission
The quality of audio transmission will be significantly influenced by the other components of the audio system
(e.g., cables, microphone and speaker), as well as their physical arrangement.
27769_02
61
CamControl PRO Software Manual
HeiTel by Xtralis
This page is intentionally left blank.
62
27769_02
HeiTel by Xtralis
5
CamControl PRO Software Manual
Offline Access
In addition to providing you with online access to live images, the site archive for CamDisc HNVR, CamDisc
SVR, Cam4mobile and CamServer and all HeiTel VG VideoGateways (see “Accessing CamDisc HNVR,
CamDisc SVR, Cam4mobile and CamServer” on page 35)) and pre-alarm images for CamTel SVR and
CamTel VG (see “Accessing CamTel SVR and CamTel VG” on page 52), CamControl PRO also allow you to
access the receiver archive offline. If configured accordingly, CamControl PRO saves all received video
images in the PC Archive. You can make this setting under Receiver options/PC Archive options (see “PC
Archive” on page 84). There are extensive search functions available for accessing the receiver archive
offline. You can also export image sequences and print out or save individual images. Alternatively, you can
use the CamControl PLAYER for offline access.
5.1
Receiver archive (PC archive)
Notes on the receiver archive
l
l
Video images are only saved when the receiver archive is activated.
The PC system time is used as the time basis for the saved images.
Image quality and resolution in the receiver archive
All video images are saved in the quality and resolution with which they were received. In Fullscreen or Zoom
viewing modes this corresponds to the slider setting underneath the video image. The video images in the
overview modes Quadscreen, Groups and Ten are transmitted and saved with low live image quality by
default in SVR and VG devices. You can adjust the quality of live images for individual cameras and the
overview modes under Recorder settings/Live video settings/Live transmission quality (see “Live video
settings” on page 141).
Storage concept
Unlike CamControl LITE, CamControl PRO does not save the video images received from different
transmitters in one single archive file. Instead it creates separate files for each call in a folder structure. In
such a way you can individually save calls to other media or delete them from the archive.
Constant access
The video images from past calls saved in the receiver archive can be accessed at any time, even during
image transmissions. The receipt of incoming alarms or performance of tours is in no way limited by
accessing the archive. Only the video images that are saved in the receiver archive during a currently active
image transmission can be viewed with the archive access software after the connection or recording has
completed. You could also set up a second workstation for access with the CamControl PLAYER software
only.
Storage capacity
Because all calls are archived in individual files, it is possible to save up to 2 GB of video image data per call.
The size of the entire receiver archive is only limited by the size of the hard drive.
27769_02
63
CamControl PRO Software Manual
HeiTel by Xtralis
Individual calls
The files for the individual calls only gradually grow to their preset maximum size, so no hard drive space is
used up unnecessarily. When the maximum size for the individual call is reached, you receive a message and
recording is stopped.
This method of saving ensures that the images received at the start of a connection or an alarm are always
retained.
FIFO storage method
The CamControl PRO saves the received video images one after each other in the receiver archive. When the
maximum size of the receiver archive is reached, the oldest images and calls are gradually overwritten. The
FIFO method of storage ensures that you always have up-to-date data without you having to intervene and
delete out-of-date data. The archive can reach up to 2 GB in size or store up 1400 individual calls with the
corresponding hard drive capacity.
The maximum archive size of 2 GB is valid only for FAT formatted hard drive partitions. On NTFS formatted
hard drive partitions, the archive size is limited to a maximum of 512 GB.
Image manipulation
Only with great effort can the digital image data be modified and returned to the archive files. For this reason, it
can be assumed that the archive only contains image data received from a transmitter. You can also verify the
authenticity of individual saved images however.
Directory structure and file names
The receiver archive is generally accessed using CamControl PRO. Here you can access all the individual
archives of the receiver archive via a dialogue box, so you must have a detailed understanding of the file and
directory structure. You can even delete archive files that are no longer necessary with the access software
using dialogue boxes (see “Deleting archive files” on page 74).
Directory structure
In case you need to access the receiver archive manually, to create a backup copy of certain archive files to a
different medium for example, the structure will now be described in brief.
64
27769_02
HeiTel by Xtralis
CamControl PRO Software Manual
Archive directory
CamControl PRO has an ARCHIVE sub-directory in the program directory of the software by default. You can
however specify a directory of your choice in Receiver options/PC Archive options (see “PC Archive” on page
84).
Transmitter directory
A further directory level contains the directories of the individual transmitters. The name of each directory is
the serial number of the transmitter in question.
Day directory
Each transmitter directory has a further level containing directories named according to the date of recording.
These directories are named according to year, month and day: 05_08_29 corresponds to 29/08/2005.
Receiver archive
CamControl PRO creates two corresponding files in the day directory for each call of the day in question.
These two files together constitute a valid receiver archive. The files have the same time saved in the file
name, but they have different file endings. Possible combinations include:
l
l
l
*.HDA and *.HIA = Alarm call
*.HDT and *.HIT = Tour or timer call
*.HDR and *.HIR = normal receiver call
Note:
5.1.1
When backing up individual archives, make sure that they each consist of two corresponding files.
You will always need these two files to access backed-up archives. Always save the two archive
files together.
Accessing receiver archive
in the lower control panel. A separate program
To access the PC receiver archive, click
window opens with the CACO4 Archive Browser dialogue box in which you can select a specific archive. The
left-hand side of the window shows the next higher level, while the next lower level of the level selected on the
left is shown on the right.
27769_02
65
CamControl PRO Software Manual
HeiTel by Xtralis
Archive selection
If you select the archive node Transmitter, the transmitters (with transmitter name and serial
number) that have archive files in the receiver archive are shown on the right. If no transmitter
name was entered in the device, only the serial number is shown.
The next level contains the individual transmitter nodes followed by the transmitter name
with serial number.
The next level contains the day nodes with the date.
If you click one of the day nodes, the individual archives with symbol for call type, time, type
(T/A/no letter code) and the call type in plain text are shown on the right.
Tour: T
Alarm call: A
Manual call: No letter code
Loading an
archive
66
You can load the selected archive by either double-clicking it or clicking Load in the CACO4
Archive Browser dialogue box.
27769_02
HeiTel by Xtralis
5.1.2
CamControl PRO Software Manual
Image search controls
Status bar
The status bar contains the following information from left to right:
l
l
l
l
l
l
The number of the current call and the number of all the connections saved in the archive
The reason for connection in the case of alarm calls (alarm) and tours (tour)
The camera number and camera name
The current image number and the total number of images saved in this call
Date
Time
Images from the transmitter archive
Video images that come from the Site archive or a transmitter's pre-alarm are identified with the word *
Archive * and the image number assigned in the transmitter archive, both of which appear in yellow on a black
background in the time and date fields.
Search controls
You can control archive access with the buttons located above the status bar. You also have the functions in
the Picture menu.
First (oldest) picture of the call
Play backwards
Previous picture
Stop play (Stop)
Next picture
Play forwards
27769_02
67
CamControl PRO Software Manual
HeiTel by Xtralis
Last (most recent) picture
You can select the playback speed for the archive with this drop-down
list. You can choose between 1 fps (frame per second), 5 fps, 10 fps, 15
fps, 20 fps, 25 fps, maximum possible number of images per second
(Max. fps) and Realtime. If you select Max. fps, the playback speed
depends on the performance of the accessing PC.
This button starts the time-based search within the selected PC receiver
archive. In the Date time search dialogue box that opens, you can set
these two parameters. After you click Search the closest image in the
PC receiver archive is shown.
CameraIf you want to restrict the image search within the archive to a particular
selective
camera, then you can select a camera or the transmitter archive in single
image search image viewing mode from the drop-down list with the camera symbol or
by right-clicking the fullscreen image. The image search is restricted
accordingly. If you select Transmitter archive, the search is restricted to
images from the Site archive or the Pre-alarm. A search restriction will
continue to apply to all subsequent image searches until you either
remove it or select another call.
The camera-selective image search is only available in single image
viewing mode. It is disabled in the Four or Ten screen overview modes.
68
27769_02
HeiTel by Xtralis
Call list
5.1.3
CamControl PRO Software Manual
Clicking the Call list button or selecting File/Load archive path opens
the CACO Archive Browser dialogue box again. Select an archive as
described above. Once you have selected a transmitter and a day, select
the desired archive (see “Archive selection” on page 65).
Multi-screen view
In addition to single image viewing mode, you can also choose between Four and if necessary Ten screen
viewing mode to access the receiver archive. You can make this selection using either the View menu or the
following toolbar buttons.
Full screen view of the archived images for a single camera (1 camera)
Multi-screen view of four archive images (4 cameras):
You can switch cameras by right-clicking, to create a group for example.
Multi-screen view of ten archive images (10 cameras):
You can switch cameras by right-clicking, to create a different sequence
of camera tracks for example. This view is available for archive images
of transmitters with ten video inputs.
5.1.4
Exporting individual images
CamControl PRO's archive access software allows you to export the current individual image in different
ways.
Image file
Select File/Save picture or click the Save picture button to save the
current image to file, either in BMP or JPEG format.
You can also save an image in CamControl PRO by selecting File/Save
picture with on-screen information. If you select this method of saving,
the camera name/number as well as the transmitter name/serial number
are shown in the image file.
27769_02
69
CamControl PRO Software Manual
HeiTel by Xtralis
Print picture
Select File/Print picture or click the Print picture toolbar button to print
the current image to the preset printer. In addition to the image, every
printout contains other useful information such as program name,
program version, transmitter name, name and path of the archive file,
printing date, camera number, camera name, as well as the time and
date of image recording.
CamControl PRO allows you to add more information in the Print options
dialogue box that subsequently opens. Add on-screen information
includes camera name/number and transmitter name/serial number on
the image to be printed. You can also include up five lines of additional
text on the image printout by selecting Add user information in the Printer
options dialogue box.
Clipboard
Select Picture/Copy to clipboard or click the Copy picture to clipboard
toolbar button if you want to copy and paste the current individual image
into another program. If you want to check the authenticity of the image
later, the archive image must be saved as an image file with the archive
access software.
Checking individual images for authenticity
Authenticity check for individual images
When you save individual images with CamControl PRO, CamControl PRO or CamControl PLAYER, a
checksum is included in the picture file. You can check the authenticity of these images with the archive
access software.
70
27769_02
HeiTel by Xtralis
CamControl PRO Software Manual
To open the dialogue box for checking individual images, select Tools/ Image authenticity check. You can
load the picture to be checked in the Check image dialogue box. If the picture is authentic, the message "The
image passed the authentication check!" is displayed. If the authenticity check produces a negative result,
the image is judged "INVALID" and the additional error message "Image is not valid! Checksum is not equal!"
appears.
The authenticity check will return an "INVALID" result if:
l
l
l
the image has been modified
the image was not created by a HeiTel system
the image was created with older versions of CamControl 4 (pre V2.23), CamControl 4® Windows
software or the HeiTel-Player (pre V3.11)
The Load image dialogue opens automatically when the results of the check are confirmed. Another image
can now be checked. Another picture can also be loaded by clicking Check image.
5.1.5
Exporting image sequences
Exporting image sequences
In addition to exporting individual pictures, you can also export entire image sequences for a specific period of
time. You can save the sequence either as an AVI clip (*.avi) or as an HeiTel export archive (*.hpx).
AVI clips
If you export an image sequence as an AVI clip, you can play it back with standard media players (e.g.,
Windows Media Player) on various hardware platforms with different operating systems. Media players
usually only allow you to play a file back in one direction, at a limited number of playback speeds and without
individual image switching. The time it takes to export the image sequence depends on the selected encoder
and the corresponding settings, as well as on the configuration and equipment of the accessing PC.
27769_02
71
CamControl PRO Software Manual
HeiTel by Xtralis
HeiTel export archives
If you use the HeiTel export archive, you still have all the advantages of archive access using the CamControl
PLAYER. The data from the selected sequence are written to a new archive file, the data are not converted,
and the archive information is retained. This means that exporting does not take long. Export archives also
have considerably less storage requirements on data carriers compared with a comparable AVI clip. Using the
HeiTel-specific archive format however means that you and third parties must use the CamControl PLAYER.
Recorded GPS data is also retained when stored in HeiTel export archives and can be used in the event of
access using the CamControl PLAYER.
File export
To export image sequences, select File/Save sequence or click the Save sequence toolbar button
opens the Export to file dialogue window:
. This
Export settings
Configure the following settings to export image sequences:
1. Select the file type (AVI-Clip or Export archive) under Target. If you select AVI as the export format, a
preview of the current image being exported is shown. If you select the HeiTel export archive, the
selected image sequence is written to a file that can be accessed as usual with the CamControl
PLAYER.
2. When exporting AVI files, the transmitter name and camera name can also be displayed in the image as
additional information. To do this, click Add on-screen information.
When exporting to the hpx format, select the option Create Self-Playing archive. This will create an
executable exe file containing the CamControl PLAYER software for playback.
3. Select a compression type when exporting an AVI file.
4. Enter the start and end time of the image sequence to be exported under Select export time window. If
you already set export marks while accessing the archive (see “Setting export marks for the image
sequence” on page 73), this range is applied in the Export to file dialogue box.
5. Select the cameras to be included in the export, if necessary. The camera is preselected when exporting
from camera tracks. When exporting more than one camera track, an additional progress window opens.
72
27769_02
HeiTel by Xtralis
CamControl PRO Software Manual
6. Start the export by clicking Start export.
Select all
The entire range of the recording is selected if you select Select all.
Setting export marks for the image sequence
The export range can be set in the File/Save sequence dialogue box or directly while viewing the recording.
Setting export marks allows you to precisely specify the range of the sequence to be exported.
Export marks are set as follows:
1. Position the slider at the desired starting image for the sequence
export, and then click Set start mark. The starting image is marked
with a turquoise frame.
2. Position the slider at the desired end image for the sequence export,
and then click Set end mark. The end picture of the export sequence
is marked with a blue frame.
3. The marks for the image sequence export are shown in the graphical
elements of image access. The marks look different depending on
the archive and the recording mode. If you want to change the
selected image sequence later, you must either reset the export
marks as described above or delete the marks and then reset them.
4. Select File/Save sequence... or click the Save sequence toolbar
button after you have set the export marks. The sequence selected
between the export marks is applied in the Export to file dialogue
box.
Checking the export sequence
Use the following functions to check / delete export marks:
You can play back the selected image sequence to check it.
Click the Go to start mark button to show the first picture of the export
sequence.
Click the Go to end mark button to show the last picture of the export
sequence.
Click this button to delete the export marks. Marks that have already
been set cannot be moved by drag and drop in the graphic elements.
They must be reset as described above.
You can access all export functions by selecting File/Save sequence. The individual commands for sequence
marking, navigating within a sequence and playing back the selected range can also be accessed by selecting
the Options menu item.
27769_02
73
CamControl PRO Software Manual
5.1.6
HeiTel by Xtralis
Accessing GPS data
If valid GPS data exists for the current image data of the PC Archive, the following dialogue box may open
automatically:
Explanation of buttons
A detailed explanation of the buttons can be found in the section on the GPS Live dialogue (see “GPS Live
window” on page 30) and on the extended GPS Live dialogue (see “Extended GPS (Live) window” on page 31)
Accessing the PC Archive
When you access the PC Archive function, after selecting the desired archive the GPS archive dialogue box
may be displayed. The display of the dialogue box is not compulsory when accessing archive images with
valid GPS data:
l
Use the GPS-Viewer
box.
5.2
button or the View/GPS-Viewer function to show or hide the GPS dialogue
Deleting archive files
The function for deleting archives is deactivated by default in CamControl PRO for security reasons. You
cannot select the Delete archive command from the File menu. Alternatively, you can activate the delete
function fully or with password protection. The delete function and its password protection are configured in
the configuration file SERVICE.INF (see “Password protecting the delete function” on page 283).
Deleting an archive
Once the delete function has been activated, select File/Delete archive to open the relevant dialogue box. If a
password is required to delete an archive, the Enter password dialogue box opens before the CACO4 Archive
Browser.
As long as the CACO4 Archive Browser remains open in delete mode, you do not have to re-enter the
password. A confirmation prompt appears before the archive in question is deleted.
74
27769_02
HeiTel by Xtralis
CamControl PRO Software Manual
You can select individual calls from a transmitter, a selection of calls from a transmitter, all the calls from a
transmitter on a particular day, or all the calls from a transmitter in this dialogue box. You can select multiple
files for deletion at the same time. Just press the SHIFT or CTRL key while selecting. You then delete the
selected files by clicking the Delete toolbar button or by selecting File/Delete.
5.3
Accessing other archives
In addition to being able to access receiver archives created with CamControl PRO, you can also edit both
CamControl PRO receiver archives and HeiTel export archives. It is also possible to access CamDisc SVR
archives offline. In order to be able to access the removable hard disk drives on the receiver PC, you need
either an internal or external HDD rack to take the removable hard disk drive. You can obtain both articles from
HeiTel as accessories.
button or select File/Load archive to open the backed-up archive
Click the Open individual archive
files, export archives and CamDisc archives on removable hard disk drives. You cannot open AVI files in the
access program.
Backing up data
If you want to back up the entire receiver archive permanently, you can do so in three ways:
l
l
l
Copy the archive file to another directory or drive (see “Updating the Software” on page 8).
Rename the archive files in Windows Explorer.
Give the archive a different name under Receiver options/PC Archive (see “Receiver archive (PC
archive)” on page 63).
Exiting the archive
Click the Close button in the toolbar or select Close from the File menu to exit the receiver archive.
The receiver software is opened automatically after the access software is closed.
27769_02
75
CamControl PRO Software Manual
HeiTel by Xtralis
This page is intentionally left blank.
76
27769_02
HeiTel by Xtralis
6
CamControl PRO Software Manual
Receiver Software Settings
You can configure CamControl PRO to suit your application in the receiver side settings. You can specify the
response to incoming alarms, configure the receiver archive, add users and much more.
When image transmission is not running (offline), click
Receiver options.
l
l
l
l
l
l
l
l
l
in the lower control panel to open
Take call: Response to incoming calls/alarms as discussed on page 78
User: User configuration, as discussed on page 80
Extras: Additional functions, as discussed on page 81
HTconnect: Configuration of the HTconnect function, as discussed on page 83
PC Archive: Receiver archive configuration, as discussed on page 84
Port A to Port D: Configuration of communication settings for the individual ports, as discussed on page
87
Serial channel: Configuration of the transparent channel, as discussed on page 92
Tours: Program automatic calls to various transmitters, as discussed on page 93
Configure transmitter index: Maintain transmitter list and supplement reference images, as discussed on
page 96
You can make a few additional settings in the CamControl PRO configuration file CAMCTRL.INI (see
“Program parameters (CAMCTRL.INI)” on page 253). Further functions for selected transmitters can be
configured in the R01 and R02 files(see “Transmitter-specific configuration files” starting on page 271).
Note:
27769_02
If the Setup button is not available (grey), the current user does not have system access (see
“User” on page 80).
77
CamControl PRO Software Manual
6.1
HeiTel by Xtralis
Take a call
In the Take call dialogue box you can adjust CamControl PRO's response to incoming calls and alarms in line
with your application.
Do not accept call
Dial from PC only
Select Do not accept call if you do not want incoming calls to be accepted. No acoustic or visual notification
whatsoever is given in this case.
Accept call manually
Call notification
If you have selected Accept call manually, incoming calls are initially only notified visually and acoustically in
the Call dialogue box. You decide whether you want to accept or ignore the call by clicking Accept or Ignore.
If your PC has a sound card installed, the RING.WAV file is played as acoustic notification. You can replace
this file with your own sound file if you wish. If this file has been deleted or the PC does not have a sound card,
short warning tones are emitted by the PC loudspeaker as acoustic notification.
Notes:
l
l
If you are operating via TCP/IP, it is not possible to accept calls manually.
Please note that for technical reasons, a call must be answered within a limited period of time. This time
can vary depending on the connection type and network operator. After this time has passed, the call can
no longer be answered.
Accept call automatically
This is without doubt the most frequently used setting. Incoming calls / alarms are automatically accepted.
Once a connection has been established, image transmission starts.
78
27769_02
HeiTel by Xtralis
CamControl PRO Software Manual
Camera-selective alarm activation - Alarm-triggering image
If you have selected Accept call automatically or Accept call automatically and are using SVR series devices,
CamDisc HNVR, Cam4mobile or CamServer as transmitters, transmission begins with the image that
triggered the alarm. If the alarm was triggered by a camera control input, the associated camera is
automatically activated.
Accept call and automatic operation
This operating mode allows you to carry out completely automated call and alarm processing. Incoming calls
are automatically accepted and processed in line with the settings. When the fixed period of time has passed,
the connection is closed again. No user intervention is required.
Time limit of connection
In the Time limit of connection field enter the maximum connection time in minutes. When this period of time
has passed, the connection is closed immediately.
Camera 1 - 10
In these boxes you can specify the number of video images that you want to receive from each camera. In
such a way you can weight the cameras differently.
Example:
The settings displayed under Automatic operation on the previous page would result in the following:
1.
2.
3.
4.
Two images are recorded from Camera 1.
One image is recorded from Camera 3.
1. and 2. are repeated until the four minutes have elapsed.
After four minutes, the connection is closed.
Special settings for automatic operation
l
l
l
Once-off recording
Connection duration = 0, Camera field(s) ≠ 0
In this operating mode, the number of images specified in the Camera 1 to Camera 10 fields is received
once.
No recording
Connection duration = 0, Camera fields = 0
A connection is established to the transmitter once and immediately closed again. No images are
recorded. The alarm is noted in the event tree however (see "Event tree" on page 22).
Recording the alarm-triggering camera
Connection duration > 0, Camera fields = 0
If you configure the connection duration and camera fields like this, then when an alarm is triggered by a
camera control input, the corresponding alarm camera is activated and recorded for the time specified. No
further camera switching takes place.
If the alarm does not involve a camera-selective alarm, Camera 1 is treated in the same way.
Notes:
l
l
l
No incoming calls or alarms can be answered or processed when you are editing the Receiver options.
If the Transmitter index was opened in a connection window to establish a connection, no simultaneously
incoming call can be answered in this window. The other three connection windows remain available for
alarm processing.
Warning signal
If you have selected Accept call automatically or Accept call and automatic operation, you can activate
visual and acoustic notification of incoming calls by selecting Warning signal. If you have a sound card,
the file ALERT.WAV in the program directory of the receiver software is played. You can replace it with a
file of your own. If ALERT.WAV has been deleted or the receiver PC does not have a sound card, short
warning signals are emitted by the PC loudspeaker as acoustic notification.
27769_02
79
CamControl PRO Software Manual
6.2
HeiTel by Xtralis
User
User Management provides you with a simple way of controlling how CamControl PRO is used. All users
must identify themselves with their name and password on program start and program end. The names of the
users are logged in the event tree. You can differentiate between simple operating personnel and system
operators with access to all settings.
Deleting a user
Click Delete user to delete the user selected in the User list from User Management.
Password
In the Password field you can enter a password for the user selected in the User list. The password may
contain a maximum of 10 characters.
Note:
If using HeiTel video systems internationally, refrain where necessary from using country-specific
special characters for user name and password.
System access
If you select System access, then the user in question is authorised to modify Receiver options (see
“Receiver Software Settings” starting on page 77).
Modify transmitter index
Only if the Modify transmitter index option was selected will the user listed be able to add, modify or delete
transmitter entries (see “Adding, changing or deleting transmitter entries” starting on page 98). Use this option
to prevent unauthorised users from viewing, changing, adding or deleting transmitter entries.
80
27769_02
HeiTel by Xtralis
CamControl PRO Software Manual
New user
In the New user field enter the name of a new user and then click Add user to include the user in User
Management. The maximum length for a user name is 20 characters.
You can only assign a user name once. If another user has this name already, a new entry is not added. The
existing entry is displayed instead.
Once the first user has been created, a username must be entered to start and close the software in the future.
You can enter a maximum of 100 users for the CamControl PRO software.
Note:
New users are granted full system access by default. Before you block access, make certain that
there is at least one user with system access. If you forget your password or there is no user with
system access so that you can't either start the software or change the settings anymore, you
must reinstall the software (see “Installing the Software” on page 8).
6.3
Extras
The Extras menu allows you to change the following parameters. Previously you were only able to set these
using the configuration file CAMCTRL.INI (see “Configuration file with modifiable keys” on page 257):
Time synchronisation
Synchronise device time to PC time
If you activate the option to Synchronise device time to PC time, each successful connection to a current
HeiTel device will synchronise the internal clock to the valid clock time for your PC. Directly after loading its
own configuration data, the device applies the PC clock time (see “Time synchronisation [TIMESYNC]” on
page 257).
Online view
View at start of connection
In the View at start of connection area, you can use the assigned pull-down menu to select the display option
that CamControl PRO should use once the connection is established (see “Changing screen view” on
page29).
27769_02
81
CamControl PRO Software Manual
HeiTel by Xtralis
Notes:
l
l
This setting has no effect on tours. The automatic processing of alarms remain unaffected.
If you select the Ten screen viewing mode for the initial view, the Ten viewing mode will only appear as
the initial view for transmitters with ten camera inputs. The connection will be opened in Quadscreen
viewing mode for transmitters with fewer camera inputs.
Predefined cameras
In the Predefined cameras area, you define the camera number(s) that are to be displayed once the
connection has been established in the selected mode of operation, respectively:
l
l
Mainscreen & Fullscreen: Select a camera using the pull-down menu.
Quadscreen: Select four cameras using the pull-down menu.
These settings correspond to the parameters in the configuration file CAMCTRL.INI in the section
[ONLINESCR] (see “View during active connection [ONLINESCR]” on page 257).
Applications window
By activating the option Application as on top window you ensure that CamControl PRO is always kept in the
foreground.
USB
Transmitter index with USB Node
Activating the Transmitter index with USB Node option causes the CamControl PROsoftware to display the
USB direct connection node in the transmitter directory (see “USB node and device grouping” on page 96).
The USB direct connection is used to select HeiTel devices that are connected via a USB cable with the
receiver PC.
Note:
Please note that a corresponding device driver must be installed for the USB interface concerned
(see “Installation of the USB driver for HeiTel Video Gateways ” on page 294).
For the CamDisc HNVR, CamServer 1, CamServer 2, CamDisc SVR 4s and CamDisc SVR 10s devices,
please observe the conditions of use of the USB connection (see “Installation of the USB driver for CamDisc
HNVR, CamServer 1, CamServer 2, CamServer 2c, CamDisc SVR 4s and CamDisc SVR 10s” on page
300).
Note:
82
In order for a change in this parameter to take effect, it is necessary - after confirming the Receiver
settings with OK, it is necessary to shut down and restart your CamControl PRO software.
27769_02
HeiTel by Xtralis
6.4
CamControl PRO Software Manual
HTconnect
The HTconnect menu allows you to change the following parameters, which you were previously only able to
set via the configuration file CAMCTRL.INI (see “Configuration file with modifiable keys” on page 257):
On
Activating the On option activates the HTconnect function (see “HTconnect: TCP/IP leased line” on page
111).
Port
In addition, you set the communications port for HTconnect through which the HeiTel devices communicate
with the CamControl PRO software. The standard value for HTconnect on HeiTel devices and software is
3333.
27769_02
83
CamControl PRO Software Manual
6.5
HeiTel by Xtralis
PC Archive
You can save all images received during an image transmission in the receiver archive of CamControl PRO.
In such a way you can access and edit all calls whenever you want with the archive access program. A
variable storage concept guarantees maximum efficiency (see “Receiver archive (PC archive)” on page 63).
Receiver archive settings
Archive activated
Select Archive activated to activate the receiver archive.
Note:
The images received are only saved when the archive is activated.
Audio recording
When archive recording is enabled, you can also record an audio stream. This audio stream is recorded for as
long as images are recorded for the transmitter in question. The transmitter audio stream is recorded
regardless of whether the connection is shown in the main window or a side panel. The PC audio stream is
always only recorded for the main window. Recording is controlled by the audio control buttons (see “Audio”
on page 206).
The archive access software now also includes buttons for audio recording access.
Archive path
You can specify a directory path for sub-directories and archive files of the receiver archive in the Archive path
field. When you activate the archive for the first time and do not enter anything in this field, a sub-directory
ARCHIVE is created in the program directory of CamControl PRO:
C:\CamControl PRO\ARCHIVE\
If you did not select the suggested program directory during installation, the directory name may be different
than CamControl PRO.
Note:
If possible, only use directory names with a maximum of eight alphanumeric characters, even if
your operating system supports longer names.
Archive capacity / MB
Specify the maximum size of the individual archive files in the Archive capacity / MB or GB field. The archive
size can be between 1 MB and 2000 MB for hard drive partitions formatted in FAT format. For hard drive
partitions formatted in NTFS format the maximum archive size is 512 GB. In addition to the display in MB the
84
27769_02
HeiTel by Xtralis
CamControl PRO Software Manual
archive size is also shown in GB.
Note:
The one-time initialisation of the PC Archive takes place immediately after confirmation of the
changes made with OK. For small archives this process takes only a few seconds. The
initialisation of a very large archive may take up to several minutes. The status window provides
progress information.
Unused capacity / MB
Remember that the overall receiver archive with the individual files containing the individual calls only grows
gradually over time. The Unused capacity / MB lets you know how much storage space is left on the drive on
which the archive is stored. Additional files are created with each new connection, occupying additional hard
drive space.
Maintain your archive directory on a regular basis therefore, and check the remaining storage space on your
hard drive. When the storage capacity is 30 MB or less, you receive a warning message from CamControl
PRO. You should start backing up your archive files to other data media or delete unnecessary data when you
receive this warning at the latest.
In addition to the display in MB the available storage space is also shown in GB.
Delete all recordings older than x day(s)
When this option is selected, CamControl PRO will delete all archives that are older than the specified
number of days. You can define any period between 1 and 9999 days. The archive dates are checked to
determine if they are older than the specified time period five minutes after the program is started. Any
archives that are older than the specified period are deleted automatically. This procedure is repeated every 24
hours.
Note:
If you use this automatic deletion function, be sure to copy any recordings that you need to a
different medium before the specified number of days pass.
Deleting archive files
You can delete archive files in the usual way in Windows Explorer or using the archive access software (see
“Deleting archive files” on page 74).
Sample calculations for determining archive size for individual calls
Network connection
Image transmission via network (LAN, 100 MBit/s)
(TCP/IP)
Desired recording length: 10 minutes per call
Image size 20
Approximately 512000 bytes of image data per second are received over
kilobytes; 25 images/s
a network connection. A 10- minute connection results in a total of 600
seconds per call. The archive size per call (ASC) is calculated as
follows:
ASC = 512000 bytes/s * 600 s = 292.97 MB
Network connection
Image transmission via network (LAN, 100 MBit/s)
(TCP/IP)
Desired recording length: 10 minutes per call
Image size 5
Approximately 128000 bytes of image data per second are received over
kilobytes; 25 images/s
a network connection. A 10-minute connection results in a total of 600
seconds per call. The archive size per call (ASC) is calculated as
follows:
ASC = 128000 bytes/s * 600 s = 73.24 MB
27769_02
85
CamControl PRO Software Manual
ISDN connection
HeiTel by Xtralis
Image transmission via ISDN (1 B channel)
Desired recording length: 10 minutes per call
Approximately 8000 bytes of image data per second are received over an
ISDN connection. A 10- minute connection results in a total of 600
seconds per call. The archive size per call (ASC) is calculated as
follows:
ASC = 8000 bytes/s * 600 s = 4.8 MB
PSTN connection
Image transmission via PSTN (analogue telephone line)
Desired recording length: 10 minutes per call
Approximately 3000 bytes of image data per second are received over a
PSTN connection. A 10- minute connection results in a total of 600
seconds per call. The archive size per call (ASC) is calculated as
follows:
ASC = 3000 bytes/s * 600 s = 1.8 MB
Archiving individual calls in FIFO mode
In CamControl PRO's default configuration, video images received are saved from the start of the connection
until the maximum file size for individual archives is reached. When the maximum size of the archive is
exceeded, then those video images received at the start of the connection are kept and those images received
last are no longer saved due to the size restriction.
FIFO mode
Particularly for dedicated lines, it may be desirable to archive individual calls in FIFO mode so that the oldest
pictures are gradually overwritten when the maximum size of the archive file is reached. You can also activate
this mode for the individual connection channels separately if necessary in the CamControl PRO
configuration file CAMCTRL.INI (see “Archiving individual calls in FIFO mode” on page 258).
86
27769_02
HeiTel by Xtralis
6.6
CamControl PRO Software Manual
Port A to Port D or Port 1 to Port 9
CamControl PRO can establish a connection to HeiTel devices through various communication paths:
l
l
l
Network, TCP/IP protocol (also Internet), via network card or remote data transmission network
Internal ISDN card or CAPI sharing over the network using Fossil drivers only in both cases (through
virtual serial interfaces)
Serial interface (COM interface) with connected modem, ISDN terminal adapter or null modem cable
These data transmission paths can be intercombined in any way. For example, you can access CamDisc
SVR over the network (TCPI/IP), inspect another object via ISDN and process an incoming call from your
modem, without having to change the settings of the receiver software.
CamControl PRO with default settings allows up to four simultaneous connections. These connections are
established via Port A, Port B, Port C and Port D. To fulfil all conceivable requirements, you can configure
each of these ports individually. In such a way, you can reserve ports for special tasks, e.g., for analogue
connections, TCP/IP connections and fixed or dedicated lines.
Note:
You have the option to scale the number of connection channels freely between 1 and 9. The
number of connection channels is configured via CAMCTRL.INI (see “Number of connection
channels” on page 268). Complete this file similar to the others with the listed parameters (see
“Configuration file with modifiable keys” on page 257) and with the corresponding entries.
Name
In order for these various tasks to be clear to the user, you can assign each of the ports a separate designation
in the Name field. These names are then displayed on the buttons for establishing a connection in the main
and side panels.
In such a way for example, you can give a port configured to establish analogue connections only an
appropriate name. If you want to reserve one port for carrying out tours, then you identify it accordingly.
Note:
Instead of the names Port A through Port D, the individual connection ports can also be labelled
Port 1 through Port 9. Depending on the number of connection channels selected, it is also possible
to have a mixed standard description. For example: Port A to Port D and Port 5
Network operation (TCP/IP)
TCP/IP
Activate TCP/IP if you want connections to be established to one or more transmitters over the network (see
“Connecting via network, TCP/IP connection (quick start)” on page 14).
27769_02
87
CamControl PRO Software Manual
HeiTel by Xtralis
Port
In addition, you directly set the communications port through which the HeiTel devices communicate with the
CamControl PRO software. The standard value for HeiTel devices and software is 3000.
This port number is always set globally for all connection ports.
Note:
This value should now only be programmed through this program window. The configuration file
CAMCTRL.INI should no longer be used to edit the port number (see “Port number ” on page 257).
Requirements
l
l
The receiver PC must be equipped with a network card and connected to a network. The TCP/IP protocol
must be correctly installed. The transmitter can be reached at a valid IP address within this network or
through a gateway.
Alternatively, Internet access may be sufficient.
Notes:
l
l
You can enter the TCP/IP addresses of your transmitters like a telephone number in the IP
address/Phone number + Dial prefix box under Transmitter Index/Transmitter Data. The separating points
must be entered between the segments of the address (e.g., 123.123.123.123). You can also enter
symbolic IP addresses in this box (see “Configuring the transmitter index” on page 96).
If you only wish to connect to your transmitter via TCP/IP, select Off from the Mode drop-down list. This
releases the serial port for other applications or for the serial channel.
Operation with ISDN cards (CAPI) or CAPI sharing over the network
CamControl PRO does not support the direct use of ISDN cards via the CAPI interface or CAPI sharing
solution in the network. The settings CAPI 2.0 and MSN are therefore disabled and greyed out.
If you still want to address CAPI-based devices however, use a Fossil driver that contacts CAPI solutions via
virtual serial interfaces. Once you have set up these virtual interfaces (see “Communicating with CAPI
devices via Fossil drivers” on page 293), these devices are operated in the same way as via the serial
interface.
Requirements
l
l
l
l
l
The receiver PC has an ISDN card.
The CAPI driver 2.0 (included with the ISDN card) has been correctly installed.
A Fossil driver to connect CAPI to virtual serial interfaces has been correctly installed.
You have an ISDN connection.
The desired transmitters can be reached via ISDN.
For more information refer to your ISDN card's manual or the Quick Start guide (see “Dial-up connection with
internal ISDN card or LAN CAPI (quick start)” on page 13).
Operation via serial PC interface (modem)
Configure the serial interface of your PC with the following settings. If you contact your transmitters via
TCP/IP, then in the Mode dropdown list select Off. This releases the serial interface for other applications.
Mode
The Mode drop-down list allows you to specify particular properties for operation via serial interface.
88
27769_02
HeiTel by Xtralis
Normal
CamControl PRO Software Manual
In this mode, CamControl PRO automatically detects whether there is a
null modem at the selected interface of your PC or not. If a null modem
cable is detected, a connection can be immediately established to the
directly connected transmitter device.
If a modem is connected to your PC and not a null modem cable, the
receiver software initialises this modem and is then available for dial-up
connections.
Switching off
automatic null
modem detection
In the CAMCTRL.INI configuration file you can instruct CamControl
PRO not to automatically detect a null modem in Normal mode. This
may be necessary for proper operation with certain modems under some
rare circumstances. Further information on changing this entry can be
found in the relevant section (see “Switching off automatic null modem
detection” on page 258).
Leased line
This mode involves a continuous connection to a transmitter.
CamControl PRO attempts to reach the connected transmitter about
every 20 seconds. This kind of operation requires a direction connection,
via a dedicated line or also a null modem for example. If you have
selected this type of connection for one connection channel, the
Transmitter index (see “Configuring the transmitter index” on page 96)
does not open when you click the Port button.
Null modem
In some rare cases, a connected null modem cable may not be properly
detected in Normal mode. If you select Nullmodem, the receiver
software assumes that there is always a null modem connected and acts
accordingly.
Note:
Off
Deactivating serial
interface
Don't forget to switch off Nullmodem mode again if you want
to establish a connection using a different method, via modem
for example.
If you only establish connections via TCP/IP, you can deactivate the
serial interface by selecting Off in the Mode drop-down list. CamControl
PRO then stops using this COM interface, thus making it available for
other applications or the serial channel.
Port
From the Port drop-down list you can select the COM port to which you want to connect your modem/ISDN
TA or the null modem cable. Here you will also find the virtual COM interfaces provided by the Fossil driver for
operating CAPI devices (see “Communicating with CAPI devices via Fossil drivers” on page 293). If the
selected COM interface is not available, is being used by another application or does not support the specified
Baud rate, a corresponding error message will be displayed after you close the Receiver options dialogue box
by clicking OK (see “Dial-up connection with modem or external ISDN TA (quick start)” on page 13).
27769_02
89
CamControl PRO Software Manual
HeiTel by Xtralis
Since special serial data transmission equipment is shown on COM ports higher than COM9, COM interfaces
from COM1 to COM99 can be selected in the drop-down menu Port.
Baud
From the Baud drop-down list select an appropriate transmission speed for the connection between the PC
and the modem/ISDN TA or between the PC and the transmitter connected directly via null modem cable.
In general, you can select 115,200 Baud for all connections. Some exceptions may require a different
selection:
l
l
A directly connected transmitter uses a different transmission speed.
ISDN operation with channel bundling should take place at 230,400 Baud, if your PC has a serial interface
that supports this Baud rate. Channel bundling with the required X.75 protocol is not possible for CAPI
devices and their virtual COM interfaces. Use a suitable ISDN TA if necessary.
Init.prefix: Modem/ISDN TA initialisation
In the Init.prefix box you can enter an AT command to initialise your modem/ISDN TA. The modem/ISDN TA
is reset and initialised with this command on program start, after the receiver settings have been changed, and
every time after an active connection has been established (receiver call). In many cases, all you need to do is
reset the modem or ISDN TA with "AT&F" in the factory settings.
Maximum connection duration
In the Maximum connection duration area you can define the maximum possible connection duration for the
respective port.
l
l
If the On option is not activated, no restriction on the connection duration is specified The entry field
shows -1.
If you activate the On option, you can specify the connection duration with values ranging from 0 to
2,678,400 seconds. 0 seconds means the connection is terminated immediately. The maximum value is
equivalent to 31 days.
General notes on modem configuration
l
l
l
l
l
l
l
The modem/ISDN TA must be configured for RTS/CTS flow control.
The DTR signal interrupts a connection or the establishment of a connection.
DCD (or M5) must indicate an active connection.
The modem/ISDN TA must not accept calls automatically (ATS0=0).
The modem/ISDN TA must send verbal messages (ATV1) in order for incoming connections to be
recognised.
The ISDN terminal adapter must be configured for X.75 protocol.
If the ISDN terminal adapter is connected to multiple ISDN data devices with an S0 bus, all the ISDN
devices must be assigned their own MSN (generally the phone number without prefix).
Operation with a telephone system
In this case, you may have to prefix the telephone number with the outside line number(s). In some cases,
there may be problems with the modem's dial tone recognition. In this case, turn off the modem's dial tone
recognition (frequently ATX3). Alternatively, you can insert a pause after the outside line number(s) (e.g.,
W=wait for dial tone).
90
27769_02
HeiTel by Xtralis
CamControl PRO Software Manual
ISDN network operation
l
l
It is generally recommended entering the MSN for trouble-free operation.
The ISDN terminal adapter must be configured for X.75 protocol.
Note:
Many of the above settings are factory defaults and can be activated with "AT&F". If you are still
experiencing problems, consult your modem manual.
Below, you will find some examples for correct initialisation of selected modems and ISDN TAs. The
configuration of the MSN is italicised in the initialisation commands for the ISDN terminal adapters. However,
the MSN does not have to be entered in every case.
Sample initialisations
Analogue modem
Model
AT command (initialisation prefix)
CREATIX V.90
AT&FX3E1V1S0=0
GSM adapter
Due to discontinuations or major technical changes affecting GSM data services by the relevant
network operators, the current documentation no longer contains any sample AT commands for
initialising GSM adapters.
ISDN terminal adapter
Model
AT command (initialisation prefix)
Stollmann
TA+PPX/PP2/PPP
3COM
U.S. Robotics ISDN
Sportster
ATE1V1B10S0=0#Z123456
ZyXel Omni.net plus ATE1V1B00S0=0&ZI=123456&ZO=123456
ZI: Z_in (incoming MSN)
ZyXel Omni.net
ZO: Z_out (outgoing MSN)
LCD+M
ZyXel Omni.net D
Prefix 1/ Prefix 2
In these boxes you can enter two dialling strings that are sent to the modem/ GSM adapter/ISDN TA before
the actual number and that control the dialling procedure. In most cases, you will only need one dialling string.
In this case, enter "ATD" (default setting) in the Prefix 1 box. Prefix 1 is used as the dial command for all
transmitter entries by default.
If you want to reach both analogue transmitters and ISDN transmitters and are using an ISDN adapter that
supports both analogue and ISDN connections, you can configure one prefix for the analogue connections and
the other for the ISDN connections. You then allocate them to the relevant transmitters in the Transmitter data
dialogue box (see “Configuring the transmitter index” on page 96).
Consult the manual for your ISDN TA to find out whether such dialling control is possible and how to use it.
Refer to your modem manual for further dialling controls.
Sample prefix
ZyXel Omni.net LCD+M
l
l
Prefix 1: ATDI (force ISDN connection)
Prefix 2: ATDN (force analogue connection)
27769_02
91
CamControl PRO Software Manual
6.7
HeiTel by Xtralis
Serial Channel
The transparent serial channel provides a simple way to transfer any kind of data between receiver PC and
transmitter during image transmission (e.g., control of pan/tilt cameras).
In order to be able to use the transparent channel, you must be using a transmitter with an additional, external
interface such as CamDisc SVR or CamTel SVR (see “Serial channel” on page 212).
On
Select On to activate the serial channel on the PC.
Port
From the Port drop-down list, select an available COM interface for the
transparent channel.
Baud
Select an appropriate transmission speed. Refer to the manufacturer's
specifications of the external device that you want to connect.
Mode
You can choose from a variety of transmission data formats:
Transmission data format
Note:
92
8/N/1
8 data bits, no parity, 1 stop bit
8/N/2
8 data bits, no parity, 2 stop bits
8/E/1
8 data bits, even parity, 1 stop bit
8/O/1
8 data bits, odd parity, 1 stop bit
Please note that all connection windows share the transparent serial channel. For this reason, the
transparent serial connection always exists between the transmitter active in the main panel of
CamControl PRO and the serial terminal connected to the receiver PC. If you want a transmitter
currently open in a side panel to use the transparent channel, all you have to do is switch this
transmitter to the main panel by clicking the side panel in question.
27769_02
HeiTel by Xtralis
6.8
CamControl PRO Software Manual
Tours
CamControl PRO allows you to automatically dial into certain transmitters at preset times and to receive a
configurable number of video images from selected cameras. If the receiver archive is active on the PC, all
the images received are saved. In such a way, you can automate routine checks and assess the received
images at a later point in time. You can program up to 100 tours each with up to 100 transmitters in this way.
Configuring tours
Warning signal
You have the option of having the start of tours notified. To do this, select
Warning signal. In addition to acoustic notification via the PC
loudspeaker or an installed sound card, a message window also opens.
Acoustic notification of tours only stops when you close the message
window.
From the drop-down list, select the port through which you want to
establish the connections during the tours. If the desired transmitters
must be accessed via different networks (ISDN, analogue), make
certain that the configured port is suitable for connections to the
transmitters in question.
Select On to activate the tour selected in the drop-down list (001 to 100).
Start time
Enter the start time for the tour in these two boxes (hour:minute).
M, T, W, Th, F, Sa, S Select the days on which you want the tour to be carried out.
27769_02
93
CamControl PRO Software Manual
Add
HeiTel by Xtralis
The drop-down list above the <-Add button contains all the transmitters
currently in the Transmitter index. If you want to include a transmitter in
this tour, then select the transmitter in question in the list and then click
<-Add.
Note:
Only transmitters that are in the transmitter index can be
included in a tour. Transmitters that have been removed from
the transmitter index or that have been renamed, can no longer
be dialed during future tours. If a transmitter is deleted from
the transmitter index even though it is still supposed to be in a
tour, the failed attempt to access these transmitter data will be
noted in the CC4LOG.TXT event file with the entry "Data not
available Transmitter name"(see “Event list” on page 22).
The following illustration shows you an excerpt from the CC4LOG.TXT
event file. The entry highlighted in pink (for illustrative purposes)
indicates the failed attempt to reach the "Parking site" transmitter during
a tour because it is no longer in the transmitter list.
Delete
94
The drop-down list above the Delete button contains transmitters to be
called during the currently selected tour. If you don't want a transmitter to
be in the tour anymore, then select it in this list and then click Delete.
27769_02
HeiTel by Xtralis
CamControl PRO Software Manual
Transmitter-specific tours
The following fields are configured separately for each transmitter in a tour. In such a way, you can receive a
different number of live images from different cameras from various transmitters.
Time limit of
connection
In the Time limit of connection box enter the maximum duration of the
connection (0-999 minutes) for the selected transmitter (list above the
Delete button). When this period of time has passed, the connection is
closed immediately.
Maximum
The maximum connection duration that you specify for the corresponding
connection duration connection channel also applies to tours and automatically processed
alarms (see “Maximum connection duration” on page 90).
Alternatively, this setting can be defined using the configuration file
CAMCTRL.INI (see “Maximum connection duration” on page 258).
Camera 1 - 10
In these boxes you can specify the number of video images that you
want to receive from each camera. In such a way you can weight the
cameras differently.
Example in the
dialogue box
In the configuration illustrated, the Building transmitter is one of the
transmitters in Tour 001. Tour 001 is carried out on Monday, Tuesday,
Wednesday, Thursday and Friday starting at 11:55.
When connected to the Building transmitter, two images will be received
and archived from Camera 1, four from Camera 2, two from Camera 3
and ten from Camera 5. This procedure will be repeated until a Time limit
of connection of 10 minutes has elapsed and the connection is closed.
Minimum
If the Time limit of connection is 0 minutes, the specified number of
connection duration images would be received and archived from the relevant cameras once.
Then the connection would be closed.
Notes on tours
CamControl PRO can only carry out tours if the software is not blocked from doing so in Receiver options and
if the port selected for tours is not occupied by another connection.
Note:
CamControl PRO does not support any tours for transmitters connected to the receiver software
via HTconnect (see “General information about HTconnect” on page 113).
Follow-up processing of tours
If tours overlap (Tour 001 starts at 11.55 a.m. and lasts 10 minutes and Tour 002 starts at 12.00 p.m.) or are
interrupted for some other reason, they are "post-processed" as long as:
l
l
l
No settings have been changed on the receiver side in the meantime
The program has not been ended and restarted in the meantime
The next tour will be continued on the same day. A tour that had already started will however also be
continued on the next day.
27769_02
95
CamControl PRO Software Manual
6.9
HeiTel by Xtralis
Configuring the transmitter index
Central transmitter index
The Transmitter index manages the names and telephone numbers / IP addresses of all the transmitters that
you can use with CamControl PRO centrally for all connection windows. The individual transmitter entries
also form the basis for tours.
Opening the transmitter index
You open the Transmitter index by clicking one of the Port A to Port D or Port 1 to Port 9 buttons, as long as
these connection channels have been configured for serial or TCP/IP dial-up connections. You can use the
transmitter list in this dialogue box to maintain or select the saved transmitters. (see “Port A to Port D or Port 1
to Port 9” on page 87)If after you click one of the Port A - D or Port 1- 9 buttons, the Transmitter index does not
open, then this connection window is reserved for connections made via a leased line or Nullmodem. To find
out how to configure the individual communication channels, refer to the relevant section in this guide (see
“PC Archive” on page 84).
6000 transmitters
The Transmitter index can manage up to 6000 transmitters. The transmitters are sorted alphabetically in the
transmitter list.
The current and maximum number of transmitters is displayed alongside the heading Transmitter list in the
form [27/6000].
Note:
If the maximum number of transmitters for the transmitter index is nearly reached and if additional
transmitters are being supplemented via the function Device detection in local area network (see
“Device detection in local area network” on page 108), then the transmitter list is only filled until the
maximum number of entries is reached. The user receives no feedback notification regarding
transmitters which it may not have been possible to add.
USB node and device grouping
The transmitter list can include a supplementary USB node (USB direct connection) for individual
transmitters. In addition to this, you can create a grouping of several devices.
96
27769_02
HeiTel by Xtralis
CamControl PRO Software Manual
USB node
You activate or deactivate the USB node
“Transmitter index with USB Node” on page 82).
by going to Receiver options/Extras (see
With integrated drivers for the USB interface (see “Installation of the USB driver for HeiTel Video Gateways ”
on page 294), a connection to the transmitter can be established. This corresponds to a network connection
with a maximum transfer rate of 9.7 MBit/s.
For the CamDisc HNVR, CamServer 1, CamServer 2, CamServer 2c, CamDisc SVR 4s and CamDisc SVR
10s devices, please observe the conditions of use of the USB connection (see “Installation of the USB driver
for CamDisc HNVR, CamServer 1, CamServer 2, CamServer 2c, CamDisc SVR 4s and CamDisc SVR 10s”
on page 300).
The transmitter data USB direct connection cannot be edited as regards its name and IP address, including
port.
If you wish to set a USB connection to a transmitter, which is not to be addressed via the standard port 3000
for IP connections to HeiTel video systems, supplement the transmitter index by an additional entry (see
“Adding, changing or deleting transmitter entries” on page 98).
The IP address for the USB connection via port 3011 to the transmitter, for instance, is:
192.168.138.95:3011
You can adjust the IP port according to your transmitter's requirements.
Device grouping
By grouping the devices or cascading, you receive the option of combining several HeiTel devices into one
group within the list of transmitters (see “Device grouping (cascading)” on page 104). This grouping is
meaningful for example, if several devices are used for video monitoring of an object and these present to the
user practically one functional unit.
Using different transmission networks
CamControl PRO with default settings allows you to establish four connections to four different transmitters
at the same time. In principle, two different configurations are possible:
1. All connection channels are configured identically and each transmitter can be accessed from each
connection window.
2. The connection channels are configured differently, and some transmitters can only be accessed from
specific connection windows.
Configuring the connection channels differently is only necessary in rare situations, for instance, if some
transmitters are to be accessed via an analogue connection and others via an ISDN connection but hybrid
terminal adapters are not being used.
In this case, you could simplify operation by extending the transmitter name to include the connection window
through which the transmitter can be accessed (e.g., Petrol Station X: Port C).
6.9.1
Dialling into a transmitter
Select the transmitter you want to connect to from the transmitter list in the Transmitter index dialogue box.
Clicking
/
initiates a call to the selected transmitter. Double-clicking the desired transmitter
entry also initiates dialling. If you click the small button to right of the Dial button, an additional menu with the
27769_02
97
CamControl PRO Software Manual
HeiTel by Xtralis
ten last dialled transmitters opens. Clicking one of these entries also starts dialling the transmitter in question.
Showing reference images
If necessary, you can enhance the view of the Transmitter index with an overview of reference images. This
makes it easier to find a specific transmitter when working with a large number of transmitter entries. If you
want to see the overview of reference images for the transmitter entries, click the Show reference images
. This overview will then be displayed on the right of the Transmitter index window until you click
button
the button again. The state of this button is saved when the Transmitter index is closed.
You can add up to eleven reference images for every transmitter entry in the Transmitter index (see “Inserting
and editing reference images” on page 101).
6.9.2
Adding, changing or deleting transmitter entries
The Transmitter index dialogue box has three buttons with which you can add a new transmitter to the list,
change an existing entry or delete an existing entry.
These buttons may be greyed out and inactive, indicating that the user currently logged in is not authorised to
modify the transmitter index. (see “Modify transmitter index” on page 80).
Supplementary information
Please make sure to note the information in the following sections when adding transmitter entries:
98
27769_02
HeiTel by Xtralis
l
l
l
l
l
CamControl PRO Software Manual
Inserting and editing reference images: page 101
Device grouping (cascading): page 104
Device detection in local area network: page 108
HTconnect: TCP/IP leased line: page 111
Multiple transmitter entries : page 116
If you want to add a transmitter or a group of devices (see “Device
grouping (cascading)” on page 104) to the list, select the Add button.
If you want to change a transmitter entry, select it in the transmitter list
and then click Modify.
In both cases (Add, Modify), the Transmitter data dialogue box opens,
and you can enter new or change existing transmitter data.
Transmitter name
Give the transmitter a unique name (maximum 30 characters).
Remember at this stage that the transmitter list is sorted alphabetically.
You may want to group individual transmitters used together for one
object by their names. It is not possible to use the same transmitter
name several times.
IP address / Phone
Enter the complete telephone number or IP address of the new
number + dial prefix transmitter in this box.
Telephone number
No letters or special characters should be entered in this box when a
connection is established over a telephone line. Only in exceptional
cases may it be useful to include a modem or dialling control character,
such as a dialling pause, in the telephone number.
IP address
You must include the associated separators when entering an IP
address (e.g., 123.123.123.123).
27769_02
99
CamControl PRO Software Manual
HeiTel by Xtralis
Port number
You can also enter a port number at the end of the IP address (e.g.,
123.123.123.123:5000). CamControl PRO will then establish a
connection using this IP address and the port number indicated. This
function, together with a router that forwards external calls to the unit in
question via assigned port numbers, allows you dial into different
transmitters at a single IP address.
Symbolic IP
addresses
Symbolic IP addresses can also be entered in this box. For the system
to recognise the entry as a symbolic IP address, the entry must start
with three dots (e.g., …www.yourdomain.com). This box can contain up
to 59 characters.
The symbolic IP addresses can also be completed by adding a port
number (e.g. …www.yourdomain.com:5000).
Note:
The HeiTel transmitter itself does not support symbolic IP
address names. However, a connection can be established to
a symbolic address via a DNS (domain name server). Please
contact your network administrator for assistance in setting up
a symbolic address and for information on DNS service
providers.
The use of a symbolic address can be particularly practical for
contacting a transmitter at a continually changing IP address,
for example with a DSL connection.
Prefix 1/ Prefix 2
You can decide the dialling string to be used for dialling out with Prefix 1
or Prefix 2. In general, only one dialling prefix is used. In this case, select
Prefix 1. If you are operating both analogue transmitters and ISDN
transmitters and are using an ISDN TA that supports both analogue and
ISDN connections, you can specify one prefix for analogue connections
and another for ISDN connections and assign them to the appropriate
transmitters in Receiver options/Port A - D. Consult the guide for your
ISDN TA to find out whether such dialling control is possible and how to
use it.
CAPI
CamControl PRO does not support the direct use of ISDN cards via the
CAPI interface or CAPI sharing solution in the network. The CAPI 2.0
option is therefore disabled and greyed out. If you still want to address
CAPI-based devices however, use a Fossil driver that contacts CAPI
solutions via virtual serial interfaces (see “Communicating with CAPI
devices via Fossil drivers” on page 293).
Serial number
This area displays the serial number of the transmitter. This area
contains no entry and is displayed in grey only when making a new entry.
Once the first connection has been established successfully, the device
serial number is obtained and displayed.
Where new transmitters are entered via Device detection in local area
network (see “Device detection in local area network” on page 108), then
serial numbers are similarly available. When using HTconnect (see
“HTconnect: TCP/IP leased line” on page 111), you have the option to
manually enter or correct serial numbers.
Automatic
passwords
100
This option was retained for upwards compatibility with pre SVR models.
If your transmitter is password-protected, you can enter the passwords
for the transmitter in question in the Auto. password 1 and Auto.
password 2 boxes in order to automate password entry when
establishing a connection.
27769_02
HeiTel by Xtralis
Username &
Password
CamControl PRO Software Manual
You can save the respective login data in the Username and Password
fields. These are used for a tour or for manual entry of a VG, SVR or
CamDisc HNVR, Cam4mobile series transmitter and for CamServer
devices.
If you want to delete a transmitter from the transmitter list, then click
Delete in the Transmitter index dialogue box. Transmitters that are no
longer listed in the transmitter list cannot be included in tours (see
“Delete” on page 93).
For deleting groups of devices, please note the information on device
grouping (see “Device grouping (cascading)” on page 104).
6.9.3
Inserting and editing reference images
You can add up to eleven reference images for every transmitter entry in the Transmitter index. The images
assigned to the selected transmitter are shown as small thumbnails in the reference image list. The currently
selected reference image is also shown as a larger image in the picture window beneath the list. The first
reference image is shown automatically when a transmitter is selected. Any picture in the list can be activated
by clicking it. The pictures can be shown as camera hints during an active connection.
You can add or modify reference images in the Transmitter data dialogue box by clicking Modify or Add in the
Transmitter index.
27769_02
101
CamControl PRO Software Manual
HeiTel by Xtralis
If you want to add a new reference image to the Transmitter data, click
Add beneath the list of reference images. You can then select a suitable
JPEG or bitmap image in the Reference images dialogue box.
Note:
You should always use images that are located on a local hard
drive if possible, as loading images over a network can
sometimes impair image transmission significantly.
Clicking Open opens the Edit image name dialogue box.
This dialogue box also opens when you select an existing reference
image in the Transmitter data dialogue box and click Modify. You can
change the name of the image (the file name is suggested automatically)
and assign it to one of the cameras from 1 to 10. If you select none for
the camera, this image is not displayed as a camera hint during an active
connection. It will only be shown as an object reference image for the
transmitter in the transmitter list.
If you wish to remove a reference image from the list in the Transmitter
data dialogue box, select the desired image and click Delete. The image
will then be removed from the image list, and will no longer be available
as a camera hint during an active connection.
102
27769_02
HeiTel by Xtralis
CamControl PRO Software Manual
Showing camera hints
During an active connection, you can have reference images that have been assigned to individual cameras
shown as camera hints. These images are shown as soon as the mouse pointer is positioned over the camera
button. The reference image is displayed until the configured display time elapses. The image is also shown
for as long as the left mouse button is held and the magnifying glass is positioned over the picture, regardless
of the configured display time. Clicking the reference image with the left mouse button zooms the picture by
approximately 20 %. The image can be zoomed by 20 % six times. Clicking the reference image at maximum
zoom returns it to its initial size. The display time begins again each time the view is changed.
You can modify the initial size of the reference image and its display time in the CAMCTRL.INIfile (see
“Configuration reference images” on page 260).
27769_02
103
CamControl PRO Software Manual
6.9.4
HeiTel by Xtralis
Device grouping (cascading)
By grouping the devices or cascading, you receive the option of combining several HeiTel devices into one
group within the list of transmitters. This grouping is meaningful for example, if several devices are used for
video monitoring of an object and these present to the user practically one functional unit.
Device or group dial
To dial a transmitter or a group you start by double clicking on the transmitter or on the group node or on a
transmitter of the respective group. Alternatively, you can also check first a transmitter, a group or the
transmitter of a group and then start the dialling process by clicking the Dial button.
If a group is dialled then the checked transmitter is always dialled first.
Popup menu
With a right click on the list of transmitters a context sensitive popup menu is opened, which may contain the
following entries:
l
l
l
l
l
l
l
Add new group
Add new transmitter
Cut checked transmitter (Ctrl+X)
Paste cut transmitter (Ctrl+V)
Add new transmitter to group
LAN device autodetection (see “Device detection in local area network” on page 108)
Show transmitters with equal serial number (see “Multiple transmitter entries ” on page 116)
Group allocation of existing transmitter data
In order to allocate existing transmitter data to the respective groups or to cancel its allocation, you have other
methods available, besides the popup menu:
1. Mouse controlled allocation: Dial a transmitter with a left mouse click and hold down the mouse button.
Now drag the transmitter to a position within a group or to a group node and release the left mouse button.
The transmitter is assigned to this group. In order to cancel the allocation of a transmitter to a group,
104
27769_02
HeiTel by Xtralis
CamControl PRO Software Manual
follow the same steps, however, position the transmitter outside of a group before releasing the left
mouse button.
2. Keyboard controlled allocation: Using the cursor buttons select a transmitter and cut it using Ctrl+X. The
transmitter symbol is displayed in grey. Thereafter, using the cursor keys, choose the new position and
insert the transmitter using Ctrl+V.
Note:
Within the transmitter list the transmitters and groups are sorted automatically by name, in
alphabetical order. Within the groups, these subordinated transmitters are also sorted in
alphabetical order.
Add
With the button Add you will also open the previously described context
sensitive popup menu (see “Popup menu” on page 104).
Delete
With the button Delete you will delete a checked entry. If the checked
entry is a group, a confirmation prompt will appear, distinguishing
between cases:
l
l
Modify
OK deletes only the selected group, while the subordinated
transmitters will be retained as individual transmitter entries within
the transmitter list.
All deletes the selected group including all subordinated transmitters
from the transmitter list.
If a group in the transmitter list is checked, then you will reach the
dialogue Enter group name with the button Modify, which is used to
modify the name of this group.
Tours
Tours are not completed for groups but only for individual transmitters. So that tours (see “Configuring tours”
on page 93) can be completed for transmitters subordinated to groups, all transmitter data of the transmitter
index in the drop-down menu are displayed above the button <- Add (see “Add” on page 94).
Camera window when dialling a group
After you have dialled a group (for example Demonstration Kiel IP), you will see an additional window to the
selection of all accessible cameras in the group.
27769_02
105
CamControl PRO Software Manual
HeiTel by Xtralis
First dial of a group
When dialling this group for the first time this list of cameras is still incomplete. First only the camera names of
the dialled transmitters (here: Demo Kiel CamDisc SVR IP PTZ) are displayed.
In order to dial another transmitter of this group, please double click on the respective transmitter name (here:
Demo Kiel CamTel SVR IP). After a successful change, the list is supplemented by the camera name of the
transmitter. To have a complete camera list after creating a new group, all subordinated transmitters should
initially be dialled once.
Note:
A complete camera list is also necessary for the smooth function of the grouping in the event of an
alarm (see “Important information about the camera window” on page 107).
View modes of the camera list
The title page of the window will always inform you of the name of the currently dialled transmitter.
A colour change between light grey and dark grey within the camera list will group the cameras by transmitters
in the respective order. In the alphabetical list of cameras the names are listed in light grey throughout.
A change between the two view modes is achieved by way of a left click in the camera list.
106
27769_02
HeiTel by Xtralis
CamControl PRO Software Manual
Camera change via camera list
Within the camera list you will switch to the respective camera by double clicking on the camera name. A
simple left click on the camera name will present the name in red font and will display, if applicable, the
respective reference picture. The reference pictures must first be allocated to the individual cameras in the
Transmitter data (see “Inserting and editing reference images” on page 101).
In this view it is possible with a left click in the reference picture, to switch to a separate presentation of the
camera list and reference picture.
The separate window of the reference picture can be positioned and scaled freely. However, these settings
are only temporary and can not be stored.
Important information about the camera window
l
l
l
l
l
The camera switching is completed from the multi-views.
The camera switching is completed only when live pictures are displayed and not in the transmitter
archive.
A camera switching to a camera of another device will lead to a hangup and a redial. These are logged
individually and each will generate its own receiver archive.
When recreating a group, the transmitter names in the camera list are displayed instead of the camera
names of the transmitter. After dialling the respective transmitter, the camera list is updated accordingly.
To make sure that the grouping will also function smoothly in the event of an alarm, all transmitters must
be dialled once by the receiver side.
27769_02
107
CamControl PRO Software Manual
l
HeiTel by Xtralis
If a transmitter exists in the transmitter list multiple times (redundancy: IP, ISDN …), then the entry
created in a group is taken into consideration when establishing a connection from the transmitter side. If
this criteria is not unique, then the entry found first is taken into consideration. Multiple entries should be
avoided. If, for reasons of redundancy, transmitters are entered multiple times, then the entry with the
main connection path in the group should be taken and the redundant back-up connection as an individual
transmitter.
6.9.5
Device detection in local area network
With the function Device detection in local area network, the CamControl PRO software offers you a
comfortable option,
l
l
to detect newly installed HeiTel devices within a local network and to add these to the transmitter list or
to update in the transmitter list the IP address entries of transmitters that automatically obtain an IP
address (DHCP) in the local network or where its IP address has changed.
LAN device autodetection
The LAN device autodetection is activated in the transmitter directory either with a right click in the transmitter
list or via the button Add. In both cases a context sensitive popup menu will open (see “Popup menu” on page
104).
In this popup menu you open a dialogue window with the name Device detection in local area network by left
clicking on the function LAN device autodetection.
Search for devices in local area network
After opening the window the CamControl software will automatically search through the local network for
current HeiTel devices (SVR series, Cam4mobile series, CamServer, CamDisc HNVR) and will list the
devices found, including the following information: serial number, name, IP-port and IP-address.
As a result of this search only those devices are displayed that will fulfil all of the following conditions:
l
l
l
The device is operational and connected to the network.
A fixed or dynamic IP address of the local network was assigned to the device.
The device has the respective firmware available (minimum requirement: Firmware 1.38) and the function
LAN auto detection support was activated (see “LAN auto detection support” on page 132).
108
27769_02
HeiTel by Xtralis
CamControl PRO Software Manual
Device detection
The device detection returns the serial number, port and IP address of the transmitters found. A name is
displayed if this has been programmed with the recorder settings (see “Device name” on page 122).
Allocation by serial number
Using the two letters in the serial number, it is possible to allocate the device to a device type. The following
table contains an overview of the current devices which support device detection (see “LAN auto detection
support” on page 132). You can allocate the devices found to a model series even if the name is missing or if
the name provides you with little information:
VG Device series
Device type
Serial number Device type
Serial number
CamServer VG 4c
CCxxxxxx
CamDisc VG 4c
DCxxxxxx
CamDisc VG 2s
STxxxxxx
Cam4mobile VG 4c
MCxxxxxx
CamTel VG 4
CFxxxxxx
CamTel VG 10
CXxxxxxx
CamDisc VG 4
VFxxxxxx
CamDisc VG 10
VXxxxxxx
Cam4mobile VG 4
MFxxxxxx
Cam4mobile VG 10s
MXxxxxxx
CamDisc VG 4s
SFxxxxxx
CamDisc VG 2s
SXxxxxxx
CamDisc VG HNVR
VNxxxxxx
SVR Device series
Device type
Serial number Device type
Serial number
CamTel SVR 4
TQxxxxxx
CamTel SVR 10
TVxxxxxx
CamDisc SVR 4
CQxxxxxx
CamDisc SVR 10
CVxxxxxx
Cam4mobile 4
MQxxxxxx
Cam4mobile 10
MVxxxxxx
CamDisc SVR 4s
WSxxxxxx
CamDisc SVR 10s
WVxxxxxx
CamServer 1
WBxxxxxx
CamServer 2
WDxxxxxx
CamDisc HNVR 10
NVxxxxxx
CamServer 2c
WCxxxxxx
27769_02
109
CamControl PRO Software Manual
HeiTel by Xtralis
Selected network adapter
Using this selection menu, you can select the network segment to be searched by selecting the
corresponding network card. Current notebooks, in particular, often have a WLAN interface (for a wireless
local network) in addition to a LAN interface (for a cable-based local network).
Note:
Please note that the following device detection is only limited to the local network segment that you have
selected via the network adapter:
l
l
Network card 1 (IP address: 192.168.31.66):
Search area network segment: 192.168.31.0 to 192.168.31.255
Network card 2 (IP address: 192.168.115.66):
Search area network segment: 192.168.115.0 to 192.168.115.255
Start search
Via the button Start search you will initiate another search. Choose one or more devices from the list in order
to use the offered options (see “Options for the chosen transmitter” on page 110).
Device selection
You select a device by left clicking on the desired entry. If there are several devices to choose from that follow
one after the other, check the first of the desired entries by left clicking, then click and hold down the shift key,
thereafter check by way of another left click on the last entry of the desired devices. All entries in between are
also checked. For optional selection click on the control (Ctrl) key and hold it down. With a left click check all
desired device entries. The option Select all checks all device entries of the current list.
Options for the chosen transmitter
The button OK is only activated if at least one device entry is selected. With OK the following options are
implemented for the checked device entries, if they were activated.
Update existing transmitters in transmitter list
The option Update existing transmitters in transmitter list updates the IP addresses and, if necessary, the port
addresses of existing transmitter entries. The allocation is implemented via the serial number of the devices.
This function is particularly helpful for transmitters that obtain their IP address dynamically via DHCP (see
“Obtain an IP address automatically (DHCP)” on page 130) or for transmitters that were allocated for technical
reasons another fixed IP address within the local network.
Add new transmitters to transmitter list
The option Add new transmitters to transmitter list supplements the transmitter list with new transmitter
entries. The following information is included in the transmitter entry: serial number, name, IP-port and IPaddress. Other entries such as Username and Password must be added.
110
27769_02
HeiTel by Xtralis
6.9.6
CamControl PRO Software Manual
HTconnect: TCP/IP leased line
For firmware 1.52 or higher, SVR series devices, CamDisc HNVR and Cam4mobile and CamServer offer a
HTconnect function for a leased line between the transmitter and the receiver software (see “HTconnect” on
page 145).
For this, the TCP/IP leased line is always initiated by the transmitter. The correspondingly-configured HeiTel
devices establish a "resting" permanent connection to the receiver for this. For this leased line via TCP/IP,
each transmitter which is connected with a receiver generates a data volume of around 6 bytes per minute for
the "resting" connection.
Intended use
The use of the TCP/IP leased line is suitable for transmitters with DSL/UMTS connections with dynamic IP
addresses, thereby eliminating the need for DynDNS entry (Dynamic Domain Name System entry) with the
corresponding providers, and for devices within company/provider networks where the firewall restrictively
prevents incoming calls.
Requirements
l
l
l
One of the above-mentioned devices with firmware 1.52 or newer.
CamControl PRO software 3.73 or newer.
The possibility for a direct connection to the receiver PC via TCP/IP using a fixed IP address or a
symbolic name where dynamic IP addresses are assigned.
Note:
6.9.6.1
The relevant information can be obtained from your internet provider or from the responsible system
administrator.
Setting up HTconnect
The set-up for HTconnect is carried out in three steps:
l
l
l
Activate the receiver software function using an entry in the corresponding configuration file
CAMCTRL.INI or via the configuration menu Receiver options/HTconnect (see “Step 1” on page 111)
Preparing the transmitter prior to installation in the building (see “Step 2” on page 112)
Installing the transmitter in the list of transmitters in the receiver software (see “Step 3” on page 113)
Step 1
To activate HTconnect on the receiver PC:
Note:
l
l
l
l
l
l
l
Alternatively, HTconnect can be activated, including port number allocation, using the receiver
software CamControl PRO (see “HTconnect” on page 83). Then continue as for the section
HTconnect Server (see “HTconnect Server” on page 112).
Close down the receiver software
Open the configuration file CAMCTRL.INI for the receiver software CamControl PRO
Locate the section [EXTRA] in the configuration file
Add the following entries in the section [EXTRA] (see “HTconnect configuration” on page 260) or make
the corresponding changes:
HTCONNECTSVR=1 ;1 = ON, 0 = OFF (Default)
HTCONNECTSVRPORT=3333 ;Default = 3333
To prevent HTconnect connections from occupying all possible connection ports, thus preventing any
alarms from being accepted, you can also reserve a minimum number of ports for alarm connections in
the [EXTRA] section:
RESERVEDALARMPORTS=x ;x = number of reserved ports
Save the changed configuration file
Start up your receiver software
27769_02
111
CamControl PRO Software Manual
HeiTel by Xtralis
HTconnect Server
l
l
Check whether the HTconnect Server program is displayed in the taskbar:
Open the HTconnect Server status window by double-clicking on the program symbol:
l
The top part displays program messages.
l
The bottom part gives details in the status section about: active connections, the total number of
connections, and the connection port.
Where applicable, it is followed by a list of the transmitters connected, showing the serial number and
IP address along with the date and time that the connection was established.
Step 2
The following steps are to be carried out prior to installation in the building:
l
l
l
l
l
Start your receiver software and establish a connection to the corresponding transmitter using the
CamControl PRO software via null modem or network.
Make sure that the transmitter has suitable firmware 1.52 (or newer). After successfully establishing the
connection to the device, open the device settings (Recorder settings/Device) by clicking on the Setup
button. The status of the firmware (for example V 01.52) is displayed to the right of the term Version.
Make a note of the serial number of your transmitter, as this is needed for Step 3.
Switch to the settings for the leased line Recorder settings/Connections/HTconnect (see “HTconnect” on
page 145).
Check whether the Port number for the leased line corresponds with the settings specified in Step 1. The
standard setting is Port: 3333.
112
27769_02
HeiTel by Xtralis
l
CamControl PRO Software Manual
Using the On option, activate the receivers to which a leased line is to be established by the transmitter.
l
The address entries for IP address 1 to IP address 4 cannot be changed in this configuration menu,
since these addresses are transferred from the menu Recorder settings/Connections/Phone & IP
numbers (see “Phone and IP numbers” on page 139).
l
The only freely-selectable address is IP address 5.
Step 3
Modify an existing transmitter entry or create an entry for the corresponding transmitter. The dialogue box
Transmitter index is accessed via Port 1/Transmitter index and then either via the Modify button for existing
entries or via Add for new entries:
l
l
l
l
Complete the entries and activate the HTconnect option in the Serial number section. The serial number
can now be edited.
If you are changing an existing transmitter entry, check whether the serial number noted down previously
in Step 2 matches the existing entry.
For a new entry, enter the serial number previously noted down in Step 2 in the corresponding field.
Complete entry by clicking OK.
6.9.6.2
General information about HTconnect
Please take note of the following information regarding HTconnect:
l
l
l
l
l
l
l
l
All connections to transmitters which have been configured in the manner described above have been
initiated by the respective transmitter as a standing connection. However, for the user these "alarm
connections" present themselves as receiver calls.
Under some circumstances, the details may deviate from a regular receiver call.
CamControl PRO does not support any tours for transmitters connected to the receiver software via
HTconnect.
Transmitters connected via HTconnect are not automatically switched to the current selection window
when selected manually, but rather to the first free connection window. Upon starting the connection, an
HTconnect connection is always displayed in the main window.
During this quasi receiver dialling, in exceptional instances, a regular alarm imminent at the same moment
can be activated instead of the desired transmitter.
The theoretical limit for HTconnect connections is specified by the receiver software CamControl PRO,
which is limited to 6000 transmitter entries. Please note that the use of large numbers of HTconnect
connections can result in performance drops when operating the receiver software CamControl PRO.
For each connected transmitter, a data volume of approximately 6 bytes/min. is generated.
Call Accept must not be switched off in the receiver software settings.
The HTconnect Server is managed as an independent program by the receiver software and should
remain minimised in the taskbar. A flashing symbol indicates that one or more connections are
established to correspondingly-configured transmitters.
27769_02
113
CamControl PRO Software Manual
l
HeiTel by Xtralis
Since correspondingly-configured transmitters always establish a connection to the receiver software
CamControl PRO from their end, the availability of one or more transmitters for receiver calls can be
restricted - in particular, immediately after start-up of the receiver software or in the event of changes to
the transmitter settings.
If necessary, you are informed of this via this information window when dialling the transmitter manually:
This window is also displayed if the leased line to the receiver has been deactivated on the corresponding
transmitter and the HTconnect option on the receiver software at the receiver for this transmitter is still
activated in Transmitter index.
6.9.6.3
Notes regarding use of third-party services
We wish to draw your attention to the fact that when using HTconnect, a correspondingly-configured
transmitter permanently attempts to establish a connection to the receiver. As soon as the connection is
established, then per transmitter and per receiver a data volume of 6 bytes per minute respectively is
generated.
If this is calculated up for a calendar month of 31 days, the "resting" connection in itself generates a data
volume of around 270 kilobytes per transmitter for each receiver. If a transmitter establishes TCP/IP leased
lines to the maximum possible number of receivers (five), then the data volume is estimated to be around 1.35
megabytes per month.
For that reason, you are advised to select a suitable tariff on pay-to-use connections such as DSL or UMTS.
Since the connection between the transmitter and the receiver software is permanently established, as it
were, whilst the data volume (as described above) is relatively modest on a "resting" connection, a volume
tariff should generally be a more costfavourable option than a time-based tariff for this application.
You are advised always to make checks at regular intervals on the data volumes used for the correspondinglyconfigured connection and on the costs incurred under the chosen tariff!
With leased lines via DSL or UMTS (3G), you are making use of third-party provider services as a user.
Note:
6.9.6.4
Please note that HeiTel Digital Video GmbH has no influence on and assumes no liability for the
function and availability of services obtained from other parties.
Extended functionality of the HTconnect Server
From software version 1.07 of the HTconnect Server (component of the CamControl PRO software package
version 3.99 or later), communication from the software modules has been switched from Windows
messages to UDP (User Datagram Protocol).
114
27769_02
HeiTel by Xtralis
CamControl PRO Software Manual
Extended HTconnect Server window
From the program version mentioned above, the HTconnect Server program window contains a search
function using the serial number of the video system and two additional buttons. The Update connected
devices button updates the list of video systems connected via HTconnect, and Show configuration
displays the current configuration of the HTconnect Server in an additional window.
Searching for a video system
Before conducting a search, you should always update the list of video systems to the latest status using the
Update connected devices button. You search for a video system within the program window by entering the
required serial number into the Search input field. After you have entered a full serial number (format:
YZxxxxxx), the HTconnect Server indicates that it has found a video system with the message:
In the list of video systems connected by HTconnect, the relevant entry is shown and highlighted in grey.
Configuration of the HTconnect Server
Clicking the Show configuration button opens an additional window in which the current configuration of the
HTconnect Server is displayed. If necessary, you can adjust the configuration of the IP ports used manually in
the CAMCTRL.INI (see “HTconnect configuration” on page 260)
27769_02
115
CamControl PRO Software Manual
6.9.7
HeiTel by Xtralis
Multiple transmitter entries
Within the transmitter index it is possible for transmitters to appear more than once in the list of transmitters.
Among the uses for this procedure is to make available for one transmitter alternative entries for different
connection types. Since in the case of transmitter initiated dialling procedures the user check can also be
realised via the transmitter list, you must ensure that where the list of transmitters contains multiple
transmitter entries, valid user names and passwords have been entered for each of these entries.
Multiple transmitter entries in the transmitter list are identified by the device serial number. The serial number
is generally automatically added to the transmitter entries following a dial-up via the relevant connection type.
Show transmitters with equal serial number
If a transmitter, i.e. a serial number appears more than once in the list of transmitters, the Show transmitters
with equal serial number option is added to the context menu that can be opened by right-clicking within the
list of transmitters. In the Transmitters with equal serial number program window, multiple entries are shown
in groups.
If necessary please check these entries for a valid user name and a valid password. Accidentally created
multiple entries should also be deleted or corrected where necessary.
116
27769_02
HeiTel by Xtralis
7
CamControl PRO Software Manual
Configuring SVR devices (as well as CamDisc
HNVR, Cam4mobile and CamServer) and VG
devices
CamControl PRO is a tool that allows you to configure CamDisc SVR and CamTel SVR simply and
conveniently.
The type of transmitter device you have switched on is detected automatically, and simple dialogue boxes
help you configure the specific features of each device. All settings are stored in the transmitter and can be
recovered in the event of power failure.
Notes:
CamDisc SVR and CamTel SVR transmitters are each available with four or ten camera inputs.
l
l
CamDisc SVR devices, unlike CamTel SVR transmitters, have a hard disk for local image archiving.
Once a connection has been established to a CamDisc SVR, you can access the image archive on the
local hard disk by clicking Site Archive in the central control panel, provided you have the relevant user
permissions (see “User” on page 123). The Site Archive menu item (see “Site archive (only CamDisc
VG HNVR, CamDisc VG, Cam4mobile VG, CamServer VG, and CamDisc HNVR, CamDisc SVR,
Cam4mobile and CamServer)” on page 175) in the Recorder Settings drop-down menu allows you to
modify the archive settings of the CamDisc SVR device.
Please note that this menu item is not available for CamTel SVR devices, which have pre-alarm storage
instead (see “Pre-alarm (CamTel VG and CamTel SVR only)” on page 164).
In terms of configuration, the Cam4mobile devices behave like the CamDisc SVR models, in that they also
have a removable hard drive. The CamServer 2 devices have a permanently installed hard drive for local
image archiving and are only available with two camera inputs.
The CamDisc HNVR/CamDisc VG HNVR devices differ greatly from the previous devices in the SVR series:
l
l
In the basic system these devices are designed for image recording by an IP camera on up to ten camera
tracks.
The use of an optional HYBRID Card 4 allows four camera tracks per device to be used to record
analogue camera signals. A maximum of two of these extension cards per CamDisc HNVR/CamDisc
VG HNVR can be used.
If a CamDisc HNVR/CamDisc VG HNVR is used without HYBRID Card 4, all of the settings options relating
to the use of analogue cameras will be missing.
Starting transmitter configuration
First establish a connection to your transmitter. Switch to the main panel if necessary. Then click
.
27769_02
117
CamControl PRO Software Manual
If the Setup button is deactivated
are two possible reasons:
HeiTel by Xtralis
after you establish a connection to the transmitter, there
1. You are not the first user connected to the transmitter at this time. At least one other user authorised to
change transmitter setup has logged onto the transmitter before you.
2. You are not authorised to change transmitter setup.
Transmitter access protection
User Management allows you to protect the transmitter from unauthorised access (see “User” on page 123).
For users without permission to modify setup, the Setup button remains deactivated, and no modifications
can be made.
Automatic logon to transmitter
Transmitter-specific User Management is not the same as User Management in Receiver options (see “User”
on page 80). Users with identities in both management systems do not have to log on with user name and
password when dialling into a transmitter. Logon is automatic.
Selection
The Recorder settings dialogue box provides you with a menu overview of all available settings on the lefthand side of the window. Please note that when you open a node, more configuration levels will be shown:
l
l
l
l
l
l
l
l
l
l
l
l
l
l
l
l
l
l
l
l
l
l
l
Device: Firmware version, serial number, MAC address and device number, page 122.
User: Transmitter user management, page 123.
Date & Time: Synchronisation of recorder time, winter/summer time, time zone configuration and adding
holidays, page 126.
Connections: Configuration of connections via various communications paths, including HTconnect and
settings for live image quality and email messaging, page 129.
Camera settings: Camera name and configuration, page 146.
Camera groups: Definition of camera groups, page 147.
Motion: Configuration of the motion settings and motion detection zones, page 150.
Privacy zones: Definition of privacy zones, page 151.
Alarms:Configuration of responses to alarm inputs, camera signals, motion detection, video loss and
camera position authentication, page 161.
Site Archive ( CamDisc HNVR, CamDisc SVR, Cam4mobile and CamServer only): Configuration of
storage options, e.g., recording quality and storage capacity per camera track, archive password and
settings for saving transaction data for POS/ATM/IBIS (Point of Sale/Automatic Teller
Machine/Integrated on-Board Information System) applications, page 175
Audio: Talk and/or listen, page 206.
Relays: Configuration of the integrated relays, page 208.
PTZ control: Protocol selection for connected PTZ solutions and transmission of their control files to the
receiver PC, page 210.
Serial channel: Configuration of the transparent serial channel; page 212.
Video out: Definition of image quality of the video output, page 216.
Alarm panel: Connection of alarm panels in accordance with the standardised VdS 2465 Enhancement
S3 protocol, page 218.
Logfile: Settings for logfile entry, page 223
Extras: Definition of specific device control functions, page 224.
Upload / Download: Loading and saving of configuration profiles to the receiver PC, page 229.
Firmware update: Dialogue-driven procedure for firmware update, page 230.
CI Adapter: Matrix for allocating additional control inputs, page 232.
IP Camera: Including IP cameras, page 237.
HYBRID Card 4: Programming and activation of DSP functions for the HYBRID Card 4 (only CamDisc
HNVR/CamDisc VG HNVR), page 246.
118
27769_02
HeiTel by Xtralis
CamControl PRO Software Manual
Underneath this menu, the Recorder settings dialogue box has four (Cam4mobile VG, CamDisc VG HNVR,
CamDisc VG, CamServer VG 4c, CamDisc HNVR, CamDisc SVR, Cam4mobile and CamServer) or three
(CamTel SVR and CamTel VG) buttons. Clicking OK confirms the modified settings. The configuration data
are then sent to the digital image transmission system. Clicking Cancel exits the Recorder settings without
applying any changed settings to the device.
Online help
Help opens the online help where necessary as a PDF document in Adobe Acrobat Reader.
Site archive state
The Site archive state … button is only available for CamDisc HNVR, CamDisc SVR, Cam4mobile and
CamServer devices and for CamDisc VG HNVR, CamDisc VG, Cam4mobile VG and CamServer VG 2c
VideoGateways. The Site archive state dialogue box tells you the recording processes (continuous or event
recording) used by each camera track and when.
This dialogue box also lets you know which tracks are completely full and which tracks have reached their
storage warning threshold. If at least one of these criteria applies, then this status window is displayed when
you open the Recorder settings.
Saving settings and saving or loading configuration profile
You must confirm changes to the settings of your transmitter by clicking OK. You can save your preferred
settings permanently in the device by selecting Save as configuration profile (see “Configuration profile for
video systems with removable hard drives” on page 120). Select Load configuration profile to immediately load
saved profile data during an active connection. Click OK to apply the modified settings to your device. Click
Cancel to exit this dialogue box and return to the Recorder settings without applying any changed device
settings.
27769_02
119
CamControl PRO Software Manual
HeiTel by Xtralis
Activating settings
Note that some settings will only take effect after the current connection has been terminated, or the next time
a connection is established.
Configuration profile for video systems with removable hard drives
A stored configuration profile for HeiTel video systems with removable hard drives such as CamDisc
VG HNVR, CamDisc VG, Cam4mobile VG, CamDisc HNVR, CamDisc SVR or Cam4mobile is of special
significance.
Requirements
The following minimum requirements apply to the device series mentioned above:
l
l
Firmware 1.76 (or newer)
To reset the configuration profile:
l
CamControl PLAYER 3.48 or newer,
l
alternatively, CamControl PRO 3.85 or newer or CamControl PRO 3.85 or newer, either one with the
integrated PLAYER software, 3.48 or newer
Saving as configuration profile
Save the current configuration profile after closing the device parameters in the dialogue box Save Recorder
Settings ? by selecting the option Save as configuration profile once. The data will be stored in a nonvolatile
memory in the device.
Note:
If you use device reset to reset the video system to its state upon delivery, even a saved
configuration profile will be deleted. If necessary, use the function Upload / Download (see
“Upload/download” on page 229) to store the existing device configuration prior to a device reset.
With this procedure, you will ensure, when exchanging hard drives in delivery state or whose configuration
profile has been reset (see “Resetting configuration profile” on page 120), that the configuration profile used is
the one stored in the video system for configuring the recording tracks.
Notes:
l
l
For video systems with device firmware 1.74 or older, a stored configuration profile for configuring the
recording tracks will not be used. Instead, the recording tracks will be configured according to the factory
settings.
When you use a hard drive that was previously used in another HeiTel video system and whose
configuration profile has not been reset, the configuration of the recording tracks from the previous device
will continue to be used.
Resetting configuration profile
To enable removable hard drives that have already been used in other HeiTel video systems to accept a
transmitter-specific configuration profile, these hard drives must be reset to near-delivery state.
120
27769_02
HeiTel by Xtralis
CamControl PRO Software Manual
Resetting configuration profile
The configuration profile can only be reset when the removable hard drive is operated in offline mode. When a
HeiTel video system is running, the configuration profile cannot be reset.
The following step-by-step instructions describe how to reset the configuration profile:
1. Turn the video system off and, if desired, switch the hard drives.
2. If desired, carry out an evaluation of the removed hard drive with the CamControl PLAYER in offline mode
in a PC Kit CamDisc USB and save relevant archive information (e.g., video sequences or logfile entries)
in another medium.
3. Leave the removable hard drive in the connected PC Kit CamDisc USB.
4. To reset the hard drive configuration, select the program option File/Write configuration profile … from the
CamControl PLAYER software.
5. After confirming the security question with Yes, the configuration profile for the removable hard drive will
be reset. For this process, all recorded images will be deleted and archive passwords that have been set
will be overwritten.
6. Successfully resetting the configuration profile is confirmed with this message.
After finishing this procedure, the removable hard drive will be close to delivery condition. This means that
neither a valid configuration profile nor configuration data from previous installations, nor valid image data, will
be found in the given storage medium.
Note:
If you access the hard drive with a file browser such as Windows Explorer, the file structure of a
HeiTel removable hard drive will be displayed. If you attempt an evaluation of these archive data
with the CamControl PLAYER software, you will receive an error message stating that this is not a
valid archive file.
You can use a hard drive prepared in this way in other HeiTel video systems with removable hard drives.
Provided that the device has firmware version 1.76 or newer and a configuration profile has been saved (see
“Saving as configuration profile” on page 120), this profile will be used for configuring this hard drive.
27769_02
121
CamControl PRO Software Manual
HeiTel by Xtralis
Note:
For video systems with device firmware 1.74 or older, a stored configuration profile for configuring
the recording tracks will not be used. Instead, the recording tracks will be configured according to
the factory settings.
7.1
Device
Version
The version number of your device's firmware is displayed here. This number allows you to verify that your
device is up to date. Current firmware versions can be found on our website, organised by device type:
l
CamTel VG 4, CamTel VG 10, CamDisc VG 4, CamDisc VG 10, CamDisc VG 4s, CamDisc VG 10s,
CamDisc VG 2s, CamDisc VG 4c, CamServer VG 4c, Cam4mobile VG 4, Cam4mobile VG 10s,
Cam4mobile VG 4c: www.heitel.com
CamDisc VG HNVR: www.heitel.com
CamDisc SVR 4, CamDisc SVR 10, CamTel SVR 4, CamTel SVR 10, Cam4mobile 4, Cam4mobile 10:
www.heitel.com
CamDisc SVR 4s, CamDisc SVR 10s, CamServer 1, CamServer 2, CamServer 2c: www.heitel.com
l
CamDisc HNVR 10: www.heitel.com
l
l
l
In addition, the firmware versions current at the time of your version of CamControl PRO was released are
available in the subdirectory DEVICEUPDATES. To perform a firmware update, please use the Firmware
update dialogue (see “Firmware update” on page 230).
Serial number
Every transmitter is identified by a unique serial number provided by the manufacturing plant. The serial
number is located on the bottom of your device.
MAC address
The MAC address (Media Access Control) is the specific hardware address of the integrated network
interface (Ethernet). This address provides a unique device identification of the device within a network.
The MAC address may be required by the network administrator in some circumstances in order to configure
network components such as switches, routers or firewalls.
Devices belonging to the CamDisc HNVR and CamDisc VG HNVR series have two network interfaces. The
relevant MAC addresses are displayed in the (TCP/IP)/Connections network (see “Special network
configuration with CamDisc HNVR/CamDisc VG HNVR” on page 133) configuration dialogue.
122
27769_02
HeiTel by Xtralis
CamControl PRO Software Manual
Device name
A transmitter can be uniquely identified any time using its serial number. However, using a transmitter name
will make things a lot easier. The Device name (max. 20 characters) is shown in the window title bar of the
receiver software during active connections. To make it easier to access connections later, the device name
is used in the event tree, the event file CC4LOG.TXT and in the receiver archive. The device name can be
faded into the current video image (see “Extras” on page 224).
7.2
User
The User tab allows you to add up to 25 different users. Moreover, it allows you to create individual user
profiles that specify what each user can do in and to the device in question.
Managing users
Creating new users
In the Enter new user box enter the name or identification of a new user (max. length: 20 characters). Click
to add the new entry to the list of Registered users.
If at least one user is registered in the transmitter and this user was not created in the User Management of
the receiver software (see “User” on page 80), the user will be prompted for their user name and password
when a connection is being established. CamControl PRO will not establish a connection if a non-registered
user or a wrong password is entered.
Note:
The user is logged on automatically if the user logged on in CamControl PRO is set up in the User
Management of the device.
User password
This entry field allows you to define a password for the user (max. length: 10 characters). You must re-enter
your password in the Password confirmation box for verification. If your entries do not match, an appropriate
message will be displayed when you click OK.
Note:
27769_02
If using HeiTel video systems internationally, refrain where necessary from using country-specific
special characters for user name and password.
123
CamControl PRO Software Manual
HeiTel by Xtralis
Define the term of validity of user passwords
All devices of the VGseries and also the CamTel SVR, CamDisc SVR, CamDisc SVRs, CamServer,
Cam4mobile and CamDisc HNVR series, user passwords with a limited term of validity can be defined
(minimum requirement: Firmware 1.88, CamControl PRO 3.88).
The validity of the user passwords is monitored by the device. A relevant note is displayed once after every
connection, where applicable (see “Warning window on expiry of a password's term of validity” on page 124).
Password expires after x weeks
With the Password expires after x weeks option, you specify the term of validity for user passwords. The term
of validity can be between 1 and 52 weeks. The standard setting is 12 weeks.
Warning x days in advance
In addition, you can define how many days in advance you wish to be informed of the expiry of the relevant
password. The prior warning can be between 0 and 14 days. The standard setting is 3 days.
If this function is added to HeiTel video systems with existing users via a firmware update (firmware 1.88 or
later) for the first time, the users must be newly created or their password will have to be changed alternatively
in order to save a valid reference date in the device.
Warning window on expiry of a password's term of validity
The above dialogue box informs you, where applicable, once after every connection on the expiry of a user
password's term of validity. To change the user password, the current password, a new password and a
repetition of this password as confirmation is required.
If the new password and confirmation differ, a relevant warning is displayed. Only on correct entry in the three
text boxes is the Change button activated in order to change a password.
The password can either be changed via this dialogue, or alternatively users with authorisation to change the
device setup can make a relevant modification of the password.
Notes:
All recipients using these user data may have to be adjusted to the changed password before connecting to
this server again:
l
l
l
l
l
CamControl PRO: Transmitter index, Receiver options/User
Event Management System: Master Data Management
CamControl MV: Camera list/Edit
CamControl iPhone/ CamControl iPad:Transmitter list/Edit
CamControl Android: Transmitter list/Edit
124
27769_02
HeiTel by Xtralis
CamControl PRO Software Manual
Creating a user profile
Live cameras
Archive cameras
In these fields select those cameras to be activated for the user in question during live transmissions and
those additional cameras to be activated while saving images during archive access. If a user selects a
disabled camera, a lock icon against a black background will be displayed instead of a video image.
Options
This field allows you to assign more transmitter configuration and control options to the user in question.
The following options are available:
Option
Description
Modify setup
Allows the user to modify transmitter settings
PTZ
Allows the user to control pan-and-tilt systems in the relevant dialogue
box
Remote functions
Allows the user to control external devices with the internal remote
adapter
Audio
Enables audio transmission for the relevant user; only with installed
Audio Card and for CamDisc HNVR devices
Transparent channel
Allow access the via serial channel
Manually alarm
enabling
Allows the user to manually activate or deactivate alarm enable
Internal relays
Allows the user to control internal relays
Disconnect in case of
alarm
Prevents a connection established by the receiver from being
disconnected in the event of an alarm
(see “Hang up and redial on alarm” on page 226)
Logfile
Authorises the user to view the transmitter logfile; applies to CamDisc
HNVR, CamDisc SVR, Cam4mobile and CamServer devices only
Archive access
optimal speed
Authorises the user for Evaluation with optimal speed of the Site
Archive. Only applies for CamDisc HNVR, CamDisc SVR, Cam4mobile
and CamServer devices.
Archive access
optimal functionality
Authorises the user for Evaluation with optimal functionality (online
player) of the Site Archive. Only applies for CamDisc HNVR, CamDisc
SVR, Cam4mobile and CamServer devices.
Note:
If Modify setup is not selected, the Setup button will not be available (greyed out) to the user in
question during active connections.
If you have created users for your device, at least one of them must have permission to change the
setup so that someone can access the transmitter's settings.
Deleting a user
Click
to delete the user selected in the Registered users list from the User Management of
your VG and SVR device.
27769_02
125
CamControl PRO Software Manual
7.3
HeiTel by Xtralis
Date and time
Internal device time (Device)
All current HeiTel devices are equipped with an internal clock. This clock should be checked regularly, and
adjusted if necessary, to ensure that images are saved with the correct time and date.
Setting the recorder time
Note:
Recorder time
This field contains the current time of the digital transmission system.
Local PC time
This field contains the current time of the receiver PC.
Calculated Date and
Time for the device
This field displays the calculated result for the date and time of the image
transmission system, taking into account the selected time zone and
automatically adjusted summer/winter time, as the case may be.
Set recorder to PC
time
If you want to set the internal clock of your digital image transmission
system, select Set recorder to PC time. Once you exit setup by clicking
OK and the settings are transferred to the device, the device time will be
synchronised with the receiver PC time, taking the selected time zones
into consideration.
Ensure that the time on the receiver PC time is correct if you are synchronising your transmitter
with it.
Summer time settings
Select Set automatically to summer time if you want the internal clock to be adjusted to the selected summer
time automatically. You can select the location of the transmitter from the drop-down list.
Note:
If time synchronization can take place via alarm panel or IBIS, the device-internal, automatic
summer/winter time changeover is not carried out (see “Summer time settings” on page 126).
Time alignment via NTP Time Server (NTP)
HeiTel video systems can be set for an automatic time alignment via the NTP Time Server. NTP means
Network Time Protocol and is a standard for aligning the clocks of computer systems in network
environments (minimum requirement: CamControl PRO V3.88 and device firmware 1.88).
126
27769_02
HeiTel by Xtralis
CamControl PRO Software Manual
The video systems use the following protocols during time alignment:
l
l
RFC 1305 (see http://tools.ietf.org/html/rfc1305)
RFC 4330 (see http:/tools.ietf.org/html/rfc4330).
NTP Settings
On
With the On option, you can activate time alignment via NTP.
Note:
When activating time alignment via NTP, synchronisation of the time via alarm panel, IBIS, serial
control or CamControl PRO is no longer possible.
Please be sure to check the video system's time after deactivating the NTP function. As the time basis for
NTP is the coordinated world time (UTC = Universal Time Coordinated), there may be differences depending
on the time zone of the video system's place of installation.
Correct the time manually, where required (see “Set recorder to PC time” on page 126).
Synchronisation
With the Synchronise every function, you can set the time interval, in which the video system is to set the
time via NTP. The standard setting for the synchronisation interval is 6 h.
NTP Server Address
The address of an NTP Time Server can be stated as an IP address or as a symbolic name (without quotation
marks):
l
l
195.145.119.188
0.de.pool.ntp.org
Note:
Symbolic addresses can only be processed directly if at least one valid DNS server and the
gateway to the network settings were set (see “Network (TCP/IP)” on page 129).
The
button is used to verify the previously entered NTP server. After pressing the
button, the entered NTP server is checked for its suitability. Relevant status messages are displayed to the
right of the button.
Possible status messages:
27769_02
127
CamControl PRO Software Manual
l
l
l
HeiTel by Xtralis
Checking, please wait … [0x02]
The NTP server is being checked. This process may last for symbolic names - in particular with
unsuitable NTP servers - approx. 40 to 60 seconds. The message is displayed in blue.
The NTP server is OK [0x01].
If the NTP server was assessed positively during the check, this message is displayed in green.
The NTP server is not applicable [0x00].
If the NTP server was assessed negatively during the check, this message is displayed in red.
l
l
Under certain circumstances, the NTP server did not provide a sufficient reply. The server may be
assessed as suitable after a further check.
Check for the server addresses set as a symbolic name whether at least one DNS server and the
gateway in the network settings (see “Network (TCP/IP)” on page 129) were set correctly.
NTP time servers can be available in a local network or via the internet (third party services). When using an
NTP Time Server on the internet, a pool of these servers should always be accessed. As part of the NTP Pool
Project (see http://www.pool.ntp.org), you can find a relevant list of these servers.
Examples:
l
l
l
l
l
l
l
0.de.pool.ntp.org (Germany)
1.de.pool.ntp.org (Germany)
2.de.pool.ntp.org (Germany)
3.de.pool.ntp.org (Germany)
0.uk.pool.ntp.org (UK)
3.ie.pool.ntp.org (Ireland)
0.us.pool.ntp.org (USA)
Global parameters
The following parameters are configured globally for the Date & Time menu.
Time zone
Select the time zone of the location of your digital image transmission system. The associated time appears
immediately in the Calculated Date and Time for the device box.
If necessary, you can configureCamControl PRO in such a way that every time a connection to the
transmitter is successfully established, its internal clock is synchronised with the time of your receiver PC
(see “Time synchronisation” on page 81)/(see “Time synchronisation [TIMESYNC]” on page 266).
Extra holidays (CamDisc HNVR, CamDisc SVR, Cam4mobile and CamServer only and the same
devices of the VG series
The calendar in these devices allows you to select a total of 25 days to
be saved as special holidays in the timer (see “Recording (Video 1-2/4/10
in)” on page 192) of the digital image transmission system. Each
selected day can be allocated to one of two holiday types. Timer
operation distinguishes between these two types by allowing separate
settings for both (see "Holidays" on page 195). This allows you to
configure two separate and independent sets of holiday rules.
To add a holiday, select the corresponding date in the calendar and then
confirm the type by clicking Add as type 1 or Add as type 2, as
appropriate.
Clicking Toggle Type allows you to reassign the selected holiday as the
other holiday type.
To remove a holiday, first select it and then click Delete Entry. This
entry will then be deleted from the holiday rule in question.
128
27769_02
HeiTel by Xtralis
7.4
CamControl PRO Software Manual
Connections
The Connections node contains the following configuration menus: Network (TCP/IP), Wireless WAN,
External Modem, Internal ISDN TA/Modem, Phone & IP numbers, Live video settings, E-Mail and
HTconnect.
Note:
Only make changes to the connection settings if you are absolutely certain that you fully
understand their impact. Incorrect settings may cause the transmitter to become inaccessible
under certain circumstances.
7.4.1
Network (TCP/IP)
Open the Network TCP/IP tab from the menu under the Connections node. Network TCP/IP allows you to
configure the internal network adapter. You can integrate the digital image transmission system into your local
network (e.g., company intranet) or a higher-level network (e.g., Internet) using the adapter.
Please note the special features concerning the two network interfaces of the CamDisc HNVR/CamDisc
VG HNVR (see “Special network configuration with CamDisc HNVR/CamDisc VG HNVR” on page 133).
100 MBit
(xx:xx:xx:xx:xx:xx)
27769_02
Information field with details of the maximum transmission speed of the
network interface and the MAC address.
129
CamControl PRO Software Manual
HeiTel by Xtralis
Obtain an IP address With the function Obtain an IP address automatically (DHCP) the
automatically (DHCP) transmitter receives the option of obtaining an IP address dynamically
from a DHCP server (DHCP: Dynamic Host Configuration Protocol).
Within the network, where the configured transmitter is used, the
respective service must be available.
By activating this function the settings for IP address, Subnet Mask and
Gateway are deactivated and displayed in grey. To have changes of this
option become effective you must confirm twice by clicking OK.
Thereafter close the connection. When changing the IP address
settings, the device will restart.
IP address
Enter an available IP address, or an IP address allocated to you by your
internet service provider, in the IP address box (factory setting:
192.168.31.95). Your digital image transmission system can be dialled at
this address. Check this address with your network administrator to
ensure that it is and will remain a unique address within the network.
If you are planning a new local network user, addresses should be in the
address range from 192.168.0.1 to 192.168.255.254 (the standard range
for private network addresses). The range could be 192.168.31.1 to
192.168.31.254 for a network covering 254 addresses for example.
Subnet mask
If your network is connected to the Internet via router by dedicated or
dial-up line, or if it is part of your company intranet, enter the subnet
mask of your sub-network in the corresponding box. You can find out the
relevant subnet mask from your network administrator or internet service
provider.
If you are planning a new local network, you should set the subnet mask
to 255.255.255.0 (allows the allocation of 254 network addresses).
Gateway
If your network is connected to the Internet via router by dedicated or
dial-up line, or if it is part of your company intranet, enter your gateway
address in the corresponding box. You can find out the relevant gateway
address from your network administrator or internet service provider.
You do not need a gateway address for a new local network (value
0.0.0.0).
Port
The default port of your transmitter unit is 3000.
It may be necessary to change the default port number if want to set up
more than one transmitter unit at one IP address via router, or if port 3000
has been already been allocated in your network or cannot be used.
Note:
Change the port number only if necessary. For an overview of
the IP ports used by CamControl PRO, press the ? button
(see “Overview of the used IP Ports” on page253).
Port numbers range from 0 to 65535. Please note that the numbers 0 to
1023 are reserved for the system. Therefore only ports 1024 to 65535 are
available. Contact your network administrator for assistance in defining
an appropriate port number.
Note:
130
If you are using any port other than the default port 3000, this
port number must be added to the IP address for transmitter
dial-up (see “Port number” on page 100).
If all transmitters dialled by your receiver PC are set to the
same port, you can change the receiver software configuration
file to that port number (see "Port number " on page 257“).
27769_02
HeiTel by Xtralis
Obtain DNS server
address automatically
CamControl PRO Software Manual
If the function Obtain an IP address automatically (DHCP) is activated,
then for this transmitter you may also activate the function Obtain DNS
server address automatically. Within the network, where the configured
transmitter is used, the respective service must be available.
Upon activating this function, the settings for DNS Server 1 and DNS
Server 2 are deactivated and displayed in grey. To have changes of this
option become effective you must confirm twice by clicking OK.
Thereafter close the connection. When changing the settings regarding
the DNS servers, the device will complete a restart.
DNS Server 1
DNS Server 2
If you have defined a symbolic IP address for alarm calls under Phone &
IP numbers (see “Phone and IP numbers” on page 139), enter the IP
addresses of your DNS service in these two fields.
Note:
HeiTel transmitters do not support direct resolution of
symbolic names in IP addresses. However, a connection can
be established to a symbolic address via a DNS (domain
name server). Please contact your network administrator for
assistance in setting up a symbolic address and for
information on DNS service providers.
A symbolic name is advisable especially in the case of
continuously changing IP addresses.
Maximum
transmission speed
If you want to limit utilisation of your network, select a maximum
connection speed from the appropriate drop-down list.
Web Server
If you select the option Web Server one of the six standard connections
is dropped in favour of up to four additional connections to PC, PDA or
Smartphone browsers. Click OK to confirm your activation settings and
then close the connection between the CamControl software and the
transmitter by clicking Hang up in the main menu. The device will then
re-initialise. This can require up to 120 seconds depending on the device
type and configuration.
27769_02
131
CamControl PRO Software Manual
Port
HeiTel by Xtralis
The default port of your transmitter unit for the Web Server is 80. It may
be necessary to change the default port number if want to set up more
than one transmitter unit at one IP address via router, or if port 80 has
already been allocated in your network or cannot be used (minimum
requirement: CamControl PRO V3.87 and device firmware 1.84). If you
change the port for the Web Server and no longer use the standard port,
this modified port applies for all Web server and Web API connections,
including CamControl MV, CamControl WM and CamControl iPhone.
These applications must be programmed accordingly.
For an overview of the IP ports used by CamControl PRO, press the ?
button (see “Overview of the used IP Ports” on page253).
Note:
To connect to the Web Server, the device's symbolic name (e.g.:
http://webserver1.heitel.com) or IP address (e.g.: http://62.214.6.12)
must be entered in the Web browser address bar.
Examples with modified Web Server port (81):
l
l
http://webserver1.heitel.com:81
http://62.214.6.12:81
Configuring connection If the Web Server is active, you can select the time period for Automatic
timeout for the Web
disconnect after from the drop-down list. The options range in different
Server
increments from Off to 24 h. The default setting is 30 min. If the Web
Server is not active, then you cannot configure a timeout.
Web API
Deactivating the Web API option prevents access to the device-internal
web interface. This goes beyond the functional scope of the Web Server.
The Web API describes a programming interface (Application
Programming Interface) and is an extension of the device-internal web
interface for httpbased integration in third-party applications.
Note:
LAN auto detection
support
Ensure that you enable the Web API if you want to access the
relevant transmitter using the HeiTel software CamControl
Android, CamControl iPhone, and/or CamControl MV.
The activation of the function LAN auto detection support is a
requirement for the transmitter to be found during the Device detection in
local area network (see “Device detection in local area network” on page
108).
Configuring the image transmitter
To configure a digital transmission system for the first time, establish a connection to your device via null
modem or TCP/IP (factory setting of the HeiTel devices: 192.168.31.95). Make the relevant settings for the
network connection in this dialogue box. Select the maximum transmission speed. These values will be
permanently stored in the settings. The IP address and subnet mask you enter will be retained even in the
event of a reset to factory values.
132
27769_02
HeiTel by Xtralis
7.4.1.1
CamControl PRO Software Manual
Special network configuration with CamDisc HNVR/CamDisc VG HNVR
In comparison with HeiTel devices of the SVR/VG series, a special feature of the CamDisc HNVR/CamDisc
VG HNVR model is that it has two network interfaces. In addition to the well-known 10/100 MBit/s interface
called Ethernet on the back of the device, this device also has a 1 GBit/s (10/100/1000 MBit/s) interface
labelled IP Camera. Whilst the Ethernet interface is primarily intended to connect to the evaluation network,
the IP Camera interface is primarily designed to connect to the network of the IP cameras.
These specifications are only a suggestion. The network interfaces may also be used in a different
constellation.
Standard IP addresses In the standard delivery version or following a device reset, the following
of the CamDisc HNVR IP addresses are assigned to the two network interfaces:
l
l
Ethernet (10/100 MBit/s): 192.168.31.95
IP Camera (10/100/1000 MBit/s): 192.168.32.95
An adapted Network (TCP/IP) dialogue box takes into account the two
network interfaces of the CamDisc HNVR/CamDisc VG HNVR:
100 MBit and 1 GBit
You select the interface to be programmed via the 100 MBit (the Ethernet
device network interface) and 1 GBit (the IP Camera device network
interface) buttons. The relevant MAC address for the network interface in
question is also displayed.
For the interface selected you can select the Obtain an IP address
automatically (DHCP) option or set the parameters manually for IP
address and Subnet Mask.
For a detailed explanation of these parameters, please refer to the
previous section (see “Network (TCP/IP)” on page 129).
Global network
parameters
The other network parameters such as Gateway, Port, DNS Server 1,
DNS Server 2, Maximum transmission speed, Web Server, Automatic
disconnect after, Web API and LAN autodetection support are
configured globally for both network interfaces.
The Obtain a DNS server address automatically option can only be
enabled if, for at least one network interface, the option Obtain an IP
address automatically (DHCP) was enabled (see “100 MBit and 1 GBit”
on page 133).
For a detailed explanation of these parameters, please refer to the
previous section (see “Network (TCP/IP)” on page 129).
27769_02
133
CamControl PRO Software Manual
7.4.2
HeiTel by Xtralis
Wireless WAN
Open the Wireless WAN dialogue window from the menu under the Connections node. If necessary, you can
configure an internal WAN card via Wireless WAN. This option is currently only available for the CamServer
VG 4c with 3G/4G module and the CamDisc / Cam4mobile VG 4c with 3G/4G module. (This device is
equipped with an internal 3G/4G module for a WAN connection).
3G/4G programming
The 3G/4G modem manufacturer and type will appear in the upper status window. In addition you will be
notified whether a connection to the provider exists. The graphic below shows information on the signal quality
and/or the power level.
PIN
The PIN (Personal Identification Number) is required depending on the
programming of the SIM (Subscriber Identity Module) card.
User name
This setting depends on the provider (maximum 38 characters).
Password
This setting depends on the provider (maximum 38 characters).
APN
The APN (Access Point Name) access data should normally be in the
following order: 1,"IP","<PROVIDER APN>"
Example data for German providers:
l
l
l
l
Dial in number
Vodafone: 1,"IP","web.vodafone.de"
T-Mobile: 1,"IP","internet.t-d1.de" or 1,"IP","internet.t-mobile"
E-Plus: 1,"IP","internet.eplus.de"
o2: 1,"IP","surfo2"
The standard dial in number for Internet connections via 3G/UMTS or
GPRS is *99#. Depending on the mobile telephone provider it may be
necessary to enter *99*1# or *99***1# as dial in number.
Note:
134
The parameters listed here will often need to be configured
with different data, depending on the provider. For example in
the case of access data (User name and Password) there are
providers by which these entries can remain empty, whereas
others require a definite or indefinite entry. Always contact
your mobile phone provider with regard to current access data.
27769_02
HeiTel by Xtralis
CamControl PRO Software Manual
Initialisation command 1 The predefined command sequence ATE0V1&D2&C1S0=0+IFC=2,2
generally ensures correct initialisation of the internal 3G/UMTS modem.
Note:
With the installed Sierra Wireless card MC7304 or MC7354,
the initialisation command must be:
--set-network-modes all
Initialisation command 2 A further command sequence enables further provider-dependent
adjustments of the internal 3G/4G modem where necessary.
Reset Adapter Every
This drop-down list menu allows you to specify how often you want to
reset the internal 3G/UMTS modem. Certain installations may require
the internal 3G/UMTS modem to be reset at periodic intervals in order to
ensure the availability of the device. Please note that this interval is reset
after each connection and that the adapter cannot be reset during active
connections.
l
With recording pause: Select this option to pause the recording of
image data during resetting of the adapter.
MTU
This setting for MTU (Maximum Transmission Unit) is providerdependent, standard value: 1500
MRU
This setting for MRU (Maximum Receive Unit) is provider-dependent,
standard value: 1500
Internal GPS
Activate this setting if you are using the internal GPS feature of the
3G/4G wireless module
When the GPS functionality of the serial channel is activated, this
function has a priority over the internal GPS.
Active antenna
7.4.2.1
Activate this tick-box if you are using an active antenna
Provider data
The following provider data was researched and tested in May 2011. This data is subject to change; always
get the current 3G/4G access data from your provider.
Germany (As of May 2011)
Provider
User name
Password
APN
Vodafone
(blank)
(blank)
web.vodafone.de
T-Mobile
t-mobile
tm
internet.t-mobile
E-Plus
eplus
(blank)
internet.eplus.de
O2
(blank)
(blank)
surfo2
Switzerland (As of May 2011)
Provider
User name
Password
APN
swisscom
(blank)
(blank)
gprs.swisscom.ch
sunrise
(blank)
(blank)
internet
Orange CH
(blank)
(blank)
internet
27769_02
135
CamControl PRO Software Manual
HeiTel by Xtralis
United Kingdom (As of June 2011)
Provider
User name
Password
APN
Vodafone
web
web
internet
O2
mobileweb
password
mobile.o2.co.uk
Orange
user
pass
orangeinternet
Three
(blank)
(blank)
3internet
BT Mobile
bt
bt
btmobile.bt.com
T-Mobile
user
wap
general.t-mobile.uk
7.4.3
External modem
Open the External modem dialogue box from the menu under the Connections node.
The External modem tab allows you to configure an externally connected modem or an external ISDN TA
(terminal adapter). If the HeiTel ISDN card is built into your device, configure this internal ISDN TA in the
Internal ISDN TA tab (see “ Internal ISDN TA/Modem” on page 137).
If you want to operate your transmitter with an external modem/ISDN TA, you may also program your device
using a terminal program and then save the settings in the modem permanently. Then all you have to do is set
the Baud rate of your transmitter to the correct value. Please refer also to the appropriate sections in the
modem or ISDN TA manual.
Baud rate
Select a suitable transmission speed for the transmitter's serial interface
from the Baud rate drop-down list.
You can select 115200 Baud in most cases. You may have to select a
different rate for some analogue modems, for example. If you are using
channel bundling with ISDN operation, you should set 230400 Baud as
the interface speed.
136
Tone dial
Select this option for tone dialling.
Pulse dial
Select this option for pulse dialling.
Number of rings
Number of rings allows you to determine the number of rings before the
transmitter replies and initiates a connection.
27769_02
HeiTel by Xtralis
CamControl PRO Software Manual
Initialisation
You can enter an AT command for initialising your modem/ISDN TA in
the Initialisation prefix box.
Dial prefix
Enter the dial command in the Dial prefix box. ATD is sufficient in most
cases. In rare instances, more advanced modem/ISDN TA control may
be required.
Last caller
If your modem/ISDN TA supports storing recent callers, you may enter
the appropriate AT command in this box.
General information on modem configuration
l
l
l
l
l
l
l
l
The modem/ISDN TA must be set to RTS/CTS flow control (hardware handshake)
The DTR signal interrupts a connection or the establishment of a connection
DCD (or M5) must indicate an active connection
The modem/ISDN TA must not accept calls automatically (ATS0=0)
The modem/ISDN TA must send verbal messages (ATV1) for recognition of incoming calls
The modem/ISDN TA must not send echo messages (ATE0)
The ISDN terminal adapter must be configured for X.75 protocol
If the ISDN terminal adapter is connected to other ISDN data devices with an S0 bus, an MSN may need
to be assigned to the ISDN TA (generally the phone number without prefix)
Operation with a telephone system
In this case, the telephone number must be prefixed with the outside line number(s). In some cases, there
may be problems with the modem's dial tone recognition. In this case, turn off the modem's dial tone
recognition (frequently ATX3). Alternatively, you can insert a pause after the outside line number(s) (e.g.,
W=wait for dial tone).
ISDN network operation
The ISDN terminal adapter must be configured for X.75 protocol.
Note:
7.4.4
Many of the above settings are factory defaults and can be activated with "AT&F". If you are still
experiencing problems, always consult your modem and transmitter manuals.
Internal ISDN TA/Modem
Go to the Internal ISDN TA/Modem tab via the selection menu, under the node Connections. If the internal
ISDN Card - or alternatively the PSTN Card for analogue telephone connections - is installed, configure it
using this tab. The settings are used solely to configure the internal ISDN module or the internal PSTN
module. Configure connections made through an external modem or external ISDN TA on the External
modem tab (see “External modem” on page 136).
Note:
27769_02
The ISDN Card or PSTN Card, in conjunction with the SVR or HNVR generation of devices,
provides the added security of redundant image transmission, as you can choose between two
independent methods of transmission (via ISDN line or analogue line and UMTS/3G network, for
example).
137
CamControl PRO Software Manual
Version
HeiTel by Xtralis
The version number provides information on the version status of the
ISDN Card or PSTN Card.
Note:
If no ISDN Card or PSTN Card is installed, instead of
displaying the version number you will receive the following
notification:
MSN
Enter your MSN (Multiple Subscriber Number) in the MSN box. This is a
telephone number (without prefix) used to dial into the transmitter. If this
box is blank, the MSN in the internal ISDN TA module will be deleted.
The associated AT and dial commands will be assigned automatically so
that no further ISDN TA initialisation is required.
When using the PSTN Card, no entry is provided in this field.
Reset Adapter Every
138
This drop-down list menu allows you to specify how often you want to
reset the internal ISDN adapter. Certain installations may require the
ISDN TA to be reset at periodic intervals in order to ensure the
availability of the device. Please note that this interval is reset after each
connection and that the adapter cannot be reset during active
connections.
27769_02
HeiTel by Xtralis
7.4.5
CamControl PRO Software Manual
Phone and IP numbers
One of the most important features of HeiTel image transmission systems is their ability to automatically
establish successively connections to one or more receivers in the event of an alarm. In the Phone & IP
numbers tab (under the Connections node), enter the relevant telephone numbers and IP addresses and
specify dial-up behaviour.
Phone numbers & IP
addresses
Here you can enter up to four telephone numbers or IP addresses
(network operation) to be called successively in the event of alarm. The
transmitter will start dialling the first entry (top priority). Enter the
complete telephone number including prefix. Use special characters or
letters only if absolutely necessary. You may prefix the telephone
number with the outside line number(s) here.
You must include the associated separators when entering an IP
address (e.g., 124.124.124.124). If you are using a DNS service, you
may enter a symbolic address here. For the system to recognise the
entry as a symbolic IP address, the address must be set in quotation
marks (e.g., "www.your_domain.com"). The IP addresses of your DNS
service must be entered in the Network TCP/IP tab (see “Network
(TCP/IP)” on page 129).
For network alarms, you can complete the alarm call number by adding a
port number. Here, the port number must be separated from the alarm
call number by a colon.
Note:
27769_02
Please ensure that symbolic addresses are enclosed in
quotation marks and that the port number is then added
outside the quotation marks, separated by a colon.
139
CamControl PRO Software Manual
HeiTel by Xtralis
Alarm by ISDN
connection
If the internal ISDN card is built into your device, you can choose
between two independent methods of transmission. If you have
connected an external modem/ISDN TA in addition to the internal ISDNTA(see “ Internal ISDN TA/Modem” on page 137), it must be possible to
differentiate between the two transmission paths. So that the transmitter
can determine which path to use to dial telephone numbers, insert a
small "i" or capital "I" in front of the number to be dialled by the internal
adapter. If an external modem/ISDN TA is not connected, you don't need
to identify the number in this way.
Alarm by network
connection
Sending an alarm to a receiver IP address is only possible via the
integrated network adapter (see “Network (TCP/IP)” on page 129).
Sending an alarm via an external network connection is not possible.
Alarm by null modem
connection
If the four entry fields for telephone numbers / IP addresses are left
blank, alarms will be sent by an existing null modem connection.
Callback
If you select Callback for an entered telephone number or IP address,
you can call back this transmitter on the next redial. After a connection
has been established, the Execute Callback? dialogue box is displayed
for about four seconds. Click Skip Callback if you don't want to call
back. The current connection will remain active in this case. If you click
Execute callback or wait four seconds, the active connection will be
closed and the transmitter will dial the first number or address activated.
The status bar in the control field will indicate successful callback by the
reason for connection "Online/Callback".
Note:
Number of re-dials
For your transmitter to be able to call you back, at least one
user must have been created (see “User” on page 123).
Number of re-dials defines the number of redial attempts in the event of
failure to establish a connection.
Pause between redials Pause between re-dials / s is the interval in seconds between re-dial
attempts.
Pause between
repeating list
Pause between repeating list / s is the interval in seconds between a
failed attempt to dial one of the four telephone numbers / IP addresses
and the next attempt.
Always call all
numbers
If Always call all numbers is selected, the transmitter tries to establish
successively a connection to every telephone number / IP address
entered. If this option is not selected, an attempt is made to reach one of
the specified receivers starting with the first telephone number / IP
address.
If the option is active for a callback, the transmitter attempts to establish
a connection with every number / address entered for a callback.
Note:
140
With appropriate relay configuration, failure to establish a
connection to a receiver in the event of alarm will be reported
(see “Relays” on page 208). Refer to your product guide for
more information.
27769_02
HeiTel by Xtralis
7.4.6
CamControl PRO Software Manual
Live video settings
Open the Live video settings tab from the menu under the Connections node.
You can configure live image resolution and quality for each installed camera and for the individual multiple
views (Groups, Quad, Ten). Moreover, you can opt for conditional refresh transmission mode.
In the case of CamDisc HNVR/CamDisc VG HNVR series devices without HYBRID Card 4 you can only
program the Conditional refresh option (see “Conditional refresh mode” on page 142).
Note:
For digital transmission systems with local continuous recording (CamDisc HNVR, CamDisc
SVR, Cam4mobile and CamServer devices and HeiTel VG VideoGateways), the settings for
transmission are made independently of those for archiving (see “Video settings” on page 176).
Live transmission
quality
For each camera, you can select seven levels of image quality for live
image transmission from the Live transmission quality drop-down list.
The preset value is the quality 720 * 288 +. The higher the transmission
quality of the video images, the greater the amount of data to be
transmitted per image, and the lower the refresh rate.
Select a suitable quality level to achieve the appropriate balance
between refresh rate and image quality. For IP cameras the Live
transmission quality cannot be programmed because the images
supplied are transferred in the original resolution. This option is not
enabled for these cameras.
Live quality for multi
view
27769_02
In the drop-down lists for Groups, Quad and Ten, you can select the
desired resolution and quality for the various multiple image views as per
the live cameras images.
The same principle applies here: The higher the transmission quality, the
greater the amount of data to be transmitted per image, and the lower the
refresh rate.
141
CamControl PRO Software Manual
HeiTel by Xtralis
Conditional refresh
mode
Select On if you want the live images to be transmitted in conditional
refresh mode.
Conditional refresh mode only requires the differences between
successive images to display the full image. In many cases, only parts
of a scene changes. Certain areas of the image, such as a background
wall, do not change at all, or only very little (e.g. due to changes in
lighting). This reduces the size of the image considerably, which in turn
may increase transmission speed by up to twice as much in some
cases.
IP cameras
When transferring images from IP cameras the following conditions
apply:
l
l
7.4.7
CamDisc HNVR, CamDisc VG HNVR: Images are transferred
depending on the programming for the conditional refresh.
Image size and format depend on the IP camera.
CamTel SVR, CamDisc SVR, CamDisc SVRs, CamServer,
Cam4mobile, CamTel VG, CamDisc VG, CamServer VG,
Cam4mobile VG:
l
Images are transferred from analogue cameras depending on the
programming for the conditional refresh mode.
l
Regardless of the parameters set for the conditional refresh
mode, images from IP cameras are always transferred as full
screen images.
Image size and format depend on the IP camera.
E-Mail
Access the E-Mail tab through the selection menu, under the Connections node. In the event of an alarm you
can inform up to two recipients by email (with or without an alarm image) using the E-Mail function.
Send email in case of
alarm
142
Activate the Send email in case of alarm (see “Send email in case of
alarm” on page 144) option if, in addition to the alarm notification by
modem, ISDN or network connection, (see “Phone and IP numbers” on
page 139) a message should be sent via email.
27769_02
HeiTel by Xtralis
Send email in case of
picture warning
threshold is reached
CamControl PRO Software Manual
Activate the Send email in case of picture warning threshold is reached
(see “Send email in case of picture warning threshold reached” on page
144) option, if, in addition to standard notification, (see “Recording (Video
1-2/4/10 in)” on page 192) a message should be sent via email is.
Note:
Requirements:
l
l
Ensure that the IP addresses for Gateway and DNS Server (see
Network (TCP/IP)” on page 129) have been correctly configured.
If possible, you should maintain a dedicated email account used only
for HeiTel device alarm notifications. The following information is
required for the programming:
Outgoing mail server (SMTP), user name or email address of the
account, and the corresponding password.
The relevant information can be obtained from your Internet Service
Provider (ISP) or the responsible system administrator.
Server information
Outgoing mail (SMTP) Under Outgoing mail (SMTP), enter the corresponding DNS domain
name of your SMTP server, e.g. in the form aaaa.bbbb.cccc. The alarm
message by email function is not supported if an IP address is specified.
User information
Account name
Under Account name, enter the email address or user name for the email
account intended to serve as the sender.
The sender address consists of the account name and SMTP domain. If,
however, the account name contains an @ sign, the account name will be
used as the sender.
Account name
Outgoing mail (SMTP)
Sender address
info
smtp.heitel.com
[email protected]
[email protected]
smtp.heitel2.de
[email protected]
In both the cases, the sender results as [email protected].
Password
Add the associated password.
Optional message or link
Text or link
As an option, you can add supplementary text or a hyperlink under Text
or link. This text is displayed in the text of the email alarm. The length for
this text field is limited to 64 characters.
Destination in case of Alarm
Destination email
address 1
Under Destination email address 1 or Destination email address 2, enter
the email addresses of the recipients.
Destination email
address 2
Note:
Alarm image as
attachment
For each destination address, you also have the option to select whether
the respective alarm image is to be sent as an attachment with the email.
In general, an attempt is made to send an alarm by email to the
recipients who have been entered. If sending of the email fails, no further
alarm message for the alarm concerned is sent by email. Independently
of the email alarm message, alarm messages from the corresponding
receivers are sent according to the settings made under Telephone
number & IP addresses (see “Phone and IP numbers” on page 139).
27769_02
Only one email address is permitted for each destination email
address.
143
CamControl PRO Software Manual
7.4.7.1
HeiTel by Xtralis
Structure of the email alarm message
For the email alarm message, the email function automatically generates a subject line, which is structured as
follows:
Send email in case of alarm
Subject
Transmitter name or Serial number, reason for alarm [Camera name, if
present], Date and Time
Example of a possible subject line:
CamDisc SVR 10 #1, control input 01 [Camera 1],
2007-06-08 11:18:42
Body of email
The body of the email is prepared in fuller detail and contains, where
necessary, the optional supplementary text or link and/or the alarm
image:
Alarm message location: transmitter location:
http:\\192.168.31.170
Unit: CamDisc SVR 10 #1 [CV547015]
Reason: control input 01 [Camera 1]
Date: 2007-06-08 11:18:42
All messages within the body of the email that have been generated
automatically by the email function contain text information only in
English.
Alarm image
The file name for the alarm image always consists of the date and time,
without separator, and has the file extension .jpg for the image format
JPEG (Joint Photographic Experts Group).
File name of the alarm image referred to in the sample alarm message:
20070608111842.jpg
Send email in case of picture warning threshold reached
Subject
Transmitter name or Serial number, reason for alarm, Camera [Camera
name, if present], Date and Time
Example of a possible subject line:
CamDisc SVR 10 #1, warning threshold (continuous
recording) reached,
camera 01 [Camera 1] 2008-12-02 15:24:01
Body of email
The body of the email is prepared in fuller detail and contains, where
necessary, the optional supplementary text or link and/or the alarm
image:
Alarm message location: transmitter location:
http:\\192.168.31.170
Unit:CamDisc SVR 10 #1 [CV651028]
Reason: warning threshold (continuous recording)
reached, camera 01 [Camera 1]
Date: 2008-12-02 15:24:01
All messages within the body of the email that were generated
automatically by the email function contain text information only in
English.
144
27769_02
HeiTel by Xtralis
Alarm image
7.4.8
CamControl PRO Software Manual
An alarm image as attachment is not generated for this warning, even if
this option is enabled for the target address.
HTconnect
Call up the dialogue window HTconnect via the selection menu, under the node Connections.
In HTconnect, the current HeiTel devices have a leased line between the transmitter and the receiver
software. This service is only available for TCP/IP connections.
Note:
Please also take note of the configuration notes for CamControl PRO software (see “HTconnect:
TCP/IP leased line” on page 111).
For this, the TCP/IP leased line is always initiated by the transmitter. The correspondingly-configured HeiTel
devices establish a "resting" permanent connection to the receiver for this. For this leased line via TCP/IP,
each transmitter which is connected with a receiver generates a data volume of around 6 bytes per minute for
the "resting" connection.
The use of the TCP/IP leased line is suitable for transmitters with DSL/UMTS connections with dynamic IP
addresses, thereby eliminating the need for DynDNS entry (Dynamic Domain Name System entry) with the
corresponding providers, and for devices within company/provider networks where the firewall restrictively
prevents incoming calls.
Port
Enter the port for HTconnect connections. The standard setting is Port:
3333.
Please note that this port must match the settings made for the receiver
software (see “HTconnect: TCP/IP leased line” on page 111). For an
overview of the IP ports used by CamControl PRO press the ? button
(see “Overview of the used IP Ports” on page 253).
IP address 1 to IP
address 4
27769_02
The address entries for IP address 1 to IP address 4 cannot be changed
in this configuration menu, because these addresses are taken from the
menu Phone number & IP addresses (see “Phone and IP numbers” on
page 139).
145
CamControl PRO Software Manual
IP address 5
HeiTel by Xtralis
The IP address or symbolic address in this field is user-definable. You
must include the appropriate separators when entering this IP address
(e.g. 124.124.124.124). If you are using a DNS service, you may enter a
symbolic address here. For the system to recognise the entry as a
symbolic IP address, you must put the address in quotation marks (e.g.
"www.your_domain.com"). The IP addresses of your DNS service must
be entered on the Network (TCP/IP) dialogue window (see “Network
(TCP/IP)” on page 129).
Activation: IP address Using the On option, activate the receivers to which a HTconnect
1 to IP address 5
connection is to be established by the transmitter. For HTconnect
connections, invalid entries such as telephone numbers are greyed out.
No connection to these receivers can be made with HTconnect.
7.5
Camera settings
The Camera settings tab allows you to make the following settings for transmission and recording for the
individual cameras:
l
l
l
l
l
Activation
Camera name
Brightness
Contrast
Colour
In the case of CamDisc HNVR/CamDisc VG HNVR series devices without HYBRID Card 4 you can only
program the Activation and Camera name options (see “Activation” on page 146).
146
Activation
Select the check box directly in front of the camera name to enable the
corresponding input and transmit an associated video signal. Use only
registered inputs for optimum efficiency. If a camera input is deactivated,
no pictures will be recorded for the camera in question and potential
video signal failure will not be monitored.
Camera name
Enter the name of your cameras in these fields. CamControl PRO will
use the name entered here as the camera name. This name is used to
label camera buttons on the central control panel and to allocate images
in the archives.
27769_02
HeiTel by Xtralis
CamControl PRO Software Manual
Brightness and
contrast
Brightness and Contrast can be adjusted in a value range of between 0
and 200.
On principle, all devices adjust themselves to the video signal received.
In certain cases however, you may need to adjust brightness and
contrast to get a satisfactory image quality.
Colour
Select On in the Colour column to transmit and archive the video signal
in colour. Deselect this option for black-and-white transmission and
archiving.
Note:
Black-and-white operation:
l
l
7.6
Black-and-white images require less storage space.
Video signals from B/W cameras should always be transmitted and
saved in black and white.
Camera groups
The Camera groups tab allows you to group several camera inputs. These camera groups allow you create
customised sets of overviews, which you can then call up in the central control panel up by mouse click (see
“Changing screen view” on page 29).
For devices with up to two camera inputs such as CamServer, no camera groups are available.
Maximum number of groups
The maximum number of groups depends on the number of camera inputs:
27769_02
Number of camera inputs
Maximum number of camera groups
1
none
2
none
4
2
10
5
147
CamControl PRO Software Manual
HeiTel by Xtralis
Creating camera groups
Pool
The Pool contains all the cameras not assigned to a Group.
Group names
You can give the individual groups a name in these two/four fields.
Meaningful group names make it easier to select the desired group in the
central control panel later. The camera groups Entrance areas and
Exterior shell have been defined in this example.
Note:
Creating a group
To assign the cameras to individual groups, just drag and drop them like
you would in Windows.
Select a camera from the Pool or from another Group and then holding
the left mouse button, drag it to the desired Group. You can move a
camera from a Group back into the Pool in the same way.
Note:
7.7
To be able to select a group as a view in CamControl PRO, it
must consist of at least two cameras.
Each camera can be allocated to one group only. Multiple
allocations are not possible.
Motion (analogue cameras)
As of the device firmware V1.96, HeiTel video systems have an enhanced video motion detection function.
Only the CamControl PRO software V4.01 or later should be used to configure the relevant video systems.
Note:
Use of a software version older than CamControl PRO V4.01 may result in the faulty configuration
of video systems with firmware V1.96 or later.
In case of VG VideoGateways a CamControl PRO version V4.12 or higher is needed.
Note:
When using IP cameras the adjustable settings for Motion, Motion detection zones and Privacy
Zones are camera-specific. The Motion functionality is for indoor use only. The IntrusionTrace
functionality (see "Analytics – IntrusionTrace Configuration" section on page 155) is particularly
also for outdoor use.
7.7.1
Motion settings
As of the device firmware V1.96, the video systems have an enhanced video motion detection function. As
part of this firmware change, the underlying Motion settings have been grouped together in the dialogue
window of this name.
148
27769_02
HeiTel by Xtralis
CamControl PRO Software Manual
Sensitivity
The video motion detection works with three different levels of sensitivity: Low, Middle and High
Extended video motion detection
The History and Brightness compensation functions are mutually exclusive and cannot be enabled at the
same time.
History
The History function eliminates short-term changes in the image. You can select a number of images (Off, 1
image to 4 images) in which changes must be detected successively (at intervals of 40 ms) in order for the
video motion detection to be triggered.
Brightness compensation
The Brightness compensation function eliminates global changes in the image. Global changes are
changes that occur in more than about 40 percent of the selected image areas (compare Motion detection
zones).
These global changes may occur due to major changes in light conditions, such as the movement of cast
shadows, or light reflected or diffused off large surfaces.
For the Brightness compensation, a Blocking time must also be set (0.5 s to 5.0 s at 0.5 s intervals). This
Blocking time defines the time interval from the suppression of a global change until a true alarm can next be
detected.
27769_02
149
CamControl PRO Software Manual
HeiTel by Xtralis
Note:
High values for the Blocking time may reduce the rate of false alarms that are triggered by camera
switching, changes in light, cast shadows or similar. However, true alarms will not be detected
during the Blocking time.
7.8
Motion detection zones (analogue cameras)
The digital image transmission systems have one integrated motion detector per camera input. The integrated
motion detection is not designed for outdoor recordings and should therefore be reserved for indoor cameras.
The Motion detection zones tab allows you to limit motion detection to certain areas of the video image. When
defining motion detection zones, you can limit the detection area to specific areas of the overall image. If, on
the other hand, you want to monitor the entire image for movements, then deselect Enabled for the camera in
question.
This dialogue is not available for devices belonging to the CamDisc HNVR/CamDisc VG HNVR series
without HYBRID Card 4.
Changes to settings in this window affect the following alarm scenarios:
l
l
l
Alarm: Motion alarm active
CamDisc VG, Cam4mobile VG, CamServer VG, CamDisc SVR, Cam4mobile, CamServer: Motiontriggered event
CamDisc VG, Cam4mobile VG, CamServer VG, CamDisc SVR, Cam4mobile, CamServer: Continuous
recording in the event of motion
Limiting motion detection to certain areas
Adjusting zones
Clicking Enabled allows you to activate motion detection for individual cameras. Click Adjust zones... to
open the Configure Motion Detection Zones dialogue box containing the live image of the camera in question.
150
27769_02
HeiTel by Xtralis
CamControl PRO Software Manual
Select zones with your mouse:
l
l
Left-click to activate zones. Active zones appear in red.
Right-click to deactivate zones.
When you select On, a green grind
appears on the image. One grid field corresponds to one zone field.
Once you have confirmed the zones with OK, only movement in the blue zone will trigger motion events.
Movements outside the active zones do not trigger events.
Note:
If Enabled is not selected, the entire image is used for motion detection regardless of the zones
selected.
7.9
Privacy zones (analogue cameras)
The VG, SVR or Cam4mobile series devices and CamServer support the definition of up to five Privacy zones
per camera input.
This dialogue is not available for devices belonging to the CamDisc HNVR/CamDisc VG HNVR series
without HYBRID Card 4.
The privacy zones function can work in three different modes:
l
l
l
“Always”: Means the adjusted zones are active at any time
“Only if not armed”: Means in case the device is armed the privacy zones are deactivated
“Off after alarm until disarm”: The complete image is visible after an alarm until device is disarmed.
27769_02
151
CamControl PRO Software Manual
HeiTel by Xtralis
Configuring Privacy
zones
After selecting a camera to configure by clicking Adjust zones …, the
Configure Privacy Zones window opens.
Defining zones
Privacy zones are defined by clicking in one corner of the area to be
defined as a privacy zone, and then dragging the mouse over the desired
rectangular area while holding the left mouse button. You can define up
to five Privacy zones per camera input.
If the defined Privacy zones have not yet been transmitted to your HeiTel
device, you can remove these again by right clicking on the
corresponding marking.
Note:
Privacy zones should not overlap if at all possible and should
also not be too large, as this can reduce the processing speed
of your device.
When using CamDisc VG, Cam4mobile VG, CamServer VG, CamDisc
SVR, Cam4mobile, and CamServer devices, you can specify whether
the Privacy zones only apply to live images, or to live images and
recording for each camera input.
This option is not available for CamTel VG and CamTel SVR
transmitters. The pre-alarm images will also include blocked-out areas if
Privacy zones are defined.
Colours
152
You can select from one of 15 colours to indicate the Privacy zones for
the transmitter.
27769_02
HeiTel by Xtralis
Deleting Privacy
zones
CamControl PRO Software Manual
To delete these zones, click Delete privacy zones. This removes newly
defined zones from the image immediately. Please note that any Privacy
zones that were defined and confirmed in a previous configuration
procedure will remain in effect until you confirm your new configuration
by clicking OK and then copy the new settings to your device by clicking
OK again in the Recorder settings window.
If you wish to add additional Privacy zones to a camera input, it can be
helpful to delete the existing zones and copy these settings to your
device.
27769_02
153
CamControl PRO Software Manual
HeiTel by Xtralis
7.10 Analytics – Allocating IntrusionTrace Licenses
Note:
IntrusionTrace is only available with CamDisc E, CamDisc+ E, CamDisc+ ETx, as well as ipVG
and only in combination with JPEG/MJPEG cameras (not H.264). When using analogue cameras
we highly recommend using the analogue realtime cards in the equipment.
In order to be able to use the intrusion detection functions of the CamControl PRO software you have to
allocate licenses to the relevant cameras and you need to configure the required detection parameters.
Proceed as described in the following subsections.
In the CamControl PRO main window click on the Dial button to activate the connection to the device. If not
done, configure the device as described in section "Connections" on page 129.
In the tree structure on the left select the Analytics node:
Note:
Before you can allocate licenses to cameras you have to obtain licenses using the Xtralis license
exchange tool. Please refer to the Xtralis Xchange Tool User Manual, document no. (27816).
Allocate the available licenses to the desired camera channels by activating the checkboxes and selecting a
license from the list.
154
27769_02
HeiTel by Xtralis
CamControl PRO Software Manual
7.11 Analytics – IntrusionTrace Configuration
Note:
IntrusionTrace is only available with CamDisc E, CamDisc+ E, CamDisc+ ETx, as well as ipVG
and only in combination with JPEG/MJPEG cameras (not H.264). When using analogue cameras
we highly recommend using the analogue realtime cards in the equipment.
Note:
To ensure proper functioning of the overall system the intrusion detection must be tested. Only
tests can ensure that intruders are reliably detected and that excessive false alarms are prevented.
Refer to Configuring SVR devices (as well as CamDisc HNVR, Cam4mobile and CamServer) and
VG devices on page 117, and the IntrusionTrace Design Guide, document no. (21814).
If not done, select the Analytics node in the tree structure on the left. Click Open configuration tool to open the
Intrusion configuration dialogue window:
To select the desired camera to be configured double-click on an entry in the camera list. The live video is
displayed.
Button
Description
Config
To set up advanced parameters, see “Advanced parameters” on page 155.
Calibration
To set specific reference dimensions for the camera. This must be done before
setting up the detection zone. See “Calibration” on page 156.
New Mask
To set up mask zones which are excluded from detection, see “Mask zones” on
page 158.
New Area
To set up the detection zones, see “Detection zones” on page 158.
7.11.1 Advanced parameters
The advanced parameters should only be modified in case the standard settings are not sufficient e.g.
rejection of true alarms or acceptance of false alarms. Ensure that a change in advanced parameters, does
not affect the foreseen detection objectives e.g. the intruder could be crawling on the ground, could be a group
of persons.
In case of false alarms, determine which parameter filters them out mostly, e.g. the duration is particularly
short, or the alarm object is huge. The advanced parameters are related to the dimensions speed, time and
distance. Other characteristics could still influence the number of false alarms, e.g. distinguishing cars
moving slowly from large group of persons is not possible.
To generate an alarm, an object must satisfy all the criteria specified in the advanced parameters AND cross
a detection zone.
Click the Config button. Two profiles are displayed in the dialogue window: Default and Custom. You can
only change the Custom profile. Select the respective entry to change the corresponding values.
27769_02
155
CamControl PRO Software Manual
HeiTel by Xtralis
Item
Description
Minimum height
Setting the minimum height is essential to avoid false alarms due to
detection of small objects. An object will only generate an alarm if its height
is greater than the specified value. The value is expressed in metres. For
detecting humans a typical minimum height is 0.3 metres, because the
person could be crawling.
Minimum time
To avoid detection of momentary motion. e.g. a bird crossing the scene.
Minimum distance
To avoid detection of small motion, e.g., of the leaves of a tree moved by
the wind.
7.11.2 Calibration
To calibrate the scene click the Calibration button in the Intrusion configuration dialogue window.
Calibration is mandatory as the detection is based on 3D measures. Make sure calibration is done carefully at
a point near the camera and further away in the detection area. Speed and size calculations in the areas closer
and further than these points will be less accurate, and can lead to false alarms and missed targets there.
Correct calibration will eliminate many false alarms and allow reliable detection as intended.
156
27769_02
HeiTel by Xtralis
CamControl PRO Software Manual
First select the desired unit of measure (feet or metres) and define the actual height of the reference object,
preferably a person. Then you can use a snapshot (from live or recorded images) to draw the measure of the
persons. Image A shows the image of the object near the camera. Image B shows the image of the (same)
object far from the camera. For calibration either position a reference object near to and far from the camera or
ask a person to assist with the calibration and to move from image position A to B during calibration.
Calibration can be carried out using the live video or a recording.
7.11.2.1
Calibration using live video
To calibrate using the live video and a person proceed as follows:
Click the Live video button to display the live video.
When the person is clearly visible at the close position, click on Set image A and then on Height A.
Drag the reference line to the size of the person in the image, see figure above.
After the person has moved to the position far from the camera click on Set image B and then on Height B.
Now, drag the reference line to the size of the person in the image, see the below figure:
To apply the calibration to the camera click on Accept. The dialogue window is closed.
7.11.2.2
Calibration using video recording
In the Recording panel of the dialogue window the following controls are available for recording and playing
back video sequences:
Record (start and stop)
Step forward
Step back
Playback
Stop playback
Position display with slider. Using the mouse the slider can be
dragged to the desired position.
Proceed as follows when calibrating using a video recording:
1.
2.
3.
4.
Click on the Record button to start recording.
Complete the recording by clicking on the Record button again.
Use the controls to find a suitable image A. Refer to the illustrations further above.
Click on Set image A and then on Height A.
27769_02
157
CamControl PRO Software Manual
HeiTel by Xtralis
5. Drag the reference line to the size of the person in the image, or to the size of the reference object
respectively.
6. Use the controls to find a suitable image B.
7. Click on Set image B and then on Height B.
8. Drag the reference line to the size of the person or reference object in the image.
To apply the calibration to the camera click on Accept. The dialogue window is closed.
7.11.3 Mask zones
Mask zones are used to ensure privacy in potentially sensible areas of the video image or to avoid false
alarms due to irrelevant parts of the image, e.g. flashing light, on screen display of time, trees, cars, etc.
Mask areas define the regions that will not be processed by the analytics module. A maximum of 5 polygon
areas can be drawn. These areas can overlap.
Note:
The mask will hide image zones, not ground zones. It should not cover the upper part of the
intruder’s body anywhere inside the detection zone.
Click on the New Mask button. To draw a mask area click the left mouse button each time you want to make
an angle. Right-click to complete the input. If required, a last line is added automatically to complete the
polygon.
You can easily change the form of the polygon by clicking one of the line end points (angles) or on a handle of
a line and dragging it to a new position. You can also add a line by deleting one of the lines and automatically
start drawing from the last line end point. To delete a mask zone, select it and click the Clear selected button.
Clear all will delete all mask and detection zones defined for the camera.
7.11.4 Detection zones
Detection zones define the regions on the ground where objects are detected as valid, i.e. where intruders
shall trigger an alarm. The detection area is like a carpet spanning the area where intruders entering that area
are to be detected. Since only the bottoms of the targets (i.e. feet of persons) are tracked, the detection area
does not need to extend up the sides of buildings or fences but only the ground surface. The lowest edge of
the detection zone should cover the lowest part of the intruder. If the detection zone includes the front part of
the scene, the detection zone should also cover the lowest edge of the image.
Whether alarms are triggered depends on the detection criteria settings in the Advanced Parameter
Configuration, see "Advanced parameters" on page 155.
158
27769_02
HeiTel by Xtralis
CamControl PRO Software Manual
In the configuration shown in the figure above the alarm is only issued if one or more persons remain at least
0.5 seconds inside at least one detection zone and move by least 2.0 metres.
A maximum of 5 polygon areas can be drawn. These areas can overlap.
Click on New Area. To draw the detection ground zone click the left mouse button each time you want to
make an angle. Right-click to complete the input. If required, a last line is added automatically to complete the
polygon. The enclosed area will be hatched with blue lines, thus creating a blue zone. You can easily change
the form of the polygon by clicking one of the line end points (angles) and drag it to a new position.
You can also add a line by deleting one of the lines and automatically start drawing from the last line end point.
To delete a detection zone, select it and click the Clear selected button. Clear all will delete all mask and
detection zones defined for the camera.
Note:
27769_02
The detection zone relates to the ground zones, not the image zones. If, e.g. a person steps into the
detection zone, it will be sufficient that the feet are in the detection zone to trigger an alarm. Hence,
do not extend the polygon beyond the ground surface you wish to monitor.
159
CamControl PRO Software Manual
HeiTel by Xtralis
Area direction
For example, movement on an adjacent road may result in false alarms. In such cases use a directional area
directed perpendicular to the roadway: Click on the detection area to select it. Then click on Unidirectional
and drag the arrow to the desired motion direction, which shall result in alarms. The arrow’s position on the
area does not have an effect on the function.
In the example above an alarm will only be released if an intruder enters the premises in the direction of the
arrow. Any vehicle or person leaving the area will not trigger an alarm.
The Bidirectional option will release alarms in case of movement in both directions along the arrow. You can
only define one direction per detection area. However, if you define two overlapping detection areas you can,
e.g., define and thus combine two orthogonal directions to be detected to prevent diagonal movement from
triggering alarms.
7.11.5 Applying the settings
After having set up the mask and detection zones for all cameras click on Save settings to save the settings.
To return to the Recorder settings dialogue window click Cancel or switch the display to the Recorder
settings dialogue and click on Close Configuration windows.
Then click on OK in the Recorder settings dialogue to apply the settings. The following prompt is displayed:
To reject the changes click on Cancel. To save the settings in a profile activate the Save as configuration
profile checkbox and click on OK.
The setup is then sent to the device and stored.
The settings are now applied to the specified cameras. An alarm in a detection zone is indicated by a red
rectangle. You can analyse recorded alarms using the archive. For more information refer to "Accessing the
Site Archive" on page 35 and to the CamControl Player Guide.
160
27769_02
HeiTel by Xtralis
CamControl PRO Software Manual
7.12 Alarms
The Alarms node contains the following configuration menus: Alarm inputs, Camera control inputs, Motion
detection, Video loss, Camera position authentication and for CamTel VG and CamTel SVR devices only,
Pre-alarm. In the case of CamDisc HNVR/CamDisc VG HNVR series devices without HYBRID Card 4 only
the Alarm inputs, Camera control in put and Video loss dialogues are available.
7.12.1 Alarm inputs
Open the Alarm inputs tab from the menu under the Alarms node. The digital image transmission systems are
equipped with several inputs that can carry out various control and notification functions. In addition to the
camera control inputs described in Camera control inputs (see “Camera control inputs” on page 167), every
transmitter is equipped with
l
l
l
an alarm enable input,
an alarm input and
a tamper input
All of which you can configure in this dialogue window.
Note:
27769_02
A switching state at the inputs must last at least 0.5 seconds to be certain that the transmitter
detects it.
161
CamControl PRO Software Manual
HeiTel by Xtralis
Note on CamServer 2c and video systems of the VG Series
Besides the conventional wiring of the following control inputs as “normally closed contact” and “normally
open contact”, CamServer 2c and the video systems of the VG series also support the voltage-monitored
circuit variants “resistance monitoring (10k)” and the BS 8418 compliant “normally closed contact”
For more information, refer to section “Specification of the control inputs" on page 312.
Arm/Disarm input
You can control connection establishment in the event of alarm with the Arm / Disarm input (designation on
the video system: Al a/d). If you use this function, the status of the alarm enable input (e.g., with a connected
key switch) determines whether a connection will be established to one or more receivers in the event of alarm
(i.e. when the alarm input or one of the camera control inputs has been triggered).
You may choose if the alarm enable input of the device will be completed by one of the following options:
l
l
Triggered manually or by software
Triggered by input
Triggered manually or
by software
If the option Triggered manually or by software is activated, the LED
display for CamControl PRO is replaced by a button that has the function
of a push button.
If this function is activated, then the arming/disarming of the device is
completed exclusively manually via the button of the CamControl
software or software controlled as for example during the Event
Management System of HeiTel.
Triggered by input
If you want to use the Arm / Disarm input function, activate the Triggered
by input option. In the event of an alarm, only a connection to the receiver
is made if the transmitter is also armed. Specify whether Arm / Disarm
input is activated when opened or closed (i.e. switched to ground) by
selecting Normally opened or Normally closed.
If you deactivate the options Triggered by input and Triggered manually
or by software, the status of the Arm / Disarm input is ignored, and your
device reports every alarm regardless of the status of this input. It is
therefore always armed. In this state the Arm / Disarm input can be used
as an additional signal input. This option corresponds to the former
function Enabled alarm enable input.
Note:
162
The options Triggered manually or by software and Triggered
by input cannot be activated simultaneously.
Connect
If you select Connect, a receiver is dialled whenever the state at the Arm
/ Disarm input changes (from armed to disarmed). This depends on
whether Normally opened or Normally closed is selected.
Normally opened
Select Normally opened from the drop-down list if you want your
transmitter to be armed when the Arm / Disarm input is closed.
27769_02
HeiTel by Xtralis
Normally closed
CamControl PRO Software Manual
Select Normally closed from the drop-down list if you want your
transmitter to be armed when the Arm / Disarm input is open.
Alarm input
If configured accordingly, a status change at the Alarm input (designation on the video system: Al in) can
cause your transmitter to establish a connection to a receiver PC or a control station. As a rule, image
transmission starts with the image that triggered the alarm. Then camera 1 will be switched on.
Connect
Select Connect to enable the alarm function. Select Normally opened or
Normally closed to specify which input state will trigger the alarm.
Normally opened
Select Normally opened from the drop-down list if you want your
transmitter to connect to the receiver when the Alarm input is closed.
Normally closed
Select Normally closed from the drop-down list if you want your
transmitter to connect to the receiver when the Alarm input is open.
Alarm only when
The function Alarm only when trigger level stable for x s (seconds) is
trigger level stable for x used to debounce the alarm input. The alarm message is only triggered if
s (seconds)
the stable state is present for at least the specified period. Possible
values are Off, 1, 2, 3, 4, 5, 10, 15, 30, 45, 60 and 90.
Note:
So that a connection can be established to your receiver in the
event of an alarm or if the status of the alarm enable input
changes, you must save the telephone number or IP address
of your receiver in Phone & IP numbers (see “Phone and IP
numbers” on page 139).
Tamper input
A change of state at the Tamper input (designation on the video system: Aux in1) always sends an alarm,
irrespective of whether the video system is armed or disarmed. As a rule, image transmission starts with the
image that triggered the alarm. Then camera 1 will be switched on. Select Normally opened or Normally
closed to specify which input state will trigger the alarm.
Normally opened
Select Normally opened from the drop-down list if you want your
transmitter to connect to the receiver when the Tamper input is closed.
Normally closed
Select Normally closed from the drop-down list if you want your
transmitter to connect to the receiver when the Tamper input is open.
27769_02
163
CamControl PRO Software Manual
HeiTel by Xtralis
7.12.2 Pre-alarm (CamTel VG and CamTel SVR only)
Open the Pre-alarm tab from the menu under the Alarm node. This tab is not available if you are using
CamDisc VG HNVR, CamDisc VG, Cam4mobile VG, and CamServer VG, as well as CamDisc HNVR,
CamDisc SVR, Cam4mobile and CamServer devices. Continue reading from the next section (see “Camera
control inputs” on page 167).
CamTel VG and CamTel SVR transmitters have their own pre-alarm archives. As long as there is no
connection established to a receiver, the transmitter unit continuously stores video images in this archive. The
oldest images are continuously overwritten. Once a connection is established, recording stops. The pre-alarm
image archive now contains video images that were recorded just before the connection and therefore just
before an alarm (see “Accessing CamTel SVR and CamTel VG” on page 52).
No pre-alarm images can be stored for IP cameras. This option is not enabled for these cameras.
Configuring recording
Enabled
Selecting Enabled allows you to activate recording for all desired
cameras.
Interval (s)
Determine the minimum interval between two images in the Interval (s)
box. Entering 0 seconds as the Interval results in maximum recording
speed.
Note:
The interval between two images can be longer than specified
in Interval (s). This depends on average picture size, image
quality and number of activate cameras.
Image quality and storage capacity
Image quality
All images are stored in the pre-alarm archive with the pre-set live image
quality (see “Live video settings” on page 141).
Storage capacity
The internal memory can hold about 1000 high-quality images from a
camera. If you enable all 10 cameras therefore, about 100 images can be
saved per camera. The actual number of stored images largely depends
on image content and image quality.
Deleting the pre-alarm archive
The pre-alarm archive is deleted if
164
27769_02
HeiTel by Xtralis
l
l
CamControl PRO Software Manual
the Pre-alarm or Transmitter settings are re-set (e.g. after a change) or
the device is switched off.
27769_02
165
CamControl PRO Software Manual
HeiTel by Xtralis
7.12.3 Pre-Alarm viewer
User interface
The PreAlarmViewer is started automatically by the CamControl PRO software in case of an alarm and an
shows that the application is running. You can close it by clicking
available pre-alarm archive. A tray Icon
with the right mouse button on the tray icon and select Exit in the pop up menu.
If an pre-alarm archive is available a new window does pop up and shows the pre-alarm archive. Up to 3
cameras are simultaneously shown (depends on the device configuration). The alarm camera is always the
first (playback starts automatically for it) and the linked cameras will be added after the transmission of their
pre-alarm archives has started. The window contains a control bar for archive evaluation at the bottom and
there is also an pre-alarm bar with slider available for graphical visualization and quick picture access (green:
pre-alarm area, red: alarm area, yellow: post alarm area - corresponding frames around the camera pictures
show also these areas).
To control individual cameras check or uncheck the Enabled checkbox next to the pre-alarm bar.
166
27769_02
HeiTel by Xtralis
CamControl PRO Software Manual
7.12.4 Camera control inputs
Open the Camera control inputs tab from the menu under the Alarm node. Camera control inputs allow you to
control and monitor your system on an individual camera basis.
Note:
A switching state at the inputs must last at least 0.5 seconds to be certain that the transmitter
detects it.
Note on CamServer 2c and video systems of the VG Series
Besides the conventional wiring of the following control inputs as “normally closed contact” and “normally
open contact”, CamServer 2c and the video systems of the VG series also support the voltage-monitored
circuit variants “resistance monitoring (10k)” and the BS 8418 compliant “normally closed contact”
For more information, refer to section “Specification of the control inputs" on page 312.
Control and monitoring functions
Alarm
27769_02
Every camera control input (designation on the video system: Control in
1 to Control in 10 if applicable) can independently trigger receiver dial-up.
CamControl PRO reports this "alarm cause" in the event tree (see
“Event tree” on page 22) in the bottom control panel and automatically
activates the corresponding camera.
167
CamControl PRO Software Manual
HeiTel by Xtralis
Alarm-triggering video
image
If there is no active connection to a receiver, a video image from the
relevant camera is recorded for CamTel VG and CamTel SVR
transmitters when a camera control input is enabled. This alarm image
will be transmitted first if the transmitter subsequently establishes an
alarm connection to a receiver that was triggered by this camera control
input or the alarm input. In the case of CamDisc VG HNVR, CamDisc
VG, Cam4mobile VG, and CamServer VG as well as CamDisc HNVR,
CamDisc SVR, Cam4mobile and CamServer devices, recording with an
active camera control input depends on the settings.
Online signalling
CamControl PRO displays the camera name on the camera button in red
instead of black for active camera control inputs of active connections.
This makes it easy to track transmitter-side events. You can also have
alarms signalled acoustically by making a setting in a transmitterspecific R01 file (see “Extended software settings” on page 276).
Extending the alarm functions
Requirements
In the CamControl PRO software V3.85 or newer and the device firmware V1.78 or newer, the alarm function
has been extended by the following options:
Functions
l
l
l
l
Entry/Exit (Arm delay): The video system is armed or disarmed within the monitored area. The
corresponding configured inputs (camera control inputs or inputs for the CI Adapter/CIO Adapter) delay
the alarm by a configurable time period. For every camera channel, only one time period can be
configured, which applies to both Entry and Exit for the monitored object.
Fire/Panic (Continuously armed): The corresponding configured inputs (camera control inputs or inputs for
the CI Adapter/CIO Adapter) always trigger an alarm, regardless of whether the video system is armed.
Alarm: The corresponding configured inputs (camera control inputs or inputs for the CI Adapter/CIO
Adapter) always give the alarm when triggered, regardless of whether the video system is armed. This
function corresponds to the option Connect, which was used up to and including CamControl PRO
software V3.83.
Off: The corresponding configured inputs (camera control inputs or inputs for the CI Adapter/CIO Adapter)
never give the alarm when triggered.
Configuring the link between internal motion detection and camera control inputs
In addition to giving an alarm for external camera control inputs or motion detection, under the conditions
named above (see “Requirements” on page 168), a combination of camera alarm inputs or inputs to the CI
Adapter/CIO Adapter and to the internal motion detection can result.
Your HeiTel video system processes the combined alarm triggers from the device-internal motion detection
and signal inputs over a time interval (5 seconds). A signal input is always reported as the cause of alarm.
The following table sheds light on this alarm behaviour:
Trigger with the preselected time interval
(5 seconds)
168
Reason for alarm
1. Trigger level
2. Trigger level
Motion detection
Camera control input
Camera control input
Camera control input
Motion detection
Camera control input
Motion detection
Input CI Adapter/CIO Adapter Input CI Adapter/CIO Adapter
Input CI Adapter/CIO Adapter
Motion detection
Input CI Adapter/CIO Adapter
27769_02
HeiTel by Xtralis
CamControl PRO Software Manual
The camera control input and
CI Adapter / CIO Adapterinput
are triggered in any order.
Motion detection
Input CI Adapter/ CIO
Adapter
Motion detection
The camera control input and
CI Adapter/CIO Adapter
input, combined via logical
OR
The camera control input and
CI Adapter/CIO Adapter input
depending on first and second
trigger level
Explanations
l
l
l
l
The recording control remains unchanged and is not influenced by expanding the alarm functions.
In order for a combined alarm from motion detection and signal input to occur, the motion detection (see
Motion detection” on page 171) must be activated and configured for the camera channel in question.
The option of alarms from a combination of motion detection and signal inputs is not available for IP
cameras.
Motion detection as an individual function can only be used in Alarm or Off mode.
In combination with signal inputs, the motion detection for the modes Entry/Exit (Arm delay) and
Fire/Panic (Continuous armed) are considered for relevant configurations.
Configuring camera control inputs
From CamControl PRO software V3.85 on, the dialogue box Camera control inputs has been redone as a
result of the expansion of alarm functions. Compared to the previous diagram, the camera name has been
removed.
The first unlabeled column gives information on the number of cameras made available by the HeiTel video
system that is being used. Depending on the device used, 2, 4 or 10 camera inputs can be configured.
Trigger level
27769_02
In the Trigger level column, select between the options Normally opened
and Normally closed (default setting); a change in this condition may
trigger an alarm.
169
CamControl PRO Software Manual
Mode
In the Mode column, you select between the following options:
l
l
Off (default setting): In this configuration, a signal input never
activates an alarm.
Alarm: In this configuration, a signal input always activates an alarm
when the video system is armed. This function corresponds to the
option Connect, which was used up to and including CamControl
PRO software V3.83.
Note:
l
l
For video systems with device firmware 1.77 or older, only the
options Off and Alarm are available. To use the extended
alarm functions, which are explained in the following text,
device firmware V1.78 or newer is mandatory.
Fire/Panic (Continuously armed): In this configuration, a signal input
always activates an alarm, regardless of whether the video system
is armed.
Entry/Exit (Arm delay): The video system is armed or disarmed
within the monitored area. In this configuration, a signal input
activates an alarm after a configurable time delay.
For every camera channel, only one time period can be configured,
which applies to both Entry and Exit for the monitored object.
l
The configurable time period for the delay for an alarm for
disarming or arming is configured via a pull-down menu.
Possible values are: 10 s (default setting), 20 s, 30 s, 40 s, 50 s,
1 min, 2 min, 3 min, 4 min, 5 min, 7 min, 10 min, 15 min, 20 min,
25 min and 30 min
Note:
170
HeiTel by Xtralis
Disarming: When the monitored area is entered (Entry), an
alarm is deferred for the configured time period and is ignored
in the case of successful disarming. Otherwise, an alarm will
sound with the triggered camera control input as the reason for
the alarm. Arming: When the monitored area is exited (Exit),
an alarm is deferred for the configured time period and is
ignored in the case of successful arming. Otherwise, an alarm
will sound with the triggered camera control input as the
reason for the alarm.
Note that for multiple camera control inputs to monitor the
armed/disarmed area, the configuration for the signal inputs in
question must be configured appropriately!
27769_02
HeiTel by Xtralis
Linked with Motion
CamControl PRO Software Manual
By activating the On option in the Linked with Motion column, the camera
control inputs are linked via a logical AND with the device-internal motion
detection for interior spaces (see “Configuring the link between internal
motion detection and camera control inputs” on page 168). Only when the
motion detection (see “Motion detection” on page 171) has already been
activated for the camera channel in question is it possible to activate this
option. If this is not done, the option On remains inactive and is greyed
out.
Note:
So that a connection can be established to your receiver if the
camera control inputs change status, you must save the
telephone number or IP address of your receiver in Phone & IP
numbers (see “Phone and IP numbers” on page 139).
7.12.5 Motion detection
Open the Motion detection tab from the menu under the Alarm node. The devices are equipped with one
integrated software motion detector per camera input. The sensitivity of this detector can be set to three
levels. You can define detection zones in the relevant camera image in the Motion detection zones tab (see
“Motion detection zones (analogue cameras)” on page 150). If a motion detector is active, the associated
video image or the defined detection zones are checked for movement every 300 ms.
This dialogue is not available for devices belonging to the CamDisc HNVR/CamDisc VG HNVR series
without HYBRID Card 4.
Note:
Ensure that the scene used for motion detection is adequately lit under all operating conditions - this
is an essential requirement. Ensure that no image noise, shadows or similar have a negative
influence on the motion detection function.
Motion alarm active
If you select Motion alarm enabled, an alarm is triggered when motion is detected in the video image of the
camera in question.
27769_02
171
CamControl PRO Software Manual
HeiTel by Xtralis
If you want to control the recordings of several cameras using the integrated motion detector, consider using
external motion detectors. The integrated motion detection is not designed for outdoor recordings and should
therefore be reserved for indoor cameras. This avoids false alarms.
Note:
So that a connection can be established to your receiver in the event of movement being detected
in the video image, you must save the telephone number or the IP address of your receiver in Phone
& IP numbers (see “Phone and IP numbers” on page 139).
Setting sensitivity
The integrated software motion detector works with three different levels of sensitivity. Select + Motion for
maximum sensitivity and - Motion for minimum sensitivity.
If you use CamControl PRO software V4.01 or later and HeiTel video systems with firmware V1.96 or later,
the Sensitivity is configured in the Motion settings menu (see “Motion settings” on page 148).
7.12.6 Video loss
Open the Video loss tab from the menu under the Alarms node. For each camera you can separately specify
whether an alarm message is to be triggered if the video signal is lost.
Connect
Activate the option in the Connect column if the transmitter should establish a connection to your receiver
when the video signal for the corresponding camera has been lost.
Symbol for Video loss:
Note:
172
Even if the option “Video signal lost detection” is disabled, the integrated error relay is triggered if a
signal is lost (see “Accessing the transmitter logfile” on page 47).
27769_02
HeiTel by Xtralis
CamControl PRO Software Manual
When an alarm message is given, the corresponding camera may be switched to display and the reason for
the alarm is displayed in the same manner as the reporting of camera alarms.
Note:
In order to establish a connection to your receiver when the video signal is lost, you must enter the
phone number or IP address of your receiver in Phone & IP numbers (see “Phone and IP numbers”
on page 139).
7.12.7 Camera position authentication
Open the Camera position authentication tab from the selection menu, under the Alarm node. For every
analogue camera track, you can generate up to two reference images.
CamDisc HNVR
This dialogue is not available for devices belonging to the CamDisc HNVR/CamDisc VG HNVR series
without HYBRID Card 4. Camera position authentication can only be programmed for the activated analogue
channels (see “HYBRID Card 4 (only CamDisc HNVR/CamDisc VG HNVR)” on page 246).
Note:
Ensure that the scene used for camera position authentification is adequately lit under all operating
conditions - this is an essential requirement. Ensure that no image noise, shadows or similar have a
negative influence on the position authentification function.
New reference image
Click the button Configure… in the column New reference image to open a camera-specific configuration
dialogue for the camera position authentication.
If you activate the option Examine current image, the live image of the selected camera is examinded every
two seconds for camera position authentication applicability. The applicability is shown as a percentage. The
indicated percentage is only an evaluation of the current scene at a given point in time.
The 4x2 matrix symbolises the eight detection areas of the video image. According to the current analysis the
individual fields of the matrix are marked in different colors in certain circumstances:
27769_02
173
CamControl PRO Software Manual
l
l
l
HeiTel by Xtralis
Red: Red fields are used to mark image areas that are not applicable to the camera position
authentication check.
Yellow: Yellow fields are used to mark image areas that provide a low but sufficient number of usable
edges for vector analysis. These areas are only applicable to the camera position authentication check to
a certain degree.
Green: Green fields are used to mark image areas that are highly applicable to the camera position
authentication check.
A video image is applicable to the camera position authentication check and can be stored as reference image
1 or reference image 2 if at least four image areas can be detected as applicable for analysis. If not, the Store
button is deactivated and is grayed out. Under different lighting conditions, different relevant edges can be
used as the basis for camera position authentication. It is therefore possible to store up to two different
reference images for each camera track. These reference images show, for example, different lighting
situations, such as day and night, for the analysis.
For this analysis, the camera image is divided up into eight fields and are checked for usable vectors. If at
least four fields contain usable vectors, the reference image is classified as Applicable (see “Applicable” on
page 174). Applicable edge vectors of the reference images are stored in the flash memory of your device.
This ensures that, even after a loss of power/shutdown and subsequent restart, the reference images found
and stored for each camera can continue to be used.
Note:
Camera position authentication and alarm should not be activated for cameras that have main
functions including a change in image section due to pivoting, inclination and/or zooming. Do not
use this type of alarm message for PTZ or dome cameras or for cameras mounted on pivoting or
tilting heads.
Applicable
If you have stored at least one applicable reference image in the cameraspecific configuration dialogue (see
“New reference image” on page 173) for camera position authentication, a Yes is displayed in the Applicable
column and the option On in the Connect (see “Connect” on page 175) column can be activated if necessary.
If no applicable reference image exists, then No is displayed in the Applicable column, in which case the
option On in the Connect column cannot be activated and is grayed out.
Triggered
The Triggered column contains information as to whether movement of the camera out of position has already
been detected compared to one of the stored reference images:
l
l
No: The current camera image (again) matches the stored reference images or the original position. The
device can, if necessary, trigger an alarm (again).
Yes: Movement of the camera from the original position has occurred compared to one of the stored
reference images. If this is not a temporary change, the camera must be adjusted and a new reference
image created using the Configure... (see “New reference image” on page 173) function.
174
27769_02
HeiTel by Xtralis
CamControl PRO Software Manual
Notes:
l
l
So that the device can set this parameter, the option On in the Connect (see “Connect” on page 175)
column must have been activated. If necessary, transfer the settings to the transmitter by pressing the
OK button.
Please note that the maximum detection delay for a camera that has been displaced depends on the
device type and the number of cameras.
Examples:
CamTel SVR with four activated channels: approx. 100 seconds
CamDisc SVR with four activated channels: approx. 80 seconds
CamDisc SVRs with four activated channels: approx. 35 seconds
Connect
Select On in the Connect column if you want the transmitter to connect to your receiver software if a
displacement of camera position is detected.
When an alarm message is given, the corresponding camera may be switched to display and the reason for
the alarm is displayed in the same manner as the reporting of camera alarms.
Note:
In order to establish a connection to your receiver when the camera position is altered, you must
enter the phone number or IP address of your receiver in Phone & IP numbers (see “Phone and IP
numbers” on page 139).
7.13 Site archive (only CamDisc VG HNVR, CamDisc VG,
Cam4mobile VG, CamServer VG, and CamDisc HNVR,
CamDisc SVR, Cam4mobile and CamServer)
The Site Archive menu item and all sub-menu items are only available for CamDisc VG HNVR, CamDisc VG,
Cam4mobile VG and CamServer VG, CamDisc HNVR, CamDisc SVR, Cam4mobile and CamServer
devices. This dialogue box is not available if you are using CamTel SVR\CamTel VG devices. Continue
reading from the next section (see “Audio” on page 206).
Local image archive settings
You can make the following settings to the local image archive of your CamDisc SVR\CamDisc VG device.
27769_02
175
CamControl PRO Software Manual
HeiTel by Xtralis
These include in particular:
l
l
l
l
l
l
l
l
l
l
defining camera-related image recording quality
assigning passwords for protection against unauthorised access to the archive
deleting recording tracks, images, passwords and the logfile
formatting the hard disk
configuring the recording of transaction data (POS/ATM and IBIS)
configuring the recording of audio data
defining the size of individual recording tracks
selecting the recording type (live image transmission and/or recording and/or archive access)
configuring event and continuous recording
timer controlled recording
All of the above items will be described in detail in the following sections.
7.13.1 Video settings
Open the Video settings tab from the menu under the Site archive node. This menu item is only available for
CamDisc VG HNVR, CamDisc VG, Cam4mobile VG and CamServer VG as well as CamDisc HNVR,
CamDisc SVR, Cam4mobile and CamServer series devices.
You can configure the recording resolution and quality individually for each camera. You can also specify
whether you want to record in conditional refresh mode.
For CamDisc HNVR/CamDisc VG HNVR series devices without HYBRID Card 4 you can only program the
Conditional refresh option (see “Conditional refresh” on page 177).
Note:
Archiving settings are made independently of transmission settings for CamDisc VG HNVR,
CamDisc VG, Cam4mobile VG and CamServer VG as well as CamDisc HNVR, CamDisc SVR,
Cam4mobile and CamServer devices (see “Live video settings” on page 141).
Archiving - Recording quality
Select the desired image quality for archive video images from the Recording quality drop-down list for each
camera.
Remember that high recording quality produces far more detailed images for later evaluation. However, more
detailed images require more storage capacity and a correspondingly longer transmission times for remote
access. The following table provides an overview of typical storage capacity requirements for the different
176
27769_02
HeiTel by Xtralis
CamControl PRO Software Manual
recording qualities of the CamDisc VG, Cam4mobile VG, CamServer VG, CamDisc SVR, Cam4mobile,and
CamServer series. It will help you find a suitable compromise between image quality, storage capacity, and
transmission time. The information refers to operation with fullscreen images (Conditional refresh mode not
activated). Conditional refresh mode allows you to reduce storage capacity requirements considerably.
Quality and resolution (pixel)
Capacity requirement (KB)
720 x 288 ++
approx. 46
720 x 288 +
approx. 34
512 x 256 +
approx. 23
The average picture size very much depends on image content and video or camera signal quality. Images
from high-resolution cameras with high contrast and detail require more storage capacity than low-contrast
images with many uniform areas.
IP cameras
When IP cameras record images, the recording quality cannot be adjusted using the function described
above. Generally speaking, image size and format can be adjusted with IP cameras via an integrated
configuration menu. In exceptional cases these parameters can be adjusted via a Generic "GET" command
(see “Generic "GET" commands” on page 243).
Conditional refresh
Conditional refresh mode only requires the differences between successive images to display the full image.
In many cases, only parts of a scene changes. Certain areas of the image, such as a background wall, do not
change at all, or only very little (e.g. due to changes in lighting). Recording in this way often requires less than
half the hard disk storage capacity of working with full images, which in turn increases recording speed by up
to twice as much in some cases.
Select On to increase recording capacity and speed.
Note:
Conditional refresh mode applies to all cameras and therefore to all hard disk tracks.
IP cameras
When IP cameras record images the following conditions apply:
l
l
CamDisc HNVR/CamDisc VG HNVR: Images are recorded depending on the programming for the
conditional refresh mode. Image size and format depend on the IP camera.
CamDisc VG, CamDisc VGs, CamServer VG, Cam4mobile VG, CamDisc SVR, CamDisc SVRs,
CamServer, Cam4mobile:
l
The recording of images by analogue cameras depends on the programming for the conditional
refresh mode.
l
Image recording by IP cameras always takes place as fullscreen image, regardless of the parameters
set for the conditional refresh mode. Image size and format depend on the IP camera.
7.13.2 Archive passwords
Open the Passwords tab from the menu under the Site Archive node. This menu item is only available for
CamDisc VG HNVR, CamDisc VG, Cam4mobile VG, CamServer VG, CamDisc HNVR, CamDisc SVR,
Cam4mobile and CamServer series devices.
You can protect the image archive against unauthorised access with one or two passwords. These
passwords must be entered before the archive can be accessed locally or via a remote connection.
27769_02
177
CamControl PRO Software Manual
Current password
HeiTel by Xtralis
An existing password must be entered in the Current password box.
If you enter an incorrect password, an appropriate message will be
displayed when you click OK. Re-enter the password in the Current
password box.
New password
Enter any new password in the New password box. It can have a
maximum of 8 characters.
Confirm password
You must re-enter your password in the Confirm password box for
verification.
If your entries do not match, an appropriate message will be displayed
when you click OK. Re-enter the password in the Confirm password
box.
Note:
You cannot access the CamDisc VG archive if you forget the passwords. If you do, you must
delete all images and all passwords before you can work with the image archive again (see “HDD”
on page 178).
7.13.3 HDD
Open the HDD tab from the menu under the Site Archive node. This menu item is only available for CamDisc
VG HNVR, CamDisc VG, Cam4mobile VG, CamServer VG, CamDisc HNVR, CamDisc SVR, Cam4mobile,
and CamServer series devices.
Recorded images are saved on the hard disk drive of your CamDisc SVR (or CamDisc HNVR or Cam4mobile
or CamServer). This tab provides you with general information regarding your hard disk drive. You can
configure several parameters.
178
27769_02
HeiTel by Xtralis
CamControl PRO Software Manual
General information
Type
This field displays the name of your hard disk.
Total Size
This field displays the size of your hard disk drive in GB.
Please note that this value is calculated using the binary system (1 KB =
1024 Byte, 1 MB = 1024*1024 Byte, 1 GB = 1024*1024*1024 Byte). Hard
disk manufacturers often specify size using the decimal system
(conversion factor of 1000 instead of 1024), so in some cases the
displayed storage capacity may be lower than specified by the
manufacturer.
Hard disk configuration commands
You must confirm changes to hard disk settings by clicking OK. Different messages may be displayed
depending on the type of change to be implemented. If necessary, you can save your preferred archive
settings in the device permanently by selecting Save as configuration profile (see “Configuration profile for
video systems with removable hard drives” on page 120). Alternatively, you can load a previously saved
profile by selecting Load configuration profile. You can also back up a mirror-image of device configuration on
the receiver PC or apply a previously saved mirror image (see “Upload/download” on page 229).
Delete track 1-2/4/10
27769_02
Select this option for one or more tracks if you want to immediately
delete all stored images on the tracks in question during an active
connection. Images on other tracks will not be deleted. The warning that
you are about to delete image data only applies to the selected tracks.
179
CamControl PRO Software Manual
HeiTel by Xtralis
Delete all images and
passwords
Select this option if you want to immediately delete all images and
passwords for the image archive on the hard disk drive during an active
connection (see “Archive passwords” on page 177).
Format HDD
Select Format HDD to format the hard disk drive when the connection
has closed.
Formatting time depends on the size of your hard disk drive, and the
device cannot be dialled during this time. It takes about two minutes to
format a 200 GB hard disk drive.
The passwords for the image archive and the transmitter logfile are also
deleted during formatting.
Notes:
l
l
Delete logfile
If you have previously saved your archive settings by selecting Save
as configuration profile, it is a good idea to select Load configuration
profile in addition to Format HDD. Without a saved profile, the
factory settings of the device will be loaded.
If you reset your image archive to its factory settings (refer to the
relevant information in your product guide), the saved configuration
profile will be deleted.
Select Delete logfile to immediately delete the transmitter logfile during
an active connection and to create "Logfile cleared" as the first entry.
The option "external RAID" allows you to use an external RAID system via the eSATA interface (depending
on the VideoGateway). Please note that you need the additional product key "RAID-ID" to have this option
available.
Boot mode
With the introduction of firmware 4.02 and the CamControl LITE software version 4.12 the option boot mode is
supported for CamDisc VG, CamServer VG, CamDisc VG HNVR and Cam4mobile VG 2c. These
VideoGateways can support HeiTel coded external hard drives alternatively.
The option “search for internal HDD first” defines the order for the boot mode. The following options are
possible:
l
l
Option Search for internal HDD first activated: The video system is using the internal hard drive for storing
video images. If the internal hard drive is not detected, the video system will check the availability of an
external hard drive to store images.
Option Search for internal HDD first deactivated: The video system is using the external hard drive for
storing video images. If the external hard drive is not detected, the video system will check the availability
of an internal hard drive to store images.
Note:
7.13.3.1
This option is disabled and greyed out in case the corresponding feature is not available.
HDD safe power down functions
For the device series CamDisc SVR, CamDisc SVRs, Cam4mobile, CamServer and CamDisc HNVR, the
introduction of firmware 1.86 and the software CamControl PRO Version 3.87 provides functions for the safe
powering down of HeiTel video systems and therefore also for the safe removal of HDDs - especially of the
SATA series.
Note:
180
The new HDD safe power down functions ensure that the integrity of data on HDDs is retained and
that during removal any potential loss of data is prevented.
27769_02
HeiTel by Xtralis
CamControl PRO Software Manual
Minimum requirements
l
l
Device firmware 1.86
CamControl PRO 3.87
Safe powering down of the recording system and safe removal of the HDD using V
out
If the system is programmed as below, the HDD is put into standby mode via V out
Press V out for at least Press and hold the V out button on the front of the device for at least 10
10 seconds
seconds. Alternatively, switch the potential-free control input V out to
ground for at least 10 seconds. To do so, connect a push-button with the
relevant contacts on the back of the device. Both procedures are
equivalent in this case.
Write logfile entry
Before the HDD is put into standby mode, the device writes the logfile
entry HDD deactivated including date and time.
HDD safe power down The HDD is put into standby mode and does not record any more data.
mode
The video system signals this state by means of the flashing yellow
video signal LEDs (depending on the device type V1-V2/V4/V10). The
device remains in this mode for 3 minutes.
l
If you do not switch off the video system during this time, after 3
minutes the HDD is reactivated and recording is started again
according to the device programming.
In this state - HDD in standby mode - the device can be safely powered
down without this hindering the functionality of the HDD.
Switching off the video Switch off the video system before removing or replacing the HDD.
system
Note:
When the HDD is in standby mode, neither video data nor
audio data (where applicable) is recorded. Nor are any logfile
entries written. Additional functions of your video system will
also be deactivated while the HDD is inactive, such as for
example the set-up of alarm and receiver connections.
Video systems without Video systems with no V out button on the front of the device V out button
CamServer 2 and CamDisc HNVR 10 - also do not have a control input
of the same name on the back of the device. Alternatively and depending
on the device type, you can switch a different potential-free control input
on the back of the device to ground using a button for at least 10
seconds:
l
l
27769_02
CamServer 2 (serial number WDxxxxxx): control input nc (Pin 8)
CamDisc HNVR 10 (serial number NVxxxxxx): control input Aux in3
(Pin 8)
181
CamControl PRO Software Manual
HeiTel by Xtralis
Safe powering down of the recording system and safe removal of the HDD using
Aux in2
If the procedure using V out described in the previous section (see “Safe powering down of the recording
system and safe removal of the HDD using V out” on page 181) cannot be used because the relevant control
input and/or the button for sequencer control is in use, control input Aux in2 may alternatively be used.
Note:
Although the software option Stop writing to HDD when "Aux 2" was switched refers to Aux 2, the
name of the control input on the back of the device is in fact Aux in2.
If the system is programmed as follows, the HDD is put into standby mode via Aux in2.
Use of the Aux in2
control input
To use the potentialfree control input Aux in2, additional programming is
necessary:
l
l
Timeout: Timeout lets you configure a period of time for which the
video system waits while activated by Aux in2, before the HDD is
put into standby mode. If activation is deactivated using the control
input Aux in2 within the defined waiting period, the HDD is not put
into standby mode. If the control input Aux in2 is deactivated after
the HDD was switched to standby mode, the HDD is immediately
reactivated. Independently of Aux in2 the HDD remains for at least
10 seconds in standby mode.
Contacts: Using the parameters Normally closed or Normally
opened you define in what switching state the standby mode for the
HDD is to be activated.
Activate the standby mode for the HDD - depending on the programmed
contact assignment - opening or closing the connection between Aux in2
and ground using a button or switch. Depending on the selected timeout
interval, either a button or a switch will be available to change the status.
Write logfile entry
Before the HDD is put into standby mode, the device writes the logfile
entry HDD deactivated including date and time.
HDD safe power down The HDD is put into standby mode and does not record any more data.
mode
The video system signals this state by means of the flashing yellow
video signal LEDs (depending on the device type V1-V2/V4/V10). The
device remains in this mode for as long as Aux in2 is activated.
l
If activation is interrupted via Aux in2, the HDD is reactivated and
recording is restarted in accordance with the device programming.
Independently of Aux in2 the HDD remains for at least 10 seconds in
standby mode.
In this state the device can be safely powered down without this
hindering the functionality of the HDD.
Switching off the video Switch off the video system before removing or replacing the HDD.
system
Note:
When the HDD is in standby mode, neither video data nor
audio data (where applicable) is recorded. Nor are any logfile
entries written. Additional functions of your video system will
also be deactivated while the HDD is inactive, such as for
example the set-up of alarm and receiver connections.
182
27769_02
HeiTel by Xtralis
CamControl PRO Software Manual
Safely powering down Cam4mobile (Revision 5 or higher) via the internal circuit
Internal connection of
Timer + input and Aux
in2
For Cam4mobile devices of revision 5 or higher (see serial number
sticker at the top of the device or on the HDD insertion) Timer + input and
Aux in2 are internally connected.
For these devices, the adjacent wiring of the Timer input in accordance
with the product guide is strongly recommended. Only use of the timer
specific to Cam4mobile in connection with the device parameterisation
described below can ensure that the HDD is put into standby mode prior
to the timer-controlled shutdown of the device. For the internal switch-off
delay (timer) to be activated, Main + must be connected to the vehicle
contact "unswitched supply" and Timer + to the vehicle contact
"switched plus" or "ignition plus".
With this wiring (see above) Cam4mobile will delay switching off the
device for a certain period after the vehicle ignition has been switched
off. The standard setting for DIP switches is a 10-minute delay before
switching off. If the system is programmed as follows, the HDD is put
into standby mode via the internal connection of Timer + and Aux in2.
Internal connection of
Timer + input and Aux
in2
To use the internal connection of Timer + and Aux in2 additional
parameter settings are required:
l
l
Timeout: Ensure that you set this value to the same value set to
delay the switching off of your Cam4mobile device. The standard
setting for DIP switches is a 10-minute delay before switching off.
Therefore the timeout should also be defined as 10 minutes.
Contacts: Due to the internal switching of Timer + and Aux in2 the
activation contact must be programmed to Normally closed so that
the HDD is set to standby mode before the device is switched off.
The standby mode for the HDD is activated by switching off the vehicle
ignition taking into account the programmed delay before switching off.
Write logfile entry
27769_02
Before the HDD is put into standby mode, the device writes the logfile
entry HDD deactivated including date and time.
183
CamControl PRO Software Manual
HeiTel by Xtralis
HDD safe power down The HDD is put into standby mode and does not record any more data.
mode
The video system signals this state by means of the flashing yellow
video signal LEDs (depending on the device type V1-V4/V10). The
device remains in this mode for as long as it remains activated via the
switched off vehicle ignition.
l
Automatic switch-off
of the video system
If activation is interrupted by switching on the vehicle ignition, the
HDD is reactivated and recording is restarted in accordance with the
device programming. Independently of this the HDD remains in
standby mode for at least 10 seconds.
The Cam4mobile device is switched off once the device-internal delay to
switch off has expired.
Note:
When the HDD is in standby mode, neither video data nor
audio data (where applicable) is recorded. Nor are any logfile
entries written. Additional functions of your video system will
also be deactivated while the HDD is inactive, such as for
example the set-up of alarm and receiver connections.
Safe powering down of the CamServer 2c or safe removal of the storage medium
In the CamServer 2c device series (serial number WCxxxxxx), a change to the existing device configuration
for the HDD standby functions may be ignored and reset.
In this device series, the main power switch operates as a standby switch, i.e.:
l
l
l
When the device is powered off, any pending write processes on the storage medium are first completed.
These processes are indicated by the flashing of the yellow video LEDs.
After the write operations are completed, the video system is switched off and all front LEDs go out.
Storage media can be removed or replaced in this state.
7.13.4 POS/ATM/IBIS
Open the POS/ATM/IBIS tab from the selection menu under the Site archive node. The POS/ATM/IBIS node
contains the two supplementary configuration dialogues Keywords (see “Keywords” on page 188) and Adapter
(see “Adapter” on page 188).
Note:
The inclusion of POS/ATM/IBIS data in the camera image using the POS/ATM Adapter can only
take place with analogue image sources.
The POS/ATM/IBIS dialogue window serves to specify the track settings for transaction data.
184
27769_02
HeiTel by Xtralis
CamControl PRO Software Manual
Recording
With the Recording option you can active the recording of transaction data for the respective camera track.
Type
With the Type option you can specify whether transaction data to be recorded is POS or ATM or IBIS or Soyal
data. A correct assignment of the type is important for the later evaluation of the transaction data. ATM data is
supplied solely by certain cash dispenser machines and access control systems. Please also note the
information in the device-specific supplementary information for the POS/ATM Adapter. IBIS data is received
via the IBIS Adapter via the transparent serial interface - preferably from a Cam4mobile device. For this
application note also the programming of the serial interface (see “IBIS function with Cam4mobile” on page
214).
Soyal data is only received using a Soyal Card Reader via the transparent serial interface. For this application,
note also the configuration of the serial interface (see “Soyal Card Reader in conjunction with a HeiTel video
system” on page 215). The IBIS and Soyal parameters are only available for data track 1.
Track size
Via Track size you can perform a percentage distribution of memory available for the transaction data and thus
carry out an individual assignment for the specific tracks. Regardless of the device type of the digital frame
recording system by HeiTel, 150 MB of hard disk capacity is reserved for the transaction data.
l
l
VG video systems: All video gateways of the VG Series reserve one percent of their hard disk capacity
for transaction data.
SVR video systems: Irrespective of the device type of the digital frame recording system from HeiTel,
150 MB of hard disk capacity are reserved for transaction data.
The sum of individual tracks must not exceed 100%, as the track distribution would otherwise be reset to the
device-specific standard value per track:
27769_02
185
CamControl PRO Software Manual
HeiTel by Xtralis
Cam4mobile VG 4c
CamDisc VG 4c
CamDisc VG 2s
CamServer VG 4c
CamServer 2
CamServer 2c
Cam4mobile VG 4
CamDisc VG 4
CamDisc VG 4s
Cam4mobile 4
CamDisc SVR 4
CamDisc SVR 4s
Cam4mobile VG 10s CamDisc VG 2s
CamDisc VG 10
CamServer 2
CamDisc VG 10s
CamServer 2c
Cam4mobile 10
CamDisc HNVR 10
CamDisc SVR 10
CamDisc SVR 10s
Number of
tracks
4
4
10
2
Standard
value per
track
25%
25%
10%
50%
Note:
For changes to the track division of the POS/ATM/IBIS archive, the archive of the transaction data
is deleted across all tracks.
Line length
Via the Line length you can specify the maximum line length for incoming data records with transaction data.
For the POS/ATM Adapter the preset value of 57 must be selected.
For IBIS data the line length of 121 characters should always be selected. If the line length is shorter, parts of
the transferred data record could get cut off. The correct selection of the line length has an immediate effect on
the quantity and quality of the saved data records:
l
l
If too high a value is selected for the line length, the available storage is not used optimally and the
number of possible data records is reduced.
If too small a value for the line length is selected, part of the data is cut off and certain date records may
be incomplete.
Note:
When changing the line length, the transaction data is deleted for the respective track.
Delete track
Via the Delete track option you can select one or several tracks which are deleted after confirming by pressing
OK. After performing the procedure the option is set back.
Note:
As the POS/ATM Adapter communicates with the CamDisc HNVR, CamDisc VG or CamServer
devices via TCP/IP, the POS function (see “Serial channel” on page 212) has no influence on the
transaction data of this device. The transparent data interface Transp. data/Control interface on the
CamDisc HNVR, CamDisc VG or CamServer can be used for other purposes.
Set values for IBIS recording
The Set values for IBIS recording button is used to set the following parameters for the initial POS/ATM/IBIS
data track:
Recording
Type
Track size
(%)
Line length
IBIS
100
121
Delete track
All other POS/ATM/IBIS data tracks are set to 0%. Confirming with OK causes existing POS/ATM/IBIS data
to be overwritten.
186
27769_02
HeiTel by Xtralis
Note:
CamControl PRO Software Manual
To record IBIS data only the first POS/ATM/IBIS data track can currently be used. If you reduce the
track size of this data track, you can assign free percentage values to additional tracks
proportionately and use these where necessary to record POS data.
The following IBIS data is recognised and can also be evaluated: Date, Time, Wagon number, Line, Course
and Station. The IBIS data is accessed in the same way as POS data (see “Accessing IBIS data” on page
44).
The Set values for IBIS recording button may be disabled (greyed out).
If necessary, follow the information positioned to the right of the button and change the programming for the
Serial channel (see “Serial channel” on page 212).
Setting parameters for SOYAL
The Set values for SOYAL recording button is used to set the following parameters for the initial
POS/ATM/IBIS data track:
Recording
Type
Track size
(%)
Line length
Soyal Card
Reader
100
57
Delete track
All other POS/ATM/IBIS data tracks are set to 0%. Confirming with OK causes existing POS/ATM/IBIS data
to be overwritten. Using this configuration, the video system allows up to 2,000,000 transactions of the Soyal
Card Reader to be logged.
Note:
For recording Soyal data, only the first POS/ATM/IBIS data track can be used. If you reduce the
track size of this data track, you can assign free percentage values to additional tracks
proportionately and use these where necessary to record POS data.
The following Soyal data is recognised and can also be evaluated: Armed status, Time of the card reader,
Card ID, Card Reader ID, and Card valid/invalid. The Soyal data is accessed in the same way as ATM data.
The Set values for SOYAL recording button may be disabled (greyed out).
If necessary, follow the information positioned to the right of the button and change the configuration for the
Serial channel (see “Serial channel” on page 212).
27769_02
187
CamControl PRO Software Manual
HeiTel by Xtralis
7.13.5 Keywords
You can call up the Keywords dialogue window via the selection menu under the POS/ATM/IBIS node which
is subordinate to Site archive. This menu item is only available for devices of the CamDisc VG HNVR,
CamServer VG, CamDisc VG, CamDisc HNVR, CamServer and CamDisc SVR series.
Keyword
The Keyword allows you filter the data. These rows contain the keyword
identifying the beginning of a new transaction. The row with the keyword
appears in blue when you are accessing this data.
Via the following options All and #1 up to #2, #4 or #10 you can determine
to what camera tracks the individual keywords apply.
Camera allocation
The assignment of transaction data to the respective camera tracks is
performed via the configuration of the POS/ATM Adapter.
7.13.6 Adapter
You can call up the Adapter dialogue window via the selection menu under the POS/ATM/IBIS node which is
subordinate to Site archive. This menu item is only available for devices of the CamDisc VG HNVR,
CamServer VG, CamDisc VG, CamDisc HNVR, CamServer and CamDisc SVR series.
188
27769_02
HeiTel by Xtralis
CamControl PRO Software Manual
Port
With Port you can set the IP port which your CamDisc VG HNVR, CamServer VG, CamDisc VG, CamDisc
HNVR, CamServer or CamDisc SVR device expects as recorder for establishing the connection. Up to ten
POS/ATM Adapter can be connected with the recorder. For an overview of the IP ports used by CamControl
PRO press the ? button (see “Overview of the used IP Ports” on page 253).
Note:
Requirements for communication between the CamDisc VG HNVR, CamServer VG, CamDisc
VG, CamDisc HNVR, CamServer, or CamDisc SVR device and the respective POS/ATM
Adapters is that the devices are in the same IP address range (e.g.: 192.168.31.x) and that the IP
port of the POS/ATM Adapter corresponds with this value for the destination. This IP address
including the port address is programmed on the POS/ATM Adapter as Target (Recorder).
After changing the IP port, your CamDisc VG HNVR, CamServer VG, CamDisc VG, CamDisc HNVR,
CamServer or CamDisc SVR device will restart.
The following table lists all POS/ATM Adapters currently connected to your recorder with the following data:
l
l
l
Name & Version: Device name, version status and serial number are displayed.
IP address: The IP address is displayed.
This IP address including the port address is programmed on the POS/ATM Adapter as Source (POSAdapter).
Type: The adapter type is currently distinguished between POS and ATM.
The following number in brackets provides details on whether it is a POS/ATM Adapter with one channel (1) or
with four channels (4).
7.13.7 Audio (recording)
Open the Audio tab from the menu under the Site Archive node. This menu item is only available for
Cam4mobile VG, CamServer VG, CamDisc VG, CamDisc SVR, Cam4mobile and CamServer series
devices.
Since the CamDisc HNVR/CamDisc VG HNVR series is equipped as standard with an integrated audio
function, audio recording is possible with these devices. If you have installed an Audio Card, then you can
save voice-quality audio data on the hard drive of your CamDisc SVR device in addition to image data. Your
device needs at least firmware version 1.34 or 1.40 for audio recording. Duplex audio (live audio transmission
and audio recording) is possible with the use of firmware V1.92 or higher and CamControl PRO V3.92 or
higher.
27769_02
189
CamControl PRO Software Manual
HeiTel by Xtralis
This tab provides you with general information regarding audio recording and allows you to configure several
parameters.
Recording duration
CamDisc SVR/CamDisc VG (as well as CamDisc VG HNVR, Cam4mobile VG, CamServer VG, CamDisc
HNVR, Cam4mobile or CamServer) reserves five per cent of hard-drive capacity for storing audio data. Your
device shows you the maximum recording duration in days calculated based on the size of the hard drive.
A hard drive with a storage capacity of 4TB (hard drives >2TB only VG-series) produces a maximum recording
period of approximately 1060 days continuous audio recording.
Audio recording
Click On to activate audio recording. You can choose from the following types of recording:
Record all time
In this mode, audio data are recorded permanently.
Recording only while
image recording
In this mode, audio data are only recorded when images are also being
saved for the selected camera.
This ensures that in the case of event- or timer-controlled image
recordings, for example, only the relevant audio data can be saved. In
such a way, recording capacity is optimised.
Storage procedure
Audio data are saved on a FIFO basis (first in first out) in both operating
modes. Once the maximum storage capacity has been reached, the
oldest recordings are replaced by the newest.
The Recording duration and Audio recording areas are disabled for
devices without an Audio Card, so the corresponding configuration
options are not available.
Audio recording commands
Delete audio track
190
Similarly to the commands for deleting individual camera tracks (see
“Delete track 1-2/4/10” on page 179), you can also delete audio track
data. Confirm the changes made to the audio recording parameters by
clicking OK. Then click OK again to send them to your device.
27769_02
HeiTel by Xtralis
CamControl PRO Software Manual
7.13.8 Track settings
Open the Track settings tab from the menu under the Site archive tab. This menu item is only available for
CamDisc VG HNVR, CamDisc VG, Cam4mobile, CamServer VG, CamDisc HNVR, CamDisc SVR,
Cam4mobile, and CamServer series devices.
In this tab you can specify:
l
l
the operating mode of your device during live transmission and access.
the size of your two, four or ten hard disk tracks.
Operating mode
Simplex
Select Simplex = Live image transmission or recording or archive
evaluation if the device is currently only ever going to be carrying out one
of these three functions.
Duplex
Select Duplex = Live image transmission and recording or archive
evaluation if you want images to continue being recorded while you are
connected to the device and are accessing live images. This mode does
not record images while you are accessing the image archive.
Triplex
Select Triplex = Live image transmission and recording and archive
evaluation if you want images to continue being recorded while you are
connected to the device and are accessing live or archive images. Unlike
Duplex, this operating mode not only allows live images to be accessed
and recorded at the same, it also allows you to access the image archive
during image recording. Recording is, however, limited to tracks whose
archives are not currently being accessed.
Note:
The Mode applies to all camera tracks on the hard disk drive.
Please note that image recording and transmission are
considerably slower when Duplex or Triplex is activated.
Track division
You can define the memory capacity of each track individually. Adjust the size using the relevant slider. If a
track is set to 0 %, no images at all will be recorded on this track.
27769_02
191
CamControl PRO Software Manual
Note:
HeiTel by Xtralis
All images stored in the device will be deleted if you change the track division because the image
archive will be re-initiated. Images on tracks that have not been changed will be deleted as well!
If the total size of all tracks is under or over 100 %, an error message will be displayed.
As long as maximum capacity has been exceeded, you will not be able to close dialogue box by clicking OK.
You must configure capacity to 100 % or below. If overall track capacity is under 100 %, it will not be
corrected and your settings will be applied directly. To avoid misconfiguration, ensure a total track size of
exactly 100 %.
to reset track sizes to the factory settings.
Click
Number of tracks (cameras)
Default value
2
50 %
4
25 %
10
10 %
7.13.9 Recording (Video 1-2/4/10 in)
Open the Video 1-2/4/10 in tab from the menu under the Site Archive node. These menu items are only
available for CamDisc VG HNVR, CamDisc VG, Cam4mobile, CamServer VG, CamDisc HNVR, CamDisc
SVR, Cam4mobile and CamServer series devices.
You can configure each of the two, four or ten camera tracks individually regarding both event and continuous
recording. Settings include:
l
l
l
l
l
l
l
Definition of partition sizes for event and continuous recording depending on total track size
Combined continuous and event recording (see “Combined continuous and event recording” on page 193)
Specifying timer operation (see “Timer operation” on page 194) for event and continuous recording
Saving preview images for optimised site archive access
Overwrite protection for stored images
Reporting underflow
Deleting any images older than a definable date
192
27769_02
HeiTel by Xtralis
CamControl PRO Software Manual
Event partition and continuous recording partition
Every camera track can be divided into an event partition and a continuous recording partition. Partition size
depends on total track size (see “Track settings” on page 191) and can be set using the slider. Changing the
size of the partition of one recording mode automatically causes the size of the partition of the other recording
mode to change.
The maximum partition size of one recording mode can equal total track size. You can therefore use the slider
to configure the track for event recording only, continuous recording only, or a combination of both recording
modes.
The sizes of each individual partition are indicated as you move the slider to make things easier. Once you
stop moving the slider and allow the cursor to rest on it, the division of the track is shown as a percentage for
about three seconds.
If you do not configure a period of time for either event or continuous recording in timer mode but allocate
space to these recording modes using the slider, a corresponding warning will appear.
Note:
If a camera track is dedicated to only one recording mode, then the special settings of the other
recording mode cannot be changed, or will be of no consequence for current operation (see “Event
recording 1-2/4/10” on page 196) and (see “Continuous recording 1-2/4/10” on page 201).
7.13.9.1
Combined continuous and event recording
Unlike the familiar timer-controlled switching between continuous and event recording, as of firmware version
V1.76 (see “Timer operation” on page 194) the CamDisc HNVR, CamDisc SVR, Cam4mobile and
CamServer devices offer contact-controlled switching.
Starting with firmware V4.02, CamDisc VG HNVR, CamDisc VG, Cam4mobile VG and CamServer VG
devices also have this contact-controlled switch.
Event recording
always enabled
If you enable the Event recording always enabled option, you turn on this
function for the selected camera track. After the adjusted recorder
settings have been transmitted with OK, this switching takes place on a
contact-controlled basis via a control input on the device.
Note:
The Event recording always enabled function requires you to
program at least a part of the selected recording track for an
event recording. If this is not done, the function remains
inactive and is greyed out.
The recording parameters for continuous and event recording of the
selected recording track can be adjusted on the dialogue box of the same
name.
Note:
If the Event recording always enabled function is used, the
extended configuration of the continuous recording can only
be set to a limited degree (see “Advanced configuration” on
page 202).
How combined continuous and event recording works
The Event recording always enabled function enables contact-controlled recording of events. For control
purposes, only the input contact is required for the relevant camera track (for example Control in1 for Camera
track 1).
l
If, in accordance with the timer settings (see “Timer operation” on page 194) a continuous recording takes
place or no recording at all, event recording is started by triggering the relevant input contact.
27769_02
193
CamControl PRO Software Manual
HeiTel by Xtralis
No pre-alarm images are recorded for these events. The image sequence consists only of alarm
image and post-alarm images.
l
The trigger level (Normally opened or Normally closed) is specified in Event recording/Trigger via
contact.
l
If necessary, continuous recording takes place only when the switching state of the input contact is
inactive.
If event recording is to take place in accordance with the timer settings (see “Timer operation” on page
194), full event recording including pre-alarm images will be started by triggering the relevant input
contact.
l
l
Application example for a contact-controlled switching
Scenario
In this example, recording is to switch from continuous to event
recording at the push of a button and an event for Camera track 1
triggered at the same time.
Input circuits
The potential-free input circuit enables the status input for camera 1
Control in1 to be switched to earth when the momentary switch is closed
- switch to event recording for the relevant camera track. The input is
now closed.
An event is triggered if, in the dialogue Recorder settings/Site
Archive/Video 1 in/Event recording 1 you set the option Trigger via
contact on Normally opened. After the event has been processed,
recording reverts to continuous recording. Since ongoing continuous
recording for the recording of an event has been interrupted with alarm
image and post-alarm images, no pre-alarm images are recorded. These
images are available as part of long-term recording.
Timer operation
CamDisc VG HNVR, CamDisc VG, Cam4mobile, CamServer VG, CamDisc HNVR, CamDisc SVR, and
CamServer devices are equipped with a timer that can be adjusted for each camera individually. In this
operating mode, images are only recorded at preset times. No images will be recorded outside of these times.
Regardless of this, it is still possible to connect to the image archive, receive live images, access the image
archive and change the configuration.
Timer operating mode can control both event recording and continuous recording. Moreover, two independent
sets of holiday rules can be defined in line with the two holiday types (see “Date and time” on page 126).
Timer operation
Timer operation is active for every camera track by default. You can
define recording times and recording types in the calendar in this tab.
Note:
194
Recording is not possible without the corresponding timer
setting.
27769_02
HeiTel by Xtralis
Weekly calendar
CamControl PRO Software Manual
One field corresponds to a time slot of 30 minutes. Use the mouse to set
times. Left-click or right-click and hold to activate, deactivate, or change
the recording mode for the time slot in question. This depends on the
current selection settings:
l
l
l
Continuous recording (blue)
Event recording (red)
No recording (grey)
The display field immediately below the weekly calendar displays the
time of the time slot currently being pointed to by the mouse. This helps
orientation.
Holidays
Timer operating mode provides two independent sets of holiday rules in
line with the two holiday types (see “Date and time” on page 126). The
rows Type 1 and Type 2 in the weekly calendar represent these two
holiday types. Each camera track can therefore accommodate timecontrolled recordings for two sets of holidays. For example, assigning
national holidays to Type 1 and company-specific holidays to Type 2
allows you to define individual and separate recording times for each
group.
Copy and insert
Clicking Copy allows you to conveniently copy weekly profiles to other
camera tracks. To apply the profile, click Insert in the associated Video
X in tab.
Copy to all timers
Clicking Copy to all timers inserts the weekly profile of the current
timer into all other timers. You do not need to apply the profile by clicking
Insert.
Note:
The Copy to all timers function automatically replaces the
weekly profiles of all tracks. Track-specific timer settings are
lost as a result.
Timer-controlled recording is the ideal solution if you only want to record
at certain times of day or only on certain days of the week/holidays
because you don't have to change the circuit or any settings. Actual
recording is controlled in line with the settings of the individual image
recording inputs (see “Event recording 1-2/4/10” on page 196) and (see
“Continuous recording 1-2/4/10” on page 201)).
Saving preview image for the site archive
Preview images
If you select Record preview images, additional smaller-sized images of
256x128 pixels are saved. These are required for displaying preview
sequences in the site archive (transmitter archive). These sequences
provide a quick overview of images saved in the transmitter archive
because they play back more quickly. Select Record preview images if
you want to use the preview feature in the archive (see “Accessing the
Site Archive” on page 35).
No preview images are recorded for devices belonging to the CamDisc
HNVR/CamDisc VG HNVR series without HYBRID Card 4. The option
is not shown in the device settings.
For devices of theCamDisc HNVR/CamDisc VG HNVR series with
HYBRID Card 4, preview images can only be recorded for activated
analogue camera channels. The option is displayed in the recorder
settings in this case. If, for the CamDisc VG, Cam4mobile, CamServer
VG, CamDisc SVR and CamServer devices, images of IP cameras are
recorded on a single camera track, the Record preview images option
can be enabled. However no images are recorded of the appropriate
resolution.
27769_02
195
CamControl PRO Software Manual
HeiTel by Xtralis
Warning on overrun
Overwrite protection
Select Overwrite protection to prevent older images from being replaced
by more recent images.
Threshold warning
In the Warning at field you can specify the capacity level at which you
want to be notified in order to be able to take appropriate action. This
notification takes place in several ways:
l
l
l
l
Continuing recording
The error relay is activated.
An appropriate entry is made in the device logfile (see “Accessing
the transmitter logfile” on page 47).
A message is displayed when you access the Site Archive
(transmitter archive) (see “Accessing the Site Archive” on page 35).
A message is displayed when your remove the hard disk drive from
the device and access it locally on your PC.
If Overwrite protection is selected and a track is full, recording will only
continue when all the image data have been deleted. You can do this
with both the CamControl PLAYER and the CamControl PRO (see
“HDD” on page 178).
Note:
If images have already been recorded on the track of your
device and you want to select Overwrite protection
retrospectively, you should delete all recorded image data
from the track. Only then will total track capacity be utilised
before Overwrite protection becomes active.
Monitoring recording time
Report capacity for []
days
Select Report period less than if you want to ensure that your device can
provide saved video images for at least the specified period of time.
Define this period of time in the [] days box. Once image data within the
defined period of time starts being overwritten, the Error relay is triggered
and this event is recorded in the logfile of the image archive (see
“Accessing the transmitter logfile” on page 47).
Data protection
Delete all pictures
older than [] days
Select Delete all pictures older than if you want your device to
automatically delete all images older than the set number of days. This
allows you to set sensible recording time frames, to comply with data
privacy regulations or just to avoid managing irrelevant image data.
7.13.10 Event recording 1-2/4/10
Open the Event recording 1-2/4/10 tab from the menu under the Site Archive node or from the Video 1-2/4/10 in
tab. These menu items are only available for CamDisc VG HNVR, CamDisc VG, Cam4mobile, CamServer
VG, CamDisc HNVR, CamDisc SVR, and CamServer series devices.
You can modify the settings for each camera track individually, provided a partition for this recording mode
has been created for the track in question (see “Recording (Video 1-2/4/10 in)” on page 192).
Recording is only possible if times for event recording have been defined in the timer for the track in question
(see “Timer operation” on page 194).
Event trigger and Event size can be modified.
196
27769_02
HeiTel by Xtralis
CamControl PRO Software Manual
Event trigger
You can define how events are to be triggered for each connected camera:
l
l
l
via the associated camera control input
via internal, software-supported motion detection
via a serial channel command (see “Serial channel” on page 212).
The triggering cause is recorded in the event list for archive access (I: control input M: motion detection and S:
serial).
Trigger via contact
The camera control input of the camera in question can report two states:
closed (switched to ground) and open (unswitched).
Select Normally opened from the drop-down list to trigger an event when
the input is closed. Select Normally closed from the dropdown list to
trigger an event when the input is open. Select Off to switch off control
input triggering.
27769_02
197
CamControl PRO Software Manual
HeiTel by Xtralis
Trigger via motion
detection
The integrated software motion detector can be set to three levels of
sensitivity. Select +Motion for maximum sensitivity and - Motion for
minimum sensitivity. The image is then checked for movement every
300 ms.
An event is triggered when the device detects motion in the video image
or in the defined motion zones. Select Off from the drop-down list to
switch off the motion detector for triggering.
Note:
You can limit motion detection by defining detection zones
(see “Motion detection zones (analogue cameras)” on page
150)
This dialogue is not available for devices belonging to the CamDisc
HNVR/CamDisc VG HNVR series without HYBRID Card 4.
Trigger via serial
command
If Trigger via serial command is active (select On), an event is
triggered by a serial command from an external device sent via the serial
interface of the transmitter. Off deactivates event triggering via the serial
channel.
The functions in this menu appear in grey because the function is
activated or deactivated across the board for all cameras with the serial
channel setting (see “Serial channel” on page 212).
Retrigger at []%
Every event is associated with a subsequent and variable alarm
duration, during which a defined number of images are recorded. If
Retrigger at []% is not selected, a new alarm event occurring at the same
camera input during an existing alarm would not be considered. To
prevent this, select the option and enter a percentage value. This
specifies if and when a subsequent event within the alarm duration will
be detected. The percentage value refers to the defined alarm duration.
With an alarm duration of ten seconds and a percentage value of 50 %,
an event occurring five seconds after the initial alarm would be detected.
Note:
198
There are no pre-alarm pictures for events occurring within the
alarm duration of a previous event and detected by retriggering.
27769_02
HeiTel by Xtralis
CamControl PRO Software Manual
Event size
Desired number of
events
Use this field to define the number of events to be recorded by the
assigned camera. The Possible number of events field specifies the
maximum number of events as a guideline.
This value depends on the following factors:
l
l
l
l
l
l
Set track size (see “Track settings” on page 191)
Recording quality (see “Video settings” on page 176)
Preview images option (see “Recording (Video 1-2/4/10 in)” on page
192)
Conditional refresh option (see “Video settings” on page 176)
Duration of pre-alarm and post-alarm
Number of pre-alarm and post-alarm images
Notes:
l
l
l
Changing the number of events deletes all the images saved on this
camera track.
If the desired number of events exceeds the possible number of
events, event size is adjusted to accommodate the desired number
of events. Event size is therefore adjusted so that the desired
number of events is archived, provided the minimum event size is
maintained.
If the minimum event size is not reached, your device automatically
reduces the number of events and saves the corrected number of
events after you click OK.
As of firmware version 1.76, the following HeiTel devices calculate in
each case with a different minimum size per event:
l
l
l
CamDisc HNVR series: 3 MB
CamDisc SVRs series and CamServer: 2MB
CamDisc SVR series and Cam4mobile series: 1 MB
To configure event recording, it is imperative that you use CamControl
PRO Version 3.83 or later.
Possible number of
events
The Possible number of events always supplies the maximum number of
potential events. Since the calculation is based on the current image
size, changes to the image size may in some cases be ignored.
Calculate your Desired number of events using the guide value Possible
number of events such that from this default value you subtract a reserve
of 20 to 30 percent, depending on the expected image change.
Duration of
prealarm/alarm (s)
These entry fields allow you to define the duration of pre-alarm and
postalarm sequences in seconds.
Pre-alarm/alarm
interval (s)
Specify how often you want an image to be recorded (every x seconds)
separately for pre-alarm and post-alarm sequence. The resulting
recording Speed will be immediately displayed in frames per second
(fps).
27769_02
199
CamControl PRO Software Manual
Number of images
HeiTel by Xtralis
Depending on your settings for pre- and post-alarm duration and
intervals, this field displays - for each sequence - the number of images
that will be recorded when an event occurs.
Note:
If the defined recording times are exceeded or more images
are recorded than was defined, increase if necessary the
Desired number of events or reduce the storage capacity
reserved for event recording (see “Combined continuous and
event recording” on page 193). If the defined recording times
are not achieved or if fewer images are recorded than defined,
reduce the Desired number of events. This makes more
memory available to the device for the individual events.
Average image size
The average image size is the basis for calculating the potential number
of events and the related memory requirement for events. Please ensure
that the average image size in each case is an instant average of recent
live images; if need be, only the average of the conditional refresh
images is displayed. Under certain circumstances, higher space
requirements per image must be assumed for a trigger - necessitated by
significant image changes. If the option “Manual Input” is enabled, you
can set the expected image size in the range of 2 to 300 KB using the
toggle switch. The potential number of events and the related memory
requirement for events change depending on the image size assumed.
Allocated size for
events
This field displays the partition size in GB reserved for event recording.
You can change the size of this partition in the Video 1-2/4/10 in tab (see
“Recording (Video 1-2/4/10 in)” on page 192).
Estimated required
size for events
Depending on the settings for pre- and post-alarm sequences and the
specified number of desired events, the storage capacity required by
event recording per camera track will be displayed immediately.
Note:
This value is an estimate because it depends on several
automatically changing factors. The actual value will be
different from this estimated value.
Messages
Below the values for reserved and estimated required storage capacity, messages concerning event size
settings may be displayed.
Desired number of
events exceeds
possible number of
events
If the desired number of events exceeds the possible number of events,
the following message will be displayed:
In this case you can reduce the number of desired events, increase the
camera track, or increase the partition for event recording (see “Track
settings” on page 191) and (see “Recording (Video 1-2/4/10 in)” on page
192)
200
27769_02
HeiTel by Xtralis
Possible number of
events exceeds
desired number of
events
CamControl PRO Software Manual
If the desired number of events is smaller than the possible number of
events, the following message will be displayed:
As more events could be recorded, you can increase the desired number
of events. Alternatively, you can allocate hard disk space not required
because of fewer events to another track or to continuous recording (see
“Track settings” on page 191) and (see “Recording (Video 1-2/4/10 in)” on
page 192).
Note:
Event size will always be adjusted to desired number of
events, as long as the minimum event size is reached. The
desired number of events is therefore achieved.
Event recording with a Soyal Card Reader
In order for event recording to be triggered via the Soyal Card Reader, it is necessary to define event recording
for camera track 1. For the other camera tracks, triggering is not possible via this card reader.
7.13.11 Continuous recording 1-2/4/10
Open the Continuous recording 1-2/4/10 tab from the menu under the Site Archive node or from the Video 12/4/10 in tab. These menu items are only available for CamDisc VG HNVR, CamDisc VG, Cam4mobile,
CamServer VG, CamDisc HNVR, CamDisc SVR and CamServer series devices.
You can modify the settings for each camera track individually, provided a partition for continuous recording
has been created for the track in question (see “Recording (Video 1-2/4/10 in)” on page 192).
Recording is only possible if times for continuous recording have been defined in the timer for the track in
question (see “Timer operation” on page 194).
Choose between two setting options:
l
l
Easy mode for very fast and simple configuration (see “Easy mode” on page 201)
Enhanced configuration methods for configuring continuous recording depending on the state of the
control input (see “Advanced configuration” on page 202)
Either of these configuration modes can be selected individually for each camera track.
7.13.11.1 Easy mode
Select Use easy mode to configure in easy mode.
The Easy mode recording process corresponds to the mode Contact status Open: Permanent in the
Advanced configuration (see “Continuous recording without external switching” on page 203).
The option "Record only when device armed" stops the continuous recording when the device is not armed.
This feature increase the overall recording time and / or protect the privacy.
27769_02
201
CamControl PRO Software Manual
HeiTel by Xtralis
Record image every [] This field defines the recording interval.
seconds
Specify how often (every x seconds) you want an image to be recorded.
Images per second
The value in this field indicates the recording speed resulting from your
interval setting.
Average image size
The average image size is the basis for calculating the estimated
recording interval. Please ensure that the average image size in each
case is an instant average of recent live images; if need be, only the
average of the conditional refresh images is displayed. Under certain
circumstances, higher space requirements per image must be assumed necessitated by significant image changes. If the option “Manual Input”
is enabled, you can set the expected image size in the range of 2 to 300
KB using the toggle switch. The estimated recording interval changes
depending on the image size assumed.
Estimated recording
period
Possible recording time is calculated automatically from your settings for
recording interval, track size and track partition size for continuous
recording (see “Track settings” on page 191) and (see “Recording (Video
1-2/4/10 in)” on page 192).
Note:
The calculated value is an estimate. Actual recording time
may deviate from this value.
7.13.11.2 Advanced configuration
Deselect Use easy mode to configure continuous recording in enhanced mode.
202
27769_02
HeiTel by Xtralis
Note:
CamControl PRO Software Manual
If the Event recording always enabled function is used (see “Combined continuous and event
recording” on page 193), the extended configuration of the continuous recording can only be set to a
limited degree.
A control input is assigned to each connected camera, i. e. each video input. This control input controls image
recording in detail. It can assume two states and can therefore report two changes. This results in the
following situations with regard to contact status:
Closed
State: Input is closed (i. e. switched to ground).
Opening (Edge +)
State change: Input has been opened. A change from Closed to Open
has occurred.
Open
State: The input is open (unswitched)
Closing (Edge -)
State change: Input has been closed. A change from Open to Closed has
occurred.
Configuring continuous recording
Continuous recording
without external
switching
Video images can be recorded without connecting a latch, momentary,
motion detector or similar device to one of the image recording inputs. If
the control input is unswitched (i.e. open) and if this contact status has
been configured as Recording mode/Trigger Permanent, this
corresponds to easy-mode continuous recording (see “Easy mode” on
page 201).
Operating modes of the image recording inputs
The recording behaviour of the different input states can be defined using the drop-down list (Closed, Opening
(Edge +), Open, Closing (Edge -)):
27769_02
203
CamControl PRO Software Manual
Off
HeiTel by Xtralis
The device ignores the state or state change of the image recording
input. This camera does not record any images.
If you set all switch states (Closed, Open, Opening (Edge +), Closing
(Edge -)) to "Off", image recording is completely deactivated for the
camera in question.
Permanent and On
"Permanent" means the device detects the state of this input (Closed or
Open), while "On" means that it detects a state change (Opening (Edge
+) or Closing (Edge -)). Depending on the values in Recording interval (s)
and Number of images, video images are recorded by the associated
camera.
Motion
The integrated software motion detector can be activated for input states
Closed or Open. Recording takes place if the device detects the relevant
input state and motion in the video image. Define recording details in the
Recording Interval (s) and Number of images boxes.
The integrated software motion detector can be set to three levels of
sensitivity. Select +Motion for maximum sensitivity and - Motion for
minimum sensitivity. The image is then checked for movement every
300 ms.
Graphical
representation
The diagram directly above the input states shows which input states are
activated / deactivated for recording. Red means active and black
inactive.
Recording interval (s)
This field defines the recording interval between consecutive images.
The recording interval applies to all operating modes. You can enter
values between 0 and 999 seconds in increments of 1/10ths of a second.
0 seconds results in maximum recording speed.
The recording interval can be greater that the set value if recording is not
in conditional refresh mode or if several cameras are recording
simultaneously.
Number of images
The Number of images field defines the number of images to be recorded
if the image archive either detects a status change (Opening (Edge +) or
Closing (Edge -)) or if the activated motion detector (+ Motion, Motion, Motion) detects motion. For continuous recording with closed input
(Closed = Permanent) or open input (Open = Permanent), no entry in this
field is required, as recording continues until the input state changes
again.
Information on image recording
The combination of various options allows for almost any recording situation. You should, however, keep
some important points in mind.
l
l
l
l
Consider carefully what you actually want to record and also what you actually want to evaluate later.
Check camera field of view and image quality.
Internal software motion detectors require considerable CPU power. If multiple camera recording is to be
controlled by motion detectors and recording time is slowed down considerably as a result, consider
replacing some of the internal motion detectors with external ones.
The device handles image recording triggered by changes in input states (i.e. Opening (Edge +) or Closing
(Edge -) with active recording) on a priority basis. If the device detects a status change at a recording
204
27769_02
HeiTel by Xtralis
l
l
CamControl PRO Software Manual
input, it will always interrupt recording triggered by a different status, a status change or the integrated
motion detector.
So that the device positively detects control input states and status changes, switching time must be at
least 0.5 s.
If the Event recording always enabled function is used (see “Combined continuous and event recording”
on page 193), the extended configuration of the continuous recording can only be set to a limited degree.
Extended continuous recording with a Soyal Card Reader
Triggering via the Soyal Card Reader is caused in the extended continuous recording by the falling edge for
camera track 1. For the other camera tracks, triggering is not possible via this card reader.
Example of triggering
In the example shown above, 100 images are recorded as fast as possible if a transaction is triggered at the
card reader:
Configuration using the falling edge (Closing (Edge -)):
l
l
l
Number of images: 100
Rec. interval (recording interval): 0 (means as fast as possible)
Rec. mode/trigger: On
The corresponding control input (Control in1) is evaluated at the same time as the card reader and can also
trigger image recording.
27769_02
205
CamControl PRO Software Manual
HeiTel by Xtralis
7.14 Audio
If the optional audio card is installed, you can transmit audio data with CamControl PRO and your device (see
“Audio transmission” on page 60) and in some circumstances you can also record audio data (see “Audio
(recording)” on page 189).
Since the CamDisc HNVR/CamDisc VG HNVR series is equipped as standard with an integrated audio
function, these devices offer you the following functions.
l
l
Connect the required peripheral devices (microphone, loudspeaker) correctly to your device. Refer to the
product guide for more information.
All required peripheral devices must be installed correctly on the receiver side as well (suitable
microphone(s), loudspeakers, sound card compatible with Soundblaster®).
Audio Card with Speex Codec (Audio V3.xx or Audio V4.xx)
The current Audio Card uses a Speex Codec. You can identify the model from the version number Audio
V3.xx. CamDisc HNVR/CamDisc VG HNVR devices also use a Speex Codec for the integrated audio
function. The version number Audio V4.xx is displayed.
Listening
Select this option if you want to listen in on the monitored object from
your receiver PC.
l
l
206
Select the input according to the connected signal source on the
HeiTel transmitter, choosing between the options Microphone and
Line.
Ensure that your signal source has been connected according to the
output signal, either with the Mic or Line in jack. These sockets are
on the rear of your HeiTel device.
27769_02
HeiTel by Xtralis
Speaking
CamControl PRO Software Manual
Select this option if you want to talk to the monitored object from your
receiver PC.
Selecting both options enables simultaneous listening and speaking
(push-totalk) from your receiver PC.
Note:
If no Audio Card is installed, you will receive the following
message instead of the version number:
The Listening and Speaking
options are not available.
Audio Card with TrueSpeech Codec (Audio V2.x)
The predecessor model uses a TrueSpeech Codec. You can identify the model from the version number Audio
V2.x. The difference from the model version described above is that you cannot apply further parameters to
the signal input (Listening).
The options Microphone and Line are deactivated and cannot be changed.
Notes:
l
l
For an Audio Card V2.x, the options Microphone and Line in the software interface are displayed in grey,
as parameterisation with regard to the signal input is not necessary. The functionality of the device inputs
MIC and Line in is given. These options displayed in grey do not indicate a malfunction of the Audio Card.
If you establish a connection from your receiver software CamControl PRO under Windows Vista to a
transmitter with a first generation (Audio V2.x) Audio Card, please install a TrueSpeech Audio-Codec on
your receiver PC. This makes it possible for Windows Vista to decode and reproduce the audio data.
27769_02
207
CamControl PRO Software Manual
HeiTel by Xtralis
7.15 Relays
The current HeiTel devices are usually equipped with two relay outputs that can be used for a variety of
applications:
l
l
l
l
l
l
l
As a latch
As a momentary with adjustable switching time
For signalling active connections
For signalling error states
For signalling a recording
For signalling arming
For signalling alarms
Relay names
You can give the relays a name, which is then used to label the buttons
in the central control panel.
Relay functions
208
Latch
A relay configured as a latch changes its state every time the button is
clicked (e.g. lighting on/off).
Momentary
A relay configured as a momentary changes its current state when
clicked for the period specified under Closed / s (e.g. for electromagnetic
door openers).
Closed while
connected
If you select this option, the relay is switched for the duration of the
connection. It reverts to idle when the connection terminates.
27769_02
HeiTel by Xtralis
Closed on error
CamControl PRO Software Manual
If you select this option, the relay signals a device malfunction or failed
attempt to establish a connection in the event of alarm (see “Phone and
IP numbers” on page 139). As the relay is active in idle state, power
failures can also be signalled.
Closed while recording If you select this option, the relay is switched for the duration of an active
recording. Once all active recordings have ended, it reverts to idle.
Closed while alarm
If you select this option, the relay is switched for the duration of the
connection. Once all active alarms have ended, it reverts to idle. The
relay follows the alarm LED of the HeiTel video system.
Closed while alarm
enabled
If you select this mode of operation, the relay is switched for the duration
of the arming. Once the device has been disarmed, it reverts to idle. The
relay follows the armed LED of the HeiTel video system.
Relay options
Closed while idle
If this option is selected, the relay is switched to idle and released on
activation. This option can be used for operating modes Latch,
Momentary and Closed while connected.
Reset offline
Reset offline causes a relay operating as a Latch to revert to idle after the
connection has terminated.
Note:
Closed / s:
If the relay is to operate as a Momentary, specify how long the relay is to
be switched before it reverts to idle.
Note:
27769_02
If the Reset offline option is enabled, the relay in question
possibly cannot be switched via applications that use the
HeiTel Web API (depending on API version), such as
CamControl MV, CamControl Android, CamControl Windows
Phone, CamControl iPad, or CamControl iPhone. This also
applies to the function of the relay in the Web Server.
If you require more than two relays, the optional R16 Adapter
offers an 16 additional relays for your HeiTel device.
209
CamControl PRO Software Manual
HeiTel by Xtralis
7.16 PTZ control
The devices have an internal PTZ control system for controlling an external device via CamControl PRO (see
“PTZ control and remote adapter” on page 54).
The following requirements must be met:
l
l
Your external device is supported. You can find a constantly-expanding list of supported devices on our
website or in the product guide.
Your external device is correctly connected to the transmitter unit. For more information refer to your
product guide.
This dialogue is not available for devices belonging to the CamDisc HNVR/CamDisc VG HNVR series
without HYBRID Card 4.
Update internal PTZ
control
Select this option to transmit the selected protocol to the internal PTZ
control system. You must update your PTZ control.
l
l
l
when you commission your external device and PTZ control for the
first time
if you want to apply a new version of the protocol to the PTZ control
system, or
if you want to remotely control another external device with PTZ
control.
When you activate this function, the Update control file (.R01) option
also becomes available.
Note:
210
PTZ control update can take several minutes with narrow
bandwidth connections. Do not close the current connection
until all the data have been transmitted and the status window
has closed.
27769_02
HeiTel by Xtralis
Update control file
(R01)
CamControl PRO Software Manual
Select this option to update the control file (R01) to the receiver PC.
Select the appropriate control file for your external device from the dropdown list. The transmitter-dependent control file is saved in the subdirectory \RMCTRL of the CamControl PRO program directory (see
“Transmitter-specific configuration files” on page 271). Update the
control file.
l
l
l
when you commission your external device and PTZ control for the
first time
if you want to transmit a new control file version to the PTZ control
system
if you want to remotely control another external device with PTZ
control.
Note:
Deactivate PTZ
If you select this option, PTZ control for this device is deactivated and
the protocol for your external device deleted. A status window is
displayed during deletion. The transmitterspecific control file (R01 file) on
the receiver PC is also deleted.
Note:
PTZ control of IP
cameras
Deactivating PTZ functions on the device in question means
that PTZ control is no longer available to any of the
transmitter's users.
PTZ control of IP cameras takes place independently of the functions
described above. The requirement for PTZ control of these cameras is
the permanent implementation of the camera within the device firmware.
Please refer to the overview in this guide (see “Supported IP cameras” on
page 245).
Note:
27769_02
Updating the control file for your transmitter will overwrite the
existing R01 file. All previous entries will be deleted.
For IP cameras integrated via a Generic "GET" command (see
“Generic "GET" commands” on page 243) , there is generally
no PTZ support.
211
CamControl PRO Software Manual
HeiTel by Xtralis
7.17 Serial channel
The transparent serial channel provides a simple way to transfer control data for remote control between
receiver PC and transmitter during image transmission. As shown in the illustration, data can be transmitted
via connected terminals (see “Serial Channel” on page 92). The settings are updated immediately during the
current connection when you click OK. Redialling is therefore not required.
Baud rate
212
Select an appropriate transmission speed for the external serial interface
from the drop-down list. Refer to the manufacturer's specifications for
the external device you want to connect.
27769_02
HeiTel by Xtralis
Mode
Function
CamControl PRO Software Manual
You can choose from a variety of transmission data formats:
Mode
Transmission data format
8/N/1
8 data bits, no parity, 1 stop bit
8/N/2
8 data bits, no parity, 2 stop bits
8/E/1
8 data bits, even parity, 1 stop bit
8/O/1
8 data bits, odd parity, 1 stop bit
7/N/1
7 data bits, no parity, 1 stop bit
7/N/2
7 data bits, no parity, 2 stop bits
7/E/1
7 data bits, even parity, 1 stop bit
7/O/1
7 data bits, odd parity, 1 stop bit
On the CamTel SVR you can use the serial interface as a transparent
interface or for serial control. On devices belonging to the CamDisc
HNVR/ CamDisc SVR/ CamServer series the POS function is also
available, while the IBIS function and the GPS function have been
designed for Cam4mobile devices:
l
l
l
l
l
l
Transparent:
Transparent data transmission from the receiver PC to the serial
output of the transmitter is possible.
POS (Point of Sale):
The interface is used as an input for serial transaction data (see
“POS function for CamDisc HNVR, CamDisc SVR and CamServer”
on page 214).
Serial control:
It is possible to control certain device functions by means of serial
commands via the interface.
IBIS:
The date and clock time on Cam4mobile/Cam4mobile VG devices
are synchronised via the IBIS vehicle bus. Wagon number, line,
course and station are also recorded (see “IBIS function with
Cam4mobile” on page 214).
GPS:
GPS data received is stored with the recorded images and
transferred if there is a live link to CamControl software (see “GPS
function for Cam4mobile/Cam4mobile VG” on page 214).
Soyal Card Reader:
The Soyal Card Reader function allows access to the card reader by
the video system to be logged, image recordings (continuous or
event recording) to be controlled and the video system to be
armed/disarmed (see “Soyal Card Reader in conjunction with a
HeiTel video system” on page 215).
Note:
27769_02
Once you confirm the new settings in the Function menu with
OK, you must terminate the connection to your device in order
from them to take effect.
213
CamControl PRO Software Manual
HeiTel by Xtralis
POS function for CamDisc HNVR, CamDisc SVR and CamServer
With CamDisc HNVR, CamDisc SVR and CamServer devices you can use the serial channel as well as an
input for transaction data in POS mode (see “POS/ATM/IBIS” on page 184).
POS recording
protocols
Recording protocols CamDisc HNVR, CamDisc SVR and CamServer
devices use the HYDRA protocol from AVE or a simple serial line
protocol with <CR> (carriage return) as the end-of-line identifier to record
POS data. The HYDRA protocol operates on a POS-/ camera-selective
basis. Only camera 1 is used for the line protocol. CamDisc
HNVR/CamDisc SVR/CamServer selects the protocol automatically.
Every line may contain 57 characters. You can configure line length in
the POS/ATM/IBIS (see “POS/ATM/IBIS” on page 184) tab, while
keywords are set in the same named tab (see “Keywords” on page 188).
Note:
To operate the HeiTel POS/ATM Adapter, the configuration of
the serial interface for the POS function is not relevant, as the
POS/ATM Adapter communicates exclusively via network
connections with your CamDisc HNVR/CamDisc
SVR/CamServer (see “Adapter” on page 188).
IBIS function with Cam4mobile
The IBIS function was primarily designed for Cam4mobile/Cam4mobile VG devices. The Cam4mobile is
connected via the IBIS Adapter with your vehicle's IBIS vehicle bus.
Configuration of IBIS
operation
The IBIS function serves to synchronise date and clock time of HeiTel
devices with the IBIS vehicle bus. The following programming is a
requirement for this:
l
l
l
Synchronise device
time to IBIS time
Baud rate: 1200
Mode: 8/N/2 (up to firmware V1.68: 7/E/1)
Function: IBIS
When the Synchronise device time to IBIS time option is enabled, the
device time is synchronised with the time transferred from the IBIS
vehicle bus. The following requirements apply for time synchronisation:
l
l
l
A valid date is transferred at least once.
A valid time is transferred at least six times.
The device time varies by at least one minute (not taking seconds
into account).
Note:
If time synchronisation can take place via alarm panel or IBIS,
the deviceinternal, automatic summer/winter time changeover
is not carried out (see “Summer time settings” on page 126).
If consecutive IBIS data records are receive d with valid date and valid
time, the time is synchronised once a minute. For devices with a hard
drive (CamDisc HNVR, CamDisc SVR, CamServer or Cam4mobile) a
logfile entry is written for every time synchronisation.
IBIS data records
Complete IBIS data records contain Date, Time, Wagon number, Line,
Course and Station.
GPS function for Cam4mobile/Cam4mobile VG
The GPS (Global Positioning System) function was primarily designed for Cam4mobile/Cam4mobile VG
devices. A GPS receiver is connected to a Cam4mobile/Cam4mobile VG via the serial interface.
Note:
214
The GPS receiver must supply data with the GPRMC data record according to the NMEA 0183
standard
27769_02
HeiTel by Xtralis
Configuration of GPS
operation
CamControl PRO Software Manual
The GPS function is used to store way points of HeiTel devices. The
following programming is generally a requirement for this:
l
l
l
Baud rate: 4800
Mode: 8/N/1
Function: GPS
Note:
Depending on the GPS receiver baud rate and mode can vary
and must be programmed in accordance with the
manufacturer's specifications.
Soyal Card Reader in conjunction with a HeiTel video system
The Soyal Card Reader is connected to the HeiTel video system via the serial interface. Soyal access control
generally contains the following functions:
l
l
l
Logging of access to the card reader in a POS/ATM/IBIS data track
Synchronous recording of images as continuous or event recording
Control of the arming/disarming of the video system via the card reader
Configuration for the
Soyal Card Reader
The following configuration is generally a requirement for this:
l
l
l
Baud rate: 9600
Mode: 8/N/1
Function: Soyal Card Reader
Note:
27769_02
If the HeiTel video system is in this operating mode, it can
only be armed or disarmed via the card reader.
Arming/disarming via a control contact or software is not
possible when the Soyal Card Reader is in use.
215
CamControl PRO Software Manual
HeiTel by Xtralis
7.18 Video out
Your digital image broadcasting system has a video output (only CamDisc SVR, CamTel SVR and
Cam4mobile, but not CamDisc HNVR and CamServer), via which you can output the connected cameras
directly to a monitor and thus obtain an overview of the premises being monitored whilst on-site.
Note:
Since CamDisc VG 2c, CamDisc VG 2s, Cam4mobile VG 2c, CamDisc HNVR/CamDisc
VG HNVR and CamServer/CamServer VG devices do not have this universal video out, these
models do not have a Video out configuration menu.
The video output can be operated in three modes:
l
l
l
Sequencer mode
Display camera of latest alarm
Display camera of latest image recording
7.18.0.1
Sequencer mode
Automatic camera
switching
Select Sequencer mode if you want to switch either one input or several
video inputs in rotation to the output.
Camera 1-4/10
Select the cameras that you want to include in sequencer mode.
[] s
Specify how long you want the output to be switched to each camera
before it switches to the next one.
Cam4mobile and SVR device control input
The digital image transmission systems in the Cam4mobile, SVR and VG series have a terminal block on the
rear with a control input labelled V out (Pin 8). You can control video output V out with this input as follows:
l
l
The control input is permanently closed (switched to ground). Sequencer mode is suspended, and the
current camera remains switched to the output. Sequencer mode is resumed 10 seconds after the input
opens.
The control input switches from the open to closed state (switched to ground). The next camera (in the
loop 1, 2, 3, 4,...) is switched to the video output. Cameras not activated for sequencer mode are also
switched to the output.
216
27769_02
HeiTel by Xtralis
CamControl PRO Software Manual
In such a way you can activate a particular camera, by suspending sequencer mode for a camera by pressing
a pushbutton connected to the control input for example. The camera remains switched on as long as you are
pressing the pushbutton. When you release the pushbutton and then press it again, the next camera is
switched to the output.
7.18.0.2
Camera of last alarm
Displaying alarm camera
If you select Display camera of latest alarm, the output is switched to another camera depending on the
recording inputs and how they are configured (see “Event recording 1-2/4/10” on page 196) or (see “Continuous
recording 1-2/4/10” on page 201).
Event recording
For event-triggered recording, the associated camera is switched to the video output if triggered.
Continuous recording
For continuous recording, four status changes can cause switching to another camera:
l
l
l
l
The image recording input is closed (switched to ground), and + Motion, Motion or - Motion has been
selected in the Closed drop-down list. Once a movement is detected, the transmitter switches to the
corresponding video input. If motion is detected at different cameras, the camera with the highest number
is switched (example: motion for edge recording on camera 1 and camera 3: camera 3 will be switched to
the monitor output).
The Opening (Edge +) drop-down list is set to "On" to record images when the closed recording input is
opened. Once this happens, the relevant camera is switched to the monitor output.
The recording input is open, and + Motion, Motion or - Motion is selected in the Open drop-down list. Once
a movement is detected, the transmitter switches to the corresponding video input. If motion is detected
at different cameras, the camera with the highest number is switched (example: motion for edge recording
on camera 1 and camera 3: camera 3 will be switched to the monitor output).
The Closing (Edge -) drop-down list is set to On to record pictures when the open recording input is
closed. Once this happens, the relevant camera is switched to the monitor output.
7.18.0.3
Camera of last recording
Displaying image recording
Select Display camera of latest image recording if you want to switch to the camera that last recorded an
image to the monitor output.
27769_02
217
CamControl PRO Software Manual
HeiTel by Xtralis
7.19 Alarm Panel
For its current devices HeiTel offers a connection to alarm panels in accordance with the standardised
protocol VdS 2465 supplement S3 (protocol enhancement for interface connection of video monitoring
systems on alarm systems).
This protocol enables a functional interconnection of HeiTel image transmitters with alarm panels via the
TCP/IP network protocol. Core functions of both systems are illustrated on both sides via this network
interface. In addition, the availability of the systems is continuously checked by both sides.
This dialogue box shows whether or not a connection to an alarm panel exists. A distinction is made between
the following messages:
l
l
Alarm panel not connected: There is no connection to an alarm panel.
Connected to alarm panel (192.168.31.208): A connection exists to the alarm panel with the specified IP
address (here: 192.168.31.208).
Note:
The specified IP address of the alarm panel was selected as an example.
Enabled
The Enabled option allows you to enable and disable the alarm panel
functionality.
Port
If alarm panel functionality is enabled, you can define a port number for
communication with your alarm panel.
Note:
When setting the parameters for the alarm panel, you may need
to enter the port address corresponding to the HeiTel device
both for the local and the target port.
Example
HeiTel device
Alarm panel
IP port for alarm panel
Local IP port
Target IP port
6666
6666
6666
Port 65535 cannot be used for alarm panel addressing. Entering this value
disables alarm panel functionality.
For an overview of the IP ports used by CamControl PRO press the ?
button (see “Overview of the used IP Ports” on page 253).
218
27769_02
HeiTel by Xtralis
Synchronise device
time with alarm panel
CamControl PRO Software Manual
When the Synchronise device time with alarm panel option is enabled, the
device time is synchronised with the time transferred from the alarm
panel. When this option is enabled, the device requests the time for
synchronisation from the alarm panel at 6-hour intervals.
Note:
If time synchronisation can take place via alarm panel or IBIS,
the internal, automatic summer/winter time changeover is not
carried out (see “Summer time settings” on page 126).
7.19.1 Messages to be sent
Via Messages to be sent your HeiTel device communicates with an alarm system to which your HeiTel
device sends messages. Individual alarms are selected from a list of possible events that were
communicated via the VdS 2465 protocol.
You can define a maximum of 40 messages to be sent.
Address
Via the address you specify the base address of the alarm system in
accordance with VdS protocol requirements. You input the address using
hexadecimal values. Composition of address:
x
Device
x
y
y
z
z
Group
Single contact, single
transmitter
Address
Address supplement,
sub-address
Area
In addition to the address entered, the following 39 addresses are
generated by the program, meaning that 40 addresses are available to you
for alarm messages to be sent. A tabular assignment of Address, Event
and, where necessary Camera (number) completes the possible
messages.
27769_02
219
CamControl PRO Software Manual
Event
HeiTel by Xtralis
In the Event column you assign an alarm event to the predefined Address.
You can choose from the following events:
l
l
l
l
l
l
l
l
l
l
l
l
l
Off: No event was defined for this address. There is no message.
Alarm enabled (Device armed): The device has been armed, either
via the Al a/d control input or via the software function, depending on
the device configuration.
Alarm input: A device alarm was triggered via the Al in control input.
This input functions independently of the status of the Al a/d alarm
enable input.
Tamper input: A tamper alarm was triggered via the Aux in1 control
input. This input functions independently of the status of the Al a/d
alarm enable input.
Aux2: The Aux in2 control input was triggered.
Temperature: The temperature sensor inside the device has
measured a critical temperature of at least 70°C (158°F).
Change of settings: The recorder settings were changed.
Motion: The alarm was triggered by a motion (internal motion alarm).
This is a camera-specific alarm; the camera number must therefore
be specified in the following column.
Video loss: The alarm was triggered by the loss of a video signal.
This is a camera-specific alarm; the camera number must therefore
be specified in the following column.
Camera position authentication: The alarm was triggered by a camera
being out of position. This is a camera-specific alarm; the camera
number must therefore be specified in the following column.
Camera input: A camera-specific control input Control in1-10 was
triggered. This is a camera-specific alarm; the camera number must
therefore be specified in the following column.
Alarm enable input: A change was detected on the Al a/d alarm
enable input.
HDD error: The HeiTel device (all except CamTel SVR/CamTel VG)
has detected a hard drive error.
Note:
These events represent the appropriate device functions in the
manner usual for the device. You may need to enable the
specific device function.
For CamDisc HNVR/CamDisc VG HNVR devices without HYBRID
Card 4 all messages listed above can be programmed. Specific
messages such as Motion and Camera position authentication may not
be performed because the device does not have the relevant functions.
Camera
220
In the Camera column, the relevant camera must always be specified for
all camera-specific events such as Motion, Video loss or Camera input.
27769_02
HeiTel by Xtralis
CamControl PRO Software Manual
7.19.2 Messages to be received
Your alarm system communicates with the HeiTel device via Messages to be received. Individual alarms are
selected from a list of possible events that were communicated via the VdS 2465 protocol.
You can define a maximum of 40 messages to be received.
Address
Here you specify the base address of the alarm system in accordance
with VdS protocol requirements, from which your HeiTel device receives
the relevant messages. These messages are used to control certain
device functions. You input the address using hexadecimal values.
Composition of address:
x
Device
x
y
y
z
z
Group
Single contact, single
transmitter
Address
Address supplement,
sub-address
Area
Enabled
In the Enabled column you specify under what conditions this message
is to trigger additional functions of the relevant line. Off, On activation, On
de-activation or On both. The standard setting is Off.
Camera
In the Camera column, you assign a camera number ranging from 1 to 10
to the individual control inputs, to which the triggering of the respective
control input refers. The camera number is selected via a rocker switch.
The range of values comprises the number of camera inputs on your
image transmitter. The standard setting is 1.
27769_02
221
CamControl PRO Software Manual
HeiTel by Xtralis
Preset
You allocate presets to the individual control inputs via the Preset
column. An allocation only makes sense for connected PTZ systems or
dome cameras, for which the presets have been programmed
accordingly. For other cameras, select the option Off. On dome protocols
with transmission of hexadecimal numerical values, up to 127 presets
(position 0 to 126) are supported. When transmitting decimal numerical
values, a maximum of only 100 presets (position 0 to 99) can be
activated. The standard setting is Off. The extended number of presets
primarily allows for the control of dome-specific special functions.
Note:
Presets can also start special functions, depending on the
system used. This for the most part affects presets with higher
numbers. For more detailed information, please refer to the
manual for your pan-and-tilt system and for your dome camera
respectively.
Alarm
In the Alarm column you choose between the options On or Off (standard
setting). If the On option is activated, the image transmitter signals an
alarm. The alarm is camera-selective and CamControl PRO displays a
corresponding message in the event tree:
Online/Alarm ’alarm panel’ camera name
l
Online/Alarm ’alarm panel’ camera name In the event of an alarm, the
relevant camera may be switched to display and the reason for the
alarm is displayed in the same way as the message syntax of camera
alarms.
Relay
In the Relay column you choose between the options Off (standard
setting), Relay 1 or Relay 2. Relay 1 and Relay 2 are standard names of
relays that can be modified in the Relay menu (see “Relays” on page 208)
if necessary. If you select one of the relay names, the selected relay can
be connected. The switching of the relay controlled via alarm panel
messages fails if a fixed function such as Closed while alarm enabled,
Closed while alarm, Closed while recording, Closed while connected or
Closed on error was assigned to the relay.
Trigger event
In the Trigger event column, choose between On and Off (standard
setting). If the On option is activated, then event-controlled recording of
video images takes place according to the programming for the respective
camera track in the Site Archive. For CamTel SVR/CamTel VG series
devices, this function is not available due to the absence of a hard drive.
222
27769_02
HeiTel by Xtralis
CamControl PRO Software Manual
7.20 Logfile
Starting with CamControl PRO Software V4.12, the “Logfile” dialog box includes a menu for logfile functions.
Digital image transmission systems equipped with hard disks log all important events in a transmitter logfile
(see “Accessing the transmitter logfile” on page 47). For CamDisc HNVR, CamDisc SVR, Cam4mobile and
CamServer devices, among others, you can configure settings so that certain parameters are saved in this
logfile.
All video systems of the VG Series have a battery-buffered logfile which stores logged events independent of
a hard disk or other storage medium.
Logfile
Last caller
If this option is selected, the last caller is written to the logfile shortly
before the connection is closed.
Note:
To determine the last caller for the external modem/ISDN TA,
enter the relevant AT command for modem initialisation in
Recorder settings (see “External modem” on page 136). The
command depends on the modem/ISDN TA employed (refer
to the appropriate manual).
Change of inputs
If this option is selected, the result of input status changes, i.e. input
closed or open, is written to the logfile. The Only when armed option
enhances this function. If it is selected, then changes to inputs are only
logged if your CamDisc VG HNVR, CamDisc VG, Cam4mobile VG,
CamServer VG, CamTel VG, CamDisc HNVR, CamDisc SVR,
Cam4mobile or CamServer is armed.
Temperature
If this option is selected, the operating temperature at dial-up is written to
the transmitter logfile.
Note:
For temperatures of 70°C and over, the message
"Temperature very high" is written to the logfile (see
“Accessing the transmitter logfile” on page 47). This message
is entered even when Temperature is not selected.
HeiTel video systems that are equipped with the device firmware V1.96
or later must always write the temperature to the transmitter logfile on
login.
27769_02
223
CamControl PRO Software Manual
Video signal loss
detection
If this option is selected, a corresponding message is written to the
transmitter logfile if a video signal to be recorded is lost for at least a
defined interval.
Note:
Clear Logfile
HeiTel by Xtralis
Even if Video signal lost detection is not selected, the
integrated error relay is triggered if a signal is lost (see
“Accessing the transmitter logfile” on page 47).
Click on “Clear logfile” to clear the transmitter logfile right away in the
middle of an active connection and create “Logfile cleared" as the first
entry.
7.21 Extras
The Extras tab provides you with options for monitoring and performing advanced settings on your HeiTel
devices.
Note:
Not all options are applicable to CamTel SVR/CamTel VG devices. The configuration options
related to hard disks in particular do not refer to CamTel SVR/CamTel VG series transmitters.
Digital image transmission systems equipped with hard disks log all important events in a transmitter logfile
(see “Accessing the transmitter logfile” on page 47). Under logfile, you can specify that certain parameters be
saved in this file for CamDisc VG HNVR, CamDisc VG, Cam4mobile VG, CamServer VG, CamDisc HNVR,
CamDisc SVR, Cam4mobile and CamServer devices.
The Service area allows you to monitor the performance of your device. Under Extra, you can deactivate the
hard disk of your CamDisc HNVR, CamDisc VG, Cam4mobile or CamServer and initiate hang-up and redial
in the event of an alarm. You can also release PTZ, audio and relay functions for the devices, and you can
specify a delay time to detect whether the video signal has been lost.
224
27769_02
HeiTel by Xtralis
CamControl PRO Software Manual
Service
Alarm call in case of
reboot
Following a device restart (triggered by switching on or, for example, by a
configuration-dependent restart such as following an IP address
change), the telephone number or IP address stored in the entry Phone &
IP numbers (see “Phone and IP numbers” on page 139) is dialled when
this option is checked.
Note:
If at the same time as the alarm Alarm call in case of reboot a
notification of a defective/missing hard drive is given, the hard
disk error alarm (see “Alarm call in case of defective hard disk”
on page 225) is handled first.
Alarm call in case of
defective hard disk
If this option is selected, the telephone number or IP address saved in
Phone & IP numbers (see “Phone and IP numbers” on page 139) is
dialled if there are problems with the hard disk. The receiver must
confirm the message after a connection has been established. If
appropriate action has already been taken to check your CamDisc
VG HNVR, CamDisc VG, Cam4mobile VG, CamServer VG, CamDisc
HNVR, CamDisc SVR, Cam4mobile or CamServer on site, or you do
not want to receive any further hard disk malfunction messages for
another reason, click Do not report again. The error message will only
appear again after you switch the device off and on again. If you cannot
take appropriate action to check your device on site right now, or if you
want to deal with the message at a later point in time, click Report again.
The message will be displayed again after 6 minutes, or your device will
be dialled again if the connection has been closed in the meantime.
The call is saved in the event tree (see "Event tree" on page 22).
27769_02
225
CamControl PRO Software Manual
Routine call every 24
hours
HeiTel by Xtralis
If this option is selected, the telephone number or IP address saved
under Phone & IP numbers (see “Phone and IP numbers” on page 139) is
dialled at the specified time (HH:MM). No picture will be transmitted, and
the connection is closed again immediately.
The Routine call every 24 hours option allows you to check and log on a
regular basis whether your HeiTel device is establishing a connection to
your receiver PC.
The call is saved in the event tree (see "Event tree" on page 22).
Extra
Use without hard disk
drive
If you remove the hard disk drive of the CamDisc VG HNVR, CamDisc
VG, Cam4mobile VG, CamServer VG, CamDisc HNVR, CamDisc
SVR, or Cam4mobile and select this option, you can operate your device
without a hard disk. Your device then acts as a simple transmitter.
Archive settings and the sender logfile cannot be accessed.
All hard disk monitoring functions are deactivated (e.g. hard disk
malfunction alarm or error relay triggering).
Note:
Hang up and redial on
alarm
If you select Use without hard disk drive and you have not
removed the hard disk, then this option is ignored. Your
CamDisc VG HNVR, CamDisc VG, Cam4mobile VG,
CamServer VG, CamDisc HNVR, CamDisc SVR or
Cam4mobile continues to work with a hard disk drive. If the
hard disk drive malfunctions or is removed at a later point in
time however, all monitoring functions remain active.
If this option is selected and there is an alarm event, an active
connection is closed and your digital image transmission system dials
the telephone number/IP address saved under Phone & IP numbers (see
“Phone and IP numbers” on page 139).
The connection will not be closed if the existing transmission media do
not match the registered numbers or addresses, or if dialling is only
possible by null modem connection.
If you do not want this automatic disconnection for special receiver PCs
(e.g., PCs in a security centre), automatic termination can be
deactivated for these computers in the CAMCTRL.INI configuration file.
Further information on changing the AUTODISCONNECT entry can be
found in the relevant section (see “Auto disconnect on alarm” on page
259).
You can also prevent specific users from configuring automatic
termination in the device's user management (see “User” on page 123).
226
27769_02
HeiTel by Xtralis
CamControl PRO Software Manual
Release access for
PTZ, Relay, Audio
after
If several users are connected to a HeiTel device at the same time, the
functions for controlling PTZ, audio and relay are passed on after a
variable period of time.
If unused functions are released after 60 seconds for example, then
these user rights are passed on 60 seconds after the previous user
stopped using them.
The time each user dialled in determines the order of priority in the first
instance. In such a way, the user who dialled into the digital transmission
system first is authorised to use PTZ, audio and relay functions for the
period of time specified in the settings. If the user uses one of these
functions, then he can continue to use that function for the defined period
of time calculated from the time he last used the function. If the first user
doesn't use the audio function for example, the next user in line can use
that function after the specified period of time.
If a user is using a function, then the next user in line is notified
accordingly. The message is shown for approx. 2.5 seconds:
l
PTZ functions:
l
Audio function:
l
Internal relays:
As of the device firmware V1.96, the Preemption option is available. If
the Preemption option is enabled, the usual behaviour up to device
firmware V1.94 is retained:
l
l
A manual connection that is initiated from the receiver software
attempts to obtain all rights (PTZ, relay and audio) when the
connection is established, as long as the user has the necessary
rights and depending on the existing connections of other users.
In the event of an alarm connection, the associated rights (PTZ,
relay and audio) of a connection that exists in parallel are withdrawn
in favour of this alarm connection.
If the Preemption option is disabled, the procedure described above can
be suspended.
27769_02
227
CamControl PRO Software Manual
Software video signal
loss detection
HeiTel by Xtralis
This function is used to set the delay time after which the loss of a video
signal due to covering or masking the camera is reported. The following
delay time are available:
Off, Immediately, 1 s to 10 s, 15 s, 20 s, 30 s or 60 s
Symbol used when video is obscured:
Merge into images
In addition to the obligatory display of date, time and image number top right, you also have the option to
display the camera name and/or transmitter name in the video image. No devices in the SVR and VGseries,
nor the Cam4mobile/Cam4mobile VG and CamServer/CamServer VG devices, support any of the following
merge into image options for IP cameras. CamDisc HNVR/CamDisc VG HNVR devices allow merge into
video image for IP cameras only in conditional refresh mode.
Merge camera names
into images
If you activate the Merge camera names into images option, the camera
name is displayed bottom centre of the video image.
Merge transmitter
name into images
If you activate the Merge transmitter name into images option, the
transmitter name is displayed top left of the video image. If no transmitter
name is defined, the device serial number is displayed instead.
Merge date and time
into images (only
CamDisc HNVR)
If you activate the Merge date and time into images option, on CamDisc
HNVR/CamDisc VG HNVR devices the date and time for the
transmitter is displayed top right in the video image from IP cameras.
Precondition for merge into image on CamDisc HNVR
Analogue video
images
When transmitting and storing analogue video images which CamDisc
HNVR/CamDisc VG HNVR devices can process using the optional
HYBRID Card 4 (see “HYBRID Card 4 (only CamDisc HNVR/CamDisc
VG HNVR)” on page 246), merging date, time and image number into the
image is obligatory. Merging the camera name and/or transmitter name
into the display can be activated as an option globally for all camera
channels.
Video images from IP
cameras
CamDisc HNVR/CamDisc VG HNVR devices allow merge into video
image for IP cameras only in conditional refresh mode. If you have
activated one or more of the merge into image options listed for the
transmission and/or storage of video images from IP cameras, please
check for both modes whether you have similarly activated conditional
refresh mode as a requirement for display.
l
l
Connections/Live video settings: (see “Conditional refresh mode”)
Site Archive/Video settings: (see “Conditional refresh”)
Note:
228
The display size of the merge in options available on IP
cameras is dependent on the respective image resolution.
27769_02
HeiTel by Xtralis
CamControl PRO Software Manual
7.22 Upload/download
The Upload / Download function allows you to save the settings of devices as a mirror-image on the receiver
PC and to apply previously backed-up mirror-images to a device.
You can also transfer a backed-up image from one device to another if the devices are of the same type and
have the same firmware version.
Load settings for PC
The selection window only shows settings saved on the receiver PC that
have the same device type and the same firmware version. To load
device settings, select the desired file from the list. Once you click Load
setup, a message informs you that these settings will not take effect
until you have transferred them to the device.
Save settings to the
PC
To save device settings, enter a File name. CamControl PRO adds the
serial number of the device and its firmware version to this name. The full
file name appears between angled brackets on the Save as button. Click
this button to save the device settings as a mirror-image.
Once the mirror image has been successfully backed up, its complete
path is displayed. The first time a mirror-image is backed up,
CamControl PRO creates the sub-folder SVR_IMAGES in the program
directory.
27769_02
229
CamControl PRO Software Manual
HeiTel by Xtralis
7.23 Firmware update
The Firmware update tab gives you the option to update the device firmware.
If the menu item Firmware update is not available in the selection list, this may be due to one of the following
causes:
l
l
l
CamControl PRO is not at version 3.65 or later.
There is no /DEVICEUPDATES subdirectory.
No corresponding firmware for the selected device type is available in the /DEVICEUPDATES directory.
Before carrying out a firmware update, you must disconnect the existing connection to the device so that any
configurations previously set up and already sent to your HeiTel video system are permanently saved.
Current firmware
The current firmware at the time of creating your CamControl PRO
software is integrated into the Setup file. Information about the current
firmware status and links to download firmware files are available on our
website at: http://www.heitel.com/en/service/upgrades/firmware
After downloading, save the firmware in the /DEVICEUPDATES
subdirectory of your CamControl PRO software. This ensures that the
corresponding file is available for a firmware update.
230
27769_02
HeiTel by Xtralis
Firmware update
CamControl PRO Software Manual
In the selection list for the Firmware update menu item, different valid
firmware versions can be displayed, as presented in the example:
l
l
The Update file column shows the name of the firmware file.
The Version column shows the type and, in square brackets, the
version number. For the firmware type there are two options, ALL
and FIRMWARE:
l
ALL: This is an update file (4 MB) that contains - in addition to
the firmware - an embedded Linux with current RAMDISK, as
required as of firmware 1.38.
l
FIRMWARE: This update file (approx. 500 to 600 KB) only
contains the firmware.
These files contain only the firmware - without embedded Linux
and corresponding RAMDISK. Due to these limitations,
FIRMWARE type update files should only be used after
contacting HeiTel Support.
Generally, however, you will only receive ALL type firmware updates.
Confirm your selection with OK.
After confirming the prompt with OK, the transmission of the firmware
file starts. A status window shows the progress of the transmission. This
is followed by a verification of the transmitted firmware file.
After the firmware file has been verified successfully, you can start the
programming of the transmitter by clicking OK.
Note:
In exceptional cases, the message "Transmission error!
Device is not being programmed." will appear during the
verification of the firmware file. You should still continue the
process; after the device has restarted automatically, you
should select the firmware version again to see if your device
now reports the correct firmware version (see “Device” on
page 122).
The device is reset automatically and then restarted. The whole process
takes several minutes.
Check the settings after selecting the device again.
27769_02
231
CamControl PRO Software Manual
7.24
HeiTel by Xtralis
CI Adapter (and CIO Adapter)
The CI Adapter tab offers you the option, where applicable, of programming actions for changes of specific
control inputs of a connected CI Adapter (Control Input Adapter) or CIO Adapter (Control Input Output
Adapter).
The CI Adapter menu entry is only displayed if a CI Adapter or a CIO Adapter has been recognised on the
serial interface of your device.
Configuration: Serial
channel
In order for the CI Adapter or CIO Adapter to work with your HeiTel
transmitter, it is necessary to configure the serial channel on your HeiTel
device. To do this, connect your CamControl PRO receiver software to
the transmitter and select Setup. In the Recorder settings/Serial channel
(see “Serial channel” on page 212) dialogue box, perform the following
configuration:
l
l
l
Baud rate: 115200
Mode: 8/N/1
Function: Serial Control
Next, transmit the configuration data to your HeiTel image transmitter
with OK. Following this programming, when the CI Adapter or CIO
Adapter is connected, the Recorder settings dialogue box will display the
CI Adapter menu item.
Note:
If correctly configured and if the image transmitter is ready for
operation, the CI Adapter or CIO Adapter should have been
recognised by your image transmitter 60 seconds after
switching on.
The CI Adapter tab allows you to allocate the 50 control inputs of the CI
Adapter or CIO Adapter.
Extending the alarm
functions
In the CamControl PRO software V3.85 or newer and the device
firmware V1.78 or newer, the alarm function has been extended by the
following options:
l
l
l
l
Entry/Exit (Arm delay)
Fire/Panic (Continuously armed)
Alarm
Off
For more information on this topic, please refer to the section "Extending
the alarm functions" on page 168.
Adjusting to the CIO
Adapter
232
With the CamControl PRO software V3.97 or newer and the device
firmware V1.94 or newer, the additional functions of the CIO Adapter are
supported: This affects both the voltage-monitored control inputs (see
“Contact (CIO Adapter only)” on page 237) and the eight relays (see “CIO
Adapter relays as global switching elements” on page 59).
27769_02
HeiTel by Xtralis
Configuring the link
between internal
motion detection and
camera control inputs
CamControl PRO Software Manual
In addition to giving an alarm for external camera control inputs or motion
detection, under the specified conditions, a combination of camera alarm
inputs or inputs to the CI Adapter or CIO Adapter and to the internal
motion detection can result.
For more information on this topic, please refer to the section
"Configuring the link between internal motion detection and camera
control inputs" on page 168.
By adding more alarm functions, the width for individual columns is so
narrow that the column headings cannot be shown in full. Thus, you can
temporarily change the column widths:
l
l
l
l
Position the mouse pointer on the separator line between two
columns whose width you would like to change.
The mouse pointer changes from the standard display to a double
line with two arrows pointing outwards:
To change the column width, press the left mouse button and hold it
down. Now moving the mouse to the left or right will change the
width of the columns in question.
After releasing the left mouse button, the chosen width for these
columns will temporarily remain.
After leaving the Recorder settings via OK or Cancel, the column widths
in the dialogue box CI Adapter are reset to the default values.
Input
In the Input column, only the numbers of the control inputs (1 - 50) are
displayed.
Camera
In the Camera column, you assign the individual control inputs a camera
number ranging from 1 to 10. The triggering of the respective control input
refers to this allocation. The camera number is selected using an
up/down control button. The range of values comprises the number of
camera inputs on your image transmitter. The standard setting is 1.
27769_02
233
CamControl PRO Software Manual
HeiTel by Xtralis
Preset
You allocate presets to the individual control inputs via the Preset
column. A corresponding allocation is only useful for connected PTZ
systems or dome cameras, for which the presets have been
programmed accordingly. For other cameras, select the option Off. On
dome protocols with transmission of hexadecimal numerical values, up
to 127 presets (Position 0 to 126) are supported. When transmitting
decimal numerical values, a maximum of only 100 presets (Position 0 to
99) can be activated. The standard setting is 0. The expanded number of
presets primarily allows for the control of domespecific special functions.
Note:
234
Depending on the system used, presets can also start special
functions. This for the most part affects presets with higher
numbers. You can find more detailed information about this in
the manual of your pan-and-tilt system or dome camera.
27769_02
HeiTel by Xtralis
CamControl PRO Software Manual
Alarm
In the Alarm column, you select between the following options:
l
l
Off (default setting): In this configuration, a signal input never
activates an alarm.
Alarm: In this configuration, a signal input always activates an alarm
when the video system is armed. This function corresponds to the
option On, which was used up to and including CamControl PRO
software V3.83.
Note:
l
l
For HeiTel video systems with device firmware 1.77 or older,
only the options On and Off in the column Alarm are available.
To use the extended alarm functions, which are explained in
the following text, device firmware V1.78 or newer is
mandatory.
Fire/Panic (Continuously armed): In this configuration, a signal input
always activates an alarm, regardless of whether the video system
is armed.
Entry/Exit (Arm delay): The video system is armed or disarmed
within the monitored area. In this configuration, a signal input
activates an alarm after a configurable time delay.
For every camera channel, only one time period can be configured,
which applies to both Entry and Exit for the monitored object.
The alarm is camera-specific, and in CamControl PRO a corresponding
message is displayed in the event tree:
l
Online/Alarm camera name (triggered control input)
When an alarm message is given, the corresponding camera may be
switched to display and the reason for the alarm is displayed
analogous to the message syntax of camera alarms. In addition to
camera names, the control input of the CI Adapter or CIO Adapter
that has been triggered is shown in parenthesis.
27769_02
235
CamControl PRO Software Manual
HeiTel by Xtralis
Entry/Exit timeout
In the Entry/Exit timeout column, you select a time period. This field
can only be configured when in the Alarm column for the corresponding
signal input, the function Entry/Exit has been selected. The configurable
time period for the delay for an alarm for disarming or arming is
configured via a pull-down menu. Possible values are: 10 s (default
setting), 20 s, 30 s, 40 s, 50 s, 1 min, 2 min, 3 min, 4 min, 5 min, 7 min,
10 min, 15 min, 20 min, 25 min and 30 min
Note:
Disarming: When the monitored area is entered (Entry), an
alarm is deferred for the configured time period and is ignored
in the case of successful disarming. Otherwise, an alarm will
sound with the triggered signal input as the reason for the
alarm.
Arming: When the monitored area is exited (Exit), an alarm is
deferred for the configured time period and is ignored in the
case of successful arming. Otherwise, an alarm will sound
with the triggered signal input as the reason for the alarm.
Note that for multiple inputs to monitor the armed/disarmed
area, the configuration for the signal inputs in question must
be configured appropriately!
Linked with motion
In the Linked with motion column, you choose between the options On
or Off (default setting). By activating the On option, the signal inputs in
question are linked with a logical AND to the device-internal motion
dection for interior spaces (see “Configuring the link between internal
motion detection and camera control inputs” on page 168).
Only when the motion detection (see “Motion detection” on page 171) has
already been activated for the camera channel in question is it possible
to activate this option. Otherwise, the Off setting cannot be changed.
Trigger event
Select in the Trigger event column between the options On or Off
(standard setting). If the On option is activated, then event-controlled
recording of video images takes place in accordance with the
programming for the respective camera track in the Site archive. For
CamTel SVR series devices, this function is not available due to the
absence of a hard drive.
Contact
In the Contact column, select between the options Normally opened
(standard setting) or Normally closed for which change of status – where
applicable –one of the above programmed functions (Preset, Alarm,
Trigger event) is to be triggered.
236
27769_02
HeiTel by Xtralis
CamControl PRO Software Manual
Contact (CIO Adapter
only)
If the CIO Adapter is being used, you choose between the Normally
closed, Normally opened (default setting), Normally terminated (10k) and
Normally closed BS 8418 options in the Contact column, any change in
status of which should trigger one of the functions configured above
(Preset, Alarm, Trigger event).
If the Normally closed BS 8418 option is selected, a short circuit or
interruption in the lines to the control contact will cause a tamper alarm.
The alarm is camera-selective and CamControl PRO displays a
corresponding message in the event tree:
l
Online/Tamper camera name (triggered control input)
In the event of an alarm, the relevant camera may be switched to display
and the reason for the alarm is displayed in the same way as the
message syntax of camera alarms. In addition to camera names, the
control input of the CIO Adapter that has been triggered is shown in
parenthesis. Next, transmit the configuration data to your HeiTel image
transmitter with OK.
Display of triggered inputs of the CI Adapter or CIO Adapter
When running the CI Adapter or CIO Adapter on HeiTel video systems, the triggering of inputs assigned to
cameras in accordance with the requirements given above are indicated accordingly.
In all multi-image displays (Quadscreen, Ten, Camera Group) signalling takes place with a red frame (see
“Activity messages from cameras in the multi-image display” on page 27), whilst in the individual screen
display the colour of the relevant camera name changes from black to red (see “Activity messages from
cameras” on page 27).
Note:
The Hang up and redial on alarm (see “Hang up and redial on alarm” on page 226) device function
does not take into account a colour marking on the camera following an alarm; however the correct
camera is displayed in the individual image display.
7.25 IP Camera
The IP Camera dialogue box allows you to use an IP camera (see “Supported IP cameras” on page 245) in
place of an analogue camera. Minimum requirements for HeiTel devices: Firmware1.74.
27769_02
237
CamControl PRO Software Manual
HeiTel by Xtralis
Limited scope of
Whilst your HeiTel device will always offer the full scope of functions
function when using IP when connected to analogue cameras, limitations can arise when using
cameras
IP cameras. General camera functions are retained but may be ignored
by the IP camera in question. The relevant functions and buttons are
disabled and greyed out.
The restricted functions for IP cameras apply to the following functions:
l
l
l
l
l
l
l
Live transmission quality and conditional refresh mode
Brightness, contrast and colour
Motion detection and motion fields
Privacy zones
Camera position authentication
Video settings in the Site Archive
l
Where applicable conditional refresh mode (without function for
CamServer VG, CamDisc VG, Cam4mobile VG, CamServer,
CamDisc SVR and Cam4mobile devices in connection with IP
cameras for the relevant camera tracks)
Record preview images
Note:
In some situations these functions can however be defined
directly via the user interface for the IP camera. For more
detailed information, please refer to the respective camera
manual.
Starting with CamControl PRO Software V4.12, there is no need to
allocate IP cameras by manufacturer and model. This has been replaced
with allocation by manufacturer and protocol.
Use the IP camera list with compatibility information to plan and set up
IP cameras (see “Help button for retrieving the IP camera list” on page
240).
Additionally, video systems of the CamDisc HNVR/
CamDisc VG HNVR series support video format H.264 (minimum
requirement: device firmware 2.08 or 4.02).
On the IP Camera dialogue box you assign a network camera to a video
channel and where necessary to the relevant recording track. 2, 4 or 10
channels will be available, depending on the device used. In the
example, a device with 10 channels has been chosen (1 - 10).
238
27769_02
HeiTel by Xtralis
CamControl PRO Software Manual
Manufacturer
You select the Manufacturer of your IP camera (see “Supported IP
cameras”) from a pull-down menu. The standard value for all video
channels is Off.
Protocol
After selecting the manufacturer, select the Protocol for your camera
type via a pull-down menu. The types listed stand for different video
protocols from the respective manufacturer.
A tabular type allocation of compatible camera models can be obtained
from the IP camera list, which you can access via the ? Button.
Additional information on this topic can be found in the section "Help
button for retrieving the IP camera list" (see page 240).
27769_02
239
CamControl PRO Software Manual
IP address
HeiTel by Xtralis
Enter the IP address or the symbolic name in the IP address column.
From device firmware V1.92 you can add a port if necessary in addition
to the IP address or to a symbolic name. Hence, you can address
several cameras behind a router or you can make use of the abilities of
an IP camera, which can provide different image sections under different
ports. If no port is stated, a connection to the camera via port 80 is
assumed.
In general, depending on the video format selected, a port other than the
standard port 80 may also be used. For example, many manufacturers
use port 8008 for video format MJPEG, while port 554 is generally used
for H.264 (only CamDisc HNVR/ CamDisc VG HNVR). Port
specification is essential in these cases. For PTZIP cameras, one port
must additionally be specified for PTZ functionality after specifying the
port for the video format (minimum requirement: device firmware 1.94).
Examples:
l
l
l
192.168.31.100
The IP camera is located in the standard IP address group of the
HeiTel video systems and is activated via port 80.
62.214.6.17:81
The IP camera is located in an external network and is activated via
port 81.
ipcam015.meinedomain.com:93
The IP camera is located in an external network and is activated via
a symbolic name or a symbolic IP address at port 93.
Note:
l
l
l
Help button for
retrieving the IP
camera list
Symbolic addresses can only be processed directly if at least
one valid DNS server and the gateway to the network settings
were set (see “Network (TCP/IP)” on page 129).
62.214.6.18:8008
In some circumstances, it may be necessary to select an image port
other than port 80 (possibly for the Video format MJPEG).
62.214.6.18:554
Under certain circumstances, it may be necessary to use an image
port other than port 80 (possibly with video format H.264; only
applicable to CamDisc HNVR/CamDisc VG HNVR).
62.214.6.18:8008:80
For video systems with the device firmware V1.94 or later, it is
possible to specify a different PTZ port, as well as a different image
port.
Up to and including device firmware V1.92, the following setting
applies:
l
Image port = PTZ port
button to access the IP camera lists containing
Click on the
information on the programming of the selected camera.
The Select menu shown alongside may also appear, using which you
may retrieve the locally stored compatibility list or download a version
from the Internet that may be more up-to-date. An installed PDF viewer
such as Adobe Reader is required to display these files.
240
27769_02
HeiTel by Xtralis
CamControl PRO Software Manual
Extended configuration dialogue
Configure: User name
/ Password
Click the Configure button to open a dialogue box of the same name. If
you have protected access to image data on your IP camera using User
name and Password, you can store this access data in the HeiTel device
via the Configure dialogue.
Depending on the IP camera used, programming of the User name and
Password may be obligatory for transmitting images to the HeiTel video
system. In some circumstances, this also applies for PTZ control of IP
cameras.
Note:
Please refer to the documentation for the IP camera
concerned in each case.
Number of Presets
For certain camera models, the Number of Presets function is activated.
Using a drop-down menu, you can select the number of the command
buttons for a camera-specific button panel between 1 and 16 and Off if
necessary:
l
l
27769_02
Illustrative button panel for selecting any one of 4 presets for
Camera 6.
Only presets 1 to 16 on the IP camera can be selected.
241
CamControl PRO Software Manual
HeiTel by Xtralis
Video format
For certain camera models, the Video format function is activated. If
necessary you can choose between the formats JPEG and MJPEG via a
drop-down list:
l
l
JPEG: The video format JPEG complies with the standard image
requirements by HeiTel video systems. This video format is
generally used when the drop-down list is deactivated and displayed
in grey. The IP camera Samsung SNB-5000, which can only use the
MJPEG image format as standard, is currently an exception.
MJPEG: With the video format MJPEG you select the
manufacturerspecific MJPEG streaming mode.
Please observe the documents accompanying your IP camera if
necessary.
Note:
If suspected interruptions in the image flow should occur with
the video format MJPEG, switch back to the alternative video
format JPEG if necessary. This behaviour can particularly
occur with larger images or high image rates. Devices of the
CamDisc HNVR/CamDisc VG HNVR series are generally
not affected.
For devices of the CamDisc HNVR/CamDisc VG HNVR series, video
format H264 is also available for specific manufacturers.
l
H264: Select the appropriate video compression for video format
H264 . If necessary, consult the documentation for your IP camera
accompanying the product.
Motion Server Port
With the Motion Server port, you set the IP port over which your video
system communicates with the corresponding IP cameras for camera
Video Motion Detection (VMD). The concerned IP cameras are marked
with the abbreviation VMD in the IP camera list (see “Help button for
retrieving the IP camera list” on page 240). Please note that the camera
VMD feature is not always available on all IP camera models. For an
overview of IP ports used by CamControl PRO, click on the ? button
(see “Overview of the used IP Ports” on Page 253).
242
27769_02
HeiTel by Xtralis
Configure with
Browser
CamControl PRO Software Manual
Click the Configure with Browser button to open the Web interface of
your IP camera in the standard Web browser. To enable this the
previously defined IP address or the symbolic name entered is
transferred to the Web browser as shown in the following examples:
l
l
http://192.168.31.223/
http://ipcam01.your_domain.com/
Note:
An IP camera can only be configured via the Web browser if it
can be reached directly from the receiver PC. If only the
HeiTel device can be reached directly and if the IP camera is
located in a local network that this device can reach, access
from the receiver PC via a Web browser is not possible.
If the receiver PC is also located in this local network, access
to the IP camera is also generally possible via the Web
browser.
Click OK to save the User name and Password in the HeiTel device. If
you have additionally selected a Number of Presets for an IP camera, a
transmitter-specific R01 file is written or added to in the \RMCTRL
directory of your CamControl PRO software. It is possible to rename the
button panel command buttons by modifying the corresponding R01 file
(see “Function and structure of R01 files” on page 272). The dialogue box
is then closed.
In certain circumstances, it is necessary to disconnect and reconnect to
the HeiTel video system in order for the camera-specific button panel for
controlling the presets to be displayed for you.
Limited image size
As of software version 3.82 and device firmware 1.74, camera
resolutions of up to 2560 x 1600 Pixel, i.e. 4 megapixel are supported.
Depending on the type of device, the image transferred by the IP camera
in each case must not exceed a certain maximum size:
l
l
CamDisc HNVR: 1.3MB
CamDisc SVRs, CamServer, CamDisc SVR, Cam4mobile and
CamTel SVR: 512 KB
Note:
If necessary, configure your IP camera so as to ensure that
the limit values given above are not exceeded.
Generic "GET" commands
These commands can be used to create commands to call up JPEG images for IP cameras that have a
similar command structure to the IP cameras previously integrated.
These commands allow you to integrate additional IP cameras without firmware modifications. For the
manufacturer GENERIC 1 the Generic "GET" command 1 is used, whilst for GENERIC 2 the Generic "GET"
command 2 is used.
Maximum string length
For the Generic "GET" instructions a maximum of 150 characters are available.
27769_02
243
CamControl PRO Software Manual
HeiTel by Xtralis
Examples …
Display of the Examples … button is optional and depends on the GenericExamplesIPCam.txt file. This
button is only displayed if, for this file, valid examples exist for Generic "GET" instruction in the program
directory of your CamControl PRO software.
Click the Examples ... button to open a dialogue box in which to select from examples of Generic "GET"
commands:
l
l
l
Select the desired camera model.
Use Add to Generic 1 and/or Add to Generic 2 to copy the relevant example string to the field in
question.
Exit this dialogue by pressing Close.
Note:
The inserted string is only an example. Authentication may be necessary, depending on the model
and configuration of your IP camera.
For more information on authentication methods, please refer to the camera documentation. An example of a
common procedure is the "Basic Authentication Scheme" in accordance with RFC 2617 - HTTP
Authentication (see http://tools.ietf.org/html/rfc2617#section-2).
Example of a generic "GET" command
GET /cgi-bin/encoder?USER=demo&PWD=demo&SNAPSHOT
HTTP/1.1\r\nHost:192.168.31.74\r\nKeep-Alive:300\r\nConnection: keepalive\r\n\r\n
Note:
To create a Generic "GET" command you will normally require the SDK (Software Development
Kit) or API (Application Programming Interface) documentation for the IP camera. Without support
from HeiTel, the user will not normally be able to use this function.
Integration via the ONVIF protocol
Starting with firmware version 2.12, HeiTel video systems support the ONVIF protocol. Problem-free
integration of IP cameras that support the ONVIF standard is not guaranteed. Advance testing is strongly
recommended.
Instant integration is based on ONVIF Standard 1.02. Due to the fact that the ONVIF standard is being
constantly enhanced, the backward compatibility of future versions cannot be guaranteed. Furthermore, there
are differences in the video formats supported and their resolutions. The resolutions and the performance of
the relevant video formats (JPEG, MJPEG and H.264) may therefore differ. Due to their higher device
performance requirements, video formats MJPEG and H.264 are available for the ONVIF protocol only for the
CamDisc HNVR/ CamDisc VG HNVR device series.
A list of tested IP cameras can be found in the compatibility summary for the IP camera list (see “Help button
for retrieving the IP camera list” on page 240). Models marked as ONVIF have already been tested and can be
operated over the ONVIF protocol.
Simply select ONVIF protocol as the manufacturer and enter the IP addresses and related
usernames/passwords. The functional scope of ONVIF integration includes image display using video
formats JPEG, MJPEG or H.264 as well as the control of PTZIP cameras.
244
27769_02
HeiTel by Xtralis
CamControl PRO Software Manual
No image from IP camera
No image
If, instead of a live image from the IP camera the message No video available is displayed, this may be for a
number of reasons:
l
No IP connection to IP camera:
l
Ensure that the IP camera can be reached under the specified IP address or the symbolic name used
from the network of the HeiTel device.
If necessary, check the recorder settings for Gateway and DNS server (see “Network (TCP/IP)” on
page 129).
Note:
l
l
The relevant information can be obtained from your Internet provider or system administrator.
Access limitation through user name and password:
l
Check whether live image reproduction of the IP camera is accessprotected by a user name and
password. If necessary, enter the access data for the camera in the Configure dialogue (see
“Configure: User name / Password” on page 241).
Incompatible video compression procedure:
l
At present only the JPEG or MJPEG image format is supported for the transfer of images from the IP
camera to the HeiTel device. Ensure therefore that your camera transfers the images in a suitable
format. Compressed video transfers with the standards H.264 or MPEG-4 are currently not
supported.
7.25.1 Supported IP cameras
A complete list of the integrated IP cameras is available under
http://www.heitel.com/upload/downloads/en/11-technical-product-information/IPcam_list.pdf
Generic commands for IP cameras
Generally speaking, the use of additional IP cameras can only be realised via updates of device firmware.
Generic "GET" commands can be used to create commands with which to call up JPEG images for IP
cameras whose command structure corresponds to the IP cameras already integrated (see “Generic "GET"
commands” on page 243).
These commands allow you to integrate additional IP cameras without firmware modifications.
Compatible IP cameras and OEM versions
Other camera models by a manufacturer may in principle be compatible with the IP cameras listed here so
that they function with a model from the list. Even if the camera models are by different manufacturers, the
cameras in question can be the same (OEM versions).
If necessary ask your supplier or manufacturer whether your camera model is command-compatible with an
IP camera from the list.
27769_02
245
CamControl PRO Software Manual
HeiTel by Xtralis
7.26 HYBRID Card 4 (only CamDisc HNVR/CamDisc
VG HNVR)
The HYBRID Card 4 dialogue window is only displayed for you when using a CamDisc HNVR/CamDisc
VG HNVR. If your CamDisc HNVR/CamDisc VG HNVR is equipped with one or two correctly-installed
HYBRID Card 4 expansion cards, you can connect up to four or eight analogue cameras.
Minimum requirement for CamDisc HNVR devices: firmware 1.82
Minimum requirement for CamDisc VG HNVR devices: firmware 4.02
The individual analogue video channels are activated via the HYBRID Card 4 dialogue window. Each installed
HYBRID Card 4 enables four analogue video channels to be activated.
HYBRID Card 4 (1)
With the HYBRID Card 4 correctly initialised, for each video channel the
DSP information is displayed; e.g.: BF547 / 01.02 / 00.02 / 01.00
l
l
l
HYBRID Card 4 (2)
With the HYBRID Card 4 correctly initialised, for each video channel the
DSP information is displayed; e.g.: BF547 / 01.02 / 00.02 / 01.00
l
l
l
Function
246
If in place of a code similar to this there is only a hyphen (-)
displayed, it means the DSP in question was not recognised.
If only a hyphen (-) is displayed for each of the four channels, then no
expansion card has been installed or the expansion card in question
is not correctly installed.
The HYBRID Card 4 (1) provides DSP support for analogue video
channels V1 to V4 on the CamDisc HNVR/CamDisc VG HNVR.
If in place of a code similar to this there is only a hyphen (-)
displayed, it means the DSP in question was not recognised.
If only a hyphen (-) is displayed for each of the four channels, then no
expansion card has been installed or the expansion card in question
is not correctly installed.
The HYBRID Card 4 (2) provides DSP support for analogue video
channels V5 to V8 on the CamDisc HNVR/CamDisc VG HNVR.
The DSP function selected is displayed in the Function column.
Currently no selection is possible. The entry is set to Analogue Video.
27769_02
HeiTel by Xtralis
Enabled
CamControl PRO Software Manual
The Enabled column is for enabling the programmed DSP function.
When enabling the Analogue Video function for at least one video
channel, additional dialogue windows are offered for programming, e.g.:
l
l
l
l
Motion detection zones (see “Motion detection zones (analogue
cameras)” on page 150)
Privacy zones (see Privacy zones (analogue cameras)” on page
151)
Motion detection (see Motion detection” on page 171)
Camera position authentication (see “Camera position
authentication” on page 173)
Additional programming options concerning the analogue video channels
are enabled on these supplementary dialogue windows; these options
are already familiar from e.g. CamDisc SVR series devices.
Note:
Please note the following points:
l
l
27769_02
When setting parameters for an IP camera and enabling an analogue
video channel for the same camera channel or the same recording
track, the analogue signal takes priority.
l
If the Analogue Video function can no longer be executed in this
setup (e.g. due to uninstalling the HYBRID Card 4), if applicable
the corresponding IP camera is displayed and recorded.
In this case, disable the analogue video channels which are no
longer being used.
Only enable the analogue video channels which are being used.
247
CamControl PRO Software Manual
HeiTel by Xtralis
7.27 PIR Integration
PIR High Level Integration
Devices running firmware version 2.32 (old series or 4.20 (VG) or higher are supporting a PIR High Level
Integration for up to 20 PIRs. This integration allows to detect connected PIRs, configure PIRs in detail and
checking the actual PIR state. The devices are supporting the “walk test” function using iPIR. In case of
alarms caused by a PIR alarm details are available.
Details concerning PIR configuration, different PIR types, Walk test, should be found within the ADPRO
PIR documentation.
PIR mode
Activates or deactivates the PIR mode.
PIRs will be connected to the serial channel.
RS485 to nRS232 converter is needed (IB RS232-RS485).
PIR will be connected to the PTZ channel. Depending on the wiring and
the number of PIRs it might be recommend to use serial channel with IB
RS232-RS485.
Note:
248
When PIRs not yet have been activated or the channel where the PIRs are connected to is
changed, the settings must be sent to device before the detection and the configuration of PIRs can
start (see image below).
27769_02
HeiTel by Xtralis
CamControl PRO Software Manual
Walk test
Allows a Walk test via iPIR software.
During this time the device cannot communicate with the PIRs but is
tunneling all to and fro the PIR. Therefore <Discover PIR>, <Timeouts>,
<Packet Errors> <PIR state> cannot be executed and will not been
updated
Allows to change to IP port used for the walk test connection
Note:
The walk test might be protected by the device user and password. Since there are some
restrictions please refer to the firmware release notes for details.
PIR list
This column contains the numbers 1 to 20. Each representing one PIR
and the address that the PIR must use within the RS485 PIR protocol.
In this column one single PIR can be activated or deactivated. While
deactivated the columns (Name, Presence… POR State) are still
updated. Yet there will be nor alarming.
This column will contain the name or type of the PIR.
This column will indicate if a PIR is still connected and accessible.
If a PIR is not present anymore it will disappear from the list after
pressing <Discover PIR> or sending the settings to the device
Shows the number of PIR answers not coming in time.
Shows the number of checksum errors of a PIR.
Shows the actual PIR state.
By clicking < (i) > a full text window for the marked PIR is shown.
This LED signalizes when a third party application (iPIR) is executing a
walk test
Green: walk test is executed.
Grey: no walk test is executed.
27769_02
249
CamControl PRO Software Manual
HeiTel by Xtralis
Green LED means all discovered PIR are enabled.
Yellow LED signalizes when a discovered PIR is not enabled.
This button starts discovering of PIR connected to the device.
Normally this is not necessary since the device updates the PIR list
latest after 60s.
This button deletes packet and time outs errors.
These errors are set to zero also when the device reboots.
A limited number of these errors seem to be normal.
When pressing the info button the PIR state of the marked PIR is shown
in an additional PIR state window (see below).
PIR State Window
The PIR state Windows shows the state of the PIR marked in the PIR list. Active events are shown in red
color. Events that are not supported by this PIR are shown greyed.
Any change will be displayed automatically. When another entry will be selected in the PIR list the window
will be actualized with its data.
PIR Details
Using this control elements allows to configure the PIR in detail that is actually marked in the PIR list.
In this caption line the PIR number that represent the PIR address
together with the PIR type and in brackets with its internal name are
displayed.
This option activates an alarm in case of tamper or hardware failures.
250
27769_02
HeiTel by Xtralis
CamControl PRO Software Manual
This option activates an alarm when a PIR cannot be detected anymore.
This option activates the general Alarm of the PIR. This alarm
corresponds with the relays output of the PIR and will normally occur
together with each PIR event.
Tamper, Presence and General can be linked to a camera, Preset and
event trigger in case of their occurrence.
In this list PIR alarms can be activated separately and linked with a camera, preset and event trigger of the
selected camera.
This list will show only the details that are supported by the PIR. Depending on the connected PIR there will 1
up to 8 different details events available e.g.:
Double Knock
Double knock allows to combine one of the events of the selected PIRs with either a camera control input,
motion detection of a camera or with one of the events of any other PIR.
If camera control inputs are used they have to be activated in their menu.
Motion will be activated automatically.
If a camera input is linked with motion this will result in triple knock.
If double knock is combined with another PIR this PIR must be enabled in the PIR list. It is not necessary to
activate the PIR detail.
Alarm events
In case of an alarm event CamControl PRO will display a detailed alarm information in the status line. This
message will contain the PIR number/Address, the alarm detail of the PIR and the associated camera.
27769_02
251
CamControl PRO Software Manual
HeiTel by Xtralis
Presets using IP cameras
Preset commands of IP cameras can be configured via "Recorder settings/IP Camera/Configure/Number of
Resets". Normally the software will use preset 1 up to the chosen number (max. 16). If other presets are
requested they can be configured via the r01-file that is created automatically in the subfolder RMCTRL using
the device serial number as name.
If the <SWNUMx> entry ends with a number between sqaure brackets this number will be used as preset
number. This allows to reach special functions that often are accessible by higher preset numbers. The preset
number must consist of three numbers (e.g. [008], [021]...).
If there is no number in square brackets the preset number corresponds to the usual numbering.
Example:
SF990101.R01
[CAM1]
SWNUM=4
SWNAME1=Light on [098]
SWNAME2=Light off [099]
SWNAME3=Wiper [081]
SWNAME4=Preset 4
252
27769_02
HeiTel by Xtralis
8
CamControl PRO Software Manual
Configuration, configuration files and
configuration examples
The following sections contain information on additional configuration options using program- and transmitterspecific configuration files.
The configuration of various data transmission devices will also be explained by means of examples.
8.1
Overview of the used IP Ports
If, when configuring the Recorder settings the option to change the address of IP ports exists (Network
(TCP/IP) (page 129), HTconnect (page 145), Web Server (page 131), POS/ATM Adapter (page 188) and
Alarm panel (page 218)), you can access an overview of the used IP Ports via the ? button positioned after the
port address.
If possible conflicts arise when entering a port address manually, the colour of the question mark symbol
changes to red: ?. Calling up the overview displays the overlapping port addresses in red (see “Overview with
notification of possible conflicts” on page 253).
Overview of used IP Ports
This overview shows the port addresses set for the functions and their usage status.
Overview with notification of possible conflicts
In the event of possible conflicts with regard to duplicated use of port addresses, these are displayed in red in
the overview.
8.2
Program parameters (CAMCTRL.INI)
Settings for your CamControl PRO software are specified and saved in the CAMCTRL.INI configuration file.
You can and may change certain settings to customise the software in line with your needs.
Note:
27769_02
Do not make any configuration changes unless you are certain of the effect they will have on the
software.
253
CamControl PRO Software Manual
8.2.1
HeiTel by Xtralis
Structure
The structure of the configuration file is described briefly below: The file is broken down into sections for
clarity. The actual settings are saved in keys in each section. Exactly one value is assigned to each key. The
setting is defined by the value.
Example:
[PORTA]
;Section
...
MAXONLINETIME=-1
; key=value
...
[EXTRA]
;Section
...
REFIMAGEWIDTH=-1
; key=value
REFIMAGEHEIGHT=-1 ; key=value
8.2.2
How to modify the configuration file
You will find the configuration file in the program directory C:\CAMCONTROL_PRO (default installation
location) or YOUR_DRIVE:\YOUR_PROGRAM_NAME. You can modify the file with a text editor. Doubleclick the file in the folder window or in Windows Explorer to open it with the editor that is associated with INI
files in your Windows system.
l
l
l
Close the receiver software (if open).
Open the CAMCTRL.INI file.
Find the section containing the key you wish to change. If the section is not present, you must create it.
Note:
l
l
l
l
l
l
All keys must be in the section to which they are assigned. If a key is not in the correct section, it
will not be recognised by the software, and the setting will not take effect.
Find the key you wish to change. If the key is not present, you must create it.
Enter the desired value.
Repeat the steps indicated above for all other keys that you wish to change.
Once you have made all of the necessary changes, save the file.
Close the text editor.
Restart the receiver software.
Note:
8.2.3
Once you have saved the configuration file CAMCTRL.INI, you must restart the receiver software
for the changes to take effect.
Overview of modifiable keys
Section
Key
Description
TCP/IP
PORT
Specify port number for TCP/IP
FASTMODE
Deactivate operating mode FASTMODE
ONLPLPORT
Specify TCP/IP port for Online PLAYER
254
27769_02
HeiTel by Xtralis
Section
CamControl PRO Software Manual
Key
PORTA, B, C, D, MAXONLINETIME
5, 6, 7, 8, 9
NONULLMO
Description
Specify maximum connection duration
Deactivate automatic null modem detection in Normal
operating mode
LRECORD
Archive individual calls in FIFO mode
TYPE
Specify connection type (NIGA) for the respective
connection channels
A_ALARMS
Specification of the acceptance of an incoming alarm call
for the respective port
A_REMOTE
No relevance for CamControl PRO: Specification of
outgoing calls initiated via command for the respective
port
A_AUTOREMOTE
No relevance for CamControl PRO: Specification of
outgoing patrols initiated via command for the respective
port
A_AUTOALARMENABLE
No relevance for CamControl PRO: Specification of
arm/disarm function initiated via command
ARCHIV
SNAPSHOTPATH
Specify the directory path for saving pictures from the
transmitter archive
EXTRA
AUTODISCONNECT
Deactivate automatic disconnection in the event of an
alarm
REFIMAGEWIDTH
REFIMAGEHEIGH
REFIMAGETIME
Specify the size and display time of reference images
HTCONNECTSVR
Activate HTconnect Server
HTCONNECTSVRPORT
HTconnect connection port
HTCONNECTOWNPORT
HTconnect UDP source port
HTCONNECTTARGETPORT HTconnect UDP target port
CBLOG
27769_02
RESERVEDALARMPORTS
Minimum number of reserved ports for alarm connection
FIMAGEMODE
Deactivation /Activation of the Image-Viewer
FIMAGES
Number of images for the Image-Viewer sequence
ONLINEMOTION_ON
Configuring online motion detection
ONLINEMOTIONCAM
Selecting cameras for online motion detection
JOYSTICK
Deactivation/Activation of the PTZ control via one or two
USB joysticks
REDFRAME
Indication of active camera alarm inputs in multi-views,
only for an armed video system
IPCAMSIZE
Determination of upper limits for the display of live
images from IP cameras
IMAGE_IMPROVEMENT
Extended function for optimised display of PAL and
NTSC cameras
DYNAMICPTZSPEED
Disabling/enabling dynamic PTZ control for IP cameras
ENABLED
Save the transmitter logfile
255
CamControl PRO Software Manual
HeiTel by Xtralis
Section
Key
Description
ONLINESCR
MODE CAM0-4
Specify the initial view
SMRESOLUTION
Adjust the picture size at 128 x 80 resolution
DEQUMODE
Adjust the image quality for quadscreen or 10-screen
viewing mode
TIMESYNC
MODE
Synchronise device time with PC time
SCREEN
ALWAYSONTOP
Keep the program window on top at all times
WIDTH
Specify the size of the program window
HEIGHT
Specify the height of the program window
XPOS
Horizontal positioning of the program window
YPOS
Vertical positioning of the program window
ROWS
Layout of the side windows in rows
COLUMNS
Layout of the side windows in columns
MODE
Reset audio mode to classic view
AUDIO
VIDEOSERVER NUMOFCONN
Number of simultaneous connection channels
PATH
LOCAL
Define the saving of logfiles and certain INI files locally or
globally
REMOTEPATH
Global storage location (target directory) for saving the
files listed above.
256
27769_02
HeiTel by Xtralis
8.2.4
CamControl PRO Software Manual
Configuration file with modifiable keys
The following sample INI file gives you an overview of the keys, what they mean and their values. Only the
keys that may be changed are shown here. If you change any of the other keys in CAMCTRL.INI that are not
listed here, you may significantly impair the proper operation of the receiver software. The text after the
semicolon (";") explains the meaning of the key.
8.2.4.1
TCP/IP [TCP_IP]
Port number
PORT=3000 ;Port number
l
l
Fast mode
FASTMODE=1;FASTMODE operating mode
l
l
TCP/IP port for
Evaluation with
optimal functionality
Range: 0 - 65535
It may be necessary to change the standard port number if you wish
to set up more than one receiver computer (for the same transmitter
or transmitters) at a single IP address using a router, or if port 3000 is
already in use in your network or cannot be used.
Please note than not all port numbers can be used depending on the
system. Contact your network administrator for assistance in
defining an appropriate port number.
Make sure that the port number of your transmitter matches the
number configured in the receiver software.
Range: 0=off / 1=on (default)
When FASTMODE is deactivated, images are requested less
frequently to reduce the image transmission rate. This reduces the
response time and can speed up the operation of the receiver
software on slower computers under certain circumstances.
ONLPLPORT=x; TCP/IP port for the Online PLAYER
l
Range: x= valid port number which is not used by CamControl PRO;
for example, Port 3081
The Evaluation with optimal functionality is carried out using the
specified TCP/IP port. Make sure that this port is open in any firewalls
that you have installed because the Online PLAYER communicates with
your CamDisc HNVR, CamDisc SVR, CamServer or Cam4mobile over
this port.
Note:
If you do not supplement the parameter ONLPLPORT in CAMCTRL.INI,
the connection or alarm port of the receiver software (increased by one)
is used to connect the Online PLAYER.
Example:
l
l
27769_02
The transmitter alarm message is carried out via Port 3000.
The Online PLAYER connects with this transmitter through Port
3001.
257
CamControl PRO Software Manual
8.2.4.2
HeiTel by Xtralis
Port A, B, C, D, 5, 6, 7, 8, 9 [PORTA] to [PORTD] and [PORT5] to [PORT9]
Maximum connection
duration
MAXONLINETIME=3600; Maximum connection duration
l
l
Range: 1 - 2678400 s (= 31 days) / -1=off, connection not
automatically terminated (default)
You can specify a maximum connection duration to prevent against
operating errors. If you specify a value for this key, it also applies to
tours and automatically processed alarms. The time required to load
the settings and establish the connection is included in the
configured duration.
Switching off
NONULLMO=0; Deactivate automatic null modem detection
automatic null modem
l
Range: 0=off (check for null modem cable)
detection
1=on (no null modem cable connected)
l
It may be necessary to deactivate automatic null modem detection
in Normal operating mode under Receiver options/Port A, Port B,
Port C or Port D etc. to ensure correct operation with certain
modems (see “Port A to Port D or Port 1 to Port 9” on page 87).
Note:
Archiving individual
calls in FIFO mode
LRECORD=1 ; Activate FIFO mode
l
l
l
l
Specifying the
connection types for
the respective port
Range: 0=off (default) / 1=on
In FIFO mode, the images from individual calls are archived in such
a way that the oldest images are gradually overwritten when the
maximum size of the archive file is reached.
This recording procedure can be configured differently for each of the
available connection windows.
FIFO mode is recommended for dedicated lines.
TYPE=NIGA ; defining possible connection types
l
l
Specification of the
acceptance of
incoming alarm calls
for the respective port
The entry for deactivating automatic null modem detection
only effects the Normal operating mode. It does not apply to
any other operating mode.
Range of values: NIGA (standard)
l
N: connection via network
l
I: connection via ISDN
l
G: connection via GSM (obsolete due to discontinuations or
major technical changes by the network operators concerned)
l
A: connection via analogue modem
Using the parameters N, I, G, A, you specify which connection
types are available for the respective port. The letters NIGA can be
used individually or in combination to define the possible connection
types.
A_ALARMS=1 ; Acceptance of incoming alarms activated
l
l
Range: 0=off / 1=on (default)
By means of an exact assignment of the parameters 0 or 1 you can
define at which connection ports incoming alarms will be accepted.
Specification of
A_REMOTE=1 ; No relevance for CamControl PRO:
outgoing calls initiated ; outgoing calls initiated via command activated
via command for the
l
Range: 0=off / 1=on (default)
respective port
Specification of
outgoing patrols
initiated via command
for the respective port
258
A_AUTOREMOTE=1 ; No relevance for CamControl PRO:
; outgoing patrols initiated via command activated
l
Range: 0=off / 1=on (default)
27769_02
HeiTel by Xtralis
Specification of
arm/disarm function
initiated via command
8.2.4.3
CamControl PRO Software Manual
A_AUTOALARMENABLE=1 ; No relevance for CamControl PRO:
; outgoing arm/disarm functions initiated via command
l
Range: 0=off / 1=on (default)
Archive [ARCHIV]
Snapshot pictures
SNAPSHOTPATH=D:\IMAGES;snapshot pictures from the transmitter
archive
You can save the current image in the transmitter archive in JPEG
format with CamDisc VG HNVR, CamDisc VG, Cam4mobile VG,
CamServer VG, CamDisc HNVR, CamDisc SVR, Cam4mobile or
CamServer devices. The image is saved in the directory
C:\CAMCONTROL PRO\SNAPSHOT or YOUR_DRIVE:\YOUR_
PROGARMNAME\SNAPSHOT by default. You can change this
location by modifying the SNAPSHOTPATH key:
SNAPSHOTPATH=YOUR_DRIVE:\YOUR_DIRECTORY.
Note:
8.2.4.4
Please note that the disk drive designation must be included in
the directory path. If the drive is not included or if the directory
path is invalid, the images may not be saved under certain
circumstances.
Extra [EXTRA]
Auto disconnect on
alarm
AUTODISCONNECT=0; Automatic disconnection on alarm
l
l
Range: 0=off / 1=on (default)
For devices you can specify under Recorder settings/Extras/Extra
(see “Extra” on page 226) that a open connection dialled by a
receiver be automatically disconnected in the event of an alarm and
a renewed alarm call made. To do this, select Hang-up and redial on
alarm.
If you do not want this automatic disconnection to take place for special
receiver PCs (e.g., PCs in a security centre), you can deactivate
automatic disconnection specifically for these computers using this key.
Note:
27769_02
The AUTODISCONNECT key only takes effect when it is
actually possible to automatically disconnect and place a new
alarm call. Callback connections, hard disk errors, 24h routine
calls and alarm calls are not disconnected. This function is
never executed for null modem connections and therefore has
no effect on this type of connection.
259
CamControl PRO Software Manual
HeiTel by Xtralis
Configuration reference images
Size and display during REFIMAGEWIDTH=200 ;Initial reference image width
of reference images
REFIMAGEHEIGHT=180 ;Initial reference image height
REFIMAGETIME=4 ;Reference image display time
l
l
l
Values:
Key
Default value
Unit
Initial width
-1
Pixels
Initial height
-1
Pixels
Display time
-3
s
Specifying a value of -1 for initial width and height means that a
reference image will be displayed with a minimum output width of
149 pixels and a height scaled in line with the original image.
During an active connection, you can have reference images, which
have been assigned to individual cameras, shown as camera hints.
These images are shown as soon as the mouse pointer is positioned
over the camera button. The reference image is displayed until the
configured display time elapses. The image is also shown for as long
as the left mouse button is held and the magnifying glass is
positioned over the picture, regardless of the configured display
time. The initial size and display time of the reference images can be
specified in the corresponding keys.
HTconnect configuration
HTconnect should generally be configured with the settings in the receiver software (see “HTconnect” on page
83).
One exception to this is the RESERVEDALARMPORTS parameter. This parameter can only be set with an
entry in CAMCTRL.INI.
Activate HTconnect
Server
260
HTCONNECTSVR=1 ; Activate HTconnect Server
l
Range of values: 0=Off(HTconnect deactivated) / 1=On(HTconnect
activated); standard
27769_02
HeiTel by Xtralis
CamControl PRO Software Manual
HTconnect connection HTCONNECTSVRPORT=3333 ; HTconnect connection port
port
l
Range of values: Valid port number not used by CamControl PRO;
standard port for HTconnect: 3333
HTconnect source port HTCONNECTOWNPORT=4446 ; HTconnect UDP source port
l
HTconnect target port
Range: valid port number not used by CamControl PRO; default port
for HTconnect UDP source port: 4446
HTCONNECTTARGETPORT=4445 ; HTconnect UDP target port
l
Range: valid port number not used by CamControl PRO; default port
for HTconnect UDP target port: 4445
CamControl PRO and HTconnect Server communicate with each other
via the HTconnect source and target port using the UDP network
protocol (User Datagram Protocol). These ports can be configured if
necessary. If you change the value for the entry
HTCONNECTTARGETPORT in the CAMCTRL.INI, the same port
number must be used for the CONNECTCMDPORT parameter in the
configuration file HTCONNECT.INI of the HTconnect Server.
The HTCONNECT.INI file may have to be created manually with the
following entries:
l
l
Number of ports for
alarm connections
[CONFIG]
CONNECTCMDPORT=4445
RESERVEDALARMPORTS=2 ; Minimum number of reserved ports for
alarm connection
l
The standard value for the minimum number of reserved ports for
alarm connections is 2.
Image-Viewer configuration
The position and size of the Image-Viewer is specified in a separate INI file (see “Window position, ImageViewer (VIEW10.INI)” on page 269).
Activate Image-Viewer FIMAGEMODE=1 ; Image-Viewer activated
l
l
Range of values: 0=Off(Image-Viewer deactivated) / 1=On(ImageViewer activated); standard
In the basic configuration, Image-Viewer is activated. To deactivate,
a corresponding entry in CAMCTRL.INI may need to be added.
Image-Viewer: number FIMAGES=3 ; number of preview images for the sequence
of preview images
l
Range of values: 3 to 15
l
In the event of changes to the presets, a corresponding entry in
CAMCTRL.INI may need to be added.
l
In the event of changes compared to the preset, if necessary a
corresponding entry in CAMCTRL.INI is to be supplemented.
Online motion detection
Online motion detection is only provided for live images from analogue cameras. If a motion is detected for a
camera, the CamControl PRO software on the camera automatically toggles.
When regions with extensive motion or pronounced changes to images are being monitored, this function can
only be used to a limited extent. Under adverse conditions, the camera channel permanently toggles.
Requirements
l
l
27769_02
HeiTel devices with the following serial numbers
l
CQxxxxxx, CVxxxxxx, MQxxxxxx, MVxxxxxx, NVxxxxxx,
WBxxxxxx, WCxxxxxx, WDxxxxxx, WSxxxxxx, WVxxxxxx
Device firmware V1.60 or higher
261
CamControl PRO Software Manual
HeiTel by Xtralis
Activate online motion ONLINEMOTION_ON=1 ; online motion detection activated
detection
l
Range of values: 0=Off (deactivated); default / 1=On (activated)
l
In the basic configuration, online motion detection is deactivated. To
activate it, a corresponding entry in CAMCTRL.INI may need to be
added.
Note:
Online motion detection can only be activated or deactivated globally.
l
l
l
The integrated motion detection is not designed for outdoor
recordings and should therefore be reserved for indoor cameras.
Online motion detection has not been developed for multiple views.
Operate the CamControl PRO software using this function in a
single view (zoom, full image).
CamControl PRO supports online motion detection in the main
window and additional windows.
Defining cameras for ONLINEMOTIONCAM=x; Bit-coded value information
online motion detection
l
x corresponds to bit 0 = camera 1, bit 1 = camera 2, …
Camera
1
2
3
4
5
6
7
8
9
10
Value
1
2
4
8
16
32
64
128
256
512
l
l
Range of values: 0 to 1023
Sample values (sum of individual camera values) for x:
l
Only camera 1: x= 1
l
Camera 1 and 2: x= 3
l
Camera 1 to 4: x= 15
l
Camera 1 to 10: x= 1023
In the event of changes to the presets, a corresponding entry in
CAMCTRL.INI may need to be added.
PTZ control via USB joystick
PTZ control via USB
joystick CamControl
RU
JOYSTICK=-1 ; Joystick PTZ control disabled
l
l
Range:
0= Off (disabled); default
1= On (enabled for joystick 1)
2= On (enabled for joystick 2)
In the basic configuration, PTZ control via USB joystick CamControl
RU is disabled.
Red frame
In multi-image displays (Quadscreen, 10-image, camera group) in the software, triggered camera alarm inputs
are indicated by a red frame around the triggered camera image.
Using the following parameters, you control the conditions under which the red frame should be displayed:
Red frame
REDFRAME=1 ; red frame in multi-image displays
l
l
262
Range:
0= ; only display red frame for armed video systems
1= ; always display red frame; default
In the basic configuration, the red frame is shown regardless of
whether the video system is armed/disarmed.
27769_02
HeiTel by Xtralis
CamControl PRO Software Manual
Upper limits for the display of live images from IP cameras
Upper limits for the
display of live images
from IP cameras
IPCAMSIZE=5
; Defines the upper limit for the display of live images
; from IP cameras in mega pixels
l
Range:
1= ; 1 Mega pixel
2= ; 2 Mega pixels
3= ; 3 Mega pixels
4= ; 4 Mega pixels
5= ; 5 Mega pixels; default setting
Reducing IPCAMSIZE from 5 to lower values reduces the need for RAM
and reduces the load on the processor imposed by the CamControl PRO
software.
Images from IP cameras that exceed the defined maximum size are
displayed as plain white images in the Live view. These images are
available in the Receiver archive (see “Receiver archive (PC archive)” on
page 63). When using more than 9 connection channels with
CamControl PRO, then it might be required to reduce the IPCAMSIZE
value (see above) to a value smaller than 5, in order to be able to start the
software correctly.
Optimised image display of PAL and NTSC cameras
Optimised display of
PAL and NTSC
cameras
27769_02
IMAGE_IMPROVEMENT=0; optimised image display of PAL and
NTSC cameras
l
Range:
0= ; default setting
1= ; variant 1
2= ; variant 2
The two alternative methods also require processing capacity from
the receiver system. Variant 1 requires less processing capacity and
subjectively gives the better result.
263
CamControl PRO Software Manual
HeiTel by Xtralis
Dynamic PTZ control for IP cameras
Dynamic PTZ control
for IP cameras
DYNAMICPTZSPEED=1 ; Dynamic PTZ control for IP cameras
l
Range:
0= ; Dynamic PTZ control disabled
1= ; Dynamic PTZ control enabled; default setting
In general, dynamic PTZ control for IP cameras permits dynamic control
of the pan/tilt speed depending on the cursor position of the
corresponding control symbols.
Zoom speed can be modified if required via a pop-up menu which can be
invoked for PTZ-IP cameras through a right click on the control symbol
Z+ or Z-. IP camera behavior during dynamic PTZ control depends both
on the features of the camera as well as on the level of implementation of
the driver for HeiTel video systems.
8.2.4.5
Transmitter logfile [CBLOG]
Saving the transmitter ENABLED=1;Save the transmitter logfile
logfile
l
Range: 0=off (default) / 1=on
l
Activating this function saves CamDisc HNVR, CamDisc SVR,
Cam4mobile or CamServer logfiles in the directory
C:\CAMCONTROL PRO\CBLOG or YOUR_DRIVE:\YOUR_
PROGRAM_NAME\CBLOG. The individual files are saved under
the following name: Serial_number.LOG (e.g. CV542016.LOG).
l
The extended logfiles of the CamServer 2c and VG device series
(see “Extended evaluation dialogue for battery-buffered logfile” on
page 47) are also stored in the CBLOG sub-directory of the software.
To distinguish between these files, the following file naming
methodology is used: serialnumber.TXT (e.g. VX229002.TXT).
This file contains the transmitter logfile of the digital transmission
system in a structured format. It can be further processed or printed out.
As every entry is structured in the same way, you can edit this logfile in a
text editor or a spreadsheet program or similar application. The individual
fields of an entry (date/time/event) are separated by spaces. Each entry
concludes with <CRLF> (CR: go to beginning of line hex 0X0D, LF: line
break hex 0X0A).
264
27769_02
HeiTel by Xtralis
8.2.4.6
CamControl PRO Software Manual
View during active connection [ONLINESCR]
Specifying the initial
view
MODE=Q;Initial view
CAM0=1 ;Camera for normal + zoom viewing mode
CAM1=2 ;Camera for live image 1 for quadscreen viewing mode
CAM2=3 ;Camera for live image 2 for quadscreen viewing mode
CAM3=4 ;Camera for live image 3 for quadscreen viewing mode
CAM4=5 ;Camera for live image 4 for quadscreen viewing mode
l
Range for the initial view when establishing a connection:
View
Value
Normal viewing mode (default)
N
Zoom viewing mode
Z
Quadscreen viewing mode
Q
Ten-screen viewing mode
T
You can also specify a different initial view for image transmission, for
example Quadscreen, Ten or Zoom viewing mode. This setting applies
to all transmitters. Once the connection is established, the receiver
software switches to the configured viewing mode automatically. This
applies in the same way to outgoing and incoming calls and alarms.
Notes:
l
l
This setting has no effect on tours and the automatic processing of
alarms.
If you select Ten screen viewing mode as the initial view, this
viewing mode will only be used for transmitters with ten camera
inputs. The connection will be opened in Quadscreen viewing mode
for transmitters with fewer camera inputs.
The entry CAM0 specifies which camera should be activated by default
in Normal and Zoom viewing mode.
l
The entries CAM1 to CAM4 specify the order in which cameras
should be activated in Quadscreen viewing mode.
Note:
27769_02
The alarm camera may be activated as usual in Normal and
Zoom viewing mode. This is not possible for Quadscreen and
Ten screen viewing mode.
265
CamControl PRO Software Manual
HeiTel by Xtralis
Image size at 128 x 80 SMRESOLUTION=50; Image size in normal view for 128 x 80
l
l
Image quality ten and
quadscreen viewing
mode
Range: 5 - 100 %
When working with a live image resolution of 128 x 80 pixels (or
"lowest quality") in normal view, you can specify the picture size as
a percentage of the image size in normal view.
DEQUMODE=1;image quality in ten and quadscreen viewing mode
l
Range:
Quality
Value
Highest quality
1
Medium quality (default) 2
Lowest quality
Note:
l
8.2.4.7
Changing the quality for the overview modes also changes the
picture size in Normal and Zoom viewing modes. If you select
a higher quality, the picture size in Normal and Zoom viewing
modes increases.
Three picture quality levels are available for the overview modes (ten
and quadscreen viewing modes).
Time synchronisation [TIMESYNC]
Time synchronisation
for current devices
MODE=1;Time synchronisation operating mode
l
l
Range: 0=off (default) / 1=on
If you activate time synchronisation, the clock in the image device is
synchronised with the system clock of the receiver PC every time a
connection is established. This means that the image archive clock
is set to the same time as the PC clock automatically after the
pictures are loaded.
Note:
266
3
This function can result in the "wrong" time in local digital
image transmission systems if they are accessed from a
different time zone and the correct time zone has not been set
(see “Date and time” on page 126).
If time synchronisation is activated and the time zone is not
configured correctly, the archive may contain conflicting date
and time information when it is accessed by multiple PCs in
different time zones.
27769_02
HeiTel by Xtralis
8.2.4.8
CamControl PRO Software Manual
Program window [SCREEN]
Window always on top ALWAYSONTOP=1; Program window always on top
l
l
Range: 0=off (default) / 1=on
You can configure the receiver software so that the program window
is always on top and cannot be covered by other programs. Only
windows with the same attribute are not covered (e.g., button panels
for the Remote Adapter).
Window size selected WIDTH=1024 ; Specify the size of the program window
by width (4:3 format)
l
Range:
Window size (resolution) Value
l
l
1280 x 1024 pixels
1280
1152×864 pixels
1152
1024×768 pixels
1024
The size of the receiver software program window is automatically
set to the maximum size allowed by the screen resolution of the PC
during installation. You can specify a different window size at any
time.
If program window size is defined solely by the width values listed in
the table, the program window is displayed in 4:3 format.
Window size selected WIDTH=1920 ; program window width
by width and height
HEIGHT=1080 ; program window height
l
l
Layout of side
windows via rows and
columns
l
l
Window position
Range:
l
for WIDTH >1280
l
for HEIGHT > 767
If the program window size is defined by the width and height values,
the program window can be adjusted to other monitor formats.
ROWS=4 ; number of rows of the side windows
COLUMNS=2 ; number of columns of the side windows
Range:
l
for ROWS ≥ 1
l
for COLUMNS ≥ 1
Dependent on the number of side windows, the software will
automatically arrange them. For another layout the ROWS /
COLUMNS values can be used.
XPOS=0 ; Horizontal positioning of the program window
YPOS=0 ; Vertical positioning of the program window
l
l
l
27769_02
XPOS: This entry lets you define a horizontal displacement of the
application.
YPOS: This entry lets you define a vertical displacement of the
application.
The position 0/0 corresponds to the upper left corner of the (first)
monitor.
267
CamControl PRO Software Manual
8.2.4.9
Audio mode [AUDIO]
Classic audio mode
MODE=0; Set audio mode to classic display
l
l
8.2.4.10
HeiTel by Xtralis
Range: 0=off / 1=on (default)
In classic audio mode, the Push-to-talk button is no longer available.
The Listening and Speaking buttons are available in this mode (see
“Audio transmission” on page 60).
Number of connection channels
Number of connection With the latest version of CamControl PRO you have the option of
channels
choosing between 1 and 21 connection channels. You can configure the
number of channels in the file CAMCTRL.INI. Add the following entries
using the same format as the other parameters in this file (see
“Configuration file with modifiable keys” on page 257): [VIDEOSERVER]
Connection channels
NUMOFCONN=9; Number of simultaneous connection channels
l
l
9: Default setting
Range: 1 - 21
Depending on how many connection channels you have selected, you
will have a main panel with the corresponding number of side panels as
described for the program interface (see “Overview of basic functions” on
page 17).
When using more than 9 connection channels with CamControl PRO,
then it might be required to reduce the IPCAMSIZE value (see “Upper
limits for the display of live images from IP cameras” on page 263) to a
value smaller than 5, in order to be able to start the software correctly.
From version 4.12, CamControl PRO also supports widescreen displays
(16:9 or 16:10 format) with full usage of the screen size. Moreover, other
fixed or free formats can be specified, and the number of columns and
lines for the side panels can be defined (see “Program window
[SCREEN]” on page 267).
8.2.4.11
Specified path for logfiles
Specified path
If CamControl PRO (version 4.02 or newer) is used, the receiver logfile,
the transferred device logfiles and the CTWINPOS.INI are saved in the
local program directory of the software or the relevant subdirectories. If
necessary, a different target path can be selected.
[PATH]
Path selection
LOCAL=1 ; selection of local or global specified path ;1: default setting
l
l
Path details
Range: 0=off / 1=on (default)
If you set the parameter LOCAL=0, the target directory specified
under REMOTEPATH is used for saving the listed files.
REMOTEPATH= ; target path for saving the listed files
l
Range: valid Windows path or UNC path (Universal Naming
Convention) to the changed target directory
Example:
l
C:\DATA\LOG Windows path details
l
\\fileserver\data\log UNC path
Make sure that the specified target directory for saving exists and can be
accessed over the network.
268
27769_02
HeiTel by Xtralis
CamControl PRO Software Manual
8.3
Saving window positions
8.3.1
General program windows (CTWNDPOS.INI)
The following windows retain your last position even after the program is closed:
l
l
l
l
l
l
l
l
PTZ window
Remote list combination window
Archive access window
Audio archive access window
Cascading window
POS/ATM/IBIS dialogue box
Button panel
(positioning via R01 file does not apply for this window therefore)
GPS window
Window positions are saved in the file CTWNDPOS.INI in the CamControl PRO program directory. You can
delete this file - after closing the program - to reset the positions.
File structure
The file CTWNDPOS.INI is divided into various sections for the individual windows. Each section starts with
the internal program window name in square brackets. Then the top left corner of the window is defined using
the variables LEFT and TOP:
Example:
[RMLISTPOS_1]
LEFT=384
TOP=884
Comment
The position 0/0 corresponds to the upper left corner of the (first) monitor.
8.3.2
Window position, Image-Viewer (VIEW10.INI)
The Image-Viewer window is displayed in the basic configuration for alarm messages. The configuration file
stores the last position and size of this window, even after the program has been exited.
File structure
The VIEW10.INI file lets you define the position of the top left corner of the window (LEFT/TOP) and the
window size (WIDTH/HEIGHT).
27769_02
269
CamControl PRO Software Manual
HeiTel by Xtralis
Example
[POS]
LEFT=829
TOP=643
WIDTH=450
HEIGTH=380
Comment
The position 0/0 corresponds to the upper left corner of the (first) monitor.
Function of the Image-Viewer
The window is divided into four quadrants to display the alarm images:
l
l
l
l
Top left: The image triggering the alarm is displayed.
Top right: The first image transmitted following a successful connection is displayed.
Bottom left: The second image transmitted following a successful connection is displayed.
Bottom right: A sequence of up to 15 images is displayed - starting with the alarm-triggering image and
followed by a maximum of 14 transmitted images following a successful connection.
Configuration of the Image-Viewer
The Image-Viewer is activated and the number of images for the image sequence configured with
CAMCTRL.INI (see “Image-Viewer configuration” on page 261).
270
27769_02
HeiTel by Xtralis
8.4
CamControl PRO Software Manual
Changing the informational text (FIRMA.TXT)
If CamControl PRO is not connected to a digital image transmission system, then an instruction text is shown
in the main panel. You can change this text and include, for example, the address of your dealer or the address
and telephone number of a contact for support queries.
FIRMA.TXT
The text shown in the main panel is saved in the file "FIRMA.TXT" in the receiver software's program
directory (C:\CAMCONTROL PRO\YOUR_DRIVE:\YOUR_PROGRAM NAME). You can edit this file with a
simple text editor. Simply replace the text after the equals signs with your own text.
[ADRESSE]
FA1=Tragen Sie in der Textdatei
FA2="FIRMA.TXT" in Ihrem
FA3=CamControl PRO Verzeichnis
FA4=Ihre Support-Adresse ein.
FA5=Enter Your support address
FA6=in the textfile "FIRMA.TXT" in
FA7=Your CamControl PRO directory.
If you don't want any text to appear at all, then either delete the file or delete the text after the equals signs.
8.5
Transmitter-specific configuration files
All the settings necessary to operate the digital image transmission systems are saved in the individual
devices themselves. This means that all the transmitters work completely independently of the receiver PC
used to configure them. Furthermore, a transmitter device is fully operational and accessible even if it is
connected to from another PC workstation.
Transmitter-dependent control files (R01 and R02 files) have also been introduced for even greater flexibility.
These files allow you to extend the functional scope of your image transmission system to almost any extent
(see “Function and structure of R01 files” on page 272) and also to customise automatic alarm processing for
specific individual transmitters (see “Function and structure of R02 files” on page 276).
These files are created and saved on the receiver PC. Many additional functions and enhancements for
operation, connection control and automatic alarm processing can be configured in these files on a specific
transmitter basis.
27769_02
271
CamControl PRO Software Manual
Note:
8.5.1
HeiTel by Xtralis
You can create / edit the R01 and R02 files with a text editor. Before editing these files, always
create a back-up that you can re-apply later if necessary.
Function and structure of R01 files
VG series, SVR series devices, CamDisc HNVR, Cam4mobile and CamServer have a remote-control
concept that supports the connection of dome cameras, pan/tilt heads and video crossbars from various
manufacturers.
HeiTel also offers a R16 Adapter with 16 relays. The adapter is connected to a device. The relays can also be
controlled from the receiver PC.
You must configure the R01 files accordingly in order to be able to use remote control. Your receiver software
supports common PTZ products and their control protocols. When installing PTZ protocols, you can decide
whether you want the R01 file on your receiver PC to be updated for the selected product (see “PTZ control”
on page 210).
Generally speaking, these R01 files are designed as templates for your customisations. They can contain
commands for camera 1, camera 1 to 4 or camera 1 to 10. CamControl PRO automatically provides you with
easy-touse control elements for the various remote options, depending on the model you have (see “PTZ
control and remote adapter” on page 54). These camera-specific control elements include:
l
l
l
l
l
A camera control system
Single or double list boxes (indexed)
A double list box
A button panel
Combinations of these options
You can also define global control elements.
R01 file sections
Camera-specific and global control elements are assigned within the relevant R01 file in sections. These are
identified with square brackets:
Sections with camera-specific definitions
272
[CAM1]
; Camera 1 section
...
; Variable definition if camera 1 is active
[CAM2]
; Camera 2 section
...
; Variable definition if camera 2 is active
[CAM3]
; Camera 3 section
...
; Variable definition if camera 3 is active
[CAM4]
; Camera 4 section
...
; Variable definition if camera 4 is active
[CAM5]
; Camera 5 section
...
; Variable definition if camera 5 is active
[CAM6]
; Camera 6 section
...
; Variable definition if camera 6 is active
[CAM7]
; Camera 7 section
...
; Variable definition if camera 7 is active
[CAM8]
; Camera 8 section
...
; Variable definition if camera 8 is active
[CAM9]
; Camera 9 section
...
; Variable definition if camera 9 is active
27769_02
HeiTel by Xtralis
CamControl PRO Software Manual
[CAM10]
; Camera 10 section
...
; Variable definition if camera 10 is active
Auto. signalling/camera switching section
[CAMINPUTS]
;Automatic signalling/
; camera switching section
...
;Variable definition
Section for global control elements
[GRELAY]
; Section for global control elements
...
; Variable definition for global control elements
Section for global CIO Adapter control elements
[CIO_GRELAY]
; Section for CIO global control elements
Adapters
...
; Definition of variables for global control elements
Comments
Comments on individual entries are separated by a semi-colon. REM (= remark) is also permitted at the
beginning of lines that are solely comment lines.
Note:
We recommend adding comments to the entries in R01 files for the sake of clarity.
General variables
The MODE variable is used to assign dialogue boxes within a section:
Camera-specific sections only [CAMx]
27769_02
MODE=1
; Remote camera control
MODE=2
; Single / double list box (indexed)
MODE=3
; Single / double list box (indexed) and camera
; remote control
MODE=4
; Double list box
MODE=5
; Double list box and camera control
MODE=16
; Button panel
MODE=17
; Button panel and camera remote control
MODE=18
; Button panel and simple/double list box (indexed)
MODE=19
; Button panel, simple/double list box (indexed)
and
; remote camera control
MODE=20
; Button panel and double list box
MODE=21
; Button panel, camera control and double list
; box
273
CamControl PRO Software Manual
HeiTel by Xtralis
Global section only [GRELAY]
MODE=1
; Global control elements with list box active
MODE=2
; Global control elements with list box inactive
Variables for camera-specific dialogue box
You can configure variables for the buttons / list boxes. These variables are then sent when a button is
activated/deactivated or when a function is selected. The variables or control functions are in line with the
display mode(s) selected using the MODE variable.
Single / double list box (indexed)
The simple or double indexed list box (possible values for MODE= 2, 3, 18, 19) is used for specific cameras
and serves to control relays and/or specific camera functions. If a function is selected in the top or bottom
drop-down list, then the receiver software sends the command stored in the R01 file to the device (dome, P/T
head, remote adapter etc.) via the digital image transmission system.
The position of the text in the drop-down list is specified by means of consecutive numbering x (range from 1
to 99). The number of the labelling text must match that of the corresponding command:
CTx=
; Text for top list box (max. 12 characters)
CMDx=
; Command for top list box
The bottom list box can be defined (indexed) on the basis of the entry selected in the top list box. In such a
way 99 entries in the top list box can each be combined with 99 options in the bottom drop-drop list.
CyPNUM=
; Number of entries (range from 1 to 99) for the
bottom list box. The value y defines the reference
to the command in the top list.
CyPTx=
;Text for the bottom list box. The value y specifies
the reference to the command in the top list. The
value x (range from1 to 99) specifies the position in
this list.
CyPCMDx=
; Command for bottom list box
Double list box
The double list box (possible values for MODE= 4, 5, 20, 21) contains two independent drop-down lists and is
used on a camera-specific basis. The same variable names are used for the top list box as for the
simple/double indexed list box. Additional variables are available for the bottom list box. The value range for x
is 1 to 99.
274
CTx=
; Text for top list box (max. 12 characters)
CMDx=
; Command for top list box
FCTx=
; Text for bottom list box (max. 12 characters)
FCMDx=
; Command for bottom list box
27769_02
HeiTel by Xtralis
CamControl PRO Software Manual
Camera-specific button panel
You can use the camera-specific button panel to control certain camera functions (e.g., fixed positions) and/or
to control the relays of the R16 adapter.
When a button is clicked, it remains active for as long as the mouse button is pressed. Different commands
can be defined for pressing and releasing the button. You can also specify how often you want the command
to be repeated when the button is pressed in.
SWNUM=
; Number of buttons (range 1 to 16)
SWNAMEx=
; Button label (max. 20 characters)
SWCMDONx=
; Command when the button is activated
SWCMDOFFx=
; Command when the button is deactivated
SWT=
; Repeat time for the command SWCMDONx
Interval in 1/10 second. This command is used for
R16 adapter relays configured as momentaries.
Variables for global control elements
Global control elements
Regardless of the camera selected, these relevant control elements are shown to the right of the relay buttons
of devices.
Up to 99 different functions can be controlled with the global control elements. You can make the relevant
entries for the list box and then have their corresponding commands activated/deactivated with the button.
While the previous control elements are used on a camera-specific basis, the following variables apply to the
section [GRELAY]:
27769_02
NUMBER=
; Number of entries in the list box (range 1 to 99)
RTx=
; List text / button label
; (maximum 12 characters)
CMDONx=
; Command sent when button is activated
CMDOFFx=
; Command sent when button is deactivated
275
CamControl PRO Software Manual
HeiTel by Xtralis
Variables to rename the relay of the CIO Adapter
Global relay control of CIO Adapters
Irrespective of the camera selected, the relay buttons of the CIO adapter are displayed as global control
elements to the right of the device relay button (see “Variables for global control elements” on page 275).
Transmitter-specific renaming of relays
Relays of the CIO adapter can be renamed by entering a new description. While other control elements are
used on a camera-specific basis, the following variables are applicable only to the section [CIO_GRELAY]:
8.5.1.1
BTNTEXT_1=
; Description Relay 1 (maximum 12 characters)
BTNTEXT_2=
; Description Relay 2 (maximum 12 characters)
BTNTEXT_3=
; Description Relay 3 (maximum 12 characters)
BTNTEXT_4=
; Description Relay 4 (maximum 12 characters)
BTNTEXT_5=
; Description Relay 5 (maximum 12 characters)
BTNTEXT_6=
; Description Relay 6 (maximum 12 characters)
BTNTEXT_7=
; Description Relay 7 (maximum 12 characters)
BTNTEXT_8=
; Description Relay 8 (maximum 12 characters)
Extended software settings
Variable for automatic signalling and/or camera switching when change occurs at the camera
control inputs
In the section [CAMINPUTS] you define whether you want automatic signalling and/or camera switching to
take place when changes occur at the camera control inputs in manual operation. The function is defined
using a variable:
FOLLOW=x ; Function definition x (range 1 to 3)
Function
Value
Camera switching
1
Acoustic signalling
2
Camera switching and acoustic signalling
3
These functions are only supported in Normal and Zoom viewing mode.
If you select a function with acoustic signalling, the wave file CAMALERT.WAV, located in the program
directory, is played once. You can replace this file with your own wave file if you wish.
Note:
8.5.2
Please refer to additional HeiTel documentation to find out what commands are available for your
PTZ device and the R16 Adapter, in R01 files.
Function and structure of R02 files
If the options available in operating modes Accept call automatically and Accept call and automatic
operation are not adequate for your application, you can specify exactly how you want alarm messages to be
processed in the R02 files.
You can configure the following functions for automatic image transmission and saving to the receiver PC:
l
l
Number of transmitted live images for each camera
How often you want live image transmission to be repeated
276
27769_02
HeiTel by Xtralis
l
l
l
CamControl PRO Software Manual
Maximum connection duration
Specific alarm detection according to status input, motion alarm or service message, as well as the option
to process each message individually (see “Differentiating between alarm calls” on page 277)
Automatic querying of pre-alarm images with the number of images per camera specified
Activating transmitterrelated alarm processing
Transmitter-related alarm processing is a special function of the Accept
call and automatic operation setting. You must select this function under
Receiver options/Take call in the receiver software in order to use
automatic alarm processing via R02 files (see “Take a call” on page 78).
R02 files
When R02 files are used for alarm processing, the receiver software
differentiates between two file types:
1. Transmitter-specific R02 files:
These R02 files are assigned a certain transmitter by the serial
number in the file name (e.g., CV542016.R02). Incoming alarm
messages from this transmitter are processed in line with the
defined specifications.
2. General alarm processing for transmitter without specific R02 file:
The file STANDARD.R02 defines alarm processing for transmitters
that do not have their own R02 file.
If there are no R02 files at C:\[Program_directory]\R02, the software
uses the default settings that you specified under Receiver options/Take
call/Automatic operation (see “Take a call” on page 78).
Structure of the R02 files
In the event of an alarm, the receiver PC receives information during connection that specifies which device
(serial number) has been activated with which alarm message. The receiver software checks whether the
transmitter in question has an R02 file and if this is the case, accesses it. You can use the R02 files to specify
the images you want to be recorded in the event of an alarm. You can specify various recordings for various
alarm messages. You can define a separate section with specific commands for each alarm message.
Headings in square brackets mark the beginning of the sections in the R02 file.
You can define the following sections:
Differentiating between alarm calls
General alarm
[ALARM0000]
; General or unspecific alarm
Alarm triggered by camera control input
[ALARM0001]
; Alarm indicator camera 1
to
[ALARM0010]
; Alarm indicator camera 10
[ALARM0011]
; Tamper alarm general alarm input (contact Al
in; switching variant "normally closed BS 8418")
Tamper alarm
to
[ALARM0013]
Note:
27769_02
; Tamper alarm general alarm input (contact Aux
in1; switching variant "normally closed BS
8418")
These camera-specific tamper alarms are only triggered by tamper of the related detector line for
camera detector inputs (CIO adapter, CamServer 2c, VG device series), which have been wired
and parameterised in conformity with BS8418 (normally closed BS 8418). Independent of the alarm
enabling state of the video system an alarm will always be output in case of tamper.
277
CamControl PRO Software Manual
HeiTel by Xtralis
Alarm input
[ALARM0017]
; Alarm general alarm input (contact Al in)
Alarm enable input
[ALARM0018]
; Change at alarm enable input
[ALARM0019]
; Alarm armed
[ALARM0020]
; Alarm disarmed
[ALARM0021]
; Routine call every 24 hours
[ALARM0022]
; HDD error message
[ALARM0023]
; Automatic callback
[ALARM0024]
; Tamper alarm (contact Aux in1)
Service calls
Tamper input
Alarm triggered by "Power on"
[ALARM0025]
; Alarm message (optional) by switching on the
video systems
Alarm triggered by internal motion detection
[ALARM0031]
; Motion alarm camera 1
to
[ALARM0040]
; Motion alarm camera 10
Alarm triggered by video loss
[ALARM0041]
; Video loss camera 1
to
[ALARM0050]
; Video loss camera 10
Alarm triggered by serial control
[ALARM0051]
; Serial control triggered alarm camera 1
to
[ALARM0060]
; Serial control triggered alarm camera 10
Alarm triggered by camera position authentication
[ALARM0071]
; Cam pos authentication camera 1 (Camera
position authentication)
to
[ALARM0080]
; Cam pos authentication camera 10
Alarm triggered by alarm panel
[ALARM0081]
Alarm panel triggered alarm camera 1
to
[ALARM0090]
Alarm panel triggered alarm camera 10
[ALARM0111]
; Tamper alarm camera 1 or CIO adapter tamper
alarm camera 1 (switching variant "normally
closed BS 8418")
Tamper alarm
to
278
27769_02
HeiTel by Xtralis
CamControl PRO Software Manual
[ALARM0120]
Note:
; Tamper alarm camera 10 or CIO adapter
tamper alarm camera 10 (switching variant
"normally closed BS 8418")
These camera-specific tamper alarms are only triggered by tamper of the related detector line for
camera detector inputs (CIO adapter, CamServer 2c, VG device series), which have been wired
and programmed in conformity with BS8418 (normally closed BS 8418). Independent of the alarm
enabling state of the video system an alarm will always be output in case of tamper.
Alarm triggered by motion detector
[ALARM0121]
;Alarm camera 1 (PIR)
to
[ALARM0130]
;Alarm camera 10 (PIR)
Tamper alarm triggered by external motion detector
[ALARM0131]
;Alarm camera 1 (PIR, tamper)
to
[ALARM0140]
;Alarm camera 10 (PIR, tamper)
Alarm triggered by detection at outdoor perimeter (IntrusionTrace)
[ALARM0141]
;Alarm camera 1 (Outdoor Perimeter Detection,
IntrusionTrace)
to
[ALARM0150]
;Alarm camera 10 (Outdoor Perimeter Detection,
IntrusionTrace)
You can specify automatic alarm processing for every section with the following commands:
Command set for R02 files
Ranges:
l
l
l
t: 1 to 2678400 (time in seconds)
x: 0 to 2,000,000,000 (number of images)
y: 1 to 10 (depends on digital image transmission system in use)
Commands:
ALARM=x
Number of images to be received by the alarm
camera
LIVEy=x
Number of live images from camera y
PREALARMy=x
Number of pre-alarms from camera y (CamTel
SVR devices only)
REPEAT=x
How often LIVEy images are to be received
TIME=t
Timeout: The connection is closed after this
amount of time at the latest. The connection is
automatically closed earlier if the specified
number of images has been transmitted.
Example
CV542016.R02:
Section 1
[ALARM0001]
ALARM=5
LIVE1=4
LIVE3=4
27769_02
279
CamControl PRO Software Manual
HeiTel by Xtralis
LIVE4=4
REPEAT=5
TIME=600
Section 2
[ALARM0018]
LIVE2=5
TIME=300
Explanation of example
This R02 file refers to a CamDisc SVR with the serial number CV542016. Section 1 describes the behaviour
of alarms triggered by the status input for camera 1 (ALARM0001):
l
l
l
l
Five alarm images from the triggering camera 1 are recorded.
Then four live images from cameras 1, 3 and 4 are recorded one after the other.
Transmission and recording is repeated five times.
If it takes longer than 10 minutes (600 seconds) to process the commands defined in section 1, the
connection is closed after this period of time has elapsed. Otherwise, the connection is closed after the
last image has been transmitted.
Section 2 defines the recording behaviour of alarms triggered by a change at the alarm enable input
(ALARM0018):
l
l
l
Five live images are recorded from camera 2.
The connection is then closed.
If it takes longer than five minutes to process these commands, the connection closes after this period of
time has elapsed.
Manually creating R02 files
Please note the following when creating R02 files:
l
l
l
l
l
The receiver software looks for the R02 files in the R02 sub-folder of the program path (e.g.,
C:\CAMCONTROL PRO\R02). Create this directory if necessary.
Use a text editor to create the R02 files.
Create the necessary sections.
Save the transmitter-specific R02 file with the serial number of the digital image transmission system as
the file name with the file extension .R02 in the R02 sub-directory (e.g., CV542016.R02).
Use the file name STANDARD.R02 for the general R02 file used for all transmitters that haven't been
assigned their own R02 file.
Note:
When creating the STANDARD.R02 file, ensure that you define the processing profile for all alarm
calls so that you don't miss any alarm messages. Test your R02 files.
Creating R02 files using the R02 File Editor
To simplify the creation of R02 files, CamControl PRO Software from version 4.06 includes a R02 File Editor.
This additional tool is only available as English language version.
You will find the R02Editor.exe program file in the sub-directory R02 of the program path (e.g.:
C:\CAMCONTROL PRO\R02):
Starting the R02 File Editor
Start R02Editor.exe file.
280
27769_02
HeiTel by Xtralis
CamControl PRO Software Manual
Structure of the user interface
The user interface is divided into two sections:
l
l
File section:see page 281
Alarm configuration: see page 282
File section
In the upper part of this section existing R02 files are listed under R02 files.
The files either have the name standard (this R02 file applies to all transmitters for which no separate R02 file
has been assigned) or the device-specific serial number in the format YZxxxxxx (e.g.: CV651028, NV900444,
etc.).
In the lower part of this section you will find the following buttons:
l
l
l
Use the Load button to load the selected existing R02 file into R02 File Editor.
Use the Delete button to delete a selected existing R02 file. After confirming the security prompt with Yes
the respective R02 file will be permanently deleted.
In order to create a new R02 file, enter the respective serial number in the format YZxxxxxx in the input
field below New file. Confirm the input by clicking the New button. After confirming the security prompt
with Yes the respective R02 file will be displayed in the file section under R02 files.
27769_02
281
CamControl PRO Software Manual
HeiTel by Xtralis
Alarm configuration
The possible alarm messages are listed in the tree structure under Alarm reason. For an explanation of the
alarm reasons refer to “Differentiating between alarm calls” on page 277.
To edit a R02 file load (Load) an existing file into the file section (see “File section” on page 281). If for the
related transmitter no R02 file exists then a new file has to be created (New) which is then to be loaded (Load).
l
l
l
Select the respective alarm reason (e.g. Camera control inputs/Camera [0001]) in order to define the
parameters for automated alarm processing:
l
Number of alarm camera images: number of images which shall be received from the alarm camera.
l
Number of live images: To define the number of live images from the respective camera (1 to 10).
Repeatings of live job: To define the number of repetitions for the recording of the live images defined
above.
l
Number of pre alarm images: To define the number of pre-alarm images (only CamTel SVR devices)
from the respective camera (1 to 10).
l
Maximum connection duration: The connection will be interrupted after (at the latest) elapse of this
time. The connection will be automatically interrupted earlier if the transfer of all images has been
completed according to the definitions.
Use the Copy these values to all alarm reasons button to apply the programming of the current alarm
reason to all other alarm reasons of the current transmitter.
Use the Copy button to copy the programming of the current alarm reasons to the clipboard.
282
27769_02
HeiTel by Xtralis
l
l
CamControl PRO Software Manual
Use the Insert button to insert a previously copied programming from the clipboard to the current alarm
reason.
Use the Save file button to save the current R02 file.
8.6
Program parameters (SERVICE.INF)
The file SERVICE.INF, located in the program directory, allows you to make a variety of pre-settings for the
CamControl PLAYER as an integral part of CamControl PRO. The following entries are possible in the
[SERVICE], [EXTRA] and [GPS] sections:
[SERVICE]
Section
[SERVICE]
This entry identifies the configuration section
within the file.
Language setting
LANGUAGE=
Selected language
Example: LANGUAGE=GERMAN
Write protection
READONLY=
Open archives with or without write protection
Examples:
READONLY=1 (open with write protection)
READONLY=0 (open without write protection)
Positioning and window size TOP=
y position of the top left corner of the program
window on program start (in pixels)
Example: TOP=50
LEFT=
x position of the top left corner of the main panel
on program start (in pixels)
Example: LEFT=50
WIDTH=
Width of the program window on program start
(in pixels)
Example: WIDTH=1024
HEIGHT=
Height of the program window on program start
(in pixels)
Example: HEIGHT=740
Password protecting the
delete function
DELETE=
Delete CamControl PRO receiver archives. No
receiver archives can be deleted if this entry is
not present.
Examples:
DELETE=YES (Delete receiver archives)
DELETE=TEST (Delete only with password:
TEST)
Playback speed
SPEED=
Set the playback speed:
0: 1 image/sec
1: 5 images/sec
2: 10 images/sec
3: 15 images/sec
4: 20 images/sec
5: 25 images/sec
6: Max. images/sec
Storage directory for
individual images
SAVEPICPATH= Specification of a directory for the storage of
individual images
Example: SAVEPICPATH=C:\PICTURES
27769_02
283
CamControl PRO Software Manual
Showing event diagram
HeiTel by Xtralis
EVENTSERIES= Show the event tree
1: Event diagram is shown as soon as a camera
track with event-triggered recording is selected.
0: Event diagram is not automatically shown
when a camera track with event recording is
selected.
[EXTRA]
Section
[EXTRA]
This entry identifies an extra configuration
section within the file.
Image display
IMAGE_
Extended function for optimised display of PAL
IMPROVEMENT= and NTSC cameras
Operating modes:
IMAGE_IMPROVEMENT=0; default
IMAGE_IMPROVEMENT=1; variant 1
IMAGE_IMPROVEMENT=2; variant 2
The two alternative methods require additional
processor speed!
[GPS]
Section
[GPS]
This entry indicates the configuration section for
the GPS window.
Position of GPS window
GPSX=
X position of the top left-hand corner of the GPS
window
GPSY=
Y position of the top left-hand corner of the GPS
window
Unit for the vehicle speed
GPSSPEED=
Unit set for the display of speed in the GPS
window, possible units:
0=kn, 1=mph, 2=km/h
Example: GPSSPEED=0 (unit kn)
GPS window active
SHOWGPS=
Display of the GPS window
Examples:
SHOWGPS=1 (GPS window shown)
SHOWGPS=0 (GPS window hidden)
Control elements for Google
Earth active
SHOWMAPCTRL= Display of additional control elements in the
GPS window
Examples:
SHOWMAPCTRL=1 (control elements shown)
SHOWMAPCTRL=0 (control elements hidden)
284
27769_02
HeiTel by Xtralis
8.7
CamControl PRO Software Manual
Logfile entries (only CamDisc HNVR, CamDisc SVR,
Cam4mobile, and CamServer as well as VG Series)
CamDisc SVR (as well as CamDisc HNVR, Cam4mobile or CamServer) logs the most important device
states and events in a logfile with a capacity of up to 1,000 entries. The oldest entries are automatically
overwritten on a FIFO (first in first out) basis. The file is stored on the removable hard disk. It can by displayed
by CamControl PRO software during an active connection, or by CamControl PLAYER software in offline
mode. Certain logfile entries are system entries and beyond the control of the user. Other messages are
optional and must be specified in the device settings of CamControl PRO under Recorder settings/Extras.
These messages are identified with Yes in the Optional column of the following table. Critical messages are
indirectly connected to the error relay and identified with Yes in the Error relay column.
Logfile entries
The logfile entry column contains the messages in plain text and, depending on the message, additional
information identified by square brackets in the table. The additional date and time information applies to all
entries. Each logfile entry therefore starts with [D&T]. Letters (e.g. [x]) have been used for all other pieces of
additional information and are explained in the Description column.
Logfile command overview
Logfile entry
Description
Optional
Error relay
General messages
[D&T], Initialisation of
hard disk drive
The hard disk was re-formatted. This was
no
either triggered by the corresponding function
in the configuration menu or by accident in the
accessing PC due to deletion or modification
requiring automatic re-formatting
no
[D&T], Power on V, [x]
Device switched on / restarted. Field [x]
indicates firmware version number.
no
no
[D&T], Power off
The device was switched off. This entry is not no
written to the file until the device is switched
on again.
no
[D&T], Logfile cleared, [x], Logfile was deleted by the Delete logfile
[y]
function in the Site archive configuration
menu. Field [x] displays name of registered
user, and field [y] displays order of login
(0=one, 1=two, etc.)
[D&T], Setup changed,
[x], [y]
no
no
Device configuration was changed, or at least no
the configuration menu was exited with OK
and not Cancel. Field [x] displays name of
registered users, and field [y] displays order of
login (0=one, 1=two, etc.)
no
[D&T], Files renamed, [x], File names on a removable hard disk from
[y]
another device were renamed. The old serial
number [x] can be used to determine the
device in which the hard disk was used. [y] is
the serial number of the new device,
responsible for renaming.
no
no
[D&T], Set clock
no
no
27769_02
Time was reset
285
CamControl PRO Software Manual
Logfile entry
HeiTel by Xtralis
Description
Optional
Error relay
[D&T], Update, [x], [y]
The device was updated with new firmware.
The old version number is displayed in field
[x], the new version number in field [y].
no
no
[D&T], Track, [x],
initialized, [y]
Camera track [x] was initialized. Field [y]
no
indicates whether this camera track has been
divided into partitions for continuous and/or
event triggered recording. Existing image data
is removed.
no
[D&T], Password disabled The reset button on the front of the device
deletes all usernames and passwords.
no
no
[D&T], Alarm enabled
The video system was armed manually or by
the software.
no
no
[D&T], Alarm disabled
The video system was disarmed manually or
by the software.
no
no
no
yes
Overwrite protection is activated and hard
no
disk capacity for camera track [x] is depleted;
no more pictures can be recorded.
yes
Critical messages
[D&T], Track, [x], reached Overwrite protection is activated and the
warning threshold
percentage warning threshold has been
reached for a camera track [x].
[D&T], Hard disk full,
Track, [x]
[D&T], Period of recording The minimum recording period for camera
reached, Track, [x]
track [x] has not been reached.
no
yes
[D&T], No video signal on This message is written if a video signal error
input, [x]
is detected for video input [x]
yes
yes
[D&T], HDD Read Error,
[x]
Hard disk read error. Check removable hard
no
disk in offline mode, e.g. with application
ScanDisc. Field [x] indicates hard disk model.
yes
[D&T], HDD Write Error,
[x]
Hard disk read error. Check hard disk in offline no
mode, e.g. with application ScanDisc. Field
[x] indicates hard disk model.
yes
[D&T], Hardware error, [x] Indicates a serious hardware problem. Field
[x] classifies the error, which is displayed in
plain text as follows:
no
yes
Indicates a DSP error on a HYBRID Card 4
no
installed in a CamDisc HNVR/CamDisc
VG HNVR. [x] states the respective DSP
module. If necessary, the respective HYBRID
Card 4 must be repaired. Add an excerpt of
the relevant logfile entries to the RMA
documents.
yes
l
l
l
l
l
Clock = Timer module
Clear Flash = Faulty flash memory
Write Flash = Faulty flash memory
DSP = Faulty DSP module
Shared memory = Faulty memory module
The device must be repaired.
[D&T], Hardware error
(DSP [x] not found)
(CamDisc
HNVR/CamDisc
VG HNVR only)
286
27769_02
HeiTel by Xtralis
CamControl PRO Software Manual
Logfile entry
Description
Optional
Error relay
[D&T], No secure code,
can't store pictures
The hard disks have been configured by the
manufacturer specifically for operation with
HeiTel devices.
The device cannot be operated with standard
hard disks.
no
yes
[D&T], Temperature very
high
A critical temperature of at least 70°C was
recorded inside the device.
no
yes
[D&T], Clock adjusted
The clock could not be read at start-up. The
firmware date of manufacture has been set.
This may indicate a faulty battery.
no
yes
[D&T], Videodecoder [x]
error
The video decoder has been checked at start- no
up. This message indicates a faulty video
decoder at video input [x].
yes
Alarm connection to receiver with telephone
no
number / IP address indicated in filed [x] could
not be established. Field [y] indicates the
alarm reason (AR):
Possible values for [y]:
no
Connection messages
[D&T], Alarmcall failed:
[x], AR:[y]
General, nonspecific alarm:
0
Control input, camera 1 - 10:
01 - 10
Sabotage alarm - general alarm
input:
11
Sabotage alarm - enable/disable
status input:
12
Sabotage alarm - sabotage-status 13
input:
[D&T], Caller, [x], [y]
27769_02
General alarm:
17
Panic alarm (Tamper):
24
Device reboot (Power on):
25
Motion alarm, camera 1 - 10:
31 - 40
Video loss, camera 1 - 10:
41 - 50
Alarm released by serial
command, camera 1 - 10:
51 - 60
Fault/interruption in dedicated
line: (HTconnect):
62
Camera position authentication,
camera 1 - 10:
71 - 80
Alarm panel triggered alarm
camera 1 - 10:
81 - 90
Tamper alarm camera 1 - 10:
111 -120
Caller indicates the login order of the last login yes
(0=one, 1=two etc.). Field [x] and field [y]
indicates telephone number / IP address. This
entry is not generated for null modem
connections.
no
287
CamControl PRO Software Manual
Logfile entry
[D&T], Service Call, [x]
HeiTel by Xtralis
Description
The device triggered a service call to the
telephone number / IP Address in field [x].
[D&T], Login, [u], [v], [w], The user indicated in field [u] established a
[y], [z]
connection to the device in the login order
indicated in field [w] (0=one, 1=two etc.).
Depending on connection mode and
configuration, the following additional
information can be displayed. Field [v] =
connection established by:
Optional
no
Error relay
no
temperature no
Field [v] = connection established by:
l
l
l
l
l
l
IM=internal remote data transmission
adapter (e.g. ISDN card)
EM = external remote data transmission
adapter (e.g. MODEM)
NW = Network
NM = Null modem
UB = USB
UN = Unknown
Field [y] = Reason for connection:
l
l
l
R=Receiver dialup
A=Alarm call triggered by device
S=Service call triggered by device (every
24 hours)
Field [z] = indicates the temperature
measured in the device (optional information,
see "Optional" column)
[D&T], Logout, [w], [y], [z] The user indicated in field [w] terminated the see ADC
connection to device in the login order
indicated in field [y] (0=one, 1=two etc.). Field
[z] indicates the cause of termination:
l
l
l
l
288
no
CMD = Termination by receiver software
command (standard)
DCD = Modem, ISDN TA or TCP/IP
alarm adapter Data Carrier Detection was
deactivated (standard)
TI Timeout = No data transmitted or
capable of being transmitted 60 seconds
(error)
ADC = AlarmDisConnect, caused by an
alarm (optional feature, to be set in device
configuration)
27769_02
HeiTel by Xtralis
CamControl PRO Software Manual
Logfile entry
[D&T], Login failed, [u],
[v], [w], [y]
Description
Optional
The user indicated in field [u] tried to establish no
a connection to the device in the login order
indicated in field [w] (0=one, 1=two etc.). This
attempt failed due to unknown user and/or
wrong password. Depending on connection
mode and configuration, the following
additional information can be displayed.
Error relay
no
Field [v] = connection established by:
l
l
l
l
l
l
IM=internal remote data transmission
adapter (e.g. ISDN card)
EM = external remote data transmission
adapter (e.g. MODEM)
NW = Network
NM = Null modem
UB = USB
UN = Unknown
Field [y] = Reason for connection:
l
l
l
R = Receiver dialup
A=Alarm call triggered by device
S=Service call triggered by device (every
24 hours)
Status messages to the multipolar terminal block
[D&T], Control input [x]
closed
The control input indicated in field [x] has been yes
closed.
no
[D&T], Control input [x]
opened
The control input indicated in field [x] has been yes
opened.
no
[D&T], Alarm input closed The alarm input has been closed.
yes
no
[D&T], Alarm input opened The alarm input has been opened.
yes
no
[D&T], Alarm enable input The alarm enable input has been closed.
closed
yes
no
[D&T], Alarm enable input The alarm enable input has been opened.
opened
yes
no
[D&T], Aux input [x]
closed
The Aux input indicated in field [x] has been
closed.
yes
no
[D&T], Aux input [x]
opened
The Aux input indicated in field [x] has been
opened.
yes
no
[D&T], V out input closed
The control output V out has been closed.
yes
no
[D&T], V out input opened The control output V out has been opened.
yes
no
Status messages for serial control
[D&T], External
command: XXXX,OK
Serial command XXXX has been successfully
processed (XXXX = four-digit command)
no
[D&T], External
command:
XXXX,ERROR
Serial command XXXX has not been
sucessfully processed (XXXX = four-digit
command)
no
Status messages for CI Adapter/CIO Adapter
27769_02
289
CamControl PRO Software Manual
Logfile entry
HeiTel by Xtralis
Description
Optional
Error relay
[D&T], External input: xx
(cam:yy) closed
Input for the CI Adapter/CIO Adapter has
been closed
xx= Input for the CI Adapter/CIO Adapter
(01 - 50)
yy= Camera number configured in the sender
setup at the time the camera is triggered
(01 - 10)
yes
no
[D&T], External input: xx
(cam:yy) opened
Input for the CI Adapter/CIO Adapter has
been opened
xx= Input for the CI Adapter/CIO Adapter
(01 - 50)
yy= Camera number configured in the sender
setup at the time the camera is triggered
(01 - 10)
yes
no
Status message for the HDD safe power down functions
[D&T], HDD deactivated
The logfile entry is written before the hard disk yes
is deactivated via one of the HDD safe power
down functions.
yes
[D&T], Video signal ok on This message is written if a valid video signal yes
input, [x]
was detected following a video signal error for
video input [x].
yes
Positive messages
8.8
Configuring data transmission devices
The next section explains how to set up devices for transmitting data using selected examples.
8.8.1
Analogue dial-up modem (Creatix V.90)
The Creatix V.90 modem is an external adapter for analogue dial-up. It can be used on the side of both the
receiver PC and the digital image transmission system. It is connected via the serial interface in both cases.
Receiver-side configuration
Init strings
Modem initialisation
AT command
Initialisation for transmitter
AT&FE0X3S0=0
Initialisation for transmitters in private AT&FX§E0X3S0=0
branch exchanges
Baud rate
115200 baud
Dialling string
ATD
Receiver-side configuration
Init strings
290
Modem initialisation
AT command
Initialisation for receiver PC
AT&FE1V1S0=0
27769_02
HeiTel by Xtralis
CamControl PRO Software Manual
Initialisation for receiver PC in private
branch exchanges
AT&FE1V1X3S0=0
Baud rate
115200 baud
Dialling string
ATD
Special settings
Pulse dial
The modem can be preset to the European setting (CTR21). Pulse dialling is not possible with this setting. If
the exchange does not accept tone dialling (in rare cases, e.g., old telecom systems), switch to pulse dialling.
In this case, the German setting (DEU 49) is necessary. Tone dialling is still supported:
l
l
l
l
Switch to DEU 49:
AT*NC3&F&W&W&1
Switch to CTR21:
AT*NC9&F&W&W&1
Query current setting:
ATI6
Tone or pulse dialling dial string:
ATDT or ATDP
8.8.2
ISDN TA (Stollmann TA PPX)
The ISDN TA+PPX (successor of TA+PP2 / TA+PPP) is a reasonably-priced external ISDN adapter. It can
transfer data via a B channel at 64,000 Bit/s. It is operated at the serial interface like a modem. You don't need
special drivers or application programs for the TA+PPX. It can therefore be used with standard PC without
any problems.
Features
Type
Active ISDN adapter
Version
PPX: 1.008, PP2: 5.373, PPP: 5.275A (firmware to be used)
Connection
Serial interface with up to 115,200 Bit/s
D channel
DSS1 protocol (Euro ISDN)
B channel
64,000 Bit/s, X.75, V.120
Included in delivery
ISDN adapter, ISDN connection cable, modem cable, data
medium with manual, plug-in power pack (included in delivery
for PPX)
Warranty
24 months (for PPX)
Approvals
German BZT approval, European approval
Receiver
27769_02
Modem initialisation
AT command
Initialisation for receiver PC
ATE1V1B10S0=0
Dialling string
AT command
Prefix 1
ATD (establish connection Dial=D)
Prefix 2
Not used
291
CamControl PRO Software Manual
HeiTel by Xtralis
MSN
Setting the MSN (Multiple Subscriber Number):
l
If several ISDN TAs or devices with the ISDN service attribute "data service" are connected to your
ISDN S0 bus, then every device must be assigned an MSN (i.e. a telephone number) at which it can be
reached. This number must be at the end of the initialisation string.
Connecting the adapter to the transmitter
Transmitter
Initialisation with MSN for current devices:
l
ATE0V1B10S0=0#Z123456^M (123456 is the MSN)
Status of the LEDs on the TA+PPX / TA+PP2 / TA+PPP
Status
Cause
LEDs off
No current or device defective
L1 flashing, L2 off
ISDN-S0 bus not ok
L2 flashing
Device defective
L1 on, DTR on
Correct status
If the green LED (L1) flashes for an extended period of time, the connection to the S0 bus is not ok.
Solution:
l
l
The Western plug is probably not connected or there is no S0 bus available at the connected jack.
Determine what protocol is available at the ISDN connection. Euro ISDN (DSS1) is the standard protocol
for the ISDN TA.
It is also possible that the ISDN connection is not a basic connection and is configured for telephone
systems (direct inward dialling with two or three numbers). In this case, the ISDN TA can only be
operated via the telephone system!
Checking transmitters with ISDN TA (+PPX, +PP2, +PPP or integrated)
Incorrect MSN
Incorrect initialisation
Once you are using a TA+PPX, TA+PP2 or TA+PPP on the receiver PC side, you can remotely configure all
of the terminal adapters listed above in use on the transmitter side. This also includes all HeiTel devices with
internal ISDN card. For example, you assign MSNs and configure the protocol to X.75 in this way.
Proceed as follows:
l
l
l
Connect the ISDN TA to the PC and establish a connection using a terminal program (e.g., the terminal
software located on the installation CD).
Dial into the transmitter with the command ATDnnnnnnE (n=call number).
Once successfully connected, confirm the password prompt with Enter.
The version number of the adapter is then automatically displayed. Once a connection has been established,
several commands are available. These are described in detail in the ISDN adapter manual. The following
functions are described in the following:
292
Function
Description
msn
Query set MSN
reset
Reset ISDN TA
ireset=x
Automatically reset ISDN TA every x minutes
show
Show configuration
27769_02
HeiTel by Xtralis
CamControl PRO Software Manual
TA+PPP V5.246 (c) Copyright Stollmann E+V GmbH
cmds: 0-Hayes
prot: 10-X.75
isdn: 0-DSS1
flc: 3
ccts: 1 cdcd: 1 cdtr: 2 cdsr: 0
bsize: 2048 start: 1
dbits: 8 sbits: 1 prty: 0
br: 8-115200 or 0-adaptive
llc: bc: 88 90
dte: 0 t1: 2 n2: 10 k: 7
Function
Description
dial.hayespar
Export content of adapter register
002B0D0A08031E010400
8.8.3
Installing and using ISDN cards
If you are using an internal ISDN card instead of or in addition to external ISDN terminal adapters, a CAPI
driver is installed. Your operating system accesses the ISDN resources through this CAPI driver. Programs
configured to use internal cards also use the CAPI interface to communicate with these devices.
CamControl PRO does not support the direct use of ISDN cards via the CAPI interface. With a driver that
allows the ISDN card to be accessed via virtual COM ports, you can also use your ISDN card to transmit
images with CamControl PRO (see “Communicating with CAPI devices via Fossil drivers” on page 293).
Communicating with CAPI devices via Fossil drivers
CamControl PRO currently does not support the direct use of internal ISDN cards via CAPI. With a driver that
allows the ISDN card to be accessed via virtual COM ports, it is easy to use your ISDN card for image
transmission with CamControl PRO. Even if these COM ports don't really exist as hardware, they can be
configured and used in the same way as normal serial interfaces.
A tried-and-tested software solution is the use of the Fossil driver cFos, which is available on the Internet.
Internal ISDN cards from AVM
If you are using internal AVM ISDN cards, you do not need to use cFos because AVM products have a CAPI
port driver that allocates the ISDN resources virtual COM ports / virtual modems.
Notes on installing cFos
l
l
l
l
Always determine what serial connections / COM ports your PC actually has in the Windows Device
Manager.
Determine the MSN at which CamControl PRO is to be accessed on the ISDN-S0 bus.
Start installing cFos.
During the course of the installation, you will be asked to select the interfaces you want to be available in
the future as virtual COM ports. As an ISDN card is generally connected to an S0 bus, which allows two
simultaneous connections, you should also specify two COM ports. Do not select any COM ports that are
physically present or that have already been configured as virtual ports by other programs. COM1 and
COM2 are often the only physical serial interfaces available. COM3 and COM4 should then be selected
as virtual COM ports.
You can also assign an MSN (Multiple Subscriber Number) during cFos installation. In general, this is the
telephone number (without prefix) your transmitters use to dial the receiver software in the event of an
alarm. Using the MSN, the driver identifies calls intended for CamControl PRO, thereby avoiding conflicts
with other ISDN devices connected to this ISDN connection. Enter an MSN in the corresponding field for
each virtual COM port.
27769_02
293
CamControl PRO Software Manual
l
HeiTel by Xtralis
After successful installation, the virtual COM ports are available in the receiver settings of CamControl
PRO. If the virtual COM ports are not available in the receiver settings or an error message appears during
subsequent initialisation, check that the installation procedure was carried out correctly.
Note:
Some telephone systems and ISDN cards expect an MSN even for outgoing calls. If you are
unable to establish a connection to the receiver software and you receive the error messages "Call
rejected" or "ISDN-Layer...", enter an MSN.
Initialisation
The AT&F command is generally sufficient to initialise ISDN cards.
8.9
Installation of device drivers
To operate your CamControl PRO software, it may be necessary to have particular drivers installed. The
drivers which are part of the scope of delivery are found in the subdirectory \Drivers in your CamControl PRO
software.
Device-dependent installation procedures
l
l
l
CamDisc SVR 4, CamDisc SVR 10, CamTel SVR 4, CamTel SVR 10, Cam4mobile 4 and Cam4mobile
10: page 294
CamDisc HNVR 10, CamDisc SVR 4s, CamDisc SVR 10s, CamServer 1, CamServer 2c and
CamServer 2: page 300
VG device series: page 301
8.9.1
Installation of the USB driver for HeiTel Video Gateways
Technical Product Information No. 14.01
Product/Version
CamDisc SVR, CamTel SVR, Cam4mobile, CamDisc SVR 10s, CamDisc SVR
4s, CamServer 1, CamServer 2c, CamServer 2, CamDisc HNVR, CamServer VG
2c/4c, CamDisc VG 2c/4c, CamDisc VG 2s, CamDisc VG 4, CamDisc VG 10,
CamDisc VG 4s, CamDisc VG 10s, CamTel VG 4, CamTel VG 10, Cam4mobile
VG 2c/4c, Cam4mobile VG 4, Cam4mobile VG 10s, CamDisc VG HNVR, ipVG,
CamDisc E, CamDisc+ E, CamDisc+ ETx
Date
February 2014
Topic
Installation of the USB device driver
Short description
Installation of the USB device driver for use of the USB direct connection
Download Current
Firmware Version
SVR/SVR s/VG Series:
http://www.heitel.com/en/service/downloads/?dir=02-firmware-updates#02firmware-updates
Download
CamControl LITE
Demo Version
http://www.heitel.com/en/service/downloads/?dir=01-demosoftware/01camcontrol-lite#01-demosoftware
Download
CamControl PRO
Demo Version
http://www.heitel.com/en/service/downloads/?dir=01-demosoftware/03camcontrol-pro#01-demosoftware
8.9.1.1
Introduction
The use of the USB direct connection for connection to the HeiTel devices requires the installation of a driver
for the respective USB interface. Depending on the Windows operating system, device series and
CamControl LITE/PRO software version, the driver installation can be different. Therefore please consider the
driver installation instructions that are described in this document.
294
27769_02
HeiTel by Xtralis
CamControl PRO Software Manual
Configuration
Start CamControl LITE. Click Setup. The Receiver options dialogue box opens. Now in the Options list click
Extras. Check in the USB section whether the option Transmitter index with USB node is activated or switch
it where necessary to be active. Then click on the OK button.
Standard settings for the USB direct connection
The USB direct connection is made available, upon activation, at the top of the list in the ‘transmitter index’ of
the CamControl LITE/PRO software. The default data for this transmitter data is as follows and cannot be
changed:
l
l
Transmitter name: USB direct connection
IP address and port: 192.168.138.95:3000
This connection data cannot be changed! If a non standard port number has been used in the transmitter e.g.
3001, an additional entry for USB connection will need to be added. The IP address would be
192.168.138.95:3001. Please note the network settings of your device and consult the product guide if
necessary.
Additional USB connection
Only one HeiTel device can be connected to a receiver PC via a USB connection at any one time. This is
because the device IP address for the USB connection is always 192.168.138.95 and cannot be changed.
Simultaneous use of two devices via USB will inevitably result in IP address conflicts!
Additional driver installation
If you are trying to connect to your HeiTel device using the direct USB connection, but using a different USB
port on your PC/Laptop, Windows may require that the driver be loaded again (particularly on XP).
8.9.1.2
Requirements
1. PC/Laptop with USB 2.0 hi-speed interface
2. USB 2.0 type A to B (printer style) cable for connecting to the transmitter with a maximum length of two
meters
3. CamControl LITE or CamControl PRO software
4. One of the following HeiTel VideoGateway device series with the appropriate firmware and CamControl
software. Please note the requirements of the dependent installation processes:
l
l
l
SVR series (page 295): CamDisc SVR 4, CamDisc SVR 10, CamTel SVR 4, CamTel SVR 10,
Cam4mobile 4, Cam4mobile 10
SVR s series (page 299): CamDisc HNVR 10, CamDisc SVR 4s, CamDisc SVR 10s, CamServer 1,
CamServer 2c, CamServer 2
VG series (page 301): CamServer VG 2c/4c, CamDisc VG 2c/4c, CamDisc VG 2s, CamDisc VG 4,
CamDisc VG 10, CamDisc VG 4s, CamDisc VG 10s, CamTel VG 4, CamTel VG 10, Cam4mobile VG
2c/4c, Cam4mobile VG 4, Cam4mobile VG 10s, CamDisc VG HNVR
8.9.1.3
Installation of the USB driver for SVR series
Currently, the USB function can only be used with the following devices if their firmware is version 1.58 or
higher:
l
l
l
CamDisc SVR 4 and CamDisc SVR 10 device (serial no.: CQxxxxxx and CVxxxxxx)
CamTel SVR 4 and CamTel SVR 10 devices (serial no.: TQxxxxxx and TVxxxxxx)
Cam4mobile 4 and Cam4mobile 10 devices (serial no.: MQxxxxxx and MVxxxxxx)
27769_02
295
CamControl PRO Software Manual
HeiTel by Xtralis
To use a USB direct connection with your CamControl LITE or CamControl PRO software, it will be
necessary to have particular drivers installed. The drivers (which are part of the scope of delivery) are found in
the subdirectory \Drivers in your CamControl LITE/PRO software. After installing this driver, the configured
interface corresponds to a network interface with a maximum transmission rate of 9.7 MBit/s.
Driver installation in Windows 8 and 8.1
The USB driver is essentially installed in Windows 8 and Windows 8.1 in the same way as the installation
described in the chapter relating to VG series (page 301).
Driver installation in Windows 7
The USB driver is essentially installed in Windows 7 in the same way as the installation described below for
Windows XP.
Driver installation in Windows Vista
Install the USB driver in Windows Vista in the same way as you would in Windows XP, following the steps
described below.
Starting from firmware version 2.04 or higher please open the \Drivers subdirectory in the program directory of
your CamControl LITE/PRO software. Run the file pl2502vista.exe to install the USB driver. Follow the
instructions.
A reconnection of the USB cable might be necessary after having run the driver installation manually.
Driver installation in Windows XP
Please install the USB driver as follows:
Step 1
Before you connect one of the appropriate HeiTel devices with a USB interface of your receiver PC, please
install CamControl LITE/PRO software version 3.74 or higher.
Step 2
Switch on your HeiTel device and connect the USB cable to the corresponding USB socket on the front of the
device. Next, connect the other end of the USB cable with a corresponding socket on your receiver PC (only
after you have switched the PC on).
As soon as your device is ready, the hardware assistant automatically displays a welcome dialogue:
Select the option No, not this time and confirm the selection with Next >.
296
27769_02
HeiTel by Xtralis
CamControl PRO Software Manual
Step 3
In the following dialogue screen, select the option Install from a list or specific location (Advanced). Confirm
your selection with Next >.
Step 4
In this dialogue screen, select the options Search for the best driver in these locations and Include this
location in the search:
Open another Windows dialogue box with Browse
Step 5
From the Browse for Folder box, select the subdirectory \Drivers, which is located in the installation directory
of your CamControl LITE software.
Confirm your selection with OK.
27769_02
297
CamControl PRO Software Manual
HeiTel by Xtralis
Step 6
The previously-selected subdirectory is now entered as the location.
Confirm your selection with Next >.
Step 7
If you receive a message regarding the Windows logo test, you can skip this test by selecting Continue
Anyway.
Step 8
This dialogue box provides information about the status of the driver installation.
Step 9
After the driver has been successfully installed, you will see this final dialogue box.
298
27769_02
HeiTel by Xtralis
CamControl PRO Software Manual
Complete the driver installation by selecting Finish.
8.9.1.4
Installation of the USB driver for SVR s series
The USB direct connection requires the installation of a driver for the respective USB interface. After installing
this driver, the configured interface corresponds to a network interface with a maximum transmission rate of
12 MBit/s.
If you use the USB direct connection with a CamDisc HNVR, you can obtain a maximum nominal transfer
rate of 480 MBit/s.
Please note that only devices are supported that are equipped with a modified front board (starting Nov. 2011).
This function can be used with the following devices if their firmware is of version 1.72 or later:
l
l
l
CamDisc HNVR 10 device (serial number: NV9xxxxx)
CamDisc SVR 4s and CamDisc SVR 10s device (serial number: WS1xxxxx and WV1xxxxx)
CamServer 1, CamServer 2c and CamServer 2 device (serial number: WBxxxxxx, WCxxxxxx and
WD1xxxxx)
The USB drivers for these devices can be found in the \Drivers subdirectory of CamControl LITE software as
of version 3.80:
l
l
l
PL2502NW_v20044.exe: Driver file for Windows 2000 and Windows XP
pl2502vista.exe: Driver file for Windows Vista
pl2501win732bit.exe: Driver file for Windows 7
Starting from firmware 2.04 or higher and CamControl PRO/LITE software v. 4.07 the driver
VideoGatewayPL2502.inf for Windows XP (32/64 Bit), Windows Vista (32/64 Bit), Windows 7 (32/64 Bit) and
Windows 8 (only 32 Bit) was added. The USB direct connection can be used with the following devices that
comply with the following serial numbers:
l
l
l
CamDisc HNVR 10 device (serial number: NV206xxx or higher)
CamDisc SVR 4s and CamDisc SVR 10s device (serial number: WS206xxx and WV206xxx or higher)
CamServer 2c and CamServer 2 device (serial number: WC211xxx and WD206xxx or higher)
Driver installation in Windows 8 and Windows 8.1
The USB driver for SVR s devices is essentially installed in Windows 8 and Windows 8.1 in the same way as
the installation described in chapter of VG series (page 301).
Driver installation in Windows 7
The USB driver for SVR s devices is essentially installed in Windows 7 in the same way as the installation
described in chapter of VG series (page 301).
27769_02
299
CamControl PRO Software Manual
HeiTel by Xtralis
Driver installation in Windows Vista
Depended from firmware and software version you are requested to install an USB driver after having plugged
in the USB cable. Follow the instructions in the same way as the installation described in chapter of SVR
series (page 295).
Starting from firmware version 2.04 or higher please open the \Drivers subdirectory in the program directory of
your CamControl LITE/PRO software. Run the file pl2502vista.exe to install the USB driver. Follow the
instructions.
A reconnection of the USB cable might be necessary after having run the driver installation manually.
Driver installation in Windows XP
Depended from firmware and software version you are requested to install an USB driver after having plugged
in the USB cable. Follow the instructions in the same way as the installation described in chapter of SVR
series (page 295).
Starting from firmware version 2.04 or higher please open the \Drivers subdirectory in the program directory of
your CamControl LITE/PRO software. Run the file PL2502NW_v20044.exe to install the USB driver. Follow
the instructions.
8.9.2
Installation of the USB driver for CamDisc HNVR, CamServer 1,
CamServer 2, CamServer 2c, CamDisc SVR 4s and CamDisc SVR
10s
The USB direct connection (see “USB” on page 82) requires the installation of a driver for the respective USB
interface. After installing this driver, the configured interface corresponds to a network interface with a
maximum transmission rate of 12 MBit/s.
If you use the USB direct connection with a CamDisc HNVR, you can obtain a maximum nominal transfer
rate of 480 MBit/s.
Standard settings for the USB direct connection
The USB direct connection is made available in the first position upon activation in the transmitter list in the
CamControl PRO software. The default data for this transmitter data is as follows and should not be changed:
l
l
Transmitter name: USB direct connection
IP address and port: 192.168.138.95:3000
Note:
This connection data should not be changed! If necessary, enter a further transmitter entry for a
USB-connection (see “Additional USB connection” on page 295).
USB cable
Only use a certified USB 2.0 hi-speed cable to connect to the transmitter. The cable should not be longer than
two metres.
Limitations concerning the USB direct connection
This function can also be used with the following devices if their firmware is of version 1.72 or later and these
devices were produced from 2009 onwards:
l
l
l
CamDisc HNVR 10 devices
(serial numbers: NV9xxxxx)
CamDisc SVR 4s and CamDisc SVR 10s devices
(serial numbers: WS9xxxxx and WV9xxxxx)
CamServer 1, CamServer 2c and CamServer 2 devices
(serial numbers: WBxxxxxx, WCxxxxxx and WD9xxxxx)
300
27769_02
HeiTel by Xtralis
CamControl PRO Software Manual
The USB drivers for these devices can be found in the \Drivers subdirectory of CamControl PRO software as
of version 3.80:
l
l
l
PL2502NW_v20044.exe: Driver file for Windows 2000 and Windows XP
pl2502vista.exe: Driver file for Windows Vista
pl2501win732bit.exe: Driver file for Windows 7
8.9.2.1
Driver Installation in Windows XP
Open the \Drivers subdirectory in the program directory of your CamControl PRO software. Run the file
PL2502NW_v20044.exe to install the USB driver. Follow the instructions. Accessing the program again will
start the deinstallation process.
8.9.2.2
Driver installation in Windows Vista
Open the \Drivers subdirectory in the program directory of your CamControl PRO software. Run the file
pl2502vista.exe to install the USB driver. Follow the instructions.
8.9.2.3
Driver Installation in Windows 7
For the video systems CamDisc HNVR 10, CamDisc SVR 4s, CamDisc SVR 10s, CamServer 1,
CamServer 2 and CamServer 2c, no valid Windows 7 driver is available.
Open the \Drivers subdirectory in the program directory of your CamControl PRO software. Run the file
pl2502win732bit.exe to install the USB driver. Follow the instructions.
8.9.3
Installing the USB driver for the VG-series
The USB direct connection requires the installation of a driver for the respective USB interface. After installing
this driver, the configured interface corresponds to a network interface with a maximum transmission rate of
12 MBit/s.
The USB direct connection rate with a CamDisc VG HNVR, offers a maximum nominal transfer rate of 480
MBit/s.
This function can be used with the following devices of VG series with firmware version 4.02 or higher.
l
l
l
l
l
l
CamDisc VG HNVR (serial number: VNxxxxx)
CamDisc VG 2s, CamDisc VG 4s and CamDisc VG 10s (serial number: STxxxxxx, SFxxxxxx und
SXxxxxxx)
CamDisc VG 4 and CamDisc VG 10 (serial number: VFxxxxxx und VXxxxxxx)
CamServer VG 2c/4c and CamDisc VG 2c/4c (serial number: CCxxxxxx und DCxxxxxx)
CamTel VG 4 and CamTel VG 10 (serial number: CFxxxxxx und CXxxxxxx)
Cam4mobile VG 2c/4c, Cam4mobile VG 4 and Cam4mobile VG 10s (serial number: MCxxxxxx,
MFxxxxxx and MXxxxxxx)
Driver installation in Windows 8 and Windows 8.1
Step 1
Turn on the (VG) device (also applies to SVR/SVR s/HNVR devices) and plug the USB cable in the front
connector of the device. Plug the other side of the USB cable into the USB port of the computer.
Step 2
Got to the “Device Manager” (you can find it in the “Control Panel” → “System” → “Device Manager”) and
select in section “Other devices” the node “RNDIS/Ethernet Gadget” or “Ethernet/USB RNDIS (depends on
the connected HeiTel device).
27769_02
301
CamControl PRO Software Manual
HeiTel by Xtralis
Step 3
Click with the right mouse button on the selected device and select Update Driver Software… from the popup
menu
Step 4
A new dialogue appears. Select “Browse my computer for driver software”
Step 5
Select “Let me pick from a list of device drivers on my computer” on the next dialogue.
302
27769_02
HeiTel by Xtralis
CamControl PRO Software Manual
Step 6
Select “Network adapters” in the device list of the next dialogue.
Step 7
Select “Microsoft” in the Manufacturer list and as Network Adapter “Remote NDIS Compatible Device”.
27769_02
303
CamControl PRO Software Manual
HeiTel by Xtralis
Step 8
Press “Yes” on the following dialogue.
After successful installation of the driver one can now build up a connection via USB to the HeiTel device.
304
27769_02
HeiTel by Xtralis
CamControl PRO Software Manual
Driver installation in Windows 7
Step 1
Before you connect one of the appropriate HeiTel devices with a USB interface of your receiver PC, please
install CamControl LITE/PRO software version 4.07 or higher.
Step 2
Switch on your (VG) device (also applies to SVR/SVR s/HNVR devices) and wait until the device is started
completely. Plug the USB cable in the front connector of the device and the other side into the USB port of the
computer (only after you have switched the PC on).
Windows 7 tires to install the driver for Ethernet/USB RNDIS automatically. If there was no previous driver
installation done or the driver was uninstalled a corresponding driver error message appears.
Step 3
Got to the “Device Manager” (you can find it in the “Control Panel” → “System” → “Device Manager”) and
select in section “Other devices” the node “RNDIS/Ethernet Gadget” or “Ethernet/USB RNDIS (depends on
the connected HeiTel device).
Click with the right mouse button on the selected device and select Update Driver Software… from the popup
menu
Step 4
A new dialogue appears. Select “Browse my computer for driver software”
27769_02
305
CamControl PRO Software Manual
HeiTel by Xtralis
Step 5
Select “Browse…“ and select the subdirectory \Drivers, which is located in the installation directory of your
CamControl LITE software.
The previously-selected subdirectory is now entered as the location. Confirm your selection with Next >.
Step 6
This dialogue box provides information about the status of the driver installation.
306
27769_02
HeiTel by Xtralis
CamControl PRO Software Manual
If you receive a message regarding the Windows logo test, you can skip this by selecting Continue Anyway.
Step 7
After the driver has been successfully installed, you will see a final dialogue box. Complete the driver
installation by selecting Finish.
27769_02
307
CamControl PRO Software Manual
HeiTel by Xtralis
Driver installation in Windows Vista
Depended from firmware and software version you are requested to install an USB driver after having plugged
in the USB cable. Follow the instructions in the same way as the installation described in chapter of SVR
series (page 295).
Starting from firmware version 2.04 or higher please open the \Drivers subdirectory in the program directory of
your CamControl LITE/PRO software. Run the file pl2502vista.exe to install the USB driver. Follow the
instructions.
A reconnection of the USB cable might be necessary after having run the driver installation manually.
Driver installation in Windows XP
The USB driver for VG devices is essentially installed in Windows XP in the same way as the installation
described in chapter of SVR series (page 295).
8.9.3.1
Troubleshooting
It may happen that no USB connection can be established. This can have several causes. Therefore, check
your CamControl LITE/PRO software and firmware version to ensure that your device meets the
requirements of the USB connection.
Due to the fact that there is a network adapter installed in the USB connection, it happens that your PC has
problems to initialize a network adapter properly. In these cases it is recommended checking the Device
Manager to see if the "RNDIS / Ethernet Gadget" or "Ethernet / USB RNDIS" device is installed correctly. If
your device can be found under "Other devices" a new driver installation should be done. Follow the
instructions depending on your operating system which is described in this document and update the driver by
manual allocation of the USB driver in \Drivers subdirectory of CamControl LITE/PRO or by the included
drivers of your operating system
If necessary run the installation of the USB driver manually (again). The drivers can be found in \Drivers
subdirectory of your CamControl LITE/PRO software.
Note the order of the connection setup. It is recommended turning off the device and disconnecting the USB
cable. Turn the unit back on. After successful device startup (about 2 minutes) plug in the USB cable first to
the USB jack on the HeiTel device (printer interface). Then connect the other end to the USB port of your PC
and follow the installation instructions. If necessary a new manual driver installation is needed.
If necessary use another USB port of your computer. Note that a new USB driver installation may be required.
In some cases, it is recommended rebooting the PC. During the restart make sure that the USB cable is not
plugged in. Only after a complete restart the USB cable should be reconnected again.
If you are still experiencing problems with the USB connection is recommended using the network interface
(default IP address 192.168.31.95) to establish a connection to the device. Consult also the CamControl
LITE/ PRO manual to get more information.
8.10 Additional software GPS Data Viewer
8.10.1 Installation of the GPS Data Viewer
If, with the installed CamControl PRO software, you want to use the additional control elements from the GPS
window (see “Extended GPS (Live) window” on page 31), please install the GPS Data Viewer. During the
installation, you can choose whether to use Google Earth or OpenStreetMap to represent the position data on
the map.
Note:
308
Starting from April 2012, the GPS Data Viewer V1.2, which is included in the scope of the Software
delivery starting from CamControl PRO V3.85, will no longer provide a map view when using
OpenStreetMap. This is due to changes in the map structure. Version 1.3 of the GPS Data Viewer,
which is supplied with CamControl PRO V4.12, will fix this problem.
27769_02
HeiTel by Xtralis
CamControl PRO Software Manual
Installation
You can find a corresponding installation program for this selection in the subdirectory \Install_
GPSDataViewer of the CamControl PRO software starting with Version 3.85:
1. Find the subdirectory Install_GPSDataViewer and open it.
2. Start the program GpsDataViewerSetup.exe. The installation will take place exclusively in English. With
Next, you can continue the installation, with Back you can jump back one dialogue box, and with Cancel
you can cancel the procedure.
3. Select the target directory for the installation of GPS Data Viewer. To do this, it is mandatory that you
install this additional software in the program directory of your CamControl PRO software. Please verify
the suggested program directory and if necessary, correct the path by using the function Browse.
4. Select the display mode for the GPS Data Viewer:
l
Google Earth
l
Open Street Map
27769_02
309
CamControl PRO Software Manual
HeiTel by Xtralis
5. Before beginning installation of the files, you will be shown a summary of the previously selected options.
Select Install to start the copy process.
6. This dialogue box will inform you when the copy process ends. End the installation by selecting Finish.
8.10.1.1
Additional information regarding Google Earth
If you chose Google Earth as the map representation during the installation procedure described above, it is
mandatory that you install the Google Earth application on your CamControl PRO PC.
Note:
310
The licence terms and conditions of use for Google Earth. Please consult the relevant software
documentation.
27769_02
HeiTel by Xtralis
CamControl PRO Software Manual
Possible display problems
The Google Earth application accesses data on the Internet and hence requires an Internet connection. If
display problems occur, check the internet connection and the availability of the Google Earth servers.
8.10.1.2
Additional information regarding OpenStreetMap
If you chose OpenStreetMap as the map representation during the installation procedure, the display will take
place in a separate program window with the label GPS Data Viewer, which can be closed, if necessary,
together with the CamControl PRO software.
Note:
The licence terms and conditions of use for OpenStreetMap. Please consult the relevant software
documentation.
Possible display problems
The OpenStreetMap application accesses data on the Internet and hence requires an Internet connection. If
display problems occur, check the internet connection and the availability of the following servers:
l
l
www.openstreetmap.org
www.openlayers.org
General notes on the OpenStreetMap project
l
l
l
OpenStreetMap is a project with the goal of creating a free map of the world. Volunteers collect or
discover geo information with, for example, a GPS device by walking or driving through the "white areas"
on the existing OpenStreetMap map. This process is called mapping or cartographising. In prepared form,
these collected raw data result in material for maps.
Based on this volunteer collaboration, the degree of geoinformation coverage varies widely around the
world. It ranges according to region from very detailed to not yet covered.
The collection of data is constantly being expanded.
8.10.2 Uninstallation of the GPS Data Viewer
The GPS Data Viewer software can be uninstalled via two different methods.
8.10.2.1
Uninstallation via the Control Panel
l
By selecting Start Menu/Control Panel/Add and Remove Programs, you will get an overview of the
installed software.
Select the GPS Data Viewer software.
l
If necessary, check the Support Information to verify that the desired installation has been selected.
Under Support Information, the installation path to the GPS Data Viewer software will be displayed.
Click on the Remove button.
l
After confirming the security question with Yes, the software will be uninstalled.
l
l
l
This dialogue box will inform you when the uninstallation process ends. End the uninstallation by
selecting OK.
Note:
27769_02
In the case of multiple installations on a computer (e.g.: CamControl LITE, CamControl PRO and
CamControl PLAYER, each with GPS Data Viewer) the most recently installed GPS Data Viewer
software can only be uninstalled once. For further uninstallations, the following procedure must be
used.
311
CamControl PRO Software Manual
8.10.2.2
l
l
l
l
HeiTel by Xtralis
Uninstallation via direct call to the file unins00*.exe
In the program directory of your CamControl PRO software, locate the uninstallation files unins00*.exe.
Here, * serves as a placeholder for a digit from 0 to 9.
l
unins000.exe: This uninstallation routine is associated with the main application (here: CamControl
PRO).
l
unins001.exe: This uninstallation routine is associated with the first additional application (here
generally: GPS Data Viewer).
Select the uninstallation routine for GPS Data Viewer software and start the program.
l
Check the window title for the following security question. The title should read GPS Data Viewer
Uninstall.
After confirming the security question with Yes, the software will be uninstalled.
This dialogue box will inform you when the uninstallation process ends. End the uninstallation by
selecting OK.
8.11 Specification of the control inputs
Besides the conventional wiring of the following control inputs as “normally closed contact” and “normally
open contact”, CamServer 2c and the video systems of the VG series also support the voltage-monitored
circuit variants “resistance monitoring (10k)” and the BS 8418 compliant “normally closed contact”.
Standard switching for control inputs
The CamDisc VG 4c has a number of control inputs (Al a/d, Control in1, Control in2, Aux in). However these
inputs are not galvanically isolated from the operating voltage of the device.
Depending on the configuration, these can be activated by "Normally closed" or "Normally opened" contacts.
Note:
The control inputs must always be activated such that they are potential-free.
Input circuits of control inputs
312
27769_02
HeiTel by Xtralis
CamControl PRO Software Manual
Wiring variants for voltage-monitored control inputs
In addition to standard wiring of control inputs, the related Video Gateways permit different types of voltage
monitoring.
Normally terminated (10k)
The wiring variant Normally terminated (10k) allows different circuitry for "Normally opened" and "Normally
closed".
R=10 kΩ
Control input
R=10 kΩ
Normally opened
Control input
Normally closed
For circuitry with a resistance, a distinction is made between two different states:
l
l
Not triggered: The figures show the safe state in each case (not triggered) of the detector line or the
control input for the variants "Normally opened" and "Normally closed".
Camera alarm: If the "Normally opened" or "Normally closed" contact is operated, depending on the type
of circuit, a camera alarm is activated. Manipulations of the detector line such as interruption or short
circuit cause triggering as soon as the CamDisc VG 4c no longer measures the predefined control
resistance of 10 kOhm (±40%).
Normally closed BS 8418
RL
RT
Control input
RL=RT=1,5 kΩ (±1%)
In the wiring variant Normally closed BS 8418 with two resistances a distinction is made between three
different states:
l
l
l
Not triggered: The figure shows the safe state (not triggered) of the detector line or the control input.
Camera alarm: If the "Normally closed" contact is operated, a camera alarm is activated.
Sabotage alarm: If the detector line is interrupted or shorted, a sabotage alarm is activated.
27769_02
313
CamControl PRO Software Manual
HeiTel by Xtralis
This page is intentionally left blank.
314
27769_02
HeiTel by Xtralis
9
CamControl PRO Software Manual
Troubleshooting
The following chapters should allow you to be able to determine the reasons for a fault or error and to
independently arrive at a solution. The individual chapters are structured systematically by theme. Text
passages should only be skipped when they contain a reference to additional information.
9.1
Installation problems
Type of Error / Fault
Possible Causes
Remedy
The computer crashes or Another active program
Windows error messages prevents installation.
are shown.
Close all running programs
(including virus scanners) before
installing.
The installation program
reports an error.
1. Use the original installation
CD.
2. Download latest program
version from our website
(Category
Service/Downloads)
Installation CD is
defective.
9.2
Operating CamControl PRO
9.2.1
Video Frame Transmission
Error in the Screen Display
27769_02
Error / Fault
Possible Causes
Remedy
Colours are shown with
errors (disturbance to the
right of the logo).
Defective or incorrect
graphics adapter.
Use a new or updated driver or try
another colour palette: 16 bit, 24
bit or 32 bit at a resolution of
1024x768.
Screen logo is shown
incorrectly.
Incorrect screen settings. Change the screen settings:
Resolution 1024x768, 16 bit.
Pictures in archive are
faulty.
Missing or incorrect
graphics driver.
1. Select a smaller screen
resolution (1024x768).
2. Select another colour palette.
3. Use another screen driver.
Pictures are shown with
faulty, gaudy pixels
Missing or incorrect
graphics driver.
Select a smaller screen resolution
(1024x768).
315
CamControl PRO Software Manual
HeiTel by Xtralis
Remote Module: Pan-and-Tilt Systems, Relay 16
Error / Fault
Possible Causes
Remedy
No operating window
appears in the software
1. Control file R01 is
missing
2. Control file R01 has
been named
incorrectly
3. Control file R01 has
been copied to the
wrong directory
1. Check the serial number of
the transmitter and name the
R01 control file after the serial
number of the transmitter.
2. Check the MS-DOS name of
the file (mark using Windows
Explorer, right click with
mouse button, properties)
xx123456.r01?
3. Check whether the control file
is stored in the receiver
software directory.
The remote system does
not function although the
software displays the
operating window
1. Information
1. Check whether the correct
contained in R01 file
R01 file for the remote
is incorrect
system is being used.
2. Incorrect or defective 2. Check the R01 entries: Has
connection cable
the assignment been made to
from video
the correct camera? Are the
transmitter to remote
addresses in the file and the
module or from
remote hardware correct?
remote module to
system
Archiving (storing) Pictures at the Receiver End (PC)
Error / Fault
Possible Causes
Remedy
Receiver archive does not 1. Archive has not been 1. Activate the archive in the
record any pictures.
stored
receiver setup.
2. Hard disk is full;
2. Make sure that there is
archive file can not
sufficient free hard disk
be created
space.
Live pictures are recorded
but not archive pictures
from the frame storage
unit.
Frame storage archive
(online) has not been
played back using the
Play button.
No pictures are shown
after the archive is called
up in the CamControl
PRO Software
Incorrect archive file has Select the correct archive file or
been selected or there are start picture transmission.
not yet any pictures in
memory.
The Play button (double
Transmission fault
arrow) for transmitting
pictures from the
transmitter archive to the
receiver archive has been
pressed, but transmission
only lasts for a short time.
316
Reselect the frame storage unit
and play the required sequences
using the Play button (double
arrow).
The Play button must be repressed. The software does not
carry out any fault correction.
27769_02
HeiTel by Xtralis
9.3
CamControl PRO Software Manual
Evaluating Contents of CamDisc SVR, Cam4mobile and
CamServer
General
Error / Fault
Possible Causes
Remedy
Device can not even be
addressed using the null
modem cable.
1. The very first time
1. Allow the device to run for 15
the system is
minutes and then re-attempt
switched on, the hard
to connect.
2. Carry out a hardware reset
disk is initialised.
(see product guide).
This procedure can
take up to 15
minutes, and during
this time the disk can
not be addressed.
2. Incorrect baud rate
Archiving Pictures onto the Hard Disk at the Transmitter
Error / Fault
Possible Causes
Frame storage unit is
Frame storage unit has
entirely full; too many
been switched off during
pictures for the hard disk. initialisation, e.g. when a
new hard disk is first put
into operation.
9.4
Remedy
Check the archive settings in the
frame storage unit. Has the
required recording method been
set? Has the memory been
accidentally divided into rings?
No null modem connection possible
You can only establish a connection between the transmitter and receiver systems using the original null
modem cable (recognisable by the orange-red sticker on the cable). Commercially available null modem
cables can not be used. The pin assignment for the null modem cable is specified in the manual of the
appropriate transmitter.
9.4.1
Troubleshooting for Direct Connections
Error / Fault at Receiver Possible Causes at PC Remedy
(PC)
Receiver
The transmitter list
appears after the Dial
button is pressed.
27769_02
1. The null modem
1. Receiver settings Port A (to
cable has not yet
D): Deactivate TCP/IP and
been recognised by
set Mode to normal. Select
the program
the correct COM port under
2. Incorrect receiver
Port.
modem settings
2. Check the null modem cable.
3. Incorrect or defective
The transmitter list must not
null modem cable.
appear (when the Dial button
4. Incorrect or defective
is pressed) when the null
COM port
modem cable is connected,
unless TCP/IP is activated.
3. Test the COM port with
another device and program
(e.g. mouse or modem and
Hyper Terminal).
317
CamControl PRO Software Manual
HeiTel by Xtralis
Error / Fault at Receiver Possible Causes at PC Remedy
(PC)
Receiver
The Connection Status
1. Incorrect baud rate
1. Receiver settings Port A (to
2.
Incorrect
or
defective
dialogue box appears, but
D): Set Mode to normal.
null modem cable.
setup is not loaded.
For CamDisc SVR and
3. Transmitter is
CamTel SVR devices enter a
switched off, not in
baud rate of 115200; the
factory setting or
device detects the baud rate
defective.
automatically (auto baud rate
4. Null modem is
detection).
connected when
Check the transmitter (use
device is switched on
the transmitter manual).
2. Test the COM port with
another device and program
(e.g. mouse or modem and
Hyper Terminal).
3. Switch the transmitter off for
a short period and switch it
back on after connecting all
cables correctly.
When connecting devices 1. Hard disk can not be
with a hard disk, the
addressed.
2. Hard disk is not
Connection Status
entirely formatted;
dialogue box appears;
device has been
Setup or Setup HDD is
switched off too
not fully loaded. After
soon.
connection is established,
the hard drive archive can
not be read out
9.5
1. Remove the hard disk from
the unit when switched off;
check and/or clean the
contact strip of the removable
frame.
2. Test the hard disk in the PC
using Scandisk (thorough
surface test, untick
"Automatically fix errors").
No remote transmission possible
Troubleshooting for problems arising during remote communications via telephone and computer networks is
divided into several thematic sections that you should read through systematically. The errors/faults are
categorised in the individual sections according to the various methods of data transmission.
No Remote Transmission possible
Error Causes at PC Receiver
Outgoing Call
(Step 1)
Analogue
ISDN
TCP/IP
Error Causes at Transmitter
Incoming Call
(Step 3)
Analogue
ISDN
TCP/IP
Incoming Call
(Step 2)
Analogue
ISDN
TCP/IP
Outgoing Call
(Step 4)
Analogue
ISDN
TCP/IP
First try to narrow down the error. Aided by the following steps, check which function can not be correctly
executed by your system:
Step 1
The receiver can neither call your own transmitter, nor another transmitter (demo transmitter).
Consult: (see “No remote transmission possible” on page 318).
Step 2
The receiver can call other transmitters (e.g. demo transmitter) but can not establish a
connection to your own transmitter. Consult: (see “Error at Transmitter: Incoming Call (Step
2)” on page 324).
Step 3
The receiver can establish a connection but can not accept incoming calls. Consult: (see
“Error at Receiver PC: Incoming Call (Step 3)” on page 322).
318
27769_02
HeiTel by Xtralis
Step 4
CamControl PRO Software Manual
Your receiver can be called by other transmitters, but can not be called by your own
transmitter (alarmed). Consult: (see “Error at Transmitter: Outgoing Call (Step 4)” on page
327).
Steps 1 to 4 each refer to a chapter that can be consulted for troubleshooting when an error or fault occurs. If
the error/fault can not be assigned to one of the four possibilities listed above then begin with the reference in
Step 1.
9.5.1
Error at Receiver PC: Outgoing Call (Step 1)
If you can not dial your transmitter then you should first test your receiver by selecting a known working
transmitter. Your dealer should be able to name you an appropriate transmitter (demo transmitter). If you are
able to establish a connection to a demo transmitter then the error may be in your transmitter (see “Error at
Transmitter: Incoming Call (Step 2)” on page 324). Check correct functioning of your transmitter by having
your dealer call your transmitter.
Testing the Null Modem Connection
If you have access to a transmitter with an external V.24 interface, then you can begin by testing your
transmitter with a null modem connection to your PC (see “No null modem connection possible” on page 317).
In this way, you can make sure that the transmitter is functioning correctly (without modem).
Testing the Data Transmission Equipment
If you have experience in using data transmission equipment and PC applications, then we recommend that
you first test the data transmission device connected to your PC using standard Windows software (e.g.:
Hyper Terminal for modems or Telnet for TCP/IP networks). You should test your ISDN card using the
application software that came with the card.
Observe Display on Modem
Data transmission between the PC and the modem/ISDN-TA, as well as the connection status, are often
signalised by an LED display on the modem/ISDN-TA. Monitor programs are often delivered for internal ISDN
cards; these programs show the status of the CAPI interface. When operating, please observe these displays
- they can be very helpful in locating the problem.
When using an internal ISDN card, please use a fossil driver, which makes the ISDN resources available as
virtual COM interfaces.
General Errors/Faults
27769_02
Error/Fault at the
Receiver (PC)
Possible Causes at PC Remedy
Receiver
Initialise modem
message freezes for 1520 seconds and is
terminated with an error
message
1. Modem / ISDN-TA is
not switched on
2. Modem / ISDN-TA is
defective or incorrect
Firmware
3. Initialisation string is
not accepted by the
Modem / ISDN-TA
4. COM port is
defective
5. Incorrect or defective
V.24 cable
1. Switch on the modem /
ISDN-TA.
2. Replace the modem / ISDNTA or carry out an update.
3. Check the commands in the
init string.
4. Test the COM port with
another device and program
(e.g. mouse or modem and
Hyper Terminal).
5. Replace the cable.
319
CamControl PRO Software Manual
HeiTel by Xtralis
Error/Fault at the
Receiver (PC)
Possible Causes at PC Remedy
Receiver
Transmitter list does not
appear
1. Faulty receiver
setting
2. Null modem cable is
connected
Dial button is deactivated! Incorrect configuration
1. Receiver settings Port A (to
D):
Activate TCP/IP, depending
on the remote communication
device being used, or set the
Mode to normal.
2. Connect the modem / ISDNTA using the original model
cable.
1. Receiver settings Port A (to
D):
Activate TCP/IP, depending
on the remote communication
device being used, or set the
Mode to normal.
Errors / Faults sorted by Type of Transmission
No Remote Transmission possible
Error Causes at PC Receiver
Outgoing Call
(Step 1)
Analogue
ISDN
TCP/IP
Error Causes at Transmitter
Incoming Call
(Step 3)
Analogue
ISDN
TCP/IP
Incoming Call
(Step 2)
Analogue
ISDN
TCP/IP
Outgoing Call
(Step 4)
Analogue
ISDN
TCP/IP
Please read the section for your application or for the type of data transmission you are using:
Analogue
Operating an analogue dial modem at your PC, page 320
ISDN
ISDN card or external ISDN-TA, page 321
TCP/IP
Connection via local network cards, page 322
Analogue Telephone Network
After you have excluded general sources of error (see “General Errors/Faults” on page 319), and your PC is
obviously able to communicate with the connected modem.
Checking the Modem with a Telephone
Please check your analogue modem by dialling a mobile telephone or normal telephone as transmitter
telephone number. The telephone should ring and you should hear the carrier signal, just as with a fax
machine. Some of the following errors/faults can be excluded by making this check.
320
27769_02
HeiTel by Xtralis
CamControl PRO Software Manual
Error/Fault at the
Receiver (PC)
Possible Causes at PC Remedy
Receiver
No connection possible,
error message No
Dialtone (or even No
Carrier, depending on the
type of modem)
1. Tone dialling is not
1. Set the modem to pulse
supported
dialling (see modem manual,
2. Outside line required
AT commands).
(e.g. predial "0")
2. Correct the telephone number
3. Modem is set to
or the dial prefix to 1 or 2
"Wait for dial tone"
(e.g.: ATD0).
4. Defective connection 3. Add the ATX3 command to
or connection cable
the init string so your modem
does not wait for a dialling
tone.
4. Check the connection with a
telephone.
5. Replace the connection
cable.
Connect message, but
screen remains black;
connection is established
1. Incorrect modem
initialisation string
2. Other data device is
accepting the call
(e.g. fax).
3. Bad connection.
1. Enter the correct modem init
string in the receiver settings
(usually the factory setting).
2. Disconnect all other data
devices from the line.
3. Reduce the port speed, i.e. to
57600 from 115200.
(End of Step 1, analogue telephone network)
ISDN Network
After you have excluded general sources of error (see “General Errors/Faults” on page 319), your PC is
obviously able to communicate with the connected ISDN-TA or ISDN card.
Check ISDN
You should first test the ISDN connection, when possible with the application software for the ISDN device or
with a terminal program (see “Testing the Data Transmission Equipment” on page 319).
27769_02
Error/Fault at the
Receiver (PC)
Possible Causes at PC Remedy
Receiver
No connection possible,
not even to demo
transmitters; error
message No Dialtone (or
No Carrier, depending on
the type of TA used)
1. No ISDN MSN
available
2. Defective connection
or connection cable
(ISDN light at TA is
out or flashes)
3. No dial line available
or other ISDN
characteristics, such
as closed user group,
is set
1. Get an ISDN-MSN.
2. Check the ISDN cable
3. Check the connection using
an ISDN telephone.
4. Check the telephone number.
321
CamControl PRO Software Manual
HeiTel by Xtralis
Error/Fault at the
Receiver (PC)
Possible Causes at PC Remedy
Receiver
When operating an ISDN
telephone system, you
are not able to dial out but
incoming calls are
recognised.
1. Number for outside
line has not been
entered
2. PABX system has
not been configured
for data
3. Incompatibility
between the PABX
system and the
ISDN adapter
1. Check the telephone number.
2. Check the settings of the
PABX system.
3. Use the ISDN adapter with
another program (Hyper
Terminal, Fritz!Data) and
evaluate the error messages
4. Test the ISDN adapter at an
ISDN connection without
PABX system.
(End of step 1, ISDN network)
TCP/IP
Error/Fault at the
Receiver (PC)
Possible Causes at PC Remedy
Receiver
No network connection
possible
1. TCP/IP or subnet
mask computer
settings are not
correct
2. No IP address
entered at the PC
Check the network system
settings.
No connection, error
message 10060
PC is not connected to
the network
Test network access (e.g. at MSDOS prompt using the "ping
<TCP/IP address, e.g. of a
second registered network PC>".
If you receive an error message
(timeout) then your PC does not
have network access. Establish
the connection.
(End of Step 1, TCP/IP)
9.5.2
Error at Receiver PC: Incoming Call (Step 3)
This section deals with cases when CamControl PRO can call a transmitter and receive pictures, but can not
accept any alarm call from a transmitter. If your PC is also not able to call any transmitter then you should
consult the chapter specified in the following (see “Error at Receiver PC: Outgoing Call (Step 1)” on page 319).
No Remote Transmission possible
Error Causes at PC Receiver
Outgoing Call
(Step 1)
Analogue
ISDN
TCP/IP
Error Causes at Transmitter
Incoming Call
(Step 3)
Analogue
ISDN
TCP/IP
Incoming Call
(Step 2)
Analogue
ISDN
TCP/IP
Outgoing Call
(Step 4)
Analogue
ISDN
TCP/IP
Checklist
First check the following frequent sources of error:
l
l
l
Is call acceptance activated in the receiver settings? (see “Take a call” on page 78)
Is the correct telephone number of the receiver PC entered in the transmitter? (see “Phone and IP
numbers” on page 139)
Is the modem/ISDN-TA correctly configured? (see “Port A to Port D or Port 1 to Port 9” on page 87)
322
27769_02
HeiTel by Xtralis
l
CamControl PRO Software Manual
Are you attempting to make an alarm call via TCP/IP?
Please check the cabling; a Crosslink cable is used only for the direct connection between PC Receiver
and Transmitter.
Please read the section for your application or for the type of data transmission you are using:
Analogue
Operating an analogue dial modem at your PC, page 322
ISDN
ISDN card or external ISDN-TA, page 322
Analogue Telephone Networks
First check your analogue receiver modem by calling it from a mobile telephone or normal telephone. Some of
the following errors/faults can be excluded by making this check.
Error/Fault at the
Receiver (PC)
Possible Causes at PC Remedy
Receiver
Call is not accepted, even 1. Incorrect modem
from a telephone
initialisation
2. Incorrect receiver
settings
1. Check the modem init string
and when required, add the
AT command S0=0.
2. Check whether one of the two
options "automatic call
acceptance" or "automatic
operation" is ticked in the
Receiver Settings/Call
Acceptance box.
Call is accepted from a
Transmitter can not dial
telephone, alarm call from
transmitter is not received
At the transmitter end, during an
existing connection:
l
l
l
l
Enter the AT command X3 in
the modem init string.
Enter dial prefix 1 ATD.
Check the telephone number
entered: is a number required
for an outside line?
Make sure that your alarm
detector contact is not
continually connected.
CamDisc SVR and CamTel SVR:
l
l
Arm Your device if
necessary.
Test your alarm detector: the
camera button in CamControl
PRO is highlighted in red
when a camera alarm
detector input has been
triggered.
(End of Step 3, analogue telephone network)
ISDN Network
To check whether your receiver is not able to accept alarm calls via ISDN then you must first be able to call
your receiver from an ISDN data terminal (data service). If you call your receiver using a modem then the
receiver will only accept the call when a hybrid adapter is attached to it that is able to receive call from both
analogue as well as ISDN sources. In this case, you can also consult the instructions for analogue telephone
networks (see “Analogue Telephone Networks” on page 323).
27769_02
323
CamControl PRO Software Manual
HeiTel by Xtralis
Check using a Second Receiver Software
In order to exclude the transmitter as a possible source of error you should not check the call acceptance of
the receiver using the alarm function of a transmitter, unless you are sure that this transmitter is working
correctly. Instead of this, you can call your receiver PC using the CamControl PRO from a second PC. If the
receiver is reachable using this method (data is of course not transmitted in this case and the connection is
terminated after a short time) then the error may be with the transmitter. In this case, please continue with
Step 4 as follows (see “Error at Transmitter: Outgoing Call (Step 4)” on page 327).
Error/Fault at the
Receiver (PC)
Possible Causes at PC Remedy
Receiver
Alarm call is not received, 1. Incorrect modem
error at the receiver end.
initialisation.
2. Incorrect receiver
settings.
3. PABX system
requires an MSN.
4. Second data device
accepts the call at
the same S0 bus.
1. Check the modem init string
and add the AT command
S0=0 when required
2. Check whether the option
"automatic call acceptance"
or "automatic operation" is
ticked in the Receiver
Settings/Call Acceptance
box.
3. Allocate an MSN to the TA, if
the PABX system requires
one.
4. Make sure that all additional
data devices have been
allocated an MSN. To test
this, disconnect all other
devices at the receiver end.
(End of Step 3, ISDN network)
9.5.3
Error at Transmitter: Incoming Call (Step 2)
No Remote Transmission possible
Error Causes at PC Receiver
Outgoing Call
(Step 1)
Analogue
ISDN
TCP/IP
Error Causes at Transmitter
Incoming Call
(Step 3)
Analogue
ISDN
TCP/IP
Incoming Call
(Step 2)
Analogue
ISDN
TCP/IP
Outgoing Call
(Step 4)
Analogue
ISDN
TCP/IP
Please read the section for your application or for the type of data transmission you are using:
Analogue
Operating an analogue dial modem at your PC, page 324
ISDN
ISDN card or external ISDN-TA, page 324
TCP/IP
Connection via local network cards, page 324
324
27769_02
HeiTel by Xtralis
CamControl PRO Software Manual
Analogue Telephone Networks
Error/Fault at the
Receiver (PC)
Possible Causes at PC Remedy
Receiver
No connection: Modem
synchronisation noises,
followed by dropped line,
No Carrier
1. Bad connection,
contact problems or
bad line
2. Incorrect modem
configuration
3. Defective modem
cable
4. Other device (fax)
accepts the call
1. Check the telephone
connection cable, contacts
and modem cable at the
transmitter.
2. Switch off the modem and
transmitter for a short time,
and then back on, (switch
modem back on first).
3. Check the modem init string
at the transmitter, add S0=0.
4. Reduce the port speed at the
receiver modem.
5. Reset the transmitter to the
factory settings; then enter
the special modem init string
for the modem being used.
6. Disconnect other devices or
use a modem switch.
Connect message
followed by Cancel
1. Incorrect modem
configuration
2. Defect at the modem
cable or bad plug
connections
3. Incompatible modem
1. Check the subscriber’s line
and modem cable.
2. Check the modem init string.
3. Reduce the port speed at the
receiver modem.
4. Test another type of modem.
No connection possible
Port speed at the
transmitter has
incorrectly been set to
230400 baud
1. Reset the device to the
factory settings.
2. Using the null modem
connection, set the port
speed to 115200 baud.
(End of Step 2, analogue telephone network)
ISDN Networks
Before installing the system, inform yourself thoroughly regarding the ISDN connection:
l
l
Which MSN has been assigned for the picture transmission system (if applicable)?
Have all connected data devices been assigned an MSN?
If the transmitter is operated at a PABX system, find out about any peculiarities involved in connecting data
devices:
l
l
l
Does the device demand the use of an MSN?
Must the branch-line be released for data communication?
Does the system have any other peculiarities?
27769_02
325
CamControl PRO Software Manual
HeiTel by Xtralis
Using special commands, many ISDN-TA’s provide you with the opportunity of obtaining exact information
regarding aborted dial attempts (see TA manual); you should also evaluate this information when available.
Error/Fault at the
Receiver (PC)
Possible Causes at PC Remedy
Receiver
No connection, No Carrier 1. Incorrect and/or
defective ISDN or
V24 cable
2. Incorrect TA
configuration
3. TA not set to EuroISDN DSS1
4. Incorrect MSN
entered in TA
5. Port speed at the
transmitter has
incorrectly been set
to 230400 baud
6. TA defective or
incorrect Firmware
7. PABX system not
configured for data
services
8. Incompatibility
between the PABX
system and the
ISDN adapter
1. Check the ISDN connection
cable, contacts and the V24
cable. Does the TA signalise
the presence of an ISDN
line?
2. Switch off the modem and
transmitter for a short time,
and then back on (switch
modem back on first).
3. Check the modem init string
at the transmitter, add S0=0,
and set the port speed to
115200 baud.
4. Enter the correct MSN.
5. Reset the transmitter to the
factory settings; then enter
the special modem init string
for the modem being used.
6. Set the TA to Euro-ISDN
(DSS1).
7. Replace the TA or have the
TA updated.
8. Check the settings of the
PABX system.
9. Test the ISDN adapter at an
ISDN connection without a
PABX system.
No connection, No
Answer
1. Device is not
connected to the S0bus
2. Incorrect telephone
number
3. PABX system does
not accept the
transmitter
1. Check the ISDN connection,
cable and transmitter.
2. Use the correct telephone
number.
3. Assign an MSN and enter this
in the system.
Connect message, black
screen, No Carrier
1. Call has been
accepted by another
data device
2. Incorrect protocol is
set at the TA
1. Assign MSNs to all other data
devices or disconnect these
to test the S0-bus.
2. Check the modem init string.
(End of Step 2, ISDN network)
326
27769_02
HeiTel by Xtralis
CamControl PRO Software Manual
TCP/IP
Error/Fault at the
Receiver (PC)
Possible Causes at PC Remedy
Receiver
Error message
Terminal server is not
Test network access (using
CamControl PRO: 10060 connected to the network Telnet or, at MSDOS prompt,
using the command "ping
<TCP/IP address Transmitter>".
Establish the connection.
(End of Step 2, TCP/IP)
9.5.4
Error at Transmitter: Outgoing Call (Step 4)
This chapter contains help and instructions in case your transmitter can not call your receiver. You should first
have checked that your transmitter can be called by the receiver, and that your receiver can be called by
another transmitter.
No Remote Transmission possible
Error Causes at PC Receiver
Outgoing Call
(Step 1)
Analogue
ISDN
TCP/IP
Error Causes at Transmitter
Incoming Call
(Step 3)
Analogue
ISDN
TCP/IP
Incoming Call
(Step 2)
Analogue
ISDN
TCP/IP
Outgoing Call
(Step 4)
Analogue
ISDN
TCP/IP
Analogue Telephone Networks
Please first check your analogue modem at the receiver by calling the receiver with a mobile telephone or a
normal telephone. Some of the following errors/faults can be excluded by making this check.
Error/Fault at the
Receiver (PC)
Possible Causes at PC Remedy
Receiver
Call is accepted by
telephone; alarm call is
not received by
transmitter
1. Transmitter is set to
"Waiting for outside
line"
2. PABX system
requires a number for
outside line
3. Alarm contact is
continually closed
4. SVR device is not
armed on or alarm
contacts are not set
to Connect.
At the transmitter end, and during
picture transmission:
1. Enter the AT command X3 in
the modem init string.
2. Enter the dial prefix1 ATD
3. Check the entered telephone
number: is a number required
for the outside line?
4. Make sure that the alarm
detector contact is not
continually connected.
5. SVR devices:
l
Arm Your device if
necessary.
l
Set the alarm detector
contact to Connect
l
Test your alarm detector:
the camera button in
CamControl PRO is
highlighted in red when a
camera alarm detector
input has been triggered.
(End of Step 4, analogue telephone network)
27769_02
327
CamControl PRO Software Manual
HeiTel by Xtralis
ISDN Networks
Please check your ISDN-TA at the receiver end by calling the TA from a second PC and a terminal program.
The receiver program must be started for this test and call acceptance must have been activated.
Error/Fault at the
Receiver (PC)
Possible Causes at PC Remedy
Receiver
Alarm call is not received, 1. PABX system
error at the transmitter
requires an MSN
2. PABX system
end
requires a number for
an outside line
3. Alarm contact is
continually closed
4. SVR device is not
armed on or alarm
contacts are not set
to Connect.
At the transmitter end, and during
picture transmission:
1. Enter the dial prefix 1 as
ATD.
2. Assign an MSN to the
transmitter
3. Check the entered telephone
number: is a number required
for the outside line?
4. Make sure that the alarm
detector contact is not
continually connected.
5. SVRdevices:
l
Arm Your device if
necessary.
l
Set the alarm detector
contact to Connect
l
Test your alarm detector:
the camera button in
CamControl PRO is
highlighted in red when a
camera alarm detector
input has been triggered.
(End of Step 4, ISDN network)
328
27769_02
HeiTel by Xtralis
CamControl PRO Software Manual
10 Software Licence Contract
Please read all of this software licence contract carefully. It stipulates the legal regulations by which you are
allowed to use the software package that you have purchased. The term "software package" comprises
software products including updates, epigrams, changed versions, additions or copies as well as printed
material and online or electronic accompanying materials. This licence contract is not a contract of purchase.
The copy of the software product contained in this package (as defined below) and all other copies that you
are entitled to make within the scope of this contract, remain the property of HeiTel (referred to in the following
as the licensor). By installing this software product, you agree to the regulations set forth in this contract. If
you do not agree to this contract then you are not entitled to install or to use the software product. However,
you may return the product to the dealer from which you have purchased it for a full refund.
Use of the Software
1.1
Excepting §3.2, the licensor grants the purchaser the non-transferable and non-exclusive right to use
the enclosed software product within the scope of the following conditions for his exclusive use only.
1.2
The permission to use this software product is limited to its use at a single computer workstation,
irrespective of whether this is a PC workstation within a network or any other multistation computer
system or whether this is a single workstation that is not connected to other computer workstations. If
the software product is to be used at more than one computer workstation then you must either
purchase the appropriate number of licences as full individual software versions or a multi-user
licence (right to copy the software or purchase of additional original data media and/or manuals) which
then permits the purchaser additional rights to multiple use of the software.
1.3
The permission to use the software on single, non-networked PC workstations includes the right to
install the delivered software from the original data media onto the mass storage of the hardware
used, as well as the right to load the program into its working memory.
1.4
When using the software within a network or on any other multi-station computer system, this
permission of use includes the right to install the purchased software once onto the mass storage and
to load it into the working memory of a connected computer. Use of the software within a network or
any other multi-station computer system is not authorized if this allows the software to be used at a
number of computer workstations that exceeds the number for which the licence has been purchased.
A licence for the software product may not thereby be divided or simultaneously used at several
computer workstations. The customer must take measures in the form of access protection
mechanisms to ensure that multiple use of the software does not exceed the number of purchased
licences, or that by multiple use of the software, additional licences are purchased.
1.5
If a customer changes the hardware at a workstation on which the licensed software product is being
used then he must delete the software from the mass storage of the previously used hardware.
Simultaneous storage, stocking or use of the software on more than one computer per workstation is
prohibited.
Backup Copy
2.1
The customer is entitled to make one backup copy for each purchased licence of a full version of the
software. This backup copy must be marked accordingly.
Limitations
3.1
The customer is forbidden to decompile, reverse engineer or disassemble the software, or to
manipulate the software in any other perceptible manner.
3.2
The software product may be transferred to third parties when the customer passes the software on in
its entirety to the recipient, without keeping any copy for himself, and only after the recipient of the
product agrees to all of the regulations contained in this licence contract.
27769_02
329
CamControl PRO Software Manual
HeiTel by Xtralis
3.3
The customer may not change, modify or process the software product in any way without previous
written agreement from the licensor.
3.4
The customer is not authorized to rent, lease, sub-licence or lend the software product.
3.5
The licensor reserves the right to change this software product and its accompanying materials at any
time as well as the right to its further development, improvement or replacement by a newly
developed product. The licensor is no way obliged to inform the customer regarding changes, new
developments and further developments or improvements to the software product. Neither is the
licensor obliged to provide the customer with such.
Period of Use
4.1
A licence contract in accordance to these regulations is made for an unlimited period of time.
4.2
A licence granted by these regulations loses its effectiveness without need of cancellations when the
customer infringes one of the regulations contained in this contract. The customer agrees bindingly in
such a case to return or to destroy all copies of the software product according to the wishes of the
licensor. Destruction of the software package must be confirmed in writing to the licensor.
Guarantee
5.1
Both parties to the contract agree that it is not possible with the current state of technology to develop
data processing programs in such a way that they are perfectly suitable for all applications. However,
the licensor guarantees that the software is suitable for the usage described in the user guide. The
licensor accepts no liability that the software product meets the requirements and purposes of the
customer or that it functions with other programs used by the customer.
5.2
The licensor has neither explicitly nor silently guaranteed that the software has any particular
characteristics; the customer accepts sole responsibility for selecting the software product as well as
for using it and for the results arising from such use.
5.3
The customer must examine the software program and the accompanying material thoroughly on
receipt of the same and must report any faults or deficiencies immediately, and at the latest within 60
days after the program has been put into operation. Latent defects must also be reported immediately
after they have been discovered. If the customer does not fulfil his duty of reporting such defects then
all liability of the licensor is excluded.
5.4
Should the software be faulty, then the original data medium on which the software is stored must be
correctly packaged and sent back to the licensor. The name, address and telephone number of the
customer as well as a description of the fault and a proof of purchase containing the date of purchase
and the location of the purchase must be enclosed with the software.
5.5
If the product deviates considerably from its description, the licensor is obliged to either improve or to
replace the product, the choice of which remains his. If replacement deliveries and/or improvements
are unsuccessful then the customer can either demand a partial refund or the cancellation of the
contract.
5.6
All warranty claims are non-applicable if the software product has not been used in accordance to the
regulations of this contract or to the instructions provided by the licensor or to the operating manual, or
when the software has been modified without the written permission of the licensor, unless such noncompliance to the regulations or change in the product was not responsible for the fault.
5.7
In case of an unfounded complaint, the licensor reserves the right to demand that the customer
reimburse him for any costs arising thereof.
5.8
The licensor does not guarantee that the product does not infringe on any commercially protected
rights of third parties, unless such infringement is culpable. The licensor excludes himself from any
costs arising from the legal protection of commercially protected rights and claims for damages from
third parties.
330
27769_02
HeiTel by Xtralis
CamControl PRO Software Manual
Liability
6.1
The licensor does not accept liability for claims arising from the usability or impossibility to use the
software package unless such damages have been caused by the licensor intentionally or through
gross negligence on his part or on the part of his agents. All liabilities for indirect damages, as well as
for accompanying damages and subsequent damages, are excluded. Should violations of
professional ethics arise that have not been committed by the licensor, his legal representatives or his
executives, but from other agents, then the liability of the licensor is limited to damages that are
foreseeable at the time the contract is made and that are typical for such contracts.
6.2
This exclusion and these limitations do not apply in the case of culpable infringement by the licensor
or his agents of important contractual obligations, in cases where guaranteed properties of the
software package are missing, as well as in cases of compelling liability according to the product
liabilities law.
6.3
Where guaranteed properties of the software package are missing, the licensor is not liable for such
subsequent damages that are not contained in the guarantees made.
6.4
The liability of the licensor is limited within commercial trading to the replacement for typical,
foreseeable damages.
6.5
Liability claims must be asserted by the customer to the licensor in writing immediately after they are
known.
6.6
Inasmuch as liability claims do not expire at an earlier time according to the legal regulations, they
expire at the latest three years after the claim arises.
Protective Rights
7.1
All rights to the software delivered remain with the licensor unless they have been expressly granted
to the customer.
Place of Jurisdiction / Final Regulations
8.1
The location of the licensor is the exclusive place of jurisdiction for all possible complaints of the
licensor as well as for all possible complaints of a customer against the licensor.
8.2
If individual regulations within this contract are ineffective, this does not result in the rest of the
contract being ineffective. The parties agree to replace the ineffective agreement with a legally valid
regulation that comes as close as possible to the intended and economic reason of the ineffective
regulation. The same also applies when gaps in the contract requiring to be filled arise in the execution
of the contract.
8.3
No oral agreements exist in addition to this contract. Changes and additions to this contract must be
made in writing.
27769_02
331
CamControl PRO Software Manual
HeiTel by Xtralis
This page is intentionally left blank.
332
27769_02
HeiTel by Xtralis
CamControl PRO Software Manual
11 Addendum
For late-breaking information that could not be included in the manual at the time of printing, refer to the HeiTel
Internet pages (www.heitel.com) under Service, Downloads. There you may download the complete
CamControl PRO Software History:
http://www.heitel.com/upload/downloads/en/01-demosoftware/03-camcontrol-pro/sh_cc_pro_gb.pdf
27769_02
333
CamControl PRO Software Manual
HeiTel by Xtralis
This page is intentionally left blank.
334
27769_02
www.xtralis.com
UK and Europe +44 1442 242 330
D-A-CH +49 431 23284 1
The Americas +1 781 740 2223
Middle East +962 6 588 5622
Asia +86 21 5240 0077
Australia and New Zealand +61 3 9936 7000
A Disclaimer about this document, statements about Intellectual Property, Copyrights, and Liability, as well as a General Warning are
available in an earlier section of this document.
Document No: 27769_02