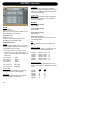
1
REVERB 4000
HIGH DEFINITION REVERB
User’s manual
IMPORTANT SAFETY INSTRUCTIONS
The lightning flash with an arrowhead
symbol within an equilateral triangle, is
intended to alert the user to the
presence of uninsulated "dangerous voltage" within the product's enclosure that may be of
sufficient magnitude to constitute a risk of
electric shock to persons.
The exclamation point within an
equilateral triangle is intended to alert
the user to the presence of important
operating and maintenance (servicing)
instructions in the literature accompanying the
product.
1
2
3
4
5
6
7
Warning!
•
To reduce the risk of fire or electrical shock,
do not expose this equipment to dripping or
splashing and ensure that no objects filled
with liquids, such as vases, are placed on the
equipment.
•
This apparatus must be earthed.
•
Use a three wire grounding type line cord
like the one supplied with the product.
•
Be advised that different operating voltages
require the use of different types of line
cord and attachment plugs.
•
Check the voltage in your area and use the
correct type. See table below:
8
9
10
11
12
13
14
Read these instructions.
Keep these instructions.
Heed all warnings.
Follow all instructions.
Do not use this apparatus near water.
Clean only with dry cloth.
Do not block any ventilation openings. Install
in accordance with the manufacturer's
instructions.
Do not install near any heat sources such
as radiators, heat registers, stoves, or other
apparatus (including amplifiers) that produce
heat.
Do not defeat the safety purpose of the
polarized or grounding-type plug. A
polarized plug has two blades with one
wider than the other. A grounding type plug
has two blades and a third grounding prong.
The wide blade or the third prong are provided
for your safety. If the provided plug does not fit
into your outlet, consult an electrician for
replacement of the obsolete outlet.
Protect the power cord from being walked
on or pinched particularly at plugs,
convenience receptacles, and the point
where they exit from the apparatus.
Only use attachments/accessories specified
by the manufacturer.
Use only with the cart, stand, tripod,
bracket, or table specified by the
manufacturer, or sold with the
apparatus. When a cart is used, use
caution when moving the cart/apparatus
combination to avoid injury from tip-over.
Unplug this apparatus during lightning storms
or when unused for long periods of time.
Refer all servicing to qualified service
personnel. Servicing is required when the
apparatus has been damaged in any way,
such as power-supply cord or plug is
damaged, liquid has been spilled or objects
have fallen into the apparatus, the
apparatus has been exposed to rain or
moisture, does not operate normally, or has
been dropped.
Voltage
Line plug according to standard
110-125V
UL817 and CSA C22.2 no 42.
220-230V CEE 7 page VII, SR section
107-2-D1/IEC 83 page C4.
240V
•
•
•
•
•
BS 1363 of 1984.
Specification for 13A fused
plugs and switched and
unswitched socket outlets.
This equipment should be installed near the
socket outlet and disconnection of the device
should be easily accessible.
To completely disconnect from AC mains,
disconnect the power supply cord from the AC
receptable.
The mains plug of the power supply shall
remain readily operable.
Do not install in a confined space.
Do not open the unit - risk of electric shock
inside.
Caution:
You are cautioned that any change or
modifications not expressly approved in this
manual could void your authority to operate this
equipment.
Service
•
There are no user-serviceable parts inside.
•
All service must be performed by qualified
personnel.
a
IMPORTANT SAFETY INSTRUCTIONS
EMC / EMI.
This equipment has been tested and found to
comply with the limits for a Class B Digital
device, pursuant to part 15 of the FCC rules.
These limits are designed to provide
reasonable protection against harmful
interference in residential installations. This
equipment generates, uses and can radiate
radio frequency energy and, if not installed and
used in accordance with the instructions, may
cause harmful interference to radio
communications. However, there is no
guarantee that interference will not occur in a
particular installation. If this equipment does
cause harmful interference to radio or television
reception, which can be determined by turning
the equipment off and on. The user is
encouraged to try to correct the interference by
one or more of the following measures:
•
•
•
•
Reorient or relocate the receiving antenna.
Increase the separation between the
equipment and receiver.
Connect the equipment into an outlet on a
circuit different from that to which the
receiver is connected.
Consult the dealer or an experienced
radio/TV technician for help.
For the customers in Canada:
This Class B digital apparatus complies with
Canadian ICES-003.
Cet appareil numérique de la classe B est
conforme à la norme NMB-003 du Canada.
b
Certificate Of Conformity
TC Electronic A/S, Sindalsvej 34, 8240
Risskov, Denmark, hereby declares on own
responsibility that following products:
Reverb 4000 - High Definition Reverb
- that is covered by this certificate and
marked with CE-label conforms with
following standards:
EN 60065
Safety requirements for mains
(IEC 60065) operated electronic and
related apparatus for household
and similar general use
EN 55103-1 Product family standard for
audio,video, audio-visual and
entertainment lighting control
apparatus for professional
use. Part 1: Emission.
EN 55103-2 Product family standard for
audio, video, audio-visual and
entertainment lighting control
apparatus for professional
use. Part 2: Immunity.
With reference to regulations in following
directives:
73/23/EEC, 89/336/EEC
March 2003
Mads Peter Lübeck
Chief Executive Officer
TABLE OF CONTENTS
INTRODUCTION
ALGORITHMS
Important Safety Instructions &
Certificate of conformity . . . . . . . . . .a-b
Table of Contents . . . . . . . . . . . . . . . . .3
Introduction . . . . . . . . . . . . . . . . . . . . . .4
Quick Start . . . . . . . . . . . . . . . . . . . . . .5
Front Panel Overview . . . . . . . . . . . . . .6
Rear Panel Overview . . . . . . . . . . . . . .8
Signal Flow Diagram . . . . . . . . . . . . . .9
Typical Reverb 4000 Setups . . . . . . .10
Introduction . . . . . . . . . . . . . . . . . . . . .34
VSS-4 . . . . . . . . . . . . . . . . . . . . . . . . .36
VSS-3 . . . . . . . . . . . . . . . . . . . . . . . . .40
NonLin-2 . . . . . . . . . . . . . . . . . . . . . . .44
DVR-2 . . . . . . . . . . . . . . . . . . . . . . . . .46
VSS-4 TS . . . . . . . . . . . . . . . . . . . . . .48
Ambiator . . . . . . . . . . . . . . . . . . . . . . .50
Reverb-4 . . . . . . . . . . . . . . . . . . . . . . .51
APPENDIX
OPERATION - STAND ALONE
Reverb 4000 as a “Stand Alone” unit
Front Panel Operation . . . . . . . . . . . .12
Recall . . . . . . . . . . . . . . . . . . . . . . . . .13
Recall Wizard . . . . . . . . . . . . . . . . . . .14
Store - Delete . . . . . . . . . . . . . . . . . . .15
Utility . . . . . . . . . . . . . . . . . . . . . . . . . .16
Bypass . . . . . . . . . . . . . . . . . . . . . . . .18
I/O menu . . . . . . . . . . . . . . . . . . . . . . .19
MIDI Implementation . . . . . . . . . . . . .53
Technical Specifications . . . . . . . . . . .54
Preset List . . . . . . . . . . . . . . . . . . . . .56
OPERATION - via TC ICON
Installation . . . . . . . . . . . . . . . . . . . . .21
The TC Icon Editor - Quick Start . . . .23
Basic Operation
Setup/Select pages . . . . . . . . . . . . . .24
Operating Pages . . . . . . . . . . . . . . . .24
Preset Structure
Recall - Store - Delete . . . . . . . . . . . .26
Bank Handling . . . . . . . . . . . . . . . . . .26
Preset Handling . . . . . . . . . . . . . . . . .27
System
I/O - page . . . . . . . . . . . . . . . . . . . . . .28
Levels page . . . . . . . . . . . . . . . . . . . .29
MIDI page . . . . . . . . . . . . . . . . . . . . . .30
System Map Page . . . . . . . . . . . . . . .31
Net and Card . . . . . . . . . . . . . . . . . . .32
Uploading Software . . . . . . . . . . . . . .32
UI - User Interface . . . . . . . . . . . . . . .33
TC Electronic, Sindalsvej 34, DK-8240 Risskov – [email protected]
English Version
Prod. No: 606106918
Rev 1.07 – SW – V 01.11
3
INTRODUCTION
Congratulations on the purchase of your new Reverb 4000!
The Reverb 4000 is a Single Engine Stereo version of System 6000 - featuring the best
reverbs and presets from System 6000 and M5000 plus emulations of immortal classics.
Reverb 4000 is also the first stereo reverb capable of rendering credible space onto two discrete
sources, or to truly process a composite stereo source. Utilizing the latest hardware technology and
software based upon 30 man-years of development, Reverb 4000 offers the most immense and
innovative selection of State-of-the-Art stereo Reverbs. Designed as a single rack space module
with an extremely easy to use instant access interface, and with the option of using the ICON
Software Editor in DAW environments, the Reverb 4000 is the ultimate choice for live- and studio
applications working in stereo.
- In the Studio
Reverb 4000 complements any large scale mixing console, and provides the professional studio
with the ultimate Main Reverb featuring an amazing palette of simulated rooms - from natural
sounding credible spaces to emulations of vintage reverbs and TC Classics. On top of offering frontedge pristine reverb technology, it features impressive headroom, level handling and analog as well
as digital interfacing capabilities.
Reverb 4000 integrates perfectly with DAWs and features 24 bit AD/DA converters as well as 44.1
to 96kHz Sample Rates, hence offering processing power not obtainable inside any workstation
available today. Connectable via USB the included ICON Software Editor provides easy access and
complete overview for detailed editing purposes, and is a genuine tool in a studio environment.
At the Venue
The Instant Access front panel is a great advantage for live applications. Never before has a Main
Reverb provided so many colors to the palette, and been so easy to operate. Switch between
Character, Glossy and Vintage Reverb effects with just a single touch of a button. The front panel
always keeps important parameters within reach, and thanks to the latest DSP and power supply
technology, as well as TC Electronic's heritage of making top-end reverbs, the new Reverb 4000
delivers the best true stereo reverbs imaginable.
Features in Reverb 4000 also include Generic Reverbs providing Polished Sustain, Vintage Reverb
emulations, True Stereo Reverbs with several flavors, Favorite presets and algorithms from the
past, Mono Reverbs covering arbitrary formats, Credible Environments spanning from
claustrophobic to outdoor scenarios, Analog domain converter scaling with wide headroom and
AES/EBU, S/PDIF, TOS-Link and ADAT digital I/Os.
About this manual
The manual is divided into three major sections.
• Operation via the Front Panel
• Operation via the TC Icon Software Editor
• Description of the Algorithms
Latest manual version can always be downloaded via www.tcelectronic.com.
If you have questions left unanswered by this manual you may also take a look at our TC Support
Interactive site. This site is also accessed via www.tcelectronic.com
5
FRONT PANEL OVERVIEW
POWER On/Off
Switches power On/Off.
To completely disconnect from
mains the Rear panel POWER
switch must be used.
The Reverb 4000 auto sensing
power supply accepts 110 to
240V.
PCMCIA slot
For software updates and
preset backups.
OVERLOAD LED
Indicates internal overload.
Decrease Input level to
compensate. The LED must
never be lit.
96/88.2/48/44.1kHz LEDs
Indicates current Sample
Rate.
DIGITAL IN LED
Indicates that a digital Input is
selected.
MIDI LED
Indicates incoming MIDI
information.
EDITED LED
Indicates that the currently
recalled preset has been
edited but not yet stored.
LEVEL METERS
Shows the current Input level.
DISPLAY
The display is divided into two
sections:
The Upper section is dedicated
to essential information/
operation, such as Recall, Store
and Wizard functions plus I/O
and Utility.
These functions are controlled
via the keys in the Program and
Control section on the front panel.
The lower section of the display
always indicates preset
parameters and values. The
three Default parameters are
Pre Delay, Decay and Hi Decay.
Pressing the HOME key will
always return to these three
parameters.
You scroll down through
additional parameters using the
UP/DOWN keys and set their
values using the three dedicated
value wheels F1, F2 and F3.
HOME- key
Returns to the first line in the
parameter list showing the three
key parameters:
PreDelay, Decay and Hi Decay.
CURSOR UP/DOWN keys
Scroll up and down in effect
parameters.
6
FRONT PANEL OVERVIEW
F1 - PRE DELAY wheel
Dedicated parameter adjust
wheel. Always adjusts the
value of the parameter
displayed to the left of the
lower part of the display.
When at “home-page” this is
the Pre Delay parameter.
F2 - DECAY wheel
Dedicated parameter adjust
wheel. Always adjusts the
value of the parameter
displayed in the middle of the
lower part of the display.
When at “home-page” this is
the Decay parameter.
F3 - HI DECAY wheel
Dedicated parameter adjust
wheel. Always adjusts the
value of the parameter
displayed to the right of the
lower part of the display.
When at “home-page” this is
the Hi-Decay parameter.
RECALL key
Press to go straight to the
Recall page. Select preset
using the ADJUST wheel and
press ENTER to confirm.
STORE key
Press to store the current
preset in a user location. User
location can be selected using
either the CURSOR
UP/DOWN keys or the
CONTROL ADJUST wheel.
Press ENTER to confirm and
execute.
WIZARD key
Press to enter the Wizard
recall mode. Via the Wizard
function you can setup various
criteria to assist your preset
selection.
ENTER key
Press to confirm operations
such as Recall.
CURSOR UP/DOWN key
Scrolls in the Control section
menus.
UTILITY key
The Utility menu holds
settings for:
MIDI, Memory copy and
Display Viewing angle for max
viewing comfort and various
others.
BYPASS key
Press to activate bypass.
Two bypass modes can be
selected via the I/O menu:
Cut Input
Will cut the signal chain before
the Reverb processing. Allows
the Reverb to “hang” after
Bypass is activated.
Cut Output
Use this mode to immediately
cut the generated Reverb.
CONTROL ADJUST
wheel
Adjusts parameter values in
the control section.
I/O key
Press to enter the I/O menu.
This is where you set-up: Input
selection, Clock, Levels, Dither
and more.
7
REAR PANEL
Power Input
100 - 240V
Power Switch
Balanced
Analog
Inputs
XLR
Balanced
Analog
Outputs
XLR
Optical
ADAT
&
S/PDIF
Sync AES/EBU S/PDIF
Input/
Input/
In
Output
Output
Note: The USB connection is for passing control data only.
Cables - wiring
XLR to XLR
8
XLR to Jack
Stereo
XLR to Jack
Mono
MIDI
In/Out/
Thru
USB
SIGNAL FLOW
9
TYPICAL SETUPS
Connecting and Setting up the Reverb 4000
Standard analog setup
Standard Send/Return Setup
With this setup the Reverb is fed with an
analog stereo signal from e.g. a mixer AUX
section. Via the Input Ch. parameter found in
the I/O menu it is possible to chose which Input
channel to be processed. Select between Left,
Right and Stereo Input.
• Connect according to illustration.
• Press I/O to setup basic Input/Output
options.
• Set the Kill Dry parameter to - “on” (default).
10
TYPICAL SETUPS
Reverb 4000 Digital Setup
It is assumed that the TC Icon software is
correctly installed on you computer. Page
20 describes installation procedure.
Connections
• Connect the Reverb 4000 to a free USB port
on your computer using a standard USB
cable (supplied).
This connection ensures communication with
the TC Icon Software Editor.
• Open the TC Icon Editor and select
appropriate port on the Setup-Devices -Port
page.
• Connect MIDI In/Out - if needed
• Connect digital audio to your Workstation
using correct cables.
Setting up
• In the I/O menu - setup following:
Input Select : Digital
Digital In Sel : Digital Input Type
Input Channel: Stereo, Left or Right
Clock Select : 44.1/88.2 - 48/96
Clock mode dependent.
Optical In/Out settings if optical I/O is
selected.
11
FRONT PANEL OPERATION
The Display
The Reverb 4000 display is split into two main sections.
• The Upper section changes depending on the selected functionality.
• The Lower section always shows parameter values. These parameters can always instantly be
adjusted using the F1, F2 and F3 VALUE wheels.
Category Filter
Function
Preset Number
Upper Section
Lower Section
Adjusted by F1
(Pre Delay)
Adjusted by F2
(Decay)
Adjusted by F3
(Hi Decay)
HOME - returns to the top three preset parameters.
CURSOR UP/DOWN keys - scrolls through the preset parameters.
F1 (Pre Delay), F2 (Decay) and F3 (Hi Decay) - adjusts parameter values.
Controls for any action concerning the upper section of the display
12
RECALL -
FRONT PANEL OPERATION
To access the Recall display simply press RECALL.
To make an appropriate preset selection fast and efficiently we have added both a Category Filter
for rough selection but also a Recall Wizard functionality that will help you narrow down and pick
the appropriate preset for you application.
Category Filter
Function
Preset Number
Upper Section
Preset Name
Application
Lower Section
Parameters &
current values
Presets
The options are:
The Reverb 4000 holds 150 factory presets.
These are arranged in various categories such
as Halls, Rooms etc - see below.
To make a simple Recall
• Press Recall to ensure you are at the Recall
Page.
• Select the preset you wish to recall using the
CONTROL wheel.
• Press ENTER.
The Reverb 4000 also has various filter
functions to ensure fast and efficient preset
search.
Category Filter
Make your primary selection based on Category.
• Use the ADJUST wheel to select a specific
preset within the selected Category.
• Press ENTER to recall the selected preset.
Recall Wizard
When “Wizard“ is selected it is only possible to
select between the presets matching the criteria
set in the Wizard menu. (See next page for
explanation).
• Use the ARROW UP/DOWN keys in the
Control section to scroll between different
categories.
13
RECALL WIZARD -
FRONT PANEL OPERATION
The Recall Wizard is a dedicated filter to assist you in making the appropriate preset
selection for your application. Enter the Wizard by pressing the WIZARD key.
Function
Category Filter
Origin
Source
Size
Parameters &
current values
There are three types of selections to make.
In any of the three types you can select “ALL”
if you do not want to limit the selection.
Basics
Use the UP/DOWN keys to select function and
the ADJUST wheel to set values.
Source
In the select list you set for which specific
application you are looking for a preset.
Options
• Enter the Wizard bank from the Recall
display using the UP/DOWN keys in the
Control section.
• Press WIZARD and select Size, Source and
Origin (see below).
• Then press WIZARD or RECALL to go back
to the RECALL Display.
• Now select preset from the limited list
appearing based on the WIZARD selections.
Size
Defining the size of a specific Reverb type is a
delicate issue. Altering Decay times
considerably on a defined room-size is not
equivalent to changing the size of the room. We
suggest selecting Size according to
application.
Options
Origin
All of the presets in the Reverb 4000 derive
from other top quality Reverb processors by TC
Electronic.
Options
• Then press RECALL or WIZARD to go to the
Wizard Bank.
14
STORE & DELETE -
FRONT PANEL OPERATION
To enter the Reverb 4000 Store mode press STORE
Function
Storing Mode
Storing Location
Name/Rename
Parameters &
current values
Basics
Use the UP/DOWN keys to select function and
the ADJUST wheel to set values
Name
To enter or alter a preset name during storing
procedure:
• Select Mode - Overwrite/Delete.
• Select Location - where to store.
• Set/Change name.
• Set cursor at the “Name-line”.
• Use ADJUST wheel to change letter.
• Use ARROW UP/DOWN to jump between
letter positions.
• Press ENTER to store and confirm.
Mode
Select between Overwrite and Delete.
Overwrite:
Standard storing method. The preset at the
location where you attempt to store will be
overwritten.
Delete:
Use this function to delete presets without
storing a new one at the same time.
Consider this a “Clean-up” function.
Locat. - Location
Select a user location where you wish to store
the preset.
The Reverb 4000 itself has 100 user locations.
With a standard PCMCIA card an additional
100 presets can be stored.
(If used in conjunction with a TC Icon PC Editor
an unlimited number of presets can be stored
on your computers hard drive).
15
UTILITY -
FRONT PANEL OPERATION
The Utility menu
Display
This is where you setup:
- MIDI Input/Output
- MIDI mapping
- MIDI dump functions
- Bank copy functions to and from PCMCIA
cards for backup/restore
- Display Viewing Angle for viewing comfort
- Other various utilities
Viewing Angle
Adjusts the optimal display viewing angle.
MIDI
Channel
Range: 1-16 or Omni
When “Omni” is selected Reverb 4000 receives
MIDI information on all channels.
A few important parameters can be controlled
via Standard MIDI Control Change (MIDI CC),
but all parameters can be controlled via MIDI
Sysex. Complete Sysex documentation can be
downloaded via www.tcelectronic.com
SysEx ID
Range: 0 to 127
Sets the Reverb 4000 own SysEx ID for
identification in larger MIDI setups.
Overview of the Utility menu:
MIDI Input
Program Change
Range: On/Off
Determines whether Reverb 4000 should
respond to incoming program changes or not.
Control Change
The Reverb 4000 allows for both extensive and
precise control of parameter values via MIDI
Sysex. However, a simple mode is also
available where a few important parameters
can be accessed via standard MIDI CC’s.
In the Algorithm chapter all parameters
controllable via MIDI CC are marked with
corresponding MIDI CC numbers. A complete
list is also available in the appendix section.
Following CC modes are available:
Off:
No response to incoming MIDI CC messages.
On:
The three Home-page parameters from each
algorithm can be controlled by a given set of
controllers.
The Reverb 4000 responds to either Single or
Double Precision Controllers.
16
UTILITY -
FRONT PANEL OPERATION
When only Single Precision controllers are
received the three Home-page parameters can
be controlled using the following MIDI
controllers:
MIDI CC
Control
F1
F2
F3
-
76 (Pre Delay)
77 (Decay)
78 (Hi Decay)
When Double Precision Controllers are
received the three homepage parameters are
controlled using a combination of values sent
as MSB (Most Significant Byte/Coarse) and
LSB (Least Significant Byte/Fine).
By sending values 0-127 on each of these
controllers up to 16384 (128*128) steps are
available giving highest precision when needed.
MSB/LSB
Control
F1
F2
F3
-
22/54 (Pre Delay)
23/55 (Decay)
24/56 (Hi Decay)
Example:
Control Change “On” mode is selected and a
preset using the VSS-3 algorithm is recalled.
The value of the Decay parameter can be set
by sending:
MSB: 23 followed by a value from 0-127 &
LSB: 55 followed by a value from 0-127
SysEx
Range: On/Off
Determines whether the Reverb 4000 should
respond to incoming MIDI Sysex.
MIDI Out
Program Change
Range: On/Off
Program changes are sent to MIDI Out when
presets are recalled via front panel controls.
Control Change
Off:
No CC messages are sent during front panel
operation.
Single Precision mode
In this mode Reverb 4000 sends parameter
values when adjusting values using the F1, F2
and F3 ADJUST wheels.
MIDI CC
Control
F1
F2
F3
-
76 (Pre Delay)
77 (Decay)
78 (Hi Decay)
Double Precision mode
If Double Precision mode is selected Reverb
4000 sends MIDI CC values described as a
combination of MSB and LSB values.
MSB/LSB
Control
F1
F2
F3
-
22/54 (Pre Delay)
23/55 (Decay)
24/56 (Hi Decay)
SysEx
Range: On/Off
Determines whether the Reverb 4000 should
send MIDI Sysex.
MIDI DUMP
Dump
System
Includes all parameters in the I/O and Utility
menu.
Cur. Preset
Only the current recalled preset is dumped via
MIDI when “Execute” dump is performed.
User Bank
If User bank is selected the entire User bank is
dumped to MIDI when “Execute Dump” is
performed (see next page).
17
UTILITY -
FRONT PANEL OPERATION
Execute Dump
Press ENTER to MIDI Dump.
MIDI Mapping
It is possible to map any incoming program
changes to recall any preset in the Factory,
User or Card bank.
Mapping
Normal:
In Normal mode all banks can be accessed for
program changes. Bank selection is done via
Ctrl 0 (MSB) and Ctrl 32 (LSB):
• Controller 0 must be set to 0 in all cases.
• Controller 32 value must match the bank
number you wish to address according to the
table below.
Ctrl
Ctrl
Ctrl
Ctrl
32
32
32
32
value
value
value
value
0
1
2
3
Ctrl 32 value 32
Ctrl 32 value 64
-
Halls
Rooms
Plates
Effects
- User bank
- Card bank
Following mapping modes are also available:
• Into Factory
• Into User
• Into Card
• Into Map
When “Into Map” is selected the Reverb 4000
maps incoming program changes according to
the MIDI Mapping described below.
Map From - Map To
Select which incoming program change to map,
and which preset to map to.
Example:
You wish to send program change 1 to the
Reverb 4000 and recall preset 30 in Bank 1
(Rooms). Use the following setting:
Map From
Map To
18
1
1-30
Card Copy
The Copy Function can be used to load or
backup the User bank to or from a standard
PCMCIA card.
Copy
Select between:
“Card to User” or
“User to Card”
Warning !
The “Copy From” function handles the
entire bank. Therefore backing up or
retrieving banks will destroy and overwrite
the presets in the target bank.
Execute Copy
Press ENTER to copy according to your
selection above.
Misc.
Auto Info
Range: On/Off
When Auto Info is set to on, information on
Algorithm and Decay time of the current preset
is saved as a text and will be displayed on the
Recall page.
Format Card
Press ENTER to format the PCMCIA card
present in the slot.
I/O MENU -
FRONT PANEL OPERATION
Signal Processing Flow
Reverb 4000 Internal architecture
The internal signalpath of Reverb 4000 uses
double precision (48 bit) processing to take full
advantage of the machine's digital Inputs and
Outputs. In a mastering situation you can even
feed the dry signal through the 4000 with no
degradation. The Dry Level and Digital Input
Trim controls are 24 bit transparent when set at
0.0dB, while they are bit pattern preserving
when set at -6, -12, -18, and -24dB.
Analog Max
Range: -11 to 21dBU (1dB steps)
To achieve best signal to noise ratio the Analog
Max level must be correctly set to match the
device to which the Reverb 4000 is connected.
Example:
If the mixer’s Analog Max level is 18dBu, the
Reverb 4000 Analog Max Level parameter
should likewise be set to that value.
Clock
I/O
Input Select
Range: Analog, Digital
Select between analog and digital Inputs.
Input Channel
Stereo:
Stereo processing on Stereo Input signal.
Left:
Mono signal present on Left Input channel is
linked to right Input and processed to Stereo
Out.
Right:
Mono signal present on Right Input channel is
linked to left Input and processed to Stereo Out.
Level
Kill dry
On/Off - Default is “On”
Removes all Dry signal from the Output
regardless of preset Mix setting.
Clock Mode & Clock Select
Clock mode can be set to Normal or Double.
Normal:
If Clock Mode is set to “Normal” the following
options are available:
44.1, 48, Di In, Wordclock.
Double:
If Clock Mode is set to “Double” the following
options are available:
88.2, 96, Di In, WordClock.
Bypass
Bypass mode
Two modes are available:
Cut Input
Will cut the signal chain before the Reverb
processing. Allows the Reverb to “hang” after
Bypass is activated.
Cut Output
Use this mode to immediately cut the
generated Reverb.
19
I/O MENU -
FRONT PANEL OPERATION
Analog Offset
Digital Output
Input Offset
Range:The range is relative to the set Analog
Max parameter.
The Analog Max parameter sets ideal interface
level to the surrounding environment and adjust
both the Analog Input and Output Max level.
The Analog Input offset parameter is used to
optimize the Input level while keeping the
Analog Max setting.
Dither
Range: 8, 16, 20, 24, Off
Determines to what bit truncation should be
made. Dither should be applied at the final
stage only and according to the next
downstream device in the signal chain.
Output Offset
Range: -20 to +20dB
The range is relative to the set Analog Max
level parameter.
The Analog Output Offset parameter is typically
used if the downstream device has an
operating level that differs from the set Analog
Max setting.
Digital Input
Input Select
Range: AES/EBU, ADAT, Optical.
Selects digital Input type. Digital Input must be
selected.
Digital Input Trim
Range: -24 dB to 0 dB (Step 0.2 dB)
Trim parameter on the digital Input.
Signal is bit transparent at -6, -12, -18 and
-24dB.
Optical
Optical In
Options: Tos-Link, ADAT 1-2, ADAT 3-4,
ADAT 5-6, ADAT 7-8
Select appropriate Optical Input type according
to your setup.
Optical Out
Options: Tos-Link, ADAT 1-2, ADAT 3-4,
ADAT 5-6, ADAT 7-8
Select appropriate Optical Output type
according to your setup.
20
Status Bit
Range: S/PDIF, AES/EBU
Determines which Status Bit should be sent out
with the digital signal.
INSTALLATION -
OF THE TC ICON SOFTWARE EDITOR
Introduction
The TC Icon Software Editor is a generic Software Editor that currently controls the following
products by TC Electronic: System 6000, DB-8, P2 and Reverb 4000.
In this section only subjects relevant for usage with the Reverb 4000 will be discussed.
Requirements for running the TC Icon
Software Editor
• A Pentium PC with any of the following
operating systems: Windows 2000,
or Windows XP.
The included Reverb 4000 CD-ROM holds:
• A folder called: ”TC Icon Software Editor”.
• The manual in PDF format.
• A USB driver called “rev4000”.
Installing - TC Icon Editor
• Exit all programs on your computer and open
the CD contents.
• Open the folder called: TC Icon Software
Editor.
• Copy the file called TC Icon x.xx.msi to a
location on your computer - e.g. your
desktop.
• Double-click on the .msi file and follow the
instructions.
A TC Icon shortcut will appear both on the
desktop and in the Start menu.
Connecting
• Connect the Reverb 4000 to free USB port
on your computer using the supplied cable.
The cable is a standard USB cable.
• Power on the Reverb 4000.
• Your computer now detects the Reverb 4000
and a standard Windows hardware Wizard
opens. This Wizard guides you through
installation of the USB driver located on the
CD ROM accompanying the Reverb 4000.
• The option “Search for a suitable driver for
my device” is automatically pre-selected.
• Press Next
• Insert the Reverb 4000 CD ROM and mark
the option CD-ROM drives as above.
Continued ->
• Press Next
21
INSTALLATION -
OF THE TC ICON SOFTWARE EDITOR
• Now specify at which location the Wizard
should look for the appropriate driver.
• The Wizard now finds the correct driver on
the CD ROM.
• Press “NEXT”
• Press “Finish”. The Driver is now installed
and you are all set to go.
22
THE TC ICON EDITOR - QUICK START
Basics
Navigating the TC Icon Software Editor is easy
as soon as a few basic elements are explained.
Generally:
• Press the top-tabs to do primary selections.
• Press the side-tabs or elements to do
secondary selections.
• Press parameter value fields to instantly
assign parameters to Fader 6.
• Adjust values using Faders 1-6.
• The TC Icon symbol key in the upper left
corner switched between two main modes:
- Setup/Select pages for main system
operations and
- Operation pages that are specific for the
connected units.
(also see the LINK explanation on next page)
Unpacked and ready
• Connect according to illustrations on pages
10/11.
• Install software according to explanation on
the previous page of this manual.
• Power up the Reverb 4000 and start the TC
Icon software on your computer.
• Go to the Setup/Devices/Select page.
depending on number of connected units and
in which locations these are assigned.
• Press the large Reverb 4000 key.
• TC Icon now retrieves data from the
Reverb 4000.
• When ready you will see the Main operating
display.
• GO
• Press the DETECT key. The TC Icon Editor
will scan the system and find the connected
units.
• When the connected Reverb 4000 is
detected, assign the unit to one of the eight
shortcut keys in the right side of the display,
by pressing one of the eight keys (see
above). Any key will do. When several units
are connected this page serves as a
convenient organizer for the entire system.
• Go to the Select page (top-tab), and you will
see a screen similar to the one below
23
THE TC ICON EDITOR Basic Operation
The Icon Link key in the upper left corner
allows you to navigate between two main
pages/modes.
Setup/Select pages
BASIC OPERATION
Press the ICON key in the upper left corner to
select these pages or press the unit on the
Select pages.
These pages are relevant to one specific unit.
Operating Pages
• Library pages handle operations such as
preset Recall, Store, Delete and bank
handling for backup
• System pages handle overall Clock Settings,
I/O settings and network settings.
• Engine pages are where you control all
algorithm specific processing parameters.
Renaming presets
All user presets can easily be renamed.
Click on the CURRENT ENGINE NAME key on
the Store page and a keyboard display will
open.
Via the Select & Setup pages you access
overall settings and choices like:
• Selection of which connected unit to operate.
• TC Icon settings such as display and Faderappearance.
On the Select page illustrated above all
connected units will appear. Press one of the
units indicated on that page to access the unit.
Auto page
This page is for time-code operations and
redundant when operating a Reverb 4000.
Operating pages
ICON key
The preset is not stored by entering the
name and pressing ENTER.
To actually store a preset the STORE key
must be pressed on the Store page.
Link
The LINK key allows you to assign any
algorithm parameter to any of the 6 Faders.
Thereby you are not limited to operate only the
parameters visible on the current page.
LINK key
24
To assign a parameter
• Press the LINK key.
• Select the Fader you wish to link a parameter
to, by pressing the field just above the fader.
• Press the parameter you wish to link to the
selected fader.
PRESET STRUCTURE -
RECALL/STORE/DELETE
Library Pages
Search - Expanded Wizard
These are the pages from where all preset
handling is controlled when using the TC Icon
Editor.
There are three selections to make when
using the Search function. In any of these
selections you can chose “ALL” if you do
not want to limit the selection by that
specific parameter.
Recall
The Reverb 4000 holds:
- 150 Factory presets.
- 100 User locations for customized presets.
- 100 User locations on a PCMCIA Card.
- Unlimited User locations on a Hard disk.
Presets can be selected either directly or with
assistance from a Search function that will help
you narrowing down your choices and find the
presets best suited for your application fast.
To recall a preset directly:
• Select Bank and then a catagory such as
Halls, Rooms etc.
• Then select the desired preset by touching
the preset name in the list
• Then press RECALL
Info
Basics
• Select Source
• Set Size
• Select Origin
• Decide if User presets should be included
• Select preset based on the selections made
• Press Recall
Source
In the source list you select for which specific
application you need to use the preset.
Options
Info
Presets marked with the small Info tag have
additional description attached. Press the Info
tag to see the information.
When storing presets you can edit the Info text
by entering this in the Info field. (see next
page).
25
BASICS
- PRESET HANDLING
Size
Defining the size of a specific Reverb type is a
delicate issue. Altering Decay times
considerably on a defined room-size is not
equivalent to changing the size of the room.
Select Size according to application.
Options
Origin
All of the presets in the Reverb 4000 derive
from other top quality reverb processors by TC
Electronic.
Options
Store - Delete
To store a preset:
• Select the Store page by pressing the
STORE side tab.
• Select a preset location.
• Press STORE.
Info
Wizard
Info
To each preset a short Info-text of max. 64
characters can be entered. Press INFO and
enter any text you wish. The text can be viewed
on the Recall page by pressing the Info tag
there.
Wizard
• Press Wizard if you wish to add Wizard tags
to the preset you are storing.
It is further more possible to search by a simple
text string via the Text Filter function.
E.g. enter “Hall” in the Text filter box and all
presets that include the word “Hall” and meet
the criteria defined by the Source, Size and
Origin settings are now available for recall.
Reset
Resets all Search settings.
26
• Press Enable Wizard and select the tags
you associate with the preset you are storing.
These tags are the same tag that you can use
to search the preset by later, in a Recall
situation.
BASICS
- PRESET HANDLING
To delete a preset
• Select the Delete page by pressing the
DELETE side tab.
• Select the preset you wish to delete.
Press DELETE.
LIBRARY -
BANK
Bank Handling
Via the Library Bank page it is possible to
backup and retrieve the User bank either to
your hard disk or to a PCMCIA card.
From Bank
In this area you select which bank on the
Reverb 4000 you wish to copy from.
From File
If you have already stored banks on your
computer this is where these files will appear.
To Bank
Select to which Reverb 4000 bank you wish to
copy the selected bank to.
To File
Select “To File” if you wish to back-up the
selected bank to your hard disk.
The TC Icon saves the bank files in a
specific location. The location varies
slightly between the different operation
systems.
As an example Windows 2000 saves backup
files in: Application Data\TC Electronic\TC
Icon\Reverb 4000 Presets\xxxxx
Do not move the files from this location or the
TC Icon will not display the presets in the
“From File” screen.
Rename
Press to rename the selected bank.
Delete
Press to delete the selected bank.
27
SYSTEM -
I/O PAGE
Digital Output
Dither
Range: 8, 12, 14, 16, 18, 20, 22, 24, off
Reverb 4000 processes internally at 24 bit
resolution. Dither must be set to match
downstream devices.
Status Bits
Select whether the Reverb 4000 should send
out AES/EBU or S/PDIF status bit information.
Optical Select
Input Select
Input Source
Select between Analog and Digital.
Digital Source
When Input Source is set to Digital you can
select between:
- AES/EBU
- S/PDIF
- Optical
Select according to the connected Digital Input
source.
Input Channels
Stereo:
Stereo signal is processed.
Left:
Only the Signal present on the Left Input is
processed.
Right:
Only the signal present on the Right Input is
processed.
Clock Select
Clock select
Range: Internal 44.1kHz (88.2@Double Rate)
Internal 48kHz (96@Double Rate)
Digital In
Word Clock
Locked Clock
Indicates whether the Reverb 4000 is locked to
the clock present on Digital Inputs.
28
Optical In
Range: Tos-link, ADAT 1/2, ADAT 3/4, ADAT 5/6
or ADAT 7/8.
When Input is set to Digital, and Digital Source
is set to Optical, the Optical In parameter
selects which optical Input should be
processed.
Optical Out
Range: Tos-link, ADAT 1/2, ADAT 3/4, ADAT 5/6
or ADAT 7/8.
Selects optical Output format.
SYSTEM -
LEVELS PAGE
Analog Levels
Max I/O Level
0 to 22dBU (1dB steps)
To achieve best “signal to noise ratio” the Max
I/O level must be correctly set to match the
device to which the Reverb 4000 is connected.
Example:
If the Mixers Max I/O level is 18dBu, the Max
I/O Level parameter should be set to that value.
Bypass
Bypass Mode
Cut Input
Will cut the signal chain before the Reverb
processing. Allows the Reverb to “hang” after
Bypass is activated.
Cut Output
Use this mode to immediately cut the
generated Reverb.
Bypass
Activates/deactivates bypass according to the
set bypass mode - see above.
Kill dry
Range: On/Off
Removes all Dry signal from the Output
regardless of Mix setting.
In Offset
Range: The range is relative to the set Max I/O
Level.
The Max I/O Level parameter sets ideal
interface level to the surrounding environment
and adjust both the Analog Input and Output
Max level. The Analog Input offset is used to
optimize the Input level while keeping the Max
I/O level setting.
Out Offset
Range: -20 to x dB (Step 1 dB) (x is relative to
the selected Max I/O Level.)
The Analog Output offset parameter is typically
used if the downstream device has an
operating level that differs from the set Max I/O
value, based on the device feeding the Reverb
4000.
Reference: See Signal Flow diagram on page 9
Digital Level
Input Trim
Range: -24 dB to 0 dB (Step 0.2 dB)
Trim parameter on the digital Input.
Signal is bit transparent at -6, -12, -18 and
-24dB.
29
SYSTEM -
MIDI PAGE
Card Bank
Incoming Program Changes are mapped to
recall presets from the Card bank. This requires
that a Reverb 4000 formatted PCMCIA card is
inserted in the Card slot.
Custom Map
Maps incoming program changes according to
the Custom map settings. These settings are
set via the Map page.
Control
Read Program Change
Select On/Off
Setup
MIDI Channel
Range: 1-16 or Omni
When Omni is selected Reverb 4000 receives
MIDI information on all channels.
SysEx Device ID
Range: 0 to 127
Sets the Reverb 4000 own SysEx ID for
identification in larger MIDI setups.
Program Map mode
Normal
In Normal mode all banks can be accessed for
program changes. Bank selection is done via
Ctrl 0 (MSB) and Ctrl 32 (LSB):
• Controller 0 must be set to 0 in all cases.
• Controller 32 value must match the bank
number you wish to address according to the
table below.
Ctrl
Ctrl
Ctrl
Ctrl
32
32
32
32
value
value
value
value
0
1
2
3
Ctrl 32 value 32
Ctrl 32 value 64
-
Halls
Rooms
Plates
Effects
- User bank
- Card bank
Factory Bank
Incoming Program Changes are mapped to
recall presets from the Factory banks.
User Bank
Incoming Program Changes are mapped to
recall presets from the User bank.
30
Send Program Change
Select On/Off
Read Control Change
Select On/Off
Send Control Change
These settings relate to the 6 faders on the TC
Icon Software Editor.
Off
No CC messages are sent when Faders are
moved.
Single Controller
When Faders are moved - CC values are sent
to MIDI out according to the table below:
FADER
FADER
FADER
FADER
FADER
FADER
1
2
3
4
5
6
-
MIDI
MIDI
MIDI
MIDI
MIDI
MIDI
CC
CC
CC
CC
CC
CC
value
value
value
value
value
value
70
71
72
73
74
75
Double Controller
In Double mode both MSB and LSB are sent
when moving Faders 1-6 according to the table
below:
FADER
FADER
FADER
FADER
FADER
FADER
1
2
3
4
5
6
-
MSB
16
17
18
19
20
21
LSB
48
49
50
51
52
53
SYSTEM Read Sys Ex
Select On/Off
Send Sys Ex
Select On/Off
Preset Dump
Dump System
Complete Bulk Dump to MIDI Out that includes
all settings.
Dump Engine
Partial MIDI Bulk dump to MIDI Out that only
dumps currently loaded Engine preset.
MIDI MAP page
MAP PAGE
Fill From Current
This is a convenient function you may choose
to use when creating a “map to” list.
Example:
001 mapped
002 mapped
003 mapped
------025 mapped
to 001
to 002
to 003
to 201
• Press Fill From Current
- Then:
026 mapped to 202
027 mapped to 203
028 mapped to 204
etc.
Reset All
Resets all MIDI mappings.
When Reset - incoming MIDI prg. ch. 01 will
map to preset 1 in Bank 1 (Halls) and MIDI prg
ch. 02 will map to preset 2 in Bank 1 etc.
This is a “MIDI Custom Program Map page”,
where you can customize how the Reverb 4000
should map incoming program changes.
First of all the general MIDI settings must be
set up at the MIDI page. (see previous page)
Setting up the Custom Map:
• Use the slider to select which incoming
program change to MAP.
• Select which bank to map to using the BANK
SELECT arrows.
• Use the PRESET SELECT arrows to select
which preset in the selected bank to map to.
31
SYSTEM -
NET & CARD - PAGE
Net page
A 1 or 2 MB PCMCIA card can be used for
preset back-up. The card must be properly
formatted with empty preset banks.
Format card with Empty preset banks
Press to format card. The card is then
formatted and ready to use for Reverb 4000,
either as preset backup media or as an
additional preset bank.
Dump Binary File To Card
It is also possible to dump a binary file to a
PCMCIA card inserted in the Reverb 4000.
This function is especially useful when updating
software.
On this page following information can be
found:
• TC Icon Software number
Current TC Icon version.
• Reverb 4000 SW Number
Current loaded software in the Reverb 4000.
• Reverb 4000 Serial Number
Serial Number of the Reverb 4000 currently
operated.
Network Identification
The Network identifier merely serves as a
name for easy recognition. It is especially
useful when several units are connected and
controlled via the TC Icon Software Editor.
Press to change the name via the keyboard
display.
Card page
Be aware that Dumping a Binary File to a
PCMCIA card will erase all data
previously stored on the card
In this case the card does not need to be
Reverb 4000-formatted as described above.
• Download the software from
www.tcelectronic.com
• Rename the file to “dumpfile.bin”
• Place the file in the folder: “My Documents”
• Then press the “Dump Binary File To Card” key
To load the Software to a Reverb 4000 from the
PCMCIA card:
• Power off the Reverb 4000
• Power on while holding the I/O key pressed.
• Select “LOAD PCMCIA” and press ENTER
• Select “START” and press ENTER
Grab Binary File From Card
This function is used to grab a binary file from
an inserted PCMCIA card. The file will be
placed in your My Documents folder.
Be aware that in case the file you are
grabbing has the same name as a .bin
file already placed in the “My Documents”
folder the previous file will be deleted.
32
SYSTEM UI - Icon Views
UI
Trim
On the Icon Setup page two sub-pages are
available for controlling the TC Icon
appearance.
Fader appearance
Three options are available. Changes will take
place next time you open the TC Icon.
Faders at bottom
Press the value field to activate the Trim
function. With the Trim function a higher value
resolution is available on most parameters for
fine adjustments.
To release the Trim function simply press the
value field again.
Color Page
Depending on the light in the environment in
which you are working, different Color schemes
may be optimal. Select a color scheme to your
liking or make your own. - Enjoy
Fader at right side
No faders
No faders visual on the screen.
33
GENERIC REVERB INTRODUCTION
The TC Reverb Palette
Until 10 years ago, digital reverb was mostly
used as a Generic effect applied to many
sources of a mix. Nowadays, where more aux
send and returns are at disposal, new
approaches have emerged. Elements of the
mix are being treated individually, adding room
character, flavor and depth in more creative
and complex ways.
At TC, we call this a Source based approach,
and we have put more than 30 man-years of
development time into design and refinement of
Source based room simulation.
When Generic digital reverbs were invented,
they stretched the DSP power and memory
bandwidth capabilities of their time; and Source
specific processing was completely out of the
question. Even though we may now consider
Generic types to be less than ideal, they still
have applications for which they may be
chosen instead of their Source based cousins.
The large reverb and room simulation palette of
High end reverbs by TC Electronic allows the
user to choose whatever principle suits a
present need. Below you will find a suggestion
of when to use what.
Generic Reverb
Generic reverb is primarily a flattering sustain
effect which can be added to many sources of
a mix, or a complete stereo or multichannel
stem. It adds little character but also does no
harm, because the effect is blurred or washed
out.
If Early Reflections are offered, there are only
few of them and they play a rudimentary role.
Therefore, a strong localization is not imposed
on the signal, which is what you want when one
reverb is used on many sources.
For a graphical artist, the equivalent tool to
Generic reverb would be a paint brush.
Generic Reverb Pros
• 1st choice for composite, mixed material and
stems
• 1st choice when used with multichannel
joystick on console or DAW
• 1st choice for adding to classical main
microphone pick-up
• Works well on moving sources
• Prettier than life
• Quick and easy to use
34
Generic Reverb Cons
• Blurring takes away character from individual
sources
• Pitch modulation may be a problem with
some material
• Mono compatibility often compromised to
obtain extra width
• Imaging inferior to Source based reverb
Source Reverb
When elements of a mix are picked up
individually, a chance exists to define exactly
how each of them is to be heard. There is no
reason to apply one Generic reverb to several
single sources, unless they are supposed to
present an identical position to the final listener,
or you have run out of aux sends.
When it is desirable to distinguish between
single elements sharing more or less the same
panning position, source based reverb should
be a first choice. Subtle discrimination between
reflection patterns of individual sources can
make all the difference in the world when it
comes to obtaining depth, expression and
natural imaging.
Source Reverbs are able to generate multiple,
complex Early Reflection patterns. For best
results, if some reflections are already picked
up by a microphone, they should be excluded
from the simulated pattern by using the
appropriate reflection decrease control.
Instruments or sources can alternatively share
the same reverb input in groups, e.g. stage left,
center and right, for a more complex and
desirable result than a Generic, one-send
reverb approach.
For a graphical artist, the equivalent tool to
Source reverb would be a 3D rendering system
or Virtual Studio.
Source Reverb Pros
• 1st choice when input sources can be
separated
• 1st choice with spot microphones
• More depth and distinction obtainable in a
mix
• Adds character and definition to a source
GENERIC REVERB INTRODUCTION
Source Reverb Cons
• Require more sends or direct feeds than
Generic Reverb types
• No advantage on composite signals
• Not ideal for moving sources
Sampling Reverb
Sampling reverbs present a variation of the
Source theme: An impulse response is taken
from an actual room based on a specific source
and pick-up position. This "canned room" with
frozen source, pick-up and speaker positioning,
can later be applied to any signal.
From experiments we have found it difficult to
translate a room feeling to speakers, due to
compromises by nature built into the emission
and pick-up process when capturing a room
response. This is especially true with
multichannel formats such as 5.1 and 6.1,
where DSP in simulators can be used to
optimize a virtual room for a specific speaker
configuration.
Currently, no sampling reverbs are available in
TC Reverbs.
Sampling Reverb Pros
• "Organic" or natural feeling
• Some properties of a natural room may be
captured
• Different flavor to simulations
Sampling Reverb Cons
• Little editing possible. Editing often doesn't
sound right
• Difficult to capture sense of space as well as
it may be simulated
• Only one fixed source position per Engine
• Long recall times
• Lower dynamic range and bandwidth than
VSS algorithms
35
VSS-4
This following section of this manual
describes the Reverb 4000 algorithms. The
descriptions are organized and illustrated
via the TC Icon views.
At the end of each algorithm section a table
illustrates how the parameters are organized
in the Reverb 4000 as stand alone unit.
Main page
Multipliers - General
Multipliers are typically used to specify a given
Decay time in relation to a Master Decay.
Multiplier example: When a Decay multiplier is
set to 1.25 and the Master Decay is 2.0
seconds the resulting decay time will be: 1.25 X
2.00 = 2.5 seconds.
Master Reverb
Introduction to VSS-4
VSS™4 is a True Stereo Reverb - or two
Source Input to Stereo Output reverb - and
radically departs from being an additive sustain
diffuse field added to a 2-channel signal. Based
on source related Reflections from multiple
angles, the precision of VSS™4 is comparable
to real-world mono or stereo sources positioned
in an authentic or virtual space.
The two Input sources can be used for either a
final stereo-mix, or for positioning of two
individual mono-sources in the same virtual
space.
Because VSS™4 is a true stereo rendering of a
real room, you will experience that even with
only one source Input, you get a stereo Output
including the Early Reflections and Stereo
diffused fields.
Used for mastering purposes, VSS™4
maintains full bit transparency when bypassed
and with the two Sources placed in +/- 30
degrees position.
Master Decay
Range: 0.1 to 20 sec
Adjusts the Master Reverb Decay time. Decay
time can be further adjusted using the multiplier
for the following bands: Lo, LoMid, HiMid and
Hi.
Pre Delay
Range: 0 to 300ms
Pre Delay on the complete wet signal including
Early Reflections.
HiCut
Range: 20Hz to 20kHz
Determines the Hi Cut frequency for the Diffuse
Field part of the Reverb.
Reverb Size
Range: 0 to 15
Adjusts the overall perceived size of the Diffuse
Field part of the algorithm. Generally you would
attempt to define the perceived room size by
altering the Decay time. However, with the Size
parameter you can achieve a perceived
alteration of the room size thus keeping the
Decay time. The default value is meant as the
size that the specific Location Type is intended
to have.
Reverb Type
Range: Normal or Colored
When a Location Type is selected a Reverb
type is automatically set. With the Reverb Type
parameter it is possible to select between the
most natural sounding Diffuse field (Normal)
and a more colored "vintage" Diffuse field
setting.
36
VSS-4
Reverb Diffuse
Range: -25 to 25
This parameter gives you more or less diffusion
than the algorithm designer intended for the
given Decay time. For optimum performance
the diffusion is automatically adjusted behind
the scenes whenever you change Decay times.
This parameter gives you the added control to
vary the diffusion around this automatic setting.
Master Early
Decrease - Restriction in Order
Range: 0 to 100%
Reflection patterns are rendered to a high
order. 1st order reflections have hit one surface
before arriving at the listener, 2nd order
reflections two surfaces etc. High order
reflections are often more diffuse than low order
ones. In Reverb 4000 this effect is emulated by
assigning individual diffusion characteristics to
each reflection.
During perceptual experiments, we have found
that reducing particular orders of reflections can
be useful for optimizing the room response to a
given microphone placement. The 0% setting
will enable the full response while 100% is full
reduction.
Lo Color
Range: -50 to 50
Lo Color adjustment of the Early Reflections
Early Stop
Range: 0 to 100%
The Early Stop parameter can reduce the later
reflections in the Early Reflections pattern.
When using large location types this can be a
useful parameter to smooth the overall
perception of the room.
The parameter range limit will be less
than 100% if the Early Start parameter is
set to anything other than 0%.
Levels
Reverb Level
Range: Off to 0dB
Adjusts the level of the Diffuse Field reflections.
Early Level
Range: Off to 0dB
Adjusts the level of the Early Reflections from
the two sources.
Dry Level
Range: Off to 0dB
Attenuates the Dry signal level on the Output
side thus leaving the Reverb and Early Level
unaffected. Off equals a “kill-dry” setting.
Setup page
Hi Color
Range: -50 to 50
Hi Color adjustment of the Early Reflections
Early Start
Range: 0 to 100%
Adjusting the Start time is an efficient way of
getting rid of the first reflections that normally
color the source the most. By adjusting the
Start time, the first reflections are discarded but
the timing of the later reflections remain
unchanged. Therefore this adjustment is
typically more acoustically precise and useful
than a normal Predelay control.
The parameter range limit will be less
than 100% if the Early Stop parameter is
set to anything other than 0%.
Location Type
Select between different Locations. Both the
Early Reflection- and Diffuse Field-types are
changed when switching Location to give the
optimal starting point for further adjustments.
37
VSS-4
Positions
Range:
R 30º, R 15º, R 7º, C 0º, L 7º, L 15º, L 30º
Sets the location of the two Input sources.
Depending on the Location Type the number of
positions can vary. Typically a small room has
less positions than a large location. Source 1 is
Left Input and Source 2 is Right Input
Note - in 96kHz position B is eliminated.
Color page
Decay Crossover
Lo Decay
Range: 0.01 to 2.5
Decay multiplier in relation to the Master Decay,
for the frequencies below the Lo Xover setting.
LoMid Decay
Decay multiplier in relation to the Master Decay,
for the frequencies above the Lo Xover and
below the Mid Xover settings.
HiMid Decay
Decay multiplier in relation to the Master Decay,
for the frequencies above the Mid Xover and
below the Hi Xover settings.
Hi Decay
Decay multiplier in relation to the Master Decay,
for the frequencies above the Hi Xover setting.
Lo Xover
Sets the Cross-over frequency between the Lo
and LoMid Decay.
Mid Xover
Sets the Cross-over frequency between the
LoMid and HiMid Decay.
Reverb
Lo Cut
Range: 20Hz to 200Hz
Determines the Lo Cut frequency.
Attenuation amount is controlled via the Lo
Damp parameter.
Lo Damp
Range: 0 to -18dB
Attenuation of the frequencies below the
selected frequency via the Lo Cut parameter.
Hi Soften
Hi Soften is a special filter used to "soften" the
high frequencies of Reverb diffuse field. This is
not a simple Hi Cut filter but a complex set of
filters working together to remove the
frequencies that give a "brittle" or “harsh”
sounding Reverb. Hi Soften is scaled/linked to
the Hi Cut and Hi Decay parameters.
Hi Cut
Range: 20 to 20kHz
Attenuates the high-end frequencies.
38
Hi Xover
Sets the Cross-over frequency between the
HiMid and Hi Decay.
VSS-4
Gloss page
Reverb Modulation
The algorithm designers have adjusted the
diffuse field part of the reverb to be as smooth
and natural sounding as possible. However, to
integrate with the source material or to get a
different sound, it's sometimes needed to add
in modulation to the late part of the reverb.
Modulation Type
Select between different types of modulation on
the five Reverb diffuse fields.
Modulation Rate
Range: +/-50
Adjusts the Rate of the selected modulation.
Modulation Depth
In the Reverb 4000 user interface the
parameters of this algorithm are organized
as follows:
Home
PREDEL
DECAY
HIDEC
MIDI CC:
22/54 (DP)
76
(SP)
MIDI CC:
23/55 (DP)
77
(SP)
MIDI CC:
24/56 (DP)
78
(SP)
Levels
EARLY
REVERB
DRY
Reverb
LOCUT
REVSIZE
LODAMP
REVTYPE
HICUT
DIFFUSE
POS A
POS B
HICOL
DECRS
Early
TYPE
LOCOL
START
STOP
Decay
LO
LOMID
HIMID
HISOFT
Xover
LO
MID
HI
Modulation
TYPE
RATE
DEPTH
Range: 0 - 200%
Adjusts the Depth of the selected modulation.
(SP) : Single Precision
(DP) : Double Precision
39
VSS-3
Introduction
The VSS-3 algorithm is a multipurpose
algorithm, that with the comprehensive amount
of parameters in both the Early Reflection
section, the Reverb diffuse field and modulation
section opens for numerous flavors.
Use the VSS-3 as a high quality Source reverb.
Main page
Hi Decay
Range: 0.01 to 2.5
Multiplier for the frequencies above the Hi
Xover frequency.
Levels
Rev. Level
Range: -100dB to 0dB
The Output level of the diffuse field part of the
algorithm. When Rev Level is set to off, the
effect will consist entirely of Early Reflections.
Early Level
Range: -100dB to 0dB
The Output level of the Early Reflections. When
Early Lev is set to off the Reverb effect will
consist entirely of the Reverb Diffuse Field.
Dry Level
Attenuates the Dry signal level on the Output
side thus leaving the Reverb and Early Level
unaffected. Off equals a “kill-dry” setting.
Early page
Decay
Range: 0.01 to 20s
The Decay time of the Reverb. Usually
associated with the time it takes the Reverb
Diffuse Field to decay 60dB. This is the overall
Master Decay for the four band Decay
parameters (found in the REVERB section
below), which are multiples of this base Reverb
time.
Rev. Delay
Range: 0 - 200ms
A Delay to the diffuse field part of the Reverb.
Adds additional time between the Early
Reflections and the onset of the "diffuse field"
of the Reverb.
Hi Cut
Range: 20Hz to 20kHz
Rolls off the top end of the signal as it enters
the Reverb. Used in conjunction with Hi Soften
and Hi Decay to "darken" a room.
Pre Delay
Range: 0 to 100ms
A Delay placed at the Input of the algorithm.
This sets how long after the dry sound the Early
Reflections and the diffuse field will begin.
40
Early Reflections
Early Type
Range:
Concert Hall
Theater
Church
Venue
Studio
Softhall
Near
Hard
Spread
Build
Random
Slap
VSS-3
Car
Phonebooth
Bathroom
Smallroom
Carpark
Swim Stadium
Airport
Street
Alley
Piazza
Forest
Reverb page
Pick the type that best compliments your
material or best represents the effect you are
going for.
Early Size
Range/Type: Small, Medium or Large
Changes the size of the Early Type parameter.
Some of the Early Types are one size.
Early Color
Range: -40/+40
Adjusts the spectral balance in the high end
frequencies. This is actually a simple way of
adjusting a complex selection of frequencies.
Early Lo Cut
Range: Off to 400Hz
Sets the Lo Cut frequency for the Early
Reflections.
Early Position
Here you can select between a Close and a
Distant setting. This enables you to change the
distance between the listening position and the
source in the same Early Reflection pattern.
Please note that some of the Early
Types only have one position available.
Early Balance
Range: -100dB R, Center, -100dB L
The left/right balance of the Early Reflections.
Allows you to offset the Early Reflections from
the normal center position.
Reverb
Reverb Type
Range: Smooth, Natural, Alive, Fast, Fast Wd,
Alive Wd
Adjust this parameter with the Early Level
turned all the way off and the Rev Level all the
way up. Change the type to get a feel of what
each one sound like.
Reverb Width
Range: Wide, Stereo, Center or Mono
With this parameter you can change the width
of the diffuse field. The Mono setting is where
the left and right Reverb Diffuse Fields are
completely identical, the Center setting opens
slightly in the middle, Stereo is the normal
stereo image width and Wide covers the
outside of the stereo image.
The RevTypes: Fast Wd and Alive Wd
only have one width (extremely wide).
Lo Cut
Range: 20Hz to 200Hz
Adjustable filter that allows you to remove low
frequencies from the Reverb. The Lo Cut
frequency can be perceived as a Threshold
frequency. The cut will be performed according
to the Lo Damp parameter.
Lo Damp
Range: -18dB to 0dB
Sets the amount of cut in dBs.
(See Lo Cut description above).
41
VSS-3
Hi Cut
Range: 20 to 20kHz
Filter that allows you to remove high
frequencies from the Reverb.
Hi Soften
Range: -50 to +50
Hi Soften is a special filter used to "soften" the
high frequencies of Reverb. This is not a simple
Hi Cut filter but a complex set of filters working
together to remove those frequencies that
make a Reverb sound "brittle" or harsh. Hi
Soften is scaled/linked to the Hi Cut and Hi
Decay.
Reverb Balance
Range: -100dB R, center, -100dB L
The left/right balance of the Reverb. Allows you
to offset the diffuse field from the normal center
position.
Diffuse
Range: -50 to +50
This parameter gives you more or less diffusion
than the algorithm designer intended for the
given Decay time. For optimal performance the
diffusion is automatically adjusted behind the
scenes whenever you change Decay times.
This parameter gives you the added control to
vary the diffusion around this automatic setting.
Hi Decay
Sets the Decay time for the High-end
frequencies of the Reverb diffuse field.
Lo Crossover
Range: 20Hz to 500Hz
Sets the frequency at which the transition from
the low to the low-mid frequencies takes place.
Mid Crossover
Range: 200Hz to 2kHz
Sets the frequency at which the transition from
the low-mid to the mid frequencies takes place.
Hi Crossover
Range: 500Hz to 20kHz
Sets the frequency at which the transition from
the mid frequencies to the high frequencies
takes place.
Mod page
Decay/Crossover
Lo Decay
Range: 0.01 to 2.5
Multiplier for the frequencies below the Lo
Xover frequency.
LoMid Decay
Range: 0.01 to 2.5
The Ratio control multiplier for the low-mid
frequencies.
HiMid Decay
Range: 0.01 - 2.5
The Ratio control multiplier for the mid
frequencies. This parameter is normally set to
1.0, as it is the main parameter adjusted by the
main Decay parameter. This mid-range decay
control would normally be omitted, however, TC
Engineers felt you could use this parameter as
a fine adjustment tool to “tweak” a preset to
sound just right without having to adjust the
master Decay parameter.
42
Reverb Modulation
Rev. Mod. Type
Range: Off, Smooth 1, Smooth 2, Perc, Wow,
Vintage, Wild
Selects the type of modulation.
Rev. Mod. Rate
Range: -100, default, +100
Allows you to offset the speed of the LFO from
the factory default assigned to each Type.
Rev Mod Width
Range: 0% to 200%
Sets the Width of the modulation.
VSS-3
Space Modulation
Space Mod. Type
(Off, Normal, Fast, Slow, MidFreq, Sync)
Selects the type of Space Modulation.
Space Mod. Rate
Range: -100, default, +100
Allows you to offset the speed of the LFO from
the factory default assigned to each type.
Space Mod. Width
Range: 0 to 100%
Sets the width of the modulation.
Space Mod Depth
Range: -50, default, +50
Allow you to offset the amount of space
modulation from the factory default.
In the Reverb 4000 user interface the
parameters of this algorithm are organized
as follows:
Home
PREDEL
DECAY
HIDEC
MIDI CC:
22/54 (DP)
76
(SP)
MIDI CC:
23/55 (DP)
77
(SP)
MIDI CC:
24/56 (DP)
78
(SP)
Levels
EARLY
REVERB
DRY
Reverb
LOCUT
WIDTH
BALANCE
LODAMP
TYPE
DELAY
HICUT
DIFFUSE
Early
TYPE
HICOLOR
SIZE
LOCUT
POSITION
BALANCE
LOMID
HISOFT
HIMID
HIDEC
MID
HI
Decay
LO
Xover
LO
Modulation
TYPE
RATE
Space
Modulation
Type
Rate
Depth
DEPTH
Width
(SP) : Single Precision
(DP) : Double Precision
43
NONLIN-2
Introduction
NonLin is an Effect Reverb with controllable
Envelope, Attack, Hold and Release. It is
capable of generating compact Vocal
Ambience, dramatic eighties drum and
percussion sounds, Reverse Reverb or
completely new and twisted effects. Nonlin also
does classic Gated Reverb, but because it
doesn't need to be triggered, it can be used on
all sorts of program material.
The eighties with a Twist
Compared to effect Reverbs from the past,
Nonlin features longer and more diffused
response with a higher resolution, but classic,
low density processing is also available.
However, there is more to updating a classic
than free Envelope, selectable response and
higher resolution.
NonLin also features a Twist parameter, which
radically alters the sound, sometimes in weird
ways. Adding Twist may not always be pretty,
but the parameter truly is a new spice included
to spark imagination and storytelling, and which
can be used to add character to any source of
a mix.
Main page
Attack
Range: 0 - 500ms
Sets the Attack time (= build up) of the Reverb
Envelope.
Max. range for this parameter depends
on the Hold and Release settings.
Hold
Range: 0 - 500ms
Sets the Hold time (= fully open time) of the
Reverb Envelope. For a typical eighties style
response, Hold should be set at 60-120 ms.
Max. range for this parameter depends
on the Attack and Release settings.
Release
Range: 0 - 500ms
Sets the Release time (= Decay) of the Reverb
Envelope.
For a typical eighties style response, Release
should be set at 0-100 ms. The most gated and
unnatural effect is obtained at short Release
settings.
Max. range for this parameter depends
on the Attack and Hold settings.
Reverb
Style
Selects the basic Reverb Style subjected to the
Envelope and Twist modifications. The Style
parameter should be seen as an algorithm
selection inside the algorithm.
Different Styles have different features with
regards to density, diffusion type, spectral
response, stereo image etc. Choose one that
suits your program material.
Differences are more pronounced with
low Diffuse settings and Twist Ratios.
Envelope
Pre Delay
Range: 0 - 500ms
Pre Delay offsets the Output and timing of the
Envelope Generator. It is typically used to
obtain depth and definition in a mix, or align the
effect with a musical beat. Delays in the 10-40
ms range can be considered for percussive
sounds, while dense vocal slap effects could
use 70-150 ms of Pre Delay.
44
Diffuse
Range: 0 - 100%
Sets the amount of diffusion applied to the
Reverb Style selected.
For high Diffuse ratios, the Attack and
Decay times of the reverb Envelope may
be slightly affected.
NONLIN-2
Twist
Levels
Type
Selects which type of funky effect treatment to
be used on the reverb. Twist Type should be
regarded as a spice capable of sparking
imagination in the mix process. Try the effect
on all sorts of different sources to add character
or make them stand out. If spectral shaping
using the Twist parameters gets out of control,
the Lo and Hi cuts can be used to stay within
limits.
Dry Level
Range: Off - 0dB
Adjusts the dry signal level passed through the
Engine. For a typical send/return configuration,
leave Dry level off.
When the Twist Ratio is set at 0%, Twist
Type has no effect.
Ratio
Range: 0 - 100%
Applies the selected amount of "Twist" to the
Reverb.
When the Twist Ratio is set at 0%, Twist
Type has no effect.
Wet Level
Range: Off - 0dB
Adjusts the wet Output level.
Filter
LoCut
Range: 20Hz to 20kHz
Lo Cut on the Reverb Input.
Hi Cut
Range: 20Hz to 20kHz
Hi cut on the Reverb Input.
In the Reverb 4000 user interface the
parameters of this algorithm are organized
as follows.
Width
Width
Range: 0 - 100%
Adjusts the Output Stereo Width. 0% denotes
mono, while 100% is max width.
The Reverb Style and Diffuse parameters
also affect the perceived width of the
effect. Width difference between Styles is
most obvious at low Diffuse Ratios.
Level Page
Home
ATTACK
HOLD
RELEASE
MIDI CC:
22/54 (DP)
76
(SP)
MIDI CC:
23/55 (DP)
77
(SP)
MIDI CC:
24/56 (DP)
78
(SP)
WET
DRY
STYLE
HICUT
DIFFUSE
Levels
Reverb
LOCUT
WIDTH
PREDEL
Twist
TYPE
RATIO
(SP) : Single Precision
(DP) : Double Precision
45
DVR-2
Introduction
DVR-2 offers a pristine Generic Reverb with
true vintage flavor. Generic Reverb is
complementary to Source Reverb, and both
types are at disposal in the Reverb 4000.
You can read more about Generic Reverb
elsewhere in Reverb introduction but the term
is used to describe a flattering sustain effect,
which can be added to many sources of a mix.
It produces little character but also does no
harm, because the effect is blurred or washed
out. Instead, it adds a good sense of
spaciousness and more or less pronounced
modulation.
Recreation of a Classic
The development of DVR-2 has been a process
extending several years, with the goal of
recreating the most shining Generic Reverb of
all times, the EMT250. A particularly well
sounding machine was refurbished, and in the
making of DVR-2 many design disciplines were
involved...
Better than the Classic?
While DVR-2 in Normal mode is very close to
the sound of a perfectly aligned 250, having
used much DSP power to mimic artifacts of old
hardware, the algorithm can also be put in a
High Resolution mode. Using this function, the
noisefloor is much lower, but use your own ears
to determine if this is actually a plus for a
specific situation.
Please note: Many of the constraints and
criteria listed above produce non-linear audio
behavior, making it impossible to obtain more
than a static and crude result if trying to sample
an original processor. A minute emulation does
more justice to the original from an audio point
of view, and can also still be adjusted.
Main page
Hardware technical: What was the precision of
converters and how where they implemented in
the eighties with emphasis, block scaling,
linearity, filters etc? How much processing and
RAM was available, what was the sample rate
etc?
Software technical: Which kind of processing
was done in discrete circuitry, what type of
truncation and noisefloor artifacts would result,
how could the low sample rate be mimicked
precisely, and how could all of this be
transferred to a modern DSP platform.
Perceptual: Making sure the qualities of the
original processor was preserved. Sweet
modulation, spectral characteristics,
spaciousness, distortion, saturation etc.
Hundreds of hours spent listening and
measuring.
User: The four basic parameters of the EMT250
were carefully laid out, offering a remarkably
simple user interface with complex, yet
optimized interactions under the hood. DVR-2
is a resemblance of that including range and
coarseness of parameters. Also the original I/O
structure is kept with Mono in to Stereo and
Quad out.
46
Reverb
Pre Delay
Range: 0, 20, 40 and 60ms
Pre delay is the amount of time from an input is
received until reverb starts building up at the
output.
Decay
Range: 0.2 - 4.5s
Adjusts the Master Decay time.
Lo Decay
Range: 0.5 to 2.0
Decay multiplier for low frequencies. For a x1.0
setting, low frequency decay will equal the
Decay setting.
DVR-2
Hi Decay
Range: 0.5 to Max.
Decay multiplier for hi frequencies. For a x1.0
setting, high frequency decay will equal the
Decay setting.
Levels
Wet Level
Range: Off - 0dB
Adjusts the reverb level of the output channels.
Dry Level
Range: Off - 0dB
Adjusts the dry signal level of the output
channels.
Filter
Hi Cut
This is DVR-2´s HiCut and can be used to limit
or extend the overall frequency spectrum.
Hi Q Scale
Corresponds the small potmeters inside older
reverbs used to equalize sound differences
caused by electric component-tolerances. Use
the Q-scale in combination with the set with
HiCut Frequency to shape the treble to your
personal flavor.
In the Reverb 4000 user interface the
parameters of this algorithm are organized
as follows:
Home
PREDEL
DECAY
HIDEC
MIDI CC:
22/54 (DP)
76
(SP)
MIDI CC:
23/55 (DP)
77
(SP)
MIDI CC:
24/56 (DP)
78
(SP)
WET
DRY
Reverb
TRIMLO
QSCALE
HICUT
Decay
LO
RATIO
HIDEC
Misc.
MODDPTH
LORES
INTRANS
Levels
(SP) : Single Precision
(DP) : Double Precision
Trim Lo Freq
A subtle damping of selected frequencies in the
lower end.
Misc.
Lo Res
Switches the DVR-2 to a lower bit-resolution.
This adds an older and more grainy sound and
also noise giving a simulation of various vintage
reverbs.
Input Trans
Emulates the sound of Input transformers
typically used in vintage Reverbs. Use it to
create a warm vintage like sound. Especially
good for short Decay times.
Modulation
Sets the Depth of the modulation. Normal set to
100%. Increase if you like a more liquid, chorus
like sound.
47
VSS-4 TS (TRUE STEREO)
Main page
Rev1/Rev2 page
Reverb 1 - Reverb 2
Reverb
Link
The Link mode is used to link parameters
between the Reverbs 1 and 2. E.g. if “Link 1+2”
is selected the Master Decay of both Reverb 1
and Reverb 2 is controlled by a single handle.
Decay
Master Decay parameter. This parameter is
also found on the Main page.
Pre Delay
Range: 0 - 300ms
Adjusts the Pre Delay
Decay
Adjusts the Master Decay time.
Hi Decay
Decay multiplier for Reverb A hi-end
frequencies. For a x1.0 setting, high frequency
decay will equal the Decay setting.
Wet Level
Range: Off to 0dB
Input level adjust.
If the input signal is close to full scale and/or
long decay times are used, it may be necessary
to attenuate the input to avoid overload.
Dry Level
Range: Off to 0dB
Dry Level control.
In send/return configurations, the parameter
should be set to Off.
48
Rev. Diffuse
Range: -50 to +50
This parameter offsets the diffusion away from
what is considered optimum for a given Decay
time.
Build
Range: Fast, Slow
Selects the speed of the build-up (i.e. attack) of
the reverb.
Reverb Type
By selecting different types or different version
(A, B, C, D), de-correlated responses are
ensured.
Reverb Lo/Hi Cut
Lo Cut
Range: 20Hz to 200Hz
Determines the Lo Cut frequency. Attenuation
amount is controlled via the Lo Damp
parameter.
Lo Damp
Range: 0 to -18dB
Attenuation amount of frequencies below the Lo
Cut setting.
VSS-4 TS (TRUE STEREO)
Hi Cut
Range: 20Hz to 20kHz
Determines the Hi Cut frequency.
In the Reverb 4000 user interface the
parameters of this algorithm are organized
as follows:
Hi Soften
Smoothen the High End frequencies.
Decay
Lo Decay
Range: 0.01 to 2.5
Decay multiplier related to Master Decay, for
frequencies below the Lo Xover setting.
LoMid Decay
Range: 0.01 to 2.5
Decay multiplier related to Master Decay, for
frequencies above the Lo Xover setting.
HiMid Decay
Range: 0.01 to 2.5
Decay multiplier related to Master Decay, for
frequencies above the Mid Xover setting.
Hi Decay
Range: 0.01 to 2.5
Decay multiplier related to Master Decay, for
frequencies above the Mid Xover setting.
Home
PREDEL
DECAY
HIDEC
MIDI CC:
22/54 (DP)
76
(SP)
MIDI CC:
23/55 (DP)
77
(SP)
MIDI CC:
24/56 (DP)
78
(SP)
Home B
PREDELB
DECAYB
HIDECB
WET A
WET B
DRY A
DRY B
Reverb A
LOCUT
DECAY
BUILD
LODAMP
TYPE
HICUT
DIFFUSE
Reverb B
LOCUT
DECAY
BUILD
LODAMP
TYPE
HICUT
DIFFUSE
LOMID
HISOFT
HIMID
HIDEC
MID
HI
LOMID
HISOFT
HIMID
HIDEC
MID
HI
Levels
Lo Xover
Sets the Cross-over frequency between the Lo
and LoMid Decay.
Decay A
LO
Mid Xover
Sets the Cross-over frequency between the
LoMid and HiMid Decay.
Xover A
LO
Hi Xover
Sets the Cross-over frequency between the
HiMid and Hi Decay.
DECAY B
LO
Xover B
LO
Link
LINK
(SP) : Single Precision
(DP) : Double Precision
49
AMBIATOR
Introduction
Ambiator is a new small-space modeller with
integrated panning af a source. Try it when you
grow tired of power panning or just need to add
that subtle sense of ambience bringing life and
character to certain elements of a mix.
Main page
Material
Range: Marble, Plaster, Concrete, Brickwall,
Mineral Wool and Wood.
The Material parameter is an integrated part of
the Shade parameters and defines overall
sound.
Diffusion
Range: Off, Normal, Metal and Smooth
Selects between different diffuse/boundary
types or turns diffusion off. The diffuse amount
is an integrated part of the Shade parameters.
Levels
Wet Level
Range: Off to 0dB
Adjusts the Wet level of the algorithm.
Dry Level
Range: Off to 0dB
Sets the amount of Dry signal.
Main
Size
Range: 0.5 to 2
Multiplier. “1” is default and the size intended by
the designer.
In the Reverb 4000 user interface the
parameters of this algorithm are organized
as follows:
Home
Shade
Range: -100 to 100
The Shade parameter is an “amount control” of
both the Material/Diffuse type parameters.
Where the Material and Diffuse Type
parameters define the “sound” or “color” of
ambience, the Shade parameter adds or
subtracts the amount of definition.
Locations
Location Type
Range: 40x40 ft box, Big Studio, Box Car, Mid
Studio, Small Corridor, Small Studio, Medium
Room, Corner Close and Corner Far.
Simply defines the basis location type
emulated.
Position
Range: -100(Left) to 100(Right) - 0 is Center.
Position panner for the generated reflections.
50
SIZE
SHADE
MIDI CC:
23/55 (DP)
77
(SP)
MIDI CC:
24/56 (DP)
78
(SP)
WET
DRY
MATERIA
POSITION
DIFFTYPE
Levels
Location
TYPE
(SP) : Single Precision
(DP) : Double Precision
REVERB-4
Introduction
Variation/Color
Reverb 4 is a new Stereo In, Stereo Out
algorithm making its debut in Reverb 4000. This
is a 2003 version of a Generic Reverb, suited
for composite material and main microphone
processing. It adds spaciousness rather than
localization to the audio image.
Diffuse
Range: -50 to +50
Sets the amount of Diffuse
Important for mastering purposes, Reverb 4
features full 24 bit transparency, and the wet
Output is de-correlated the same way a good
recording of a natural room would be.
Therefore, the Wet/Dry balance is not upset
when listening in mono.
Main page
Tweak
Range: -25 to +25
The Default setting is 0 and the setting
intended by the designer. However, exiting
resonance variations can be found by twisting
the tweak parameter that detunes the
algorithms delay settings and disadjusts the
algorithm structure.
Lo Color & Hi Color
Color adjust parameters on the entire Reverb.
Hi Fact
Range: -25 to +25
Scales Hi Cuts
Levels
Early Level
Range: -100 to 0dB
Level parameter for the Early Reflection part of
the algorithm. Increase to emphasize the
definition of the Room. Decrease to set focus
on the Diffuse part of the algorithm.
Decay
Range: Variable depending on Rev Type
Master Decay for Reverb A
Pre Delay
Range: 0 - 300ms
Pre Delay for setting for the entire Reverb.
Rev Type
Select between various Reverb types.
Reverb Level
Range: -100dB to 0dB
The Output level of the diffuse field part of the
algorithm. When Rev Level is set to off, the
effect will consist entirely of Early Reflections.
Dry Level
Range: -100 to 0dB
Attenuates the Dry signal level on the Output
side thus leaving the Reverb and Early Level
unaffected. Off equals a “kill-dry” setting.
Wet
Range: Off to 0dB
Adjusts the Wet level of the algorithm.
51
REVERB-4
Modulation
Type
Range: dependent on Rev Type
Variations of modulations over the Reverb
Types.
Rate
Range: -25 to +25
Allows you to offset the speed of the LFO from
the factory default assigned to each Type.
Depth
Range: -25 to +25
Allows you to offset the amount of space
modulation from the factory default.
In the Reverb 4000 user interface the
parameters of this algorithm are organized
as follows:
Home
PREDEL
DECAY
HIFACT
MIDI CC:
22/54 (DP)
76
(SP)
MIDI CC:
23/55 (DP)
77
(SP)
MIDI CC:
24/56 (DP)
78
(SP)
Levels
EARLY
REVERB
DRY
Reverb
LOCOLOR
REVTYPE
HICOLOR
TWEAK
HIFACT
DIFFUSE
Modulation
TYPE
RATE
DEPTH
(SP) : Single Precision
(DP) : Double Precision
52
APPENDIX -
MIDI IMPLEMENTATION
REVERB 4000 - HIGH DEFINITION REVERB
Function
Transmitted
Recognized
Basic Channel
Default
Changed
1
1-16
1
OMNI-1-16
Mode
Default
Messages
Altered
X
X
True Voice
X
X
X
X
Velocity
Note ON
Note OFF
X
X
X
X
After Touch
Key’s
Channel
X
X
X
X
Pitch Bend
X
X
Control Change
O
O
Prog Change
O
O
SysEx
O
O
X
X
X
X
System real time Clock
Commands
X
X
X
X
Aux Messages
X
X
X
X
X
X
X
X
Note Number
Common
O:YES
X:NO
Song Pos
Song Sel
Tune
Local ON/OFF
All Notes OFF
Active Sense
Reset
Mode 1: OMNI ON, POLY
Mode 3: OMNI OFF, POLY
Remarks
Mode 2: OMNI ON, MONO
Mode 4: OMNI OFF, MONO
53
APPENDIX
Formats:
Output Dither:
Word Clock Input:
Sample Rates:
Processing Delay:
Frequency Response DIO:
Analog Inputs
Connectors:
Impedance:
Max. Input Level:
Min. Input Level (for 0 dBFS):
Sensitivity:
A to D Conversion:
A to D Delay:
Dynamic Range:
THD:
Frequency Response:
Crosstalk:
Analog Outputs
Connectors:
Impedance:
Max. Output Level:
Full Scale Output Range:
D to A Conversion:
D to A Delay:
Dynamic Range:
THD:
Frequency Response:
Crosstalk:
EMC
Complies with:
Safety
Certified to:
54
XLR (AES/EBU)
RCA Phono (S/PDIF)
Optical (Tos-link, ADAT)
AES/EBU (24 bit),
S/PDIF (24 bit), EIAJ CP-340, IEC 958,
EIAJ Optical (Tos-link),
ADAT Lite pipe (24 bit)
HPF/TPDF dither 8-20 bit, independent dithered output
RCA Phono, 75 ohm, 0.6 to 10 Vpp
32 kHz, 44.1 kHz, 48 kHz, 88.2 kHz, 96 kHz
0.2 ms @ 48 kHz
DC to 23.9 kHz ± 0.01 dB @ 48 kHz
DC to 47.9 kHz ± 0.01 dB @ 96 kHz
XLR balanced (pin 2 hot)
20 Kohm
+22 dBu (balanced)
-10 dBu
@ 12 dB headroom: -22 dBu to +10 dBu
24 bit (6.144 MHz delta sigma @ 48/96 kHz)
0.8 ms @ 48 kHz, 0.4 ms @ 96 kHz.
>103 dB (unweighted, BW = 22 kHz), >106 dB(A)
-95 dB (0,0018 %) @ 1 kHz, -6 dBFS (FS @ +16 dBu)
10 Hz to 20 kHz : +0/-0.2 dB @ 48 kHz
10 Hz to 45 kHz : +0/-1 dB @ 96 kHz
<-80 dB, 10 Hz to 20 kHz
typical –100 dB @ 1 kHz
XLR balanced (pin 2 hot)
100 ohm (active transformer)
+22 dBu (balanced)
-10 dBu to +22 dBu
24 bit (6.144 MHz delta sigma @ 48/96 kHz)
0.57 ms @ 48 kHz, 0.28 ms @ 96 kHz
>+100 dB (unweighted, BW = 22KHz), >+104 dB(A)
-82 dB (0.008 %) @ 1 kHz, -6 dBFS (FS @ +16 dBu)
10 Hz to 20 kHz : +0/-0.5 dB @ 48 kHz
10 Hz to 45 kHz : +0/-3 dB @ 96 kHz
<-60 dB, 10 Hz to 20 kHz
typical –90 dB @ 1 kHz
EN 55103-1 and EN 55103-2
FCC part 15, Class B
CISPR 22, Class B
IEC 60065, EN 60065, UL 6500 and
CSA E65, CSA File#LR108093
Due to continuous development
these specifications are subject
to change without notice.
Digital Inputs and Outputs
Connectors:
- TECHNICAL SPECIFICATIONS
APPENDIX
- TECHNICAL SPECIFICATIONS
Environment
Operating Temperature:
Storage Temperature:
Humidity:
32° F to 122° F (0° C to 50° C)
-22° F to 167° F (-30° C to 70° C)
Max. 90 % non-condensing
PCMCIA Interface
Connector:
Standards:
Card Format:
PC Card, 68 pin type 1 cards
PCMCIA 2.0, JEIDA 4.0
Supports up to 2 MB SRAM
Control Interface
MIDI:
In/Out/Thru: 5 Pin DIN
Anodized aluminum front
Plated and painted steel chassis
Display:
Dimensions:
Weight:
Mains Voltage:
56 x 128 dot graphic LCD
19" x 1.75" x 8.2" (483 x 44 x 208 mm)
5.2 lb. (2.35 kg)
100 to 240 VAC, 50 to 60 Hz
(auto-select)
Power Consumption:
Backup Battery Life:
<20 W
>10 years
Warranty
Parts and labor:
1 year
Due to continuous development
these specifications are subject
to change without notice.
General
Finish:
55
PRESET LIST - HALLS
No Name
Preset Derrives from
Algorithm
1
2
3
4
5
6
7
8
9
10
11
12
13
14
15
16
17
18
19
20
21
22
23
24
25
26
27
28
29
30
31
32
33
34
35
36
37
38
39
40
41
42
43
44
45
46
47
S-6000
VSS-4
DVR
Rev-4
VSS-3
VSS-3
VSS4
VSS4
VSS4
VSS4
VSS4
VSS-4
VSS-4
VSS-3
VSS-4
VSS-4
VSS-4
VSS-4
VSS-4
VSS-4
VSS-4
VSS-4
VSS-4
VSS-4
VSS-4
VSS-4
VSS-4
VSS-4
VSS-3
VSS-3
VSS-3
VSS-3
VSS-3
VSS-3
VSS-3
VSS-3
Rev-4
Rev-4
VSS-4
VSS-4
56
Large Hall
Crystal Hall
Soft Hall
Back There
Studio 40x40 ft
Rich Hall
Wooden Chamber
Wiener Halle
Concert Gebouw
DTuned Hall
Cincinnati Music Hall
VSS4 Chamber
Vocal Bright
Medium Hall
Joy Hall
Europe Orch Hall
Show Hall
Back Wall Hall
Natural Hall
Big Orch Hall
New Age Hall
Warm Slap Hall
Bright Slap Hall
Erase”Verb”
Alone In The Dark
Shortstop Hall
Big Jazz Scene
Large Clear Hall
Warm Cathedral
Ambient Hall
Bright Theatre
Church
Vocal Hall 1
Vocal Deep
Boston Garden Hall
Amsterdam Hall
Showtime
Cool Pop Ballad
Live Pop Ballad
GM Hall <M5>
Church1 <M5>
Church2 <M5>
480 Hall <M5>
SlapHall <M5>
WoodHall <M5>
5000Hall <M5>
Live VoxHall
S-6000
M-3000
M-3000
S-6000
S-6000
M-3000
S-6000
S-6000
S-6000
S-6000
S-6000
S-6000
S-6000
S-6000
S-6000
S-6000
S-6000
S-6000
S-6000
S-6000
S-6000
M-3000
M-3000
M-3000
M-3000
M-3000
M-3000
M-3000
S-6000
S-6000
NOTE: Presets marked with <M5>
are emulations of M5000 presets of the same name
VSS-4
PRESET LIST - ROOMS
No Name
101
102
103
104
105
106
107
108
109
110
111
112
113
114
115
116
117
118
119
120
121
122
123
124
125
126
127
128
129
130
131
132
133
134
135
136
137
138
139
140
141
142
143
144
145
146
147
148
149
150
151
152
153
154
Small Blanket Room
Church Coffee House
Dirty Room
Puk Drum Ambience
80X80 feet Box
DrewRoom <M5k>
HomeRoom <M5k>
Library
Spanking Room
DTuned Ambience
Cozy Corner
Live 2
Small Studio
Small Wood Room
Studio Live Room
Small Room
Medium Room
Dark Red Velvet
Tight & Round
Conga Lounge
Snare Room
Kick Room
Small Hall
Generic Live Club
Flat Rap Club
Overhead Mics
In The Room
Tight & Natural
Store Room
Furnished Room 2
A Small Room
Stretched Room
Slaugterhouse
Medium Basement
Box 40x40 ft
Subtle Studio
Box Car
Subtle Room
Small Corridor
Subtle Wood
Close to the Corner
Far from the Corner
Subtle Big
Rock Vocal Room
Short Rock Snare
VocalDry <M5>
VocalWet <M5>
Locker <M5>
Shorcut <M5>
Ugly1 <M5>
Ugly2 <M5>
WoodFlr <M5>
StoneWall <M5>
Ambience <M5>
Preset Derrives from
S-6000
S-6000
S-6000
M-3000
S-6000
S-6000
S-6000
S-6000
M-3000
S-6000
S-6000
S-6000
S-6000
S-6000
S-6000
S-6000
S-6000
S-6000
S-6000
S-6000
M-3000
M-3000
M-3000
M-3000
M-3000
M-3000
S-6000
S-6000
S-6000
S-6000
S-6000
S-6000
S-6000
S-6000
S-6000
S-6000
S-6000
S-6000
NOTE: Presets marked with <M5>
are emulations of M5000 presets of the same name
57
PRESET LIST - PLATES
No Name
201
202
203
204
205
206
207
208
209
210
211
212
213
214
215
216
217
218
219
220
221
222
223
224
225
226
227
228
229
230
231
232
233
234
235
236
237
238
239
58
EMT 250
Long Vocal
EMT 140
SteelPlate <M5>
GoldPlate <M5>
Pure Plate
Vocal Plate+Delay
Mellow Plate
Chorused Plate
DTuned Plate
Dark Room
Bright Chamber
Dance Lead
Dirty Plate
Long Perc
EMT 140 Short
EMT 140 Long
St. Joseph Church
Dome Chapel
Museum
Indoor Arena
Vocal Plate
Wood Diffuse
Jazz Plate
Medium String Hall
Eternal Piano
Bright Plate
Dual Plate
2 Rooms
2 Halls 4 You
Dual Backyard
Super Strings
Nice Vocal
Ballad Vocal
Church
String Hall
Nice 4 Perc
Scoring Stage
Snare Plate
Preset Derrives from
Algorithm
S-6000
S-6000
S-6000
DVR-2
DVR-2
Rev-4
VSS3
VSS3
Rev4
DVR2
VSS3
DVR2
Rev4
DVR-2
Rev-4
VSS-3
Rev-4
DVR-2
Rev-4
Rev-4
Rev-4
Rev-4
Rev-4
Rev-4
Rev-4
Rev-4
Rev-4
VSS-4
VSS-4
VSS-3
VSS-4TS
VSS-4TS
VSS-4TS
VSS-4TS
DVR-2
DVR-2
DVR-2
DVR-2
DVR-2
DVR-2
DVR-2
Rev-4
S-6000
S-6000
S-6000
S-6000
S-6000
S-6000
S-6000
S-6000
S-6000
S-6000
S-6000
S-6000
S-6000
S-6000
S-6000
S-6000
M-3000
S-6000
S-6000
S-6000
S-6000
S-6000
S-6000
S-6000
S-6000
S-6000
S-6000
S-6000
NOTE: Presets marked with <M5>
are emulations of M5000 presets of the same name
PRESET LIST - EFFECTS
No Name
301
302
303
304
305
306
307
308
309
310
311
312
313
314
315
316
317
318
319
320
321
322
323
324
325
326
327
328
329
330
331
332
333
Tight NonLin
AMS NonLin A
Garage Gate
Cheap Spring
Light Starburst
TajMahal <M5>
AutoPan Gate
Xplode Gate
Reverse Ramp
Dixie Chicken
AMS NonLin B
Whisper
KitPig1
KitPig2
Drummy
Electronic Megaphone
Spacedome PA
NonLin Bright
Muffled Pipe Vocal
Breathing 130BPM
Kick Thundergate
Snare Boinkygate
Thick Slapback
Tight Stereo Slap
Dense Dark Room
Dense Arena
NonLin Slap
Ricochet Verb
Tight & Smooth
80´s 808
Studio Spring
Nonlin Vocal
RichVerb <M5>
Preset Derrives from
Algorithm
S-6000
S-6000
S-6000
S-6000
S-6000
NONLIN-2
NONLIN-2
NONLIN-2
Rev-4
NONLIN-2
VSS3
Nonlin2
Nonlin2
Nonlin2
Nonlin2
NONLIN-2
NONLIN-2
NONLIN-2
NONLIN-2
NONLIN-2
NONLIN-2
NONLIN-2
NONLIN-2
NONLIN-2
NONLIN-2
NONLIN-2
NONLIN-2
NONLIN-2
NONLIN-2
NONLIN-2
NONLIN-2
NONLIN-2
VSS-4
VSS-3
Ambiator
Rev-4
Nonlin-2
VSS-3
S-6000
S-6000
S-6000
S-6000
S-6000
S-6000
S-6000
S-6000
S-6000
S-6000
S-6000
S-6000
S-6000
S-6000
S-6000
S-6000
S-6000
S-6000
S-6000
59