1
G ETTING S TARTED W ITH OWL
A UTHORING
Online Web Learning
University of Massachusetts at Amherst
A Series of Hands-on Activities to Teach You the
Various Tools in the OWL Authoring System
Center for Educational Software Development
The University of Massachusetts at Amherst
Amherst, MA 01003
June 2012
http://www.cesd.umass.edu/cesd/
© CESD, University of Massachusetts, Amherst, MA USA
Table of Contents
1 INTRODUCTION.......................................................................................................... 1 What is OWL? ........................................................................................................................................................1 The History .............................................................................................................................................................1 How It Works..........................................................................................................................................................1 Organization and Use of This Manual ....................................................................................................................1 Before You Get Started...........................................................................................................................................2 2 GETTING INTO OWL .................................................................................................. 3 Authoring Window.................................................................................................................... 3 Logging In...............................................................................................................................................................3 First Time Information (only for initial log in).......................................................................................................3 Using OWL as a Student........................................................................................................... 4 Taking the Tutorial .................................................................................................................................................4 Getting to the Authoring View ...............................................................................................................................5 3 INSTRUCTIONAL UNITS AND QUESTIONS ............................................................. 6 Instructional Units..................................................................................................................... 6 Creating a New Instructional Unit ..........................................................................................................................6 Static Questions ......................................................................................................................... 6 Creating a New, Short Answer Question in the Question Editor ...........................................................................7 Testing the Question ...............................................................................................................................................8 Input Box and Answer Range .................................................................................................................................8 Multiple Choice Questions .....................................................................................................................................9 Multiple-Multiple Choice Questions ....................................................................................................................10 Additional Input Boxes, Answer Ranges, and Capitalization...............................................................................11 Matching Questions ..............................................................................................................................................12 Using Custom Inputs in Questions .......................................................................................................................12 Question Tags .......................................................................................................................................................13 Manually Graded Questions .................................................................................................................................13 Parameterized Questions ........................................................................................................ 14 Creating a New IU for Parameterized Questions..................................................................................................15 Creating a Parameterized Question.......................................................................................................................15 Viewing Math Operators, Symbols, and Functions ..............................................................................................15 Parameterized Questions Using String and Vector Functions..............................................................................16 Parameterized Questions Using a User-Defined Table ........................................................................................16 Instructional Unit Content...................................................................................................... 17 Adding Internal Content to an IU .........................................................................................................................17 Adding External Content to an IU (in a New Window) .......................................................................................18 Navigating Through IUs and Questions ................................................................................ 18 Searching Instructional Units................................................................................................................................19 Moving Between Question and IUs......................................................................................................................19 4 MANAGING TAGS AND TABLES ............................................................................ 21 Managing Tags......................................................................................................................... 21 Examining Current Tags .......................................................................................................................................21 Creating a New Text Tag......................................................................................................................................22 Creating a New Image Tag ...................................................................................................................................22 Managing Tables ..................................................................................................................... 22 Viewing a User-Defined Table .............................................................................................................................22 Creating a New User-Defined Table.....................................................................................................................23 Adding a New Entry .............................................................................................................................................23 5 AUTHORING A COURSE.......................................................................................... 25 Courses and Sections ............................................................................................................... 25 Your OWL Course and Section ............................................................................................................................25 Assignments.............................................................................................................................. 26 Assignment Settings .............................................................................................................................................26 Creating a New Question Mode Assignment........................................................................................................27 Adding IUs to the Question Assignment ..............................................................................................................27 IU Settings for QuestionPool Type Assignments .................................................................. 28 Creating a New QuestionPool Type Assignment .................................................................................................28 Adding IUs to the Assignment..............................................................................................................................29 Where to Go From Here ......................................................................................................... 29 6 APPENDICES ............................................................................................................ 30 Appendix 1 – OWL Question and Question Pool Mode Comparison ................................ 30 Appendix 2 – OWL Instructor Guidelines............................................................................ 31 Grading .................................................................................................................................................................31 Student Handouts ..................................................................................................................................................31 Assignments..........................................................................................................................................................31 Support..................................................................................................................................................................31 ii
1 INTRODUCTION
What is OWL?
OWL stands for Online Web-based Learning. Basically it is a content presentation and assessment tool. Students
log into the system, choose an assignment, read any given information, and then answer questions. The questions
are graded automatically by the system, and the scores are reported to the student.
OWL has 4 components: the student quiz engine, instructor tools, authoring tools, and administrative tools. All
components are accessed over the web through individual logins. The quiz engine delivers the content, questions,
and scores to the student. The authoring tools provide for the creation of the content material, questions,
assignments, and courses, as well as management of students and grades. Administrative tools allow for the
addition of new authors as well as other high-level administrative tasks.
The History
OWL was developed in the Center for Computer Based Instructional Technology (CCBIT) at the University of
Massachusetts. It was created in 1996 in collaboration with the Chemistry department as a web-based replacement
for the electronic homework system currently in use. Next, the department of Physics began to use OWL and
furthered its development. Since then it has been revised and expanded and now is used by over 20 departments and
thousands of students at the University. An additional training component is also used by the University’s
Department of Environmental Health and Safety for their training and certification programs. In 2001 Harcourt
College Publishers (which became Thomson Learning and is now Cengage Learning) began licensing the system for
use with their Chemistry textbooks.
How It Works
OWL can be accessed from any type of computer running a reasonably up-to-date web browser. The information
that you author in OWL is saved in a database. There may be one or many databases set-up at your site, and you
may have colleagues working in the same database as you. (At UMass, databases are traditionally created for each
department. Check with your system administrator to find out the configuration at your site.) As OWL runs,
information is obtained from the appropriate database, and then web pages are generated based on that information.
Thus, OWL’s web pages are dynamic and change as the information in the database changes.
Organization and Use of This Manual
This is a training manual. It is designed for people that will need to use OWL’s authoring (instructor) tools. It is not
a user manual (the Authoring Manual is available on-line in OWL by pressing the Help link from an authoring
page), but rather a series of hands-on activities to introduce you to the various tools in the OWL authoring system.
It does not explain everything in the system, but rather gives you an overview to get you started. First you’ll get
onto the system as a student to see what OWL looks like from a student’s perspective. Next, you’ll learn to get onto
the system as an author, begin authoring questions, put them into assignments, and from a student’s perspective,
check what you’ve created. But that is only half the story. When you are done with this manual, you’ll need to also
do the Getting Started with OWL – Course Management training to cover all the aspects of the instructor tools
that you’ll need to run your course.
Getting Started With OWL is intended to be done sequentially. The exercises are ordered and later ones depend
on earlier work. You do not need to go through the whole training in one sitting, but can log out and then log back
in later and continue where you were. (All your information is saved in the database in which you are working.)
1
Each page in the system has a title bar and title. There will be a navigation bar on the left side of the page. In
addition for authors and administrators, there will sometimes be a command bar at the top of the page underneath
the title.
This training will refer to OWL pages by their title in bold. For example, while creating and editing questions,
you’ll often be on the Question Editor page. Below are some examples of the authoring items you’ll be using
consistently throughout the manual.
Buttons look like this:
Questions
Command bar items and links look like this:
Edit
When you are told to type something into the system, the words you are to type will appear like this: type this
now. Any quote marks should be typed in as they appear. You may also be told to press Enter; since keyboards are
different, this may be the Return key on your system instead.
Often, you will be told to enter a title with your initials when you are creating something. These titles need to be
unique across the system. Since other authors may be working in the same database and completing these same
tutorial exercises as you, your initials will make the title unique, or different from theirs. (You’ll also then be able to
tell yours from theirs!)
Before You Get Started
You should have received an email notifying you that you have been added as an instructor to the system and
supplying you with some general information. You will need this information before you start working through
these exercises. Use the email that you received to make sure that you have the following items.
1) The base URL (web address) for accessing the OWL system.
OWL URL:___________________________
2) Your login and password for getting into the system.
Login:_____________________________
Password:___________________________
3) Access to the file tajmahal.jpeg (downloaded from Getting Started page).
Now turn this page to continue Getting Started With OWL.
2
2 Getting Into OWL
Authoring Window
Most users log in on an OWL User Login page. When you log in, OWL checks to see if you are a student or an
instructor. Students are presented with a student window from which they can access their assignments. Instructors
are presented with an Instructor View window.
Some UMass Amherst users access OWL via a link from Moodle.
Authors are initially presented with an Instructor View window.
Logging In
1) Start your browser.
2) Go to the OWL URL.
If you have been set-up with a training account by an OWL administrator, use the following:
•
http://owl.oit.umass.edu/
•
Select Miscellaneous and Training. Do not select your department’s link.
3) You should see the OWL User Login page.
4) Enter your Login.
5) Enter your Password.
6) Press LOG IN
If you have never logged into OWL before, continue below with First Time Information. Otherwise, skip ahead to
Using OWL as a Student.
First Time Information (only for initial log in)
The first time that you log in, you will be asked to supply your contact information and change your default
password to a new one. You can change all of it again later if needed.
1) After successfully logging in the first time, you should be on the Instructor's Contact Information and
Password page.
2) Enter your Current Password.
3) Enter a New Password. (Remember this new password because you’ll need it the next time you log in to
OWL.)
4) Enter it again to Confirm New Password.
5) Edit your First Name, Last Name, Email address, Telephone Number, and Office as needed.
6) Click the Submit button.
7) You are now on the Welcome to OWL! page.
3
Using OWL as a Student
OWL provides tutorial assignments that you can use in your course to ensure that students understand the system
before completing any coursework. The tutorials are quick and simple, providing students with an overall
understanding of the various question types and how to navigate in the OWL system.
Before learning any of the authoring tools, it is important to complete the available tutorials as a student. Please
complete both the Question and QuestionPool mode versions. Completion of these two assignments will allow you
to navigate the system as a student, experience various question and assignment types (modes), and it will give you
an overall understanding of the system before you move behind the scenes to authoring course assignments.
Taking the Tutorial
To see things as a student, select Student Window link from the pull-down list below the OWL logo. This
opens a browser window containing the student view of OWL.
If you see the Rostering Problem page, you have been added as an author, but not yet rostered for any
courses as a student. Press Add Course , then press the Add New Course link, and finally choose
to be added to the Tutorials course (or another if it does not exist.) You won’t be able to log in until
someone handles the request. Alternatively, you can just go ahead to the Course/Student
Management section of this training to learn to search for yourself as a student and add yourself to the
Tutorial course.
There are two types of assignments for you to complete. The first assignment is in Question mode. In this mode
you are always presented with ONE question at a time. While you’re in this mode, the status bar at the top
keeps track of your progress. The second assignment is in QuestionPool mode. In this mode, you are only
presented with a subset of all the questions in the assignment at a time. In order for you to obtain credit for each
unit, all the questions must be completed successfully in one pass.
1) If you are not on the My Courses page, click My Courses from the navigation bar to the left.
2) In the Your Course and Section List, select Tutorials.
3) If you see some course announcements, read them and then press Go to Assignments .
4) You are on the Assignment List page. If not, choose that link.
5) Click on the Tutorial (Question Mode) assignment link.
6) You are now on the Unit Menu for Tutorial (Question Mode) page.
The top of the Unit Menu page shows the name of the assignment, the assignment type (mode), the
assignment due date, an overview of your current score, and the assignment's requirement status.
The unit menu table lists the individual informational pages and questions in the assignment plus any
score for that part.
7) In the unit menu table, choose the Question 1 link next to the label Multiple Choice.
8) The first question in the unit will be displayed.
9) Read the question, choose your answer and then click CHECK ANSWER .
10) Read through the page carefully.
Note the Feedback offered at the bottom of the page for some questions. Although this offers feedback
on actually answering questions, in a regular assignment, Feedback usually consists of extra
information to help you answer the question.
If you want to try a question again, click Redo Question in the navigation bar to the left.
11) Locate the Status: bar at the top of the page. Find the set of buttons containing question marks.
4
The first box informs you of your status for Question 1. A green check appears if you answered the
question correctly; a red X appears if you answered the question incorrectly. Click the second box to
go on to the next question. You can also get to the next question by clicking Next Item in the
navigation bar.
12) Complete all the questions, and then click Unit Menu in the navigation bar to the left.
13) Notice how your scores are displayed.
14) Now click the Assignment List link in the navigation pane.
15) The Assignment List page will appear showing your updated performance.
16) Now choose the Tutorial (QuestionPool Mode) assignment.
17) Work through all the questions again, completing both the units in the assignment.
Notice that in this mode you will have to use the Unit Menu link to get to all the questions in the
assignment. Notice also that your scores are displayed differently and that mastery criteria are
included.
Because QuestionPool assignments require correctly answering a specified number of questions in a
single attempt, there is no Redo Question option for this assignment.
18) From the Unit Menu, press Assignment List to return to the list of assignments.
Getting to the Authoring View
Before you opened the student window, you were in a browser window containing the OWL instructor tools.
That window should still be available. Just select that window to return to the instructor tools. (You can close
the student window if you like. You can always open it again if you need it.) Then to get to the authoring tools,
select Author View from the pull-down list below the OWL logo. You should be on the Authoring Home
page.
5
3 Instructional Units and Questions
One of the unique features of OWL is that you create your content and assessment materials first. These are
independent entities and are not locked to a particular course as they are in other systems. They become part of a
reusable pool of material that anyone in your database can use to construct assignments for their courses.
Instructional Units
An Instructional Unit (IU) is a group of content material and questions related to the same concept. For example,
the possible Instructional Units for an American History course might be divided into such topics as “Heroes of the
Revolutionary War” or “The Haymarket Riot.” For now we will just focus on putting questions into IUs. (We’ll
add content later.) IUs may contain one or more questions. When an IU is included in an assignment, either all of
the questions, or a manually or randomly chosen subset of the questions is presented to the student.
For additional information, see: Help | Question Building Tools | Instructional Units
Creating a New Instructional Unit
1) Click IUs from the navigation bar.
2) You are now on the Search Instructional Units page.
This only happens the first time that you select this tool. Subsequently when you go to IUs, you will
be on the Instructional Unit Management page of the last IU that you visited.
3) Press the New IU link in the command bar at the top of the page.
4) You are now on the New Instructional Unit page.
5) In Name, enter: Static Earth Questions – your initials.
6) Press the Save New IU button at the bottom.
Static Questions
Questions are the basic assessment entities in OWL. They may be Multiple or Multiple, Multiple Choice,
Matching, True/False, Short Answer/Fill in the Blank(s), Manually Graded Short Answer, Programming or
Manually Graded Programming. Questions are also either static or parameterized. Static questions appear
6
exactly the same each time they are presented to the student, while parameterized questions vary on each
presentation.
For additional information, see: Help | Question Building Tools | Questions
You should be on the Instructional Unit Management page for the Static Earth Questions IU that you just created.
Note the name, number, and creator that appear on the page just under the command bar.
Creating a New, Short Answer Question in the Question Editor
Let’s create a short answer question in the Question Editor page. In this part of the manual, the Description,
Ask, Answer, and Feedback boxes will appear similar to how they actually appear on the Question Editor page.
In succeeding examples, those boxes will appear only when necessary, and the questions and answer data will
be given in the text.
1) Under Content/Questions in IU:, click Add New Question.
2) Under Select type of question to create choose “Short Answer” from the drop-down list.
3) Click on the Create Question button.
4) You are now on the Question Editor page.
The top of the page contains commands, navigation, and information about the question that you are
on. In this case, you are on a new question with not much in it yet. The rest of the page contains five
boxes into which you type information to define the question.
5) In the Description box, enter: pi.
Description:
(Leave the other settings as they are.)
pi
6) Skip over the Variables box. (It is not used in static questions.)
7) In the Ask box, enter: To calculate the radius of the Earth, you need to know the value for PI. What is it to
2 decimal places?
Ask:
To calculate the radius of the Earth, you need to know the value for PI. What is it to 2 decimal places?
8) In the Answer box, enter: 3.14
Answer:
3.14
9) In the Feedback box, enter: An approximate fraction is 22/7.
Feedback:
An approximate fraction is 22/7.
7
10) Press Save
There are multiple Save buttons to avoid having to scroll up and down the page. It doesn’t matter
which Save button you press, they all work the same. After you press Save, the Question Editor
page will return with your newly authored question.
Testing the Question
Testing a question ensures that you have authored it correctly. This exercise will help you understand how
OWL grades numerical questions.
1) Press View from the command bar to see how the question will appear to a student.
2) Answer the question; in the input box type: 3.12
3) Press Check Answer
Notice that this answer was graded as correct. Unless you specify an exact range, OWL uses a default
of 2% for a numerical answer. You will learn more about controlling answer ranges in the next section.
4) Press View to try the question again.
5) In the input box type: 3.75
6) Press Check Answer
Notice that this time the answer is incorrect since it is outside OWL’s default range for numerical
answers.
Input Box and Answer Range
An Input Box is the box in which the student types the answer to a question (for example, 3.12 and 3.75
from above.) In the question that you just wrote and tested, you may have noticed that OWL automatically
created an input box for you. Instead of letting OWL generate the input box, you can specify one and
control its placement, size, and the number of characters that it will accept. Doing so will provide you with
much greater control on the look and function of your questions.
An input box is signified in the question editor’s Ask box by two underscores (__). Anywhere in a
question’s Ask section that you type in two underscores, you’ll see an input box when you view the
question. (Thus you can make an answer with more than one part. More on that later.) When OWL
automatically generates an input box, it is 20 characters long. If you designate your own box, it will be 20
characters long as well. But, you can add a number to the designation (__#) to change the box’s size.
Moreover, input boxes usually allow the student to type in any number of characters. If there are more
characters than the length of the box, then the characters will scroll. You can also limit this behavior in
your answer designation as the exercise below will demonstrate.
An Answer Modifier controls how a question is graded by specifying constraints on the answer. Modifiers
include range, capitalization, etc. Modifiers are placed in the Answer section after an answer’s value and
are separated by a vertical bar. More than one modifier may be used with an answer.
For additional information, see: Help | Question Building Tools | Questions | Question Definition |
Answer Modifiers
Let’s edit your current question (not create a new one) to control the input box and the grading range for
the answer. We’ll change the range from the default of 2% to 0% (r=0 modifier.)
1) Press Edit from the command bar.
8
2) In the Ask box, press Enter (on the keyboard) twice after the question mark.
3) Type: PI = __ (notice the 2 underscores!)
Ask:
To calculate the radius of the Earth, you need to know the value for PI. What is it to 2 decimal places?
PI = __
4) In the Answer box, after the 3.14, add the answer modifier: | r=0
Answer:
3.14 | r=0
5) Press Save
Don’t forget to Save the question or your changes will be lost!
6) View the question.
7)
Notice that you get an input box next to PI = just as you designated.
Test the question with both 3.12 and 3.14 as answers.
Notice that this time, 3.12 is not correct.
8) Edit the question again and change the input box to: __5
9)
Save and View the question
Save and View is a short cut for pressing the Save button and then the View link. There are
multiple ones on the page that all function the same just as is the case for the Save buttons.
10) Try typing this in the input box: 1234567
You’ve only changed the size of the input box, not the number of characters that the student can enter.
11) Edit the input box designation to: __5m
12) Save and View the question again.
13) Again, try typing the following in the input box: 1234567
You’ve now limited a student to typing a maximum of five characters in the box. (It really only needs
to be 4, but we don’t want to give away the answer completely!)
Multiple Choice Questions
Now let’s add a new, multiple-choice question to the Static Earth Questions IU.
1) Return to the question editor (Edit).
2) Press New from the navigation bar (makes a new question in the same/current IU).
3) Under Select type of question to create choose “Multiple Choice” from the drop-down list.
4) Click on the Create Question button.
5) In the Description box, enter: oceans
6) Skip over the Variables box.
9
7) In the Ask box, enter: Which of the following is not an ocean?
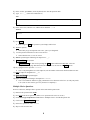
8) In the Answer box, enter the following:
Answer
*
A
Pacific
B
Indian
C
●
D
7)
Choice Text
Aunt Arctic
Atlantic
Save and then View the question.
8) Test the question a number of times. Notice that the order of the choices changes.
Multiple-Multiple Choice Questions
In order to answer a multiple-multiple choice question correctly, the student must choose all the answers that
apply to the question, not just one. We’ll add a new one of these.
1) Return to the question editor (Edit).
2) Press New from the navigation bar.
3) Under Select type of question to create choose “Multiple-Multiple Choice” from the drop-down list.
4) Click on the Create Question button.
5) For Description: Amazon River
6) Skip over the Variables box.
7) For Ask enter: The Amazon River runs through which two countries?
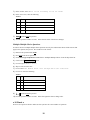
8) For Answer enter the following:
Answer
A
*
Choice Text
√
Peru
B
C
Poland
√
D
9)
Brazil
Mexico
Save and then View the question.
10) Test the question a number of times. Notice that again the choices change order.
● IU Check ●
Now let’s do a quick IU check to make sure that you have the correct number of questions.
10
1) Scroll to the top of the page and view the following information: Author, Last Modified by, and Last
Modified.
You should be the author and the modifier, and the date should read as the current date.
2) At the left of the previous information, find your current question and IU number.
3) Below that you’ll find a drop-down list next to Go To Question in IU.
4) Click on the down arrow in the gray box to see the question numbers in the IU.
You should have authored three questions by now. Your question numbers may not be consecutive.
Question numbers are unique in the system and others in your database may be creating questions at
the same time.
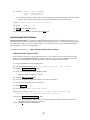
Additional Input Boxes, Answer Ranges, and Capitalization
A short answer question may include more than one input box. You can create Additional Input Boxes by,
once again, typing 2 underscores (“__”) where you wish an input box to be. A question can also contain various
possible correct answers signified with Answer Ranges. In the question below, students may supply a number
of correct answers for the first part of the question.
This question will also be the first example of a short answer question with a text answer. (The previous short
answer question had a numeric answer.) Text answers must be enclosed in either single or double quotes. Also
by default, answers are case-insensitive. If you want to make sure that your students capitalize things correctly,
you can set OWL to be case-sensitive by using the answer modifier c=0.
Create a new question in the IU as follows:
1) Press New on the command bar.
2) Under Select type of question to create choose “Short Answer” from the drop-down list.
3) Click on the Create Question button.
4) Description: Everest
5) Skip over the Variables box.
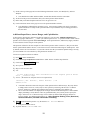
6) Ask:
__15 has traditionally been considered to be the highest peak on Earth.
It is __5 meters high.
7) Answer: (the answer for each part must be on a separate line)
'Everest', 'Mt. Everest', 'Mount Everest' | c=0
8848!n|r=.05
8)
A student is allowed to answer the first part of this question in three different ways; they may choose
to simply answer “Everest”, or they may be more specific by answering “Mt. Everest” or “Mount
Everest”. Either way, students must capitalize their answer as signified by the modifier c=0.
The !n forces the number to be displayed as an integer instead of with decimal places. When number
display formatting is used, numeric values are graded differently, and you may need to specify the
range. In this case we’ve allowed a range of 5% to allow for different and changing estimates of
Everest’s height. For additional information, see: Help | Question Building Tools | Questions |
Question Definition | Variable and Number Formatting.
Save and then View the question. Try the answers: Mt. Everest and 8840.
Both parts should be correct.
9) Try these answers: everest and 7500.
11
Both parts should be incorrect since “everest” isn’t capitalized and “7500” is outside the range.
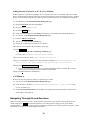
Matching Questions
Matching Questions allow a student to link related information together. Matching questions require multiple
input boxes, and multiple answers.
Create a new question in the IU as follows:
1) Select New from the command bar.
2) Under Select type of question to create choose “Matching” from the drop-down list.
3) Click on the Create Question button.
4) Description: city/country
5) Skip over the Variables box.
6) Ask:
Match the city with the country:
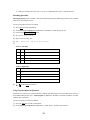
7)
Answer: (Left Side)
*
Choice Text
A
3
Paris
B
4
Boston
C
1
Cairo
D
2
Delhi
Answer: (Right Side)
Choice Text
8)
1
Egypt
2
India
3
France
4
U.S.A.
Save and then View the question.
Using Custom Inputs in Questions
Sometimes you want to write questions that have students input their answers in a format that doesn’t fit one of
the standard OWL question types. Custom inputs are additions to the OWL system that expand the ways that
students answer questions.
Create a new question in the IU as follows:
1) Select the New link from the command bar.
2) Under Select type of question to create choose “Short Answer” from the drop-down list.
12
3) Click on the Create Question button.
4) Description: circumference
5) Skip over the Variables box.
6) Ask: The circumference of the earth is
{input.select|choices='350,4657,24901'} miles.
Don’t start a new line after the “is”; the line will wrap automatically because of its length. Note
that the input is enclosed in curly braces {} and not in parentheses ().
7) Answer: 24901!n
8)
Save and then View the question. Try the different answers.
9) Return to the Question Editor page and click the Custom Inputs link next to Ask.
A small window will open describing custom inputs and the various ones that are available. If you
look at Drop-down List, you’ll see that it is the custom input that was used in this question. We
implemented it a bit differently than described since you won’t learn about Variables until the next
section of the training.
10) Close the small window.
11) You should be on the Question Editor page.
Question Tags
Tags – Tags are named text, image, or applet entities. For example, in a World Geography class tags may
serve as maps or pictures of geographical features. Tags are created using a separate authoring tool, and
once they are created can be used in any question. Tag names must be unique across all tag types.
For additional information, see: Help | Question Building Tools | Questions | Question Definition |
Using Tags in a Question
An image tag named earth, representing a picture of the earth, already exists in the database. Let’s change
the appearance of the previous question by adding this tag to it. Note that tags are in curly braces {} and
not in parentheses ().
Change the question to the following:
Ask:
{tags.earth}
The circumference of the earth is
{input.select|choices='350,4657,24901'} miles.
1)
Save and View the question.
A picture of Earth will now be included when the question is viewed.
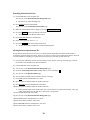
Manually Graded Questions
You may want to have students answer a question that OWL cannot grade automatically. You can add these
kinds of questions to OWL, but you need to be willing to grade them (or find someone else who will) by hand.
Questions can have both automatically as well as manually graded parts in them.
Create a New short answer question in the IU as follows:
1) The question type should be Manually Graded Short Answer.
13
2) Description: layers
3) Ask: What are the 4 main layers of the earth?
__10, __10, __10, __10
Briefly describe each layer.
{input.textarea}
Note that the first 4 input boxes are standard, automatically graded parts, and the fifth one is a custom
input.
4) Answer: 'inner core'|g='layers'
'outer core'|g='layers'
'mantle'|g='layers'
'crust'|g='layers'
'' | evaluator='ManualGrade'
5)
To enable students to supply the 4 answers to the first question in any order, we’ve used the g (for
group) answer modifier and set all the answers to belong to the same group. For the fifth answer,
we’ve used a Custom Evaluator. Some Custom Inputs need to be matched with a special evaluator
so that they can be graded. Click on the Custom Evaluators link next to Answer for more
information.
Save and then View the question.
6) Try answering the question a number of times using different orderings for the Earth’s layers.
Manually grading questions is discussed in the Getting Start with OWL – Course Management
training.
● IU Check ●
Now let’s do another quick IU check to see what has been created.
1) From the Question Viewer (or Question Editor) page, click the number link next to IU: just under the
command bar at the top of the page.
2) You should now be on the Instructional Unit Management page for your Static Earth Questions IU.
3) Under the heading Content/Questions in IU, check to see that there are seven authored questions listed: pi,
oceans, Amazon River, Everest, city/country, circumference, and layers.
Parameterized Questions
Parameterized Questions vary slightly from one viewing to the next. This feature allows the student to redo the
question and get a different version of it with a different answer. (So, they can’t do the question, then just redo it
and cheat by putting in the correct answer that they just viewed!) Parameterized questions are one of the highlights
of the OWL system and enable authors to write one question that contains an infinite number of variations.
For additional information, see: Help | Question Building Tools | Questions | Parameterized Questions
14
Creating a New IU for Parameterized Questions
You are now going to create a new IU to put your parameterized questions into.
1) Make sure that you are on the Instructional Unit Management page.
2) Press the New link from the command bar.
3) In Name, enter: Parameterized Earth Questions – your initials.
4) Press the Save New IU button at the bottom.
5) You are now on the Instructional Unit Management page.
Creating a Parameterized Question
The first example will show you how to parameterize a question by just varying numbers in it.
1) Under Content/Questions in IU: press the Add New Question link.
2) Under Select type of question to create choose “Short Answer” from the drop-down list.
3) Click on the Create Question button.
4) You are now on the Question Editor page.
5) Create the question as follows:
6) Description: days to climb
7) Variables:
num = 1,2,3,4,6,12
each = 12/num
# the answer
Look up variables in the Help manual to better understand them. ( Help | Question Building Tools
| Questions | Question definition | Variables) For instance, Variables must be one per line. The
“num” variable is randomly set to one of the values in the list, and the “each” variable is then
calculated based on the chosen value.
6) Ask: Your goal is to climb 12 miles up Mt. Kilimanjaro. If you climb
{num!n} mi. per day, how many days will it take you to accomplish your
goal? __3m
Variables are inserted into the Ask, Answer, or Feedback sections by entering them inside of curly
braces {}, not parentheses ()!
7) Answer: {each!n}
8) Feedback:
9)
mi / days = 12 / {num!n} = {each!n}
Save and then View the question.
10) Test the question a number of times using the View link.
Viewing Math Operators, Symbols, and Functions
A glossary of Mathematical Operations explaining Math Symbols and Arithmetic Operations, Trigonometric
Functions, and Vector Functions exists in the author manual.
For additional information, see: Help | Question Building Tools | Questions | Question Definition |
Mathematical Operators.
15
Parameterized Questions Using String and Vector Functions
Sometimes you want more than numbers to vary in your questions. You can use coordinated lists of strings and
numbers to parameterize your questions even further.
Create a New short answer question in the IU as follows:
3) Description: shapes
4) Variables:
shapes = stringList('triangle','square','rectangle','pentagon','octagon')
sides = vector(3,4,4,5,8)
index = 1,2,3,4,5
item = stringAt(shapes, index)
answer = vcomp(sides, index)
The shapes and sides variables are string and number lists that contain the question’s parameters.
Index is a randomly selected number that determines which item in the list should be selected, and it is
then used in the stringAt and vcomp functions to get that item from the string and number lists.
7) Ask: A {item} has __2 sides.
8) Answer: {answer!n}
9)
Save and then View the question.
10) Test the question a number of times using the View link.
Parameterized Questions Using a User-Defined Table
Sometimes the number of items and amount of data is too much to keep in variable lists. In such cases, you
can use a user-defined table to parameterize the question.
A user-defined table is a collection of structured information. When the table is created, a set of
categories (fields) is defined for it. Each entry in the table has a value for each category (field). Like tags,
tables are created using a separate authoring tool, and once they are created can be used in any question.
Table names must be unique.
For additional information, see: Help | Question Building Tools | Questions | Question Definition |
Using Tables in a Question
The table you’ll use in the example, Geography, already exists in the system. Let’s look at this table first,
and then use it to create a parameterized question.
1) Select the Tables link from the navigation bar.
2) Click the blue arrow under Manage Structure for the Geography table.
3) Choose View/Edit from the command bar.
4) Note the field names, Feature and Country, used as table column headings and the entries in the table.
5) Click the Questions link in the navigation bar (not the command bar at the top of the page) to return to the
question editor.
Create a New short answer question in the IU as follows:
5) Description: country id
16
6) Variables:
geoRow = Table.Geography
place = geoRow.Feature
where = geoRow.Country
The first line chooses a random entry from the Geography table, and then identifies it with the variable,
geoRow. This variable is then used to get specific field information for the selected entry.
11) Ask: In which country is {place} located? __
12) Answer:
{where} | c=0
13) Save and then View the question.
14) Test the question a number of times using the View link.
Instructional Unit Content
Instructional Unit Content – IUs may also contain content material exclusively or in addition to questions. Any
content material provided is presented to the student before the questions in the IU. Content in an IU may appear in
the regular OWL window or in a new, separate window. The content may also be internal (defined and managed
inside of OWL) or external (an existing URL).
For additional information, see: Help | Question Building Tools | Content
Adding Internal Content to an IU
So far, all the IUs you have created contain questions only. You will now go back to one of your previously
authored IUs and add Internal content to it. Internal content may consist of a lot of information, if you like.
However, for training purposes, you will only add one sentence of internal content to your IU.
1) Click on the IUs link from the navigation bar.
2) Next to Search for IU Name enter: Static Earth Questions – your initials.
3) Click the Search for IU Name button.
4) Click on the number link in the IU Number column.
Make sure the IU found has your initials!
5) Click the Add New Content link.
6) Leave the no option (●) selected for Display in New Browser Window.
7) Choose the internal option (●) for Content Type.
8) Press Continue
9) For Name, enter: Static Questions Content.
10) For Internal URL Text, enter: The earth is a large place containing many
different types of landmasses and bodies of water.
11) Press the Save New Content Page button.
Later on, you will have a chance to test your newly authored questions as a student. This internal
content will appear with the static questions.
12) Press the IU link from the command bar.
17
Adding External Content to an IU (in a New Window)
With this option, it is possible for students to access a current web-site in a new window. They can read and
observe all information contained on that web-site before attempting to answer the questions in an IU. Students
also have the option of keeping the new window open for reference while they are completing an assignment.
1) You should be on the Instructional Unit Management page.
2) Press the Search link from the command bar.
3) In Name, enter: Parameterized
4) Press the Search button.
5) Click on the number link in the IU Number column next to your Parameterized Earth Questions IU.
6) You are now on the Instructional Unit Management page.
7) Click the Add New Content link.
8) You are now on the New IU Content page.
9) Choose the yes option (●) for Display in new Window.
10) Leave the external option (●) selected for Content Type.
11) Press Continue
You are now on the New IU Content Page Attributes page.
For Name, enter: Parameterized Questions Content
12) For External URL Link, enter: http://earth.jsc.nasa.gov
13) For Notes Displayed to Students, leave any existing text and add: Read the information and
then go on to the first question by choosing the '?' from above.
14) Press the Save New Content Page button.
Later on, you will have a chance to test your newly authored questions as a student. This external
content (web-site) will appear with the parameterized questions.
15) Press the IU link from the command bar.
● IU Check ●
Now let’s do one more quick IU check to see what has been created.
1) You are now on the Instructional Unit Management page.
2) Check the Name (should be Parameterized Earth Questions – your initials) and
Creator (should be you).
3) Under Content/Questions in IU, there should be one content page and three questions created: days to
climb, shapes, and country id.
Navigating Through IUs and Questions
There are several ways to get to an IU. From anywhere in the system, if you’d like to return to the last IU you
edited, simply click IUs from the navigation bar. Your other options are going to an IU by its number,
retrieving all IU’s, conducting a Quick Search, or conducting a Search by one or more specific IU categories. OWL
also allows you to move between IUs and questions easily.
18
Searching Instructional Units
1) Click the IUs link in the navigation bar.
You are now on the Instructional Unit Management page.
The last IU you edited should appear.
2) Press Search from the command bar.
You are now on the Search Instructional Units page.
3) Make sure all the input boxes are empty by pressing Clear Search Form
4) Press the Search button at the bottom of the form .
All of the IUs in your database will be listed.
5) Press New Search from the command bar.
6) In the Name input box, enter: Earth
7) Press the Search button at the bottom of the form.
All IUs whose name includes the word Earth should appear.
Moving Between Question and IUs
Newly authored questions may or may not be in sequential order (depending on whether another author is
creating new questions at the same time). There are several ways to move between Questions and IUs. The most
convenient method is searching for a particular IU, then going to a particular question in that IU.
1) For each of the following, note the Question Number and IU Number at the top left of the page, and note
the contents of the drop-down list just beneath them.
2) Click the IUs link in the navigation bar.
3) You are now on the Instructional Unit Management page.
4) Under the Content/Questions in IU heading click on a box containing a ?
5) You are now on the Question Editor page.
6) Note the question number and IU number at the top of the page.
7) Press Next from the command bar a few times.
8) Note the question number and the IU number each time.
9) Press Previous from the command bar a few times.
10) Note the question number and the IU number each time.
In the Question Editor, Next and Previous refer to the next/previous question numerically. They may
or may not be in the same IU and may or may not be your questions.
11) Press the IU number link next to IU:
12) You are now on the Instructional Unit Management page.
13) Press Next from the command bar a few times.
14) Note the IU Name, Number, and Creator.
15) Press Previous from the command bar a few times.
16) Note the IU Name, Number, and Creator.
19
Similar to the Question Editor, Next and Previous will take you to the numerically next/previous IU in
the database. Again, they may or may not be your IUs.
20
4 Managing Tags and Tables
Managing Tags
Now that you’ve learned how tags operate in questions, we’ll go into further detail on how to manage tags. Tags
can be created and then used over and over again. Functions such as examining, searching for, and deleting are
common for all tag types. Creating Text, Applet or Image tags require different functions.
For additional information, see: Help | Question Building Tools | Tags
Examining Current Tags
Before creating a new tag, you may want to examine the existing tags to see if there’s something you can use or
modify.
1) Click on the Tags link in the navigation bar.
2) You are now on the Tag Authoring Main Menu page.
3) From the Select a tag type drop-down list, choose Text Tag.
4) Press View
A list of Text Tags should appear. Scan the available Text tags and their descriptions.
5) You are now on the Tag Manager – Text Tags page.
6) Next to the unitNote tag, press the blue arrow in the View/Edit column.
7) You are now on the View/Edit Text Tag page.
Note the information under Questions and/or Content Using This Tag, especially the drop-down list
of questions using this tag. Remember that tags can be used in multiple questions. Any change you
make to a tag affects all questions using that tag.
8) Press the Main Menu link from the command bar.
9) You are now on the Tag Authoring Main Menu page.
10) From the Select a tag type drop-down list, choose Image Tag.
11) Press View
A list of available Image Tags should appear. Scan the available Image tags and their descriptions.
12) Next to the earth tag, press the blue arrow in the View/Edit column.
13) You are now on the View/Edit Image Tag page.
A picture of Earth should appear for you to examine. Again note the information under Questions
and/or Content Using This Tag.
14) Press the Main Menu link when done.
21
Creating a New Text Tag
So far, you’ve used existing tags while authoring questions. Creating new text tags is easy and economical if
you need to use identical text while authoring a variety of questions. Now, let’s create a new Text Tag.
1) From the Select a tag type drop-down list, choose Text Tag.
2) Select the Create New Tag button.
3) You are now in the Create a New Text Tag page.
4) In the Name of the new tag box, enter: Reminder-your initials
Tag names may only contain alphanumeric characters; do not include spaces in your tag name.
5) Skip the Description box.
6) In the Text box, enter: Make sure to do each step of the problem
Remember when creating Text and Image Tags it is important to write a simple, yet recognizable
description for the tag. In this exercise we will skip the description.
7) Press Create
8) You are now on the View/Edit Text Tag page.
Since the tag isn’t being used in any questions yet, the delete option appears where there is otherwise
Questions and/or Content Using This Tag.
Creating a New Image Tag
The most widely used graphics formats on the Web are GIF or JPEG formats. Unless you’re a graphic artist,
you’ll probably be using images that have been prescanned and saved in either a GIF or JPEG format. In order
to create a new Image Tag, you must have the image file accessible from your local system.
1) Select Main Menu from the command bar.
2) From the Select a tag type drop-down list, choose Image Tag.
3) Click the Create New Tag button.
4) For the Name of the new tag, enter: TajMahal-your initials
5) Press the Browse… button to locate the tajmahal.jpeg image file on your machine that you downloaded
from http://owl.oit.umass.edu/gettingStarted.
6) Press Create .
For more information about the other image tag settings, see the Help.
Managing Tables
You have seen how existing tables can be used to create parameterized questions. Now we’ll look at some of the
options for managing tables.
For additional information, see: Help | Question Building Tools | Tables
Viewing a User-Defined Table
Remember that a user-defined table is a collection of structured information that can be used in any question.
You’ve already used a table while authoring the parameterized question, “In which country is {place} located.”
22
1) Click on the Tables link in the navigation bar.
2) The Table Manager: Table List page will appear.
3) In the Manage Entries column, click on the pencil icon in the row for the Geography table.
4) Click View/Edit in the command bar at the top of the page. This takes you to the Geography Editor page.
5) Press the Edit link for any one of the rows to see how to get to the editor for a given entry.
6) Press the View All link in the lower command bar to return to the list of table entries.
Creating a New User-Defined Table
Before creating a new user-defined table, you need to determine what kinds of information you’ll store in it.
Each entry will contain one or more pieces of information, called fields. Depending on the type of information
that will be in the field, the field is defined to be one of four types: character or text for text values and integer
or floating point for numeric values. Character fields also need to have a maximum length associated with
them.
1) Choose Table List from the top command bar.
2) Press the New Table link in the command bar.
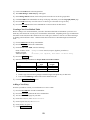
3) Under Create a New Table, enter the following:
Name of table to create:
Number of fields:
Table Description:
USCapitalsYour Initials (no spaces, hyphens, parentheses)
3
US state, its capital, and order of union entry
3) Press the Continue button.
4) Enter the following information for Step 2: Define New Table Columns:
Field Name
State
Capital
Number
Field
Type
char
char
int
Field
Length
25
25
(leave empty)
Fields of type char must be big enough to hold the largest anticipated entry for that field.
Leave the Variable Tags column entries at the default value, no.
5) Click the Create New Table button.
Adding a New Entry
Now that your table is created, you can add entries to it one at a time.
1) Press the View/Edit link from the command bar.
2) Press the New Entry link from the lower command bar.
3) You are on the Editor page for your table.
4) Under State char(25), enter: Massachusetts
5) Under Capital char(25), enter: Boston
6) Under Number int, enter: 6
7) Click Save New Entry
23
You would repeat the process to add more entries to the table. Instead of adding entries one at a time,
you can also upload them from a file created in another application. For more on table definitions and
uploading/downloading, see: Help | Question Building Tools | Tables | Table Management |
Table Management Functions.
24
5 Authoring a Course
Courses and Sections
A course (such as World Geography) has a name and a curriculum. Once you have a course and section to go with
it, you then define the assignments for the class. The set of assignments is the course curriculum.
For additional information, see: Help | Course Authoring | Course Curriculum (Modules)
Sections are the active entities of a course. Students are rostered for a section of a course, and thus to use a
course, it must have at least one section. When you create a course, you are required to create a section in it at
the same time. Also whenever you create a section in a course, you are added to the section’s roster and are set
as the section’s message recipient.
For additional information, see: Help | Course Authoring | Courses and Sections
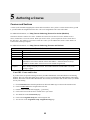
Course & Section Attributes
Course Name
Section Number
Instructor
Location
Time
Announcements
Message
Recipients
must be unique
identifies the section
name of instructor
building and classroom number
time of day class starts
New or edited announcements are shown to students of that section upon login and can
optionally be sent to those students with an email address. Announcements are always
available to students under Announcements in the student navigation bar.
enabled author(s) who receive the email messages for that section. There must be at
least 1 message recipient per section. On section creation the current author is set as the
message recipient.
Your OWL Course and Section
If you have been set-up with a training account by an OWL administrator in the Miscellaneous and Training
database, then your course has already been created. If you are not working in the Miscellaneous and Training
database, then check with the OWL administrator who created your account to find out what course you should
use for your training.
1) Choose Instructor View from the pull-down list below the OWL logo to return to the instructor tools.
2) Click on Course List in the navigation bar at the left.
3) Find the course called World Geography – [your name]
4) Click on the arrow in the Section # column next to your course.
5) You should be on the Course Home page.
6) Click on the Assignment Setup link in the navigation bar.
7) You are now on the Assignment Setup: Assignment Setup page.
25
Assignments
You construct assignments for your students from objects currently in the system. Assignments can be IU based or
non-IU based (see below). Assignments that contain IUs in turn contain the content and questions from the IUs.
For IU based assignments, the Assignment Type (see below) determines how the questions in the IU will be
presented to the student. The types, Question and QuestionPool, are the most commonly used. See Appendix 1 for
a comparison of these two types.
For additional information, see: Help | Course Authoring | Course Curriculum (Modules) | Developing
a Module
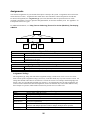
Course
Assignment 1
Assignment 2
IU 1
IU 2
Assignment 3
Assignment 4
IU 3
Assignment Types – IU Based Assignments
QuestionPool
Question
Exam
Training
subset of questions from IUs are presented and mastery criteria set for each IU
all questions from IUs are presented
like question mode but with only 1 attempt and no scores, answers, or feedback given to
students during the exam
QuestionPool mode question presentation with additional training constraints
External
Survey
Tutor
for 2nd party modules
an assignment containing only non-graded questions
a hand-crafted assignment designed to tutor a specific concept
Assignment Types – Non IU Based Assignments
Assignment Settings
The assignment type, along with some other assignment settings, is fixed across all the sections of a course.
Some section specific assignment settings (see below), on the other hand, may vary from section to section. All
settings have default values that are used when new sections are created. For example, World Geography 100,
Section 1 may vary from World Geography 100, Section 2. Even though they have the same assignments, the
sections can have different due dates for assignments, and/or one instructor may wish to limit students to only
three attempts at a question, while another instructor may decide not to set a limit at all.
General Assignment Settings
Name
Description
Assignment Type
Time Permitted
Allow Question
Resubmission
Partial Credit
Scoring Type
must be unique within the course
description of the assignment for instructors only
IU and Non-IU based types below
the amount of time a student has to work on an assignment (can be unlimited)
for Question type assignments only, determines if a student can answer the same question
again (no new parameters)
for Question and Exam modes only, determines if partial credit is given for short answer
questions with multiple input boxes and for multiple, multiple choice questions
determines how the score for the assignment will be calculated
26
Assignment Notes
instructor and student notes for the assignment
Start Date
Due Date
Number of
Attempts Allowed
Display Feedback
Display Answer
Requirement
Status
date at which a student can first view the assignment. Authors may view at any time.
date at which scores from subsequent attempts of the assignment are not recorded
number of times the question or IU (depending on assignment type) may be attempted
(can be unlimited)
determines if and when the feedback is shown when student checks an answer
determines if and when the correct answer is shown when student checks an answer
indicates if the assignment is required, optional, or extra credit
Section Specific Assignment Settings
Creating a New Question Mode Assignment
The course you have just created is empty – it doesn’t contain any assignments yet! First, we’ll add a Question
type assignment, and later we’ll add a QuestionPool type assignment. Both of these assignments will contain
the same IUs, the ones you just authored. Let’s create the easier assignment first:
For additional information, see: Help| Course Authoring | Course Curriculum (Modules) |
Developing a Module | Question and Exam Mode
1) From the Assignment Setup: Assignment Setup page, choose the New Assignment link near the top of
the page.
2) You are now on the New Assignment, Select Type page.
3) Under the heading Select the Type for the New Assignment, click on the Question link.
4) You are now on the New Assignment page.
5) For the Assignment enter: Geographical sites – Question.
6) For the Description enter: static & parameterized geography questions.
7) Leave all the other values as they are.
8) Press Save New Assignment
9) You are now on the Assignment Management page.
We have now set the general and section specific assignment settings for this course’s section as well
as the defaults.
Adding IUs to the Question Assignment
Right now the assignment that you just created is empty. (It has no questions in it.) You must assign particular
IUs to the assignment in order to give it some content. We’ll now use the two IUs you’ve created to fill it out.
1) Choose Link IU under the Assignment Content header.
2) You are now on the Add New IU Link page.
3) Under Search Instructional Unit Entries, for the name enter: questions.
Both your IUs were named “___ ____ questions”. This search will find all IUs with the word
‘questions’ in the name.
4) Press Search
27
5) Find the IU named Static Earth Questions – your initials. Under Select the Instructional Units to Add to
the Assignment, click to select the box in the Select IU column next to this IU.
6) Similarly, click to select the box in the Select IU column next to the IU named Parameterized Earth
Questions – your initials.
7) Click the Add IUs button.
8) You are back on the Assignment Management page.
Notice that at the bottom of the page under the heading Instructional Units, the two IUs that you just
link are listed along with their content and questions.
IU Settings for QuestionPool Type Assignments
In Question type assignments, all of the questions in the IU are presented to the student, and there is no concept of
mastery. In QuestionPool type assignments, a subset of the questions in the IU can be presented to the student, and
the idea of mastery is introduced. Thus in this mode, you need to set two IU presentations attributes: Questions to
Present and IU Mastery.
IU Settings for QuestionPool Type Assignments
Questions to Present
IU Mastery
The Number of Questions to Present value determines how many questions from
the IU are shown to the student. Questions are picked randomly from the IU. If
the number of questions to present is less than or equal to the number of questions
in the IU, no question is repeated. Each time the IU is selected a new set of
random questions is chosen.
number of questions that must be completed correctly in one attempt at the IU
to master the IU
For additional information, see: Help | Course Authoring | Course Curriculum (Modules) | IU
Presentation Attributes
Let’s create a new assignment just as you did before, but this time in QuestionPool mode. Now you’ll have to give
values for the IU settings when you link in your IUs.
Creating a New QuestionPool Type Assignment
1) Press the Assignment Setup link in the navigation bar.
2) You are now on the Assignment Setup: Assignment List page.
3) Choose the New Assignment link in the command bar at the top of the page.
4) You are now on the New Assignment, Select Type page.
5) Under Select the Type for the New Assignment, press the QuestionPool link.
6) You are now on the New Assignment page.
7) For the Assignment Name enter: Geographical Sites - QuestionPool
This distinguishes the assignment from “Geographical Sites – Question”.
8) For the Description enter: same as other, but in QuestionPool mode
9) Leave all the other values as they are.
10) Press Save New Assignment
11) You are back on the Assignment Management page.
28
Adding IUs to the Assignment
Link your two IUs as you did before, and notice that OWL prompts you for IU settings.
1) Choose Link IU under the Assignment Content header.
2) You are now on the Add New IU Link page.
3) Note that your previous search criteria and search results still appear.
4) Under Select the Instructional Units to Add to the Assignment, click to select the box in the Select IU
column next to the IU named Parameterized Earth Questions – your initials.
5) Click to select the box in the Select IU column next to the IU named Static Earth Questions – your initials.
6) Click the Add IUs button.
7) You are now on the Add IU with Defaults page.
8) For the Static Earth Questions IU, set the Number of Questions to Present to 3 and the Number Needed for
Mastery to 2.
9) For the Parameterized Question IU, leave the Number of Questions to Present at 3 and set the Number
Needed for Mastery to 1.
Note that these are the two IU settings. OWL knows to ask for them because it is a QuestionPool type
assignment.
10) Press Add IU(s) to Assignment
11) You are back on the Assignment Management page.
Where to Go From Here
That’s it for your tour of OWL authoring. To actually run your course in OWL, you’ll need to learn how to set
assignment start and due dates, send announcements, get student grades and progress information, give extensions,
and answer student messages. All of this and more is covered in Getting Started with OWL – Course
Management.
Besides the things that are covered in these two Getting Started training manuals, there are loads of features and
links that we haven’t described to you. These include:
using HTML in questions
IU description fields
use of integers
conditional feedback for all but short answer question types
adding hints to questions
ordering questions, content, and IUs
uploading and downloading tables
The best thing to do is to start exploring and experimenting in OWL. Please be aware, though, that as an author you
have access to other authors’ content as well as the content that you create. Be careful not to modify content that
someone else has authored or that is being used in others’ courses. If you ever have questions about this issue or
anything else related to OWL, please choose the Tech Support link in the navigation bar and send a message. If you
need to know more about a feature, press the Help link on the navigation bar and look through the Author Manual.
Best of luck and happy authoring with OWL!
29
6 Appendices
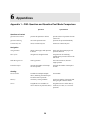
Appendix 1 – OWL Question and Question Pool Mode Comparison
Question
QuestionPool
Questions & Content
Question Presentation
presents all questions in all IUs
presents subset of questions from IU
(can be all)
Question Ordering
can set the question order
questions are presented randomly
Content Only IUs
can use content only IUs
cannot use content only IUs
shows content pages and questions
in all IUs
shows only the content pages and
questions in the IU
Ease of Use
navigation is straight-forward
navigation can be confusing students always need to return to the
unit menu
Redo Wrong Answer
redo by question
can redo an entire IU, but not a
single question
Limited Attempts
can limit the number of attempts
for each question
can limit the number of attempts at
each IU
available for multiple-multiple
choice, matching, and multi-input
box short answer questions
no mastery scoring available
not available
assignment score is number of
correct answers or pass/fail (100%)
assignment score is either mastery
of all IUs, # of IUs, or # of correct
questions
Navigation
Navigation Bar
Grading
Partial Credit
Mastery
Scores
30
need to set number of questions that
must get right to master each IU
Appendix 2 – OWL Instructor Guidelines
Grading
OWL can be made optional or can be required as part of a student’s grade in a course. We’ve found that when made
optional, its use is quite limited. If it does count towards a student’s grade, we suggest that it not be worth more
than 15%. Somewhere in the 5-15% range is enough incentive for students to do their OWL work to better their
grade, but makes it not so important that it promotes cheating.
Student Handouts
A student handout that explains how to use OWL is available on the Getting Started with OWL page (click
Getting Started from the navigation bar). This handout should be edited to accurately reflect OWL use in your
department and course. It should be given to students before they need to get on the system. Departments that have
been using OWL may already have a specialized handout.
Assignments
A student tutorial assignment (in both QuestionPool and Question mode) is supplied with each OWL database.
Make sure to assign the Tutorial as your students’ first assignment and make sure to count it for credit. Its due date
should be before any of your regular OWL assignments. This helps to insure that students can log in and learn to
use the system before they are required to do any real work. You may want to tailor the tutorial to fit your
department. For departments that have already been using OWL, check existing courses for a specialized tutorial
instead of using the one supplied with the system.
Support
Technical support is available through OWL or via email. From an authoring window, click the Tech Support link
in the navigation pane to report a problem or ask a question. You can also send email to [email protected].
Someone should respond to you within one working day.
31