Download Identify & Report Professional Home & Property Inspection Software
Transcript
Identify & Report Professional
Identify & Report Professional User Manual
Rev.B
Home & Property Inspection Software
SOFTWARE CREATED BY INSPECTORS FOR INSPECTORS
Home Inspection Software for iPad, Mac Pc's
No Internet or Wi-Fi Access Required
Manual:I&R US Rev. B
Identify & Report Professional
Identify & Report Professional User Manual
Rev.B
Introduction ..... The Process
Chapter 1 ... IdentifyReport Pro Install US
Chapter 2 ... Installing FileMaker Go 11 onto iPad US
Chapter 3 ... Installing “Identify @ Report” onto iPad US
Chapter 4 ... Transferring Files Computer to iPad, iPad to Computer US
Chapter 5 ... Creating A New Inspection US
Chapter 6 ... Select Report Category US
Chapter 7 ... Managing Photo’s US
Chapter 8 ... Print An Inspection Report US
Chapter 9 ... Makeing A Template US
Chapter 10 .. How to Select A Template US
Chapter 11 .. Damaged File Recovery US
Chapter 12.. Importing Updates US
Appendix 1: Installing Identify Report Pro. User Manual In ibooks On iPad
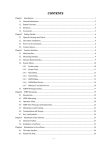
CLICK ON THE CHAPTER TO VIEW
Identify & Report Professional
Identify & Report Professional User Manual
Rev.B
Introduction
The Process
To Index Page
Manual:I&R US Rev. B
Starting an Inspection from the Computer,
1. Client calls on the phone, …..
2. Click Start New Inspection icon, Enter New Inspection ID# (See Chapter 2 Creating
a New Inspection)
3. Select Continue with Default Report or Select form Template List. (See Chapter 7
Select a Template)
This will put you on the Order Form. Enter as much information as possible on the Order
Form. As you complete the Order Form, in the lower right Corner you see the Print Icon
Select Print Contract. This will print the Contract, Standards of Practice and the Invoice.
You may print to a PDF and e-mail it or print a hard copy to take with you to the inspection
and have review with the Client.
If you are Using a iPad SEE Chapter 8 on how to Copy Inspection Files to Ipad or iPhone
Instructions From Computer after Scheduling on computer below.
If you are entering the inspection information on the Computer, Select To Current Inspection icon in the upper right corner of the Order Form.
Now you see the Report Menu.
To import the photos into Identify & Report Select the Photos icon( see Chapter 4 Managing Photo’s), You will see the Photos Thumbnail screen, Select the Auto Load icon (you
will need to copy all your inspection photos into a folder “C:\Photos IdentifyReport Upload
Only” to auto load) or Select the Folder ware you have the Photos. All the Photos will be
loaded into. Now Select the photo Hold down the left Mouse button and Drag the Photo
to the correct Category (sample all Plumbing photos to the Plumbing category) Select the
category for your comment, button. You will see the Photos on the bottom of each inspection category.
Select the Category (see Chapter 3 Select Reprot Category) of the area to be inspected, Enter the Report Identifiers, then Select the Sub Category form the tabs across the top of the
screen, Select the Click to View Comment Selection Box this will open the a list of Comment Descriptions. Select form list the list then Click Copy To Report button. You may
edit the comment at any time. You can also Select the Recommendations icon at any time
and Select Copy To Report to make it part of the report.
After you have entered all Report Comments Select the Copy Comments to Summary icon
on the lower right of the Category screen. To proof the Summary Select the Summary icon.
Select the Print icon (see Chapter 5 Print an Inspection Report) Select PDF Factory Select
of, you will see the report, save to a PDF or print.
Copy Inspection (see Chapter 8 Transferring Files Computer to iPad, iPad to Computer)
Introduction; page 2 of 3
Files to Ipad or iPhone Instructions From Computer after Scheduling on computer.
On your iPad Start Identify & Repot from the Main Menu Select the Backup icon, Select
Auto Backup. Then Select EXIT
To Replace current Inspection files on Your Ipad, with the Files On the Computer.( this
will copy over the files on the iPad so do your Backup ) (see Chapter 8 Transferring Files
Computer to iPad, iPad to Computer ) Plug in your iPad, Start iTunes, Select your iPad
Device, Select Apps form the top of your iTunes screen. Scroll down to the bottom of the
screen, Select Filemaker Go v11 icon. A list of Files will display. Select the ADD button,
Select the Folder C:\Identify Report v12.
Select the Files Inspection Controls, isdcNarrative and isdcNarrative Photos. If you have
added any New Report Comments Select the ISDC Lookup file . If you hold down the
Control key you may Select them all at the same time. Let up on the Control key. Then Select the OPEN button. Select Copy over all when prompted.
You will see the copy bar across the top ….
After Your Inspection you will need to Copy Files Back to the Computer
On your Computer Start Identify & Repot from the Main Menu Select the Backup icon,
Select Auto Backup. Then Select EXIT
To Replace current Inspection files on Your Computer, with the Files On the iPad.( this will
copy over the files on the iPad so do your Backup ) Plug in your iPad, Start iTunes, Select
your iPad Device, Select Apps form the top of your iTunes screen. Scroll down to the bottom
of the screen, Select Filemaker Go v11 icon. A list of Files will display.
Select the Files Inspection Controls, isdcNarrative and isdcNarrative Photos. If you have
added any New Report Comments Select the ISDC Lookup file . If you hold down the
Control key you may Select them all at the same time. Let up on the Control key. Then Select the SAVE TO button. Select Copy over all when prompted.
You will see the copy bar across the top ….
If you need to start a inspection on the iPad in the filed that is Ok. Just remember you
will copy over any thing you have entered on the computer after you copied last files to your
iPad.
Introduction; page 3 of 3
Identify & Report Professional
Identify & Report Professional User Manual
Rev.B
Chapter 1
Identify Report Pro Install US
To Index Page
Manual:I&R US Rev. B
Identify & Report Professional
Installing Identify & Report
After downloading “Identify & Report Professional” remember where you downloaded it.
The “User Account Control” Security Warning opens Select Yes.
Chapter 1; page 2 of 12
The “User Account Control” Security Warning opens
Select Yes.
Select Next
Software License Agreement Select Yes
Chapter 1; page 3 of 12
Fill in Information.
Home Inspector’s Name
Then
Inspection Company Name
Company Phone Number and E-Mail address
Registration form Fill in Select Next.
Destination Directory doesn’t change.
Select Next
Don’t change install typical.
Select Next
Chapter 1; page 4 of 12
Ready to install. Select Next
Setup Progress Window Opens. Do nothing
Select Next.
Chapter 1; page 5 of 12
Magnifying Glass License Agreement
Select I Agree
Destination Directory don’t change.
Slect Next
Chapter 1; page 6 of 12
Magnifying Glass Setup Completed.
Select Finish
If you are running Windows XP this window will not appear.
If you are running Windows 7 Select Compatibility Mode.
Chapter 1; page 7 of 12
The Magnifying Glass will open. Right click on handle and chose “Close Magnifying Glass”
Installing pdf Factory.
Select Setup
Chapter 1; page 8 of 12
Click Next
Check the
“I accept the terms”
Then
Click Install
Chapter 1; page 9 of 12
pdfFactory was successfully
installed!
Click Finish
Close Background Window
Chapter 1; page 10 of 12
Last Minute Note:
You Must Be A Experienced, Trained, Inspector, To Use This Software
Things to Remember:
1. Only use the same Inspection Report I.D. # one time. Never use the same report ID
number.
2. To start a New Inspection Report, Click NEW INSPECTION button, Enter New
Report ID Number.
3. To Print a Inspection Report, Click Find Inspection, Then select the Report to Print.
4. To add your Company Name to all printed reports go to InspectionSoftware.com
and Register This Software.
Select Next to start Identify & Report Australia.
Chapter 1; page 11 of 12
Chapter 1; page 12 of 12
Identify & Report Professional
Identify & Report Professional User Manual
Rev.B
Chapter 2
Installing FileMaker Go 11 onto iPad
To Index Page
Manual:I&R US Rev. B
Identify & Report Professional
Installing FileMaker Go 11 onto
iPad
Step 1
Turn on iPad, DO NOT CONNECT TO COMPUTER.
Step 2
On The iPad go to InspectionSoftware.com, “Select Support Training”
Step 3
This will take you to the “Home Inspection Software Support and Training” page.
Chapter 2; page 2 of 4
Step 4
Scroll Down to the Bottom of the page to the “Download FileMaker go 11 for iPad” box
and Select “App Store”
Step 5
This will take you to the iPad Apple Store. There is a cost for FileMaker Go 11 $39.99.
InspectionSoftware.com DOES NOT receive any money for this APP all funds go to FilMaker INC.
Step 6
You will see the “FileMaker Go 11” icon is on your iPad desktop. Chapter 3 will show you how to Transfer
files to you iPad.
Chapter 2; page 3 of 4
Chapter 2; page 4 of 4
Identify & Report Professional
Identify & Report Professional User Manual
Rev.B
Chapter 3
Installing “Identify @ Report” onto iPad
To Index Page
Manual:I&R US Rev. B
Identify & Report Professional
Transferring Files Computer to iPad, iPad to
T
Computer
1. On Computer
You will need to have iTunes installed.
Go to http://www.apple.com/itunes/download/ and download and install iTunes
2. On iPad
Install “FileMaker Go 12”
You will need to go to the App Store and install the “FileMaker Go 12” app. from your iPad
VERY IMPORTANT:
You must Exit “Identify & Report Professional” correctly from your computer and the
iPad before copy any files between the two devices.
After you have completed your Inspection
Click “EXIT” on both devices.
Chapter 3; page 2 of 6
Opening iTunes
Plug the iPad into your computer using
the usb cable provided by Apple. iTunes
program will start.
Step 1
Select the “iPad”, Botton.
Step 2
The iTunes Summary window opens.
Select The Apps Botton
File Sharing is where transferring documents
between your iPad and your computer.
Step 3
Note:
This section is what is on your iPad.
Under File Sharing Apps Select on
“FileMaker Go”
Chapter 3; page 3 of 6
This will open up the
“FileMaker Go Documents”.
VERY IMPORTANT: UNDERSTANDING “Add...” & “Save to...” Button
“Add...” Button
Under APPS click on
“FileMaker Go”
THEN
Select “Add” always means
copying files from
Computer to iPad.
“Save to...” Button
Files on iPad
Select the files wanting to
copy onto Counter.
THEN
Select “Save to” always
means copying files from
iPad to Computer.
Chapter 3; page 4 of 6
Installing Identify @ Report onto iPad
VERY IMPORTANT:
You must Exit “Identify & Report Professional” correctly from your computer and the iPad
before copy any files between the two devices.
Step 1
Plug the iPad into your computer using the usb cable provided by Apple. iTunes program will start.
Step 2
Open iTunes App for “FileMaker Go” (See “Opening iTunes ).
Step 3
Under Apps Select “FileMaker Go”.
Note:
The FileMaker Go Documents list will be empty the
first time you Add file to
youe iPad.
Step 4
Select “Add” Add Files from computer to iPad.
Step 4
The Folder “Identify Report Prof
Fm12.3 usr” opens in iTunes
Step 5
Across top select “Type” Twice this
will sort files by the type of file.
Step 6
Highlight all File type that have
“FileMaker Pro 12 Runetime
Database”
THEN
Step 7
Select Open
Chapter 3; page 5 of 6
Step 8
Identify & Report is Now
on Your iPad
Chapter 3; page 6 of 6
Identify & Report Professional
Identify & Report Professional User Manual
Rev.B
Chapter 4
Transferring Files Computer to iPad,
iPad to Computer US
To Index Page
Manual:I&R US Rev. B
Identify & Report Professional
Transferring Files Computer to iPad, iPad to
T
Computer
VERY IMPORTANT:
You must Exit “Identify & Report Professional” correctly from your computer and the
iPad before copy any files between the two devices.
Plug the iPad into your computer using the usb cable provided by Apple. iTunes program will start.
See Chapter 3 “Installing Identify Report onto iPad” Pg. 3 on how to Starting iTuns
We will ADD Files To iPad From Your Computer.
Step 1
Plug the iPad into your computer using the usb cable provided by Apple. iTunes program will start.
Step 2
Open iTuns go to Apps Select
FileMaker Go.
This will Open “FileMaker Go
Documents” on your iPad
Chapter 4; page 2 of 6
Step 3
Holding down the “Ctrl” key
and Highlight the three files to
be ADDed to your Computor.
Files on iPad
Inspection Control.
ISDCnarrative.
ISDCCnarrative photos.
Step 4
Select “Add”
At the top of the iTunes Window you can fallow the files being transferred.
Congratulations you have Copyed Files from your Computer to Your iPad.
Chapter 4; page 3 of 6
VERY IMPORTANT:
You must Exit “Identify & Report Professional” correctly from your computer and the
iPad before copy any files between the two devices.
Plug the iPad into your computer using the usb cable provided by Apple. iTunes program will start.
See Chapter 3 “Installing Identify Report onto iPad” Pg. 3 on how to Starting iTuns
We will SAVE TO your computer From Your iPad.
Step 1
Plug the iPad into your computer using the usb cable provided by Apple. iTunes program will start.
Step 2
Open iTuns go to Apps Select
FileMaker Go.
This will Open “FileMaker Go
Documents” on your iPad
Chapter 4; page 4 of 6
Step 3
Holding down the “Ctrl” key
and Highlight the three files to
be ADDed to your Computor.
Files on iPad
Inspection Control.
ISDCnarrative.
ISDCCnarrative photos.
Step 4
Select “Save To...”
At the top of the iTunes Window you can fallow the files being transferred.
Congratulations you have Copyed Files from your iPad to Your Computer.
Chapter 4; page 5 of 6
IMPORTANT NOTE:
If You Added Or Change Any Comment To The Comments Library You Will
Need To Select You Will Meed To Select
“ISDClookup.” also.
Chapter 4; page 6 of 6
Identify & Report Professional
Identify & Report Professional User Manual
Rev.B
Chapter 5
Creating a New Inspection US
To Index Page
Manual:I&R US Rev. B
Identify & Report Professional
Creating a New Inspection
A professional inspection is as easy as one click.
The Identify & Report Professional inspection program is designed to create professional inspections each and
every time. The program uses a Default Report inspection as a standard template for the creating inspections.
This Default Report inspection may be modified to meet the user’s requirements by selecting the Default
Report at the
Find Inspection screen and entering/editing data as desired.
The Default Report is essential to the operation of the program and should never be deleted.
Starting an Inspection
(Non-Template)
1.Click on the “New Inspection” button at the Main Menu.
Chapter 5; page 2 of 6
2.
First Enter a New Report ID Number:
The best ID Report Number Format
Example:
Use the first three letters of last name then Clients name: Bill Jones
the date of the scheduled inspection.
Scheduled inspection date: May 5, 2012
Recommended ID Number
Jon051112
If you are inspecting
Mutable units just
Add u1, u2.etc…
Jon051112u2
3.Select continue
Very important:
Only use Letters and Numbers for Report ID Numbers.
The program does not recognize punctuation mark, spaces and special Characters.
Chapter 5; page 3 of 6
4.Enter required information on the order form.
5.All drop down’s Boxes have the ability be edited.
Chapter 5; page 4 of 6
6. The edit window will open, you can remove, add or modify any statement as you would like.
Then reselect the field to auto enter the information.
7. When you are finished filling in the Order Form click on “TO CURRENT Inspection” icon.
Chapter 5; page 5 of 6
8. On right side of screen, you will see a column of buttons listing the main inspection categories each
categories has sub categories, select as needed.
9. At any time you
can select the “To
Summary” button
to view summary.
Chapter 5; page 6 of 6
Identify & Report Professional
Identify & Report Professional User Manual
Rev.B
Chapter 6
Select Report Category US
To Index Page
Manual:I&R US Rev. B
Identify & Report Professional
Select Report Category
Click “Identify Report Prof ” icon to start
“Identify & Report Professional”
Click in the Client Box to start inspection
Click on icon of category
Example: For this example we will use “Foundation”
Chapter 6; page 2 of 9
The “Foundation Identifiers” window opens.
Header Layout
Very important:
Only use Letters and Numbers for Report ID Number. The
program does not recognize punctuation marks, spaces and
special characters.
Report Identification: is the Report ID Number
This icon takes you to “Report Menu”
This icon generates you PDF report using “pdf Factory“
Completed Category “Yes or No” switch
Photo Library icon
This icon takes you to the report summary
This icon “Menu Select” is a summery of Report Categories.
Chapter 6; page 3 of 9
In the category window the columns
are the identifiers, click in box and a
drop-down windows opens then chose
or Edit
Chapter 6; page 4 of 9
Getting around Report Comments Window
Recommend Buttons
1= MAJOR DEFECT
2= MINOR DEFECT
3= SAFETY HAZARD
4= Recommend Evaluation By A Qualified Licensed Contractor / Engineer / Specialist.
5= Recommend Evaluation of infestation / deterioration by a Licensed Pest Inspector.
6= Recommend Evaluation or repairs by a Qualified Licensed Contractor Getting around
Note: To edit “Recommendations” select Default Report.
“Report Comments:”
All comments entered this box go directly into report.
This icon is the “Flash Comments” Hot Key
“Flash Description”
Click in the Box to view Foundation “Comment Section”
In the “Flash Description” window click in box and a drop-down window opens then select or Edit.
After selecting from the “Flash Description”
Drop-down list, Click the “Flash” Hot Key to
copy selection into the “Comments section”
Chapter 5; page 5 of 9
The Comment section Drop-Down Window will open. Select the comment from the list that you want.
Click the The “Copy to Report” icon this will copy into the “Comment Section”
The comment that you
have Chose appears in the
“Comment Section”
Select “Delete “ to clear
“Report Comments”
Window
The Delete icon will delete all content
from any field selected.
Chapter 6; page 6 of 9
When you are finished with your comments at any time Click “ADD Comments to Summary”
To add, edit or remove you comment list click the “Edit” icon.
This will open the Edit you comment Lookup Library Window.
(See Comment “Lookup” Window below)
Comment “Lookup” Window
Add New Comments icon
All Comments are sorted by the first Numeric number.
In the Comment Description, window is the description seen when you select, new comment on the Report Entry screen
when selected.
Chapter 6; page 7 of 9
Keep your description short.
The Comment
Windows is your
complete comment.
To modify an existing comment just click in the box and edit as desired when finish with changes make
sure you click outside of field to save changes.
The “Spell-Check Comment” icon checks spelling in “Report Comments” Window.
This “Edit” icon edits “Photos Comments” for the category you are Inspecting.
Comments for Photos.
Chapter 6; page 8 of 9
Chapter 6; page 9 of 9
Identify & Report Professional
Identify & Report Professional User Manual
Rev.B
Chapter 7
Managing Photo’s US
To Index Page
Manual:I&R US Rev. B
Identify & Report Professional
Managing Photos
Set you camera to a low resolution for all pictures. To Upload
photos to “Photos IdentifyReport Upload
Only” folder just images no Sub-Folders. Click on the icon on
the desktop this will open the Photo Folder
just drag and drop. Now Identify Report has access to images.
This “Edit” icon edits “Photos Comments” for the category you are Inspecting.
To make a comment under Photos select “Edit”
Comments for Photos.
Chapter 7; page 2 of 6
To edit
“Photos Comments” Window see “Comment “Lookup” Window”
Comment “Lookup” Window
Add New
Comments
icon
All Comments are
sorted by the first
Numeric number.
In the Comment Description, window is the description seen when you select, new comment on the Report Entry screen
when selected.
Chapter 7; page 3 of 6
The Comment Windows is your complete comment.
Keep your
description
short.
To modify an existing comment just
click in the box and
edit as desired when
finish with changes
make sure you click
outside of field to
save changes.
Select
Photo Library icon from
anywhere in the program.
OR
Select the “Auto Load” icon
Select to look up your photo
folder.
Chapter 7; page 4 of 6
The “Image_Import” Window will open to the right of the “Narrative Photos” Window.
Drag and Drop Photos to where you want then.
After you have placed the images where you want then. Click on Category icon to return to Report.
Chapter 7; page 5 of 6
The picture is now loaded to where you want it.
You can copy from the
“Report Comments” into Comment Window
for Image by Highlighting Copy Past or Drag
and Drop.
Note:
If you are using an iPad just tap image box and take picture with iPad the image will be inserted directly
into you report.
Chapter 7; page 6 of 6
Identify & Report Professional
Identify & Report Professional User Manual
Rev.B
Chapter 8
Print an Inspection Report US
To Index Page
Manual:I&R US Rev. B
Identify & Report Professional
Print an Inspection Report
All PDF Factory files are automatically saved to:
“C:\Users\<User Name>\Documents\PDF files\Autosave”
If you are comfortable with this no changes are needed. Just remember where your reports are located.
Skip to Steep 11
To create a file for your Inspection PDF reports.
1. Go to my “Documents”
2. Create a Folder in this example “My Identify Reports” (You can name this whatever fits your
needs).
3.Close MY Documents
Open “Identify & Report Professional”
From the “Main Menu”
The current Client displayed is the Inspection Report to be printed
Chapter 8; page 2 of 9
You have three print formats to choose from:
“Same”= Print Photos on same page.
“Next”= Print Photos on the Next page.
“Last” = Print Photos on the Last page.
1.
NOTE:
Always use pdfFactory as you
default printer.
Click “OK”
2.
As the Inspection Report is being generated this screen
appears.
If Report does not Display, Click “PDFfactory icon.
Chapter 8; page 3 of 9
Print settings.
3.
Select the “Settings icon”
NOTE:
If you don’t want to go through the setup
then go to Page 6 Step 13
Then Select “Setting...”
4.
The settings window will open
Select “Folder”
5. There are three settings that you will be changing.
“Saved files:”
“Autosave:”
“Data files:”
Chapter 8; page 4 of 9
6.
To change these Select “Browe...”
7.
Locate “My Documents”
8.
Scroll to “My Identify Reports”
(In this Example)
Chapter 8; page 5 of 9
8.
Go to Page 3 Step 5 and Repeat for “Autosave” and
“Data files”
When you have changed these settings it will look like this.
Notice all three end with “My Identify Reports”
9.
10. Click OK
11.
Renaming your New Inspection use the “Report ID:” number
By Default the
“Title” is “ISDCNarrative Photos”
Chapter 8; page 6 of 9
In the “Title” Box REPLACE “ISDCNarrative Photos” with the “Report ID” Number in this example
12.Samp070612
13. Save to any Folder
Chapter 8; page 7 of 9
14.
Select the pdf icon to view PDF
15.
When you View the PDF it is saved automatically, notice the File Name.
Chapter 8; page 8 of 9
You can go to where your “My Identify Reports” to see the Inspection Report ready to send.
Chapter 8; page 9 of 9
Identify & Report Professional
Identify & Report Professional User Manual
Rev.B
Chapter 9
Makeing a Template US
To Index Page
Manual:I&R US Rev. B
Identify & Report Professional
Making a Template
Select “Customer Name” Box
Select “Add” Button
Chapter 9; page 2 of 4
The “Report Menu” opens
Chapter 9; page 3 of 4
Select “Edit”
The “Template List” opens
Select the
“Edit This Template” for any
modification you would like
to do.
Chapter 9; page 4 of 4
Identify & Report Professional
Identify & Report Professional User Manual
Rev.B
Chapter 10
How to Select A Template US
To Index Page
Manual:I&R US Rev. B
Identify & Report Professional
Selecting a Template
From the “Man Menu”
Select “New Inspection”
In the example below we are using “Sample Report Unit 2” where “Sample Report” is the Report ID
Number plus the unit Number. (See notes)
Chapter 10; page 2 of 5
In the example below we are using “Lake Front Apartments U2” where “Sample Report” is the Report
ID Number plus the unit Number.
Then “Select Template Report”
Chapter 10; page 3 of 5
Select “Use This Template” you would like to use
Congratulations you have just created a new Template with the new “Report ID:”
Fill out the “Order Form” then select “To Current Inspection”
Chapter 10; page 4 of 5
The “Report Menu” will open select a
category in this example “Foundation”
You can now make any minor changes
that apply to your new Inspection.
Chapter 10; page 5 of 5
Identify & Report Professional
Identify & Report Professional User Manual
Rev.B
Chapter 11
Damaged File Recovery US
To Index Page
Manual:I&R US Rev. B
Identify & Report Professional
Damaged File Recovery
This Step By Step Tutorial Shows You How To Recover Damaged
Files.
All Files That Are Recovered Will Use There Times The Disk Space.
(Example: Let’s Say you have A File That Is 1gig. The Disk Space Required to Recover
This File is 3gig’s In Size.)
Three Files That You Will Want To Recover:
Inspection Control, ISDCNarrative, and ISDCNarrative Photos.
Step 1
Holding down the “Ctrl” and the “Shift” keys
on your keyboard, double click the “Identify
& Report” desktop icon.
Step 2
The Identify & Report Directory Will Open. Highlight the File That You Want to Recover
(Example: Inspection Control)
Note:
File Name Should Be The File
You Have Selected.
Step 3
Click the Select Button.
Chapter 11; page 2 of 4
Step 3
The Recovery Window Opens To Show Recovery Progression. You Don’t need to anything.
Step 4
The Recover Built, A New Database Window Opens. Select the “OK” Button.
Step 4
After The Files Have Been Recovered Select The Red “X”. This Will Open Identify & Report
Main Nenu.
Notes:
A New File Has Been Created.
“Inspection Control Old”
Chapter 11; page 3 of 4
Repeat These Steps That You Want To Recover:
Inspection Control, ISDCNarrative, and ISDCNarrative Photos.
Chapter 11; page 4 of 4
Identify & Report Professional
Identify & Report Professional User Manual
Rev.B
Chapter 12
Importing Updates US
To Index Page
Manual:I&R US Rev. B
Identify & Report Professional
Importing Updates
In this example we are going to Import three files “Inspection Control.Usr,
ISDCNarrative.USR and ISDCNarrative Photos.Usr” From an older version
of “Identify & Report Professional v12.05i” to “Identify & Report v12.06ip”.
Select “Identify & Report Professional
v12.05i” icon on Desktop to start
“Identify & Report Professional”
The “MAIN MENU” Opens.
You will need to turn on the Toolbar, by selecting the Toolbar switch in the bottom left corner.
Chapter 12; page 2 of 19
First we will unlock “Inspection Control.Usr” from “Identify & Report Professional v12.05i”
Check to see that you are at [Inspection Control]
The Toolbar opens at top of window.
Select “Show All”
“Records” will change from one to how many Records (Inspections) you have, in this example four.
The “Total” will be grayed out.
The “Show All” will be grayed out.
Chapter 12; page 3 of 19
Next we will unlock “ISDCNarrative.USR” from “Identify & Report Professional v12.05i”
Select “Client Name:”
Check to see that you are at [ISDCNarrative]
This will open the “REPORT MENU”
You will need to turn on the Toolbar, by selecting the Toolbar switch in the bottom left corner.
Chapter 12; page 4 of 19
Select “Show All”
“Records” will change from one to how many Records (Narrative) you have, in this example ten.
The “Total” will be grayed out.
The “Show All” will be grayed out.
Finely we will unlock “ISDCNarrative Photos.Usr” from “Identify & Report Professional v12.05i”
Scroll down to see “Photos”
Select the “Photos” icon
Chapter 12: page 5 of 19
Check to see that you are at [ISDCNarrative Photos.]
This will open the “Photos”
You will need to turn on the Toolbar, by selecting the Toolbar switch in the bottom left corner.
Select “Show All”
“Records” will change from one to how many Records (Narrative) you have, in this example five.
The “Total” will be grayed out.
The “Show All” will be grayed out.
Chapter 12; page 6 of 19
You have now unlocked “Inspection Control.Usr, ISDCNarrative.USR and ISDCNarrative Photos.Usr”
data files, to be imported to the “Identify & Report Professional Australia” new updated version.
Close “Identify & Report Professional Australia” by clicking on the Red “X”
Chapter 12; page 7 of 19
Select “Identify & Report v12.06ip”
icon on Desktop to start “Identify &
Report Professional”
The “MAIN MENU” Opens.
Select “Find Inspection”
Chapter 12; page 8 of 19
The “Find Inspection List “opens.
On the Toolbar select: File
Import Records
File
The Open File window will open. You are in the New Version of “Identify Report” you need to go to the
older version of “Identify Report” Folder.
Click “Computer”
Select Drive C:/
Chapter 12; page 9 of 19
First we will import “Inspection Control.Usr” from “Identify & Report Professional v12.05i”
Find the older version of “Identify Report” in this example we are using “Idendify Report Az v12 05”
Select “Inspection Control.Usr”
Then Select “Open”
Chapter 12; page 10 of 19
The “Find Inspection List” opens
Select “File” from the Toolbar
The “Import File Mapping” window opens.
There are three very important selections to be made.
1.
“Arrange by:”
“matching names”
2.
In the “Import Action” box check the radio button
“Update existing records in found set”
3.
Check box
“Add remaining data as new records”
Chapter 12; page 11 of 19
“Import Option” window will open.
Make sure the “Perform auto-enter option while importing” box is checked
and
under the “Import values in repeating fields by
Keeping them in the original record” radio button is checked.
Then Select “Import”
The “Import Summary” Window will open. Don’t need to do anything just click “OK”.
On the Toolbar select: Window
Show Window
(ISDCNarrative Photos)
Chapter 12; page 12 of 19
Next we will import “ISDCNarrative.USR” from “Identify & Report Professional v12.05i”
The “REPORT MENU” Window opens.
Check to see that you are at [ISDCNarrative]
On the Toolbar select:
File
Import Records
File
Scroll down until you find “ISDCNarrative.USR” and highlight then click “Open”
Chapter 12; page 13 of 19
The Open “Key” window opens. Select “Guest Account” radio button.
Then Click “OK”
The “Import File Mapping” window opens.
There are three very important selections to be made.
1.
“Arrange by:”
“matching names”
2.
In the “Import Action” box check the radio button
“Update existing records in found set”
3.
Check box
“Add remaining data as new records”
Chapter 12; page 14 of 19
“Import Option” window will open.
Make sure the “Perform auto-enter option while importing” box is checked
and
under the “Import values in repeating fields by
Keeping them in the original record” radio button is checked.
Then Select “Import”
The “Import Summary” Window will open. Don’t need to do anything just click “OK”.
Finely we will import “ISDCNarrative Photos.Usr” from “Identify & Report Professional v12.05i”
Select “PHOTOS” icon
Chapter 12; page 15 of 19
The Photo Library Window opens.
Check to see that you are at [ISDCNarrative]
On the Toolbar select:
File
Import Records
File
Scroll down until you find “ISDCNarrative Photos.Usr” and highlight then click “Open”
The Open “ISDCNarrative Photos” window opens. Select “Guest Account” radio button.
Then Click “OK”
Chapter 12; page 16 of 19
There are three very important selections to be made.
The “Import File Mapping”
window opens.
1.
“Arrange by:”
“matching names”
2.
In the “Import Action” box check the radio button
“Update existing records in found set”
3.
Check box
“Add remaining data as new records”
“Import Option” window will open.
Make sure the “Perform auto-enter option while importing” box is checked
and
under the “Import values in repeating fields by
Keeping them in the original record” radio button is checked.
Chapter 12; page 17 of 19
Then Select “Import”
The “Import Summary” Window will open. Don’t need to do anything just click “OK”.
Select “MENU”
Select “EXIT” to Exit Program
The “REPORT MENU” opens
Chapter 12; page 18 of 19
Chapter 12; page 19 of 19
Identify & Report Professional
Identify & Report Professional User Manual
Rev.B
Appendix 1:
Installing Identify Report Pro. User Manual
In ibooks On iPad
To Index Page
Manual:I&R US Rev. B
Identify & Report Professional
Installing Identify Report Pro. User
Manual In ibooks On iPad
Step 1
Go to the App Store and Install iBooks.
Step 2
On The iPad go to InspectionSoftware.com, “Select Support Training”
Open iBooks Select “Collections” then Select PDFs.
Step 3
Open Safari on iPad go to InspectionSoftware.com,
“Select Support Training”
Chapter 4; page 2 of 4
Step 4
This will take you to the “Home Inspection Software Support and Training” page.
Select “Identify & Report Professional User Manual”
Step 5
The “Identify & Report Professional User Manual” pdf file Opens. Select “Open in…”
Step 6
Select “Open in iBooks”
Chapter 4; page 3 of 4
Step 7
This will Open “Identify & Report Professional User Manual” in iBooks.
You Can Now From iBooks Read The User Manual.
Chapter 4; page 4 of 4


